Transcripts
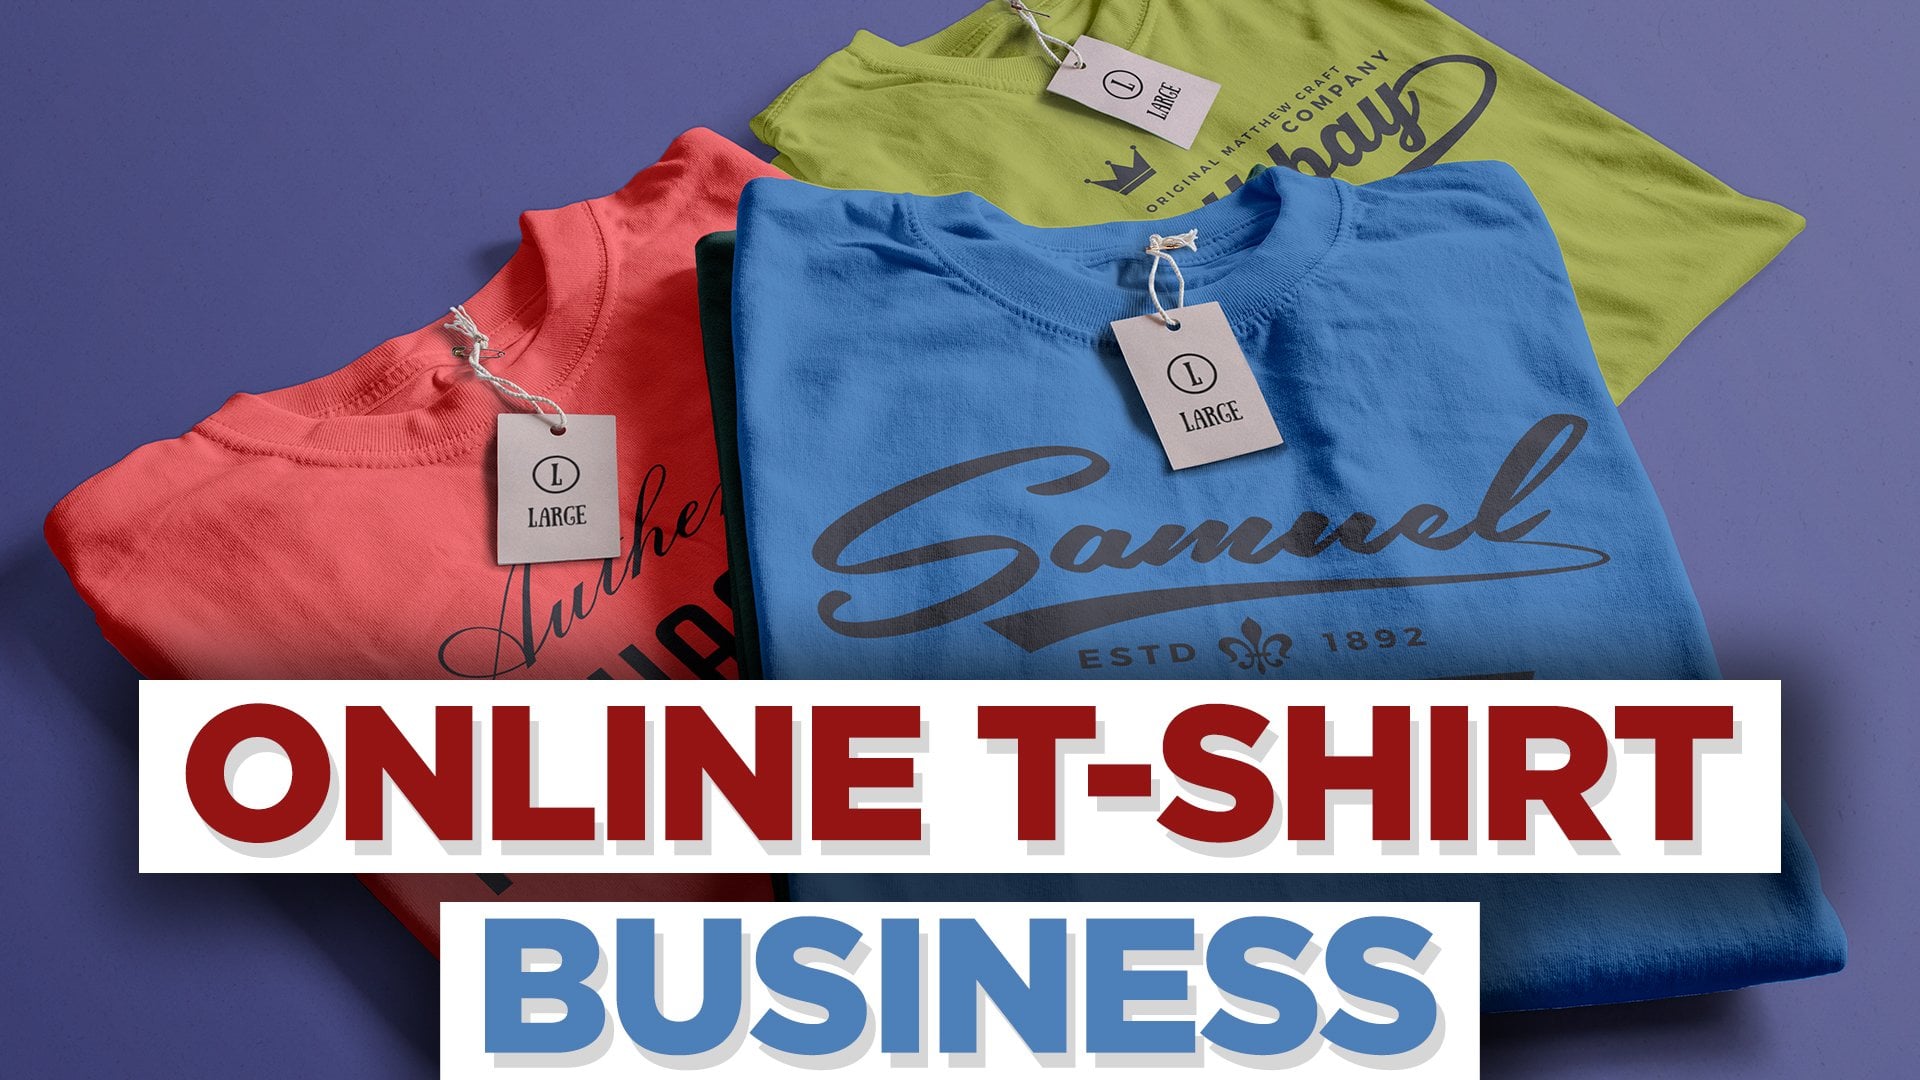
1. Course Introduction: Do you want to start
an online business? You have a great business idea, but you need help
in getting started. If that's you, you are
in the right place. In this course, I will guide you step-by-step to plan and
open an online shop. We will cover the key
business concepts of marketing and finance, as well as the steps required
to create an online shop with a branded website and a
professional email address. This course is divided
into two sections. The first section
is for brushing up the concepts and
planning the business. Because if you fail to plan, you plan to fail. And I don't want that. In the second section, we will go through
the exact steps to set up an online shop. Using Shopify. We will learn how to
upload the product, set up this door policies. And I will also introduce you to some apps to manage
your business. Without any delay. Let's get started.
I will see you.
3. 01 Business Basic and 4P Framework: So why do businesses fail? The failure of businesses can be categorized into two
broad categories. One is failure due to planning, and the second is failure
due to execution. A business can fail
because there is not enough market research
done while planning. So think of things
like pricing or the product market
fit is not right, or they have not
researched it well, there can be failure in
planning the financials, like how the product
would be priced, how much you would
be able to sell, how much you are earning, and what are your overall costs. If there's a failure in
either of these two, then the business can fail. On the execution side, there can be failure
in operations. So let's say you are
hiring somebody, but you are having difficulty
in retaining employees. You're having difficulty
in sourcing the products. You are having difficulty in producing and delivering
your products on time. There can be issues
with marketing, so you're not able to
acquire the customers. Maybe you're not able to
attract customers by putting effective ads that will actually drive the customers
to buy your product. There can also be issues
with customer retention. So let's say you managed to
find a customer and then the customer has a problem and you're not able to
resolve their complaint, the customer decides
to return the product and then they provide negative
feedback to their friends, family, and even
on the internet. There are multiple reasons why a business can fail
and we need to address each and every aspect
of business to make sure that we are as
fail-safe as possible. So let's get started with
the marketing strategy. This is the four P's framework. The first p is product. So this is a no-brainer. You need to decide what
exactly you are selling. It could be digital
or physical product. The second is price. That is, how much are
you asking for it? The third P is placed. So where exactly are you
selling your product? The final P is promotion. So that is how are
you going to find your customers and how are you going to make that sale happen? Coming to product. The product can be either a physical products
such as a phone, laptop, a watch, or anything tangible that you
can hold in your hand. You can also create digital
products such as e-book or video courses that the customer can simply download
from your website. When we think about product, these are the three questions
you need to ask yourself. The first one, why your product? That is, what is the value that we are bringing
to the customer? And why should the customer be interested in your
product at all? If it is a phone, the value that the
customer is getting from a phone is that they can
connect with their friends, they can surf the Internet, etc. The second question
you need to ask about your product is what
is the alternative? So let's say you are not creating this
particular product. Where else can the customer go to get the same or
similar value from an alternative product
if you are creating a new phone than there are so many products in
the market already, there is iPhone,
there is Samsung. So the customer has
plenty of alternatives. In this case, one of the most important things in business is product
differentiation. If there are alternatives
to your product and this product
differentiation becomes the most important factor. So let's say I'm
creating a new phone and I have to answer
the question, why is my product
better than an iPhone? Either it is providing same
features for a cheaper price. Maybe it is faster, maybe it is lighter in weight, but there is something
that needs to differentiate my product
from an alternative. And as I said, this could be the most important question
that you need to answer. Now, let's say I wanted to
sell physical products. And the product I want to
sell is it framed map? And this is a beautiful
piece of wood work. It is a laser cut street
view map of Miami. Okay. Now here are some questions
that I need to answer. How will you get the materials? So taking a quick look at this, Let's say I would need
some wooden planks. I would need some paint. I would need some
packaging material for packaging and
shipping it off. Okay. So I have to determine where
I can get these materials. Can I go to a Home Depot? Can I get it on Amazon or is there any other
supplier that I can find that can give me a better price or
better quality or both. Now once I have decided
how I'm going to procure the materials to create
a process map for this. So the first thing I
need to do to create this particular product is
start off with a digital file because these are high
resolution images that need to be
first created only then I can start laser
engraving and laser cutting to create this
particular physical product. Do I have the ability to
create these digital files, or am I going to outsource
this process to someone? Let's say I know a thing or two about creating these
digital files. So I will say, okay, this is going to be me. And if you take a look at
this particular product, there are multiple layers. The first one is this. So the first layer has some
engraving of these streets. These are the smallest fruits
that you can see in black. So the first layer would need
to have laser engraving. Can I do this in-house or
will I have to outsource? Let's say I will be taking
care of this as well. Then I see there is a top layer with more prominent streets. So those are laser cut. Can I do it myself or will
I have to outsource it? Let's say I am
outsourcing this layer. The base here is
painted in blue. So that is, that is the
painting job that I need to do. And let's say I am
outsourcing that as well. Once all the layers are, once all the layers are
placed on top of each other, then I'll have to do
some polishing to make sure it looks like a
high-quality product. So let's say I'm outsourcing
that product as well. And the final two steps
are packing and shipping. So maybe I can pack myself and I can ship it out
myself as well. So once I have created this
particular process flow, I will have some sort of
idea in my mind as to how much time it would take and how much money it would cost. Now that we have our entire
process planned out, Let's talk about price. In order to determine
the selling price, there are a few
approaches we can take. The first one is to do
some market research. You can do some
surveys and go and ask your customers what they are willing to pay for
such a product. The second way is you can take a look at what your
peers are selling for. That is, if I'm creating
this particular frame map, what are similar
products selling for? I can do a Google search for it. And the third is the
cost-based pricing. So I simply take a look at all the cost that is of
material, labor and equipment. Then based on the cost, I add a markup. So let's say it cost
me $20 to create one particular piece
of framed map. And then I add $10 on top of it and I determine that my
selling price is $30. These are the three
approaches you can take for determining
your selling price. I would not recommend
to start off with this. This could be a good strategy to check whether you are
profitable or not, but I would not recommend starting off with
cost-based pricing. So let's take a look
at General Dynamics of how pricing can impact the
quantity you are selling. So on the horizontal
axis we have the price, that is the selling
price of the product. And on the vertical axis
we have the quantity. So generally when I'm selling a particular product at
a lower price, right? So let's say if I'm
selling that map at $20, maybe I will have a
lot of customers. Let's say I have 100,000 customers willing to
pay $20 for that map. But now if I decide to go here and let's say
price it at $1,000. Maybe I will find five people who are willing to pay $100
for that particular map. I'm showing an extreme example, but you get the idea. Now this is how
price can determine how much quantity you can
sell for products in general, this supply curve looks
something like this. If the supplier is selling
their products for $20, maybe you will have only 100 suppliers willing to create that product for you. And if the supplier is able
to sell the product for $100, maybe you will have 100,000
suppliers lining up because they are able to sell their product for
such a high price. So as a seller, this is the curve that you are looking at when you are
determining the selling price. You would want to
be somewhere in this particular
region so that you are not too highly priced, So that you are getting
only five customers. You don't want to be too low on the pricing that you are
getting a lot of customers, but maybe you are not
making any profits. So you would need to find a sweet spot that works for you, that you are making
a profit and you are able to sell more
quantity as well. Now let's determine the
selling price of the frame mapped we talked about
you can do some surveys, but surveys can be expensive. So if you have the
budget for that, we will consider doing a
market research survey. But let's say we're
not doing that now, since we are just starting out, I will just do a quick
Google search to find similar products and what is
the price range for them? So let's say I figure out that that a city map like that with the size eight inch by 12 inch sells for
around $60 on average. And it gives me some sort of
an anchor price and minds. So maybe I can price my
product close to $60. So now I am deciding to
sell my product for $603, but how much is it costing
me to create that product? So let's say per map, I'm spending $5 on wooden
boards, $1 on paint. The packaging would
cause me to 50. Shipping would cost
me eight bucks. The electricity
for laser engraver and laser cutting is
costing me $0.50. And let's say I have an employee that creates four of
those in an hour. I pay them $40 an hour. So poor map, I'm
paying them $10. I add all of this up. So 5.6 and 14, 17, 27. So the total cost
is $27 per map. This is just the variable cost. I'm not considering any
fixed costs such as renting a warehouse or
the cost of my equipment. This is the variable
cost to create one map. Now I'm selling it for 60. My variable cost is 2071. Rule of thumb I would suggest
is to do this check whether your variable cost is less than 50% of
selling price or not. And here I'm selling for 60, 50 per cent of 60 is $30. My variable cost is $27. Now, this is not
a business rule. This is just a sanity
check that I want to do. And the reason I want
to keep it under 50 per cent is
because first of all, a lot of this money will go
into covering my fixed costs, such as paying for the
equipment like laser cutter, laser engraver and
all those things. And the other thing is if the cost of these
things go up a little, I should still have some
room to make profit, okay? So this could be a
good rule of thumb. You can keep this
at 40%, 60%, 70%, whatever you are
comfortable with, I'm comfortable
with 50% or more. Now we have figured
out the product, we have figured out the pricing. Now, let's talk about
the place where we can sell these frame maps. Now let's talk about
the place where we can sell these framed maps. Do I want to be an online store or do I want to be
a physical store? Or I can be both. Physical stores generally will have very high startup costs. So depending on the location
where you are based, you would have to sign a lease for maybe a year or
even a couple of years. That could mean a lot of money that you have
to spend upfront. If you own a retail space, then you don't have to
pay for the leaves. You have to determine if that is the best use of the
space that you have. Okay. So let's say you
are signing a lease and the place cost
$5,000 a month, and you are doing
12 month lease, you have to spend $60,000 just to rent
the place for a year. If you have a retail space, maybe you have to
have an employee. Either you are gonna be in the store or you have to
have an employee who would be present to take care
of customers in case of a physical store location can be a very vital determining factor. A good location of a physical
store is a huge advantage. On the flip side, the physical stores
are restricted by public holidays,
working hours, and in case of the
COVID era, lockdowns, if you only have
a physical store, your sales can get severely limited because
of these factors. In case of an online store, the start-up costs are very low. You can even start on a
month-to-month plans. So if you want to try
out a particular idea, you can take a look at
Shopify or some other service that will allow you to pay
on a month-to-month basis. Online stores can basically run 20473625 in case of
an online store, websites speed and design
are important because you don't want your customer to be confused when they
visit your website, it should be easy to navigate. The checkout experience
should be smooth. There should be a search bar where the customer can easily search for any item if they're not able to see it straightaway. So the design and speed
are very important. The challenge with
an online store is that finding a customer may not be easy if you don't have the right
marketing in place. So they're like
billions of websites. And once a user logs onto Internet and goes
on Google Search and types and for something, maybe they get like 1
million results for it. So you need to have
a plan of showing up whenever a customer
looks for your product. And we will talk
about that in a bit. For my use case of selling
these framed maps, I think it might be
easier for me to just start off as a Shopify store. Shopify is just one
of the providers. You can even get your own store made with your own
checkout and all. But I like Shopify because
of the integrations that are available and it costs
me just $29 a month. And basically for $25 a month, I can set up this store. I can start accepting payments. I can get I can gather
customer information, I can do marketing
and everything. So Shopify could be a
great starting point. There are some other
competing services as well. But for this particular course, I will just focus on Shopify. But you get to decide which
service works best for you.
4. 02 How to get a customer via ads: Now we have decided everything. We have decided the price, we have decided we are
creating a Shopify store. We have decided the
product and how we're sourcing and how
we are shipping it. Now the most important
part here is promotion. How do you find a customer? Or rather how does the
customer find you? For new businesses that do
not have any customers, the quickest way of finding a customer could be
paid advertisement. So you can basically run paid advertisements on
all of these networks. Google, instagram, Facebook,
Twitter, LinkedIn. All of these platforms have
advertisement features. You can even take a
look at forums such as Reddit and Quora. And you can run your ads on
those platforms as well. If you are advertising
on Google or any other search engine that is called search engine marketing. You might have heard
that term S, E, M, and this is basically
what SEM is that you do paid marketing
on search engines. How does paid advertisement
look like for a consumer? So if I go to Google and let's
say I want to buy a drone. So in the search bar
I typed by drone. And Google will show me 244
million results in 0.92 s, okay, the first few results
would be advertisements. So it clearly shows here
that this is an ad. This is an ad, this is an ad, and this is an ad. So the top four results that Google is showing me our ads. And if I want to sell my product and I want to do search
engine marketing, I can put my ad so
that once a user says, I want to buy laser cut maps, and then the customer
searches than if I have my search
engine marketing setup, maybe my ad would come
up here at the top. And every time a user
will click on it, Google will charge me
some money because they are showing my
adds to that user. Now, let's understand
the dynamics of acquiring a customer
from Google search. I will start off by defining
a target segment for my ads. So let's say my target
segment is people in the age group of 20 to 35 years. And they love, they have
interests in traveling. So I will use this
information to create a target segment. Now this is the target
segment that I have that could potentially be
interested in my product. So I will tell Google to
show my ad to these people. So these people see my ad. Then not all of
these people that see my ad will actually
read the full adder. So maybe my ad is not speaking to the desire
and the customer. Let's say a fraction
of these people will read the full add. A fraction of people
reading the full AD will actually go ahead
and click on the ad, so they will take some action. Now, this is also
important because when I'm designing
an ad campaign, I will want to have
some sort of CTA, which is called to action. So think of a statement like by now or grab your
ten per cent discount. Now, call this number
now for a special offer, some sort of a call to action so that the user who sees my ad and reads my ad actually takes the action
on clicking on it. Once they click on the ad, they would be redirected to my website or my Shopify store. Now, let's say these people
are clicking on the Add. Now they're on my store. A fraction of these people
who are actually visiting my store will end up
purchasing something from me. So that user is now onboarded
as a customer on my shop. I can gather some
details from there like, where do they want the
product to be shipped? What is their email address, what is their phone number? They are essentially
onboarded as a customer. A fraction of those
customers will come back and make a second purchase. So let's say there are
ten people who are buying the product from me because they came through
this entire funnel. Hopefully some of them will
like my product and even without coming through the
entire funnel on their own, they will come back and buy another product from
me in the future. So I'm able to retain those
customers for my business. A lot of people
call this a sales funnel because it is
shaped like a funnel. But if you think
about it, it is kind of a leaky funnel because at every stage we are letting some people leak
from our funnel.
5. 03 Organic Traffic, Customer Acquistion, Customer Lifetime Value: In the previous lecture, we talked about paying for advertisements and getting
a customer that way. In this lecture, we
will talk about getting a customer without
paying for it. So we can do that
via organic traffic. Getting organic traffic is
a lot more challenging, but it is incredibly rewarding because
essentially you pay $0 to get in Leeds and those
leads convert to customers. And there is a whole
science behind it. It is called search engine
optimization or SEO. Seo techniques can
work on Google search, Bing search, or any
other search engine. Since Google controls
about 85 to 90% of market share when it
comes to organic searches, most of the people will associate
SEO with Google itself. So if we go back to the
same example where a user types in via drone
and searches on Google. The first four results were ads, which were search engine
marketing or SEM. The first result
that does not have the add tag is the
first organic result. Now here I am getting
a result from dji.com. What that means is
this website has not paid anything for
getting featured here. It is ranking on top of
Google's search based on the algorithm that Google
uses to rank the website. And this rank of number
one position is given by Google's algorithm based on the search term that the
user uses in the search bar. It can also depend
on location and the language that
you're using on Google. Now how can you get
organic traffic, the way Google decides which side would
feature on the top or on the first page of a search result depends
on many factors. The first factor
is great content. If you're selling something, try and add a blog page which will tell more
about the product, cry and add great product
description so that Google recognizes that there is a good explanation of
what the product does, what the specifications are. And Google believes
that a user can get good information before making a purchase on your website. Another important factor
is age of domain. So if I'm starting
a website today and I'm buying the domain
name today itself. And if I have to compete
with a business which has their website for
like 15 years already. Even if my quantum
quality is high, Google will have more trust in an order domain because it has already established its presence and it has a history
on the Internet. The third factor
is internal SEO. So when I'm creating a site, there are certain things I
can do on my website itself, like linking one page to
another or making sure that the user can navigate from
one page to another properly. And that all the pages are
linked to some other page on the website so that there is a flow of traffic
that can happen. The fourth major factor
is external SEO. External SEO is something that happens outside of my website. So let's say I created
this great website. I have done everything, I
have written great content. I have linked my pages
properly on my own website. But then Google looks
for some trust signals. And trust signals can
come from backlinks. And backlinks are simply some external website
linking to your website. So for selling the maps, I have created this
website and someone, let's say on the editorial
team of Time Magazine, light my product and
on-time dot com, they decided to write an article and they gave me a backlink. What that means is they wrote
an article and somewhere in the article they give
a link to my website, my website.com, and they
made it a clickable link. So any reader who is reading
this particular article, if he or she goes
and clicks on it, they will be
redirected to my site. So this is a form of backlink, since this particular
back link is on a high authority sites such as time.com or New York Times are. There are plenty of
well-established websites that will pass on great
value simply if they have a clickable link on their website which sends
the visitor to my website. Consider this a form of vote. And the more crusted
the website is, the more established
the website is on, the value of the vote is higher, then there are some
social signals. It would also help
if a lot of people are talking about your
product or Instagram and Facebook and
they are linking to your product or they are referencing back
to your website. There are plenty of factors that go into
determining how Google will rank your website based
on more than 100 factors. But backlink remains one of
the most prominent factors. So a new website can work on getting their great
content written. They can work on getting
internal SEO optimized, but they will not
have age of domain because I'm just starting
a website right now. What age does it have? It has an age of a month, right? External SEO, you have
to work on it over time. If you keep writing great content or if
your product is great, slowly and slowly,
you will start acquiring these backlinks
from crossroad sites. So this is a slow process, but SEO is important because the thing with ads
is they are quick. They will deliver
results very quickly, but they are expensive, right? So you should have a short, mid and long-term strategy. The short-term strategy
could be to run the ads, but the long-term
strategy should be to focus on organic
traffic as well, because this is
free once you are able to establish authority, once you are able to rank high in the Google
search results, all the traffic that you're
getting is basically free. Now, let's take a look at few important
concepts of business. Would it not be
great if you just open your store or you started your website and
people are queuing up outside your store
to buy stuff from you. The reality is a little
different from this. As a new business,
you might have to pay some money to
acquire a customer. And it is very important
to track how much money you are paying to get
that one customer. That is the customer
acquisition costs. That is, how much do
you need to spend to get a new
customer on average? So let's say you spend
$1 on ads in a month, and that month you got
100 customers, right? So I will divide 1,100 and I get my cost of
acquisition as $10. And knowing this number
is very important. Now what is customer
lifetime value? Customer lifetime value
is the total value at customer can give you
over their lifetime. And what I mean by that is, let's say you have
a customer who comes and buys
something worth $10, and then you are able to add
them to your email list. And then later
sometime you send them a different offer and they come back and buy something
again from you, right? So in that case, Let's say they come in
by another ten bucks and six months later
they come and buy something worth
another ten bucks. So you acquired this
customer just once, and let's say you paid an
acquisition cost of just $10, but the total value
that the customer brought you is $30, okay? So in this case you are making a profit because you spent ten, but your customer is
giving you $30 in profit. So this is a
profitable scenario. So it is important to
have an estimate of both your customer
acquisition cost as well as the customer
lifetime value. And that is how you decide if a particular marketing
strategy is working or not. And we will do an example to see customer acquisition
cost as well as customer lifetime
value in action. Now let's briefly understand a few digital marketing terms. The first one is CPM, which is cost per
thousand impressions. The m here is the
Roman letter M, which stands for thousands. So a lot of people can
get confused and think that CPM or cost per
million impressions, but it is actually cost
per thousand impressions. So some search engines or social media networks might charge you per
thousand impressions. So if you're paying
for an ad and if the search engine,
let's say Google, Facebook or Instagram, they
show your ad to 1,000 people. They might charge you
for just showing the ad. So that is called CPM. The second digital
marketing term I want you to know is CPC, which is Cost Per Click. Cpc is the cost you
need to pay to Google, Facebook, or Instagram when
a user clicks on your ad. So in the previous case, we were just talking about
the users seeing your ad, which was just an impression. But CPC here is the
cost you have to pay only when the user
clicks on your ad. So no matter how many people
actually viewed your ad, only you pay only if
you click on the ad. And Google essentially
charges you on CPC basis. Only Google does not
charge you on CPM, at least as of
recording this lecture, they can change
the rules anytime. Now, CPC would depend
on a lot of things like the country or geography
you are targeting. So if you are targeting, let's say a US are one of
the developed markets, your CPC would
tend to be higher. And if you are targeting some developing or
underdeveloped market, maybe your CPC would be lower. It would also depend on the niche in which
you are targeting. If you're targeting
downloads of a finance app, the CPC might be
higher as opposed to if you are trying
to sell a bracelet, then maybe the cost per
click would be lower. It all depends on
the competition and what your competitors
are trying to bid on. The cracks of the
matter is once you run the ads and only if the user
actually goes and clicks, then you have to pay
Google on a CPC basis. The next digital
marketing term is CDR, or click-through rate. So CDR measures how
many people who see your ad actually click on
it to visit your website. So let's say your ad is shown by Googled 1 million people, but only 10,000 of them
will actually click on it. Then we divide
10,000 by 1 million. We get a click-through
rate of 1% divided into the number of impressions
as a percentage value. Now that we have understood what customer acquisition cost is, what a customer
lifetime value is, what CPM, CPC, and
click-through rates are. Let's do a quick example
of what a funnel looks like and let's understand all those terms in some context. Okay, so let's take a look at a sample customer sales funnel. So here I have created
a funnel, after all, Google that I want
to target people in the age group of 24 to 35 years. I want people who are
interested in travel, and I want people in the United States to
be shown this ad. So based on these filters, Google will try and
target my ad and show it to people that fit
this particular criteria. So let's say the
target segment or the potential customer
base that I have created. There are 1 million people who
will actually see this ad. So 1 million people
will view the ad out of these 1 million
people when they see the ad. Maybe my ad speaks
to the desire of 500,000 people who are
more interested in my ads. So 50 per cent, or 500,000 of these
million people end up reading the full AD. And after reading the full add, let's say 100,000 people
respond to my call to action. So let's say I had
put a call to action of get the offer now or buy now, or get 50% off now
something that will speak to the customer
and the customer will take an action
based on that. So out of 500,000, 100,000 decide to
click on the ad. So 20% of these people actually take action
and click on the Add. 100,000 people are
visiting my website. And let's say I have created
a beautiful website. People like the
product description. I have laid out the
shipping policy, return policy, payment terms and
everything neat and clear. They dress my quality and 50,000 of them decide
to buy the product. So I have a conversion rate of 50 per cent between
these two steps, 50,000 people are
now my customers. They bought at least
one product from me and on my website I set up a mechanism to
collect their emails. And let's say some
of them decided to opt in to receive
promotions from me and I send them promotions a couple of weeks
later and 10,000 of them decide to come back
and buy again based on the communication that
I did with them via email. And for this case, let's
assume they just come back ones and buy one more item. So there's a retention of 20
per cent, as we see here. Now let's try and understand how these terms fit into this
particular scenario. So let's say I'm running
this ad on Google Search. Google does not charge
me per impressions, so the cost per impression
would be zero for me. But e.g. if I tried
this on Instagram, maybe they would have charged me some money for impression. But for Google,
let's say it has $0. Now, Cost Per Click, this is where I have
to pay these CPC. Now let's say for my
particular product, which is a framed laser cut map, the cost per click is $2.50. Now 100,000 people are
clicking on my ad. So I will multiply
this by 100,000. And here I will get
a total cost of $250,000 that I have to pay to Google what the
ad that they showed. And for the hundred
thousand people that clicked on my ad, click-through rate
is the ratio between the people who clicked and
the people who viewed the ad. So 100000/1000000. So if I divide
those two numbers, I get a click-through
rate of 1%. Now let's talk about the
customer acquisition cost. So here, effectively at
the end of the campaign, I'm getting 50,000
customers because these 50,000 people actually ended
up buying the product. And the cost that I pay to
acquire these customers was here in this step
when I paid CPC, when I paid the cost, click to Google, the
total cost I paid was $250,000 and the number of
customers I got is 50,000. So I will do to 50000/50000. And this is in dollars. So my customer
acquisition cost is $5. Now, before I come to the
customer lifetime value, I would have to understand
the pricing structure. So let's say I'm selling this
particular product for $50. The cost price,
that is the cost of material and packing
and shipping. Just the variable cost
is let's say $30. So here I am not including the cost of renting a warehouse, our cost of salaried
employees, If I have any, these items are not included here or even the
cost of equipment. So let's say I bought a
couple of laser engraver, I bought a couple
of laser cutters. The cost of all those
are not included. This is just the variable cost. So the contribution margin is selling price minus
the cost price, which is $20 in this example. Here, my profit
margin is basically the contribution margin
divided by the selling price. And it is 20/50. I'm getting a contribution
margin of 40%. And this is important to note, and a lot of people get
confused with profit margin. And they think that you
got a profit of $20, your cost was $30. And they end up doing
something like this, 20/30, and they say their
profit margin is 67 per cent. This is wrong. The profit margin is
always computed on the base of selling price
and not the cost price. One easy way to think
about it is that the profit margin can never
be more than hundred percent. Whereas if you do
this calculation, chances are this number would be higher than
hundred percent. So always remember
that profit margin is computed on these tails
are the selling price. So let's say per item, I am making a contribution
margin of $20, 50,000 people bought the
product from me here. So let's multiply that and see what the
contribution margin is here. So here I'm making $1 million
in contribution margin. And 10,000 of those come back and buy the
product again from me. So here I am getting
200,000 or 0.2 million. The total contribution
margin I'm getting from this campaign is 1.2 million. And the total customers
that I got were 50,000. If I divide these two, I should come up with my
customer lifetime value. A quicker way of
doing it is this. We know the contribution
margin is $20, that is selling price minus
the variable cost price. So I do $20 and I multiply
it with this number. So it is one plus the percentage of customers that are coming back to buy from me. So that was 20% or 0.21, 0.2 multiplied by 20. And I see that my customer
lifetime value is $24. Now if I'm comparing
the money that I'm spending to acquire
a customer versus the money that I'm able to get in terms of customer
lifetime value, this number should always
be greater than this. Only then it makes
sense to continue with the current
marketing strategy. So one more thing I
would like to mention here is in some cases, companies have a fixed
budget for advertising, and in that case, the
advertisement cost will not be considered
a variable cost. It might be considered
as a fixed cost. However, if you have a more dynamic digital
marketing strategy, then you can consider
your ad spend or advertisement cost
as a variable cost, depending on that, the customer acquisition cost can vary. But the crux of
the matter is that the customer lifetime value
that you compute should be greater than your
acquisition cost for your venture
to be profitable.
6. 04 Business Financials: Alright, now let's move on to the basic understanding
of financials. The primary reason
anyone wants to start a business is some sort
of financial benefit. So let's see what are the
things we need to keep in mind when we are planning
a business venture. The two most important numbers
you will hear from people, our sales and profit and sales and profit
are not the same thing. Sales is also referred
to as the top line and profit is also referred
to as the bottom line. And in a moment we
will see why it is so undoubtedly sales are important because if you are
making a sale, if you're selling something, you are getting some money
from your customers. So that is definitely important, but we cannot ignore that costs. The costs are a real thing. And once we reduce the
costs from the sales, then we arrive at our profits. And for any business, profit matters more
than sales because you can sell $1 million
worth of stuff. But if you're
spending $2 million to get those sales
of $1 million, then you're not really
making a profit, then that business
is not sustainable. For growth companies, it
can be different because they're spending more money
to get more market share. And at some point in the future they will
turn profitable. Growth. Companies are different,
but I'm talking about generic businesses here, such as selling my framed maps. So I would want to be profitable in the
first couple of years, if not from day one itself. Okay, So this is what an
income statement looks like. And here are few of the terms that we need to keep in mind. The first line, we
have sales or revenue. So if I'm selling 100
framed maps for $100 each, my total revenue is 100
times 100, which is $10,000. And the reason why
sales is called the top line because on
an income statement, sales is mentioned
on the top line. Then we reduce some cost, which is cost of goods
sold, advertisement cost. We arrive at gross profit after removing our
variable costs. And here I am considering
advertisement cost as a variable cost because I'm
using a dynamic strategy. So if my advertisement
strategy is not profitable, I will cut off my
advertisement strategy. So in a way, my advertisement
cost is a variable cost and we will understand
what variable cost exactly is in a moment. We remove other stuff like
rent, utilities, SGA, which is basically salary and general
administration charges. Then we arrive at profit before taxes or income
before income tax. Then we pay our taxes, and then we arrive at the
net profit or net income. And this is the net profit that matters the
most because you, when your customers pay you, you are collecting revenue. But after all the
expenses and taxes, what you get to keep
as a company or as a business is
your net profit. And as mentioned
on the bottom line of the income statement. So that is why people call stale fast top line and
profit as bottom line. So let's review some of the finance terms,
sales or revenue. That is, how much
money you collect from customers for selling
them, your products. Selling price. Let's say I'm selling
something for $50 each, and I'm selling 10,000 of them than the sales
would be $500,000. Simple as that. And if I have different
types of products, so let's say I have a
different product and bigger size which I'm
selling for $100 each, and I'm able to
sell 100 of those, then I will just multiply
these two numbers and add it here to
get my total sales. So here I will add 10,000 more. So my total sales
would be $510,000. Now, in order to make
the sale happened, we have to create the product, we have to run the business, we have to do marketing. And there are some other
areas where we need to spend money in order to run this
business efficiently. So the money we paid
to create, promote, and ship the finished
products to customers, those are our costs. And in addition to that, the money you spend to operate your business is also a cost. So here it would be if you have an employee you want
to pay their salary. And if you have a warehouse, you pay the rent and
utility Internet, and all those things will
make up the total costs. Now, costs can be categorized
into two broad categories. First is fixed cost and the
second is variable cost. The way you can think
about fixed cost is, no matter how many units you
are producing or selling, you pay the fixed cost,
e.g. renting cost. So if you are renting
an office for $5,000 a month and you're signing
a lease for 12 months, whether or not you make a sale, you are signing the lease, and you will end up
paying $60,000 to the landlord or whoever has least the retail
space out to you. So here in this retail space, I can sell maybe one unit or 1 million unit are
10 million units. This particular cost
that I am paying, the rental cost of $60,000
will not change for the year. Similarly, if I
have an employee, like a salaried employee
and I say, okay, I'm going to pay you
$40,000 per year. Whether or not I'm able to sell one or 1 million or
10 million units. I still have to pay this
person $40,000 per year. Now this is a salaried employee. So this can be
considered a fixed cost. If I do some sort
of contract where I pay the person on
an hourly basis, like wages or on a unit basis, that I could consider
those labor costs as variable costs. It totally depends whether
the money that I'm paying out is dependent on
the quantity or not. Variable costs are costs that depend on quantity you produce, e.g. raw material cost. So if I'm creating 100 of
my laser cut maps and it cost me $3 to buy the
word for one map. So I will be spending $300 in raw material costs
for this particular map. Right? Now if I'm
creating 100,000 maps, then the rate of three
dollar in costs for wood would now be a total of $300,000 in raw
material cost, right? So here my cost is depending on the quantity
that I'm producing. So the cost of raw material
is a variable cost. In some cases, companies
will have a fixed ad budget. So no matter what happens, let's say the company has an
annual budget and they have earmarked $100,000
that they will pay for TV ads or
digital ads, right? The fixed budget
can be considered a fixed cost for a company. So here, this is a fixed cost. However, if I'm running
small campaigns, let Sam spending
$1,000 on Google ads. And if I'm seeing
that my cost of acquisition is too high
via Google ad channel, then I will stop doing these ads here depending on the
quantity that I'm selling, I can decide to start or
stop a digital ad campaign. And in my case, I can consider advertisement cost
as a variable cost. So depending on the situation, some cost items can either be classified as a fixed
cost or a variable cost. So profit margin is the
money you get to keep after deducting the variable
costs from the sales. So let's say I'm selling
just one product and the selling price of
product is $50 per unit. And the variable cost on
that particular unit is $30. So my gross profit in
this case would be $20 and my profit
margin would be 20. And that is divided
by the selling price, which is 20/50, that
is 40% profit margin. Again, I would reiterate
that the profit margin is always computed on a
base off selling price, not the cost price. Now profit can have
multiple meanings because it can be computed
at multiple stages. The first one is gross profit. When we take the
revenue and reduce the direct cost or
the variable cost, then we get a gross profit. So in our previous example here, when we were doing this
calculation from 50, we remove 30, which
was variable cost. This 20 dollar here
was my gross profit. Then from the gross profit, if I reduce the
operating expenses, such as the rental
cost of the warehouse, the salaried employees, etc. Then I arrive at
operating profit. From the operating profit, if I remove the taxes
that I'm paying, then I arrive at
the bottom line, or the net profit. So profit is a term
which can be confusing because there can be
a huge difference between the net profit
and gross profit. So always make sure you are understanding what kind of
profit is being talked about. If they are talking
about the bottom line, they are talking
about the net profit. However, if they
are talking about margins and gross
profit margins, maybe they are
talking about this. If they are talking
about operating profit or operating
profit margins than they are
talking about this.
7. 05 Income Statements: Now let's take a quick look at the income statement of Apple. So this has been sourced from apple.com investor
relations site. You can easily go and
grab this from there. What I want to highlight is this structure of this
income statement. So here you would notice on the top line we
have the net sales. Sales and revenue
are the same thing. The reason why they
call it net sales is because maybe they
had a product refund, maybe they had a
subscription for which they had to
refund their customers. So Apple is removing the
refund from the sales. So even if you are
starting your business, let's say you are
selling 100 products and three of the products
come back to you. You can reduce those
refund amounts to arrive at net
revenue or net sales. So Apple sells
products as well as services because
they are selling Apple TV subscriptions
and iCloud subscriptions. And that is why they have both products as
well as services. Next thing I want you to
focus on is cost of sales. Some companies will write
cost of goods sold, and that is basically
the variable cost or the direct costs associated with selling these
products and services. So here they have
split the cost of sales for products
as well as services. So this is the number two
I want you to focus on. The third one is
operating expense. So Apple spent a lot of money in R&D research and development. So here they have
listed the expenses for that and then they have selling general and
administrative. So here they have
the cost of office, here they have the cost
of salaried employees and everything on this
particular line item. Then here I want
you to come here for provision of income taxes. So there would be paying income taxes based on the
income they're making. So they would be paying
this much in taxes. And then at the bottom here
we have the bottom line, or the net income or the net profit that the
company is reporting here. So here are these five
important points. Our net sales or net revenue, the cost of sales or
cost of goods sold, operating expenses, which
includes fixed cost, and then the income tax
that you have to pay, and then the net
profit or net income, gross margin or gross
profit is here. Operating income or
operating profit is here. And then net profit or
net income is here. So these are the three types of profits that are
mentioned here. And basically these are the important headers
that you need to keep in mind even when you are planning for your own business, broadly, your numbers
can be categorized into these numbers without going
into too much accounting. I just wanted to show you what an income
statement looks like. Okay, now, let's do some sort of projection for my business. Okay, so let's say I'm
selling the map for $50 each. And my variable cost is a
cost price is $30 per unit. So assuming I'm selling
50,000 units in a year, this is just my
projection that I would be able to
sell 50,000 units. Actually, let me go back to the previous example and pull
some numbers from there. So my selling price was 50, cost price was 30. And I was selling 50 plus 1060000 units and my advertisement
cost was $250,000. Let me just use
those same numbers. So I'll take the 60. And my ad cost, which I have mentioned
here, is $250,000. Okay? So my cost of
goods sold would be cost price times
60,000 units, which is 181.8
million daughters. And my revenue or sales would
be 60,000 units times $50. So this is how I am getting the cost of goods sold
or cost of sales. And this is my revenue. So 60 times 50, this will give me a total
revenue of $3 million. So my gross profit here
would be $950,000. Okay, So my cost
is 1.8 plus 0.25, which gives me a total
variable cost of 2.05. And I reduce that
from the sales and I get a gross profit of
mine had ran $50,000. Let's say I'm running a
small workshop and I'm paying $50,000 for that. So my rent and utilities
included is $50,000 for a year. And let's say I have an employee who takes care of some of the administrative
stuff and he or she helps me out with
some of my work as well, and I'm paying them
$50,000 per year. So basically, both
of these two can be considered under SGA itself. But here I have just
split it to show that rent and utilities
are important. So before you go ahead and
decide to rent an office, make sure you understand
the cost associated with it and the impact of that. On the bottom line, I remove $100,000 from
my gross profit. I arrive at $850,000. Let's say the tax rate that
I'm getting is 20 per cent. Let's am a small business, so I'm getting a
favorable tax rate for a first few years because
my government is amazing. So I will remove
$170,000 from here. And post-tax, that is, after paying my taxes, I am left with $680,000. So this looks like a
good prediction for me. So I'm starting my business and in a year I'm making a top line. That is my revenues
of $3 million. Even after taking off my
variable fixed costs and taxes, I'm able to make
$680,000 for the year. This is the money that I
have at the end of the year. I can either take it out and
enjoy life or I can decide to put that money back to
grow the business further.
8. 06 Forecast Scenarios: So we just did one scenario
where we forecast the sale of 60,000 units and we assumed thirdly an advertisement
cost, etc. What I would recommend you is to forecast at least three
scenarios because future is unpredictable
and there is no guarantee that
I'm going to sell 60,000 units in a year. There is no guarantee that my advertisement
conversions would be as good as I'm imagining. So my suggestion would be
to create three cases. One is realistic case, which you think is
the most probable. One is an optimistic case. Sometimes, sometimes
with this stroke of luck or the star's aligning, you might get better sales and better profits than you assume. So create an optimistic
case for that. And I would also suggest to
create a conservative case. So assume that not
everything is going your way and there can
be certain challenges. So factor those in and create
a conservative scenario. So these three cases, I have just created
three cases randomly. So my first case here is a realistic case where
I'm assuming that 50% of my target segment out of 1 million people are sure
desire and read the full add. 20% of them respond
to my call to action. So 100,000 people
click on the ad and out of that
50% end up buying. So out of 100,000 people
that visit my website, 50,000 end up making a purchase. And I'm able to retain 20 per cent of them
for a repeat purchase. So 10,000 out of these 50,000
people come back and make a purchase without me spending
any extra dollars on them. So I'm assuming, okay, my cost per click is $2. So I'm spending
this much in ads. I'm making a sale of $2.5 million from this
first purchase, and I'm making
additional $500,000 from the repeat purchase of
these 10,000 customers. So here I've done my cost
as 1.8 million and then my ad cost also I have
considered as variable costs. So $200,000 is here. And on the revenue
of $3 million, I'm able to make a
profit of $1 million. So keep in mind, this is my
gross profit, not net profit. I still have to take off the
cost for an office space, warehouse, salaries, etc, from
this and of course taxes. Second scenario is an
optimistic scenario. So let's say my target
segment for Google Ads is amazing and 70% of those people actually
end up reading my ad. So out of 1 million people
that I'm targeting, 700,000 or read my full add, 30% of them respond
to my call to action. So 210,000 people actually
click on the ad and 60% of those people who
visit my website actually make a purchase,
which is amazing. So 126,000 people
make a purchase, and I'm assuming a high, high rate of repeat purchase. So 40 per cent of
these hundred and 26,000 people are coming
back and making a purchase. So if I use those same numbers, I'm selling products
worth $8.8 million. So that is amazing. So my variable
costs would be cost of raw materials
and cost of goods, which is 5.3 million
approximately. And since more people are
clicking on my ad here, I'm spending more money on
digital ads, so $420,000. My total cost is 5.7 million
on revenue of 8.8 million, I'm making a gross
profit of $3.1 million. Now the good thing
about this is, let's say my fixed cost
is $200,000 a year. And no matter how many
units I'm selling, my fixed costs would remain $200,000 per year in
all three cases, right? The fixed costs that
I have to remove from this particular gross
profit remains $200,000. So that is amazing.
The third case is the conservative case. Let's say the target
segment that I created for 1 million people, only 30% of them actually show the interest and
read the full add. 300,000 are reading
the full add. Only ten per cent of the
people who are reading the full AD are responding
to my call to action. So only 30,000 people
are actually clicking on the ad and coming to my
website or Shopify store. And only 30% of these 30,000 people actually
are making a purchase. So 9,000 customers, and I'm assuming a repeat
purchase rate of 10%. So only 900 out of these 9,000 people are coming to make
a second purchase with me, the cost per click
remains the same. The sales in this case
is just $450,000. And I'm getting
additional $45,000 due to the repeat purchase
from these 900 customers. Here in this case, I'm making
a revenue of $495,000, which is this plus this. My cost is 60,000. It is lower because fewer people are actually
clicking on my ads. But that is not necessarily
a good thing because my customer lifetime
value is a lot higher than my cost to
acquire a customer. So I don't mind
spending more money. And by spending more
money in this case, I'm making more profits. So lower cost is not
always a good thing. So my total revenue was for 95, total cost is 357. I'm making a gross
profit of $138,000. Now, here we have the problem. The problem is our fixed
cost here is $200,000. If my gross profit is only
$130,000, then in this case, if I have to pay $200,000 for all other things that
are non negotiable, like rent and salary of
my salaried employees, then here I'm making a loss. So we need to be realistic, but we also need to figure
out multiple scenarios, such as an optimistic
scenario and a conservative scenario
just to make sure that we are prepared for
all these scenarios. Now, the major question here is, can you survive the
conservative case? If the answer is yes,
then congratulations, you have a very
solid business plan and most likely
you will succeed. Now, if you're not able to
survive the conservative case, you need to think about ways
of making things right, even if things
don't go your way. E.g. in this particular case, if you see that this
fixed cost of $200,000 is too high and it is
driving you into the red. That is, it is driving
you into the losses. Think of ways of actually
reducing your fixed costs. So if you're paying
for an office, maybe see if you can use a garage space
which can be cheaper. If you're thinking of getting
a full-time employee, think of getting a
part-time employee. So you have to see ways in which you can reduce
your fixed costs. Maybe you can bring
it down to $100,000. If that happens, then even
in your conservative case, when you are making
a gross profit of $130,000 with a fixed
cost of $100,000, you will still make
a little bit of money and your
business will survive. Now having said that, this is
just one year's projection. So if you believe
that you can take losses for a couple of
years and then you'll be fine if you start
making profit in the third year or fourth
year or even later, that's a decision that
you have to make. But I'm just giving you
a framework that you can use to think and optimize and strategize your
business plan and determine what is the best
particular strategy for you. I hope this was helpful for you. I hope this gave you
insights into how to plan financially
for your business, how to do predictions, how to understand sales
and taxes than costs. And overall, I wish you great success in coming up
with your business plan.
10. 01 Getting Set Up: So now that you have given a proper thought to planning
your online business, it's time to take action and
start your online business. So the first thing you
want to do is identify the product or service that
you're going to offer. You can offer a
physical product, you can offer a digital
product or a service. Physical product would be
something that you can touch and hold in your
hands such as a phone, a cup, a customized T-shirts, something of that sort. It digital product
could be something like an e-book or a course
that is hosted online. Service would be something
like consultancy services. You can offer your customers
help in digital marketing. You can help customers
with their taxes. So offerings of those
kind would be Services. So let's say I wanted
to start my business by selling a physical
product first. For simplicity, let's
just start with a pen. So I have just one
product which is a simple blue pen that
I want to sell online. Now let's do a quick check on the model that we had talked about in the
previous course, plan your online business. The first p is product. What are you selling? We have decided to sell a pen. Second, P is price. How much are you asking for it? And let's say I have done some market research
and I'm comfortable selling this band
for $2.99 per pen. The place where you
are selling it. We will sell this spent
exclusively online. So we will build an online store and sell the span online. We will have no physical
locations where a customer can actually come and pay cash
and buy the pen from us. They can just go to the
website and buy it online. And the final P is promotion. So how you will find
your customers. And initially, let's say this is the first time I'm
starting a business. I have no existing customers. So I will have to rely on
some online advertisements. So I will look for
Google ads, Bing ads, social media ads on Facebook,
instagram, Twitter, etc. Next thing we need to
do is come up with a brand name and a tagline. There are some tips for
finding a good brand name. Brand name should be unique, so it should be different from everything
else that exists. I cannot really use a name of a business that is
already operating. So I have to be careful while
choosing the brand name. It should be easy to
remember there is no point in complicating the brand name because
they're easier we make for the customers to
remember the brand name. The more likely it will
stick in their mind, the brand name should
be protectable. And here I am talking
about the trademark. So let's say I want to
name my company Apple, but I cannot really do that because there is an
existing company, Apple, which owns the
trademark on its name. So I will have to look
for a unique name that I can protect by trademark. And I have to make
sure that I'm not infringing on anyone
else's trademark. So depending on the
location where you are in, there would be a portal, a website where you can go and see if the name
that you're looking for already has a trademark registered in
somebody else's name, or is it something that you can actually get a trademark for? One more thing we
need to keep in mind though it is not that important, but it is kinda important. And that is domain availability. So if I'm naming my
company blue pens, there is a high chance that blue pens.com might already
have been taken and we can make a little change to the domain name so that it
still conveys our brand, but it is also available. So we will, when we do the domain search later
in the course, we will see how we
can tackle that. And let's say I don't really have a brand name in my mind. So what I can do is I can
take help of the Internet. And let's say I go to Google and I type in brand
name generator. And let's see what ideas
google is throwing at me. So there are some options
from wix.com, shopify.com. And let's just try these two and see what
we can come up with. Okay, so widths result
does not really take me to a brand name
generator directly. So I will close this
tab and Shopify actually takes me to this
business name generator tool. And let's see how that is. Find a business name and
describe your brand in one word, enter it into the
sharp name generator. So let's say I
want to sell bands and let's see what suggestions
Shopify has for us. They have come up
with 200 results and the results are here. Guardian pens, pens,
high-tech bands, Record purpose bands,
Hyperion pens, pens by red. And there are so
many brand names you might like some of them, you might not like any of them. It's totally a personal
preference here. Let's say I want to
get more specific and make it blue pens. Here I get options like
profitable sprint, Harold, A3s, let's say I don't
really like any of the names that they
have suggested and I will try and name my
business royal blue pants. Okay, so let's go
back to our slides.
11. 02 Create Digital Assets: Now that I have decided the name would be
royal blue pants, I will also come up
with a tagline for it. But at this point
I have to create some assets for my online shop. And three critical assets that
I can think of, our logo, the brand logo, the cover
image for the online store, and some product
images for logo. What we can do is we can use a tool such as
Adobe Photoshop. Which is if you know
how to use Photoshop, that is a great tool. There is a free online
tool called Canva. It is a drag-and-drop editor, which is very easy to use. And the third option
here would be to outsource it to someone
on Fiverr or Upwork. And you're going to
explain to them how you want the logo
to look and someone else will create it and deliver
it to you in a few days. So these are the three options that I can think of
for creating a logo. And among these three options, Canva is my favorite because it's very easy to
use and you don't really need to have the
skills for Photoshop or you don't really need
to outsource it to Fiverr are up for work. I will show you
how Canvas works. Here in Google, I will
simply look for Canva. This is the first result. And if I click on this, I will create a
new account here. So I will go to sign up. And I can use a Google
account to sign into Canvas. So that will save me some time. And let's say I pick
the Google account. Then it's science
main straightaway. Here there are some options so you can use it as
a student teacher, personal, but here we
are a small business, so I will pick this one. If you are just starting out
and you are the only member, you don't really need
to create a team. You can choose maybe later. There's also an option of
using Canva pro for free. They give you a 30-day
trial and they give you some premium image as and premium fonts if you are
subscribed to Canva pro. But for now, we're just going
to use the free version. So I will click on maybe later. Here you can choose whether
or not you want to get newsletters or
emails from Canva. I will choose not now for now. So it looks like I am in this Canva portal and I
have to create a logo. So what I will do is I will hit this particular button,
create a design. And here I will choose a logo, 500 by 500 pixels. And there are so many
templates that you can use for creating this logo. So there are some of them with this particular watermark
which says Pro. So that is available only to the people who have
subscribed to the Pro plan. For the free plan, there are
still plenty of options. Let's say I like this
particular logo. Okay? So the brand name
is royal blue pants. And I can make this
font a little smaller. I come to this area, choose a smaller font
size, let's say 42. And all of this comes and
fits in just one line. And here I will write, let's say something like best-in-class or
something like that. Whatever the business brand
and business tagline is, you can easily make it
here in the logo itself. This one, I can make
it a little bigger. So just by using a template, I'm able to create
this if I want to add some more
elements to the logo. So I can use this particular
button on the left elements. And then I can search for, let's say, a pen. There are these options
that I can add to this. E.g. I want to use
this particular image and I pull it here like this. Let's say this is the logo
I want for my business, royal blue pens, and that
is the blue pen on top. I'm satisfied with the colors. If I want, I can change the
color of the background. I come here, I click on this and I make it,
let's say yellow. Or I make it blue. And for the sake of saving time, I'm just going to accept this
logo as my business logo. And I come here,
share, download. And I can choose this as a
PNG or JPEG or other format. So for logo, I will
prefer using PNG. And then I hit Download. I have this particular image
downloaded to my computer. Now I have the logo ready. The second thing I
want to create as an asset for my website
is the cover image. For cover image as well. We have a lot of options. The popular options are Shutterstock, Pixabay,
and Unsplash. Shutter stock has free images
as well as paid plans. Pixabay and Unsplash have a ton of free images
that are copyright free and royalty free so you can use them even
for commercial purposes. Just make sure you read the details of each and
every image that you want to use and double-check
that they are okay to be used for
commercial purposes. Let's take a look at
all three options. Let's go to shadow stock
and see what we have here. Shutter stock has
plenty of images. And let's say I want
something abstract, like abstract background
for my website. Let's say I like this design. Here you would see that you have the options to
purchase this image. Here you can choose
the license type that you want to
purchase for this image. So for standard license, you can use it for
limited purposes in print advertising packaging, but you can use it for
unlimited web distribution. And then there is an
enhanced license as well. And based on the type
of license you choose, there are these
differences in cost. The standard license, one
option is to pay €49 per month, which comes out to
€1.96 per image. In dollars, it would be
pretty much the same. And then there are other
plants here as well. So if you really like an
image on Shutterstock, you can choose a plan and pay. There are also on-demand packs. So for five images, you can pay 49 bucks, which is roughly 9.8 per image. So if you really like
something on Shutterstock, you can definitely
decide on choosing either a subscription or
buying a on-demand pack. Or now I will show you
the alternatives which are Pixabay and Unsplash. So on Pixabay, you
have millions of images that you can use for your website for
commercial purposes. So here let's say I want to look for the same term,
abstract background. There are plenty of options
that you can choose from. Say for my website, I want one of these. Let's say I like
this image a lot. So I just select on this. And I make sure that the pixabay license
covers these two things. It is free for commercial use, and there is no
attribution required. You can just go ahead and hit
the Free Download option. You can choose an image size. So for my website, I can use 1920 by 11, 52 pixels. I will just go ahead
and download this. And if you sign up
for an account, which you can again
do with Google. So let me go ahead and do that. That makes it easy. I don't have to use the capture and prove that I'm not a robot. So I will just hit the button again after logging in Download. And I have the image
downloaded already. So I have this particular
image now downloaded to my computer, similar to pixabay. And there is another option for free images, which is Unsplash. And Unsplash also has a ton
of pictures that you can use. So if you just search
for abstract background, and let's say you want to
use this particular image. Make sure you read the license. It says free to use under
the Unsplash license. Okay? You can simply download this one for free or choose a size. Let's say I choose the
medium-size and I hit Allow. And I have this particular
image as well on my computer. So I'm saving these assets on my computer so that I can
use them for my website. The next thing to
do on our list is to have some product images. So getting a product
image is tricky. Sometimes you can
do it yourself. You can take a photo with
your camera or your phone. But then you might not
have the right lighting. You might not have the
right background for it. But there are some
workarounds for that. So e.g. I. Have a pen, I have my iPhone, I can just take a
picture, which I did. And then what I will do is to make it look a
little bit better, I will remove the background and there are some
online tools available, such as Remove BG. In which you put an
image and then they remove the background using
artificial intelligence, they will identify the
background and remove it. The third option is you can
also outsource this work with someone on a website
such as fever or Upwork. And you can take some images, you can send the images to
them and they can remove the background or edit the background the
way you want them to. So there will be some
cost associated with it. It can cost anywhere
between $20 to $2,000 based on the expertise
level that you want. I will show you how I
took a picture with my iPhone and how we can remove the background
using Remove BG. So using my iPhone, I just took a normal picture. I took a notepad, I put my pen on it, and I took a photo and
transfer that to my computer. So this is the photo
that I have here. And now what I want to do is I want to remove
the background. So let's say I don't really like this particular
background of t notebook. For removing the background, there is a very amazing resource which is called Remove BG. If you just Google
search for Remove BG, the first result
would be removed. Rpg, click on this link. And it has a very
simple interface. It tells you that you
have to upload an image here and they will remove
the background for you. So I click on this, I select the Pen image. I upload it. And I wait for the magic to
happen and looks like, it looks like this result
is pretty impressive. So this looks pretty good. I will just click on Download and I should
have my image ready. So let's take a look
at how it looks now. Okay, So this was the
image of the band. And this is the image of the pen with the
background removed. And honestly this is
pretty good because the background is totally gone and it was all for
free. I like this. However, you have to keep in mind that this particular image, the one from which
the background is removed, is a preview. And the dimensions of
this images for 33 by 577 pixels only. If you want a
high-quality image, you can use the
Download edge d option. And here it will ask you to sign up for the account for free. So let's go ahead and do that. We'll continue with Google. Okay, so now I can
download this image in HD. Now you would see that
this image is much better than the preview image because the resolution
is much higher. So to compare, I
will show you this. So even if I zoom on this
versus if I zoom on this, you will see that this
image is much better. It has a much finer
background removal. The resolution is
much better here, whereas this image
gets pixelated if you want to zoom in on it. So if you're selling a product, I would say always have
high-quality images. So this one makes total sense. I will go ahead and use this. So they also have
a credit system. Let's see what this
credit system is. The website explains that
images up to 0.25 megapixels, that is off resolution
625 by 400 are free. If you want higher resolutions, up to 25 megapixels, they are available for
one credit per image. And let's see what do
they mean by a credit. If you want to get full
resolution images, you have to buy credits. There are some subscription
plans on a monthly basis. So there is a plan for 40
credits per month for €9. But it says for
non-commercial use only. But I want to put it
on a commercial store, a store that actually
sells products, so I cannot use this. I can use this plan which
is 200 credits per month, and that is €39 a month. And that comes out to be
roughly $0.20 per image. If I pay yearly, I
save ten per cent. The other option is
to pay as you go. You can also choose to
not use a subscription, but just by some
credits for images. E.g. you want to use ten images and you don't really want the service
on an ongoing basis. You can just buy
ten credits for €9, which is $0.90 per image. For now, I will just continue with the one image that I have, but I'm just showing you these options that
are available.
12. 03 Get A Domain Name: The next thing we need to do is to come up with a
website address. And the website address
is called a domain name. So whenever we see a website
like www.google.com, the website address
is the domain names. Google.com is the domain name. Likewise, we will look for something like
www.myawesomebusinessname.com. I don't really want
this particular domain, but this is just an example. And how do I get a domain name? There are plenty of options
available in the market. The popular ones are GoDaddy, named cheap pork bun. So if you're looking
for a domain name, always compare the prices and the features at
multiple websites before you come to the decision of where to buy the
domain name from. Let's go ahead and take a
look at all three options. The first option was GoDaddy. Here on GoDaddy, I can
look for the domain name, so my business name as royal blue pants and
I wanted.com domain. Okay, so I just end a royal blue pants.com here and search if
this is available or not. Then it tells me that
my domain is available. Royal blue pants.com and it cost me $0.68 for the first year. And that costs 1999. But here, and they're
giving me a promotion which cost me just
$0.68 per yard. So let's see how that works. Because there might
be a little trickier. It also suggests me that I can bundle up and get
more domains with the extension.net.org dot
info so that I can use all of these and redirect all the customers looking for these websites to
my main website, which is.com, then
it suggests me more TLD is and TLD
or top-level domains, whatever that follows,
the dot is called a TLD. Top-level domain. The most popular and
the world is.com. But there are plenty of new
options coming up these days. So I could buy dot edu, but there are some restrictions. So let's see what that is. Here. If you want to use a dot edu, the registry and contact
address must be in the EU. So for now I am in
Luxembourg, which is an EU. I can go ahead and
actually register it, but it is not available to someone who is
outside of the EU. And there are other
options like dotnet.org, dot code or info. And plenty of those. Okay. Most popular TLD, as I said, is calm and if it is available, I will always prefer
to use a.com domain. So let's see how much I'm actually paying
for it on GoDaddy. So I go to make it yours. I don't really want
to add anything here. I'm just shopping for
domains, so no tanks. I continue to cart. Then there are some add-ons
like full domain protection. Domain protection with prevents hackers from stealing
your domain, requires approval via
two-factor verification. All of these are nice, but I will compare
and see if there are some other sellers that are
providing this by default. And I don't really want
to start my website, vet them for now. Email essentials. You can get an email address
with ten GB e-mail storage, email plus with 50
GB storage, etc. So for now, I will just focus on the domain name and see
how much it costs me. I will decline the
wind protection. I will decline other add-ons. Okay, So if I choose one year, then it tells me that I can actually get this
domain for just $0.68. Okay, That is good to know. If I want to use this particular domain
for just one year, I can go ahead and
use this $0.68. This is a promotional
price they're offering me. I can actually go and do. I'm ready to pay and buy
this domain for one year. But if I want to use it
for at least three years, then it will cost me 40.66, which is not a bad
price, to be honest. So GoDaddy is costing
me 40.6, 643 years. And for one year, it is just costing me less
than $1, less than €1. I will go ahead and delete this card for now because I want to compare the prices at
other service providers. Also, the next option
was named cheap. And in named cheap. Let's see what prices
they are offering. I will look for the
same domain name, which was royal blue pens.com, and see what prices they have. They are offering me this
domain for €7.98 per year. And let's see if
I do three years, what is the price for that? Ssl is a security certificate, which is very important. So if I take a look at
this particular website, it will show a lock here, which simply means
that this side is a secure site and the connection to this
particular website is encrypted. So this is very
important to have SSL. And here it looks like that name cubed.com is not giving
me SSL by default. I will have to add
this to the plan. So on top of the €8,
I'm paying here, I have to pay five-year-olds
almost to get SSL. So that brings my
cost to €30 per year. With an SSL here we
are paying almost €40 per three years. The next option I wanted
to try was pork bun. They generally have
very good prices. And let's see what they
are offering here. And I will look for the
royal blue pens.com. And here, royal
blue pants.com is available for 9.73 barrier. It renews at 9.73 per year. Okay. So let's go ahead and add this. And if I go to check out, I notice this thing here that these things come
free with every domain. We have this SSL certificate, which is already included here. Unlike in named cheap, they were asking me to pay €5 per year for the certificate. So here my cost is 9.73, but SSL is included. When I'm talking about port one, my overall costs would be lower. So I will go ahead and use
this particular service, pork bun, to create this two. By this domain, I will
create a new account here. And I will choose the
password they suggest. You fill in the details
and create your account. And then you can
continue to billing. It will remind you to
check the spelling of any domain registrations
for one last time. So make sure there's no
spelling or type of mistakes. There's royal, there's blue, there's pans, There's dot com. Okay, so I'm confident and
I'll go ahead and continue to billing so I can use a credit
card to make the purchase. I will fill in the details. And by this domain.
13. 04 Create Account With Payment Processors: Okay, so now I have
made the payment, and this is my domain management
page on pork bun.com. And here I see that I have this domain available
in my account, and it is royal blue pants.com. And here I have some
settings that I will need to use when I
later configure my website. For now, I will leave
it the way it is, and I will go ahead and continue with the
rest of the course. Next thing we need to think
about is how to accept a credit card payment or a debit card payment
from a customer. We have an online shop. We cannot really accept
cash from the customers. So let's go ahead and
see how we can do this. Two of the popular payment
processing services are Stripe and PayPal. I will go ahead and
create an account with both stripe as well as PayPal so that I can accept
payments from my customers. First, I will see what
Stripe has to offer. If I come to this section, the products, Stripe
offers online payments. It gives you a pre-built
payments page for checking out. And there are some options
to customize the UI, which is the user interface, which is the way the customer will interact
with the website, the look and feel of the
website while checking out. And there are some options
for creating payments links, which is again, a
very good feature. I will show you how
that works as well. And you can create
some invoices and you can also do subscription
management through Stripe. Okay, so let's go ahead and create an account with Stripe. So I will go ahead and use this sign-up button to
create my new account. I will use my e-mail. I will use my email address, my name, the country, and I will use the strong
password suggested by Apple. So I will go ahead
and get this thing verified so that they can
verify my e-mail address. And I will just click on
this verify e-mail address. So that's stripe knows
this email belongs to me. Okay. Now I have to activate
payments on Stripe. Then there are some questions
regarding my business. So choose the location and
business to get started. I have a registered business in Luxembourg, so I
will choose this. You can choose United
States if you are located there or the country
that you are operating in, you can choose accordingly. Okay, then there are
some more details to fill out like legal name, email address, date of birth, and some other things so you can go ahead and fill those in. I'm using a fake number. I do not want to show my real details because
it can be tricky online. I will just put
something like this. Then next step would
also be to include your VAT number or your
tax ID is if you have one. And I have to pick an industry. So let's go ahead and do that. I'm just selling a pen, which is their merchandise
business website. I just bought my domain. So it is dark. Royal blue pens.com
product description. We sell pens for
writing or process. And then describe
how you fulfill the orders in order to help stripe keep your
business compliant, we need to know a
little bit more about how you provide
goods or services. So here I have a small business. I have pens in my house. I will ship them myself. Let's say I choose yes, here. And here they are asking, on average how long
after paying well, your customers typically receive
their goods or services. So within two weeks, so I will try and ship them
as quickly as possible, maybe in less than a week. But there is no
option of a week. So I will go ahead
and pick two weeks. Now, we have to add the
public details for customers. So when a customer
is buying something using the credit card,
on the credit card, what should be the descriptor like when we buy something
on the credit card, we get something like this. And the website or the merchant name on the credit card statement
should be this. So I will go ahead and keep
this as royal blue pens.com. If you want, you can remove the.com and just name
it royal blue pens. Or you can keep the
entire website address so that they know where
they made the purchase. The customers know that. Shortened descriptor, I will say our B bands and customer
support phone number. Make sure you add a customer support phone number as well. We'll go ahead and hit Continue. Then there is the option to add the bank to
receive the payouts. Here. Go ahead and connect
a bank that you have. Most likely you already
have a bank account. If not, go ahead and
open a new bank account. There are plenty of
online banks these days which have low account fees and better and favorable terms
for new small businesses. I would recommend
keep a separate bank account for
your business so that it's easier for
doing accounting. So you know, your
business expenses, you know, the revenues
you are getting, all of those transactions are happening from one
bank account that will make your life so much easier when you are
filing for taxes. So go ahead and enter
all of these details. Here. They will
give you the option to activate two-step
authentication. It is also called
two-factor authentication. And what that does
is whenever anyone, including you try to
sign into your account, it will ask you for a password. And there are some options like using SMS to receive
that onetime password. You can use the Google
Authenticator app. And you can also
use a hardware key, such as a UB key. I already used this
authenticator app. I will go ahead and
use this option here. If you have never used the
Google Authenticator app, you can download it from the App Store or the
Google Play Store. And then what you need
to do is simply open the app and look for the
option to scan in new code. And then when you scan this
QR code on your phone's app, the Google Authenticator app. Then this account will get linked to that Google
Authenticator app. And this account will be secure and it will require a
two-step authentication, onetime password whenever
you try to sign in. So this is additional
level of security. And since this is a
financial account, I would recommend that you enable those two-factor
authentication. So I am doing this on my device. I'm using the scan QR
code option and then I'm done. I hit Continue. It gives me the option to authenticate
using the password. So here in the app I have
this onetime password. I will go ahead and enter this. Then they will give you the
option of this backup code. And it is important to save
this backup code because what happens if you are not able
to access your account? If you lose your phone, then you will not
be able to generate the onetime password using
the authenticator app, right? So in that case, you can
use this backup code to come up with to
recover your account. Okay, so you can add more methods for
two-step authentication, but for now I will just use the authenticator app
and I hit Continue. Now here's the option of doing
automatic VAT calculation. This is EU specific. If you are in US,
there might be options off automatic sales
tax collections. I would recommend
you enable that. It simplifies the life a little. So I'll make sure I select the right product
category because the VAT calculation or sales tax calculation is dependent on the
type of product. So I will choose
general tangible goods. Because I am setting a pen
which is a physical good, I will go ahead
and hit Continue. Then there is the show customers who are climate commitment. With Stripe Climate, you can direct a fraction of
your revenue from payments to fund the
frontier carbon removal. You can set your contribution. You don't really
have to do this if you are passionate
about contributing to the people who are
working towards making this planet better,
like removing carbon. You can go ahead
and enable this. A message will show when
a customer is paying. A lot of customers
actually support businesses that support
the Earth as well. I will use this
default value of 1%. You can also set a threshold
like if my business has processed already
10,000 in revenue, then I will start contributing 1% of my revenue to defund. Or you can leave it
at zero and right from the first
transaction you will get to contribute 1% of your revenue towards
this Stripe Climate. So I will leave this unchecked. I want every transaction
to contribute to this cause and there is the option to
review and finish up. So this is you are almost ready to
start exploring stripe, take a moment to review and
confirm your information. So make sure everything
makes sense to you and hit Submit. All right, so now here
we have this account. There is some analytics
talking about gross volume sales
customers, etc. But now we are just
getting set up. So all of this data is just some default lines
that they have drawn. Okay? And then you can customize your dashboard here
by adding your logo. So I will click on Upload, and I will pick this logo
that I had created on Canva. Okay. Then you can go to the branding settings and I will show you what
options we have there. If you're doing this branding,
there are some options. So whenever the
checkout page shows up, you will see on top
that there is a logo. Now there is this
shortened name RB pens. And then some details that the
customer needs to fill in. You can customize it. So e.g. I. Want the background to
actually be black in color and my buttons to be green in color
for some reason, then I can go ahead and do that. Okay. You can also change
the font if you want. You can make it sharp. If you want. You can make it
in pill shape if you want. So you notice the shape of the button is changing
into a pill shape. If you keep it sharp, it
is a sharp rectangle. If you keep it rounded, you get a rounded rectangle. So not only on the buttons, but also on the forums here. Okay, and then you
can see the preview on mobile phone this way. You can also see the preview
on a desktop this way. So you can switch the preview
on top right-hand side. Okay, So let's say
these changes. Then we go back to the home. So this is pretty much
it for now on Stripe. Later on when I
have to integrate my payment portal
to some website, I will use the
credentials to do that. For now we will continue
with the course. The second option for
accepting payments is PayPal. Paypal is also very
popular globally and I will show you how to create an account
with PayPal as well. Simply search for
PayPal and Google. And I come to paypal.com. And it is also a very
simple interface. There is a button to
sign up for free. And here you can choose either a personal account
or a business account. And I would recommend
because this is a business that I'm starting, I will choose the
right type of account. Enter your e-mail address to sign up for if
does this account. So I will go ahead and do that. And here's the password. I will use this strong
password suggested by Apple. And then some details
that I need to fill. And some more details. Address. Make sure you have checked all
of these details. Make sure everything
makes sense, and then hit Agree
and create account. Describe your business. I am a sole proprietor. Make sure you choose the
right type of business. You could be an individual, you could be a sole
proprietor or you could be a partnership or private
company, public company. Whatever your business statuses, make sure you choose
the right one here. Okay, so the next step is to put in the product
or service keywords. Let's say I'm selling
stationery stuff. So stationary stores,
office and school supply. Okay. Website I will fill in the
website details which is royal blue pants.com and
CC statement name, I will keep the same as before. Rb pants as I kept in Stripe. And I have to fill in
some more details. So I will go ahead and do that. Okay, once done with
all of the details, make sure to double-check
and hit Submit. Then some questions from PayPal, what do you sell? Let's say I sell goods. You can also choose
services if you want. I haven't just big goods
for now and hit Next. Next, how would
you like to sell? Pick all of the answers
that apply to you, dig payments on your
website or in your app. I will go ahead and select this. Send invoices are estimates. I will select this as well and create a link you can
use to request payments. I will select this as well. Your customers purchase
your products, buy-in, single transaction
and subscription. So I do not really have
any plans of starting a subscription plan
because I have just one product which is a pen. But if I want, I can start a subscription that
goes like this, that a customer
base, €9 per month. And they get three new pens every month,
something like that. So for now, let's go ahead
and select this as well. So what type of setup
experience is best for you? I will go for the
pre-built solution that doesn't require coding. There are other options as well. Custom solution that you can
tailor to your business, let your developer take
care of it for you. I want to keep this simple, so I will just use the
pre-built solution that PayPal is offering here. So let's go next. So this is my
dashboard in PayPal. Let's take a quick tour here. Here on the left-hand side, there is an overview of the account activity
and money movement. Here there are some
short quick links. Here. There are some actions
like creating an invoice. So now that we have seen
the process of creating a account with both
stripe as well as PayPal. At this point, I want
to tell you that I like Stripe
better than PayPal. I like the way it
integrates and the extra features that Stripe has. Now that we have
our domain name, we also have the Stripe
account configured. Let's move on to the next step of creating a Shopify account. And Shopify is a one-stop shop
for e-commerce solutions. So there we can upload our product photos,
product descriptions, and integrate the payment
method so that we can receive the payments when a customer
buy something from us. So let's go ahead and see
what Shopify can do for us.
14. 05 Setting Up Shopify And Connecting Stripe: Alright, so now we
are on Shopify and let's take a quick tour of what this website can do for us. Shopify is one of the most popular options for people who want to
open an online store. And as they say, Bring your business online. Create an e-commerce
website backed by powerful tools that help
you find customers, drive sales, and manage
your day to day. And we will see how Shopify
actually achieves that. So one of the key features of Shopify is the option
to sell everywhere. And you can use one
platform to sell products to anyone anywhere
in-person with POS, which is point-of-sale and
online through your website, social media, and
online marketplaces. So you can integrate
your Shopify store, even with your
physical store POS, and you can keep
track of inventory and revenue and
things like that. Shopify also gives you the option to market
your business. And they have some built-in
marketing tools that help you run the digital
marketing campaigns. And sharp, if I also offer some cool insights
into your business. So what you are selling, how many you are selling, what is the average order
value and things like that. And as I said earlier, there are plenty of businesses
in 175 countries in fact, that use Shopify and they have made 496 billion USD in sales. So they have had a
collective revenue of 496 billion using Shopify. Okay, so now let's get started. Let's start here. On top right-hand side there is this option to get a free trial. Actually before that, let's go ahead and see what
the pricing is. So depending on the region, the pricing would change. In Europe, the
pricing is in euros. So shopify offers 14 days free trial without requiring
any credit card. And there are three plants. There are actually four plants. I will go into the
fourth one later, but it highlights three plants. The first one is Shopify basic. It includes everything you
need to create a store, ship products, and
process payments. The cost of this
is €24 per month. If you are paying
on a monthly basis, if you choose to make
an annual payment, you can save ten per cent. So if I choose yearly, the effective cost
would be €21 per month, but they will charge
you 21 times 12. They will not charge
you €21 per month, and they will give you one
invoice for the interior. So let's stick to the
monthly plan for now. What's included in the
basic Shopify account is basic reports. You get to staff accounts and up to four inventory locations. With the regular
Shopify account, you have to pay €69 per month. And instead of getting
basic reports, you get professional reports. You get up to five
staff accounts and up to five
inventory locations. There is also the
Advanced Shopify plan, which costs €289 per month. It has a custom report builder, 15 staff accounts, and up to
eight inventory locations. So for most businesses
that are selling a few products or even
a few hundred products, this basic Shopify
plan should suffice. There is also a fourth plan, which should be somewhere here. And it comes under
the heading of alternative solutions
for your business. There is this startup plan
which costs €5 per month. And here you get
to sell products through social and
messaging apps. So you will not really have
a full fledged website. You will just get a place
to host the products. And you can share the links
to those products either on social media or on a blog or other website that
you already might have. So this could also
be an option for getting started with
selling something online. And then they have
the Shopify Plus plan which costs $2,000 per month. And that is for
enterprise companies. And that is the
companies that can actually afford this
kind of pricing. So in all three of these plants, basic, Shopify and advanced, you get to build an online
store with Shopify is robust e-commerce platform,
no coding required. And that is what
is the difference here in the startup plan? You will not get
this online store. Okay? So for this course, I will go ahead and pick the Sharpie five basic plan
because I think it will suit 90 to 95% of the people who want to
start a small business. I will take advantage of
the Start free trial. And there are some questions
straight up if you want, you can skip all of them. But let's see what
they are asking. Let's get started. Which of
these best describes you? I am just starting. Where would you like
to sell initially, I would like to sell
on online store. I would also like to
sell on social media. And let's say I want to sell
even on Amazon and Google. So I will select this as well. Which social channels
do you want to sell on? I want to sell on
Facebook, instagram, Pinterest, and that is it. Which online marketplaces Do
you want to sell on Amazon? Let's say just on Amazon. What would you like
to name your stores? So we already have a name
which is royal blue pants. Okay, I will remove this. Actually, I can edit
this link here. So this is the link that Shopify is providing
to me by default. And later on I can connect the domain that I had
purchased on pork buns. So I had purchased a domain,
royal blue pens.com. I will connect this so that I get the customers
to this website. And I can remove
these dashes here. Okay, a store with that
URL already exists. Alright, so I will go
ahead and add back the dashes. Not a problem. Where will your
business be located? So I have to put
in the location. I will keep the
location as Luxembourg. Now, there is an option to
create a Shopify account. I can use email, I can use Apple,
Facebook, Google. I will go ahead and create
an account with Google. Let's give it a few minutes. Okay, so here I get a message
that my trial has started. I can actually go ahead and
select a plan at this point. So let me go ahead and do that. I will go for monthly
payments for now. I will choose the basic
Shopify plan and there are some additional
costs to be aware of when you are
processing payments. There is a transaction fee for all payment providers
of two per cent. So there is this 2% that
Shopify will charge me in addition to whatever my
payment processors stripe or PayPal charges me. This is on top of that. So let's say Stripe charges me two per cent and Shopify
charges me another 2%, I would be paying 4% total. There is a currency
conversion fee of 2%. What that means is all of
these costs keep adding up. So whenever I'm
pricing a product, that is, I'm determining
a selling price. I have to keep
these charges into mind because these
can add very quickly. I will go ahead and
choose this plan. But before that, I want to show the difference between
this plan and this plan. Here. In this case,
if I'm choosing the regular Shopify plan, which is €69 per month. The transaction fee
is half of this, so this is two per
cent, this is 1%. So what that means is if I'm
processing $100 per month, I'm paying $2 in
transaction fees. If I am processing
thousand dollars, then I'm paying $20
in transaction fees. If I'm processing
$10,000 of revenue, then I'm paying $200 and
transaction fees, right? So in that case, if I'm hitting 10,000 and
monthly revenue, I'm paying $200 in
transaction and 24 as the subscription,
so I'm paying 224. Whereas if I am
processing $10,000 in revenue here with
the Shopify plan, I am paying only $100 in transaction fees because the
transaction fee is 1% and I'm paying $69 or €69 in
subscription fee to Shopify. So the total cost for
me in this case would be 169 here in this case, for 10,000 in revenue, I am paying 224. So depending on how much
revenue you are processing, this plan might
actually be cheaper. So you have to keep
that in mind as well. For now, I'm choosing
the basic Shopify plan. So there are some
savings if you choose a lock-in period
of higher month. So if you are doing 12
months, save 30 bucks. If you are doing three years, you save 216 bucks. But for now I will just
continue with the monthly plan. And Shopify guarantees
you that they won't charge you until the
free trial ends. So that is something good. And this is the plan
we have chosen. The billing cycle is monthly, and then there are some
details to be filled here. So country, firstName, lastName, address, apartment, postcode,
see, and phone number. So make sure you fill
in all these details. I will go ahead and do that. Okay, So save the address. And then since I
have chosen a plan, so I will have to put the credit card details
here even though they will not charge me until the trial is ending in 14 days, I will go ahead and do that. Okay. So they will verify the
credit card details. And once the
verification is done, VR setup on Shopify. Okay, I will choose the
monthly billing cycle again. And I will hit the Start
plan to get started. Alright, so congratulations, you have been successfully
subscribed. How did you hear about Shopify? You can put in anything here, but I will choose a
friend or colleague. And I will go ahead and do this. Or you can actually
choose online video because if this is the first time you're
hearing about Shopify, you can say online video. Next we get this setup guide. And the first step here is to customize the team, bigger team, and customize your
content layout and typography to
reflect your brand. So let's go ahead and do that. On top, you would
see this message. Your online store is
password protected. Only visitors with your
password can access your store to let anyone browse and sharp
removed the password. So this is a protection sort of thing because while we
are building the website, I do not really want any
customer to come and see all the things
that are broken or not in the proper
professional fashion the way I want it
to look finally, while I'm building the store, I will keep this store
password protected. Once I'm done and I'm confident that I can
show it to customers. I will remove the password. Okay, so let's go ahead
and pick IT. Team. The default team they're
suggesting is Dawn. It team is simply the way everything is structured
on the website, how the images show up, what are the fonts, how the menu bar shows up? All these design factors, these design patterns combined
together is called a team. So for now, we have
the team dawn, and there are some more
popular free themes available on Shopify. There's refreshed craft sense, freedom to escape ride Studio. So if you want, you
can actually go to the Theme Store and take a look at all the teams and decide which one
speaks to you the most. There are also some
paid themes, e.g. this one is for $200, this focal is for $320. Don is free. And here you can actually
filter by free or paid. So I'm just looking for
the free themes for now. Take a look at all
of these teams and decide which one
you like the most. So here, let's say I like to do. So I click on studio. And I go to try theme here. I click on my account. And then it gives me
the option to add studio to your
online store themes. I will go ahead and add this. Okay, So we will give
it a couple of minutes. The team is getting
added to my account. It might take a little while. Alright, so here
we have this team Studio added to the account. I will click on Customize, and then I see some
of the options. So here I have the navigation. I can use the element
announcement bar, which is getting highlighted
here in the main Canvas. Then there is header which
is getting highlighted here. Then every element
that we have here, be it a heading, we get an image. It is all showing up here
in the sequential format. And I can highlight
all of these items, or I can directly click
on something on Canvas. And on the right-hand
side I have the option to edit this. So here let's say
instead of announcement, Welcome to our store. I can write something
like, Whoa, you are having a great day. Enjoy shopping with us. Okay, so this is how you
can edit an element. Then if I want to make
some changes here, I can easily do that as well. There are plenty of options
here that you can play with. So padding is the space
between two elements. So here if I increase
the padding, you will notice that this line, the royal blue pens, is actually getting further
away from the top line. So if I reduce it, it gets closer to the top line. You can play around with these things or they're
stopped padding. There is bottom padding as well. So you can increase or
decrease it if you want. I will leave these numbers
at default for now. I can enable this sticky header. And there is custom logo width. So here at this point I can
also add the default logo. And I have created one already. So I will go ahead and
select that image. I will upload it
from my folders. So from Canva, I had
downloaded this file, the royal blue pants logo. I will go ahead and select that. Alright, so I have my logo here. I will go ahead and
select this logo. And there you have it. Can add an alt text. Alt text is simply the
description of the image. So this can actually help you in Google search because we
are describing the image. So I will write royal
blue pens logo. Next I will come to this section and I can change the text here. I can say something like the best and in the universe. Okay? Then I can change
the size if I want. I can make it small. I can make it large. I can even make it extra large. I will leave it
at large for now. And then moving on, I will come to this element. And this element here
is a slide show, so I can select an image here. I will upload the abstract
image that I had here. And upload it. I will go ahead and
add these pens. But for now what
I'm doing is I'm just adding some random images. But what you can
do here is you can actually add the images of actual products that you are showcasing
to your customers, what products you are selling. Alright, so I have three images
in this slideshow, 12.3. Let me actually change this. And I will add another
image from the Internet. So I will go for
free images, bands. And let's say I select this one. Okay, so here in
this slide show, it catches the user's
attention straightaway. You can actually display your high-quality
product images. I have put some
random images here, but you should of course go for whatever you
think is right? Then you can have some
collections on Shopify. Shopify when you are
selling products, Let's say you are selling pens. You're also selling watches
and things like that. You can create collections of products and you can create featured
collections of products. So once you are uploading
multiple products, then you would be able
to do all of that. For now, I am leaving
this the way it is. And here there's some more
messaging for the customers. And you can write
something like, we believe only in
the best products. Again, you can add an image. You can write more things here, and you can link the sharp
button to your product page. Then there's another section for Featured Collection
and sharp by artists. So let's say you have multiple
designers and you can feature the collections
by artist if you want. Eric Ford from your
brand's founder, or highlight a customer review. Maybe I can write something like maybe I can
write something here. Like the pens are amazing. This is a review
from a customer. So I will write. Sean Smith said this. Okay. Then you can add an image of the review of the person,
something like that. Okay, so here we
have seen how we can edit and make changes to the
elements on the front page. I will go ahead and
save it the way it is. And then I will hit Publish. Okay, so even though
I have published it, The store is still
password protected. The option of published was just to make sure
I want to change the team from the
default theme of Don. Okay. So now that we have
a front page ready, partially, I will take a look at how we can add products here. So here on the left-hand side I have the option of products. And clicking on
that, I get this. What are you selling? And I will hit Add
your products. So I am selling blue pants, blue pen, and I will
name the model, let's say a classic, I will write in these
are the best value for money in blue pens
available in the market. Write something like
some description like Wait, I don't know, 25 g, size, 6 ", something like that. You can be as descriptive
as you want here. The more the description, the better it is
for the customer because they can take
an informed decision. So make sure you fill
this out wisely. Then there is the option
to add the media. So I will add the file, the transparent background, one pen image with
Remove Background. So the pricing was due 99, as I had talked about
earlier in the course. And there is this option
of Compare at price. And what this does is it
can give you the option of showing that this
product is actually at a higher price and you are
selling at a discount. So what I can do is I
can put like, okay, this product usually
sells for 499, but I'm selling this
to you for 299. So here I'm giving the idea, the impression to the customer that they're getting a deal on this product and they have the option of charge
tax on the product? Yes. Cost per item. This is for myself. The customers won't
be seeing this. This I guess, is for identifying if I'm making
good profits or not. So let's say I procured
these pens for a buck each. Then I can add an SKU or
a stock keeping unit. So I can write a
code like Ben 001. Okay, and then there
is an option of barcode which I will
not use for now. And then there is the option
of cracking quantity. I want them to do that. And then there is this option of continue selling
when out of stock. What this means is
if I am putting the total quantity
available here as 100. And if I've already
sold 100 pens, do I want to have the option for newer customers to
keep buying the pen? Ideally, if it takes
me a long time to procure the product and
send it to the customer. I will not continue selling
when it is out of stock. Because then if the
customer buys and they are already paying
for the product, and then instead of getting
the product in three days, let's say as I'm promising, they get the product in a month, the customer in that
case will not be happy. Instead of that, what
I'll do is I will simply disabled selling once
I'm out of stock. So for now, I will
keep this unchecked. This is the physical product. The weight is 25 g. And then there is some
customs information, country or region of origin. I will pick Luxembourg. And then there is an HS code. So I will have to Google
this for pens so I can Google the HS code for bands. Here I get that the US import and export data fountain pens, telegraph bands and other pens. The HS code is 96083 zeros. I will just copy this
and paste this here. And then if you are selling products that have
multiple options, so same product but different
size or different color, then you can keep
adding it here. So e.g. I. Have an eight-inch band. So I'll keep it as size. And I will make it eight
inch, six inch. Okay. And then I can add
another option, e.g. say color, and I will add blue, I will add red, and I will add black. So what this does is
for the same product, it is giving the options
of the size of six inch, eight inch, and in three colors, blue, red, and plaque. So if that is the case, go ahead and add them. But I have just one
product of one size. So I will remove this. Okay, here at the bottom we have this search engine listing. And what this does is if this product shows
up in Google search, how exactly you
want this to look? I will choose blue pen classic, and I will add something
like royal blue pants. And here is the description. I would just add shape
and best value for money. I already have that.
Okay. Maybe I can add shipping in three days. And the URL handle is this one. Here I have the option of
keeping it active or draft, so I will keep it
active and I will sell it online and Facebook
and Pinterest as well. Alright, so let me go
ahead and save my product. Alright, then I have the
option of inventory. And here I have the
quantity hundred set. And if I am making sales, this quantity will
automatically adjust. Then there is an option of managing your
incoming inventory. You can create collections. So you can create a
new collection name at featured bands. And you can write
these are the and select the best bands
from our election. Okay, for now I
will choose manual. And here if you want, you can add an image to this. I will use the default
image of this blue pen. I will save this. Alright, so here in
this collection, what I can do is I can
browse for the product. Since I have only one product, I can choose only that. But if you have
plenty of products, you can pick and choose
which products you want to add to this
particular connection. Okay, so now we have created
a collection as well. Go back. There's option of
gift cards as well. So if you have a store
and if you want to give your customers the
option to buy a gift card, you can enable that as well. The customer tablets
you import customers. If you have existing customers, you can import it from
a file if you want. So you can use a CSV format which is
comma separated value. And if not, if you have
only a few customers, you can add them
manually as well. And let's say I
have no customers because I am starting
a brand new business, I will leave this option. Then there's analytics
for total sales. The total sessions that is
number of times your store actually received
an online visitor and then returning
customer rates. So a customer visiting
your store wants. Then they came back again. So what percentage of those
are returning customers? Then conversion rate. How many people are adding
the product to the cart, how many people are
reaching the checkout and how many people are actually
buying product from you. So you can track all of that. Average order value is simply the total sales divided by
the total number of orders. And you get the average
order value, total orders. And some more stuff that you can track
here and analytics. And here you can also offer some discounts to
your customers. So let's see how to
create a discount here. There are few options,
amount of products. So if it is a 50 dollar product and you are offering $10 off, you can create a discount of
that type amount of order. So not only one product, but no matter how many products
they have in the cart, you can offer a discount
on the entire order value. You can create something
like by X, get Y. So buy one, get one by
to get one by three, get funds, something like that. Then you can give
a discount code for free shipping. So e.g. like Amazon does, is
for Prime members, Amazon offers free shipping no matter what the
order value is. But for others, there is a minimum order value only above which Amazon
offers free shipping. So let's see the first option. The first option
here is amount of products and the method
is discount code. I will hit this Generate button and it creates a
discount code for me. Okay? So this is simple as that. If you want, what you
can do is you can also create something like new buyer. Then I have manually created this discount
code, new buyer ten. And here I can choose it as a percentage or a
fixed amount, okay? So I will choose it as a
percentage, ten per cent, and it will apply to specific collection
or specific products. So I click on specific product. When I browse, since I
have only one product, I can choose that if you
have multiple products, you can choose which items to apply this discount code on. Minimum purchase
requirements, you can set that this trend
per cent will only apply if the purchase quantity is 20 bucks or
something like that. So I will keep this as no
minimum requirements here. You can let all customers
use the discount code or you can allow only specific
customer segments to use this discount code. So I click on this
and I hit browse. The default options
that Shopify gives me are these customers who
have not purchased. So these are basically
brand new customers. I want to enable this
discount for them, and I will leave the
remaining unchecked. So when I created this
discount code, new buyer ten, my intent was to incentivize a new buyer or a new customer
to make a purchase here. And here, I've set
the eligibility that only the customers who have not purchased anything
from me before, that is those customers
or new to me. Only they will be able to use this discount code to get
the ten per cent discount, then there are more controls
here like you can do, limit the number of times the discount can
be used in total. So let's say I want only the first 100 customers
to get this discount. So I can set a
limit here. I want. I can let it be ongoing
forever in perpetuity. So all the customers who are first-time buyers will
get that discount. Here I have the option of controlling the
coupon combinations. So new buyer ten can
be combined with other product discounts
are shipping discounts. So I will leave this
unchecked because if I'm already giving
them a 10% discount, I do not want them to collaborate with other
discounts available. Alright, and then you can
set the active dates. So when does this
promotion start? You can also put an end
date to this promotion, but I will let it go forever. So now that I have
created all of this, here is the summary. The code is new buyer ten, the type and method is amount of products and they
have to use this code. The details are available
on online sales channels. Ten per cent of blue pen classic that is only on one product. No minimum purchase requirement. And it is for customers who
haven't purchased before, no usage limits and can
combine with other discounts. And it is active
from today itself. And I click on Save discount. This discount is now active. Now, let's go back to
the discount store. And customize this here. So here I have this featured
collection showing up here, and I have just
one product here. And this is the
blue pen classic. Here I have the selling
price to Euros and 99. And this was my Compare
at price because I wanted to show that the
customer is getting a deal. I had put a compare at price of 499 and the user is able
to buy it for just 299. So if I click on that, I come to this product page. It gives me some more
details like blue pen classic tax included. The quantity I can change
from here if I want. And it gives me more details like these are the
best value for money. Blue pens in the market. The way it is 25 g,
the size is 6 ". I can go ahead and
hit buy it now. And it takes me to
the checkout page. Here are the customer
gets the option of adding the discount code. And the discount code
was new buyer ten. I want to make sure it works. Okay. It is working and my
new total is €2.70. So my promotion code
is also working. Okay. And then I can
fill in all the details continued to shipping
and make the purchase. Alright, so now we'll
come down here to settings on the left-hand side, bottom, and I click on it. I come to the Payments tab and I want to integrate
a payment processor. And here I have the option of choosing a payment provider. I have the option of
using PayPal or Amazon. I prefer to use stripes, so I will go ahead
and see if stripe is supported with Shopify or not. So I do choose a provider. It says be compliant with PTSD to payment
regulations in Europe. And I have stripe as
one of the options. So I will go ahead and
select Setup stripe. It automatically redirects
me to the stripe platform. So here you would notice it
is connect dots striped.com. And since I already
created a Stripe account, it is identifying that I have this account with
Stripe. I hit Connect. Okay, So here I had used
the apple password, so I will go ahead
and select this and authenticate this and login. Now for Stripe, I had used the
two-factor authentication. So on my mobile phone, on the authenticator app, I will get the one-time
password code, and I will go ahead
and enter that. So I select the
account I want to connect royal blue pens. It will connect automatically to Stripe and get back to Shopify. Alright, so now I
get the message that stripe is
activated and you are now compliant with European
PSD do payment regulations. Okay, so my payment
is now setup. Here. I have one more option, the option of capturing payment either automatically
or manually. So for most cases, capturing the payment
automatically makes sense because if you
have the product in inventory and the customer can actually come and
make that purchase. You want to take the payment then and there
from the customer. In some cases, let
say I am selling a handmade painting and I'm not sure if I will be
able to deliver it to the customer in by the
desired timeline or not, or if there is
some customization that the customer wants. And before accepting payment, I want to make
sure I can deliver on that customization or not. In that case, I will select manually and I will read the
customer's messages and make sure they are okay with
what I am delivering and then I will accept the
payment from the customer. The problem with
automatic payments is in cases where you are
charging the customer and for some reason you
are not able to deliver the product or service to the customer because
of the customization, because you're out of stock
or something like that, then let's say the
customer is paying you $1,000 for that order. And then you realize you
cannot really Delaware it and you can
refund the customer. So the customer will
be happy because they get all of
their money back. But the problem is, for
every transaction you are getting charged by Shopify,
which is two per cent. You are also getting charged by stripe, which
is two per cent. So you will have
to take a hit of that four per cent
processing fees, even if you are refunding it, the customer, So the customer
gets the money back, but you are now out of 4% of 1,000 bucks,
which is 40 bucks. So in that case, when you are not sure if the customer's requirements
can be met straightaway, it might make sense
to switch to manual. Otherwise, if it is
a standard product, it makes sense to do automatic
captioning of payments. Alright, so the
payment is also set.
15. 06 Policies, Markets, Menu, Domain, Email Marketing: So in the previous lecture, we were able to connect
stripe to Shopify. And now we can go ahead and do some other things to
our Shopify account. So here one important thing is to have the right
policies on the store. So let's go ahead and
click on policies. This link takes me to all kinds of policies like Store policy, privacy policy,
terms of service, shipping policy, contact
information, and legal notice. So if you know someone who can create good policies for you, like an attorney or someone who is familiar with this topic, always go ahead and
consult with them how to formulate your policies. If you want to use a
template with shopify provides like
something over here. If I click on this, I get a default template that actually defines
the refund policy. So e.g. here they are doing a
30 day return policy. If you want to change it, you can manually make the edits. So if I wanted to 14
day return policy, I can edit this. And I can edit this. Similarly, you can go
ahead and make sure read it line by line and
make changes were required. So here you have to insert your own address or the address where the
returns can be sent. And similarly, go
ahead and make sure you are okay with the policy
that you're publishing. Next is the privacy policy. And if you want to
use Shopify template, you can just hit this button. And then you have
this thing here. You can again go ahead
and read it line by line and make changes
as necessary. Next is Terms of Service. Again, I will use the template. And then there is
a shipping policy. Shaping policy is tricky because it depends on where your
customers are located. If you are distributing
only in one country, maybe it gets a little easier. But if you are
shipping out globally, then you will have to determine which customers
get free shipping, which customers are
charged for shaping. What I generally would
recommend is to go for something like terms of shaping as free shipping on orders above 49 bucks or whatever this number
you are comfortable with. And I can even make it free global shipping
on orders about 49. So what I will do is
I will take a look at the shipping rates to
most locations and then I will choose whatever the shipping costs are added
into the price itself. So if a customer is
buying safe products worth 49 bucks from me
and I have margins of, let's say, 30 bucks on it. And shipping is eight to
ten bucks on average. For global shipping,
I will include that cost into the price
of the product, right? So $20 is the cost
of the product. $10 is the cost of shipping. So my total costs are 30 bucks. And I am pricing the product at 50 bucks and telling them that I'm offering
free shipping. So this is this strategy you
can use or you can choose to charge for shipping extra depending on
your preference. Then there is contact
information so you can leave your email
for customer support. You can give a phone
number as well. So okay, something like this so
that the customers know how to reach out to you
in case of any issues. So we can do this legal notice. I will leave this blank for now. And this is, of
course a fake number. I do not own this number. Okay. Then here we have the option of configuring the
checkout experience. So let's go ahead and do that. First is the checkout style. You can change the logo, colors, fonts, and other things. Then we have the option
of customer accounts. I can make accounts
mandatory for all customers. I can also keep it optional so that they can check
out as a guest. So I would actually keep this account creation as
optional so that the customers, if they are in a hurry and they do not want to
create an account, they can just check
out as a guest. Or if they want to create
an account with us, they are welcome to do so. Customer contact method, you can choose both phone
number and email. I prefer emails more
than phone numbers, so I will just go for email. And then here in
customer information, I would want to have bought their first as
well as last name, company name, I will
choose optional address. Line two would be optional shipping address, phone number. I can leave that as
optional as well. Show tipping options
at checkout. If you are selling
something creative, you can leave this
option checked. If you are selling
general products, I would not really give
this option for tipping. Require a confirmation step. Customers must review their order details
before purchasing. This is good for the customers, but it also increases an
additional step in the process. So you can take a judgment call whether you want the checkout to be quicker or you want to
add this additional step, okay, so here you can choose
whether or not you want to fulfill the orders
automatically. That is, Shopify will
consider the order is fulfilled or you can
make periodic checks in the Shopify account and
manually mark the order as fulfilled as you actually
fulfill the order. Okay, There's plenty of options that you
can configure here. Then there is also an option of abandoned checkout emails. Now, this is a cool
feature because if a customer comes
to your website and they add something to their cart and they do not end up
purchasing the product, then you can send them abandoned checkout
emails automatically. So this is a cool feature
that we have in Shopify. So we can do anyone who abandons their checkout send after 6 h, 10 h, 24 h. So Shopify recommends 10 h based on maybe some research
they have done. I will leave it at 10 h. Then I will hit Save. And we have shipping
and delivery. Here in shipping, we have some shipping rates
that we can configure. So let me go ahead
and hit Manage. If my product is shipping
to Luxembourg itself, then I am offering
free shipping. But let me see what
options I have here. Standard and price is zero. But I want to add
the condition that the minimum price on the order, that is the total
order value should be 49 bucks for the free
shipping to trigger. Okay, and for the
rest of the world, I will do the same thing. Here. I will make it standard, and I will add conditions
based on order price. A minimum order of 49
gets you free shipping. So I select this and then
I save my shipping policy. Next, take a look at
taxes and duties. So here I am putting the option of all prices include tax. I am not a fan of this
because the taxes can be very high and it will eat
up into my profit margins. Also, since taxes like VAT and sales tax have to be
given to the authorities, I will prefer to add them later. That is on top of the
product price so that I know exactly how
much I'm getting and how much I have to give to
the authorities like VAT or sales tax and charge
tax on shipping rates, charge VAT on digital goods. All of that is now
taken care off. And then it's another option
to collect duties and import taxes so that if you
are shipping internationally, the customer does not have
to pay the import taxes. So let's take a look
at what this is. If I hit compare plans. Okay, So they are telling
me I have to upgrade to advance Shopify if I want
to enable that option. Sales tax and VAT can be
a little tricky as well. So depending on where
your customer is located, you might have to collect VAT and deposit to that country. So this is a little complicated
and as Shopify suggests, you should talk
with a tax expert if you're not sure
where you have the tax obligation
and you can add new countries and regions by
creating a shipping zone. And you can configure what taxes you have to
collect from people. So in case of taxes
and legal matters, always consult a professional. In this market stab, you can choose where
you want to sell your product and where you
want to sell your product. E.g. if I want to enable this
international market here, which is 28 recommended
countries and regions. I can manage this by
clicking on this. And here, I will click
Activate and see what happens. Now I get this message. Your store will recommend
localized experiences. Geo localization
app is installed. So now this is active
in more markets. Okay, so here is a list of countries that you
do not sell to. So if you view them, there's a lot of countries. If I want to add a market, let me go ahead and
click this option. And let's say I want to sell to entire North America or at least two countries
and North America. And I add countries and regions. So let me go down and look for United States and
Europe, United Kingdom. So let me add these
two countries. I also want to add, let's say Canada to my list. Alright, so I created a market. I can name it us, CA, UK. Okay, so I have added
three new countries and I have created a new market
by the name USCA and UK. So I'll go ahead and save this. So I am selling in my
primary market, Luxembourg, I'm selling in 25 more
countries in international, and I'm sending in
three more countries because I just created a new
market and activated it. If I hit Manage here that we see which are the countries
that I am selling to. I'm setting do
Australia, Austria, Belgium, Czech Republic,
Denmark, Finland, etc, etc. So you can see the
complete list here. Now we come to apps
and sales channels. There are plenty of apps
that shopify supports. And by default they are
integrating facebook, the online store of
course, and Pinterest. And we will take a look at Shopify apps later
in this course. Now, let's go to domains. Here. You would notice that Shopify
has given me a web address, which is Royal dash, blue dash pens dot
my shopify.com. But what I want is I
want the users to access my store by logging onto
royal blue pants.com. That is the domain name or the website address I bought on pork bun earlier
in the course. So let's see how I can do that. There are two options here. You can buy directly
from Shopify also. So let's say I did not
buy the domain earlier. I click on buy new
domain and I want to check what is the
pricing on Shopify. So let's say I look for
royal blue pens, new domain. Okay? So this is a random domain
name that I have typed and Shopify is charging me $15
per year for this domain, which is not too bad. But I got a better deal at pork bun where I was paying
less than ten bucks per year. And that included the
SSL certificates. So I do not need to
buy it from here. I will go ahead and connect
an existing domain. And I will type in
royal blue pens.com. And I hit Next. Then I get some instructions
for connecting my domain. To connect your domain, follow
the instructions to change your provider account settings follows settings instructions. Let me click on this. And then I get
redirected to a page. And let me see where are
the instructions for this. Looks like I have to
select somewhere here. Connect automatically. So it looks like
this does not work for me if I'm choosing domains. Because when I did this, they did not give me
the option to connect automatically. Let me try again. Okay. So the only option is to follow settings,
instructions. And apparently I have
to watch a video, which I am not a big fan
off for technical details. So I will choose connect
manually from here. Okay, so connect your
third-party domain to sharp. If I manually. Before you begin to
complete this procedure, you have to have this
particular thing, okay? All right. Step one is to change your DNS records in your third-party domain
provider account on a domain providers website, login to your account, find the DNS settings. So I will login to
the pork bun account. Here for this domain. I will go into the details. And then I will create two separate windows so I
can keep them side-by-side. On your domain
providers website, login to your account,
find the DNS settings. So let me go ahead and
pick the DNS records. So here I have the DNS records and then point the air record
to the Shopify IP address. So here I can pick in
the type a record. And what I can do is point this to this
particular IP address. Alright, if necessary, change the host name to add symbol. But I'll try and leave it blank. Delete any other error codes on the domain if
there are present. So I can take a look at
all the records and point the CNAME record to the name www to shop
start my shopify.com. Let me first add the record. Okay, so I will go ahead
and delete these records. And then I will add a
record to my DNS records. So the first thing I had to do was point the error code to Shopify IP address
232273, dots X5. So I did this record
and I pointed it to the IP 232-27-3865. And the second thing
I have to do is point this CNAME record with the name www to shop
start my shopify.com. So here in type, I will choose C name. And then I will put www here. Then I will point it two sharps. My shopify.com. So I will copy this and paste it here and
then add this record. Okay, so I have done step one. Next from your Shopify admin
go to settings and domains, and click Connect
existing domain. And then click Next to confirm your domain is connected,
Verify connection. Okay? So I come to the settings and domains and I come to
connect existing domain. And here I will type royal
blue pants.com and hit Next. And since I've already made the changes in my DNS
settings in port one. I will go ahead and
verify connection. Okay, so now I see that
this domain is connected. So royal blue pants.com is
connected to my Shopify store. So it takes just a
couple of steps. It may sound too technical
that you are changing records and settings
and things like that. But if you just
follow these steps, it just took me two steps
to connect this to Shopify. So our domain is
also set up now. So any customer who
clicks on royal blue pants.com will be brought
to my Shopify store now. Alright, next is brand. So here there are some logos. I already have a logo, so I will go ahead
and do this import. Okay, So they're telling me
your logo is less than 512 by 512 and may not be used by
some apps and channels. Alright, so now I will create a new logo and I have to
change the size and facts. So let me go ahead and
add a custom size logo, and I'll make it
512 by 512 pixels. And I will use this logo. I will select an item, do Command a to
select everything, command C to copy. And in the new size, I will paste this. I'll make sure everything
is positioned center. Okay? And I will bring them down
closer to the center. And the background.
I can make it blue. I can leave it white if I want. Okay, so let me go ahead
and download this logo. Okay, so now I have that
image on my computer. I will change this and
upload the new one. So this one is d
phi one to pixel. I will choose this and
I will upload this. Alright, so now
that message that we're showing up is gone. And I will do the same here. I will change it and
pick the 512 pixel. And that message is
coming from here as well. Alright, and you can see the
previews of the logo and circle and square and fab icon. So fab icon is the icon
you see on the top. So for pork bun, this is tears for Canvas. Does this for
Shopify, does this. You see it in the browser tab, which is kind of small, but that is what it is. And then you can choose your
brand's primary colors. I want my brand's primary
color to be this color. Let's say basically you can
do whatever you want here. And the contrasting color
would be, let's say black. You can use secondary color. You can choose a cover image. So I want to choose this
as the cover image. Add a slogan. Slogan I have is best-in-class. So I will do best in class. And short description. We create great blue pens that wow, our customers. Then you can add a
social link if you want. If you, if you have
a Facebook page, Twitter page, and
all these profiles, you can connect all of them. For now I will just save this. Let's go to Notifications. Now. Here you can customize
the e-mail templates. So change the look and feel of email notification
to your customers. Receive, add your logo
and color themes. So let me go ahead and do that. This is the order
confirmation template. The email goes with the header, royal blue pants or the number. Thank you for your
purchase hydrogen where getting your order ready
to be shipped, etc. etc.. And then the
details and how much they paid and customer information
and stuff like that, and the payment method as well. And here there will be a
generic line in the footer that if they have any
questions they can reach out on this email address. Here I can also add the logo. I will choose the
512 pixel logo. Here it is. So the first
email was order confirmation. Then the second one
is order updation. Then we have the invoice and it gives the
order gets canceled. We have to send the
cancellation e-mail. So there is a template
for all the emails that the customer will receive
based on the activity. Okay? This is pretty handy because you do not have to
craft these e-mails. These emails get automatically
trigger to the customer based on the action that
the customer is taking. Then there's plenty of
other options for emails. Here at the bottom,
this is also important. The marketing options. There is the concept
of double opt-in. What that means is, if a
customer comes to my website and the customer enters their e-mail address and says
they want to be subscribed. What I will do is
I will send them an e-mail on the
same e-mail address. And I will send a link in that email only when
they click on that link, I will consider that
they have agreed to receive newsletters or
promotions from me. This is a good way to
confirm that we are not spamming someone and we are sending e-mails and promotions only to people who are genuinely interested in our business. So for e-mail and SMS, I would prefer to have
customers that have double opt-in because
I don't want to send emails to people
who never read them. And sometimes someone can use a fake email and
someone else's e-mail. And then I send
promotions to them, which is not really
the best thing to do. Okay, So this is what we
have in notifications. If you want to change the text or something
off an e-mail template, you can do that as well. E.g. you want to change the text and the order
confirmation email. You can click on this. And if you understand
a little bit of HTML, you can get this done. If you do not know HTML, you can still make minor edits. But I would say don't
do it because you have the risk of actually
breaking something in the code. So if you know HTML,
it's well and good, or you can seek
help from a friend. Or a freelancer on Fiverr or Upwork who can help you with
customizing these e-mails. Otherwise, the default works
for most of the people. Okay, So we have taken a look at a lot of these menu items. And what I want to do next
is I want to come out of the settings and I want
to go back to my team. So I go back to my online store. Okay, So now I'm here
in my online store. I want to make some
changes to the team. I hit Customize here. And here. In the footer section. I want to make some changes. So first of all, this mission thing, I don't know if I want to
put the mission here. I could just put some
contact details and just a phone number and maybe the email address. And then I want to
add a block here, and I want to add a menu. And here I see that I have
this option of footer menu. And let's see what
a footer menu is. So let me go ahead and
click on this link. Here I have the footer menu, which as of now just
has this search bar. I want to add a few
things to this. So I want to add some
policies like privacy policy. I will add that. I will add more policies like
shipping and return policy. So shipping policy and
refund policy as well. And I will also add the
terms of service here. So I have data as well. Okay, so in the footer menu
I have these items added. I will save this menu. Now that we are in menus, I will also make some
changes to the main menu. So in main menu we have
contact, catalog and home. If I want, I can add
a blog page as well. So here is blogs. Okay? So I will save this menu also. So now if I go to the
team and customize, my top menu has four
items, home catalog, contact and news, which is
the blog menu I've added. Just now. Here I have these things. I can actually remove
one of the blocks. This sharp I can remove. I have the Info, which I can just
write navigation. And I will save this. Okay, so here I have
the navigation menu. If the customer wants to
read privacy policy shaping, policy driven policy
terms of service, they can come to the
bottom of the page and easily read these policies. So that is also taken care of. Now you would also want
to give information to your customers about
some generic things about the product, right? So you don't only want
to sell the product, you also want to tell the
customers something like, if I wanted to create
a new blog post, I will write something
about why riding with blue pens is a
sign of intelligence. I don't know, I'm
just making this up. And then you write
a long blog post. And what that does is it helps you find a place in
Google search results. So if there is some person who is curious about now blue pens, and if there is a correlation of using blue bandwidth
intelligence or IQ, then they can come
to your blog post. And that is one way to attract
people to your website. And if the company or blog post, maybe you can link the
products there or you can put a link to the shop and
they can actually. Go ahead and buy the
product from you. So this is one way of
getting traffic from search results are
written random words. So I will just
delete this for now. But you can very effectively use blogposts to drive
traffic to their website. Okay, next, I want
to tackle marketing. In marketing, you can
create a campaign on top and you can
use Shopify email. They allow you 10,000
free emails per month. And for every additional 1,000 emails, you have to pay $1. Okay, so I will go ahead
and click on this. Alright, so there is this email app which is
provided by shopify itself. This app would need
certain access. Like they would need access to information about your
customer and store. And they would be able to see the customer information
and edit store information. Which makes sense
because if you want to send emails to
your customers, you will have to send their names and e-mail
address to the app. So I will go ahead and
click on Update app. Alright, there are plenty of
templates that you can use. Let's say you want to talk about the seasonal sale or do you want to talk
about new arrivals? So I will click on this. And I will select
the template and I can make some edits to the
template to suit my taste. So I can send it to
all these subscribers, which at this point is zero. And then you can also choose other segments like
email subscribers, abandoned checkouts
and things like that. Subject, I would say,
let's say hello. We have new products. New products you will love. And a preview text is something that you will
see on your email app. You can leave this
blank if you want to discover the latest
additions to our store, sharp arrivals currently loving. And this section I can delete. There's browse more and then there's the basic information about the website,
about the store. And then there is also an
option to unsubscribe. We have to respect the
customer's opinion in case they do not want to receive any promotional e-mails from us. We always have to
give them the option of unsubscribe from our list. So all of that is cool. I will just go ahead
and review this. At least one subscriber
is required. If I want, I can change
the e-mail colors. So content background is white, the border is gray,
which I'm okay with it. But if you want to change, you can change it to, let's say a black if you want. You can send a test
e-mail to see how it looks like when the email
actually reaches the customer. I'm sending an email to this
email address and I will send it and see how
it looks in my Gmail. Ok, so this is the
email that I received. I will report this as not spam. And here I have new arrivals, the season discovered the
latest addition to our store. And I have this
e-mail in my inbox. So that is cool. Once you start
building your email base, your customer base
with their e-mails, you have more and
more subscribers. You can take advantage of these email marketing
campaigns as well. For now, I will exit this.
16. 07 Set Up Professional Email: In the previous lecture, we talked about sending
emails via Shopify. And this is the
test e-mail that I was able to send to my
own e-mail address. Here you would notice something. If I click on the details, it will show that
the email came from my Gmail address via
Shopify email.com. And if I want to give a professional look to my
e-mail communications, I would want an
email address which says something like contact at royal blue pens.com rather
than this Gmail address. So let's go ahead and
see how we can fix that. To do that, we come
to the Shopify store. And here at the bottom
left hand side, we have these settings. We choose the store
details. Here. We see that there is this
Contact Information tab. Here there are two
e-mail addresses, so the first email
address is the Gmail one, and Shopify uses
this to contact you. So if Shopify has to
communicate something to me, they will send me an
e-mail over here and this second email address
is for the customers. So when I'm sending
an email via Shopify, the customers get to
see this email address. And that is why
in this tab here, when the test e-mail was sent, it came from the Gmail account. So if I want to change this and make
it look professional, there are a couple
of steps for that. For that, let me go ahead
and make some changes. The first thing I
will do is I will click on the edit here. And here in the sender's
e-mail which the customer C, I will make it
something like contact at royal blue pens.com. I will go ahead and save this. Now this is just the
first step of the change. Here. There is this message that
emails you send me show up differently in some
customers inboxes. So what that means
is the via Shopify, email.com, which was here, will still show up. So let's see how we
can remove this. I will click on this
fixed this option. Here it tells me about the
customer communications. And here it tells me that
the email may show up in inboxes like this contact at royal blue pens.com
via Shopify email.com. So that is what we
just talked about. And if I want to remove it, I have to authenticate
my domain. And here it shows that the domain status is
not authenticated. Once I'm able to authenticate
my domain with Shopify, this via Shopify
email.com will disappear. And this can definitely help
with your brand building. So let's see how we
can authenticate the domain and remove
this particular line. Okay, so here it says to
authenticate your domain, you will need to create for new records with your
domain provider. And I had bought the
domain on pork buns. So my domain provider
is pork bun. It says in a separate
browser window, login to the admin of your domain provider and
navigate for DNS management and create for new CNAME records with the host names
and values below. So here are the four records, 123.4, all are of
the type C name. So I will go ahead and
show you how to do that. Okay, so now I have
my work when I count here, I will login. Here in the details. I will go ahead and open
up these settings for DNS. So here is the option
of DNS records. I will click Edit. And here I have to
make these changes. I have to add four records, 123.4, all are off types C name. So in pork bun, in
the first field, I will choose the type C name, which is the canonical
name record. Then in host, I will
copy this value, which is six K5 point
underscore domain key. So I can just click on Copy. And I do Command V to paste it. And the value DKIM one
dot this long string. I can simply copy this and paste it here in
this answer field. Okay? Tdl, I will leave it the
Vedas and notes if you want. This is for your
personal reference. I can write maybe for
Shopify, email, verification. You can leave it blank.
I'll just put in a note, but this does not affect
the DNS settings at all. Okay, so I add my first
record like this. Alright, now I can see it here that the first one is added. Then I have to add second,
third, and fourth. Now, I will focus
on two for now. So the host is, again, I will just copy this here. Paste it in the host field, and the value will go
in the answer field. And I will add this. So the second record
is also added. Next again, this is a CNAME. I will copy the
hostname, put it here. I will copy the value. I will put it here and add this. And finally, the fourth one, I will copy this
and the host name. Add the value and add this. So I have added
for CNAME records. So all four of these
values are now added. I will now hit this
authenticate domain button and see if Shopify is able
to authenticate this. So DNS settings take a little while to propagate
and come into effect. And here, shopify says that this should
take about an hour, but it may take even 24 h once the custom DNS records have been authenticated by
hosting provider, your sender email
will be confirmed. So DNS settings
generally take time, even when we were connecting the domain name to Shopify that time it
happened very quickly, but it can take anywhere
between 1 h to 72 h. So we will wait for this
particular verification to be over and check
back on this later. Okay, so now we have
given it some time and now Shopify is able to
authenticate the domain. And thanks to the setting
changes we had made, this domain is authenticated. So which enables you to send emails from
Shopify with this domain. So now that the domain
is authenticated, I will go ahead and try and sand another test e-mail and see what is shown as the
sender in that e-mail. For that, I will go ahead
and close the setup guide. And I will go to marketing. Here in marketing,
I will go to Create Campaign, go-to Shopify, email. And what I will do
is I will just go to the same e-mail template
I used last time. Actually, I can go
here previous e-mails. I can duplicate it. Here on the right-hand side. Here I have this option
of sending a test e-mail. So I will go ahead
and click that. I will send it to the
same Gmail address. Alright, here it says
test e-mails sent. So let me go ahead and see what it looks like
in my Gmail inbox. Alright, so now I am
in my Gmail account, and this is the fresh
email sent by Shopify. And here if I see the details, it says from royal
blue pants and the e-mail addresses contact
at royal blue pens.com. So unlike last time
where it was showing the Gmail address that is gone and now I have a
professional email address. And I also don't
have the text which said via Shopify gmail.com. Alright, so now we have this professional
e-mail setup with our business name or our
domain name in Shopify. Next, I will close this and I will take a look at some of the
other things we can do here.
17. 08 Quick Check & Open Store For Business: Now let's take a look
at this setup guide. We have completed all
of these steps here. So customized team
first product, we added a custom domain
and sales channel. As of now we have just
one sales channel, which is the Shopify store. And if you want to extend it
to Facebook and Instagram, you can go ahead and
do that as well. For Connecting Facebook,
you would need a Facebook business
manager account. So you will have to
set up and fill in more details regarding what
your business is about. If you have any tax
ID is et cetera. So that varies from
region to region. I will not be covering
that for now. And Shopify apps as of now, we have just added
the email app, but there are plenty more
apps that are very good. Some of these Shopify
apps are free, but most of them are paid. But later in the course, we will take a look at
some of the Shopify apps that can add some good
value to your store. For now, let's continue to
see what suggestions we have. Here. We have some suggestions regarding improving
the store quality. Make these changes to build
trust with your customers. So I will click on
the recommendations. And here it tells me two
things that need to be done. First is to add an About Us
page and that makes sense. So let's go ahead and do that. Alright, so I will just
name it difficultly about us and you can
write your story. Like we are a team
of experts who are passionate about writing. And then you can actually
write your story. What inspired you to
start this business? And anything else that you want to write
about you basically. So this is your space. This is one of the opportunities where you can tell
your customers or potential customers your story
and why you started this. And you can be as
candid as you want. So for now I will
just leave this here and I will just write my name
and I will save this page. So I will go back. And I will go here to home. Let's take a look at what are the recommendations are there? The next recommendation
is to add product photos or videos. Help customers feel confident in their purchase by including
at least two photos. So we have added just one photo. Okay, so what I can
do is I can click on this and hear in
the media section, I can add more photos
of this particular pen. So for now, what I will
do is I will just include one image with the
background because I don't want to take more
images for this course. I will add one more image. And it actually
makes sense, right? Because if I'm buying
something online, I would want to make sure
what the product looks like, maybe from different angles. And maybe if the
product has variants and it is available
in different colors, I would like to
look at the images of different types
from different angles. So for now, let's have
these two images here. And I will go back here. If I go back to the Home tab, it tells me that the store
quality has improved. So if I click on Review, I see a checkmark because
I added a refund policy. I added an About Us page, a privacy policy,
product photos. And I have said the
product as active. Okay, so the next thing here
is if you want to create a shortcut to come to
your Shopify store admin, you can just bookmark this link. So I do Command and D, and this particular thing gets
bookmarked on my browser. Now that I have made
all the changes, I will take a quick look here. If I click here close
to the online store, I can see my online store. So I have this banner on top. I hope you're
having a great day. Enjoy shopping with us. I have the logo,
I have this menu, and I have this slideshow
with images of pens. Actual images would be better, but for now we have these three
images from the Internet. And then collection, we
have just one product. So if I click on this, I get to see the details. So this is my pen, this is the second image. If I click on this, it will show up in a large size. This is the first image, this is the second image. Here I have this problem
that if I'm scrolling, this header is actually
blocking most of my screen. Now how I can fix that is by disabling this sticky header. You can keep it the
way if you want. But it can be annoying
to customers that this good percentage of the screen gets blocked
by these sticky header. So you can disable that. But for now, let's take a
look at the product details, the price, the quantity. If you want, you
can change it to whatever quantity you want. You can add the
product to a cart. You can go to view my cart. You can check out and
traditional fashion. And since I'm using Safari, it also lets me use
the Apple Pay button. So let's go the traditional
route and checkout. Then it will give the customer the option to put in
their email address. And they can also subscribe to the newsletter and promotions if they check this box and here are the
details for shipping, they can fill in the details. Let me go ahead and add some details so that I can show the entire checkout process. Okay, So I have my details
filled in and I want to make sure I had created
a discount code. And I want to make sure that the discount code I had created, which was new buyer ten, if that is working as well. So I hit apply and
it's working on it. And this code has been applied. So here at this point, I have a 10% discount
on my order. Okay, so all of this
is working fine. So now what I will do is I
will click and close this tab. And I will continue to see
what else I need to do. If at this point
you are satisfied with the way the store
looks and feels, and you have a
presentable website that you want to
show your customers. What you can do is you can come here and where it says your
online store is not open yet. You can remove the password. What that will do is
if the customers come, they can actually
see the store now. So let me go ahead and do that. Here I'm redirected to the area where I can disable
the password. So as of now it was
protected by a password. I will go ahead and uncheck this box and that should
do the trick for me. So I go and click Save. And I get a message from Shopify that your store is
open for business. You put a lot into
your business and now your online store is open
and ready to make sales. Alright, so I will close
this box and I will open a private window and Safari and see if now I can see the
Shopify store or not. Okay, So this is a private window because
I want to be logged out and see what a normal customer would see
when they visit my store. Now, the browser takes me to my Shopify store and I'm
not logged in as an admin. So this is what a
customer will see when they come to my website,
royal blue pens.com. So as a customer, I can come here, take a look at all
of the things. There are still some sections which are not really filled. But when you are
publishing your store, when you are opening
your business, make sure all of
this is presentable. Either you can remove
this section or you can add some valuable
content to this. And here I have my catalog. In my catalog, I have
just one product. So let's go ahead and
see what that is. Let's say I want
to buy this now. So if I do add to cart, I go to view my cart. I go to checkout. Here. I want to try the discount because
I'm a new customer. I want to get my 10% off. Alright, so now I have
the 10% of applied. Here. I can fill in the details for getting this
particular order delivered. So let's say I'm using some other details apart from
the administration details. Alright, so let's say
I will look at it. Shipped. Alright, now I hit
continue to shipping. Now I am getting
this thing here. This order cannot be shipped to the address you have entered. Review your address
to ensure that all fields have been entered
correctly and try again. I'm pretty sure I have entered
a correct valid address. So let's go ahead and see
what's going on in the backend. Okay, so let's go to
Settings and this option, shipping and delivery,
and see what else we can do to make sure that a
customer is able to check out. So here I have created two rates for domestic
and rest of the world. If I click on this again, I see that I have
added two plants. One is 49 and up
local Luxembourg. It will be delivered for free, but I haven't really specified the shipping plan if the
order value is less than 49. So let's go ahead and do that. So set up your own rates. So the rate name or I can write something
like paid shipping. And here I will say
that the prices, let's say 299 for shipping this. And the condition is if the
order prices maximum 49. In that case, the
customer will be able to get it shipped by
paying tonight. Tonight. Okay. So far zero to 49, we have a shipping
price off to 99, and I have 4092 up, then the shipping is free. Similarity for
rest of the world, I will do the same
page shipping. And the price is, let's say for global it is 399. And the condition would be if the order price
maximum is €49. Alright, so it looks
like we have covered the basis here. I
will save this. Okay, so now let's
go ahead and see if the customer is now able
to get it delivered or not. So now I have restarted this
session in a private tab, in a private window in Safari. And here I am on the website
again, royal blue pants.com. So let's go to catalog. Let's go to Ben's. And here let me add
just one pen to cart. View my cart. I will remove this
and make it just one. Ben. Continue to check out. And here I have this
discount applied already. And now based on the address
that you have entered, the shipping cost is
getting calculated. So I have set up an address
outside of Luxembourg and the order value is
less than 49 bucks. So I am paying the page
shipping rate of 3.99. So it gets added and the
total I need to pay is 6.69. Then I can continue to payment. And here I get the options to fill in the
credit card details and then I can use the P&L
button to make the purchase. So my sharp is now
fully functional. The pages are working. The customer is able to
fill in the details, get a final price, and enter their
credit card details to make the final purchase. This store is now in business.
18. 09 Final Touch Up And TEST Order: There are a couple of changes
that I want to make here. I want to disable the sticky header because
I don't really like it. One thing I can do is I can come to the Shopify admin page, click on online store. Go to my theme and
customize this. And here in the header section
on the left-hand side, I can select it. And I can uncheck
this option here, which says enabled
sticky header. So if I uncheck this, then the header does not block
any portion of the page. One more thing I can do here is change the way this looks. So let's say I want to make this logo a little
smaller, say 80 pixels. And instead of this
logo showing up on top, I can move it here
and make it middle left so that it is
taking less space. Then the menu and logo are side-by-side instead
of top and bottom. Okay, So I like the
way this looks. And at this point, if you want to enable
this sticky header, you can do that because the
menu has become smaller. So even if it occupies space, it is not taking up that
much space on the screen. So at this point you
can take a call. I will still remove it. And now I like the look
of the site better. I will go ahead and save this. I also want to show how
the ordering works. And I don't really
want to charge the customer and
then refund them, but I want to see if my payment gateway
is working or not. So here in payments I have my Stripe integration
already done. But here what I
can do is instead of automatic payment capture, I can change it and make it man. Well, okay. So now what I will
do is I will open a private window
and actually make the payment using the
Pay button and see if this stripe connection
is working or not. Okay, so I have opened here a private window and I'm
browsing here as a customer. So let me go to the catalog. Big my product. Add this to cart, checkout. And here I will again
try my discount code. New buyer ten. Alright, I got my discount. And here I will enter
some of my information. Okay, continue to shipping. And here I have the option of doing a pitch shipping,
which is fine. I will go ahead and enter my
credit card details here. Alright, so now that I have
filled in all the details, I will go ahead and play and see if this tribe
integration is working or not. Okay, So the order
is being processed. Give it a couple of seconds. Alright. So now I see that
I get a confirmation. It says the order
number. Thank you. And your order is confirmed. And then I have
all of my details here for billing as
well as shipping. So as a customer, I am getting this
order confirmation. Now let's see what happens
in the Shopify admin, as well as this stripe area. So I will close this. Now I will go into
my Shopify admin. I will look at this
particular option orders. Here. I see that there
is an order number, there is a date and time, the customer name, the
channel is online store, the total amount, the payment
status is authorized. So let's see what
we can do here. Okay. So at this
point I see that this order is
unfulfilled, of course, because I have not
shipped anything and in payments I see it
hasn't been authorized. That is the credit card
details have been confirmed. However, the customer
has paid 0.00, so I have not yet captured the
payment from the customer. What I can do is if I want to take this order and
ship the product, I can hit this button, capture payment, and take
the money from the customer. But as of now, I have not taken it
from the customer. Here at the bottom we see the details that the order
confirmation e-mail was sent and this payment
was authorized. But I don't really intend
to place this order because I placed the
order and my name only. So I will go ahead and
cancel this order. And I can do that by coming
to this section where it says More Actions and
this option cancel order, I can just click on this and you can select a reason here
why you are canceling it. So I will just select any reason and do
cancel order here. Okay, So now the
order is canceled. The order is white and
we should be good to go. I also want to see what
email the customer gets. So when the customer
is placing the order, this is the order
confirmation email. So it is very simple. It has a logo or the number. It says, thank you
for your purchase and we are getting an
order ready to be shipped. We will notify you
when it has been said. This is the classic
Shopify template for the customers when
they place an order. And then they have
some details here. And the customer
information below. This is the e-mail you get
when you place the order. And when I canceled the order, the customer gets an e-mail
with the same details, the order ID, etc, and the notification that
your order has been canceled, which product got canceled, and you have been
refunded as well. So the communication
from Shopify is pretty standard
where it is helpful. It is keeping the customer
in formed and in loop. So that is something
good that is inbuilt into the
Shopify ecosystem. And now let's see if we get
anything in Stripe or not. Okay, so I have my two-factor
authentication for Stripe. I will go ahead and enter that. So on Stripe dashboard, if I come to this area,
the payment section, I will see that there
is a transaction of €5.69 and it will say that
the order was canceled. And that is because I
actually canceled the order. So it will show that at this particular time
the payment started, the payment was
authorized by stripe, but it was not captured
because I had set the manual settings there
for capturing payment. And when I refunded it, stripe is telling me that
the payment got canceled. It may take a few
days for the money to reach customers bank account.
19. 10 Shopify App 1 Reconvert: Okay, so now we have the
Shopify store up and running. Let's see what else we
can do to make it better. So the first thing
I will do is go ahead and add one more product. And then we will go through
some of the plug-ins are add-ons that can add great
value to your Shopify store. So I will go ahead and login. Okay, so I will come
here to products. And here I will add a product. And the product I want
to add is another pen. So let me import the image here. This is the default image
without the background removed. If you want, you can
remove the background from that image using this
service removed out BEG, or there might be
some other services that can remove
background as well. So I will go ahead
and do this quickly. So I will just download
the free preview image. But if you are
running a business, I would recommend you
use high-quality images so you can use the
Download HD option. And it will cost you some money, which we had discussed
earlier in the course. For now I will just use
this normal download. Okay, so now this image is
downloaded on my computer. The background is gone
and it looks okay. Even though this
is low resolution. So if I zoom in, I will see that it starts
to pixelate in here. Anyway for the demo,
it should be fine. So let me go back to Shopify and I will
add one more image. This is the background
removed image. I can write blue Canvas Ben, description I will write, this is a great quality pen
that can ride on Canvas. Then I will put a price to this, let's say this cost 999. And compared price
I will put 40, 99. And the cost, let's
say is 299 for me. And SKU, I will write
Ben Canvas 001. And I have 100 of
these available. This is a physical product. It weighs 35 g, let's say region of origin. I will bake Luxembourg. And harmonized code. I will do a quick
Google search again. And the Harmonize code for pens is 960-83-0960,
830-96-0830. It gives you the option
ballpoint, pens, etc, etc. And then I will add it
some search listing. So here in Google Search, it should appear as
this royal blue pants at the best quality canvas. Alright, so I will go ahead
and save this product. Now I have two products here. The reason why I added one
more product here is because I wanted to show some of
the apps that are useful. So here if I come to
the panel on the left, there is this section for apps. I click on it and then I will
click on Recommended Apps. Then I can actually go
here at the bottom, Find More Apps in the
Shopify App Store. I will click on that. Here. I can look for
an app which will help me up sell the products. Now, when a customer comes to the store and they buy
a very basic product, let's say a cheap pen, like the cheapest product
we have available. And then since we already have the attention
of the customer, I want the customer to look at some of my other
products and maybe make a purchase of a higher cost product or
a higher priced product. So this process of
selling something more or a higher price to the
customer is called upselling. So here there are plenty
of apps and Shopify, which will help us with
this upselling process. And let's take a look at reconvert, up-sell
and cross-sell. Let's see how this app is. This reconvert, up-sell and cross-sell app has
plenty of good reviews, 3,206 to one at this point. And they have five-star rating. They have a free plan available, 30 day free trial. And what that means is
this is a paid app, so let's scroll down and see what their
pricing looks like. Okay, there's plenty
of details here, and here is the pricing. So they have a free tier. And in the free tier, if your store is making
less than 49 sales or store orders than the tear
remains free for you. And it gives you the option
of one-click upsells, vanilla data or thank-you page
editor and other features. But the first plan is
pro thank-you page. And it costs 799
per month and it is good for up to 99
monthly store orders. Then there is another plan, 14, 99 per month. It is good up to 199
monthly store orders. And then there's a
more expensive plan, 29, 99 per month. It covers orders up
to 499 per month. If I take a look at
all pricing options. So here we have a slider. We can move this. And let's say I'm
expecting to make 1,000 sales per month or 999. So that will cost me 49, 99 per month plus 0.75 per
cent of upsell revenue. So this is not the
total revenue. This is the
additional sales that this particular plugin
will help bring to me. I have to pay 0.75 per cent
of that additional revenue. Okay, So I will go ahead and try this in my Shopify store. So I will click on
this Add Add button. And here I'm already logged
into my Shopify admin. And I will just click
on install app. Here I get a message. Welcome to reconvert. Congratulations, you
are five-minutes away from boosting your revenue. In the next page, you
will approve charges for the highest possible plan, which is 79999 per month. We will not charge you 79999. This app is 100% free if you
have less than 49 orders per month and you get a 30
days free trial either way. So here if we go to this particular tab where
they have given a slider, if I slide it to
the rightmost side, and in the maximum case, if I'm making more than 50,000 sales from
my Shopify store, then this plan will cost almost 800 bucks plus 0.75
per cent of upsell revenue. But as long as I'm here
on the left-hand side, up to 49 orders per month
on my Shopify store, then my plan stays free forever. In any case, they have
a 30 day free trial. So if I do not like this, I will just go ahead
and uninstall this. So for now I will do. Let's go one more step to approve the subscription. Okay, so now we are here in the post
purchase funnel setup. Step one out of two
is let's define reconvert as you're post-purchase
upsell app on Shopify. For that we need
to go to settings, checkout and post-purchase page, and select reconvert, up-sell
and cross-sell as the, as the app of my choice, and then save that option. So I will go to the settings,
checkout and post-purchase. So settings is here. Then I go to checkout. Here. If I scroll down there is this option of
post-purchase page. And I can select the app, reconvert, up-sell
and cross-sell. And on top right, I can
see if this option, okay, now my settings have been saved, so I will close this. Now I see that the
post-purchase app has been set to reconvert. And then I can click on Start. Now. Now this app, they'll give some recommendations like this one, L is optimized to maximize conversions on the first
upsell customers can claim 15 per cent of and then if the customer is
declining that offer, then you can give them
a better offer of 30% off and things like that. So you can customize these numbers based
on your strategy. What I will do is
I will just use the default settings and
continue to the next step. Okay, so now reconvert is
active on the store and the customers will see the post-purchase funnels
and optimize thank-you page. So I will go to dashboard. And what I will do is I will see the difference the customer sees when they come
to the sharp now. Okay, so now I am
on a private window and I'm not logged
in as an admin. So this is the view a customer will get when
they come to the shop. So let me go to catalog. Now I have two pens. One is costing to 99 and the
expensive option is 999. So let me click on this and
I will add this to cart. And then let me go to view
my cart and checkout. Okay, so if I'm using
this particular app, the point of me
making the payment, there has been no effort from the app to upsell
something to me. I would have expected at this
point that they would say, Okay, if you can add this
product, that would be nice. So after I've made the purchase, the app gives me the
offer that I can make a purchase and I will be
getting some discount here. So instead of doing 99, I'm getting to 54, which is 15% off discount. And if I decline this offer, a higher percentage
discount should kick in. So now the price
went down by 30%. And I have to pay just to
Euros and $0.09 for this. And then there are
more and more offers that keeps showing up. For the next 20 min, you get 30% off everything. And if I want, I can go
ahead and sharp more. Okay, So this is one way
of making more sales. If you already have the
customer's attention and they are on the website, you can try and inside them with more discount so that they
can buy more products. So let's see if we can
configure the funnels. And here there is a
conversion monster funnel. Let me click on this. Okay, so here we have a
decision tree that you can take advantage of and you
can make edits if you want. So once the Arthur completes, then we can click on this
trigger and set it as either all orders or if the customer is entering
information or details, etc. Let us keep this as all orders. And when we are talking
off the upsell item, then what we can do is we can choose which item to upsell. So I can edit this and
click on product options. And here in the products
instead of going for the most expensive
product purchased, if I want them to buy
a specific product, I can come down here and
choose specific product. And here I can select a product. So I had created a
new product listing, which was for blue Canvas pen. I can click on this. And the customer will
see that they can buy this product which
is more expensive. So I'm upsetting this
product to them. And then they can buy
it at 08:49 at 15% off. And if they choose to decline
that offer, the 15% offer, then what I can do is I can, and in this one, and choose the same product and give them a 30% discount. You can edit this and make it, let's say 20 per cent. If you don't want to go as
high as 30% on discounts, you can choose a
different number, and then I will
save this option. So here's what is happening. The customer is
making the order, they are completing
the purchase. Then on all orders I
will trigger an upsell. And the first option the
customer gets to see is the blue Canvas pen,
which costs 999. But I will offer the
customer if 15 per cent discount with a
timer of five-minutes. If they're already
accept this offer, then I will try and
make a second upsell. For the second upsell also, if you want, you can
set a specific product. If you have plenty of options, then you can decide the
order of upselling. If not, you can leave it at a product recommendation
like this. For now, I will leave it the
way it is at this point. If the user is declining the 15% discount on
the blue Canvas pen, then I'm giving
them another offer, which is 20 per cent off
on this same product. If they are declining even that, then I am showing
them the thank you page and I'm exiting the funnel. If they're accepting it,
we are making a purchase. And similarly, if they are
accepting the second up-sell, we are making a purchase. If they are declining, then we are going to
the thank you page. So it is pretty simple. So let's see this in action now. I will go ahead and start
a private window again. And here, after
making the changes, let's see how it looks like. I go to catalog. I buy my cheapest Ben. Add to cart. View
my cart checkout. Then I will fill in the details. I go ahead and
continue to payment. And once I have
made the payment, I get the first upsell
option which says, so here I have chosen a specific
product for up-selling. I get this royal blue
Canvas pen and I'm getting a discount on the 999 price of 15% and it is
available to me for 849. So at this point,
if I accept it, I will get the price of 849. But if I decline this, I should get it 20
per cent discount. Here, even though the text
says Get it now for 30% off, if you notice out of ten bucks, I'm getting only two
bucks a discount. So it is a 20% discount. I forgot to change the texture, so I will keep that in mind. But for now, I will decline
this offer as well. Okay. So now the
order is complete. So you can configure the
final the way you want it to. I will click on edit and make sure my title reads 20 per cent now because I have changed
the number to 20%. Alright, so this is
a very helpful app that you can add to
your Shopify store.
20. 11 Shopify App 2 Frequently Bought Together: Okay, so let's go ahead
and take a look at some of the other apps that are
compatible with Shopify. So the first thing we will
do is we will go ahead and remove the app installed
in the previous lecture. So let me find the apps. So here I have the reconvert up-sell and cross-sell app open. I want to remove this for that, I can go to Settings. I can go to general settings. Here in the application status. The app is now enabled. I will go ahead
and disable this. And then if I go to
Settings checkout. And then I scroll down to
the post-purchase page. I select App as
none. And save this. Okay, So we have deactivated
the app and removed it as the preferred app for
post-purchase page. So next thing what I can do is I can even delete this app. So I go to settings and I go
to Apps and sales channels. Here I see all of my apps. I can simply remove
this reconvert up-sell and cross-sell app by
clicking on Remove button. Alright. Now let's take a look at some of the other
apps that can be helpful. One more strategy that
a business can use is to show products that are
frequently bought together. So even if you are
shopping on Amazon, sometimes you will
see that Amazon recommends that people
who byproduct day also byproduct B
and C. So that is one way they can increase the order value
for that customer. So let's take a look at this app frequently
bought together. And this has good reviews. And if I go down, this app has to pricing tiers. The first one is the free tier, which is free forever. No limits for stores created
in the last two months. So they are supporting new independent businesses
through this free tier plan. And they also have
a professional plan which costs 1999 per month and the
subordinate limited number of products,
orders and traffic. And even the professional
plan has a 30 day free trial. So let's go ahead and
install this app. I will install this
app using this button. Let me go ahead and
refresh the page. Okay, so now I have this
installation wizard. Let me click Next. And here the app is
giving the option, how many recommendations
would you like to add? So you can do plus one
product plus two products, or even plus three products. So I will keep plus
two products here. And then the position
of the widget. So you can put it below
the Add to Cart button, which would look
something like this. You can put below the
description of the product. You could put below
the product taking the full width or at
the bottom of the page. I think this could
be a good location below the Add to Cart button, but you can always
do testing with different positions and see which one gives you
better results. So I will go ahead and pick
this for now and click Next. The initial setup is finished. So let's start with
the app enabled. Okay, so let's test this out. Again. I will open a new private window and see what a customer
will see you on my store. Alright, so here I am in a
private window as a customer, I go to catalog. I pick, let's say this
product, blue pen, classic. And now when I'm looking
at this product, I get this option of
frequently bought together. And it is telling
me that I can buy this product plus I can
buy this second product. So it will show the
details as well. So this item is the
blue pen classic, the product that I selected. But it is telling me
that I can also take a look at Blue Canvas
spend, which is 999. So I like this one a little better because it is not waiting for me to complete the
purchase of one product before the second product
recommendation comes in. But here, while I'm
making the purchase, it is giving me the option
to add one product and pay for both the products
in the same transaction. So this is my
personal preference. I prefer upselling this way, but the other strategy is very successful and
very popular as well. So you can take a call there. Alright, so it looks like this app is working as intended. And here you would
notice that there is only one product
that is being shown, even though in this setting. So we had chosen to show
two additional products. And that is because we have
just one additional products. We have a total of two products. If we had three products, it would have shown two
additional products here. So let me close this
and I will go ahead and disable this app because
this is a demo store. And I don't want to
be billed for it. So I disabled it. Next I will go to settings
and remove the app. So I go to settings, apps and sales channels. Here. I can just remove the app
frequently bought together.
21. 12 Shopify App 3 Free Shipping Bar: In this lecture, we will take a look at one more Shopify App, which is for free shipping. So I will look for shipping bar. Here. There is this
app, free shipping bar. Let's check this out. Here. What this app
does is on top, it will keep reminding
the customers how far they are from getting
free shipping offer. In my store. I have enabled free shipping on
orders above 49 bucks. So let's see how this app
can help us make more sales. So they have a free plan and they have a
paid plan as well. We will go ahead and
use the free plan. I will install this app now. So I have to follow these
steps to set up free shipping with a minimum order
value for Shopify store. So go to Shopify admin
settings and shipping, open the relevant
shipping profile, added shipping zone,
shipping method condition, and or Eminem model price. Once you complete
it, click done, you can create a bar by clicking the Create
New bar button below. So I will click on
create new bar. And here I will choose the
colors, let's say blue. You can change the name of
the bar so I can write, lets say blue bar and
shipping goal is 49. Then the message will show
up something like this, free shipping for
orders over €49. And if there is some item in the cart of the user,
of the customer, then it will tell the customer
how much more they need to shop in order to get
this free shipping offer. Okay? So all of this is cool. I will go ahead and enable
this. I save this here. Okay, So let's see how
that works on the shop. So I will go ahead and
open a new private window. Alright, so I have now
opened a private window. So this is what a
customer gets to see. The banner says free shipping
for orders over 49 bucks. So let's see if this
actually changes dynamically as the
customer is adding orders. So let me pick this product. And here let's say I pick
one of these add to cart. And now that I have
added one pen, this number changed 49-46, 0.01. And let's say I keep
adding more of these. Now in my cart, the value is 17.94. So I'm just 31.06 away
from free shipping. So a message like this can also tell the customer that if they make a little
more purchase, they would be unlocking
the free shipping. So there is a high
chance that they will increase their order value
to get that free shipping. So this very simple
but effective tool can also increase your sales.
22. 13 Shopify App 4 Replay Site Recorder: We will take a look at a
couple of more Shopify apps. And every time I'm showing
you a demo of the app, I'm making sure I come here
and remove this so that I don't get unnecessarily charged for something that I
wouldn't be using. So I have removed all the apps that I have done a
demo off for now. So let's go ahead and take
a look at the next step. Here, I want to show you
a very cool Shopify App. I'm talking about this app, Replace side recorder
and surveys. So let's click on this. This app also has
very good ratings. And they have a free tier. And the Free Tier supports 100
unique visitors per month. And they have a paid tier, which is 29 bucks per month. And they support up to 10,000
unique visitors per month. And for every 5,000 additional unique
visitors, they charge $10. Okay, so let's go ahead and see what this app does for us. I add the app and install it. So here it tells me that I have a seven day free trial
ending on September 13th, and the app spending
limit is 999. But as we saw for up to 100 visitors per
month, this is free. Up to 10,000 visitors per month. It is 29 bucks. So I will go ahead and
approve this. Okay. So let's go ahead and
start the onboarding here. First thing I need to do is
enable recordings on my site. So what this app
does is it records the customers session so you can see where the mouse is clicking, where the user is navigating, at which point the user
decides to make a purchase, or at which point the user
decides to quit the website. So this can give very
valuable insights into how the user is actually
interacting with the website. And what you can also do is you can enable post-purchase survey. So I will go ahead
and open this. There are some articles
that you can read to see what should the
survey look like? What questions you should ask. But here I would ask a very simple question
which goes by, how likely are you to
recommend shopping with us? I will say one list, then, most likely. So let me make this more clear. On a scale of one to ten, how likely are you to
recommend shopping with us? One least slightly
ten is most likely. And once they are done
with their response, you can put a thank you message. Like thank you for
your valuable opinion. Save this. Now what I will do is I
will see how this works. I will go ahead and launch
your session as a customer. So my favorite thing,
new private window. Over here, I have a new
session in a private window, I am doing random
movements of the cursor. I'm taking a look
at this slide show. I'm looking at the product. And let's say I want
to check the images. And at this point, Let's say I decide
to add this to cart. So I simulated a
customer session in a private window
and I want to see how this session is captured by the better replay app
in my admin console. So I go to recordings. And here I see that there is already a session
recording available. And here it is coming from
Luxembourg and the devices, a desktop Mac OS using Safari. This session lasted 37 s. So let's go ahead and see what this
recording looks like. So I click here on
View recording. At this point they
are playing a video. So they are recording
this session. They are tracking the
cursor the way I moved it during my session
in the private window. So you can see the customer
is looking at that. The customer is
looking at a product. The customer wants to zoom in
and look at the photograph. So all of this is
getting captured beautifully by this
particular app. You can also see
how much time was spent on which page
on the website.
23. 14 Shopify App 5 Lucky Orange Heatmap: Let's take a look at one
more app for Shopify. So we come here, we go to app
and sales channel settings. And here we go to
customize your store. Now there's one more app for
recording the user sessions, the way we saw in the
previous lecture. And that app is lucky
orange heatmaps and replay. I will go ahead
and add this app. And as long as I have 500 page
views per month or lower, this app stays free for me. Let me add this evidence
style, this app. I have to fill in some
basic information to connect this app but Shopify. So there are some more questions that you can answer here. What are you most
interested in doing? I have picked
observe and monitor conversions and present
data for visualization. So I will go ahead and
set a password here. Okay, so now I'm here in
the lucky orange dashboard. So let's see how this one looks when a visitor actually
visits the website. So I will again simulate a customer visit here in
a new private window. Okay, so now I have opened
a private window and I have gone to this website,
royal blue pants.com. And I'm scrolling on my
lucky orange dashboard. I see that in real time. It is showing me I have
one visitor online. And it is showing me as a
new visitor because this is the first time they are
recording me as a customer. And let's say I do some
activities on this website. Like I scroll, I
check out a product. Scroll down, let's say
add the product to cart. And then if I check my
cart or shopping bag, I have two items,
I'll make it one. And then I will go ahead
and try and check out. Okay, so let's say I
come to this point and then I decide not
to go ahead with the purchase because
of some reason. So I will go ahead
and close my session. Now let's see what I get to see in the lucky
orange dashboard. I click on Dashboard, I click on one visitor online. Here it gives a fake name to
the customer like teal QE. And it tells me that the
visitor was from Luxembourg. Luxembourg and the
customer visited three pages and spent 1 min and 3 s overall
on the website. They added two
items to the cart, which is true at one point I
had two items in the cart. And here, if I want, I can take a look at this watch. So it is showing that I open this website in a
smaller window. And it is showing the entire
movement of the mouse. On the right-hand
side, you can also see the actions or activities. So curves are shaken, element clicked, product
viewed, element clicked. So all of these activities are actually trapped on
the sidebar as well. It also shows me when I added
the product to the cart, when I'm clicking and
things like that. So once I'm going to check out, the session recording stops. And that is common across both the apps that we saw
in the previous lecture. Also, the session
recording did not include anything from
the check-out session. Even this app like
you arrange does not include or record D
check-out session. That is because it contains sensitive information about the customers like their name, address, and things like those
are sensitive information. So the apps that do
not record them, and that is prohibited by
shopify itself, I believe. So. These are two cool
apps that you can use to see what
your customer is, seeing, what your
customer is doing. If there is a pain point, if the customer is spending
too much time somewhere. And if a customer is getting frustrated because the layout is not easy to read
and they are exiting. So you can take a look at all of this customer behavior and try and improve the
design of your store or the checkout
experience of your store. And that way you can improve
the customer experience, as well as increase the conversions and increase
your revenue that way. Lucky orange app has one more
cool feature of heatmaps. So let's take a look at that. I open this lucky
orange dashboard. And here if I come
down to analytics, here I get the information
on the most active pages. Since I did only one
customer simulation, I don't have much data here, but still, I want to
show you this feature. So I go to the homepage and here there is an
option of launching the heatmap and give it
a couple of seconds. Here I can scroll down, see where the user
has made clicks. So here we see that there
is one orange spot. So the customer
clicked here once. And that is the only hotspot where the customer has clicked. So if you want a quick
analysis of where exactly your customer
is clicking and if the products are
well placed so that the customer can easily navigate
to the next page or not. Heatmaps like this
can be very helpful.
24. 15 Shopify Apps Wrap Up: There are thousands of such apps that you
can use on Shopify. So if you are facing a business problem
and if you think you can make your business a little better by adding a feature, be sure to check out
the Shopify App Store, maybe there is a ready-made
solution for that already. E.g. let's say you want to
print out the shipping labels. So I will just go ahead
and search for shipping. And let's say I do
shipping label. And here I have so many options. If I take a look
at the first one, which is pH, multi-carrier
shipping label. Now, this app can display real-time shipping rates
from multiple carriers, like FedEx, UPS, USPS, DHL, etc. So if you do not have a free
global shipping policy, then you can use
this app to show real-time delivery options to your customers so that they know exactly the amount they would be paying for purchasing
your product from you, including the shipping price. And then they also
have this option of one-click label generation. So you'll click one button and all these shipping labels
with the information of the customer gets printed so that you can pack your stuff, use this label, and ship the
product to your customer. Likewise, there are other
solutions in the App Store. Next thing I can
think of is SEO, which is search
engine optimization. There are plenty of
plug-ins for that as well. So if I just take a
look at the first one, which is SEO image
Optimizer page speed. Let's see what is
included in this app. Seo is the practice
of optimizing your content and images so that Google indexes
your website. That is, Google
includes your website and images in its database. When a customer looks
for something e.g. say, the best blue
pens in the universe. If the customer types for that, then Google searches through its database and shows
the results, right? So ideally you would want to be the first result that Google shows many customers search for a product that
you are selling. So you can take advantage
of these SEO tools. And here this app is
for image optimization. Likewise, there are other
SEO tools also available. E.g. if I take a look
at this one, smart SEO. This app also offers some
of the features like optimized store images,
generate SEO tags, fix broken links,
managed sitemap, and speed up your store, improve SEO and drive
more organic traffic. So whatever your use case B, make sure you check
out the app store. Maybe there is a
solution that can do the heavy lifting
for you already. And almost all of them
have a free trial. So this one has a
seven-day free trial. If you think something is not really giving you the value, you can go ahead and uninstall it so that you don't
have to pay for it. Alright, so with
that, I will wrap up this section of
the Shopify apps.
25. 16 Shopify Started Plan When To Switch Plans: Okay, so now we have
already taken a look at how we can create a
complete Shopify store, how we can enhance the features with the help of
the Shopify apps. Now what if you don't
really want to commit to spanning 20 to 30 bucks every
month for the Shopify plan. Let's say you have just a
few products that you want to try and see if they can
sell in the market or not. So you can actually opt for even a cheaper plan on Shopify. And that plan is here. So we go to Settings and
we open this plan tab. And we go down here and the
bottom and change plan. If I scroll down here, we have these starter plan. It costs about €5 per month and they transaction fees
are a little higher here, so it's five per cent instead of the two per cent
we were paying here. Okay, so let's go ahead and see how this startup plan works. Once I choose the starter plan, I will get to keep
some of the features, but some of the features
will get dropped. So I get to keep the product
information I have added. I have added two products
on the store and I will always have the
option to upgrade anytime. What I will lose this, any
customization made to the team and I might lose access to more themes and some other apps. And of course, I will not have a full fledged
website with pages, blog post, navigation
and product collections. But they started plans still might be a good fit
for some of you. Let's go ahead and see
how it looks like. I'm still in the
free trial period, and I will choose the billing
cycle of €5 per month. Then I will go ahead
and start my plan. So let's take a look
at this setup guide. Now. Here I have the option of setting up
the Shopify payments. I will click on this. I already have my Stripe
account and degraded. So I will skip this step
and go to View All Tasks. And the final step here is
to share your products. I get to see two of my products. I can go ahead and close
this particular thing here. And now I want to take a
look at my online store. So here I have a
simpler looking website with just the logo, the menu, the navigation
menu is gone. The other pages
that I had earlier like blog and things
like that as gone. I also had a slideshow
of products, which is also gone. But I do have my products here. And below the collection, the featured collection
of products is also gone. So I end up losing
some of the features if I'm downgrading
to the starter plan, but if I have a
handful of products, this might still be a
good option for me. So let's see if I click on this. There is the option of
adding the product to cart. And you can go to view my cart and you can go ahead
and check out. This is also not a bad option. The only thing here
is to take a look at the transaction fees because
it is five per cent. And at one point if you
start making more sales, it might be cheaper
for you to go for the standard Shopify plan rather than sticking to this
starter Shopify plan, because you might end up paying
more in transaction fees than you would pay for
an upgraded membership. Okay, so let's do a quick
calculation when it will become beneficial for
us to upgrade the plan. This one cost €5 per month, but they transaction
fees is five per cent. The next one is €24 per month, but the transaction fees is 2%. So let's say I'm able to sell products worth
€1,000 in a month. In this case, if I'm
using a starter plan, I would pay five per cent of the transaction as
transaction fees. So five per cent of 1,000
is $50 or €50 in this case. If I want the basic
Shopify plan and I am making a sale of
the same 1,000 bucks. I'm paying just two per
cent in transaction fees. So I'm paying 20 bucks
in transaction fees. So 20 bucks and
transaction fees plus 24. The total monthly
cost would be €44. In this case, I would be
paying 50 bucks just in transaction fees and five bucks on top of that for the plan. So I would end up paying 55
bucks for the starter plan. Whereas by just paying 44 bucks, I would be getting this
basic Shopify plan, which has more options
and more features. Once your sales
starts picking up, or once you anticipate that your sales will hate
a certain number, then you can think of
changing the plants according to what would make more
sense to you financially. Similarly, we had done the
example before that once you start hitting sales
of eight to 10,000, then it might be
cheaper to switch from basic Shopify to
this Shopify plan, which costs extra €9 per month. So you have to take a look at the total cost that
you are paying, not just the subscription fee
you are paying for a plan.
26. 17 When To Switch Plans WhiteBoard: Okay, so let's do
some quick math to see at what point
it makes sense to switch from a start or too basic and from basic to the
regular Shopify plan. So here I see that this startup
plan costs €5 per month. And on top of that, there is a five per cent
charge per transaction. The basic Shopify
cost €24 per month. And there is a charge of 2% per transaction
on the revenues. And the Shopify plan
costs €69 per month. Add on top of that, I have to pay 0.5 per
cent per transaction. So here, a quick
way of determining this switching point is taking
a look at the differences. So here, if I have €24
per month minus five, which is €19 per month
on monthly fees. This is the difference. And on transaction the
difference is 5% -2%, which is 3%. Okay? So a quick way of determining what should
be the switching point. I will simply take
the monthly cost, which is €19, and divide
this by three per cent. So I can also write
three per cent as 0.03. And let's see what this
switching pointers. I use the calculator
for this 90/0, 0.03. So I get the answer as
fixed hundred and 33.33. So let's say we have 634 bucks as this
switching point between these two plants. Let's do a quick
calculation here. When my revenue is 634, then I'm paying five per cent transaction fees
in Starter plan. And here in basic Shopify, I am paying a 2%
transaction fees. So here I should be getting 31.7 in transaction fees plus the five bucks
for the monthly cost. In total, it will cost me €36.7 per month on
a revenue of €634. In case of basic Shopify, I'm paying 2% transaction
fees on the revenue of 634. I'm paying 12.68 in
transaction fees, plus I'm paying 24 bucks
for this subscription. So at this point on
the revenue of 634, I start paying lower in total
fees in basic Shopify plan. So at 06:34, I will switch
from starter to basic Shopify. If it is less than 634. I will go for this plan. If it is more than 634. I will go for basic
Shopify plan. Alright, so let's also calculate when I should switch
from basic Shopify. Shopify. The procedure is the same. I will take a look
at the monthly cost. So 69 for Shopify, -20, 44 basic Shopify,
which is 45 bucks. Okay. And in terms of percentages, the difference is two -0.5, which is 1.5 per cent. Then to compute the
switching point, I will divide this by this. So this is per cent. This is per cent. I will do 45/0, 0.01, 51.5 per cent can
be written as 0.015. And that will give me 3,000 bucks. Okay. Let's do a quick
sanity check here. If the revenue is 3,000, then the transaction fees, I have to pay 2% of that, which is 60 bucks, and the monthly fees is 24. So my total cost in this
case is 84 bucks per month. And here in the Shopify plan, I'm being 69 per month as monthly fees plus 0.5
per cent as transaction. So my revenue in
this case is 3,000. I'm paying 0.5 per cent, which is 15 bucks. I will double-check. I'm paying a monthly fee of
69 in total I'm paying for. So the switching point between
these two plants is 3,000. Okay? So simply based on
the financials, it makes sense to
have this plan 0-634. It makes sense to have the basic Shopify
plan 634-3 thousand. And once you start getting
more revenue than 3,000, it makes sense to
convert to this plan. And I'm talking of revenues. There is another plan,
Advanced Shopify. So you can use the
same technique to figure out when you should switch from Shopify
to Advanced Shopify. I really hope this was
helpful and it will help you make decisions when to switch
from one plan to another.
27. 18 Selling Products Directly Via Stripe: Okay, So we have seen
all the Shopify plans. We have done the calculations when to switch from
one plan to another. I want to show you one more
cool feature of Stripe. If you use this
feature of Stripe, you don't even need
a Shopify account. This has limited functionality, but it can still work
for a lot of people. So let's say I have
just two products. I come to Stripe, I come to the products tab. Here, I have the option
of adding a product. So here I will have my same
product, blue pen, classic. And I will write
the best blue pen. And I will give some
details such as Ray 25 g, and then there's 6 ". Okay, so go ahead and add more
description to it because this is the only place where the customer will get
to see the description. We are talking about
creating this product directly and Stripe and
selling it from here. So we don't even
get the customers to visit a website
or a Shopify store. So I will add an
image here next. Then I will categorize it
as general tangible goods. That's fine. Pricing information. I'm selling it for 299. I will charge stacked on top of this and I will make
it a onetime payment. Okay? So I will go ahead and save
and add one more product. The next product was
blue pen Canvas. And I will write this span handwrite
on Canvas as well. Then I will write
something like wait, 35 gram length 6 ". Then I will also add an image. Next standard pricing,
I'm selling it for 999. It is a onetime charge. And I will remove this check mark
because I want to charge a tax. On top of this. I will save this product. Now I click here on products. I see two products here. One is blue pen classic, one is blue pen Canvas. So how do I make
a sale from here, I will simply click on a
product, let's say this one. And if I scroll down, I get to see this, create a payment link. I will click on this. Here. Stripe will generate a
checkout page for me. So there are two pages. 1 is a payment page, one is a confirmation page. On the payment page, I can let the customer
adjust quantity and I can set limits 0-99
or any number you want. And I will put collect
tax automatically and collect customers
address because this is a physical product. I would want both billing
and shipping address. Here in the list
of countries you can choose which countries
you can ship two. So I have chosen Europe
as well as North America. And if you want, you can add
some shipping rates as well. Okay, You can go add
a new shipping rate. And let's say I'm doing 399 as my shipping rate and I will charge
tax on top of that. And estimated shipping
time if you want, you can provide between, let's say, 2.6 business days. And I will save this. So at this point, I
see the screen here. The customer gets to
see the details of the product and they get to
fill in their information, make a payment, and we are done. We can also see the preview of the payment page on
a mobile device. So this also looks good. Next we have the
confirmation page. The confirmation page
is a very standard one. It tells you what product you purchased and there's
a thank you message. If you want, you can replace
this with something like thanks for supporting
our small business. If you want to personalize this, you can do that or you can
just leave it the default way. You also have the option of not showing the
confirmation page, but I prefer to see the
confirmation message. So I think the other people
would also appreciate this. Alright, so once
you are satisfied with the look and feel of this, you can go ahead and
create a link. Here. There is this customized
link created by stripe. I can simply copy this and
send it to anyone via email, via WhatsApp, via Messenger. So this link will take them to the checkout page
we just previewed. Let's go ahead and see
what that looks like. Okay, So I opened the link
that was created by stripe. Here is the inflammation
of the product. Here is the
information I need to enter for getting
this product shipped, and here I can make the payment. So it is a one-page checkout. I like this. If you want, you can also generate a QR
code for accepting payments. So I simply click on this QR code and Stripe
will generate a QR code. And I can download it. I can put it outside
my sharp if I have a physical location or if
I'm doing a pop-up store, then I can put this QR code on the product and people
can directly scan it and make a
purchase online just by scanning and
using this QR code. This is another cool
feature of strike. There are of course limitations because if you take a
look at the products, we have just one image. We don't have much description. We do not really have a website. There are plenty
of limitations and disadvantages if you compare
it to a Shopify store. But if you don't want to pay the subscription and you have a very limited amount
of products to sell. This could also be
a viable option. And I personally like this, that stripe is giving users
this particular feature.
 Sumeet Sinha