Transcripts
1. What's Inside?: What's going on or you're a real estate agent or property manager looking to do photography in house, or maybe a young entrepreneur trying to figure out how to use your camera to make money aside, hustle to try and make it. Welcome to real estate photography one-to-one. In this course, I'll take you through four modules on what you need to get started. Hdr, real estate photography basics, HDR editing. And lastly, how to grow your real estate photography into a six-figure, please. I'm an artist and entrepreneur who built to real estate photography businesses over the course of five years and Columbia and Buford, South Carolina, I built a six-figure business, done. It's so well done or with a team served hundreds of clients and support and myself independently throughout my twenties. For me, real estate photography was the fuel I needed for my creative ventures. And I know that it can be that and more for you to help you get as much out of it as I did. It's not easy. But if you put in the work, you can turn this into a six-figure business and BM.
2. Welcome + Instructions: What's going on? My name is Cole Connor and I am happy to welcome you to real estate photography 101. Discourse has four modules taking you from what you need to get started, HDR real estate photography basics, HDR real estate photography, editing. And lastly, how to grow into a six-figure real estate photography business. I'm an artist, an entrepreneur, and I've built to real estate photography businesses and two different cities, Columbia, South Carolina, and Buford, South Carolina. I built a six-figure business, did a solo, did it with the team, served hundreds of clients and supported myself independently throughout my twenties. For me or real estate photography was the fuel I needed for my creative ventures. And I'm beyond thankful for all that taught me. It's not all easy, but if you put in the work, you can turn this into a six-figure business no matter who you are and no matter where you are, I highly recommend using all the resources in this course to succeed, including the two free presets, community documents and ability to ask me whatever questions you have. All right, Here we go. Let's dive into module 1.
3. What You Need v.s. What I Recommend: Hi there. Welcome to Module 1 of real estate photography, one-to-one, what you need to get started, there's a route to go that's the absolute minimum. And then there's the route where you spent a good bit of funds to get started. I'm going to discuss the minimum as well as what I personally recommend. When I started my real estate business In 2016, I started with a minimum, I had a Nikon D 5300 with a Sigma 10 to 20 millimeter lens, and of course, SD cards and tripod, a very cheap tripod real estate photography. The most important thing is that your lens is why it, and if you need to be able to squeeze in a small spaces and get the full scope of a room with each shot and a lens that isn't wide, changes everything first things first, there are two terms that you need to know when choosing a camera initially, full-frame versus crop. The terms full frame and crop referred to sensor size. Full-frame sensors have the same dimensions as 35 millimeter film or 24 by 36 millimeter, which is the standard size crop sensor refers to any sensor that's smaller than 35 millimeters for most of us is a bunch of hoopla, but it's important to know the different. For example, my Nikon D 5300 has a crop sensor, which means I need to have a wider lens to get the right size width shot. Crop sensor camera, I recommend a minimum of 12 millimeter lens, but would prefer a 10 millimeter for a full-frame camera, I recommend at the minimum, a 16 millimeter lens, and that is what I use to this day. Choosing a camera's often adopting process and a lot of money is involved. I'm gonna give you my recommendations, but ultimately, just go with your gut. The market has a lot of options, but I personally am a Sunni man. I've used the A7, S2, I've used the A7 S2, the A7 3, and the A6 400. When it comes to real estate, photo or video, I was originally recommended the Sony camera because of its great low-light performance when it comes to video. And also just as good at both photo and video together. Because I knew I wanted to do both. A really made sense for me. But like I said, I started with the d Phi dy 300. So you've got to start somewhere over the past three years with a Sony. I had absolutely no complaints. I believe creatively and professionally Sony cameras. I've taken me to the next level. That's not to say that any other type of camera would not work. There's plenty of good Nikon's cannons and beyond that can get the job done for crop sensors. I'd recommend the Sony A6 thousand series. They are much cheaper and you do have to keep in mind that you will need a wider lens when getting a crop sensor camera, if I had to choose, I would go with the full-frame. Another huge thing to keep in mind when choosing a camera for real estate photography is you want to make sure the camera has the ability to do auto bracketing. Her bracketing is a photography technique where you take several different images in the same position with different camera settings and blend them together and post the main difference between getting a really cheap camera like the Nikon D 5300 and a much nicer one is going to be quality build in settings. If you're able to get a nicer camera, it should be able to last you a good long while and your quality will be enough to build a six-figure business. So you will make your money back outside of lens and camera, you'll definitely need a solid tripod there literally so many options out there. I'll list a few options in the course description. Just make sure you won't want that sturdy, has a leveler and preferably a ball mount. It, it really makes it easier for your verticals more on that in Module 2, a couple of more things to note about what you need if you're planning alternatives business into a full fledged real estate and marketing business, you will need to begin to plan for some more purchases because this is a real estate photography course, I must mention the importance of drone photography, especially in the real estate world. I've locked in a ton of clients that I otherwise wouldn't have been able to lock in because I have a drone. You do not have to have the most expensive or a nice drone. But if you are planning on getting a job and I would visit DJI.com, fantastic brand. I've had great experiences with them. Go there, peruse the consumer drones. You can get one as cheap as the DJI many. I personally had the DJI magic Pro to and really enjoy it. It literally does everything I could possibly want, including following beginning with a drone as one of your services, you will need the FAA Part 1 0, 7 course. It's not complicated. I studied for less than two weeks and past. You can do it. I think it cost like 150 bucks. You can do it. Yeah.
4. What Else You May Need: When choosing your camera, you want to also think about video quality. Like me, like I mentioned before, the Sony is good with both photo and video, but there are other options. So go with your gut. There are several other things that I would recommend for those with the budget, but I'll just put those in the course description below because it is not necessary. But if you do want to check it out, go for most of us, there's no need to get bogged down in the stuff. Now, let's move on to Module 2, because the reality is you don't need to draw $5 thousand right now. The minimum will a 100 percent.
5. A Note On Smart Phone Photography: Because I've heard people talk about this and I feel like it's a point of contention. I want to talk about iPhone photos for one sec. The reality is in 2021, most nice new Samsung or iPhone can take really good photos. They have very powerful photography abilities and the wide angle is awesome. It's just their phones, It's gorgeous. They take gorgeous photos, which is fantastic for real estate photography. And in a lot of people think they don't need to hire will save taco because of this. And you may be this first news China, learn how to do on your own, which is on your own, which is totally okay. But here's where iPhone photos fall short. It comes with shooting the interiors. Sometimes what I don't want to grab my camera and I just gotta take an outside shot or shot up a front gate or something. I will use my iPhone because there's not a huge difference there for what we're doing. It's doable. But when it comes to interior, there is a big difference. I just can't recommend that any professional or professional business use an iPhone to shoot real estate photography. It may work sometimes, but it won't always work. You'll notice it in the shadows. You'll notice it just with the quality of the image when it comes to end or maybe of your spaces really, really bright, it'll work. But just know it won't always work and it's not the same. See you in Module.
6. Photography Basics (Shutter Speed, Aperture, ISO): Now that you've got a good understanding of what you need to get started in a real estate photography. Now it's time to actually take photos. We're going to break this down into two main sections, photography basics and real estate photography basics. If you know the basics of photography, feel free to skip this section when it comes to using DSLR cameras, there are three main settings that you're gonna wanna pay attention to. Shutter speed, aperture, and ISO, and always keep the camera on manual, not Otto, your professional, use manual and understand what each of these settings do. I'm gonna keep it simple because for real estate photography, it's all you really need to know. Let's talk shutter speed. Shutter speed is literally the speed at which the shutter on a camera closes. A fast shutter speed creates a shorter exposure. Shutter speed creates a shorter exposure, which is the amount of light let in. And a slow shutter speed gives the photographer a longer exposure, aka takes more time and lets more light in. Basically, the faster the shutter, the faster the pictures taken next up, aperture. Aperture refers to the opening of a lens is diaphragm through which light passes lower F-stop, it gives more exposure. F-stop is aperture because they represent larger aperture. Lower F-stop gives more exposure because they represent larger apertures. While the higher F-stop gives less exposure because they represent smaller apertures. Easy way to remember this is if your f-stop is 2.8, there will be less in-focus and a more depth of field. If you have an f-stop of 20, everything will be in focus and you will have more depth of field. Generally, last one for now Let's talk iso. Iso refers to the sensitivity, the signal gain of the camera's sensor. So basically, if you're in a bright enough space or outside, your ISO will stay as low as possible. The only time you'll need to raise your ISO and the real estate world is typically when you're doing a video shoot inside the nicer cameras, shoot much better video and low light. Even with higher ISO, you'll really see the quality difference in cameras and low light, like I mentioned.
7. Real Estate Photography Basics (Settings, Bracketing, Etc): So now that you know what each of these are, it's important to know how they all work together in real estate photography, specifically, each time you adjust one of these settings, it's going to affect the brightness of your image in real estate photography, the only one that I changed pretty much ever is shutter speed. I always keep my f-stop between 68. I keep my ISO under 250, always, I adjust my shutter speed and so my levels tell me my exposure is 0 or just looks right. Also, always shoot in RAW for Sony, that's point a RW. You want to shoot in RAW set your photos are the highest quality. They could possibly be. Dislocation. You need to go back in and edit the details really well. Lastly, I keep my white balance on auto. The only thing I keep on auto, mainly because Sony's auto white balance is really good. So let's get into what you probably have no idea about, which is HDR bracketing, what that means when you're looking at the camera. So you have the option to take a certain number of images, 3, 5, 7, 9 on my Sony, I go with the setting of five for outside and nine for inside chats. Because for the inside, I want to make sure that there's enough dynamic range. Fill in the shadows and also see out the windows for a lot of real estate agents, that's very, very important. You can also choose how much EV, aka exposure value that you want in-between those shots. I usually stick with 0.7, but go with what works for you now that your settings are all good to go, Let's talk about what photos to take. This can be up to your personal process, but here's what I recommend. I always take more photos than needed. There had been one too many times where there was the one angle that the agent wants to add intake. So it's just not worth it. I'm including a link below of how many photos I take a sample home, but let's go through it before pouring the home up and looking at the images. I always take photos of the front and back of the home, obviously three different angles and usually varying in distance from the side of them and usually varying distances from the home. I always include one to two angles of the porch. If it's a bigger porch area that's decorated, then I take more photos. If there's a garage, I asked age and if it's necessary to take those photos because sometimes their stuff, old stuff stuffed full of stuff for every room in the house, especially in the beginning. I recommend taking two to three angles of every room, bedrooms. I definitely take an angle from the doorway and then I usually do the opposite. So it showcases the windows are clauses in the bedroom. Never skip a bathroom. Big rule. Don't forget the bathrooms. Focus heavily on the master bedrooms and the kitchens. Take a more photos than you think you'll need to make it easy to understand. Let's just go through a sample hone. This home includes drone photography, so it'll be a great opportunity to see how and why I take certain drone shots.
8. Angles In Real Estate Photography: So let's just go through this and see the different angles that I took. This is head on facing the TV in the living room. Then I did an angled one so I can see the porch. Then a straight on at the porch. Some people have different feelings about doing angled shots versus straight on shots. For me, I've really come to love the straight on shot. So it's more of an interior design look, but I really, really enjoy it. And then an angled one as well, just in case you wanted to see more of the kitchen in that shot. And then angle back the other way towards the front porch. Showcasing over here, this stairway heading up towards the second floor. Then we're focusing in on the kitchen. Always take more shots than needed of the kitchen. Going through closer us a more of an interior design style here. Wide angles of the kitchen straight on at the kitchen. You see around getting the kitchen is a highlight points I want to take more than necessary here. Showcasing the living room and they are close up of the oven. That's something I always do. People love to know what their cooking area is going to be like. Other angle, this is more of an interior design shot. Close up of the dining table. You see where I'm getting at. It doesn't take that long to take these extra angles and you don't know which ones will just stand out where your client, the age, and the homeowner will be like, Wow, that's a gorgeous shot because that's what you want. You want to go above and beyond for your clients. Picture of the stairwell. You can't miss that. Both angles of it. Going into the bathroom. We see. I'm just going to go through these quickly. There will be a link where you can check these out yourself to see exactly the angles that I took. So we're going to the bedroom. And you can see this is the angle from the doorway. Then a head straight up headshot of the bed. Then you can see the hallway from this angled shot. And then a more of an interior design look there. Then picture from the little porch outside of the master bedroom. So you want to showcase the view that people will see. Porch, their bathroom, multiple different angles ahead on shot. Close ups of the tub. If it's a nice bathroom, you want to take as many shots as you can to showcase it. So like this, they probably won't use that shot, but you take it just in case. Then we're going upstairs showcasing very similar shots, but they're also very different at the same time, different levels there. Then pointing down the stairwell. See, this is more of a unique shot that you don't have to take, but it just kinda shows the design of the home, which is cool. All right. I think this is a gorgeous shot. Seeing out the windows, you get the light coming in from the top. This angle is just right on. And if I would have, I want to miss this, if I wouldn't have taken two to three angles of each room. All right. Bathroom here and let's move on to outside. So this is the front porch. You can see it's already taking several different angles of the front porch because they got the plants out there that obviously put in the work to make it pretty. So you want to highlight that for them. And this is the front of the house. I'm taken one kinda close up where you can see the whole house and then showing one where you can see the whole front yard from the left. And then I went back probably about six yards. And so you can see more of the whole house and so the r's beside them. This is the back porch. And the reason I didn't take from the right, as you can see on the left, there's a new house being built and I did not want to showcase that back porch area right here. Course units, ics, several different angles of this. Go through this backyard, beautiful backyard showcasing several angles of this. I feel like you get the gist you want to do is take as many pictures as you can. That's the bottom line, is you never know which one's going to pop. And then as we get to the end of these here, I even did a video for this home. You get to the drone shots. So with the drone photography, it's important that you capture it from different heights. So the drone can go up to 400 feet. So I like to do a couple of shots. Really close up, probably 50 to a 100 feet. And then I do a couple from 150 to 250, and I do a couple of as high as you can go. So these are pretty high ones here showing how close it is to the water. And you see that our backup a little bit so you can really see how much water is out there. Then the other side. Now you're kinda showcasing more of the neighborhood and you can still see the house, but it's not the primary focus. Now we're spinning around. It's literally you're just doing a circle. These drone shots take me less than 15 minutes because once you know exactly what you're taking, It's not that complicated. Spinning around the hash on the neighborhood and a little bit closer here. I loved to take the shot straight down because it showcases that design of the art and the roof and just that whole lot itself. It's those are interesting ones to me. Got a little bit closer, then a really close one of the back yard area. And then I'm not usually sure about these from an aesthetic standpoint. But because this house was interestingly shaped, especially for the area I wanted to see if they like to shut. This was one of my favorites. You can't see the other houses. It's hidden in the trees. This is the good one that it took me a second to find this shot, but it was important. And then some of the closer ones, and then we're back to the beginning. So that's one full home and I believe the homes around 3000 square feet. That's a 117 photos. So it's not like I was being skimpy with the photos. I just went in $1 million home even six years into this, making sure that I got the shots.
9. Verticals & Positioning: So at this point, you've seen an entire home than a photograph. Let's get into the nitty-gritty of how I photographed these homes. When it comes to the positioning of real estate photography, you've got to think about what you're shooting for. Most of your work will most likely be standard residential homes or apartments. But you will occasionally come across clients who have an Airbnb or VRBO. And they'll want specific types of photography showcasing the amenities and the interior design that you may not typically take. So the home that I just showed you, you'll see the only took a couple interior styles just because I really like the shots. Now I would like to use it for my portfolio, but that doesn't mean that they really care about those shots. Other homes, I've taken pictures of our Airbnb and they want to show the remote. They want to show that there's a coffee maker. So always keep that in mind. Feel free to Zoom in for these shots. They don't have to be the standard wide angle and focus on the details. Two of the biggest things to really consider outside of your settings with real estate photography is the height of the camera. Injure verticals for the height of the camera. I always keep it around my chest. I'm around 511 for reference. Take a look back at some of the photos that I just showed you to see how high I am and if I remember correctly, that home, I'd barely changed the height of the tripod, if at all. The key is that you don't want too much of the ceiling or too much of the floor, you want to keep it balanced. So what are your verticals? You ask the best way I know to explain it is your verticals are your straight up and down lines in your images. You want the edge of your camera screen slash viewfinder to be parallel with your walls. This is very important. It's what makes the aesthetically pleasing shots feel so good. Let's take a look at this image. This is the edge of your image and your vertical. Your verticals, like as I explained, are the lines in your images. You want them to be parallel to the edge of your screen or viewfinder or image. So as you can see, a may not be perfect every time and I'm not even trying to pretend like these are perfect. But what you'll see is that for the most part, these verticals are all parallel in all these lines across. So you have the line of the wall, you had the line of the window, the door, and the edge of my screen here. And if you go throughout all of them, you'll see, I'm always pay attention to this, this line right here in the edge of my screen, parabola. Go again. Same thing. This line right here, this learner here, parallel. Hope that makes sense to you. See this was not perfect, but it's pretty close. It looks better over here, parallel. And that's why with your tripod, you want to have a leveler and you want to have a ball mounts so you can easily adjust that. Sometimes you won't have the perfect verticals on location and that's okay. Just make sure you do your best to fix it in post.
10. Other Types of Real Estate Photography: Lastly, I just want to mention that HDR bracketed photography is not the only way to be successful in this real estate industry. You can use flash photography or a mixture of flash and ambient, aka fully ambient photography. If you're getting towards higher in real estate, I would, I would definitely consider doing more research into flame being. I've used this method before. And though it does look really nice for the price point, for the price point of the cities that I work in and just doesn't really make sense for me personally. I find the other way easier. And people aren't really willing to pay enough for me to do fly ambient. But some people I know actually just use Flash and they just come in with one flash, turn off all the lights and knock it out. But that is not what I'm teaching today. Because when I'm teaching today is HDR. As if folks, let's dive into module 3 editing. See you there.
11. My Entire Real Estate Photography Editing Process: Here we are in module 3, when I first started editing was one of the most annoying things that I did until I figured out a process that made it much easier on me. What I want to show you is my process, but that doesn't mean that there's not a million other ways you could do it. This is just how I do it and what works for me. Hopefully, it works for you too. If this doesn't work for you, tweak it till it does for editing, there are two things you will need a photo editing software. I highly recommend Adobe Lightroom, which you can find in the Adobe Creative Cloud. You can check it out in the description I've posted an affiliate link, which if you do use, supports me. So it'll be awesome if you do use it. The other is an HER software that you use to blend all of your bracketed photos together. Apple estimate a great list of all the different HDR softwares that you can use paid and free. I also put a link to that in the description so you can check out all your different options. I personally use Aurora. I paid a onetime fee of 99 dollars. So let's step-by-step go through my editing process using the two Lightroom presets that are now available to you that I've created directly after the shoot. I transfer all of my footage from my SD card to my hard drive, my external hard drive. I organize my hard drive by year and date and what's transferred. I upload all of those images into Lightroom using a very simple basics preset. This just gives minor adjustments to the image, auto balancing the white balance, as well as some lens distortion that could happen. I then export all the raw photos, the dot a RAW photos as jpegs. And I size it appropriately according to the MLS. I do this at this point so that Aurora can blend the images together faster. If you put a bunch of a RAW photos into Aurora, it will usually either take forever or crash. So smaller jpegs work way better. One of the biggest struggles in the beginning when dealing with all of these big files was having a computer powerful enough to deal with it. So wouldn't take hours and hours and hours and hours to do simple tasks. I highly recommend if you don't already getting some sort of computer that can handle this type of processing. What really matters is your RAM. Ram to be good these days, if you have a newer computer, most likely you'll be okay. But you definitely don't want to be spending half the day editing photos when it should only take 30 minutes because time is money. Once that export is finished, I immediately transfer all the images into Aurora for batch processing, I confirmed the right images are aligned and then I process them. Then Aurora works his magic and blends them all together. Honestly, this is the longest process of editing. It's just transferring it. My computer, exporting out of light room smaller and then batching and processing in Aurora, all of that as your computer doing the work for you, It's literally you just moving things around should only take like less than 10 minutes if you have everything set transferring, exporting, processing. Once that's complete, I transferred the blended images. So the five images are now one, the nine images are now one back into Lightroom. And when I import them into Lightroom, I use my interior preset or my exterior preset. Most of the time when I do this, I barely have to touch the images. It's beautiful. But let's take a look at what the presets do and what I adjust.
12. Using Real Estate Presets & Editing Photos Live: All right, so we're in light room now and this is the image trace out of Aurora ready to be edited. So when you put my real estate interior preset on their right here, that's what it does. Boom, boom, boom, boom. So obviously it already looks pretty good. But if I were to make any changes to it, it feels like it's a little crooked. So I'm going to go down here to transform. And I'm going to move it this way a tad. Feel like that feels much better. But then I feel like my verticals are off. So I'm gonna go up a little bit here. I feel much better about that. You can also start to see there's a little purple and the reflection. It's not going to go here to HSL slash color and bump it up. You'll see right here, it starts to get real purple. So I'm going to cut that down a little bit. Magenta. You just have to make sure there's no purple or magenta in the room or the home or else it will affect that as well. I'm going to turn that down. Part of me wants to turn the shadows up. But for this one particularly, I don't really want to notice that I'm in the reflection here of the TV. So I'm going to keep the shadows are around right here. Somewhere in that area. Some people, when they do Edit, put things on the TV. Usually editing companies do that. I'm not someone that does that though, but, you know, plenty of people do. And so we come over here to this picture. This is with the preset, without the preset. So I feel like you can tell a huge difference on this one. Boom, there you go. Same thing with the purple. Ok, I went ahead and cut this down a little bit here. That's what we're doing. Now let's just take a look quickly at what all the stuff debts. So this is the temperature. Move this, this way it gets real Yellow. Move this this way it gets through blue. That has to do with the white balance. You can also do auto white balance here. And that's going to put it where the, put it where lightroom thinks. It looks like about white balance, which in May. So you can go to exposure, this is going to make it super bright. It's pretty much go to, you can go to exposure. This is going to get super bright or super dark. Adjust as necessary contrast. We're going to cut this up a little bit. Contrast. You see what it does here. This is going to give it a flat look. And the more contrast you give it, it's like less shadowy highlights is going to affect these bright areas. So I like, especially for this image, I want the highlights to be down. He can cut the shadows up. Some people don't do a lot of shadows in real estate photography. I prefer to have, Let's shadow, so I cut it up. Whites that's going to affect the white areas of the photo. Also affects this part right here that the highlights effects. So you want to be careful with that because you'll blow out certain areas, blacks. So we're doing here. Texture, it gives it almost a sharpened look. Blurry. If you go this way, clarity. See what that does. You're going to want to play around with all these because it's different for interior and exteriors as well. Vibrance is going to cut up the color saturation as well, but they do it differently. I'm not even going to pretend to be an expert about why exactly each thing does what it does. Just go into Lightroom, play with it and see what looks best to you. This HSL, HSL color comes in really, really good handy because a lot of houses that you take photos of, the lighting is just not good. So this helps you change colors. For example, you want to change the hue of this blue. I mean, you can make it any color that you want, which is kind of cool, but you have to be really careful with it and make sure you don't adjust too much from the actual color of the home. This home was lit very well. Great. Window light, the accent lighting. I mean, it just looks fantastic. So I'm not going to have a lot of issues there, but this you'll notice just changes the colors. The ones that I play with the most are the orange and the yellow. Occasionally green. Because sometimes in corners you get like little green, faded looking areas. So you want those to go away. So if you want, for example, the green to go to a completely, then you'd go to saturation. Let me see what that does there. So like for this shot because there's no green in the image, I would maybe even cut it up a little bit so you can extra C outside. Transform as another place I stay quite frequently and you can do auto. Sometimes that works great. Sometimes it doesn't, but vertical, it's going to do this. Horizontal, do this, rotate. Let's do this. You just play with them, see what they all do. And then whenever you're ready, just constrain crop. Boom. Tons of other things you can play with. I don't usually mess with much of this, but as you can see, this affects the color of the shadows, the color of the highlights. Lots of things you can do there. Like I said, don't really mess with that. You can mess with sharpening. Let's see, on the pre-sale what I do here, 35 on the sharpening. So nothing crazy. Not much going on here. I didn't know you can do things. I don't, particularly because in the basic preset already messed with this lens distortion. I don't mess with that anymore and the preset. And yeah, I would say the only thing looking at this with just the preset, I would just up the shadows a little bit and turn the purple down because I can see a little bit in the TV. But outside of that feeling pretty good. Now let's look at an exterior photo somewhere to go back to library will do the same house. Will go to Katie here, and then 614. Let's just do one of these fraught shots. So this is one that's already been through Aurora and process, so we'll just reset. So that's what this is looking like after Aurora, me automatically just doesn't look super bright. It looks kinda warm. Under here the shadows are kinda yellow. So let's take a look at what this exterior preset does. Boom, nothing, Boom, preset. So as you can tell, it just makes it brighter, makes the blues pop a little more. Not doing anything crazy still. But for this one particularly, I will cut up the shadows more. I just think that's going to look a little better. And yeah, I'm done with this shot. I could make you make it a little more blue because it's still seems a little warm. But then you kinda get these blues in the shadows. So I could come in and turn down the blues more, but you see what that does to the sky. So I think I would keep it just like that. Let's use another example for the exterior preset. Let's go with a backyard shot and see so many shots on the sound. Well, this one, I really like the angle now and let's see, we'll do a drone shot. So you can see what it does here. I think This looks like it's already been processed. Maybe not though really hard to tell on this one. Here. That's really helpful. I'll go to library and then post. Okay. All right. So we're looking at this is one that has been processed through Aurora. And this makes a pretty big difference when you go to the exterior preset. So boom, big difference there. Blues or pop and way more greens or pop and it just looks like a beautiful day. One thing that I would change if I was going to be like a perfectionist. You turn that auto off on transform. And I like personally for the skyline to be more straight on this home particularly I didn't do that. Who knows why I was in a rush. Maybe I just missed it, but auto will sometimes do that. So just be careful about that. If you do auto, then maybe come back and just rotate it more this way. But honestly with drone shots, he might not even want to do auto. But then it will go all do one more for the exterior. Let's do this. One of my favorite shots at this home right here. So if you reset it, go to the exterior. Boom, boom, boom, boom. That's what it's gonna do. I'm here potentially you could turn down the blue's a little bit because you can kinda see it in the shadows here. Or if you want to get extra technical, you see the blues are in the shadow, so you could kind of do the opposite. Let's see, I don't want it too much, just a little bit. And let's say crank up the shadows a little bit more. All right. That is that we have edited a photo, we've gone through Lightroom and kind of show.
13. Editing Pt. 2: So I wanted to show you an example of a room that's just not pretty, not pretty at all. This is a super standard house, super standard room. This is what you're getting before the preset. And as you can see, it just, it looks a little dark. Which could be because maybe I took the photo a little too darker. I should have included more bright photos and the Aurora interaural before it blended together. But this is what we have. So I'm gonna go here, but the interior real estate brightens it up so much. Looks solid of actually regular. But I want to show you some things that we're seeing here that people may not like. So here the wall from this image is like an off gray, but this is some of the green that I was mentioning that kind of pops up. I gave you an update. You see there is green there. So I'm just going to turn that down here. I don't like the way this yellow looks. Had just looks kinda dingy. So I'm gonna take this yellow. It's actually orange and turn it down a little bit here. Don't want to turn it too much because then it looks unrealistically Grey. So just a little bit, so it's not so orange. And it kinda looks like this carpets turned in blue a little bit. So I'm gonna go to the blue and I'm just going to turn that down because the carpet isn't blue. Carpet. Which evening looks purple or bit here is like a grayish color. So I'm going to turn that down a little bit. And as you can see, there's a difference there. The other thing I wanted to show you is sometimes there's marks on the wall scoffs. I can kinda see their stuff up here. There's lots of little things, but I want to show you an example of how you get rid of, let's just say they did not want this outlet here. So you click this clone tool, you can make it go bigger or smaller. And what this is going to do is clone this area right here and repeat it. That's the word clone this area and put it here to cover that up. And boom, you can obviously tell a little bit that it was there. But when you use the clone tool, you can change the feather, change the opacity to make it better and less noticeable. But we want the opacity to be all the way up there. So boom, that's how you make things disappear. That does come in handy quite often if there's a roach on the floor or some sort of stain on the wall that they're going to paint the next day. Things like that. You want to keep that in mind? That is the only healing type tool that really I use on a consistent basis already. Please let me know if you have any questions.
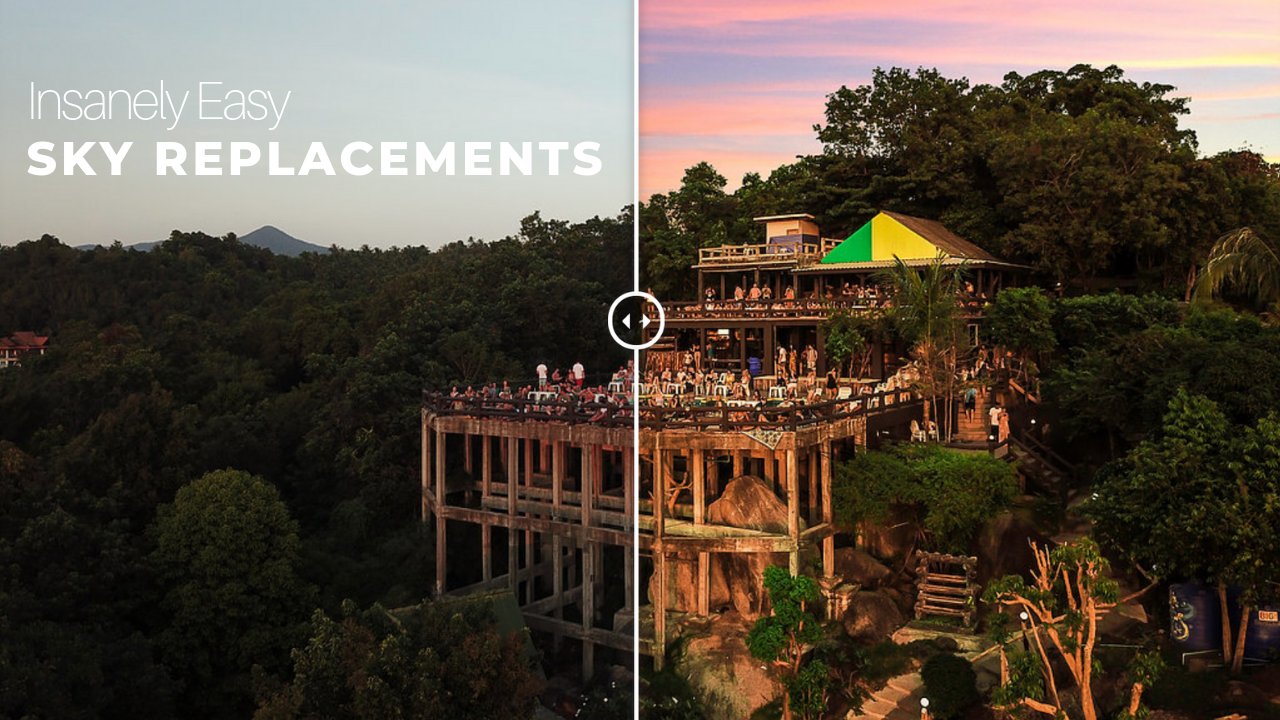
14. Sky Replacement: Luckily, Photoshop has recently come out with something that helps real estate photographers tremendously with this, they added sky replacement. So let's take a look at how we use Sky Replacement. All right, so so we look at this picture. It's a little town home right here. Beautiful shot. Lots of green, lots of blue. But the sky, the sky is super gray, doesn't look cool, doesn't look fun, doesn't look happy. So what we're gonna do, thanks to Adobe Photoshop. And I right-click here. We're going to edit in editing in Adobe Photoshop 2021, a copy of with the Lightroom adjustments, correct. Now this is going to pull up Photoshop for you. So make sure you have Photoshop downloaded if you haven't gotten the clue, yeah, I definitely think you should get the Adobe Creative Cloud suite. Very helpful and they all work together very well. Give this a second to open up. And here we are. So right now we're in Photoshop. Right now we're in Photoshop with the image. Now I'm going to go to Edit at the top left. Literally that easy sky replacement. It's going to auto detect the sky for you and insert a new sky. But a lot of pain. And so this is a plane sky, but you can add clouds here. And what I've noticed with these, Let's see. I think for this one I'm going to go with that. It looks the previous. But take a look at these. They have, you know, regular strides and they have spectacular skies. And it's sunsets, just a click of a button, how you change it. Boom. Every time that I've used it so far, I up the brightness to around 30. It just looks better to me. Even, even go to 40, especially on this one, push O K. You can change the temperature as well. There's lots of little things you can do with it. But for what I do, typically never have to do that. File. Save. Boom. Give it a second to save, exit out and check this out. You're going to see a copy, this one. And then the copy that you created, which actually is this one, but I've already done it because I've already edited this house. But you see, boom, it really changes the look of the picture and makes it look like a beautiful day where I would love to live. On Friday. On Friday, please let me know if you any questions.
15. Sizing & Sending To Clients: Depending on how much time I have or how expensive the property is, I sometimes take a break, get my eyes some time to recuperate and take a look back at the photos to make sure that they're all complete before I send them to the client, if they are good to go. And that's when I export for you export, like I mentioned before, it's really important that you understand what size to export your photos. All MLS is aka multiple listing services, aka where real estate agents upload their photos, have different sizing requirements. Make sure you check with your local MLS to make sure that the size of photos that you're sending to your clients will work so that you don't have to re-export them constantly and annoy your clients or clients that don't use them unless you may want to see if they need their files to be a certain size as well because they could be using them for marketing campaigns and they won't huge sizes. So just check beforehand, less go. We are done editing and ready to send to the client's weight clients. How do you get clients? Module four away.
16. Building Your Foundation: This is the most important to module of this course. If you're looking to start your own real estate photography business in gain clients, I'm not going to go into extreme detail on the basics of branding because that's not what this course is about. Just know that making sure you have a strong brand is important with anything that you grow. If you do need help with branding, I suggest the credits, wow guy coaching program, you can check that out in the description first things first, you need to make sure that you have a couple of things. You need to have a business name. You want people to see the name of your business and know what you do unless you're just some sort of creative marketing agency or something. For example, my business that I grew was bot real estate photography and then in Buford bot Buford real estate marketing. Next step, you need to have a logo. Try to be as creative as possible. But in the beginning, it is not a 100 percent necessary to be super creative. Just get something and stick with it until you're ready to upgrade colors and fonts for real estate photography. I wanted say it's the most important thing in the world. But when you're talking branding in general, you want to try to stick to a couple of colors and a couple of fonts on your website, on your graphic design and your flyers, etc. Mission statement. Because you're going to have to create all these profiles. You're going to have a website, you know how all these things go ahead and write down what your business's mission statement is. And then on top of that, Go ahead, go ahead and create a business plan, including researching your competition. You need to do this research competition. Every area is different. Once you've done this, go ahead and create your website. I recommend element or there's a leak and description if you want to check it out, I love element or it's been really awesome to me, but there's several other options. You've got Squarespace, he got wakes, he got just WordPress in general, there are tons of tutorials online if you need help with that, we do go over that in the creative smog that coaching programs as well, then you're going to want to create your main social media channels, which off the jump. It's going to be Facebook, it's going to be Instagram, is going to be Google, My Business, TikTok and YouTube. That's what I would do. You're going to have to have some portfolio to get the stuff going. What I do with my step dad and my mom on a construction company. They had just finished building a house. I asked him if I could take photos of that set house. That was the first legitimate home that I photographed. And I use those photos. I put them all over my website, put them on my social media to help get me more clients. So then I could use more photos, et cetera. I recommend shooting two to three homes to have as a portfolio before launching everything. So if it's just your own house that you've got a photoshoot, do it, do what you gotta do. Or V added to a couple of for free. You got to do a couple for free via, we'll say friend, use that contact wisely. Lastly, find one to three, preferably three people who'd be willing to leave you a review on your Facebook and your Google My Business. And you can quote that on your website as well. More importantly, Google My Business, less importantly, Facebook. Once you've laid a foundation that looks like a professional, legitimate company, it's time to truly get to work. It takes a lot of planning and pre-production to get to this point. But if you've made it this far, now it's time to start making money. I'm going to go through the strategies that worked for me, as well as some basic principles that I believed helped my business to succeed. A lot of this will work for any business that you create.
17. Business Principles: First, let's get into some business principles that make all the difference. Unless you're just extraordinary at something and people are dying to work with you. Most businesses are doing things that almost anyone can do. For example, real estate photography is a business that a lot of people can do. It's not the hardest thing in the world. And a lot of people do it well. So they're really only a couple of things, especially in the beginning that you can do to stand out. You can undercut the market while you build and or can be an exceptional professional. When you do the latter, you can really grow into a powerful business. You want to be quick and reliable. People want someone who can always get the job done and get it done fast. As I grew, I had to set boundaries for this. But for you just starting out, do things as well and as fast as you can. For photos, a 24 to 36 hour turnaround is pretty standard. But like I said, if you could do it faster, do it with 24 to 36 hour guarantee, that gives you a little bit of time. So that knocking it out in 12 hours seems like you're doing someone a huge favor. And that, and that's going above and beyond. And people remember stuff like that. Always be professional. This is something I stand strongly behind as much as clients can be your friends for seem like your friends. There's a very fine line. I've had clients. I consider friends. I've had clients. I don't consider friends when I'm on that when I'm on the job, I almost always act the same way. Professional, on-time, making small talk, never too opinionated, always agreeable. If your client is extremely into eating clean, don't talk about how you love chow down on chicken. Just blend in with the room. But it's about being yourself while blending in. It's also a very fine line, but I really do believe the chameleon in me has been a big reason of why I've been able to grow that, find ways to connect with the client's business is so much of our relationships when it gets down to it, people don't want to feel transactional. They wanted to feel like you care and you listen. So do that lastly on the business principle, to accept your mistakes and make up for them. If you genuinely have done a bad job, don't pretend like you did it. It's an incredibly bad look. Offer free photos next time. If you can offer a refund, do that, Do anything you can to make them feel like you care enough to do what's right? Well, some people take advantage of you. Yes. But the more you grow, you'll be able to avoid the clients that don't mean you any good when you do right, people will hear the good word and come one by one.
18. How To Gain Clients Pt. 1: Cool. Let's get into some client acquisition. I'm going to put it to you bluntly, the beginning is the hardest part. So put all your resources together to get in the door. If you know a real estate agent, property manager, anything, anybody do not hesitate to contact them and let them know what you're doing. You can do you can do a free shoe, you can do a discounted shoot, like I mentioned, for your portfolio if you feel like it's necessary. But in my experience, most of the time that doesn't really work. People aren't afraid to pay. They want good work. They want it done well, it's just about the relationship part and getting in the door, trust. The first thing you should do is create a profile with Google, my business. I know I mentioned this before, but this is like the number one thing. Also do thumbtack, Zillow, bark, hows, and any other website that you find. I said these because these are ones that I use that really helped me that can take traffic and send it your way. Some of these will cost you, and that's okay. Google AdSense is pretty cool, works with Google, My Business and they give you a $150 of free add money, add to use when you sign up for a new Google My Business. So that's cool. These things are great ways to find clients for you who don't already used someone else. So it'll help you build your portfolio and build your connections outside of personal referrals, I believe Google, My Business is the number one referral of clients to me. Let's take a look why. So the thing with Google, my business, if I'm in Los Angeles, California right now. So if I type in real estate photography and I'm Asian, I'm a property manager. I'm just someone's selling their home. Look what comes up first, you got three ads as well. I mentioned Google AdSense three ads that come up first, but most people, they skip past that. So you go to this is Google My Business. This is why it's important. You have an ad here, but who's the first person you see the luxury level? 35 star reviews, three plus years in business. And then you have some other ones who are decent as well. But who are you going to pick? You're probably going to pick the luxury level. But let's go down. They've won the Google My Business game. But the ones who are actually winning in Google SEO is property shots, then some YouTube videos, California real estate photography. But you see how this person, California real estate photography, using it in his name as well, just like I did in Colombia. Property shots, LA rail, say photographer. So you get why Google, My Business is important. It's important for you to have the most reviews. And in most cities, people still aren't taking advantage of it. So B1 of the ones that does take advantage of it, get as many people as you can to leave reviews, put real estate photography in the title. So you will pop up in your area. Now let's take a look at some tech thumbtack in the beginning was one of the biggest resources for me because I didn't have a ton of budget to spend on acquiring leads like a bark for example. But pretty much what these are, it's people who need property photography or real estate photography. They are going on the sides and they're searching for people to do that. So you're signing up as a thumbtack professional, as a bark professional, and you're pretty much fighting other real estate photographers for the job. So it's not what you wanna do, but if you've gotta build up using that, it is business coming in the door. You just have to do everything you can to win that lead. Similar things with like Zillow and house. If you pay or you sign up to be a Zillow photographer, they give you they pretty much agents who are looking for photographers through Zillow. Zillow sends them your way. So just another opportunity to gain leads, gained clients.
19. How To Gain Clients Pt. 2: Okay, so with that out of the way, we've got to dive into what most people hate. And that's cold outreach. It's very time consuming, but it can be worth it. I spent most of my time cold emailing, not cold calling. I did a couple called cause and I just didn't like the way it made me feel. So I didn't do a ton of them. Actually think I did get one appointment off of that. And I also had other people on my team try cold calling. And I think if you do it and you don't care about it and it doesn't bother you, then it will work. But you just gotta be a pretty personable person and it just wasn't for me. But cold emailing was I first. I personally prefer cold emailing. Just don't be hurt. If you don't get a response, people are busy, people have things to do, they will always respond and that's okay. I compiled agents, emails from several cities in the beginning and reached out one by one. What's crazy is my first true client came from a cold email. And guess what? That client is the number one agent in Buford, South Carolina in this paid me thousands of dollars over the past several years because of a cold email. That's pretty cool. You just never know, but don't just email agent's email property managers as well. Some of my biggest clients have been property management companies needing photos for rentals and commercial real estate agents. They have the big bucks. You shoot. Office buildings, apartment complexes. Don't skip those little niches because there's a lot of money to be made there. There's a lot of strategies for cold emailing and it's kinda hard to say what's the best way to go. I've tried a variety of different subjects, subject lines. I've given discounts. I've tried long emails, short ones at this point. Here's what I recommend, short and to the point and the parts that you want them to notice, make sure it's bolded a clear link to your portfolio or attach a flier of your work, mentioned their name and try not to have typos. Don't be afraid to just ask if they'd be gained for coffee so you can talk to them about how you may be able to help them gain clients like that too. Or maybe say that if they need a backup photographer, you would love to be there back-up, let them know you have what it takes. Another way to get in with the agents that I didn't know about until I got into the industry was logins. This is where different offices host a service provider and pretty much allow them to come, bring lunch to their agents and talk about what they do if you can swing buying lunch for people, this is a big option and a way to gain a lot of clients. Because if you have a lot of the agents in the office come and you give a great presentation. You can win over the entire office, which for any one real estate photographer is huge. Going there. She moves it up in gains and planets and bringing some discount coupons. The first lunch in and I did, I made a presentation provided as much value as I can and I definitely was cheaper than the other people in the market. And I did end up gaining the whole office and it completely changed the game for me. How I got into that office was that cold email that I mentioned. So if you don't want to email directly an agent, you can even email the admins at the front of the office, let them know you would love to bring lunch to their office and tell them about what you do. That already takes you on a whole nother level that most feel safe. Photographers aren't even thinking about. Be confident and deliver. You've got this.
20. How To Gain Clients Pt. 3: Once you start getting some regular clients, and even before I recommend starting with content marketing, heavy social media in business networking groups, don't get me wrong. You can start this whenever. I just didn't do it consistently until a year or two in mostly because I didn't know how or what to do right up there with Google, my business e-mail content marketing definitely took me to another level. What do I mean by this? Well, for both Buford and Columbia, sent out emails with YouTube videos providing value to my current and future clients. This seam me as a pro in my field and builds trust before I didn't meet with people. I've even gained YouTube and music fans from doing it. I strongly believe in content marketing on so many levels. So let's look at some of the emails that I sent out. I was lucky enough to have the e-mails, all the agents and both areas sent to me by an agent at the time. If you do have someone close to you who is an agent who can get that for you. That's amazing. If you don't, you just gotta grind it out and do research on all the different e-mails. Or you can purchase emails, but some of them are always legit. So just be careful. One thing I did to build credibility locally was hack the real estate Instagram hashtags. So like hashtag beauty for real estate hashtag, Columbia real estate hashtag, color real estate hashtag, Columbia houses, all that type of stuff. I put the same hashtags for the main ones that were in the real estate Columbia category or real estate Buford category. So that when people were looking at those hashtags, my work came up. I followed agents, I liked their post, a comment on their posts. I flooded it with my work. I talked in interacting with the community. It's also important and it all works together.
21. How To Gain Clients Pt. 4: Lastly, I broke down and joined a business networking group. This is a heavy commitment, but for me at the time it did pay off, I joined the group knowing that one of the top agents was in the group. This particular one that I joined was like the biggest business networking group in the country or something that was like a 100 people or more. I can't remember. It was a lot of people. All of these business networking groups are different. But the premise of it is that you had to go to the group lunch and every week, you had to have a separate meeting with at least one person a week and you had to have a certain amount of referrals given out per week. So you had to refer the other people in the group a certain amount of times. So naturally, yes, you getting clients because people are referring, you expect if you go to these meetings and you go to these luncheons, and you start to build those relationships. Because what is business about? It's about relationships. If you work it right, and you pick the right group that maybe has the top agent, you will get to work with the top agent like I did because you build the relationship, you provide value, you show them what you can do. You stand out and eventually they'll notice in because you're in a group of them, they automatically have that trust with you and they want to connect with you. Looking back, very glad I joined the business networking group, but I went to a forever, I would get in, build relationships and get out. That's in module 4. We're so close.
22. You Made It: Well folks, you've made it through real estate photography one-to-one. Congratulations, I appreciate you taking the time to go through this course and trusting me as your instructor and coach, I do want to mention a few things before I go that I think will help you don't quit your day job too soon. I made a whole video on this and I will link it. Just be careful when you quit. Any of you are considering quitting prematurely. Watched the video, please.
23. Advice on Competition, Growth & Pricing: Most markets have room for several real safe photographers. On top of that, your competition, who has the most real estate photography work, maybe willing to partner with you, hire you, or even refer you when they're too busy. I highly recommend just having a coffee, grabbing a drink, whatever with your competition. I highly recommend meeting with your competition and just talk shop. You never know a friendship can boss them out of it. Don't take things too personal. This is business. Baby clients will use other people. You will be hurt. Just maintain professionalism and be ready when they come back and don't be afraid to ask what you did wrong if they do glow a, show that you care, Be careful with how you grow. Once you grow to a certain point, you have a choice to make. You'll consider hiring help are doing it all yourself. There's so many ways to do this, but just be careful with which way you go. I recommend working as much as you can completely by yourself until you absolutely can't stand it anymore, then I would raise my prices, raise your prices, and then repeat. That's what I would do because having a team is very stressful and I don't know how often it's really worth it. Based on my experience, I got to situational, my partner ended up stealing some clients and starting their own business. So if you do partner with anyone or hire anyone, make sure you have contracts in place. Obviously, if you want to expand on multiple occasions, you will have to hire and train your photographers just make sure no one has all the control unless as you balance it out and be smart. You got this. Like I said, though, personally I would do it so low, you can definitely earn six figures and beyond by doing it solo. Lastly, let's just talk about pricing very quickly. I struggle with how to price myself and beginning and even more as I grew, my big, my biggest advice is to research your competition and just put yourself somewhere in the middle where it makes sense to you. Make sure your bills get paid as you gain experience and clients raise your prices as necessary. I started in $95 per house, then I moved out to 125. Then I moved up to now 175 and it'll probably keep going up if I keep doing, just be competent when you raise, like I've said it many times, you got this. If you have any additional questions, you can ask them in podia or interact with the CISG community. I'm here to help. So please do not hesitate to ask any questions seriously and stay tuned. More courses are on the way or there's something you would like me to teach, please let me know. Also remember the craves Survival Guide coaching program is available. There's four different modules for week intensive. You hop on a Zoom with me. We actually talk through what you're trying to do, your brand, your goals, your strategy, and we take it to the next level. So consider doing that. Lots options there. Thank you so much. I am out.
 Cole Connor, Artist, Creator & Coach