Transcripts
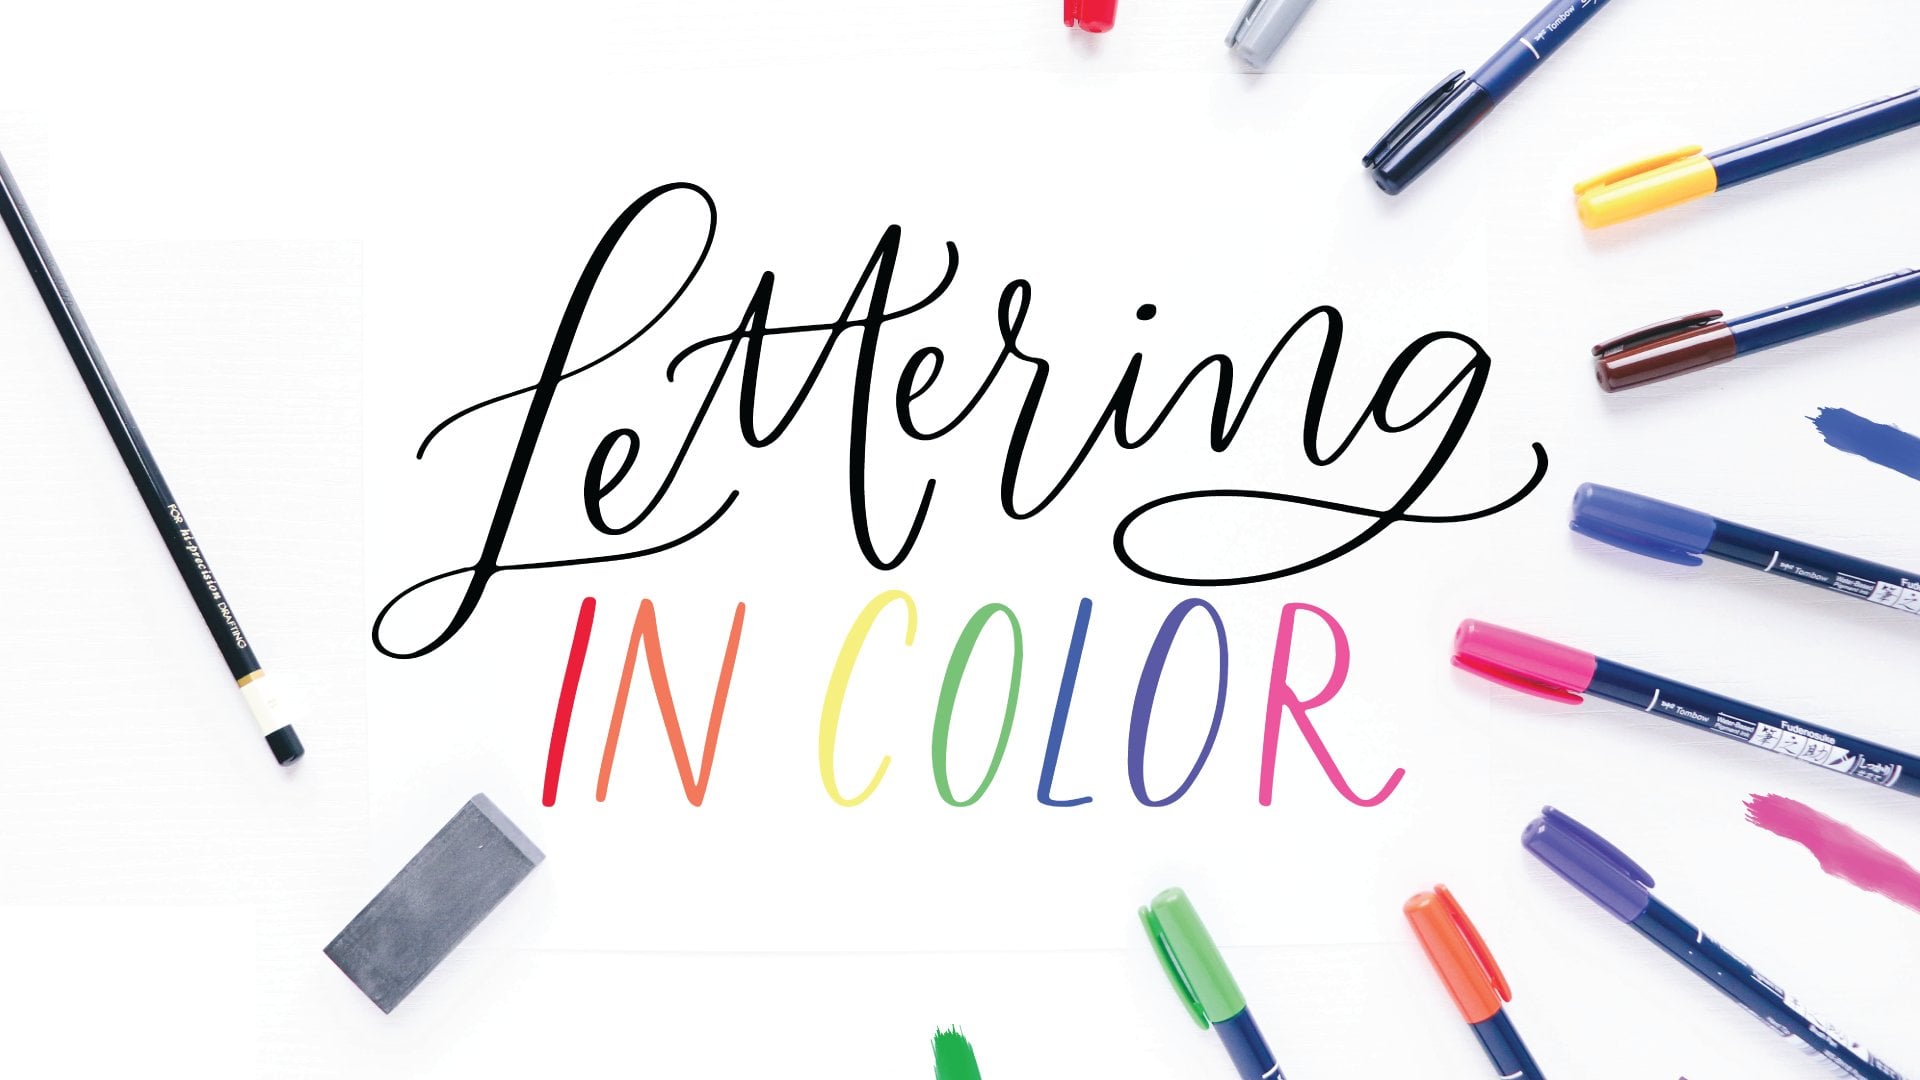
1. Welcome to Procreate Color Palettes: Hey there and welcome to Procreate
Color Palettes, a simple process for
standout palettes. My name is Kiley Bennett and
I'm an artist and designer and Skillshare teacher
based in Central Kentucky. In this class, I am so excited to share my process for creating lively and balanced
color palettes inside my favorite
app Procreate. This isn't a class
on color theory, this is a class about
how to notice and become aware of the
color palettes that exist all around us and
how to use your instincts to create color
palettes that you'll want to use over and over again. Color is one of the most
powerful design tools that we have at our disposal and
it's everywhere around us. It's most certainly
found in nature. It's probably found
all around your home. It's definitely found in unexpected places and even
inside your imagination, so join me for this class and I guarantee you will
be more confident with color and you'll
walk away with four unique color palettes
that you can start applying to your
creative practice today.
2. Class Project: Throughout class, I will share four
unique color palette prompts for you to follow. Your class project is to create one or more
color palettes, either following along with me using these prompts or to
interpret the prompts with your own gathered
inspiration and then share them using the lesson on how to share your
color palettes. I hope you will tag me on
Instagram @KileyBennettco so that I can re-share your color palettes
with my community. Let's go ahead and get started.
3. Overview of Color in Procreate: [MUSIC] In this video, we are going to cover how to use the color tools and
features inside Procreate. As of November 2021, there have been some
cool updates to the color tools so we're
going to explore those as well as do a really
basic overview of how to use the color tools
inside of Procreate. This is more of just
a general review rather than a
comprehensive tutorial. If you'd like something
that is more in depth, make sure to check
out my other class, the Procreate class, which is here on Skillshare, and anything that is out
of date in that class, as far as color goes will
be covered in this video. To find the color
menu in Procreate, all you have to do is open
up a document, any document. I have started a new document. You can find this circle in the top right and then click
on that and that's going to open up the color menu
and then you've also got five tabs down at the bottom
that do different things. I'm on the Disk tab right
now it's just the first one, and I love using
the disk this is probably the most used
color tool inside of Procreate just
for me because it is the most intuitive
for me to use. How you use the color
disk it's really easy. You're going to use this
outer ring to select the color family
that you want to be in and then the inner circle, you can use this
little picker to select a light and a
dark of that shade. It's really easy to use. Something that is really cool about the color disk
is that you can double-tap on certain points in this inner circle and it will
give you certain colors. If you ever want to
find true white, no matter which color
family you're in, you can double-tap
in the top left of this inner circle
and it's going to populate to true white. Then you can also find
true black by tapping down at the bottom and
it'll select true black. Then you can also tap on all the quarter points of this circle to select
the color that is, I guess just the truest value of that specific color family. If I want to go to yellow,
up here at the top, it's giving me a
really bright yellow, over here it's giving me
more of a rich yellow, and then that's a
muddy brown, black, little bit of a charcoal gray, a true gray and then
we've got true white. You can experiment with what
it's like to click around in all those points and see
what colors you like to find. Whenever you select a color so let's find an orange
that we like. I tend to like Corelli oranges quite a bit so let's find
something there. You can tap into
this palette below. Let me select a few more colors. I also really like blue-green, really light, and
soft blue-greens. Whenever you select your colors, you can put them
into the palette. If you forget to put
them in the palette and you use a color
inside your document, so let's find just a color. I'm going to make a
mark in my document, but I forgot to put it in my palette it's going to
show up on my color history. Color history is an updated
feature in Procreate and it shows you the 10 most recent
colors that you've used. That's really handy. If you find that you forgot to add something
to your palette, it's going to be right
there and you'll be able to then add it
to your palette. Something else that you can do with your palette
that's really neat, is you can drag and rearrange colors when you
have a lot of them, that can be really handy
and you can also hold down and you can delete
swatches as well. That is a little brief
overview of how to use the color disk and then I'm going to clear off
my history here, which you can do as well. If we move over to the
classic color picker, it is basically the
same as the color disk, but it is a little
bit different. I'm going to also clear out this layer so that
you all can see. It's a little bit different. You've got sliders. The sliders are basically the same thing as
the color disk, they just look a
little bit different. The first slider is
going to allow you to choose your color
family and then you can go from left to right
with this slider and then top to bottom
with the third slider. That's basically going
to give you light and dark and then this is
going to give you, I think the tone of that color. Let's slide it over to yellow. We can also go inside here and then move around if we want. Then you can also tap
on the top left to find true white and then if
you go all the way down, you'll find true black. Then it's the same
idea you just select your color and then you add it into your palette just like
that. It's really easy. Like I said, I prefer to use the disk it's just
slightly more intuitive, but it's totally up to you. The next tab is the
Color Harmony tab and while I think this
tab is really cool, I hardly ever use it, but I'll show you how to
use it if you'd like to, it could definitely
come in handy when you're trying to put
together color palettes. You want to click
on this little word up here "Analogous", and then it's going to open up a larger menu of different
options to choose from. If you wanted to go with
analogous colors which are right beside each
other on the color wheel, then you would stay on analogous and you can
move any of these around actually and it's going to allow the other two to
follow along with it so that you'll always be finding analogous colors on
the color wheel and then all you have to do is click into whichever color
you want to select, then you can add that
to your palette. You can also move to the inside, those colors are going
to get closer together, outside, they're going
to be farthest apart. Then you can use
this slider to go to dark and light as well. If you click on complementary, they're going to
always be colors that are right across
from each other, let's brighten this up,
on the color wheel. That can be really useful when you're putting together
a color palette and you want to have colors
that complement one another or that contrast
in a really nice way, that's a great way to find
colors that are complementary. Then you can just look around
in split complementary. Honestly, I don't really
know color theory that well, I know just enough
to be dangerous, but I'm not an
expert and I don't want to teach you anything
that is not accurate. My advice to you is to
just get in here and play around and have fun
that's what I do, and it always works out. Let's go ahead and move on
to the Color Value tab. In the Color Value tab is
where you can manually input color codes to
get a precise color. If you've created
a color palette in Illustrator or if
you are looking at color codes on some
other website and you want to have that exact same
match show up in Procreate, you can use the hex
code or the RGB and HSB number values to type in the exact same numbers there so you can get
a perfect match. That can be really handy and it also goes the
other way as well. If you want to select this pink and you want to send it to
Illustrator or Photoshop, you could just type
in the color code into those programs and you
may have an exact match. Sometimes when you
transfer a document from one screen to
another screen, it doesn't always translate
exactly the same, the colors might show
up differently if your screen is not
calibrated properly, which is a very
complicated concept if you're just trying
to get started. Don't worry about
that just worry about having the same codes show up on all your
different programs and that will take
care of that problem. Then lastly, we
have palette and so this palette menu is where all of your palettes
are going to be stored. Something new that has
happened with Procreate, which is a pretty
cool update is that, so let me select a
palette as my default. I'm going to click on
these three little dots, will select that as our default and then I'm going to click on cards and it's showing
my color palette. Let me zoom back out. It's showing my color palette as this thing called the cards,
which is pretty cool. It also gives each
color a description. They don't always feel
totally right to me. [LAUGHTER] this
does not look like a light grayish orange, that does not look like orange. But you can actually give
these very specific names, which is something
that I like to do and we're going to
talk about later on, but you can tap into any
of those and then open up your keyboard and you can give
them very specific names. Let's go back to
the compact view. Oh, before I do that, you
can also move things around, drag, and reorder them. You can really make
everything look really nice and organized that way if that's something
that you'd like to do. Then if we go back to compact, I wanted to just explain
a little bit about how to use the palettes if you've
never used them before. You click on this plus sign to create a brand new
blank palette. It's automatically
going to set it to default and how you know, something is set to
default is it's going to have that little blue
check and it just means that that's the
palette that is showing up at the bottom of
all of these tabs. You can also name your
palettes by clicking on untitled and that'll give
you the option to name them. You can also use
those three dots to share a palette so you can share a pallet with another
Procreate user, you can duplicate a palette, or you can delete a palette. I'm going to go ahead
and delete that one. I have quite a few
palettes here, I just got this new iPad, so I don't have as many palettes
as I did in my old iPad, but the possibilities
are limitless and you're going to have a lot of
fun filling this up. That is a crash course
in the color features in Procreate and now
that you are refreshed, let's go ahead and move
on to our next video, which is all about
finding inspiration.
4. Finding Inspiration: [MUSIC] In this video, we're going to
talk about finding inspiration for color palettes. This can be done
online in your home, out in the world, or even
inside your own mind. We're going to start
with the easiest way to source color inspiration, which would be photographs, and specifically photographs
that you can easily find online on royalty-free websites. My favorite source for
royalty-free images is Unsplash. They have a really wide variety of photos that are
really unique. There's a lot of opportunity
for color palettes. You can also create an
account on Unsplash and start a saved folder of images that are
inspiring to you, so you always have some
inspiration to pull from. You can also use Pinterest. It's a really great place
to find inspiration, but you have to make sure
that the images that you're gathering inspiration
from are royalty-free. If they're not, that you are
really truly just using them as inspiration and you're not pulling directly
from those photos, which I'm going to show you
how to do in just a minute. While finding photos online is definitely the easiest
way to find inspiration, I've used it many times. There's nothing wrong
with doing it this way. It's really my least utilized
way to source inspiration. I really prefer to seek out my own inspiration by being out in the world
or out in nature. Let's talk about
those ways because they're a lot more
fun. You're like me. You've got your phone with
you everywhere you go, which is great
because it means you can capture
inspiration anywhere. When I say anywhere, I mean it. I have taken pictures
of parking lots at sunset of retro wallpaper
in an old bathroom. Quilts that my grandmother made. Vegetables from the
farmers market or even the thread display
at the fabric store, the zippers, or different types of fabric
at the fabric store. You just never know what
you might encounter out in your everyday life
when you least expect it. Keep your eyes open and
always be noticing color. I keep an album on my
phone that's dedicated to photos that spark some
color inspiration for me. One of my secret weapons for creating color palettes
is to look in the past. For me personally, the color palettes of
the '50s and '60s, and '70s, they are
some of my favorite. They are inviting and they are comforting and oftentimes
they're really unique. I really found myself
in this late inspired by vintage and retro
color palettes. I like to take trips to the flea market or the
antique mall and I'll just take photos of anything
I see that catches my eye. I also find a lot
of inspiration from old photographs where the colors are really muted and soft, as well as old quilts. You're going to see
that in this class. Vintage textiles are some of my favorite ways to
gather color inspiration, but my most favorite
and most used way to create color palettes is
by using something tactile, holding something in my hands. It just helps me spark
inspiration so much and that's where my
secret weapon comes in. I love using paint chips. They really are
my secret weapon. You can find them for free at your local hardware store or anywhere where paint is sold. I am a frequenter at the hardware store because we
always have a home project. I'm always grabbing
a few each time I go and I'm just slowly
adding to my collection. I bring them home. I cut them apart
because usually, they come in a strip
where you've got several colors on
a strip together. I just separate and organize them and store them
in a little box so that I can easily pull
them out whenever I need to. It is so easy. Why are like using
something that's tactile is I feel
like seeing and holding the color
chips in my hands allows me to create
really balanced pallets, which we're going to talk about. Also, the possibilities
are just endless. When using paint chips, you can try to recreate palettes that you find in your
gathered inspiration photos, or you can use your
own made-up themes to spark a palette idea. When I think about themes, it really helps me come up with pallets from
the top of my head, which guarantees that I'm not intentionally copying what
another person has done. You could start by being
really broad with your themes, like you could do
summer or autumn, Christmas or beech, forest, canyon, etc. Or you can get more
narrow and you could create themes like muted summer, which I have done. Let's go ahead and move
these out of the way. This is my muted summer palette. We've got some greens and
some gold, a bright yellow, we've got a really
pretty soft blue, some soft peach, a little
bit of a purply pink. Then we've got a couple of
bright colors in here as well. But I've hidden them
so you can see less of them because we
want some contrast. We don't want everything to be the exact same tone because our color palette is
going to look flat. We're going to talk
about that soon. But when I'm using
these paint chips, it also allows me to think about how colors are going
to be distributed. In a muted palette, I definitely want
to have contrast with some brighter colors, but I don't want them to
take over my palette so I can know that I want to use less of this
purple and pink. Then maybe I will allow that yellow to take over
more because it is a softer color and it's
not so bold and bright. This would be one idea for
how I would use paint chips. I would let the ones that I want to highlight the most
take over the palette. Then I'll show less of those bright colors or the colors that I don't
really want to use as much, but I still want to have them
in order to have balance. I also went ahead and pulled this canyon at sunrise palette, which is really pretty. I did a retro Christmas which is one of my all-time favorite
palettes to work on. This is a beachy palette, and then this is a palette that represents a cabin in the woods, autumn type of palette. Now that you know the various
ways to gather inspiration, let's go ahead and move
on to our next video, which is how to transfer our
palette ideas to procreate.
5. Creating Palettes in Procreate: [MUSIC] In this video, I'm going to show you the
really simple process for transferring
inspiration photos, or real-life pallets
into Procreate. Let's go ahead and start by
talking about photos first. First thing you want to do
is make sure that the photo you're going to use is in your
Camera Roll on your iPad. My iPad syncs to my iPhone, so all of the photos
from my iPhone are automatically inside
my camera roll here on my iPad already. You can also air drop a photo and have it open
inside of Procreate. I'm going to show you
the quickest way that Procreate allows you to create
a palette from a photo. It's like a cheat, and I don't really use it because I prefer
to use my own eye. But if we go to
our Palette menu, so on our Palette menu, we're going to click
the plus sign. Then we're going to
select "New From Photos." I'm going to click
on "New From Photos" and then I'm going
to go to my album, see all my cat
photos that I have. I'm going to click on
"Color" and then I'm going to select the photo
that I want to use, which for me is this photo
of my grandmother's quilt. Just tapping on that, it says palette from image because it's pulled
colors from that image. Let's go ahead and
go into our palette. I'm going to zoom in so you can see what this looks
like up close. I will insert a photo of my grandmother's
quilt side-by-side so that you can see that the palate that it
naturally pulls doesn't really represent what my eye is picking
up from this photo and why I was initially
drawn to this photo. I was drawn to this
photo because of this soft colors and I don't see any of that beautiful
yellow that I wanted to pull from that photo
inside this palette. Sometimes it is hit
or miss and it's really miss on this photo. I prefer to pick manually to
pull colors from the photos using my own eye and not to rely on Procreate to
pick my palette for me. Let's go ahead and
I'll show you how to manually pick colors
from a photo. I'm going to delete
this palette. Just click those three dots
and then click "Delete". I'm going to open up
that photo inside the document by going
to the Wrench icon. We're going to insert
a photo and then go to my album for my color. Then we're going to click
on that quilt photo. It's now inserted
inside our document. I'm going to open up
my color disk and I've got a blank palette selected for default,
which is perfect. I'm going to use the
Color Picker option or the Eyedropper tool to manually pull colors
from this photo. I like to start just
the top corner, and I'm going to start pulling colors that I
see with my own eye, and I'm not going to
limit myself at all. I want to pull as many
as possible and then narrow down later. Using my color picker, I really want to
capture this yellow. I'm going to go to just move it around until I find a yellow
that looks like what I want. There we go. I use a
yellow that I want. Then I'm also going to
gather a couple more shades. We've got where the shadow is. It's a really rich golden brown, so I want to capture
that as well. Then let's see if I
can capture a really light soft yellow right there. Then definitely got to get
this blue that's represented. What I'm focusing on
is there's colors that my eye is picking up
on from the photo. Those are the colors
that I want to focus on capturing from the palate. If your eye is drawn
to blues, red, soft pink, yellow, this creamy white
background of the quilt, those are the colors
that I'm going to focus on getting and I'm
not going to worry so much about
trying to represent every single color
that's inside the quilt. I'm going to go ahead and
speed this up and I'm going to fill up this blank palette
with colors from this photo. [MUSIC] One thing that I also
want to make sure I have represented in my palette is a neutral white and then
a neutral dark of some sort. That's also something
that I want to focus on no matter what photo
I'm looking at, I want to try to find some neutral white and
a neutral dark. That was really easy in
this palette because we have this really pretty creamy
white of the quilt base. Then we also have some dark
navies and some blues. Then I can also pick out some really neutral darks from
the shadows of the quilt. No matter what photo
you are looking at, that's also a good idea to try and seek out some
neutral colors as well. We're going to talk
about that a lot more in the next video when we talk about creating
a balanced palette. I'm also going to narrow down
this palette of colors that I have to create something that's really pretty imbalanced. No matter what photo you have, you can use the same process. You can also take photos of your paint chip pallets or any palettes that you
have in real life. I also wanted to show you
this. It's really cool. I ordered some swatches
for furniture in the mail, and I just got them in as
I'm filming this class. Look how beautiful this
palette of colors is. What I would do is I
would snap a photo on my iPhone or on my
iPad of this palette. Then I would use the
same method to pick out the colors and create
a mini palette with this, and I might add to it as well. Color inspiration can truly
be found anywhere today. It was found in my mailbox. Let's go ahead and move on
to the next video and we'll talk about creating
balanced palettes.
6. Creating a Balanced Palette: [MUSIC] Let's talk about what makes a balanced
color palette. A good way to frame
this would be to share some dos and don'ts, and these are just
some quick rules to follow that will make pallet
creation easier for you. They are not absolutes, they are not universal laws, they're just my little
rules of thumb. If you find that you don't
agree with one or you have a better way of doing it
that is totally fine. Color and what looks good to
the eye can be subjective, and then goal here is that you will have some things
to take with you as you move forward and you'll
feel more confident in trusting your own eye
when creating a palette. The first do of
pallets is contrast. It is important
to have contrast, this means have
lights and darks. If your palate consists
of only colors that are in the same tone whether
that's all lights, all darks then your
palate is going to look flat and you want your
palette to look alive, so having a mix of lights and darks is going to achieve that. The next do of palettes is to include an off-white
and an off-black. The biggest mistake that I made over and over again
early on in creating color palettes was to
have a really bright pure white and a really
dark pure black. The problem with
that is these colors are rarely found
for us in nature, and they're almost
always only pure black and pure white when we are viewing them on a screen. If you put these colors in with a really natural
organic palate, they are probably
going to look out of place and they're going to take away from that
natural lifelike feel that you want your
palette to have. It's a good rule
of thumb to choose an off-white or an off-black, and these off colors
can lean warm, or cool, or muddy, or neutral, or really
whatever you want them to be to fit in with your
palette as a whole. You also might not need
to have a white or black at all if you're using a small or a limited palette, and there are many
cases in which pure white or pure black look
really good in a design. You will once again
know whether this looks right in your palette or it looks like it doesn't belong, so use your eye to
make this call. Another do of a
balanced palate is to please do use several
shades of the same color. It's okay to have several
oranges, or blues, or greens in different shades
to fill up your palette. I will often have at least
two of the same color family, but sometimes three or four colors of the
same color family in a palette consisting of
anywhere from 10-20 colors. A lot of my design
work is focused on surface pattern
design and I usually do need to have as
many as 18 colors available to use in my palettes, so in that case I would need
multiples of some colors. What I like to try to
do is get shades that are different in
tone or temperature, so let's think about
greens for example. I might have a true grass green, but I might also pair that with a muted mossy green as
well as a dark-rich green. Making sure that your greens or blues reds are different
enough from one another ensures that your
palate is going to be clear and it's not going
to be confusing to the eye. The finale do I have
for this is to put in practice and use your intuition. I don't know color theory nearly as well as I should for
an artist and designer, but I still feel like I
have a good grasp on color. I've had years of practice in putting together color palettes, and in all those
years I've always relied on my own eye to know whether a palette
was balanced or not or whether it was
missing something. Sometimes it takes using
that palette in a piece of artwork or in a pattern to
know whether it really works, but I promise you have the
right stuff, you will know. Trust your instincts,
put in some practice, and you'll become more confident
with color in no time. Now that we know
the dos and don'ts of creating a balanced palette, let's go ahead and
work on narrowing down that color palette that I created previously using my grandmother's
quilt as inspiration. We're going to take
all the things that we just talked about into account when working
on this color palette. I'm going to go ahead and start a new layer and just hide
the layer with the photo. The first thing
that I noticed is that I've got a couple of colors that are really similar
to one another. I've got several oranges
that look the same, so I'm going to drag those around and put
them side-by-side. Then I can see what
needs to change, and then this pink also
looks really close to these colors as well. What we can do is
we can put them literally right next
to each other on our screen and you can almost
not tell the difference. If I really liked
one of these colors; so for instance I really like this peachy coraly orange color. I might change this orange
to be a lighter version, but it looks like I already
have a lighter version there. Let's see how that one
looks next to this one. That's more contrast, but still they're pretty
close to each other. I think what I'm going to do, is I'm going to eliminate this darker orange just by holding down and
click "Delete", and then I'm going to lighten up this orange just a little bit more so that we
have some contrast. Let's clear this out and
then we can color with that colourly color and then with that light
orange right beside it. That looks like there's enough difference between
those two that it's not going to
be super confusing, but I still think I could take it even a little bit lighter. All I'm doing is just
moving it to the left a little bit and I think
I like that a lot better. We will include that color in our palette and we're going
to delete this orange color. Now I want to look
at these two reds. They're basically
exactly the same, so I'm just going to pick one to delete and we won't
worry about that one. There's a pink here that's really close to
this coraly orange. I'm going to lighten up
this pink by selecting it, and then taking it up and
to the left a little bit. That's what that's
going to look like. Next to this orangey color, there's definitely
enough contrast there for me not to
worry about that. Then we've got some blues that are pretty close to one another, but I think they are
actually different enough. Let's just make sure. Just a great way
as you can see to test out your palette
is just to put colors right beside each other
and just make sure that they are not super close. I've got these two really
neutrally white colors and one leans a little
bit more of a pink. I don't know if
that's translating on-screen and then one is really a very light white. They look the same on the camera but they are
different on my screen, so I'm going to take
this one that leans pink and I'm just going to have it lean a little
bit more pink. Let me drag that
down a little bit. I think that looks good. Let's make sure we tap
into our palette to catch that one and then we can delete the one that we're
not going to be using. I'm also going to reorder
these now that I'm eliminating some colors just
so I can see what we've got. Let me do that real quick. [MUSIC] This is what my palette
is looking like. If I put this up side-by-side
with my quilt photo, I like this a lot better
as a representative of the colors that I was drawn to in this photo
in the first place. I'm making sure as I complete this palette that
I've got some contrast, so I've got some really
bright bold colors. I've got this orange; this orangey coral
which is really bright. I've also got this golden
yellow which is very bright, then I've got some dark
grounding colors as well. I've got a brown and then
I've got this dark navy, and then I've also got
a really neutral white, and then I've got a really soft yellow as well as a soft pink. Those can also serve
as neutrals as well. I'm very happy with
how this ended up. The final touch is going
to give it a name, so I'm going to name it after my grandmother since
it's her quilt. One thing that I notice is that I don't have
really a green, but really there wasn't that
much of green in this photo. It's also okay if you are missing some colors
in your palette, it's not that
important to always have every single color
family represented. If I start to create
some pattern design or another illustration
using this palette and I feel like I'm really
missing some greens, then I could go ahead and add some green in
there and try to find a shade that fits with
the feel of this palette. That completes this
video on the dos and don'ts of creating
a balanced palette. Let's go ahead and move on.
7. Palette 1: Found in Nature: [MUSIC] This first palette that we're going to
create together is something found in nature. I want you to take
a walk outside or go somewhere and
keep your eyes open, and snap a photo, does not have to
be a good photo. Don't apply a filter to it. Just snap a photo
of something that sparks that color
inspiration for you, and that's what we're going
to use together for this. Remember, this is the first of four palettes that we're
going to create together. I want you to create your
own palette based on your own photo and you can share it as part
of your class project. You can share all the palettes that you do or just one,
it really doesn't matter. But the point is
that we're going to start putting this
into practice. I'm going to go to the wrench
icon in a fresh document, I'm going to insert a photo, go to my album, and then I'm going to select
this photo down here. This is not a fancy
photo at all. I just snapped a photo
because I was so drawn to the colors that I
was seeing here on a walk. I'm going to move that
over to the side, and then open up my
color menu and I've got a fresh blank
palette to choose from. Let's go ahead and
grab the color picker. I'm going to start moving
around and grabbing colors. Actually for this one,
I might try to just start in ROYGBIV order so
that I can keep it organized. You don't have to do that. But it might be easier
for me to do it that way, so I'm going to search out
for any reds that I see, and I actually do
see a few up here. There are more reddish
pinks but it still work. [MUSIC] I found a lot of really beautiful colors in
this photo and I'm really excited because I think
this palette for me is going to be full
of greens and pinks. That's what I'm
going to focus on, and then a couple of those
really pretty orangey-yellow, golden colors that
are in the leaves, so I'm already
thinking that I want my palette to be just like chock-full of pinks and a gold and then lots of
really pretty greens, and I'm thinking about how I can apply this palette
to an illustration, so I would love to recreate
some flowers similar to this and to do a really
pretty floral pattern, perhaps, using this
color palette, which I might just do, and I'll show you if
I happen to do that. But I want to go
through the process now of narrowing down
some of these colors. I'm going to start a new layer. I'm going to use that same
process that I talked about earlier to start
narrowing colors down. [MUSIC] I'm really happy
with this palette. I'm not exactly sure about where this
bright orange fits in, it just doesn't really feel like it's really
belonging there. For now, I am going
to delete it. Just use my instinct. I have several colors that can serve as a golden yellow
if I need them to, and I have two that are
really close together. But I think I'm going to have
to get in and start using this palette on a design to really narrow down
between the two, so I will post a finished
palette for you to see, so this is Palette Number
1 found in nature.
8. Palette 2: Inside Your Home: [MUSIC] Palette number 2, I want you to find
inspiration inside your home. So I'm going to go ahead
and pick out a photo that I have of the
inside of our home. Let me insert photo, go to my album, and I am going to
pick out this picture of my kitchen that I have not
yet created a palette from. For some reason I just really liked the colors that were happening
in this palette. Palette number 2 is going to be something found in your home. I have a picture that I
have taken of my kitchen just on a particularly
bright day. My kitchen doesn't get
a lot of natural light. So when the sun is really
shining inside of my kitchen, I always take notice of it. I just really liked the
colors that were going on inside this photo and I've yet to make
a palette from it. Right away I know
that I have a lot of pretty greens and neutral
colors to pick from. For me this is going to
be a neutral palette, I can already feel it. I am going to slide
this over here and then I've got a fresh
pallet to get started with. I'm going to clear my history, and then we're going to go ahead and get started on
this one as well. [MUSIC] So as I'm working on my palette, I know that my cabinets are this really pretty color green. I know exactly the shade
of green that they are, but I'm not able to
really pick up that green in this photo. When I actually use the
eyedropper tool on this photo, it's green, but it's like a brown top with a
green undertone. It is not at all
what I really want. I am going to manually select a green that I know even
when we open it up, it's over here in the orange and our eyes are reading green. At least mine are. They might not be
through the screen, but I know that I can manually select the color green in my cabinets that
are in my kitchen, and I'm going to go
ahead and do that. Let's see if we can get
really close to the screen. They are a neutral color, and I do have a little
bit of yellow in them. That looks about
right, right there. That is actually closer to the color that the
cabinets are in real life. Maybe a little bit
muddier and lighter. I'm going to manually
select that color, and then I'm going to
give it a little partner. Something that I like to do is, if you want to focus on a certain color family and
you're only picking up one shade that you really
like in your photo, you can give it what
I call partners, which is you select that color. I'm going to go back and select that color and then I'm
just going to move it, hold onto it and just move
it down into the right. I'm just giving it a darker
version of that color. This is what they would
look like together and they play really nicely together.
They look really good. Then if you wanted to give
that darker one a partner, you would just move it down
even a little bit more, and then now we can see how beautifully those
all go together. If you wanted to create a monochrome palette where all the colors really played
nicely with each other. That's kind of how
you could do it, but I actually don't
want a dark green, so we're going to delete that. I am going to narrow this
palette down as well, and I will show you
the finished result. [MUSIC]
9. Palette 3: Unexpected: [MUSIC] This next color palette that we're going
to create together is something unexpected. You don't have to think
too hard about this, it can just be
something unexpected. You weren't really
taking the photo for the purpose of color, but then when you take a
second look at the color, you see how beautiful it is, or it can be color inspiration found in
a really unexpected place. I am going to go with
the first option for me. I snap a lot of photos
of my cats, like a lot. I have three cats and they are the cutest cats in
the world and they're always doing something
cute because that's what our pets do. When I was creating
my color album, I inserted this photo of
my cat lying in the sun, not an unusual thing
for a cat to do. But I look back on this
photo and I just see so much color inspiration
in this photo. This is my cat and she's lying on a rug in
our living room and the sunlight was
just washing over her, and she just looks so
blissful and happy, and I am so inspired by all the colors that
I see in this photo. That's not originally why
I snapped this photo. That's what I'm going
to use for this prompt. Let's move her over to the side. Then I've got a fresh
palette to start with. I'm going to clear my history, and then let's get started. It is going to be
really [LAUGHTER] hard to narrow those
one down because I can already tell that there
are so many pretty colors. I mean, where do you even start? Sometimes it's really hard to find exactly what
you're looking for, so you need to really get
up close so you can select the exact pixel that
you want to capture, and I still didn't get it. There we go. While we're here, I know that my rug has
some greens in it. They're really hard to
find, but once again, I know that just because I look at it every single
day and I've studied this rug so much that
I know there are green undertones in it, so I'm going to
try to find those. I'm specifically going
to set out for them, but if I can't find them that I might manually select the green. It looks like there's
some of them. They are going to be a
little bit hard to find, so we might have to
find them ourself, which is not a problem. Gosh, there's just
so many colors, I'm just getting distracted
by all the possibilities. I'm not finding any
greens in this palette, and I'm also not
going to find hardly any blue at all in this
palette, and that's okay. If you feel like your palette is leaning too much
in one direction, it's totally fine to add
some blues, add some greens. I'm going to add some blues, I think for this palette to ground it a little bit further, it's leaning a little
bit too earthy, and I know grounding
it sounds like I want to make it
even more earthy, but I actually just want
to balance it out and ground it so it's not too
far in one direction. What am I do is select one of the colors that's leaning
a little bit more green, and then even though it
says that it's orange, [LAUGHTER] it's not, it
leans a little bit green. I'm going to slide
around to the blues. If I just hover around
in the blue area, even in the green, and to the blue area, I can just leave everything
where it is and then I can select some blues that will be along the same tone as the colors that I
have been selecting. Then I can move it around
a little bit further. I really tend till
I really soft, muddy blue colors, those are sort favorites. I always hang out over in the left side when
it comes to blues. I also tend to do
that a lot with green and a lot with purple. For some reason,
that's what I like. I'm going to hang out
over there and then select a couple of these colors, and then I might go over to the purples as well. I've got a couple of wildcard
colors down there that I can use as I narrow down my palette and
then create a palette that looks really
nice and balanced. [MUSIC] I'm going to
go ahead and do that, and then I will show
you the final result.
10. Palette 4: Freestyle: [MUSIC] The final prompt that we're going to do
together for creating a palette is what I'm
calling freestyle. So I've gathered up some inspiration from
around my studio, I'm going to be using
my paint chips, but you can really use
anything you want, anything that's inspiring
you that you find in nature, in your home, at a store can be a photograph,
it can be anything. I'm going to move this out
of the way while we do that. I'm going to use these
that I showed you earlier, and then I've also got
a little painting here. This is a print of an original watercolor
that an artist in my hometown did and I
have that there really like some of the blues and
the pinks that are in this. Then I'm also going to take
some of my paint chips and they are no
longer nice and neat, but I think we can
figure it out. Let's go ahead and start with a brown and then I'm
really liking this green, it's similar to the
background of this, which is what I wanted. Actually, that pink is
really close as well, so let's start with these three. [NOISE] I'm going
to switch out this. This is more of a yellow gold and this is more of an ocher, like a really rich brownish gold with some green undertones. So let's start with these three. I like that I'm seeing
some blue here, like a more true blue. So let's try to pick
something out of our paint chips that
represents that color. Something that I'm
doing is I'm holding up colors to see how each color reacts with the other colors around it and that is really,
really helpful. This color plays really
nicely with each of these. So there's enough
contrast between these. I'm loving the contrast between this and then that's
really pretty as well. Then I've picked out this, it's called hearts
of palm and it's a really light green color that's muted and I
really like that. So I think for sure that
I want to use that coral. We definitely want
to make sure that we have some contrast. So we have dark of this color, but we might want to have
a dark of another color. I like that. I think I might like that. I think I would like to add
a purple in here as well, something that's not going
to interrupt anything else. Let's see if we can
start out with that. Also, I've got some really
pretty golden yellows that I feel could work really well too. So I'm going to start
with these colors. This is pretty normal
for my process, I'll just start
gathering up some colors and I really don't need
that many to get started. It's just a good
starting place for me right now and I'm going
to snap a photo on my iPad and then we're going to bring this photo into Procreate and we're going to start
pulling some colors and then that way
we can add more, we can take away, we can refine, we can
tweak, we can do all that. So I'm going to just
quickly snap a photo. This is a great starting point. I'm really excited about these, I've got a fresh color palette, and let's start picking
out our colors. What's going to be
great about this is since this is velvet, there's a lot of
variation going on here. So we've got the light
greens and then as we move we can just see
that the color changes, so that's going to be
really great to play with and make sure to grab
and least a light and a dark. I'm just going to
be very careful, so I can make sure to select ones that have enough
contrast in them. Let's move on to our pinks. I'm going to grab a light
from the velvet as well as a dark from the velvet too. Then I know what color I want
from this and it is that just true rich brown gold color that's a little bit more
brown than what I want, so we are going to manually just move it up a little bit and I'm going to take
it to the right, which means it's going to be a little bit richer of color, so we're just going
to delete that. Swatch and move that
one over and then I might do it again,
give it a partner, bring it up into the right and then just tap beside
it because that's going to be a nice color that's going to match
with that really well. Then let's grab just yellows, pretty easy to grab. We've got our colors here. We have 11, so I'd like
to make it an even 12. Let's add another color. I feel like we could add, say we have three greens, we have three yellows, we've got to mobs, we have one purple, so we could add a
dustier darker purple. Let's try that and then we can always tweak it if we don't
like how that one looks. [MUSIC]
11. Share your work: [MUSIC] In this video, I want to talk about
some creative ways to share your palettes. Once you've come up with
your color palettes, there are a lot of different really creative
and unique ways that you could showcase the colors
that you come up with. I'm going to share a couple
of ways that I have shared my color palettes with my Instagram community
in the past. The first of which is
to draw some circles or some creative little
brushstrokes or something on your document and
then to fill each of those with the colors
from your palette. You can leave it just like that, or you could take it
an extra step and use the text feature in Procreate to give each of your colors a name. I especially like to do
this when I'm thinking seasonally or I've created
a palette from a theme. Every month on Instagram, I create a color palette for that month and I'm
using names that go with things that
happened in my life or things that are happening in the season or that time of year, when I'm coming up with
the names and people always really seem to
like it and I'll ask, what's your favorite
name or what's your favorite color
and they always use the names are
in the palette, so that's a pretty fun way. Another way to share
your palate would be to create a piece of
artwork and then to showcase the colors
in your palette using little circles or squares just right beside that artwork, so that people can
see the inspiration that you started with when
you sat down to create. But I wanted to show
you a way that you can showcase the photographs that you used for your inspiration, as well as the color swatches
that you came up with right here inside of Procreate using some really cool
little shortcuts. The first thing
you want to do is decide which photo you want to use and you'll want
to make sure that you have that color
palette selected. I'm going to go down to my color palette and I'm going
to set that as my default. Then I want to insert that quilt photo
into this document. We're going to go to
the Insert a photo, go to albums, and then
grab that quilt photo. It's taking up a lot of this space right now so
I'm just going to slide it over until I have a
decent amount of space. You could do it one
side or the other. You could even do
a top or a bottom. If you wanted to have all of your swatches down here below, that's also an option as well. I'm going to create a brand
new layer and that's where all of the swatches from my
palette are going to go. I'd like them to be in
rectangles that are starting, touching almost my picture and then coming all
the way to the end. You could just use
the Quick Shapes tool to draw in a rectangle. That would work totally fine, but I like to get really
precise and I'm going to grab this ribbon selection tool. Then I'm going to
select rectangle, and that's going to allow me to draw a rectangle really easily. I'm just going to start
at the top corner and then pull down and
create a rectangle, and it doesn't really
matter what size it is, we're just getting that
rectangle created. You're still in this
selection mode right now. I want you to go ahead and fill it with the first
color in your palette. Let me go to disk. Mine is a really light color, so you're probably
not going to be able to see it very well on screen, but I'm just grabbing
it and dropping it. Now I'm going to tap
that and I'm going to be deselected from
that selection mode. Now I have my rectangle just like that and all
I have to do now is just duplicate and I'm going
to move that one down, then fill it with my next color. I want to count how
many colors I have. I have 16 colors
and I have two of these rectangles that I don't think I'm going to be
able to get 16 in here, but let's go ahead and try. You can play around with this. You might have less colors,
you might have more. If you need to resize. What we're going to do is I'm just pinch those two together. Let me show you that again. Got my layers open and
I'm going to pinch to combine the top rectangles
that I've created. I'm going to duplicate those and we're going to try to get 16 rectangles evenly spaced in here and if you
have magnetics on, that's going to be really easy. I'm going to pinch again. I'm going to have a total
of eight rectangles. This is just a
workaround in Procreate. This would be so much easier in a program like Adobe
Illustrator or Photoshop. But I'm just trying to
show you way you don't have to use any other
program but Procreate. Now I've got eight rectangles. I need to make it 16, so I'm going to pinch
those eight together. Then I'll be able
to size these up. I'm going to select free form, and that's going to allow
me to just grab the bottom. That looks like
it's about halfway. Let's duplicate again and
now we've got 16 rectangles, pinch those to combine those. I know this is a lot of steps, but you got to get creative
inside of Procreate. I'm going to extend these
down to the bottom. Just make sure that you
have free form selected. Now we've got 16 strips that
we can fill with color. I'm going to continue
filling these up. Not going to include one. I'll show you how we fix
that in just a minute. If you miss count or you've got one too many or one too few, you can use the same method of grabbing it and making sure
you've got free form on. If you're missing one,
you can just slide up until you've got room
for another one and then duplicate a rectangle from this grouping and
then move it down. In my case, I've got
one-to-many because I omitted a color as I was
filling up my swatches. I'm just going to
grab this and move it down. Just like that. Now I can deselect
it and it's going to look totally even and
just for spacing reasons, I'm going to tap to get
this where I want it to be. I've got the same amount of
white space on all sides. If you didn't know that
little trick in Procreate, if you're trying
to get something positioned really precisely, you can tap in the direction
that you want it to go and it will move
it pixel by pixel, which is really great
for precise placement. I'm going to tap
a few times top. Then I've got my quilt
color palette inspiration ready to share with the world. You could also add your
name somewhere on here if you want to
share this and then make sure that no one
is able to copy it. What I would do is I would add my logo in another program. You could also just add it into a new layer inside of Procreate. Then when you're ready to share, you just want to go to the
wrench icon click Share, and then you're
going to save it as a JPEG and you can
send it to your phone, you can send it to
your computer or wherever you post to Instagram. I can't wait to see
your color palettes. I am really excited to
see what you created and don't worry if this tutorial was a
little bit overwhelming. Like I said, I just want
you to be able to not have to leave for another program in order to put this together. Watch that video as many times as you need in order
to get the hang of it and you will be ready to share your
palate with the world. I can't wait to see it.
 Kiley Bennett, Artist + Online Educator