Transcripts
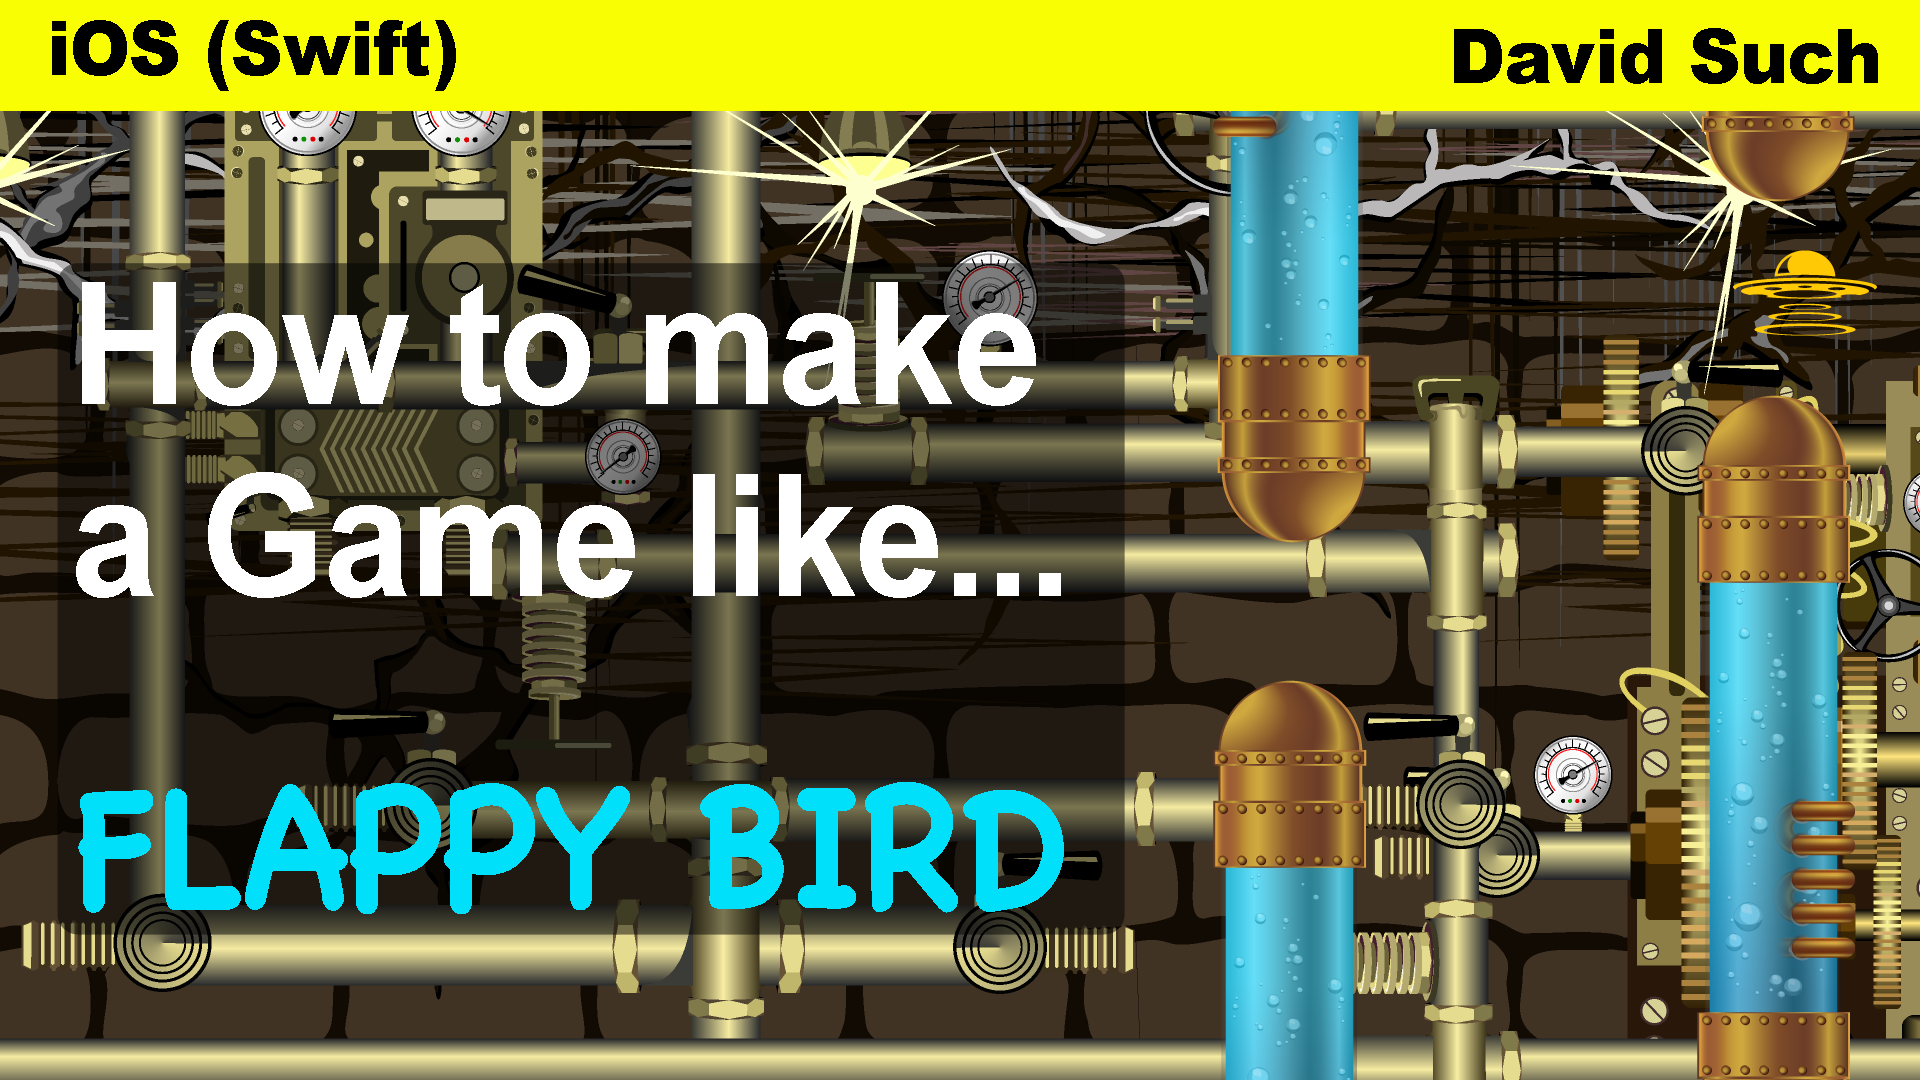
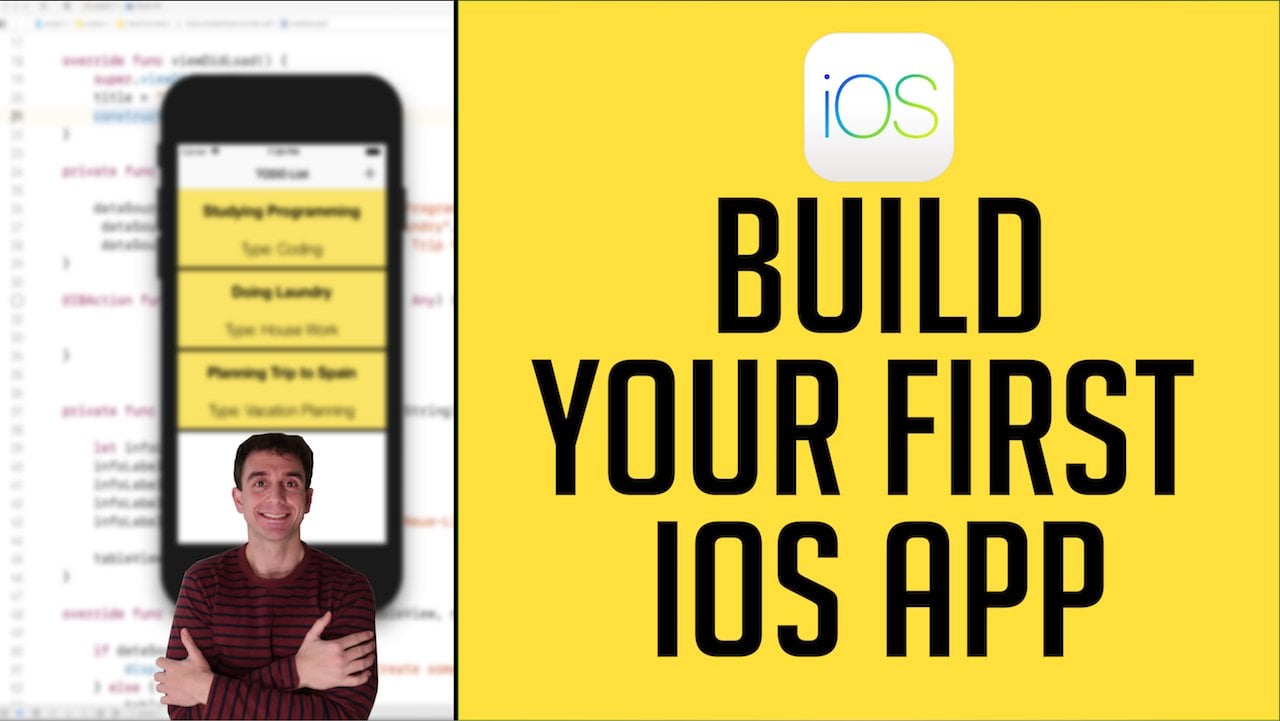
1. Lesson 1 - Introduction: David such and welcome to listen. One had to make a game like plenty food. It's version of the game that I built is called Drawing Explorer, and you can download a copy of this for free from the APP store. Wouldn't carried you to do this because they give you a good idea of what, before a version of the game will look like. The objective of this course is to build your own version of the game. To do that, you'll need to provide some graphics and sound affects. But don't worry if you're a rubbish illustrator, that's never stopped me. There's lots of free resource is which are available on the Net, and I'll tell you exactly what you need as we go along. Next up is a screen grab off the completed and just to give you again, an idea what the APP looks like once it's done. What I would like to do now is just give you a taste of what we'll be doing during each of the lessons, outline some of the prerequisite knowledge and summarize what you learn. By the end of the course, we could get stuck into the maiden tight eyes. To complete this course, you're going to need a copy of X Code. This is the apple developer environment and is available for free from the Apple Mac app store. So if you haven't got this already going downloaded at the end of this lesson, you will need it in listen to. I'm assuming that you have some familiarity with Swift, which is the programming language that we'll be using. I will be writing all the codes, so don't worry if you're not an expert, but I won't be stopping to explain how each line of code works. Otherwise, we'll be here all day. If you have any questions, then ask him in the project Sanction will be making extensive use of the game kid and Sprite kid frameworks. So again, it would be useful if you had some experience with this. All right, so what we're gonna cover in the course as we go along? Well, you've already done half a blessing one so well done, Ralph, way through that and listen to I'll take you through sitting up the project in x code and also show you how we can scroll a background image which will simulate movement. Well, then look at how you can add and move. The player using Sprite kit and similarly for obstacles will look at how you can use sprites to simulate those. Next up is collusion detection. In the old days, you would have to have Donald Model are heavy lifting for collision detection yourself. But now, with the spread kid and Game kid frameworks, Apple has done a lot of the hard work for you. The same is true or state machines with game kid. It's almost trivial to implement these, and they make it very easy to transition your game from one state to another. Well, they look at how you can save the players, score and display it, how we do a game menu and how we handled the game over state. By the end of this course, you will have learned the following had a scroll a background image to simulate movement, had a reply of physics body to a sprite and thereby allowed the world forces, for example, gravity to act upon it. You'll learn how to handle collision detection, which is very important for most games. You'll see how a typical game loop operates. Will talk about state machines, signing players scores, animating, moving and rotating. It's bright and adding sound and visual. Fix the sand on visual effects. Avery. Important by endless YSL Well, that's it for Lesson one well done on making it this far in Listen to, we'll talk about how you can scroll on image and simulate movement, thereby we'll also talk about how you set up the projector. Next code. Please follow along if you'd like to learn about what other courses are available, and I would encourage you to interact with the project section on the site. This is the area to ask questions. If you have any, I will refrain and respond to all the questions as we go along. Please use the project. Section two also applied your work. I'd love to see what you have created so far. Reviews are always appreciate. It help
2. Lesson 2 - Setting up the Project: such welcome to listen to how to make a game my fucking food. It's sweet in this lesson, but we're going to do Is Cracker makes code and rights and carried in particular? We look at the game loop and the different elements that are made up of that, and we'll add a foreground and background in each and talk about how the apple handled dips . By the end of the listen, your app. It looked like this. All right, start by opening up eggs code and create a new project. You want to check that I always is being selected up the top there, and then click on the gang template. Click next, and then you'll be prompted to us. But the product name. I use drone demo for this one, but you can call your game whatever you like. You want to check that the language selected is swift, not objective C, and that the game technology is brought kid. Click on next and you'll be prompted to save your game. Somewhere. I was group more together Next code projects folder, but you can side deals with you were. If you like, we can then try out the template that's provided in X code. Click on the play button, which is in the top left hand side of the screen that will open up the simulator and you'll see the APP displayed. It prints out Hello World and allowed you to draw on the screen. You never play around with that. If you like. All right to get rid of the signal, I'd I just click on it and then Tech Command Q. And that will remove it from the screen they were going to do is sit up the deployment information because we're using the iPhone just in portrait orientation. I want you to take off the landscape lived and landscape broad click bottoms There is showing. We also don't need the don't SKs falls, That is, game seemed on this case and actions, not SKs. So click on those and delete them. You have used interface builder before then s case files are like Deb files for interface Builder will be building a lot of their screams in code so we won't need these. We're now clean up the template code in the game. You control the class, so select that in the project navigator on the left. The first thing we need to do is insert a new function. Call view will lay out some fuse. The reason that we need to use this instead of you did load is the is the problem of you did load is that the view size may not have been set at the stage off the graphic life cycle. In other words, we don't know what the size of the screen is at that stage. So instead, we're gonna use the view will land some peace. Don't worry if you don of attends to into eternal this code all of the code. But we glided down in the project section for each one of the lessons. So you be other. Open those up and copy the code across the other thing we're gonna do while we here is Pixley supported interface orientations. So once we need our portrait and portrait upside dance, I just enterprises showing you NextCard We don't need to add three images to our asset component. So go in there and set up a new folder. I called it scenery once again. You can call it what you like. What we're gonna do is add three images to this folder. The 1st 1 will be the background image will, which will be scrolled along to simulate movement. The next one will be the Graham image, which will be static. And then the 3rd 1 is an image I've called bottom and thats required for the iPhone X size , which I'll show you shortly for the editorial. You can use the images provided, but if you want to do your own version of the APP, then you can replace these. My images are 1136 pixels wide. We checked three times. Resolution is 3408 pixels. The week there's not really critical as long as it's wider than the resolution of the biggest supported screen. So currently, at the moment that's 1242 pixels at three times resolution simply for the height. It's not critical but needs to cover the entire screen. So remember these three images that will be making up the entire scream, so the minimum height of those three images, added together at three times resolution, must be to 436 pixels to have the images just open up finder and dragged him across to the appropriate image set for smaller screen sizes. Thean Midge will be scoured down. The next step is to clean up the code in the games in class. So go ahead and click on that in the left hand side, Project Navigator and delete the material is showing. The easiest way to do this is probably to open up the game seen class, which is provided as part of the project and justly, which is different. You can then just add in the code that you require. Finally, we need to add a constant and two variables. The constant is the parent node, which is the Sprite node, which contains ALS, the other Sprite nodes within the scene. The variables are grand level, which is self explanatory and background heiple. So I feel like self explanatory. As you'll see shortly. This will make out code more flexible and allows to use different image sizes without having to change the code. We need to add another class with constant in it, so we'll take this opportunity to clean up the project, create a new folder called Classes, and they dragged the three existing swift classes into that folder. Well, now, add a new file, make sure that it's a swift file. Click next and call it constance dot swift. Click create and then copying the code that you'll find in the listen section of the project file. Head back to game seen dot swift, and then we'll add in the ed scenery function. This is the code which will display out background foreground and bottom images. All of these images are contained within the parent node, so we also need to add that to a saying. We need to call the function that adds air scenery and then we can try out what we've done so far. Well, that's it for Listen to in Listen. Three. What we'll do is we'll take those background images that we've added today and scroll those two senior like movement. If you have any questions, please and come into the projects, 16 below reviews are always appreciate it, and I look forward to seeing you next week
3. Lesson 3 - Scrolling the Background: I'm David such and welcome to listen. Three of how to make a gang like flipping booed in sweeped. In this lesson, what we're gonna do is scroll the background to simulate movement. We're also going to start populating the update function off the game or the end of the lesson. Europe will look something like this before getting into the code. Let's have a look at the theory behind how this all works. This white rectangle represents an iPhone screen will start with the S E because that's a smaller screen that we're gonna have to deal with now. We overlay the background ground and bottom images notice that the bottom image doesn't even appear on the iPhone etc. Screen. However, we now overlay the iPhone X scream. You can see why this is required. If you look at the ad scenery function in our game same class, you'll see that were actually heading two of each one of the images. Why is that? The reason is this is how the illusion of movement is performed. Each one of the images is moved from the right to the left, making it look like out playing character is moving in the opposite direction. When the images move off the iPhone screen, we pick them up and put them down at the end again, creating the illusion off infinite movement. Okay, let's say we do all this in code. We're gonna be altering the game seen class. So go ahead and open that up. Being X code, the first thing we need to do is add three new variables. They're called velocity, which is thespian, that your Sprite character is going to be moving over the ground. It's emotional value, which will sit to 100 initially, and we can play around with that as we go along. We're also gonna need Delta time and last time we use these within the update function to keep track of how long it's been since we last rendered a screen. You can see in the Ed Senior remitted that we're using This four loop toe had two copies of each one of the images the ground background and bottom images that you see named here exactly the same as those we showed in the animation. Naming the Sprite notes makes it very easy for us to refer to them. Another part of that code. This will come in very handy shortly. That said, the updates scenery method. This function grabs all the Sprite node in the parent node and its rates. Through them, we can teach Noto a sprite node to get access to the size variable we take. The widowed with God has done an obstacle. Everything else has moved to the left. The amount that it's moved is based on how long it's been since we've last moved it. This keeps the animation smooth. Finally, we check whether the scenery is going off the screen, and if so, we move it to the right so I can begin again. The update method in sync It is called once before I'm This is a good place for us to assign our delta time and last time variables. Delta Time. It's the time between each frame being rendered within uses, an update scenery to ensure that the animation is smooth. The last thing we need to do here is called our new updates Scenery method. Let's take it How I knew code works. Click on the play button in the top left hand corner of X code to compile and run the new app. You should see something like this. Well, that's it for Listen. Three in Listen four. We're going to add the player character to the screen and then had to move it. Don't forget to follow me. If you have any questions, then ask them in the project section, please update.
4. Lesson 4 - Adding the Player: I am David such and welcome to listen before we had to make a game like Flappy Bird in Swift and listen for we're going to cover is adding the player character, Sprite. We also learned how to move that that spot around the screen. By the end of Listen, your apple looks something like this once again before getting stuff into the common. Let's cover some quick background on the game plan. Keep Framework Gameplay. Kid comes with a number of useful functions. This includes entities and components, state machines, artificial intelligence, part finding raid, immunization and rule systems. In our game, we were using introducing components, state machines and radicalization that they're looking into these components in a bit more detail into. These are based on G can into the class, and they represent things like your player obstacles or enemies. Components of blocks of code, which could be used by one or more entity in our guy, will have a movement component and a visual compartment. Notice that the drone entity uses both of these. But the obstacle unity uses the visual component. Obviously, articles don't move in this guy. Let's see how we get into this in the car. The first thing to do is create two new groups, physical entities and components. Now click on the components group and another new suite for this one should be called the Your Compartment. Still in the component and another sweet fall called Movement Combined in the end of the group created Niece, We fall. I call mine Drone 80 but you can call us whatever you like Player Entity would have ever likes to your guy. The next thing is the population. Drawing into the grass. I got a call from a frantic section Nimal Ranch. The first thing we need to do is import. The SWAT team and gang plan keep frameworks will be doing those within the drawing entity defined two new variables. Video component and the movement combining just like in Seoul earlier notice it is part of the visualization passing a string. The name of the street will be used as the texture for asked right bone associated with this entity we could know at the moment video component is used to set the stage for the spot. Next up is the movement compartment. We need to get access to this right now. because that's what we'll apply. The movement involves two. We define two variables as well. Exposition and the grand middle the exposition defines were spiteful, displayed the same and the ground level gets past him from the main gang State class in the applying movement function were assigned the exposition variable to the Sprite narrowed Exposition. This isn't changing at the moment. So despite my position, will stay static. Finally, the update function for this component just passes in the applied movement with the number of seconds since its last thing called in back to the games in class and will pull all this together. The first step is to have a new constant which contained to have drowned entity. This is where we passing the name of the image which will be displayed on s broad. Next, we had a new function called Ed Drone This six up and running entity open up assets and dragging your drone image Our images 1 44 times 86 pixels for the three times resolution. When you've done that, it back to the game, same cost and we could head and you function had drunk one thing off. But to do was to name the drawing Image file. So hit back to a state. Do that now. The last thing we have to do is to call the drone up method from the update Method Games, Kabbalah in Europe. And then you could see a new drink. Sprite displayed about schooling background in the simulator. Well, that's it for lesson For In listen. Five will generate obstacles and add them to the game, saying, once again, if you got any questions, asked him down below, Please follow along and upload. Your project is a year long so I can see what you're made of, so you make.
5. Lesson 5 - Adding Obstacles: Hi, I'm David such and welcome to listen for and had a like a game like flipping booed in Swift Listen, five would get a cover Obstacles generating scorning them and displaying on the scene will be using the random ization function that we talked about in the last lesson. We just part of gang blanket. By the end of lesson, Europe looks something like this. Remember this slide from listen for what we're gonna do is create the obstacle entity. Remember, it's only got a visual component, not a movement component, right? Open up X code. And in the interdict group, what we want to do is create a new swift file called Obstacle Entity. Once you've created this file, copy the code across from this month's project section. You'll notice that the obstacle entity carried is very similar to the card that we had for the drone entity. Noticed that X Code is throwing up a warning for the Sprite node Constant. That's because we're not using it at the moment, but we will be shortly right. Let's born some obstacles, click on game scene, and then what we're gonna do now is add a new helper function called create obstacle. We're gonna be creating a lot of obstacles, so this will make it easier as we go forward. What the create obstacle function does is create a new S case. Bright note obstacle. We will create a period these at the top and bottom of the screen at random intervals over in Constant start Swift. We're gonna add two new CD float extensions which will make out code more readable. They are degrees to Iranians in clamp. We're gonna use the degrees to Iranians in this lesson. But what we're using clamp shortly back in game scene, we can now add three new Constance The obstacle Minsk, Al and next scale to find how high are tubes will be and they get multiple are defined. How big the gap will be between the two tubes. Next up is the ad obstacle function. This uses their create obstacle helper function to create a bottom of sickle and a top obstacle. We're using the random ization functions from gameplay kit to give our tubes of variable height. I noticed that for the top obstacle, we rotated 180 degrees for simplicity. We combine these two obstacles into one pain owed within creators sequence, which we apply to this pain node, which will move the obstacles at the same speed as the background. Let's head to New Constance. The initial spawn delay and the on goings form delay now ed in the Spawn obstacle and the stop schooling obstacle functions. Once the spawn obstacle function is called, it will continually create new obstacles on the screen at Variable Heights. We're not using the stops born function yet, but we will be finally up in the didn't move function. Let's call their new spawn obstacle method. We, of course, have to add the image that we're going to display on an obstacle Sprite note. Click on the Assets folder and then add a new image it said called Tube Zero pregnant across. And then we could try out our Web so far, click the X Code play button to compile the code and run it in the simulator. After the initial spawn delays, obstacles will start appearing and scrolling along the screen. You'll see that there are various heights as poor, a random ization function at the moment. Out Drone is just cruising through the obstacles, but we'll fix it up next lesson. That's a lesson five in Listen six, we're gonna be covering physics and collision detection in particular, will be adding gravity to our app, which will allow our drone fall and will also be other detect when the drone collides with obstacles. If you've got any questions, then ask him down below. Follow along and I look forward to seeing you next, listen.
6. Lesson 6 - Physics & Collision Detection: Hi, I'm David such and welcome to listen. Six in how to make a game like Flappy bird in Swift. In this Listen, we're gonna be covering physics and collision detection. So in particular, we're gonna be adding physics body to our sprite. Note our drone sprite. There's allow us to have gravity have an effect on it will also then be up to use the collision detection framework to detect Win Drone collides with an obstacle. By the end of the lesson, Europe will look something like this to apply physics and collision detection to our there are three things that we want to keep track off the ground, the drone or the player and the obstacles in spite, kid heading physics is a simple is adding a physics body to a sprite note. There are lots of ways to do this for our drone and obstacle. The physics body will be defined by the image texture off the sprite node for the ground will use an edge based on two points. In other words, a line to represent the physics body. I think the best way to understand this is a polluted and carried so crack open it carried , and let's have a look in the constants dot swift file. We need to add a new physics category enough. These will be assigned to our various physics bodies, and we'll make it easy for us to determine what has crashed into what head back to game seen and will turn gravity on and assign a new contact delegate. This contact delegate will be called whenever a collision is detected. Mixed up will create a new function, which will add out. Graham Physics, as mentioned earlier, will do this by using an age defined by the grand level. After assigning the cat really big mask, we can assign this new node to a parent mode. Next is a physics contact delegate. This is where the magic happens, and we determine what happens when our drone, it's either the ground or an obstacle. At the moment, we're just gonna print out to the debate console, but in later lessons will do something a bit more exciting. Let's fix up this era. The problem is that the game seen class doesn't know that it needs to conform to the SK Physics Contact delegate. We need to tell it to do that click on drying entity, and we can attach the physics body. First of all, we create a new physics body, which is the same size as the image texture. We assigned the drone category. Big mask toe. Identify this object as the drone in collisions. The collision Big mask defines what categories of objects. This note should collide with the contact test Big mask to find switch collisions we want to be notified about now. We need to do the same thing to the Obstacle entity. It operates the same as the drone entity, but the categories are different. Of course, we're about ready to try out the code for this list. There's one more thing that we need to do. Head back to game scene and adding the ad Graham physics method to the did move function. Cook on the play button, the next code to compile and run Europe in the simulator. You can see when the F runs now that it immediately falls to the ground due to gravity. You can also see the physics contact delegate method working by the messages being printed in the divan console. That's it for listen, seeks in Listen. Seven. We're gonna be covering the game. State Machine in particular, will be looking at how we transition 21 states and how we persist. The game's tied. If you got any questions, ask them down below. Follow along and I'll see you next lesson.
7. Lesson 7 - The Game State Machine: I'm David Subject and welcome to listen seven and had to make a game like Flappy booed in Swift. In this lesson, we're gonna be looking at state machines. How will assist the games tight Now, a transition between various games states. By the end of this, listen directly. Something like this. A state machine is a collection of objects that each defined logic for a particular state of gameplay and rules for transitioning between states. They're useful because they reduce the complexity of managing again in game play. Cute, we subclass G K State to define each state and the rules allowed for transitions between states. The state machine for our game is showing in this slide. Each box shows again, state and the arrows indicate allowed transitions between states. Let's go and create this in code. First, we'll create a new state, I told these. Create a new group called Game States, then create five new sweet files. They should be called Crash State Game over state playing state May menu state and Tutorial State Copy and paste the code for each of the five G K state sub classes. As usual, you can copy the code from the project section of this lesson, you should recognize thes state names from the slide earlier. Each state class has functions, which to find what happens when we enter the state. When we leave the state and when update is cooled within the state. Let's fix this era because we haven't defined the rebound, function it over to the movement component class and editing as shown during testing, I found that the drone could get stuck on a column if it didn't rebound slightly from it when it had a collision. That's what this function is useful, in fact, the game scene and let's add our state machine variable. We moved a lot of the initialization calls into the playing state class. Consequently, we need to remove these from did move and enter into our state machine in the playing state simply for uptight. The's update methods are now managed by the state class. Make sure you remove updates, scenery, and then we contested a rabbit still working notice that we're getting errors because we're trying to call sand falls that we haven't added to the project yet. Let's fix it now. You can only use the sound effects that I provide. You can provide your own great a new group called Santa Fix and then just dragged the falls in. Make sure that copy items, if needed and enter targets are both selected. We need to update our escape physics contact elegant so that it uses their new state machine. Notice it out. Santa thinks they're now working. It's difficult to get an idea of what our state machine is doing if our drone immediately crashes into the ground. So let's edit a touch method, which will give the drone some height every time you take the screen. Copy the code showing in the touches. Begin function at the moment. If we're in the plane state, we're providing an upward impulse. Every time the user taps the screen, compile the code and then you can try this out by tapping on the simulator scream, You get a new passport. Well, that seems for listen seven in Listen night. We're gonna be looking at how we site plan school and this is at school. Thanks for calling along. And if you have any questions, ask them down below. Please upload your projects as we go along, and I look forward to see you next week.
8. Lesson 8 - Keeping Score: I own David subs and welcome to listen night. He had to make a game like Flappy Bird in Swift. In this listen, we're gonna learn how to persist and record the players school. By the end of lesson, you wrap. It looks something like these, right? Let's head scoring to a game, open a big scope and head down to gain seen. The first thing we're gonna do is add two new Constance. The 1st 1 is called front name, which will contain the name of their fund. Naturally enough, the next one is called Score Action, which will play a sound every time we score another point. Knicks will have three variables. The first one's called score, which will contain the school value. The next one's called School Node, which is the label which will display the school. And the 3rd 1 is top margin, which allows us to place the score in the same position every time. Now score action requires a sound effect for also go ahead and add that in now. The new function ed score will build the score node required to display the school number hit up applying state. This is where we will call the Ed school function. Let's just at the school. Hit the play button to running, compile and view the up in the team later. Hey, the school's not being shown. Why is that? If we go back to the ed school function, you can see that we using this color called interface color, which we haven't defined. This is why the score isn't being displayed. Director part is, open up acids great and you folder. I called mine Caliph al it and then add a new color sit click on the color to select the color that you want to use. I'm just using white because it contrasts nicely with my background finally renamed the color to interface color. That way we can reuse this, come up whenever we want to field and run the APP, and this time you should be out of see the school. We want to increment the score every time the drone passes a set of columns. To do this, we're going to create an invisible Sprite note trip wire. Although invisible, we're going to attach a physics body so we can detect whenever the drone collides with this trip wire in this example, I've made the trip wires visible so you can see how it works. That's no implement these in code open up, obstacle entity. We're gonna create a new parameter called detection. You'll see why shortly for obstacles that we want to detect when the drone passes, we're gonna add this new invisible sprite note that we spoke about. If you want to see the triple Eyes yourself just uncommon. The color statement. Meghan Game scene Find the create obstacles function and ending this new detection parameter. We need to do the same in Ed Obstacle Notice that we're only adding detection on the bottom obstacle If we didn't do this with beginning double detection every time we passed a pair of columns. Now that we have these detections right nodes, we need to do something when we collide with them. Tsk. Physics. Contact Delegate is where we handle this when we detect a collision. We removed the trip wire note from the parent node. We implement the school and we play a sound. Let's create a help. A function called update school, which will display the current school number. Then in the plane state update function who call updates school. Okay, let's take out code for a spin. And there you have a functional scoring feel game, but that to hallucinate and listen. Nine, we're gonna be creating the gang menu displaying that. You got any questions? Asked him down below. Don't think it dropped your projects and I'll see you next. Listen.
9. Lesson 9 - Main Menu and Tutorial: by David Such and welcome to listen, knowing how to make a game like flappy food in Swift Listen. Nine. We're gonna learn how to do a gang menu and display it by the end of the listen. Europe look something like this back in Listen seven. We introduced the G K State machine in this listen will be filling in the code for the main menu state and the tutorial state. Let's start with the main menu State code. You get a copy of this code in the Listen nine project section. The major change is the ed main menu function. This adds a number of Sprite nodes, which represent the buttons and images showing on the main menu. The User Data Dictionary allows us to determine which button has been pressed. We want to call the admin you function when we entered this state. Then when we exit the state, we need to remove all the spite notes that we just added. Knicks will complete the tutorial state code based in the new Function Ed tutorial as showing once again, we're using a couple of Sprite notes to display our images. When we enter the tutorial state, we want to call the editorial function, and as we exit the state, we need to delete those same sprite nodes. This should be a familiar pattern by now. To make our code more readable, we're going to create a new button type structure. This should be placed in the Constance far. We will use these labels to determine which button has been pressed. Now's a good time to and our images for the main menu and tutorial screens. Open up assets and drag these images in there showing for the purposes of the tutorial. You're welcome to use the images found in the project section of this lesson for Europe, though you're gonna one original images back and game scene. We're going to need the ability to create a new scene with a defined playing state to do. This will start by creating a new variable called initial state. We will also need a new initialized function for the class. Go ahead and put this in then down in the did move function. We also want to use our initial state variable to enter the state machine. Now go to the game view controller where we create that scene constant we need to add the initial state parameter that we added in the game Seen class that can gain scene. Let's define, restart action and display action. Both of these action methods just play a sound when required. We might as well add the sand falls Now before we forget. Second game seen scroll down and will add a new function, which we will call when we want to restart out game in restart game. We using a color called backing color that's going to find that now once again, to enhance readability in the constant file at a new structure called Keys. These will be used for saving our high school and for defining the button. Type in s bright notes second game scene Find the touches began Method Paste in the code that use their new game states the main menu state and the tutorial state. This updated function also uses the new restart game function that we defined. Notice the errors that were getting in the debug console. I forgot to define the drone zero image, so let's go and do that. Now click on assets creating new image set. Call it drone zero and then drag your image across. Okay. Now for the exciting bit. Build and run the app in the simulator, and you should have the new main menu displayed. At the moment. Only the play in tutorial buttons work, but we'll get the other buttons working in the next lesson. Well, that's people. Listen. Nine. Listen, 10 we're gonna be able to handle the gang over state. If you have any questions, please ask them down below and don't get dropped at your projects. I'll see you next week.
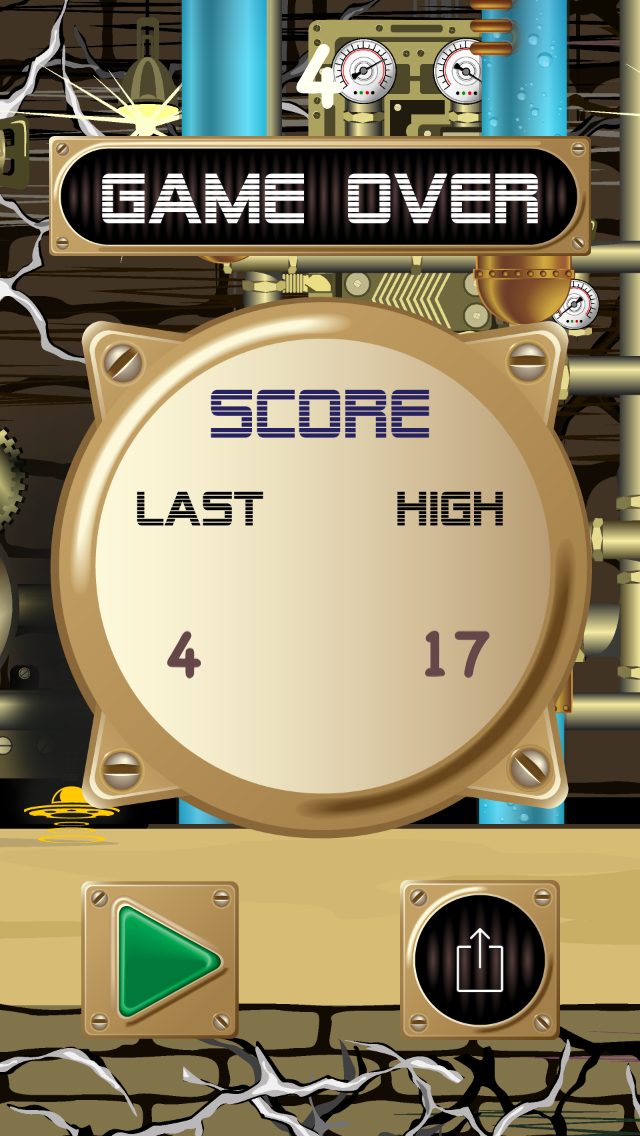
10. Lesson 10 - Game Over Man!: I'm David such and welcome to listen 10 and had to make a game like Flappy booed in Swift and Listen. 10. We learned how to handle the game over state. By the end of listen, your apple look something like this back to our state machine diagram in this. Listen, we're gonna handle the game. Overstate. Notice that we enter the game. Overstate from the Crest eight and then from this state, we can either go to the playing state or the main menu state On the game over screen, he displayed both the last score in the higher school. In order to do this, we need to store the higher score somewhere in issues. Defaults is the simplest way to get data persistence between Apple launches. It has its limitations, but it's ideal for storing small bits of Diana You were, though it is possible to heck in issues of defaults and adjust the values. Consequently, you wouldn't use this in the commercial game for your high school. We're gonna create to help of functions which will save and retrieve high school from in its use defaults, click on the game, overstate and will add those two helper functions we were just talking about. Next up is the show's school function, his heads to Sprite nodes for the background, the buttons and the images. It also adds the labels for the last school and for the high school. We want to call the show school function. When we enter the game over state, we're gonna need to add the game over images if we wanted to spy them. So click on the Essence folder and add a new folder called Game Over. Within the game over Folder, you'll need four. New Image sits thes air called Game Over OK, button school background and sheer button finally drag into your project. The appropriate image rights outstanding. Let's build and run out up in the simulator. Click on the play button and let's see how far I could get. Obviously, no very far. Notice that the last school in the high school, about zero at this stage, click on the play button and we'll try again this storm into marginally better and the last in high score displayed appropriately. So far, so good. That's people Listen, Team Listen. 11 Looking online had put some sizzle on the guy you got the questions. Don't forget to ask him down below for long. And don't forget to update your project As we go, we'll see you next lesson.
11. Lesson 11 - Slapping on some Sizzle: way. Hi, I'm David. Such and welcome to listen a living and how to make a game like flappy food in Swift. In this lesson, we're gonna have a good a sizzle sizzle those things in your game which differentiate it from other games. It's things like particle fix an animation. But into this Listen, you Appleby complete and will look something like this. Alrighty. Then let's slap on some sizzle. We're going to start with the gang scene class to provide the functionality for the sheer button you're gonna need to new functions who provide those by at the game. Seen delegate protocol thistles defined above the game. Seen classes showing to access this create a new variable called Game Seen Delegate Thin Update the game seen initialized function to pass in this parameter. We also assign this to a instance variable here. Then, in the update function update, the drone movement component said that we pass in the current state. You'll see why shortly now scroll down to the touches begin function. We want to call the appropriate function when the info rate and sheer buttons are kept. Well, let these functions shortly down Dannon and drone. We're going to animate our drone image. This is easily achieved Using a series of Sprite image is similarly for the tube obstacle. We're going to do a bubble animation. Finally, we're letting our three new delegate fun choose. She is school right app and info link in the Constance file with added two new your URLs, which will be using as links for the drone and two of animations you're gonna need to new Sprite. Atlas is dragged across the appropriate images into these. You're also going to want a copy across the particle of fixed we're gonna use for the smoke and haze. Okay, Now move across to the game view, Control up. The first thing we need to do is indicate that this class conforms with the game saying, Delegate, when we create the new seen constant, we want to pass this delicate across. The last thing we need to do here is to add the game seen delegate methods. They're two a days screenshot and share string. Right now it's time to pimp up the crash day. Add the two new effect functions, showing one of them will flash the screen and the other one will simulate the screen shaking. This will make out pressures a bit more dramatic. Click on the deed, Inter function and well under night. These newer fix. We're also gonna add a particle effect here so that when the drone crashes, it looks like smoke's coming out of it. Next up is the game over State moved to the bottom of the show score function and paste in the code is showing. Basically, what this is doing is animating in all of the sprites, which make up the game overseen. We're going to do something similar with the main menu state. Go to the main menu function and posting the code from Listen 11. You'll see that were animating the drone using else bright but headless were also scaling it up by about 50%. The other thing that we're doing is we're continuously moving the drone on and off the screen. Finally, we're adding a sort of hazy particle effect as well. The last bit of sizzle we're gonna apply is around the drone movement. The natural place to do this is in the movement component, so head over there. Now the idea is we want the drone to talk to indicate which direction it's heading. So if it's climbing, it tilts up. And if it's falling, it tilts down. We will apply a small rotation to the drone. Sprite to achieve this effect. Doesn't were using your clamping function to limit how far each way the drone will tilt. The last modification we gotta do is just limit when the drone could move to win it in the blind state. Outstanding. We're now ready for the final building run of their Web. Far up the simulator. Let's check it out. Sizzle. You can see the particle effect around out drone on the main menu when the drone crashers, which for the screen shake flash and in billowing smoke. You'll also see the game over screen animating nicely. Check out the other buttons like info to make sure that they're working properly. Well, that's it. But let's do it well done on completing the air. Listen, 12 to look at ways to From here in particular, we look at some things you don't want to think about adding to Europe. Headline the absolution procedure Get to form along if you haven't done so already. Please upload your projects. I could see what you've created. And if you enjoy the course, reviews always appreciated. Thanks very much. And so you next lesson.
12. Lesson 12 - Publishing and What's Next?: I am David such and welcome to listen 12 and make a game like Flappy Bird in Swift and listen 12. We'll look at some of the other things you might consider adding to your app to personalize . It will also outline the absolution profile for the APP store way have completed the APP in terms of our project, but it isn't really in a state suitable for commercial release. There's nothing really new that we need. From a technical perspective. Players expect a lot more meat on the game bones these days. It would be unusual for a successful game to have anyone level. That is the first place that I statist that you start. You can use the state machine to transition between levels based on something like the score. Each level could have a different background or challenges. Which brings me to the next point. To continue to engage your users, you need to progressively increase for difficulty or they'll get bored. There was quite an hour to doing this. Two ways that you can increase the difficulty are either to increase the drone speed or to increase or to decrease the gap between the columns or both the get multiplier is a constant at the moment, but changing that to a variable is simple. Another way to improve engagement with Europe is to introduce achievements. These could be something like virtual badges that come in your ship designs or possibly points, which the player can use to enhance their drone. For example, shields or extra lives. He could even unlock new levels based on achievements For your new levels, you might want to introduce something like moving obstacles. You'll need to add a movement component to your obstacle entity, but this demonstrates the flexibility off the entity component system he made in fireball streaming across the screen. That would certainly liven things up. You could also adjust the physics. Changing gravity would make life difficult for the player, or you could introduce obstacles that they can bounce off. You could even consider our multiplayer version of the game. Finally, different loves explosions. We might even want to add weather affects like fog, rain and snow. I'm just going to outline the EP submission process as you could do an entire course on this subject alone. In order to submit an app to the APP store, you need a paid developer account. Search for the EPO developer account, and you'll end up with this location. There are four different developer camp types. Free individual organization and enterprise free is no good. Vaccination and enterprises ended in the house distribution so we can ignore those. Usually you'll be choosing between an individual account and an organization account. It is more work to open up and leave no an organization account. So you would only do this if you have a company and want to do app development. It's a business for most people. An individual account will be fine. You can use this for commercial work as well if you want. But if this is the case he made there, maybe text benefits to using a company. See your captain for advice. At the moment, the cost for an individual and an organization account is executive sign Nobody knowing US dollars. I know that you need to be over 18 toe. Open an individual account and you will need a Duns number type in an organization account . Duns number is a dun and Bradstreet number in Australia. If you haven't Abyan, you'll automatically be assigned Duns number shooting that you now have you paid developer account details. Let's go in Logan. Click on account and then into your user name and password when prompted. In order to distribute your apps on the APP store, they need to be signed with a digital certificate. You can set this up in certificates, identify us and profiles. You usually have one for development and one for distribution. You need to renew them every year. This used to be a very painful process, but it is getting easier. Each app that you want to submit also needs a nap. I d. You can create these under identifies EP I D is showing Click on the plus in the top right hand corner to add a new I. D. You'll need to enter in the name and I d. The name isn't important, but the I D usually follows the reverse to my name format. This assumes you have a website to mine and is designed to be unique. So, for example, my company domain is refilling dot com dot au, So the I D for a Drone Explorer is a u dot com dot refilling dot drone explorer. If you don't have a domain just prefix the i d with something unique. Next we need to goto appstore connect. This used to be called iTunes Connect. As you can see, we can do lots of things in here, but the one that we're interested in is my abs to any new app. Click on the plus button in the top left hand corner. You'll be prompted for the app I D that you just created. The first tab pertains to general app information. This includes things like the app, name and category. It will be stored under in the APP store, for example, games all utilities next tab deals with pricing and availability. He can set what price tier to sell your pet the value of each price. T it is indicated in your local currency. You can also determine which countries Europe will be available in. This is handy if you're providing functionality that only works in certain countries. The button below Kwai Os app will indicate the current status of Europe, for example, ready for submission already for Sile etcetera. Click on this to upload your screen shots. You need at least one screenshot for the 5.5 inch 5.8 inch and 12.9 inch displays. Because the iPad can run, iPhone helps you have to include an iPad screen shot, even if the APP was designed only for the I find like ours wars. The promotional text is used mostly for saying What is new and UNEP update. The description is where you should with the details of what Europe does. You can also provide keywords to help people find Europe when surging, and a website URL for support and marketing. Once you've uploaded the build of Europe, you can add it in here. I will show you how to upload the EP build from Exco next. After filling all this in head back up to the top of the page and where there is a save button on my screen, you will see submit. Click on this and follow the prompts. The approval price has gotten much quicker and now is usually around a day or less. You need to upload a build of your app. Five. X code. The process is fairly simple. Firstly, select generic IOS device in the toolbar as showing then in the Menu Bar Click Product Archive. This will bring up a new screen, click on upload toe app, store on the right hand side and follow the prompts. It takes a little while for AP connect to process the build you get Neymar when it is finished. Once you have the A Mao, look back into APP, iTunes. Connect my abs and had the builders shown previously. You will then be Albert Smith. You're up for review by Apple. If you have any questions about this process or get stuck, then leave a comment below and I'll provide more detail. Well, that's it for the listen and that's it cools little down. If you got the questions, please out some down below. Comments always appreciate it. If you enjoy the coolest and please leave a review, don't forget to follow along, and I look forward to seeing you in the next course.
 David Such, iOS Developer, IoT Trainer