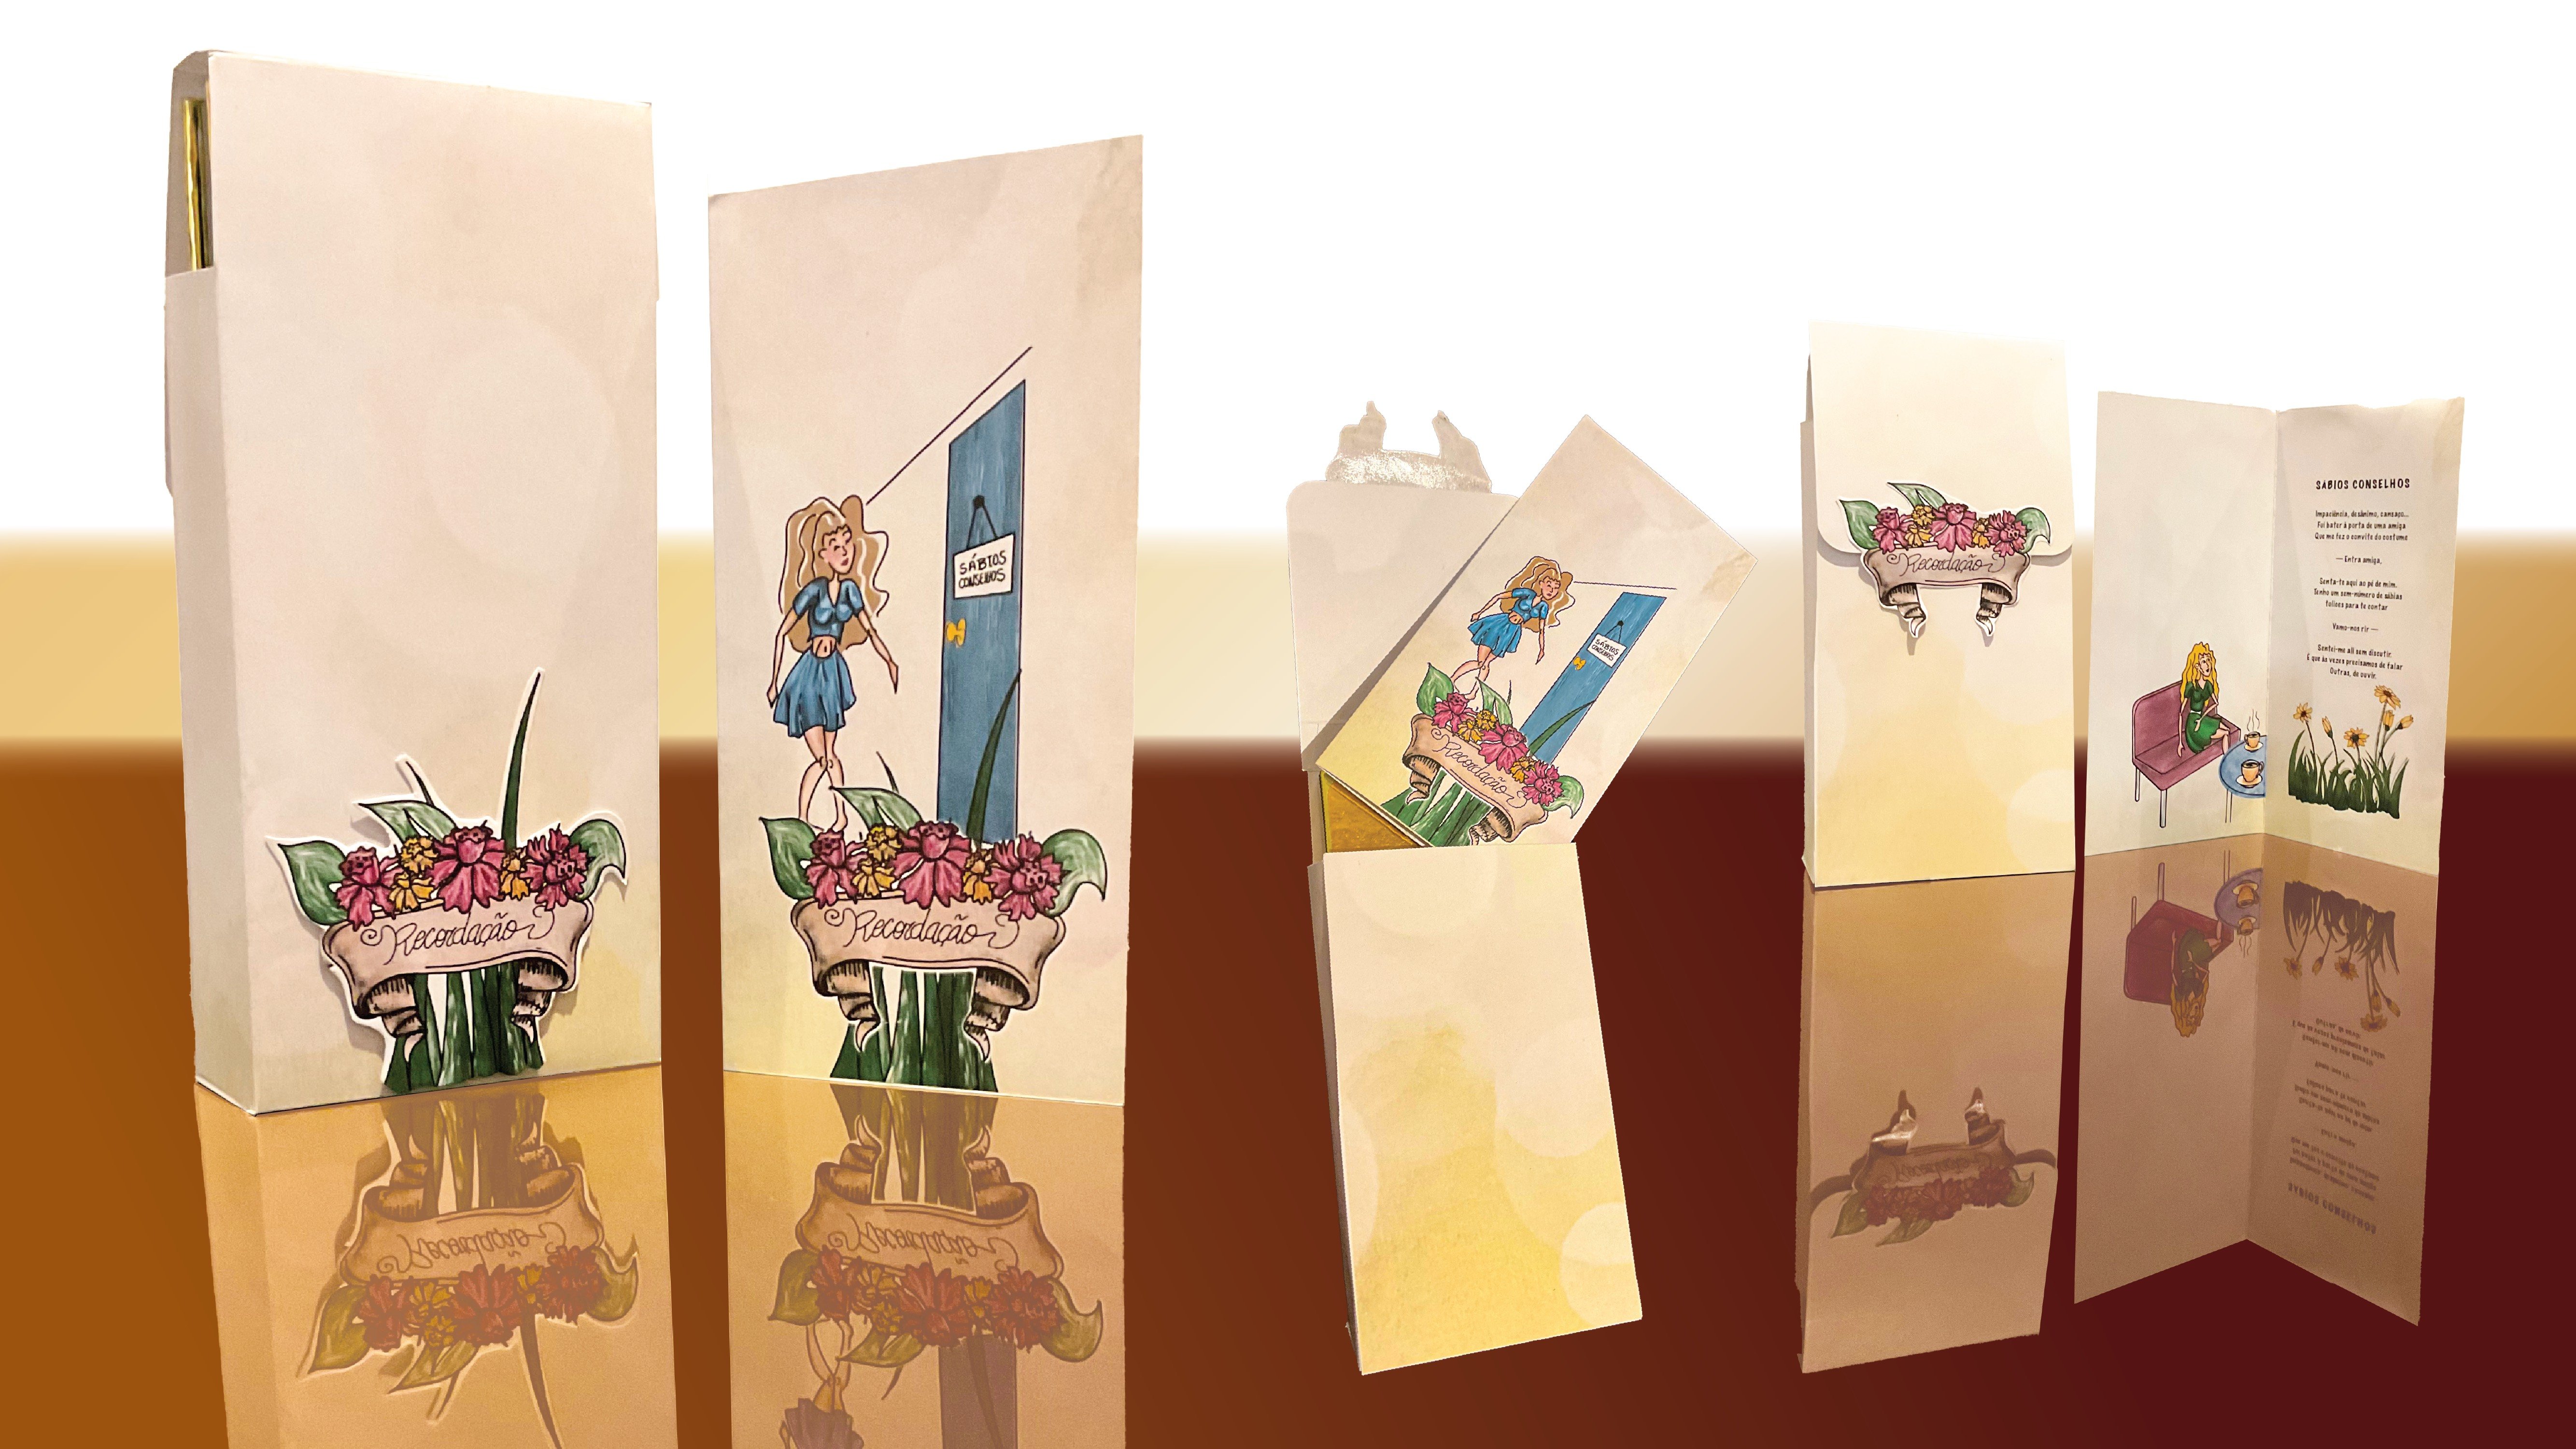
FUN WITH PAPER CUTS AND TEXTURE
 Lia D., Visual Designer & Content Creator
Watch this class and thousands more
Watch this class and thousands more
Lessons in This Class
-
-
1.
Intro
1:43
-
2.
Materials
1:03
-
3.
Sketching and drawing
2:15
-
4.
Cutting
1:42
-
5.
Coloring
3:28
-
6.
Final
1:14
-
-
- --
- Beginner level
- Intermediate level
- Advanced level
- All levels
Community Generated
The level is determined by a majority opinion of students who have reviewed this class. The teacher's recommendation is shown until at least 5 student responses are collected.
46
Students
--
Projects
About This Class
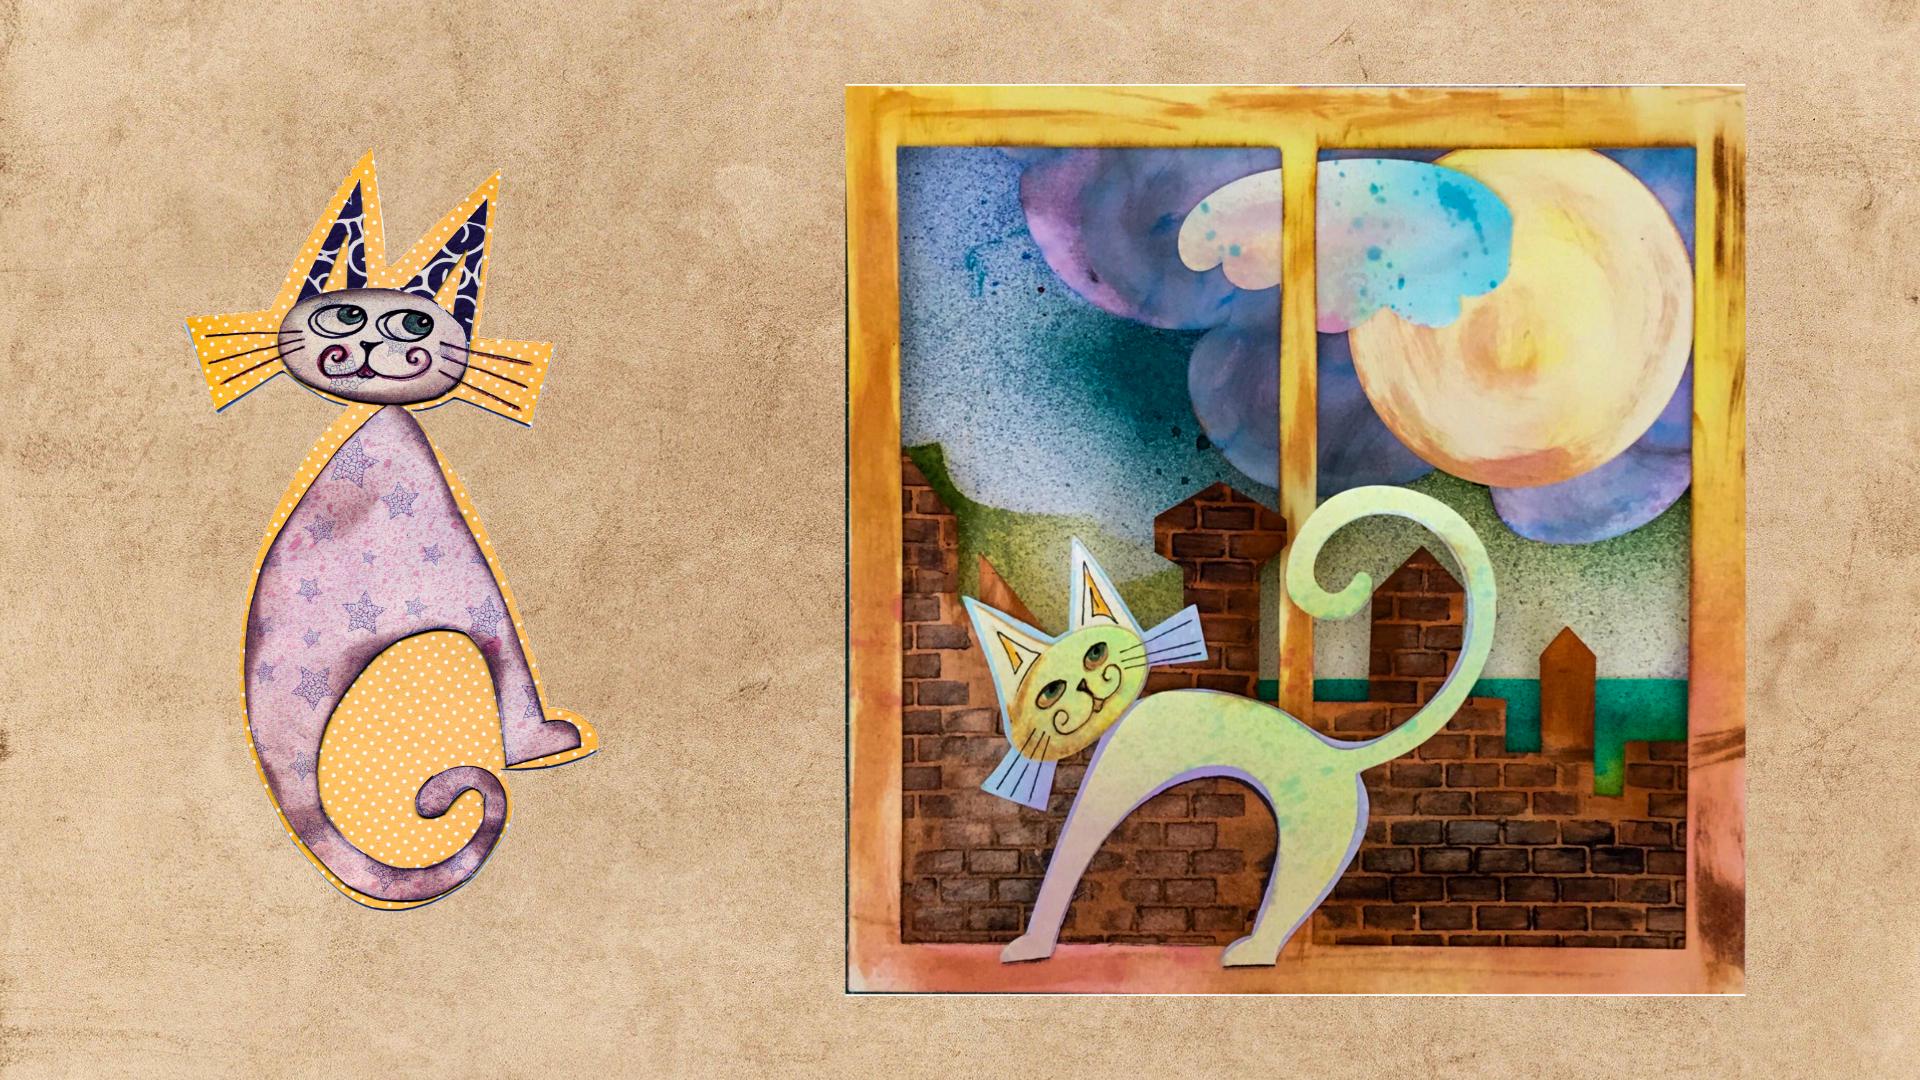

In this class we will illustrate a text by cutting paper.
The purpose of this class is to pass an accessible technique through which you can achieve satisfactory and expressive results by mixing different techniques and materials.
This way, I hope to incentive students to write and illustrate through composition of different materials and techniques.
I tried to make this class suitable for several levels.
Beginners:
It is suitable for those who just want to play with paper cutouts, since I provide the story and a drawing to cut out - in the project gallery.
Intermediate:
If your goal is to illustrate your own text or composition through your imagination, I demonstrate my method and I hope you will follow along.
We will start by drawing sketches and transfer the ideas from the text to the paper, then we draw and prepare the drawing for cutting.
We will cut and execute the final illustration.
Class outline:
- Introduction
- Materials
- Drawing
- Sketching ideas
- the relationship between text and drawing
- Drawing and preparing the drawing for cut
- Cutting
- Final illustration
Meet Your Teacher

I'm a visual designer and content creator focused on illustration and visual storytelling. I work across digital and editorial design, photography and video, combining study, observation and practice in my creative process.
See full profileHands-on Class Project
Download Text and drawings used in this class
The project:
Compose and illustrate the provided text or your own text and upload the results.
We will draw the Cutting Elements and create a sketch composition that reflects the story.
Upload your references, story and sketches, final composition ...
Class Ratings
Why Join Skillshare?
Take award-winning Skillshare Original Classes
Each class has short lessons, hands-on projects
Your membership supports Skillshare teachers
Learn From Anywhere
Take classes on the go with the Skillshare app. Stream or download to watch on the plane, the subway, or wherever you learn best.