Transcripts
1. Introduction: Have you always wanted to
make Youtube videos but been held back by the number of
steps and skills involved? Well, I made this course
especially for you. My name is Aaron
Palabiab and I've been a filmmaker for
well over a decade. With experience in independent
feature films, TV, commercials documentaries,
and of course, Youtube and other social media. You might recognize me
from my past courses, from Foolish to content creator and filmmaking for
content creators. Well, in this brand new course, we'll go step by step, learning skills and knowledge
and digestible shocks to gradually build up to making
your first Youtube video. My goal for this course is to break it down and
whittle away at the resistance you face in creating your own
video from scratch. So this is seven days to
your first Youtube video. Starting on day one, we'll
decide what content to create. Then on day two, we'll research
and write your script. Days 3.4 will be
dedicated to pre production to make sure your shoot goes as
smoothly as possible. On day five, we'll
shoot your video. And day 6.7 we'll cover editing
and uploading your video. If you've taken either of
my two previous courses, the fundamentals
will be familiar. But the big difference with
this course is the focus on actionable steps done in
a defined time frame. So this course is all about learning by
doing and building a foundation of skills and confidence by completing
concrete steps. So whether you finish it in seven days or even a few months, you'll come out of this equip to make a good Youtube video. So I'm excited for you
to give this a try. With that, let's dive
into the course.
2. Class Project: Welcome to seven days to
your first Youtube video. Your class project
will be to produce, step by step, a
classic Youtube video combining Talking Heads. Like this with Role, which is the supporting footage of the type that you
see in explainers, tutorials, reviews,
and video essays. So based on experience, I've seen that producing
a class project is a very common hurdle for video production
courses because of the number of steps
involved naturally. So again, this course is designed to encourage
you to complete it by taking it in small steps instead of being overwhelmed
about the end goal. To help guide you along and to encourage you by
visualizing your progress. I've also included a
progress tracking sheet as a notion template
that you can fill up and watch as you get
closer to the end goal. This template also
contains prompts for all of the activities
included in this course. So I highly recommend
you download Notion for free and use it as you
follow along the course. Now doing the class project
still sounds like too much. Don't worry. While I, of course, would love for you to shoot your own footage and create
a unique class project, I recognize that that may
still be too big of a step. So for those who want to
just watch and absorb the concepts and just maybe get their feet wet with editing
without having to shoot. I will also be providing
the sample footage that I'm shooting for the course demonstrations for you to edit. And then I'll even provide
a sample finished edit for you to follow and compare
to your own project. So the process of creating this project will provide
you with the information you need and the foundation
to learn and apply more advanced skills
in the future and eventually even branch out to
other types of filmmaking. But of course, if you do create your own unique class project, please don't waste
this opportunity to share your work
with me and get a supportive and
professional take on your work and how
to move forward. All right, with that, let's
get right into day one.
3. Day 1 Determine Your Why and Your Niche: Welcome to day one. This
day will be dedicated to the process of figuring out and deciding what content to create. We'll start with do
not be an influencer, which is focused on the
fundamental reason of your content creation and how
to deliver the most value. Then based on that, we'll discuss how to choose a good video topic and how to generate ideas based on that. With that, let's begin.
4. Don't Be An Influencer: In this first lesson, we'll establish
your fundamentals, your mental framework to help ensure that
you'll go through this journey for
the right reasons and with reasonable
expectations. I'll talk about
the importance of defining your value and
then present you with questions to guide you to find a channel value proposition
that works for you. Let's start with
a bit of honesty. The worst place to
start, in my opinion, is by thinking I
want to be a tuber, or I want to be an influencer. But not just so, but it's because this implies an attitude of doing
this for attention, validation, free
stuff, or money. All of which I can
honestly tell you, even for the big Youtubers, are unsustainable
motivations for building a Youtube channel. I can think of it as
building your house on sand, unless you're extremely lucky. Reality will quickly remind
you that this doesn't work. Sure. There are plenty of examples of successful looking
creators who've taken the shortcut to fame for just doing the most attention
grabbing things possible. But ask yourself if
you would really put yourself in their shoes if you're really knew
what it was like, in my humble opinion, to have a chance at
being a creator, with a truly engaged, appreciative audience that makes a positive contribution
to society. You must aim more than anything
to bring value to others, not attention to yourself. So the best place to start, I think based on experience and based on studying
other creators, is start with something you already have an
existing passion skill, or special talent for. So start with something you
like or do so much that it can be the engine of creativity for a channel that
will last for years. This is where you can
provide the most value and be the most authentic
version of yourself. And being authentic
is essential in a world where people have talked about almost
everything already. In my opinion, the best driver of a great Youtube
channel today is expertise or some other
distinguishing characteristic or point of view developed from spending time in your work, hobbies, or even
your relationships. Why? With time spent comes a depth of knowledge and
experience that will establish credibility
with your audience and make them demand to
know what you have to say. Now in case you're very young, If you're a child then you probably have a favorite hobby, and sharing your passion for that may be the best place to start without worrying
too much about all of the strategic
stuff in the numbers. If I had to sum it up, just be very interesting. Youtube doesn't
owe you anything. But you owe the
audience something cool to watch that they
haven't seen before. So before you ever
even start rolling, you must begin with defining
why your channel exists. Is it to entertain,
inform, or inspire. And in what way, specifically, can you do that that's
distinct from everyone else? Say I just want to make people laugh and make their
lives brighter, and I have a really
creative way of doing that. Or say, I want to share my
experience living on a farm to teach people what
I do and make them appreciate where their
food comes from. Or say I want to share my travels driven by
my unique interests, not just what's trendy
on Instagam or whatever, to inspire others to
expand their horizons. It could be I want to make
the best tech reviews to help others by taking the guesswork out of buying
complicated gadgets, because I research them
all the time anyway. Or even say, I want to share my stories to help
others avoid the most common, but avoidable problems of like couples in long
term relationships. So all of those are valid and all of them have
been proven to work. So frankly, there's a lot
of room for expression and experimentation as you begin
and continue your journey. So with that, let's figure out your unique take on
your chosen niche. Here are some
questions to ponder and you should write down
your answers to these. What do I love to talk about that others will find
very interesting? Do I spend a significant
amount of time fulfilling a role or doing
something in my life that gives me special
insight into something. For example, your
job being a parent, being a husband or wife, living with a certain
condition, et cetera. Tiktok is actually a great
place to see examples of the most idiosyncratic
and yet relatable content from regular folks
like you and me. Are you a combination or hybrid of things
that isn't common? I'll tell you real examples of stuff I've seen on
Tiktok and Youtube. A Canadian comedian, fluent
in Mandarin Chinese, An airplane mechanic who spews obscure lord
of the rings trivia. A chef with a precise cooking
style and prodigious skill, but does it all with a relatable and raunchy sense of humor. Even a fit former
wedding filmmaker who now hikes around the world. I hope you can guess
who some of those are. But the point is you
may not know it, but your unique experience and personality may be
very interesting, even captivating for others. Again, my advice, don't
think about being the best, but just focus on
being the only. Number four, what are you
really curious about? And can you use the act, creating videos as a reason
to pursue your curiosity? A lot of explainer and
video essay creators are basically just doing this and just taking the audience
along for the ride. Number five, don't think of
what would be popular alone. Think of what you can
make a great video about that is already popular,
at least in your niche. Of course, keep in mind this
is just a starting point. It's only with
continuous creating and sharing your work and
interacting with an audience that you'll eventually
really find your direction and
you can always pivot later on when you
or your life changes. I'll share with you
some examples of small to medium sized
channels that you can look at to give you
some inspiration, my friend Emile
explores who makes beautiful solo Moto camping
content in the Philippines. Another friend, Pixel leaves, who makes relaxing, no face
explainers about inc tablets. Moto feels an
Australian filmmaker and Moto logger who makes logs, tutorials and reviews with great production value
and a Ry sense of humor. Professional photographer
Michael Shane Bloom and his beautiful vlogs
showcasing how he takes his amazing
landscape photos. A one time student of
mine here on skill share, Spanish traveler
Ramia de Aventura, whose passion for real
adventure and funny, engaging personality took
him from less than 1,000 to hundreds of thousands of subscribers in a
matter of months. So hopefully, I've convinced you that you have a way to
share something really good. In this lesson, we established a solid and meaningful
foundation for creating Youtube videos and began writing ideas for our channels
value proposition. In the next lessons, we'll generate real ideas
for specific Youtube videos. See you there.
5. Choose a Niche and Generate Ideas: In this lesson, we'll build on the foundation established
in lesson one. We'll talk about
how to come up with good video ideas for Youtube. Generally, the best ideas
for Youtube videos lie at the intersection
between something that you're already
knowledgeable in or something you love, and then something
your target audience is actively curious
about or searching for. Because in the beginning,
you'll need to give the algorithm reasons
to find you better. Be sure it's for a topic and or a video style that
you would like to do consistently over time. If you ask me, actually, it's not a good idea
to try to go viral for some random thing that you won't want to keep repeating
or keep trying to top. So let's go step by step first based on the questions you
answered in lesson one. Think of what kind of videos
do you want to make that have a chance of being found through search
and the algorithm? For example, for me,
I'm a filmmaker, I love traveling, and I
love writing my motorcycle. My thing is making motorcycle reviews on one
hand and on the other. Making travel of logs that
have a higher level of storytelling and
production than the usual based on experience. It's the motorcycle
reviews that have cast a wide net over time to real
inviewers and subscribers. They're how I've established credibility in the
Youtube algorithm and with the wider
Youtube audience outside my core subscribers. In fact, the popularity
of my reviews has given me a certain degree
of vanity stats like hundreds of thousands
of views and five digit subscribers that may make people think
I'm worth following. So basically what
happens then is that a small percentage of
this bigger number of viewers that find me through
search go beyond being casual viewers and become
loyal subscribers. So we can call the
videos that do this reach videos because
they have a higher, wider reach in search and
in the algorithm because of their more obvious
usefulness for the Tube viewer. Now for these loyal viewers
whom we might call fans, I can create what I consider
my more personal work, which is mainly well produced
travel logs and docube logs that take way too long to edit and don't perform as
well in the algorithm. But for me, the satisfaction is in creating them and
watching them again and again. For years to come,
these have been called engagement videos
instead of reach videos, because they are more engaging, being the product of
one's true passions and often already entering the realm of what
you can call art. So sum it up,
basically, in my case, I make reviews for Reach to
get a bigger audience and travel blogs for my
own satisfaction and for more authentic
engagement with my fans. I make other kinds
of videos too, but these two are my
bread and butter. Working hand in
hand to get viewers and then turn a few
of them into fans. What Youtube or Sara did, she called one for
me and one for them. I assume most of
you are probably starting from zero
subscribers right now. For now, you'll have to
imagine what kind of content you might create
for each one for them. At the same time, you probably already know what you
want to create for you. So we can pause now, think and write down a few
potential videotypes that can be reach content and that
can be engagement content. The next step is to list specific video ideas based on the concepts you
learned in this lesson. But we'll save that
for the next lesson.
6. Choose Video Ideas and Validate Them: In the previous lesson,
you learned how to think of good video ideas to
start your Youtube channel. In this lesson, we'll apply
those concepts and list at least three or more
specific video ideas you're eager to
make a video about. So with both reach and
engagement in mind, I've already written
down some video ideas. Number one, a budget adventure
motorcycle comparison compare three or four, this is definitely going to
be a popular reach video. Number two, a travel blog featuring each of
these motorcycles. That's already three
to four more videos from that just one video idea. And again, this would
be more for me, engagement type of video. And then going a
different direction. I can do maybe tutorial how to pick a motorcycle
for beginners. I think this would be an interesting video
essay and it would lie somewhere between reach and engagement because
it has high utility. But it's also still for
a more niche audience. Take a few minutes now to
write down your own ideas. Five is good. Ten is better. Write down anything
and everything that excites you to make a
potential Youtube video about. And you should also indicate
whether it's more of a reach video or more of an
engagement or art video. Make some ambitious ideas, but also make some
ideas that you could shoot tomorrow
if you had to. Because our goal for this course is to actually make one of these videos on that note. Often in life, things that don't get done now while
you have momentum and motivation won't
get done later and it takes more effort to pick it up again
at a later time. While you shouldn't feel limited when imagining your
video concepts, you should get excited. Just make sure to
really put some in there that you
know you can already pull off today or this week with a reasonable
amount of effort. Well, moving on. Next
step is optional. Very useful you can try to
gauge the interest that the audience has for your topic by researching related keywords. The best potential topic for Youtube has a combination
of high demand, which is search volume,
but low supply, meaning few high quality videos that directly answer
the question. Youtube studio has a built
in research function, but it's more useful if you already have an
established audience. Now we have to buddy a plug
in with a free version, which is the easiest
way to see if any video idea meets
these criteria, you can install this as a
Google Chrome extension. Let's open up two buddies,
keyword Explorer. All right, over here. Now, I don't have
any motorcycles in my garage to
review right now, and I don't have time
to travel far soon. That leaves my third video
idea as one I can get started on ASAP and I don't need anything
special to make this video, say just myself and some bureau, or even just photos of motorcycles that I can find
in my archive or on Google. This isn't a commercial video, so it's fine to
borrow photos and footage from Google
or other channels. Although when in doubt doesn't
hurt, ask for permissions. Let's input how to pick a
motorcycle for beginners, and let's see the score. Wow, this rarely happens to me. I hit the jackpot. I got a 100 out of 100 score with very
high search volume, low competition, and very
high optimization strength, which I think means it's
very related to my channel. So basically I've just
validated that this is awesome, worthwhile idea to
make a video about. Now try this for yourself,
but in the end, you know, you can also just choose
to do anything you want, regardless of
potential audience. This is just a tool,
an extra step. And honestly, I'd
rather you make a video about what you
really want to make. If you've never published one, then be held back worrying about some audience and
some real talk. It's more stressful to have a popular video than
having like some, nobody see your video. Because suddenly being
found by a big audience very early can be difficult
for a variety of reasons. But if you're already ready to show up
for a big audience, why not swing for it?
I'll be proud of you. And that's it. In this lesson, you went through the process of generating video ideas and validating them using keyword
research and congrats. That's it for day one. Easy as, but very important. Nonetheless, you've put
on your shoes and you're ready to warm up for the
actual run on day two. We'll research your chosen topic and then write your script.
7. Day 2 Write Your Script: Hello and welcome to day two. Let's build on the
foundation you set on day one with the actual
substance of your content. We're going to start to do some serious work now
to prepare for this, I recommend you start
using a note taking app. Now my pick for this is
Notion which I learned using an excellent
skillshare course from Ali Abdal and this one from
Mike and Matty as well. I've linked both of them in the projects and resources tab along with a new notion for Youtube course that
I found recently. Notion will simplify
and centralize your efforts and make your notes easy to search and go back to. But don't worry if you
don't feel like learning a new app because it might
take away your momentum. You can also use something
as simple as Apple notes, one notes, or even a
physical notebook. I do suggest using an app
to make it easy to search, copy, and paste to
write the scripts. Feel free to use anything free like Google Docs
or whatever came with your computer
so that you can write offline and away
from distractions. With that, let's
proceed with day to.
8. Do Your Research: In this lesson, we'll do the research for
our first video, we'll start with writing down all our own ideas and then
we'll use a combination of Google and Youtube
search to gather more information and
see what's been said and done about our topic in
order to make sure we have a factually correct and new
discussion in our video. Now you may ask if I know
my material well enough. Do I still need to do research? Well, it's up to you. But doing even a bit of research and note
taking could save you potential headaches caused by sharing incorrect or
insufficient information. It will also ensure that you're adding something
new and valuable to the conversation and also help save you from
unnecessary criticism. In your comment section, again, I'll demonstrate the
concepts using the video, the sample video I
want to make for this course to begin before
searching outside sources. Of course, I'll create a
note in notion or any app, again, containing all
my pre existing ideas about my chosen topic. This will be just
a thought dump of anything and everything
I might have to say. The important thing
in this step is to just let the ideas flow. Don't second guess yourself. We'll revise and address any erroneous or
missing ideas later on and reorganize them
into a coherent script. In another lesson, I've already pre prepared this initial document
as you see here, These are all ideas
off the top of my head with already a bit of
research for verification. As you can see, because my topic is very familiar
and straightforward to me, my notes are already pretty well organized and
almost a script. But don't worry if your idea
isn't that fully formed yet. Please pause the video now and start writing down your ideas. Even just take five
to 10 minutes. Now after this, usually
I'll Google search, and in this case,
for this topic, I'll mainly do a Youtube search to see what others have already said about the
topic and what kind of treatment they used
in their Youtube videos. This accomplishes two things. First, it either
verifies or refutes my ideas from where I can
decide whether to change them, stand by them, or
just tweak them. Second, it shows
me where I can add new and valuable ideas to the mix that will be
engaging to an audience. You should pay attention to what hasn't been said
by other sources, but are validated by your
own experience and research. Because you'll
stand to gain a lot of credibility by contributing lesser known but useful ideas backed up by research
and experience. Or you may also find at this point that your concepts
are very similar to others. But it doesn't matter
because it's the kind of video treatment that you want that is lacking
from the landscape. This is now your chance to make the content that
you want to see. Often for me, I find info
in lots of separate videos, but not in a concise manner. Or in a way that uses, say, proper bureau and visuals to illustrate those ideas clearly. So in that case, it's your job, and this course will
help you do that to make potentially the best
video about the topic, or at least the updated
video about the topic. So as you go through
this process, make sure to write down your
notes and your thoughts in bullet points below your initial thoughts
on your notepad. And of course, it's useful to save the links to
your sources like the videos or articles for future reference and to
credit them as well. You should also use this
as an opportunity to find attainable references
for your video treatment, you want to look at
how different creators use Talking Heads in B roll. Observe how much they
talk on camera and how they support their
ideas with visuals. Do they use their own footage or do they use stock videos? Do they use wide shots, medium shots, or close ups? Static shots or moving? Do they use visuals that
directly illustrate the points or just kind of are
semi related to the topic? Learn to analyze
videos like this to expand your visual
vocabulary and then see how you can apply the
ideas to your videos in an original or just
fundamentally solid way. You may also find that you want to apply the style of one type of video to the subject
that you're talking about in an unexpected way. My favorite example of this is this chaotic but
wholesome review of the best croissants in Paris by Italian Youtuber
Louis It's a riot. And such a genius mixing of
genre and topic on Youtube. Are you already seeing how much value you
can get from taking even an hour to research compared to just going
off of your own ideas? Me, honestly, I even dive
into comment sections of related videos to get a
sense of people's questions, concerns, and sentiments
around my chosen topic. I don't even do
this as a research, I just can't help my curiosity. Anyway, all of this info is
to understand your audience, your people who are out there. You don't need to use
all of it at all, but you can let it serve you
to enrich the conversation. You're facilitating
with your video. All of that said, when
it comes to research, there's a point of diminishing
returns where you might be thinking either I don't
have enough to contribute, other people's videos
are so much better. Or maybe you're even
thinking there's no way I can give all the
information I need to give. When that happens, it's
time to stop the research. Don't get so caught
up with what others have said and done that
you feel paralyzed. The most important things
you need to do are to add your unique voice and to
make a well crafted video. This course is one
goal is to get you off your butt
and make that video. So while it would be
great if you could follow my advice to the letter and raise the quality
of your first video, I think it's more
important just to make it even if it won't be the best
video ever on the topic. Anyway, Before moving
on to the next lesson, I suggest that you take even just 15 minutes to do your initial
research on Google, Youtube, et cetera,
and take your notes. Just dump it all in
there in your notepad. Having this heaping pile
of information will make your script writing a
lot easier in the end. Good research is your way of making sure that you'll
be able to stand by what you say and that your
influence will be positive and not based on misconceptions
or wrong info. And that's about
it. In this lesson, we learned how to
research and take notes to ensure we'll have
a high quality video. In the next lesson, we'll organize and refine
these ideas and match visuals to
them in the form of an audio visual or AV script.
9. Write Your Script: Hook and Intro: In the previous lesson,
we researched and took notes for our video idea. We've shopped for
the ingredients and now it's time
to get cooking. We'll put those ideas
together into a script. Now, I'll be the first to admit script writing
is half the time, the biggest hurdle for me when
it comes to making videos. I say half the time because
when I don't write a script, the biggest hurdle becomes
the video editing. Which is all to say that the effort you put into
the previous lesson, and this and the next lesson, will make your shooting and
editing so much easier. So how do you overcome the
inertia of writing a script, the terror of the blank page? Well, by making use of the work we did in
the previous lesson, and with good old, reliable structure, with
a good script structure, it becomes almost just a matter
of filling in the blanks. So for this lesson, we'll adapt Youtube
and skill share star Ali Abdal's Hives framework to create a simple solid script
Hives stands for Hook, Intro, Value, and
End Salespitch. Ali's Hives Framework comes from his excellent free Youtube
publishing notion template that you can also access via the link in the resources below. By the way, as I
said previously, you don't need any special
app to write a script. I just use Apple's
free pages app or Google Docs and type away. Unlike a narrative film script, you don't need a
specific format. Just whatever is
most convenient, even Apple notes can work. So step one is to create a hook. This is the most
important part to figure out in the
beginning for Youtube, because you want
to give the viewer a clear idea of what
value they will be receiving within the first five to 15 seconds of the video. This also keeps you
accountable and focused. Don't waste time
on a long intro. Don't ask people to
like and subscribe yet introduce yourself
what you're about, and tell them what they're
watching your video for. It should immediately reinforce
the value proposition contained in your title and thumbnail that they clicked
for in the first place. For example, I can
write, Hi everyone. My name is Ern Pala Bab. I'm a professional filmmaker who travels around on my motorcycle. Today I want to talk about
everything you need to know to figure out how to buy
your first motorcycle. Again, quickly explaining who I am and what they're watching the video for, what
they can expect. Another example, for
another type of video, you can try to ask
a question like so, is the iphone 22 still the best phone for
creators in 2030? I'll test every feature
so you know for sure, et cetera, et cetera. Okay, so it helps here to
think not of the what, but the implicit why your viewer should keep
watching your video. This is presumably because
your video topic is interesting and you can provide the answer
they're looking for. Writing the hook should
be a fun activity. I suggest now to
pause the video. Take five to 10 minutes writing some sample hooks from the topic you chose
in the last lesson. All right, done. Okay, on to step two, the intro to the actual topic. Now it's time to expound
on what the audience will learn and also how
they will learn it. If applicable, frame
the discussion in a way that reinforces
why it matters. For example, I can say, so you want to finally
get into motorcycles, but the number of
choices between motorcycle types
seems overwhelming. In this video, we'll discuss the different types and
sizes of motorcycles, along with how to think about getting a motorcycle that fits your needs and goals
for the iphone Example, I can say the iphone
has long been the top choice for content
creators for decades now, but it already has
lots of competition. We'll look at the features, the price point, the photo, video quality, battery life, et cetera, et cetera,
you get the picture. Now if you're doing something
that's more of an essay, consider talking
about why it matters. Something like,
once upon a time, we were promised flying cars and how come that
never came true. Well, it seemed like
a great solution, but it's actually an awful idea and I'm going to tell you why. So these are all just ideas
to help you figure out how to best hook in and retain your audience within the first
few minutes of your video. If you can't answer to yourself the question of why anyone should bother
to watch the rest, well, it could be valid because you're making like some
kind of artistic video. That's fair. But for Youtube, this is part of your
due diligence to keep your viewers watching and
the algorithm appeased. So at this point, try to
write down a few sentences of your intro based on one or more of the hooks you
wrote previously. And we'll leave it
off at that for now. We'll continue in
the next lesson. In this lesson,
you began writing your script with a
hook and an intro. We'll finish the rest
of the process in the next lesson. See you there.
10. Write Your Script: Main Value: Previous lesson, you began writing your script
with a hook and an intro based on Ali Abdal's Hives
framework for Youtube. In this lesson, we'll continue the process to write the
main body of your script. And it's ending step
three, letter V. Let's work on the value. This is the meat
of your sandwich. Lay it out point by point in an organized manner and support
each point with examples. It's that simple. By now, this should be easy enough. You just get the notes you gathered from the
previous lessons and then copy and
paste them into a new note or new document. Then flesh out each
bullet point into well written sentences and reorganize them for maximum
clarity and impact. An easy way to start is just to make an outline
from your notes, like I've done here from this. It's just a matter
of expanding on each bullet point and writing proper transitions in between. Now if you're really
stuck on how to start or maybe burnt out from
writing other stuff already, well it's okay to delve
into the dark arts. Don't be afraid to use
chat GPT to convert your talking points into an outline or even
full paragraphs. Don't just ask it to write
everything for you though, but feed it the talking
points you've researched. And then of course, don't skip editing it to make it
your own and never, ever, never, ever
forget to fact check. As of this writing, AI tools like Chat GPT are still notorious for blithely,
including factual errors. In terms of organization, you want to keep related
points together to make your script both
coherent and cohesive. It's easier to do
this first with bullet points on an outline before writing the
actual script. For example, for a review, you want to segregate
between say, the pros and cons and between the different feature
categories of a product. Don't just ramble on randomly jumping
from point to point. This is the enemy
of your engagement. If they don't feel like
they know where you're going for a tutorial, obviously just go step by step and then show
the finished product. And then maybe address common pitfalls and share tips
and tricks to solve them. One way to think about it is
can you organize your video into distinct Youtube chapters with clear topics per chapter? If not, then you probably
have to organize. So going back to my
video essay idea, I need to explain basically
to beginners from scratch, from the most basic points. So I'll begin talking about
motorcycle displacement, their size, and then
the general types of motorcycles and
how they differ. And then once they
have that foundation of all the different
kinds of motorcycles, that's the time that
I can follow up with suggestions for how to think about picking which
motorcycle is right for them. Of course, at the end, you should round out
the discussion with your final thoughts
and recommendations, as well as things like
other products to consider or other resources to explore if the viewer
wants to learn more. And that could include
your own videos if you already have
a bunch of them. And remember that it's best
if your ending is satisfying, because this parting
gift is a way to make your viewer feel good and more likely to
come back for more. And finally, step four ES, our end screen sales pitch. Now this is specific to
Youtube only because in a regular video the conclusion would already have been
your final thoughts. The end screen sales pitch is just your invitation
to a viewer who found your video valuable to come back and
watch more content. It's also where once you've built up enough of an audience, you can ask them to support
you in whatever way. Like Patrion a
Youtube membership, buying a digital or
physical product, or simply liking
and subscribing. But in the end, when
it comes to writing, the most important tip
I can give you is don't be afraid to write
a bad first draft. Don't think, just write. Do not judge or over analyze. Don't worry about it being
perfect, All revision, fact checking and
acting on feedback and polishing happens only on the succeeding
passes of writing. Don't worry, I'm
very familiar with the terror of the blank page and I still deal with it every time. It's why this course took
almost two years to make. Anyway, once you have your
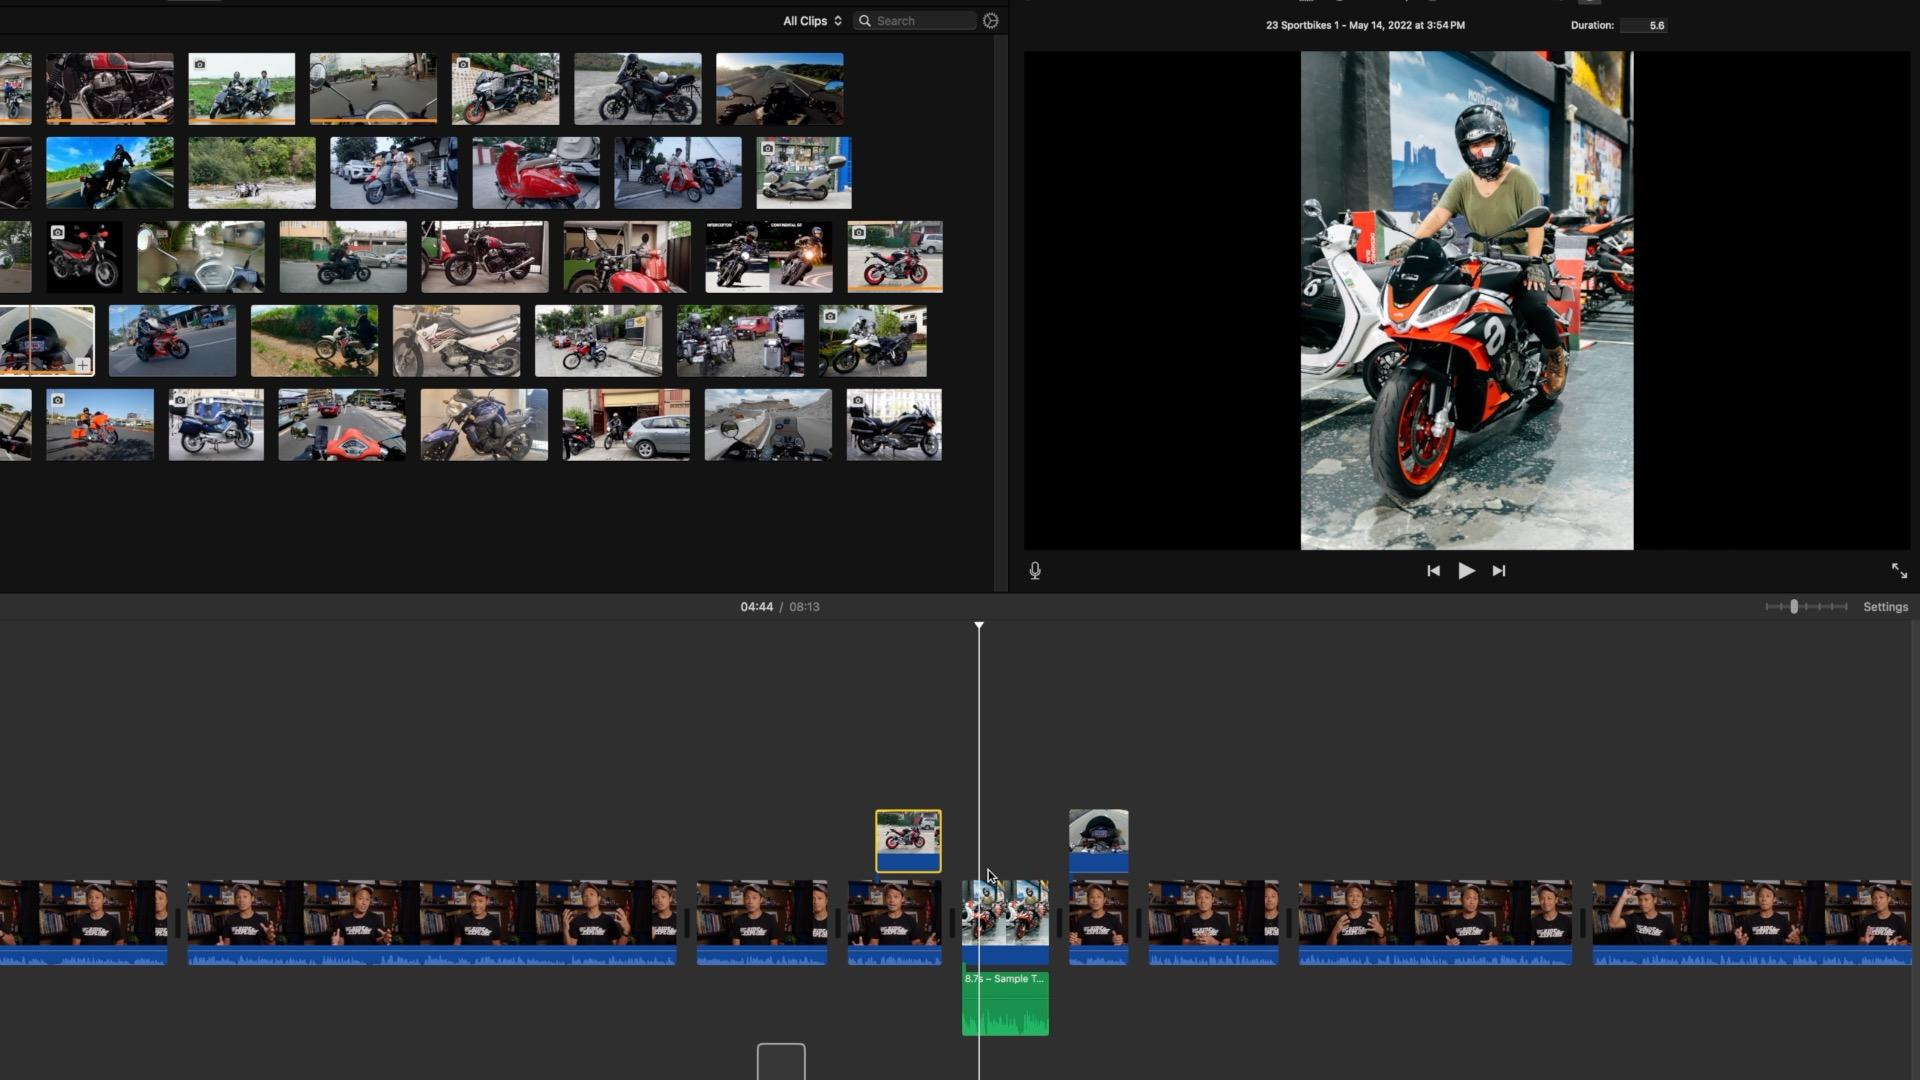
word salad down on the page, that's when you can whip it up into something worth serving. Once you're done
writing your script, let's do one more thing. You can copy and paste
your text to an AV script. The template of
which I provided in the class resources and I stole from Youtuber
Johnny Harris. Thanks Johnny. You're the best. You fill up this left column
with all of your audio, basically all of your text. This blue header
bar is optional. It's a way to delineate chapters if your
video is very long. We want this ready
for the next lesson, where we'll be filling up the right column with
corresponding visuals. Basically, paste each
individual segment of text into its
own cell like this. And then you can
separate segments roughly by where you
to different visuals, which again will match
on the right side. And that does it for day two. Congratulations for
making it this far. This is a lot of work and these are big steps that
you're getting done. You're just knocking
them out of the park. Man, am I proud of you? Look at you, look at you. On day three, we'll
begin pre production, starting with listing down your shots and figuring
out your gear. So for now, take a
well deserved break and I will see you bright
and early tomorrow.
11. Day 3 Prepare to Shoot Part 1: Welcome to day three. By now
you should have a script ready and that's a big step
time to use that script. First we'll use it to determine your supporting visuals and
then create a shot list. And then we'll follow up with an overview of how to get
your gear ready to shoot. So today is all about the first phase of
revving up to shoot. Pre production, as we
call this phase is so important that we'll spend two whole days
dedicated to this. All right, so let's begin.
12. Make Your Shotlist: In this lesson, we'll use
the script we wrote on day two to determine what visuals you
need for your video. And then learn how to transpose
these into a shotlist that will help
make your shooting more efficient and complete. So let's begin with
determining what parts of your script
you'll say on camera, you have a choice of how
much you want to do. You can be completely off camera and just
narrate over roll, or go all the way to
just completely being on camera like a recorded
lecture with no B roll. So of course, somewhere in
between is usually best, but it depends on what
you're comfortable with or what works
for your style. More talking on camera
means less bureau to shoot, but more memorization and
of course, vice versa. For me, I prefer to
be on camera for the beginning of course,
so people get to know me. Key middle points where
my face can help give emphasis and of course the end to engage with the audience. Now if you have trouble memorizing or don't have
access to a teleprompter, then feel free to keep it to that minimum amount to
save time and energy. Now for all the parts
where you'll be narrating on voiceover or VO, you have to determine exactly what supporting visuals called. All you need to
illustrate your point. It's best to have bureau that directly illustrates
what you're saying. But it's also acceptable,
especially on Youtube, to have only tangentially
related visuals just to provide the viewer
with some visual interest. Remember, in video, it's always better to show
and not just to tell. Let me give you some examples. Now, many talking points
are obvious to illustrate. If you're doing a review, then you should clearly show the components and features of the product as you
talk about them. Or show the results, like sample photos or videos. If you're reviewing a
camera or a phone, however, other points will
be more abstract or would require special
graphics to visualize. In these cases, unless
you have the ability and desire to make
graphics, don't sweat it. Just find something visually interesting and somewhat
related to what you're saying. For my sample video on
picking a motorcycle, I can talk over both
footage that directly illustrates what I'm referring to like different
types of bikes, But at other times, I
can just let general riding footage play while I
discuss something abstract, like how to use your
heart to pick a bike for something very abstract,
like concepts. You should consider
saying this on camera to take advantage of what you
can express with your face. Now, apart from video footage, you can also use photos
animated or not. You can also source footage from stock sites and other
Youtube videos. Just make sure you're
doing this either with a proper license
or with permission, or else you might risk a copyright strike,
which is not good. All right, at this point,
are you already starting to imagine what shots you'll need
to visualize your script? Well, keep those in mind
because now I'll show you how to list down your
shots in a shot list. So let's go back to the AV script that we prepared
in the previous chapter. Now we're going to fill up the right column with the
visuals that you'll need. All right, so what you do here is opposite this text
on the left column, you'll write down the
corresponding visuals basically aligned with the text you're saying to make it very
easy to refer to. So again, you're looking here at an example for my video that
I've already filled in. Partially, Just so you know, I copied this format
from a project that I worked on with journalist
and incredible Youtuber, Johnny Harris.
Thank you, Johnny. So as you can see, I've separated and even
color coded between on camera and off camera voice over parts
for easy reference. Now this is helpful but
completely optional. But the great thing about
a color coded script like mine, like this one, is that you easily see
at a glance what shots you'll need to copy to
your sequential shot list, which we'll discuss next. So as you can see here, we have different colors for bureau
that you need to shoot, bureau that you already have, and bureau that you need to
gather from various sources. And another helpful way to
color code, as I mentioned, is to highlight either
the text that will be on camera or the ones that you
will be reading on voiceover. So that you can see at a glance which parts you'll
have to memorize. So in this sample script, I've decided to highlight
only the voiceover parts. Now for each piece of dialogue, be mindful of how long
that chunk will be. Recite it out loud
if you have to, so that you know how
long each clip of barrel has to be to
cover that entire chunk. All right, so now you understand how to fill up an AV script. I suggest you pause the lesson now and start filling
up your own AV script, even just one or two pages, so you start getting the
hang of it to save time with the color coded formatting
for the bureau part, you can do what I'm doing here, which is to copy from
the legend at the top and then just paste and then basically retype whatever
you want to put in there. And that's it. In this lesson, we learned how to
create a shot list by filling in one column
of an AV script. In the next lesson,
we'll organize this further into a scheduled
or sequential shot list.
13. Arrange a Sequential Shotlist: In the previous
lesson, you filled up your AV script with your shots. We can already shoot with this, but in this lesson
we'll take one step further to make it even more organized and easy to follow. We'll copy those shots to a sequential scheduled shot
list that we can check off. As you can see in this example, S means wide shot, MS means medium shot, and CU means close up. Having a mix of these
different shot sizes helps to make your edit more
interesting and seamless. You can choose to
shoot your burel sequentially as they
appear in your video. But it's more efficient to
group shots together that can be shot using the same
or very similar set up. For example, all
indoor shots together, All outdoor shots together, all shots in the same
location or set up together. This will save time and
effort going back and forth between
locations and set ups. So my shot list in this case doesn't contain
a whole lot because I deliberately picked
a video idea that I already have a lot of
existing material for. But another shot list for all new shots might
look like this. Just as an aside,
this isn't the format we use in professional
filmmaking for shot listing and scheduling. But it's a more
efficient and easy to prepare format that's
practical for solo creators. All right, now
it's time to start working on your
scheduled shot list. Now notice that mine I've
decided to put together all the on camera spiels in one
big shot in my shot list, even though that represents
obviously several clips. Because that's just going
to be even one set up, even though it will be
many different takes. So it's actually up to
you how specific you want to get to help yourself remember everything
that you need to get. You can also just save time by giving one general name
to a shot such as say, product B roll, which might comprise three to five
different shots of the product. But you can also be as
specific as if you're making a verbal storyboard
frame by frame describing every shot as it appears in your imagined edit. It's really up to you and
basically how organized you want to be and how precise you want to be in
your eventual edit. And that's it. In this lesson, you learned how to create a
simple production schedule. Essentially, the
prep work you've done here will help make
your shoot as simple as checking boxes
off a list instead of running around wondering
if you got what you needed. All right, so I suggest
don't move on to the next lesson until you've
gotten all your shot, listing all your paperwork done. But once we've got all
our paperwork done, then in the next
lessons we learn how to get our gear good
and ready to shoot.
14. Prepare your Camera Gear: Previous lesson, we
created a shot list. We're officially done with all
the paperwork and writing. In this lesson, we're
prepare to shoot first by preparing our
mobile phones with the correct video
settings to get you started and cut through all the confusion when it comes to gear, I recommend getting the
following as a starting point. First, a mobile phone from anywhere from the
past five years or so that can shoot in ten THD doesn't matter if
it's iphone or Android. As long as it can shoot
decent looking video. And then get any of these cheap wired or wireless
level ear mic systems. Basically this lapel mic
like I'm using here, a full length tripod, preferably one for video. But even one of these ball heads that you use for
photography will do. It's a nice solid tripod. You don't need a panning head because you'll be
shooting yourself. Of course, if you're
using a mobile phone, a decent phone mount like
this crab tripod from U Lanzi that is compatible
with a tripod like this. This one uses the universal
Arco Swiss mount. So you can just swap out
the plate from any of the standard photo tripods
and put it directly on here. You might be wondering
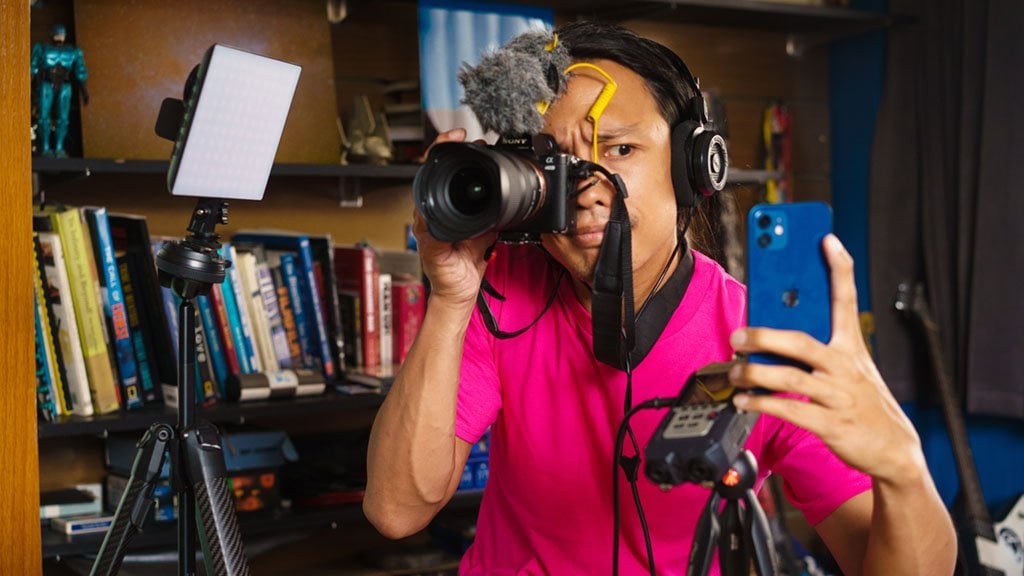
why I don't recommend getting a shotgun
mic like this one. Well, while these are good for logging and pointing
at various things, you can't get these close
enough to your mouth to get great clear sound
while also being able to frame video freely
for the best composition, especially for this
kind of Youtube video. If you already own a DSLR or mirrorless camera like this one, then of course feel
free to use that. Whichever way you should start
practicing making videos with whatever you already have or what is easily
available to you. So now I'll show you
how to set up an iphone 12 and an old Android
phone from 2016. And you can use these
examples to figure out how to do it on
your specific device. All right, to set
up your iphone. First let's go to your
settings and find camera. Okay, so open this up
and I suggest you select here 108 Phd at 30
frames per second. I recommend ten PHD 30, but you can choose 60 if you prefer that very lifelike look, it will just require more
processing power to edit. You can also choose
four K, 24 or 30, but that will be very processor
and disc space intensive, so I don't recommend
it right now. Again, you don't need to buy any special camera
app at this point unless you really
want manual control if you already know
how to do that. But for now it's not necessary and of course
you don't have a choice. You can leave it
on auto focus as well to avoid any mistakes. All right, now let's
do the same thing on this old Android phone. I mean, it's so old, it doesn't even have screen recording, so I have to use
this camera, okay. So in this case, you actually
have all the settings built right into the camera
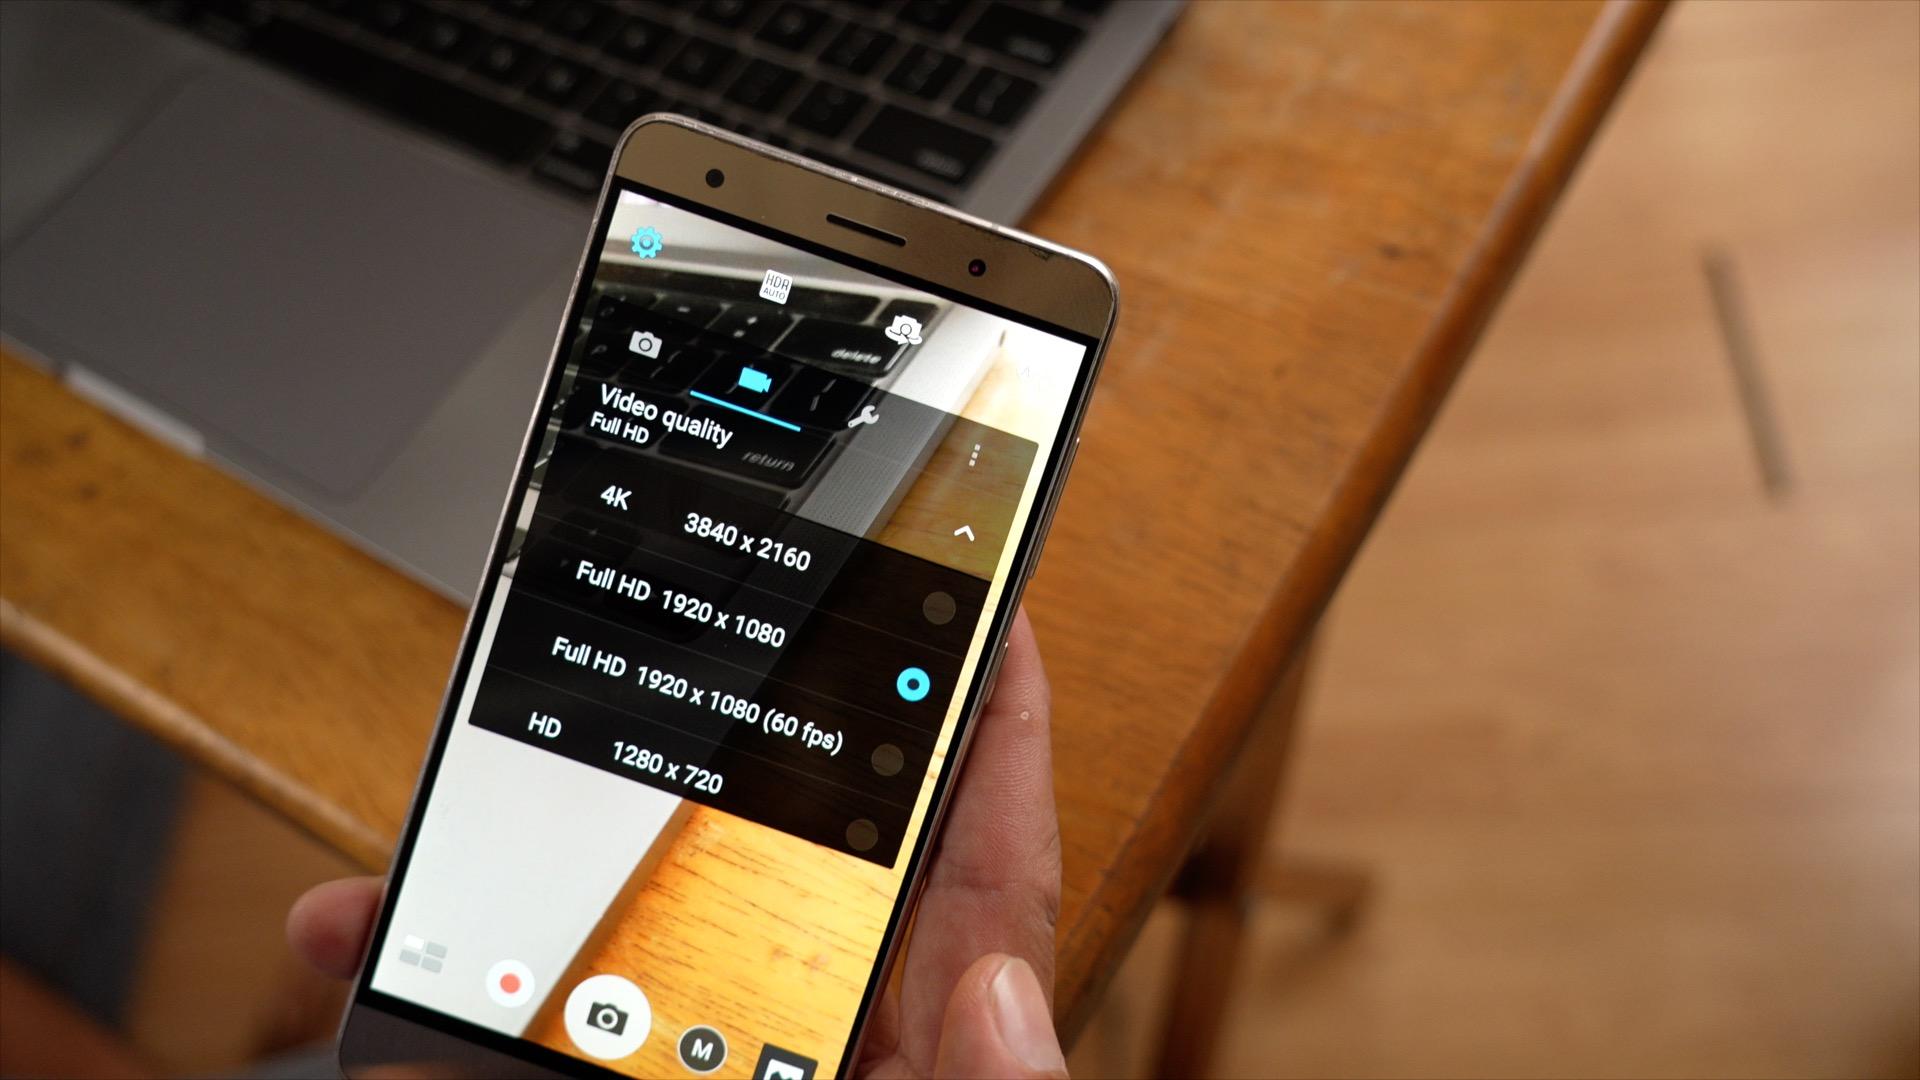
app, even manual settings. So we'll open up here. Settings switch
to the video tab. You can see here, video quality, we have full HD and we can choose between 60
frames per second. And it doesn't say what
the frame rate is here, but it's actually just
30 frames per second. This is an old phone. It doesn't have 24 frames per second on any of the
resolutions yet. But anyway, this is
exactly what we want. One more thing,
because this gives us access to manual white balance. I would like to go for manual white balance instead
of auto white balance. So we have a consistent
look from shot to shot. So you will choose daylight for standard white light,
daylight like this. And you would choose
incandescent or tungsten if you're working with warm lights to compensate. All right, But
auto white balance is fine if you don't have a choice or you'll
be shooting in mixed conditions or you just don't want to worry about it. Okay? Another really
important thing, Make sure that you have a lot of free space on your phone, download and back up
your existing videos, then delete them from your
phone if you have to. And on an iphone,
make sure to empty the phone's recently
deleted folder or else you won't get
back any more space. So you should prepare to record at least half an hour
to an hour of footage, which is precisely why I don't recommend shooting in four K because it eats up space at
about four times the rate. Okay. With that out of the way, let's set up the phone
on the tripod mount. So it's usually going
to be this kind of clamp thing here. Of course straightforward. We just put it up here, okay? And then make sure when
you're ready to shoot that the phone is level so
it's not crooked like this. You can point it somewhere where there's a horizontal line. You can just make
sure it's straight. Or you can use this option. Open your camera
settings again and then just hit the
check mark on level. When you open up
your camera again, it'll have this line and
you'll know it's level. When the line isn't broken, it becomes a straight line
that's colored yellow. When you're also ready to shoot, you might want to
leave it plugged in. If you plan on
recording long takes, it's easier to shoot yourself
on the selfie camera, so I can see myself here, but it's always higher quality
to use the rear camera. But that also makes
it hard to frame up yourself and make sure everything
looks right on camera. So if you don't have
anybody to help you frame, then you don't have a choice. You have to record and check and adjust things until you get it right. That's just how it is. But if you just
want to practice, you want to see yourself easily, then it's perfectly fine to use the selfie camera so
you have a monitor. Al right, with that, I invite you to take the time now to get familiar with all the available video settings on your phone. But basically, since this is probably your first
Youtube video, I really recommend leaving almost everything,
if not everything, on auto because I want you to get through this with
a minimum of fuss. The point is just by doing this, you'll be able to build
the foundation and vocabulary you need
to take on more advanced and in depth courses that will help you become more proficient in things like
setting exposure and all the other more
advanced camera settings. For now again,
let's just take out all the obstacles that are
preventing you from shooting. Al right, in this lesson, we started repairing our gear by setting up our mobile phones. In the next lesson, we'll
set up our microphones, then do a quick test
of the full set up.
15. Prepare Your Microphone: In the previous lesson, we set up our mobile
phones to shoot. In this lesson, we'll set up our microphones for
the best results. And then finally, we'll do a check to make sure
everything works fine. First, let's connect
the lavalier mic. If it's wired like this one, then you simply plug it into the headphone jack of
your phone directly or into the adapter
if your phone no longer has headphone
jack like so. Then from here you basically just run this cable
underneath your shirt, then bring it up here and
clip to your caller or lapel like I'm doing with the
actual mic that I'm using. Now, obviously your phone
is going to be about a meter or a few feet away from
you where my camera is now. So if you're using
a wired leveller, you'll have to get one with
a really long cable like this one from Boya that
I used for many years. And avoid framing too wide so that you can
just kind of run the cable below and hide
it as best as you can. And then do the same
thing, you run it up underneath your shirt
and clip it here. Now of course, if you want to avoid that problem entirely, then you're better off
using a wireless system. Although again, this is
much more expensive than a simple wired microphone
with a long cable. It is just way more convenient. So speaking of which,
I recently discovered this full Am X Five
wireless mic system. It's one of the
most affordable and full featured wireless
systems I know of. It's basically like a cheap
version of the famous DJImic. Out of the box, It works with both phones and
Maireless cameras. You have everything
you need to connect. But anyway, if you're using a compact wireless
system like this, the transmitters
already have a built in microphone and the receiver is what you will connect to
your phone or camera. So of course, make sure to turn on both the receiver
and the transmitter. In this case, in the full Am, they turn on automatically. When you take them out
of the charging case, of course, make sure
they're charged. The versions that work with phones can directly connect via the charging port using
one of these adapters. But otherwise, once again, you'll need to plug it via
the microphone cable to the headphone jack or the
adapter for this one. All I have to do is connect
my adapter like so, and then stick it here to
the bottom of my phone, and that's already working. And then all I have to do is
plug the transmitter here, or use the magnet, if it comes with one, to
hide it underneath my shirt. So just so you know, in
professional production, we hide this mic
as best as we can. So I suggest not doing what
I guess is kind of the norm for creators nowadays of wearing the transmitter
outside like this. I mean, it's fine,
absolutely fine for Youtube. But just in terms of professional
filmmaking discipline, it's not nice to have it
so visible like this. But if you do wear
it on the inside, there is one downside to that, which is it makes it
easy for it to move. Instead of pointing
out like that, it points into your body and that makes it
sound very muffled. So that's something you have to keep in mind and watch out for. But anyway, once your
mics are set up, the next thing you have to watch out for are your audio levels. Now the good thing is
on most mobile phones, the phone handles all
of that automatically. But if you're using a
mirrorless camera or audio recorder that only
offers manual audio levels, you'll need to do a sound check and then you can watch
these audio meters. So as you're doing
your sound check, you have to just make sure
that they're hitting between minus six and -12 Even
if you raise your voice, you don't want it super loud that if you raise
your voice a little, then the audio starts to clip. Basically you're talking too
loud for the microphone. But basically once you
have that shot in the can, as we say in the film industry, you're going to
want to transfer to your computer so you
have a bigger screen and bigger speakers or listening to your headphones so you
can make sure. It's fine. So again, on a Mac you can use Android File Transfer to download your videos
from an Android phone, or you can just air drop the test clips from your
iphone to your Mac. A better way to
download big files from your phone to
your Mac is to use the built in image capture app for reliable wired downloads. All you have to do is connect your iphone to your
Mac via lightning, to USB, open image capture, select the relevant
clips and hit download. On Windows, you just plug
in whichever phone you have and navigate to it
using Windows Explorer. And then look for
the folder usually called DCIM to find your media, drag and drop it
to your computer and then play back your footage. Make sure audio is good, make sure you have
all those things. Like you don't have
a crooked horizon, your exposure is fine,
et cetera, et cetera. And that's about it. It's
actually relatively simple. We're going to put in more
work and attention to our lighting and production
design in the next lessons. But for now, if you want to dig deeper on the topic of gear, how to use it, how to set it up, and different kinds
of gear available. Maybe if you just want to
look forward in your journey, you can hop over to my
previous courses where I do much more thorough
breakdowns on the kinds of camera and audio gear and
which may be right for you. Again, you'll find
them linked in the class resources
and congratulations, you are done with day three. You've laid the basic
groundwork in day four, we'll continue pre production by basically preparing your
little home studio. We'll figure out our lighting
and we'll design our space. And then we'll learn tips for being comfortable on camera. So see you on day four.
16. Day 4 Prepare to Shoot Part 2: Hello and welcome to day four. Today is a fun day because
you'll get to exercise some creativity and new skills without actually
having to shoot yet. We'll work on everything
that the camera is going to see and make sure it'll be
its best. Yourself included. Okay. First we'll learn how to prepare a
good shooting space that has good depth and lighting while conveying
your personality. And then next, we'll learn tips for feeling
comfortable on camera. So when you're ready,
let's get after it.
17. Light Your Space Pt 1 Fundamentals: In the previous lessons, we got our content written
and our gear ready to go. Now we need to put
in some work to make our space look
as good as it can. And don't worry,
you don't need to invest in a whole actual
studio to have a good space. You just need to put in
some thoughtful work. So an ideal shooting
space should be well lit, have depth, and convey a
bit of your personality. It doesn't need to be fancy, but we won't settle
for drab either. So in this lesson, we'll
begin with figuring out where and how to shoot
with the best lighting. First off, you want to
find a space that has some distance between you
and the wall behind you. So this will allow
for a little bit of background blur because if you're too close to the wall, then your camera won't be
able to have any blur. And basically this
helps us to create more separation and depth to give us a more three
dimensional looking frame. Now, a common mistake
I see a lot of beginners make is to just
shoot against a blank wall. Now this isn't just
flat and boring, but it also Mrs.
the opportunity to convey a bit more of
your personality. Now, the best place to start, if you don't already own lights, is to find a space in
your house or wherever you live that is already
lit by a large window, preferably with a set of
curtains to diffuse it. Now this main light is
called your key light. Now don't worry if you don't
have video lights yet. I used window light for many years before
using video lights. My first and still most
popular skill share course was all natural light start to finish coming from my
windows over there. And honestly, I still think
it looks really good. And the reason for this is that the most natural
high end look can be achieved using very big light that's diffused
through something. In this case, we have the biggest light
source of them all, sunlight being diffused
through curtains. The downside is that it won't be perfectly consistent though
that's not required. And of course, you'll be at
the mercy of the weather and how much sun you get at
a certain time of year. You can pause the
video and try to look around and see where in your home you can shoot where there is some
good natural light. Hopefully there'll
be one spot that is both well lit during the day. It has decent depth and at least some potential
to be designed. Now if it comes down between picking a place that's already
designed like your stuff, is there like I have here, or a place that's
already well lit, It's up to you whether
it might be easier to move things to a
lit area than to say, professionally light
a dark corner. Understandably,
if you don't have that option and you need lights, then it's best to start with inexpensive battery
powered LED lights. Like what I have here, what I'm being lit through
this diffusion. These are cheap non wall lights. The model numbers are
shown here on screen. And it's best to get bi color lights that can
be white, daylight color, sunlight color, or
warm the color of indoor lights depending on your environment and
what's best for you. If you're asking me,
can you just use normal household or
outdoor fixtures, I suggest you only use
purpose made video lights. You see normal lighting fixtures often exhibit
undesirable flicker, as you can see in this sample
clip shot on an airplane. And they also tend not to
reproduce colors well. And for that reason, it's
really best to go either with sunlight or dedicated video
lights for the best results. Moreover, make sure not to mix white daylight with
warm indoor lights and especially
fluorescent lights. You might be wondering,
because to your eye, it might seem like
fluorescent lights are white, just like daylight. But the truth is they
have a greenish tent and it just doesn't look
good, especially with skin. That's why whenever I'm shooting indoors and I'm asked
if I want to turn on more of the
fluorescent lights or even the warm lights to increase the illumination
of the scene, my answer is always no. But you can mix sunlight
and dedicated video lights, which is precisely
what I'm doing now in my space with sunlight
coming from here and here. But my main consistent
key light being provided by my LED
lights over here. Moving on, when lighting a
person such as yourself, you need to use the
right quality of light. And that's usually best
when it's soft light, like what I'm being
lit by right now, as opposed to sharp hard light. And I'll show you
what that looks like by going behind my
diffusion material. Do you see the difference? Now, even when you
compensate for exposure, there's just a harshness
to this that's not as nice when the light is soft and the harshest
light you can get, usually say with like a
big outdoor spot light, or with especially things
like noontime sun, You want to avoid shooting
in that as much as you can or otherwise find a
way to soften that light. To soften a video light, you can choose to buy a purpose
built soft box like this. So again, the light
shines through here. Just make sure the
one you're getting is compatible with your
specific lighting fixture. Or you can choose
to bounce the light against a white wall or ceiling, a reflector, or like a
big styrofoam board. These are tricks
that we still often use in professional lighting. Basically, the idea is to
make the light less harsh and directional by spreading it out over a bigger
space and distance. Instead of letting it be a
concentrated point of light, like a spot light
or a flashlight, I have decided to use this really cheap backdrop
stand to hang a professional diffusion
filter called a 216 so I can have a very
big surface area to shine my lights through. And it's so big
that I'm actually shining two lights through it. So remember, the bigger and more distant
your light source, the softer it is. And the more concentrated and
close your light source is, the harder the light is. We generally want to use soft
light when lighting people, but we want to use hard light for more dramatic applications. Just remember though,
that soft light comes at a price whenever you shine light through
a diffusion filter. Whenever you spread it
out over a larger space, and whenever you make
it more distant, you are decreasing that
light's intensity. So when you soften the light, you definitely need
a light source that's strong enough to still provide good illumination even
after it's been diffused. So if you're still working
with small light fixtures, this is something
you'll have to balance. But the good news is these
little LED panels that I'm using already have a relatively
soft light to begin with. Unlike our old
traditional video lights, which were very
bright and harsh and always needed some kind of
filtering to look good. And it's for that
very reason that it's a great idea to work with the sun because it's
the brightest and most powerful light
source out there. And it gives you basically a lot of leeway
to make it softer without losing too much light depending on the time of
day and where you are. All right, this lessons run a little longer
than I expected, so we'll leave it
off there for now. And in the next lesson,
we'll talk about how to properly position your
lights for the best results.
18. Light Your Space Pt 2 Light Placement: Whatever your light source. Basically, you want to keep it about a third to
the side and above you because you want
it to give your face a good contour with no
undesirable shadows. Like you'll get, for example, from shooting outside at noon. Or if you turn on a light bulb that's directly above your head. So you'll have to
adjust your light or your placement relative to
the sun for the best effect. Now for standard Talking Heads, like what we're doing here, it's actually good
to have the light a little bit closer
to the center. Because if you move it
too much to the side, which is actually just
a matter of rotating, see, see how easy it
is to work with light. I just rotate my face and I
change where the light is. But yeah, if you move the
light too much to the side, then it tends to look a little bit too moody and dramatic. Move it a little bit to the
center and that's where you get kind of a nice solid
lighting for Talking Heads. And just as another tip, if you're going to light
from one side of your face, you want to light the side of your face that is
further from the camera. And this provides a
more flattering effect. Meaning the shadow part should
be closer to the camera, because watch what happens. If I switch it around and the shadow part is
further from the camera, It tends to make my face
look a little fatter. So keep it a little
bit to the center and then a little bit
to the side for that flattering shadow on
the near side of your face. So apart from how
the shadow looks on your face, one thing
to watch out for, where you'll know your
light placement is good, is having just this little
shadow under the chin. This shows that the light
is at the right height. It gives your chin contour
and you're not having the shadow underneath your
nose or underneath your eyes. Just keep it underneath the
chin to create that contour. Yet another sign of good
light placement are these. These are catch lights. The reflection of
the light source in your eyes that makes your eyes and basically the rest of your face, look alive. You won't get this if
your light source is too high or off too
much to one side. The movie, the
Godfather, for example, is famous for purposely not putting catch light
in the actor's eyes, but that's to serve
a dramatic purpose. We're not doing the
Godfather here, we're doing a Youtube video that's best to stick
to these tips. Now, depending on the
shape of your face, you might want to adjust the light for a more
flattering result. A more central
light, like I have here, flattens features more. But it might make your
face look bigger. While a more side on light
emphasizes shape and texture. But might also emphasize skin texture more
than you'd like, especially if you're using
a harder light source. For example, in TV commercials, they usually do beauty shots
quite flat and central, so lit centrally with a soft light at the
top and at the bottom, which makes skin appear
more uniform and flawless. For narrative films, you
usually get the opposite. You have more
directional light for more realism and
drama on that note, for a more professional look. But this is purely extra credit, and I wouldn't worry about this. If it's not an option,
it's best to light from the general direction of where the natural light is already
coming from in your space. This is what we call
motivated lighting because there is a motivation for the light to
come from there. And it makes the audience kind of buy into
the illusion more that the artificial light is
actually natural sunlight. To sum it up, when
working with light, especially natural light, you
need to develop the skill, the instinct of figuring
out where to place the camera and the subject
in relation to the light. For the best results for
Talking Heads like this, just make sure not to have a strong light
source behind you. Because this kind of silhouette, you cannot correct this properly in post with any kind
of color correction. And also don't put
it too much to the side where it
just gets moody. Well, here I'm still helped
by the window light, But if I put it to the side here where there's
no other lighting, then again we're getting shadows where they're
not supposed to be. A quick pro tip to working with natural light is to employ open shade if
you have access to it. Open shade is just
somewhere indoors, but with one or more of the walls open,
letting in sunlight. So here you have soft light by virtue of having a big
bright source, the sun. But all the lighting will be indirect because you
have a roof over your head and you'll just get
bounced light from the sun, which results in,
what did you learn? Soft light. All right. I hope these tips have
enlightened you. I'm sorry. It made you excited
to play around and experiment with
what you've learned. Now you can take some
time to try to figure out your own lighting and how
to get the best result. Once you've nailed it, admire what you've done, because you've learned
how to actually make yourself and others
look good on camera, instead of settling for just
shooting whatever wherever. With your lighting fundamentals taken care of in
the next lesson, we can now focus on making
your space look nicer, or what we call
production design.
19. Design Your Space: Now that we've learned to light, let's focus on
production design. Which is how everything
you actually see in the frame is going to look when you're
designing your space. It's good to do it
with your camera already framed up so
you know the extent, called the limit, of what
you're designing for. You may want to adjust
this limit to make your job easier to
show less stuff, but without losing too much of the environment or just framing
too close to your face. This is why I like shooting on a medium telephoto lens with
a shallow depth of field. Because particularly if you
have a big mireles camera, it cuts out a lot of the
distractions by using a medium narrow view and
lots of background blur. For reference, compare the
frame of my main shot that you see there with what
you would actually see on a wider shot
with my phone. So we have this
blank white closet here and just lots of junk
on the floor on my bed. So using this lens allows
me to cut out most of that, but if I am using a phone, then I would frame it
up somewhere like that. And just clean it
up further to de emphasize the cluttered.
Look at the back. So let's frame up your camera. So you should frame
yourself sitting there, already sit in the center of the frame if you're going to talk straight to
camera like this. And then make sure
that the camera is about just below eye
level to about eye level. Make sure that the
horizon is level, as we covered in a
previous lesson, and that it's neither pointing
up nor down noticeably, because that kind
of looks awkward. You can also frame
yourself sitting to one side as I do with my computer set up because
that's how the space is designed and that's what
looks right for that space. Once you've figured out
you framed yourself up, you might have to go
a few times back and forth between sitting
and checking your phone. So what you might want to
do is just roll your phone already or your camera and then try to arrange
yourself as best you can. And then later on, watch the footage again to see
if everything looks right. But once you've got
your framework out, now you can take a look at
how you can add, subtract, or move things around in
your background to make it more interesting on camera
without being distracting. So you don't want
anything here taking away attention from yourself or whatever it is you're
showing on camera. And if you're design oriented, it's great to be deliberate
about your color schemes too. Because frames with a
unified color palette look beautiful and it's
great for the viewer to see. Now a little bit
goes a long way. In my case, this side of my room is already
designed like this. And I have my toys, some
prints and some books, so I can convey a little bit
of my personality as well. So for you, you
can strategically place some objects behind you to add design while removing all very
distracting objects. Just design this in a way that expresses
something about you. Of course, as we
do in production, feel free to move
furniture around to get the best looking frame
if you're allowed to. Of course, it's really up to your creativity
and determination. And again, this is one of those realm sub disciplines
in filmmaking that can be really fun and a great way to express yourself and develop
some skill and design sense. Meanwhile you know things
like I don't know, laundry, hampers, clothes, dishes,
random house junk. They should be all moved
out of your frame. Even just out of your frame. Like I've done here, I'm
shooting this in my bedroom. You should just move
them just out of your frame for the
duration of your shoot. As you may have seen
when I was turning the camera around in
the last chapter, there is a lot of
junk surrounding this little square where I'm shooting to make it look
good enough for this shot. And honestly, you
can probably tell I'm no design expert, so
you don't have to be. Just go with what looks nice. That won't take
too much attention away from the main subject,
which is probably you. And also watch out for stuff
like random poking stuff in the background that
looks like it's poking into or out of your head. Or for example, any loud colors, designs, or text that clash. And again, call too much
attention to themselves. An easy and popular choice is your actual
computer workstation. Like I mentioned
earlier, though, you should clean it up a little because I'm sure this
is your workspace. And 100% I know there
will be clutter there. And of course, figure out
the lighting as well, because usually these
little computer knocks tend to be quite dark. But of course, it's not just your space that
we need to design. Can you think of
anything else that will be on camera that
needs some attention? Hm, yeah. We also need to talk about you, let's talk about your wardrobe. Yes, this matters, even
in a Youtube video. So basically just
dress in clothing whose shade contrasts with the background to
create separation. You don't want to be wearing
a white T shirt against a white wall or a gray shirt
against an off white wall. So you know, you can wear
a light color against a dark background or vice versa. And also you should be
conscious to avoid wearing shirts with thin stripes
or very fine lines, because cameras often have trouble resolving these details, especially after a video
is compressed for Youtube. And so that just
kind of looks weird. And of course, you
probably want to wear something that conveys
something about you, whether a graphic related to
your topic or your hobbies, or simply something that shows
off your sense of style. When in doubt,
just dress neatly. Of course, don't forget to wash your face so it's not oily. A little bit of foundation
isn't a bad thing. And then fix your hair
a little or wear a hat, I promise it's worth
the effort because I posted entire courses where
I didn't fix my hair. And one more thing. A lot of you will
probably want to do some top down shots
for demos in B roll. And if you want to
do that, you can get one of these inexpensive arms. Okay, I can barely make
it fit in my shot. So basically you use this part
to attach the arm to say, a table or a shelf. So I'll attach it to the
table here just below me. Attach your phone here to the
end and make adjustments. And as you can see, the phone
is pointing straight down, which will allow you to
get a perfect top shot, which just isn't
possible with a tripod. Because of the shape
of the tripod, you'll be avoiding the
near leg of the tripod. And for a great example of this, check out my friend Pixel
leaves on Youtube because almost all of her shots are just top down shots as
she never shows her face. And they're so well designed and take note that she can make it look this good shooting
purely on an iphone. And if she can do
it, you can too. So before this day ends, frame up your camera so you can see the limits of your shot and start playing around with and designing your
space already. This is one of the
most fun parts, one of the most creative parts. You're basically doing
what they do in Hollywood. Just, you know, in
your own little way. In my own little way. And once you're done,
well, congratulations. We are almost ready to roll. In this lesson, we learn basic production design
to have a good looking, clean, and expressive
background in shooting space. There's just one last thing we need to work on before shooting. Can you guess what it is? Well, it's yourself.
In the next lesson, we will learn some tips for getting comfortable on camera.
20. Get Comfortable on Camera: In the previous lessons, you learned basic lighting
and production design. In this lesson, we'll
learn how to get more comfortable on camera
in five steps, beginning with step one. Embrace the awkwardness. Being on camera feels
awkward at first, and that goes for everyone. So don't feel bad. Don't beat yourself
up. Just embrace it. It's a natural part of
this learning process. And recognize that even the most seasoned on camera talents
had to start somewhere. And some of the best
ones you see on Youtube. Now, trust me, they had
little to no natural ability. And you can naturally
check this. Just go to their channels and look for their oldest videos. As with everything,
practice makes perfect. So the more you do it, the more comfortable
you'll become. So step two, practice on
your own and get feedback. So if you need help, you should begin by filming short videos just for yourself. You already have a script. We already prepared your space, so why not practice? This allows you to get familiar with the feeling
of being on camera. And importantly, it gives you something to
review and work on. You'll most likely
find things and little ticks that
you never noticed or find that the energy
you think you're conveying doesn't
translate on camera. So don't let this make
you more self conscious, just adjust as necessary. You know, I've found that
the irony is that it takes practice to be
more yourself on camera. And most people will err
on one of two sides. They'll be a little bit, maybe too much, which
I think is where I am. Or they'll be
conveying too little, which is what a lot of
shy people end up doing. But either way, as
you gain confidence, you can and maybe should start showing your
videos to someone, your partner, close
friends, or family. Just make sure they're
supportive of what you're doing because
their support and feedback can be invaluable
in refining your on camera presence in body language and even boosting
your confidence. Moving on, step
three, you should plan and prepare for
being on camera. Fortunately for
us, we've already done all of this
extensively in Dase 12.3 Part of this was figuring out which
parts to say on camera and which parts
to do on voice over. Now you should make sure
that you're able to deliver both on and off camera spiels with a consistent tone
that sounds natural. Because most people I've found when allowed
to read a script, instead of memorizing it, their tone of voice
just suddenly changes, suddenly sounds very
robotic when they read or they have
this artificial sing, song tone, which doesn't really sound good,
it's not convincing. And as a viewer, it's kind of off putting to listen to somebody
who talks like that. So again, you need to practice
to overcome this tendency. Learn to read text as if you're saying it in the
moment spontaneously. Overall preparation
just removes stress. It makes things
easier and it makes you more free and
confident on camera. And this confidence
translates to a better energy and relaxation in front of the
camera when it starts rolling. Now once you've got
all that handled, we can move on to step four, which is focus on authenticity. You know, it's a social
media cliche by now, but still it's true. Authenticity is the key to
connecting with your audience. Remember our discussion in
day one about not being the best but being the
only Be yourself. Embrace your personality and let it shine through because this is your ultimate and sometimes
only competitive advantage that no one else has. Viewers will have a
hard time connecting with you if you aren't
being your true self. And people on social media can smell that a mile
away these days. So don't try to be anybody else. Don't try to be loud if
you're actually quiet. Don't try to be
quiet and serious if you've got a
vivacious personality. Another great tip
I picked up from Youtuber Sonny
Leonard Doozy that I also always repeat is
don't focus on yourself, but focus on the value you're
imparting to your audience, at least your
imaginary audience. For now, this will help you
get out of your own head and to hold your space on camera
as your lovely unique self. Again, I really find
it's true that it takes practice to be
yourself on camera. So if it helps record
yourself, you know, make your class
project and be assured that your succeeding videos
will get better and better. Which brings us to step five. Do the work, review and
improve on the next ones. As I said, the
more you practice, the more comfortable
you'll become. It's that simple.
Pay attention to details like your body language,
your voice modulation, your overall presentation style, and make adjustments to enhance your on camera
presence over time. Remember, getting comfortable
on camera is a journey, a process talent undoubtedly will help others
get there faster. But ultimately, it's work that will make you as good
as any pro out there. Embrace the process. Be patient with yourself and maybe most
importantly, have fun. As I said in my previous
skill share course, have fun because you transmit to the viewer the
energy that you feel. So breathe, smile, laugh at
yourself if you have to. And just enjoy it, because you don't
have to do this, you get to do this. In this lesson, you learn the simple truth to
getting good on camera, which is practice and
embracing the process. That concludes day four, and wow, that means you're
ready to start rolling. On day five, we're going to shoot our first Youtube video.
21. Day 5 Shoot Your Video: Welcome back. I'm
glad to see you back because it's day five
and it's a big day. After four whole
days of preparing, we're finally ready to shoot. We've done all the
preparation to ensure that the shoot day will be a
matter of checking boxes. So this is going to be fun. So in the first lesson, we'll learn how to shoot our
talking heads on camera, and in the second lesson, we'll learn how to
shoot our B roll. So without further ado,
let's get rolling.
22. Shoot Your Talking Heads Part 1 Before You Start: With the preparation we did in days one to four in this lesson, all that's really left
is to roll the camera. So we'll go through
shooting all of our on camera talking heads Now. Based on my own experience, it's a good idea to clear out
at least 3 hours for this. Don't do this in a rush, especially if it's
your first time. This is going to ask a lot of
energy and focus from you. So set your phone to
silent or do not disturb. Even turn it off if you can. And make sure to look around and turn off any noisy appliances. If you have to turn off like electric fans while
you're rolling, then you should do that. But if it's hot, then you
can just turn it back on. In between takes the idea
would be to do it in an air conditioned room because the constant noise
on the air con is easy to remove or just leave. And again, before
you hit record, make sure you have a lot of remaining space on your
phone or camera memory card. Because if you start rolling, it can take a while to clear out and then there's a risk
you could lose some of your files when it mixes
up with your old video files. So again, you just don't
want to lose this momentum. But of course, if it
happens it's fine, Just keep going with
your set up ready from our work in days
4.5 You can record a test shot now to make sure that your lighting
and framing are on point and that your
audio is good and at the right level
in your camera. So with the camera
level horizontally and neither pointing up nor
down too much compose it. So that your eyes are roughly level with the upper
third of the frame. And don't forget to leave
sufficient head room as well. So record your test shot
and play it back to check the framing and the audio
and adjust as necessary. Don't rush this part, because if you
don't get it right, you could find yourself spending half an hour or
more getting tired, talking on camera, only to
find that your focus was off. Your audio was bad, there
was chunk in the background or even there was something in your
teeth or on your face. Any number of things that a
test shot could have avoided. If you're using a
mirrorless camera or any camera with a
shallow depth of field, that gives you some
background blur. Okay, there's additional
stuff we need to check. It's essential that
you make sure that your autofocus is focusing on you and not on your background. This tends to happen if you have bright contrasty objects in your background that the
camera likes to latch onto. An external monitor or a tilty flippy screen is essential for you to
be able to see this. Now you can also try using your camera's monitoring
app on your phone, but it comes with
some limitations. Now if you don't
have any of those, then you don't have a choice. You'll have to roll and check
every 10 minutes or so. Or of course you could just
set it to manual focus. To be able to do that, you
need to put some kind of placeholder at the same distance from the camera as
where you're sitting. And then set focus
based on that. And then once you've set focus, you have to always be
conscious not to lean so far forward or backward that
you go out of focus. Modern cameras like the one I'm using don't have a problem
with this in general, when you do that, just roll the camera with
you in the frame, play back, check
focus, and adjust. Now I'll be honest, I shot
so many tutorials and even full courses like
this without a monitor. And it's not fun. So this is why I encourage you to start shooting
with your phone first. The deep depth of field
means that everything in your frame will be in
focus at all times. It may not look as sexy, but it's a lot less
prone to mistakes. Have any and all props
you need nearby, lay them on a table
in front of you, or just out of sight as necessary to avoid delays
in looking for them. When that's set as one final step, of course
you're going to be, maybe you'll get a little
bit sweaty setting up your lights and all
your production design and all your props. So before you roll the camera, go to the bathroom,
freshen up so you can look great and feel
confident on camera. If it makes you feel
more comfortable, you can put on a
bit of makeup or at least blot out any oily
patches on your face. Of course, check your hair. You can keep a glass of water or a tumbler nearby to help
you keep your throat fresh, especially if you're
not used to this yet, and don't forget, if
you live with others, then politely let them
know not to disturb you or make too much noise
for the next few hours. Alright, the lessons
getting along again, so we leave it there for now, and I'll see you
the next lesson for part two of Shooting
your talking heads.
23. Shoot Your Talking Heads Part 2 Filming Tips: And now finally you
can hit record. I suggest that you roll
long takes to save energy from getting up
too often from your spot, But be sure to cut and check
every now and then that the camera is still running and that the files are
being saved properly, that your framing and
sound are still good, nothing's moved out of place, and of course, that
you have it run out of space on your
memory card or phone. Believe me, every single
one of those has happened to me more times than
I care to count. Then if you're using
natural light, as I suggested, you should be aware if it's starting
to get too dark. If you don't have a monitor like I have here, it's
going to be hard. So again, you have to
get up and check it. Now for this kind of video, I suggest that you
shoot it sequentially, where possible, to save time sorting things
out in the edit. But of course, if
it makes more sense logistically to shoot
in another order, then that's probably better
and will take less energy. So as you roll along and
you get through your line, sometimes you're not going
to get it all right. Don't be hard on yourself
for making mistakes. It happens to everyone, especially if you don't have
access to a teleprompter, which I already started using. Just so you know, I shot my entire first scale
share course without a teleprompter and
it was so tiring. But it also turned
out great because it looked totally natural.
Bloopers and all. As you get through
this, especially if you've memorized things, don't be afraid to add, modify, or subtract entire
lines of dialogue. This is a natural part
of the shooting process and it's a form of editing
before you even edit. And many lines that you
wrote will probably not sound natural now that
you're saying them out loud. Now, how much do you have to
get right in a single take? Well, it depends on how
much you plan to say on camera versus voice over
and your own comfort level. If you're really
having a hard time, you must at least get
a few sentences at a time straight
so that you don't have too many rapid
cuts in the edit, which isn't good for the viewer. Here's a useful tip. You can opt to shoot either with two angles on two cameras
if you have them, so that you can cut between
them to smooth out jump cuts, you know when you
cut the camera. Or you can shoot in four
K on one camera and then just crop in when jumping to a separate part so you can
hide the cuts between parts. You couldn't say continuously. If you use a good enough camera, you won't notice much
of a loss in quality. But of course, the best way to do this is to shoot in four K, but edit in H D so you can make full use of that
extra resolution. Now if you do opt
to use two cameras, the second camera should
be at least 30 degrees of an angle away from
the first camera and at a different focal length. That is zoom, So it
doesn't look like a jump cut when you're switching
between the two angles. Now for the parts of the script
that will be voice over, I suggest that you record
them in the same setting using the same equipment as
your main talking heads. The reason for this
is you want to keep the sound and tone of
your voice consistent, which helps to
maintain a fluid edit. So be conscious of
still maintaining a natural tone of voice even when you're
reading your lines. What I do is just
to have myself on camera reading it so that
it sounds exactly the same. The downside to this is
it consumes a lot of unnecessary memory since I'm recording video and
not just audio. But it's great for
efficiency and consistency. Of course, be prepared to
face technical issues, whether it's your gear
not working correctly. You know, your sounds bad, you lose your camera's focus, your lighting changes too much, there's loud noises, that's probably the
most common thing, or even people bothering
you, any number of things. It's almost certain to happen, especially if it's
your first time doing this, but that's okay. Be patient and just have the attitude that whatever
happens you can figure it out. Feel free to take
a lot of breaks. This will be tiring. But it will feel incredible once you're done and you
have it all in the can. Speaking of which, once
you're able to get through the entire script and you've double checked
your shot list, that everything in that setup is done and you can move on, Copy your footage immediately to your computer and
never, ever, never, ever delete footage from
your phone or camera without making sure
that it's backed up to an external drive or two. Make sure your
footage is physically in at least two places, not including your
phone or your camera. Then once you've got it
tacked up, skim through it. Or better yet, watch
the whole thing. This is your chance to make sure that you have
everything you need and you have good
takes for every segment, for both the sound and the video before you put
away your entire setup, just in case you need
to go back and add or revise certain parts based
on what you've seen. Especially if this
is your first time, this is a must. This initial review is also a good time
to see if you will need any additional shots based on how your talking
heads turned out. You may decide that
you didn't like your delivery somewhere or
you want to change a line. Maybe you said something
that you turned out to be incorrect or a certain part will
be better supported with roll instead
of being on camera. Whatever happens,
basically add these to your shot list to
continue next time. So just so you see them, here's how my shots for my sample video turned
out. Hi everyone. My name is Aaron Palabab. I'm a professional filmmaker who travels around on my motorcycle. Today I want to talk about everything you need
to know to figure out how to buy your first
motorcycle reminder. You'll get access to these
shots in the event that you still aren't feeling up to shooting your own footage yet. So that you can use these to edit in the succeeding lessons. And that's about it, honestly. The ball is mostly in your
court for this lesson, but I know that probably
you'll run into things, things you'll need
to troubleshoot. So please let me know in the discussions below if you have any questions, concerns, and if you have any
urgent troubleshooting that you need to get out of the way so that you can finish shooting
your talking heads. And I'll get right to you
when I get the chance. In this lesson, we went through
the process of shooting your talking heads
and you learned some tips for getting through
the process smoothly. In the next lesson,
we'll go over how to shoot your supporting
footage. Your broll.
24. Shoot Your B roll: In the previous lesson, you shot your talking heads. Now it's time to
fill in the rest. Let's check off the remainder
of your shot list and shoot all of your
roll in general you want to shoot roll that
directly illustrates your point and of
course you want to shoot it in as good
quality as possible. The point of shooting
great appropriate roll is, in my opinion, twofold. First, it's to illustrate your points as clearly as
possible to your audience. Second, it's to give
yourself the material you need for a seamless,
visually pleasing edit. With as few jarring jump cuts as possible depending
on your topic. This can be as simple as pointing the camera
at various objects, but here are some pointers
to have better Broll. First, make sure you use
a good light source to properly light your barrel
when shooting objects, you should move your table or work surface close
to the light source. Don't forget, it's
better to still have these frames neatly
production designed. Then make sure
that each clip you shoot lasts at least 7 seconds. So that you have
allowance at the heads and tails of each
shot In the edit. I usually roll every barrel
shot for at least 10 seconds. Now here are ideas for
various types of burel shots. Probably the most common
kind of barrel on Youtube is just a simple close up to show a specific detail of what
you're talking about, like a product, a
feature of its design, something it does, et cetera. The great thing about
close ups is they also cut seamlessly with your
wide medium shots, like your Talking heads. These can be handheld even, or stating on a tripod, or moving on some kind of stabilizer depending on
what you need to show. But always keep the
movement steady and slow in shooting a close up or
else it will be too shaky. Relate that the close
ups are cutaways. If you're doing a
demo or a tutorial, you're doing something
with your hands. Then a cutaway is a closer view of what you're working on that gives a better
look at it so that your viewer can see
exactly what's going on. One of the most
common examples of a cutaway is the top shot. This is great for
various kinds of demos. In this example,
it's much better to see how the coffee
is being poured from the top of the coffee
brewer than seeing it from a wide shot in front where you can't see
the coffee bed. But basically anything can be roll as long as it supports
what you're talking about. And as I said in a
previous lesson, if you're talking about
something more abstract, then you can think of something creative to represent
that point visually. If you're not seeing
it on camera, give your audience
something visually to chew on to help make your
discussion more memorable. Now here's some more
tips for shooting good footage so that you
can get quality B roll. Employ a stable, moving shot
if your frame has depth, but there's not much that's
moving inside of it. Gimbals and stabilized cameras, like most new phones, are good for wide shots, while sliders are better for
controlled moving close ups. Locked or static shots, which is just what
you call a shot on a tripod is very clean, you can use it for anything. And they're best applied too to close ups because you
need that stability. Or if you have a wide
shot where there's a lot of movement
happening in the frame. Of course, tripod shots
are also best for when you're shooting cutaways
to demonstrate something. Panning and tilting shots are also great to
reveal more detail, especially on a close up. But these generally only
look good if you have a proper video fluid head on your tripod like this
one by small rig. Then you have
specialty shots that require more advanced
knowledge and or gear. Such as time lapse, drone shots, slow motion, which is just shooting at a higher frame rate like
60 frames per second. You can already use these shots if you know how, but
don't worry about it. If you don't get build the fundamentals now
get fancy later. If you already have some
experience shooting video, then of course you can use existing footage you
have from the past. As bro, I do this all the time. In the example of my
motorcycle explainer, that's going to be the
sample class project, I'll be using mainly
footage that I already have from my many
Moto logs and explainers. I will also include
some graphics and imagery from the Internet to illustrate points that I can't shoot or don't have
material for yet. And of course you can
use stock footage. This is a common option for video essay creators these days. There's lots of
reasonable options for stock subscriptions, such as the popular
service story blocks. Some websites even offer
free stock footage. However, personally for Youtube, I'm not really big into
using stock because for me, it looks generic and
impersonal unless you're using stock footage to specifically illustrate
what you're talking about, such as stock footage of a weather phenomenon that you're explaining in your video. And so those are
just some ideas to help you shoot higher
quality Breall. I can't actually tell
you how to shoot because you're the one who knows what Breall you're
going to need. And if you're going to use my sample footage, don't worry, there will also be appropriate
Breall for you to use. One more thing, when
you're done shooting your Breall before you
pack up your whole setup, don't forget to snap a photo
or several photos you can use as either your
whole thumbnail or as elements of your
Youtube thumbnail. We'll go over thumbnail
creation on day seven, but it's best to get
your ingredients now while you still have your
entire set up. And that's it. Just lots of different
ideas for how to approach getting good B roll. In general, I'd
say to aim to get both quality and
quantity. You need them. Quantity gives you more
options in the edit and quality just helps
to make a better video. Bad looking be roll
I think can be worse than not using
any beer roll. So do this. Well, in
this lesson you learned the importance of
good be roll and got some ideas for
what to shoot, how to shoot it at high quality, and where to get it if
you can't shoot it. The ball is now in your court, you've learned everything
you need to learn, and it's up to you
to shoot everything. So I understand day five
is a really big day. So give yourself all
the time you need. Definitely take a day or two, or three or more to get through this entire process of shooting, but don't take too long. I emphasize momentum is key when you're trying to
complete a high effort, high focus project like this. That said, I congratulate you in advance for getting
through such a big day, for making it through
all of the hurdles and resistance that kept you from
getting beyond this point. Until now. You've got it all in the can and now you're
ready to get cooking. You should congratulate yourself and celebrate getting
through this shoot. Kick back a little, take the rest you need and
when you're ready, day six is up next, which is where most beginners
stall video editing. I know this is a
daunting step for many, but you've gotten this far
and you've prepared well. So I'll do my best to guide you through it so
that your footage doesn't end up languishing on a hard drive for
months and years. All right. So I'll see you
on day six for the edit.
25. Day 6 Edit Your Video: Hi everybody,
Welcome to day six. By now, you've shot
all your footage, and you can't wait to see it turn into the video
you've envisioned. So today we'll take on one of the most essential
and exciting tasks in filmmaking, video editing. I know this can be intimidating, but I promise it'll be worth it. So first, we'll get
familiar with one of the most widely available
free video editing programs. Apple's free eye movie for Mac. I recommend learning to edit on a computer and not just a phone, because this gives maximum
creative freedom and will prepare you to take on more advanced projects
in the future. In addition, it really helps to have a lot more screen space, so anyone with a Mac should
have a copy of movie. However, if you're on Windows and you need to find a free, decent editing
program, I'd recommend looking into Power
Director essential. You can also opt for
using Vinci Resolve. That's on Windows and on Mac, which is a full fledged professional editing
software that is available for free with just a few features limited
compared to the paid version. However, Resolve will be
a lot more intimidating for a beginner and even I haven't learned
how to use it yet. So for this course at launch, I'll only have
lessons for movie, but the principles
will apply to a lot of other editing programs
at the same time. Please let me know
in the discussions below if you'd like me
to include a chapter on Power Director or maybe another Windows based editing
application in the future, and I'll get right on it anyway. After we get to know movie, we'll go step by step to
build your video edit. First we lay down your talking heads to
build the foundation. And then we'll put your
bureau on top of that and then we can add
titles and other stuff. And again, if shooting
your own footage is still daunting at this point, you can work with the
sample footage I've made available for you
to practice editing. Again, it's in the
class resources. By the end of day six, you'll have your video
content all laid out and ready to be
finished on day seven. So let's begin.
26. Import and Organize Footage: In this lesson, we'll go over
how to import, organize, and work with your footage in Apple's free movie software. Learning movie
also happens to be a good stepping stone to eventually learning
final cut Pro Ten, the pro editing
software famous for fast fluid editing
for content creators. Before you proceed, make sure that you have
enough drive space, at least 20 gigabytes, because movie will consolidate
all of your video files into one big library on your
computer's internal drive, in your movies folder. So when you first open movie, you'll see the workspace divided
into different sections. Mainly the library, the viewer, and over here, the time line. Here. The library is where you organize and manage
your video projects. You can create
multiple libraries to keep your projects organized or simply use one library
organized into separate events, which are usually
labeled by date. In my opinion, it's
more organized if every project is a
separate library so that you can use
events to organize your footage not by
date but by type. So let's import our footage. If you're using
an Android phone, you have to use the free
Android file transfer app and connect the phone
with its cable. You may have to watch
for a notification from your phone asking what
USB mode you'd like to use. Make sure it's set to file
transfer or file transfer 3.0 here it's asking me now if I want to use USB for
file transfer, I'll say yes. And now you see I have my
Android file transfer. So usually what I would do is not go to the movies folder, but go to the DCIM
folder, go to camera. So right now there's
nothing in here, but all I have to do is just select the files and dragon drop them somewhere
onto my hard drive to any directory on
your computer for now. Now if you shot with a camera
that has a memory card, you can insert it now to
your memory card reader. The import dialogue will
pop up automatically. If you're in movie, we'll import this later. But first, let's look at how
to import from an iphone. On an iphone I can use air drop, but if I have a lot of files, then I have to plug
it into my Mac. You'll probably get this
dialogue where it asks you to trust this computer,
input your passcode. Then, as we discussed earlier, you can open up image capture
to download the files, or you can also hit Import here. Then instead of clicking
here on Untitled, where you have your memory card, you can click here
on your phone. As you can see, you can just
select the relevant files to Import and hit
Import Selected. Now if you're choosing to
edit using my sample footage, click on the link and
the class resources. Now if you haven't already
and download my footage, you'll find my
footage conveniently divided into two groups, Talking Heads and B roll. If your files are
on your hard drive, you can just click here to import and then look for the
folder where your files are. Then we can choose
to import All. Now this will actually copy your video files into
the movie library. You can choose to delete the files from their
original location. To save space, I would
refrain from deleting the originals from your phone or camera until your
project is finished. If you can just leave them
where they came from, if they're on a separate
drive, then all the better. Now if you don't see
the import dialogue, when you plug in your
iphone or SD card, all you have to do is
click here to bring it up. So once you're done importing, feel free to eject
your SD card or phone. Now we have our footage
in the movie library, but as you can see here,
we don't have any events. So usually when you
create an event, it's created based on the date and time the
footage was shot. But in my opinion, this isn't a very efficient way of
organizing your footage. What's better is to create an event based on
the type of footage. So as you can see here, my default event
is the date today. Instead I'm going
to replace that, I'm going to call
it Talking Heads. And then I'm going
to create another event called be roll. Right now, I don't
have any bell yet, so what I'll do is I'll select
all of my talking heads, I only have four, and drag
them here to Talking Heads, which will make it
easier to find later. And later when we get our bell, you'll find it all
under this event. So as you can see, when
I click on the event, it only shows the clips
classified under that. Now if you don't see your
library list over here, just look for this icon. Just click on it to hide and
show the library list again. You can also change the
way clips are sorted in your library here by
right clicking the event. Right now it's sorted by name, but you can also sort
it chronologically from old or oldest to newest. And this is handy when
you have a lot of footage over a lot of
different shooting days. So, for example, if I
do, from us to oldest, you can see now
that we have a year here in the library list to
help us sort out our footage. Another thing you can do here in the browser, as
you can see here, is you can scrub,
as I'm doing here, to preview the footage. While this isn't very
useful for Talking Heads, it's very useful for when
you're shooting a long B roll. Anyway. Now that we
have some clips, we can drag them
into the time line. So let's just drag two, let's drop them down here. This, the timeline is the
heart of your project. Where you put
together, rearrange, and edit your clips to
create your final video. You can hit Spacebar
to play back, or you can just scrub through by moving this line here called
the Current Time Indicator. And this is a unique feature to Apple's editing
software that makes it easy to just basically
skim through your timeline. Something you just need to
be aware of is that most of your clips should be the same
frame rate and resolution, so that movie knows
what settings to use. So if we click over
here to Settings, we can see it's set to ten ATP. It doesn't give us any manual control over the frame rate, which is why I suggest keeping the frame rate to just
what we're using, which is 30 frames per second. And any clips at more than
30 frames per second will be automatically
interpreted and played back as slow motion by movie. If you don't want
movie to do that, you can go over here to settings and then just turn off applies slow
motion automatically. So moving on, getting
familiar with the rest of the
interface of movie. Over here is the viewer
where obviously you preview your clips and the
edited video in real time. But it also has the button
to record a voiceover. You can use this as an
easy option to talk over your video if you didn't record voiceover
during your shoot. Now on top of the
viewer is the tool bar. It contains various
tools and options for editing and
enhancing your footage. And so we can leave
off there for now. We just need to get
familiar with movie so that we can start
working on our footage. So in this lesson, you learned
how to import and organize your footage in movie and got familiar with
the basic interface. In the next lesson, we'll go over how to actually
edit your clips.
27. Edit Clips and Create Titles: In the previous lesson,
we got familiar with movie and learn how to
import and organize clips. In this lesson,
I'll show you how to actually edit your clips. All right, so we've already got our two talking heads
here in the timeline. We can hit command minus and command plus
to zoom in and out. And then let's start
with basic trimming. Basically all you have to do is drag one end of the clip to
trim it, drag the other end. You'll notice here as well that when you drag
the end of one clip, the beginning of the other
clip follow suit because this is something it shares
with its big brother, CP ten. It's called the magnetic
timeline and it makes editing really efficient. And they move together
whenever you make an edit. Another more precise way to
edit a clip is to split it. Let's say see here we
have some dialogue here. We could put the current
time indicator here, so we know that it starts over there and we hit command B. Now we've split the
clip then usually what we would do is
take out this part. So we split this, click on this, hit back space, and then
we've edited our clip. Another version of
this. For example, we have this chunk of
dialogue in my talking heads. Again, I'm judging this from
the wave form over here. So I'll split this then
I'll split it over here, and then just delete
the remaining. Okay guys, quick edition here. Something really
important that I forgot to put in my original
recording of this. Now let's say we've cut
up a bunch of our clips. If you want to reorder
them, it's simple. You just drag it drop and all the clips will
automatically adjust. Now when you're working
with voice over, there's a different way
to deal with it because movie doesn't allow you to drop the voice over into
the primary story line. For example, if you needed this part to be just voice over, you need to fill up the
space in the time line, in the story line with at least a temporary
piece of video. For example, let's
put this down here. Let's drag it to be the same
length as the voiceover. We can take out the
audio for now and later. You can put the appropriate
piece of roll over. This voiceover for
example, like this. Read that out over there. Or we can just drag
it directly here and there we have our
roll over our voice over. Now as you go through
this process, if you make a mistake or
didn't like what you did, really simple, just use the usual command of
command Z to undo. And you can undo all the
way back several steps. Moving on, so let's pretend this video is edited
and there's a bunch of, let's add some transitions
to add transitions. We go here above the browser and we click here on Transitions. We can scrub through them
to preview the effect. Fade to white, it's
fading to white. Fade to black is
fading to black. Spin out iris, iris page girl. And there you get the idea
to apply a transition, we simply take one here. Let's take a classic
cross dissolve. We put it here on the space
and then when you play back, which is space bar means
more acceleration, fork and or top
speed horse power at the low end you can find it'll dissolve
to the next clip. And then if you didn't
like the transition, if you want to use a
different transition, all I have to do is click
here and then hit backspace, and then the transition's gone. Now for our purposes, honestly, we won't be using too
many transitions. And I advise you to
avoid it as well, unless you want
to show something like a significant
passage of time, a transition to a different
location, et cetera. Because honestly, it looks very amateurish to use
unnecessary transitions. And when you do use them, I generally would advise that you stick to
using basic dissolves, such as a cross dissolve
between two clips, or a basic fade to black, or a fade to white at the beginning or at
the end of your video. Moving on, we can add text
and titles by clicking here over our browser. And just like the transitions, you'll see several
presets that you can preview by scrubbing. All right, let's pick
just a really basic one. Let's use a standard
lower third, which you would have for, say, interviews,
introducing characters, or to show information. Let's drag it over here. Let's zoom in again by hitting command equal command
plus, basically. Then you can click on the
title and change the text. If you can't edit the title, just make sure to double
click it to pull it up here. You can change the font here, you can leave it on Auto size. You can change the alignment. Click select bold italic, Put a drop shadow and
change the color color. Then you can change the
color of your text here. It's just different
ways of selecting the colors you want there. You can take a spectrum on
different specific colors. Here I'll just pick
plain old white. Then you can change the
duration of the text simply by dragging the
heads or the tails, the physical ball where
you want them to be. Then if you change a bunch of stuff in your title
and you don't like it, you can, you can
double click here. Or instead of double clicking, you can just click on
here in the tool bar. And then hit Reset. And
then it resets everything. Then you can hit Check to
apply your title adjustments. There are some limitations
in working with titles in movie that you
need to be aware of. First is that certain titles have elements that
you can't change. But I think the bigger thing
is that you cannot manually move and title
around by dragging it across the
preview screen here. You will have to pick a title, a title type that has pretty much the look and
location that you want. If you're looking
for something that's just standard and
universally applicable, I suggest looking at standard lower third for something that's
here at the bottom. If you want to
change the location, you can only basically change it by changing the alignment. The paragraph
alignment here, again, that's left, middle
right, or justify. Of course, you can also
delete the lower title just to have a
single line of text. Just experiment. Take a look at all the different
kinds of titles and see which you like best. Again, I would advise
simpler is usually better, like fancy stuff like
this, Star Wars style. It's cute, but it's not very applicable to a
variety of projects. All right, let's leave
it off there for now, and in the next lesson, we learn some tools to enhance and manipulate your
footage and audio.
28. Learn Various Tools in iMovie: All right, so for now
let's delete our title. I movie also offers some basic controls for modifying and enhancing
your video and your sound. So they're all here in the
tool bar above the viewer. So if you click here, you have some automatic color
controls If you hit auto, so you can see here, it kind of automatically graded my clip. Let's undo that. Match color is a way to match colors
between two clips if you want them to have a better consistency
white balance. This is handy if, for example, you didn't set the white
balance correctly in your camera and your shot is
either too warm or too cool, then you can simply use this eye dropper
to select a color, a neutral color, like
white, gray, or black. So let's do it here. And it'll set the white balance
correctly for that. And then we can hit check
to confirm for Naldo. We'll undo something
you need to know. Also the clips
I'll be giving you won't be in this flat color. I'll pre grade them to
have a standard look, and then you can work on that
so that you don't have to learn how to create
a very flat image. So this is more for
professional and advanced use. Next up, we have more
manual color controls. This tool bar controls exposure. Take note that you
shouldn't push these settings too much
because the footage coming from your phone and
the footage I'll be giving you doesn't really stand up
to too much manipulation. Unlike say, a high quality
raw photo over here. This controls saturation, basically how vibrant
your colors are. So we can pull it up like this to make it more colorful or pull it down a little to
make it more desaturated, closer to black and white. All right, but for now, let's just reset everything. And then this last slider just controls color temperature. You can make it
warmer or cooler, but again, I would
suggest only tweaking, don't go beyond
about here or about here because it is
usually just too much, particularly for the quality
of footage we're using. Next is crop. Now this is more useful say if you're
working with photos. Ken Burns automatically like zooms in and out
from your photos. So as you can see
here, it's very easy. We set the start and
then we set the end. It slowly zooms in
according to what we set. Okay, I'll undo that. Going back to crop,
we don't want to use Ken Burns crop to fill
is when you're using footage or photos
that are vertical or just not 16 by nine the size
of the project we're using. And you want it to fill
up the entire screen then fit just makes it
fit to the screen. But if it's not exactly the same size it's going to
show black bars on the side. Unlike crop to fill
where it will leave out any black bars next up. We don't need this
for tripod shots, but this is to
automatically stabilize shaky video and you can control the amount of stabilization
with this slider. And if you get that little
jello looking stuff when you stabilize your footage, then you can just also check
here to fix rolling shutter. Now, we don't need
to do that for this because these are on tripods. This controls the sound. If you recorded your
sound levels correctly, you shouldn't have to
mess with this too much. But a cool feature on movies, you can just hit auto
and it automatically raises or lowers the sound
to about the right level. We have noise removal, I wouldn't mess
with this too much. The quality of noise removal in the software
is not that good. Then here you have equalizer. Just the voice enhance,
music enhance, base boost, Treble,
boost, et cetera. You don't really need this, but you can play around with this to see or to hear if it improves your audio
in a way you like. Next up we have speed controls. Again, this isn't very
useful for this project, but this is where
you would go if you want to slow down footage, if you want to do
a freeze frame, do a custom speed or you want
to speed it up, generally, I wouldn't mess with this
unless of course you have slow motion footage
in which case you can actually slow it down
a certain amount. And again, I movie
by default interpret slow motion footage
already as slow motion. So if you have 60 frames footage in this 30 frames
per second timeline, it'll come in here as
two times slow motion. Then finally, we just have an ability to
apply various filters. Again, I don't think this
is very useful for us. It's better off that you
just color grade manually. It's much better too, if you shot footage in a way that
didn't need color grading. But we didn't go through
that prior to shooting, when we prepared
our camera setting. So I'm assuming that
basically you're going to leave your colors
more or less as is. And just so you know,
this final tab here is just clip information
and that's it. In this lesson, you got familiar with how to work
with your footage, how to use transitions, titles, and various tools to manipulate
and enhance your footage. In the next lesson, we'll finally lay down
our actual video, starting with its foundation, the Talking Heads.
I'll see you there.
29. Lay Down Your Talking Heads: Previous lessons, you learned the basics of using
movie to edit. In this lesson, we'll apply
all of that and lay down the foundation of our Youtube
video, our Talking Heads. First, of course, you should look for all of
your talking heads, which should be easy enough
to find if you organize them using events like we talked
about in the first lesson. But also if you've
got them imported, then you could just
easily find them using the thumbnails like I did here. I haven't imported
my bureau yet. So they're going to be
really easy to find. But even if you had a
bunch of bureau here, it would still be easy to
find because it would just be a bunch of talking heads. All right, so take all of them, drag them into your
time line like so. Now here's what I suggest
you do watch all of your footage first so
you know what you have and you can compare
your best takes. So right now I have 14
minutes of raw footage, but a great tip to save
time is as you skim here, you can clearly see from the audio wave forms
where I am talking, fast way to do this would be, so let's check this wave form, this is how to take, okay. So this is just side
comments and stuff. So all I have to do
here is click here. I can zoom in if I want
to be very precise. Put my current time
indicator here and then hit command B and
just delete that. Basically do that for all the rest of the Takes
Command B, command B. Just follow the wave forms, cut out all of the dead
air so that you just basically have a lot less
footage to watch, right? Command B. Command B.
I'll finish doing this, we'll come back after I'm done. If while you're
doing this you find you cut out too
much, don't worry. You can just, for example,
if I deleted this, I can just drag it back
out to restore that part. All right. I'm done cutting out all of the dead
air more or less, which cut 3 minutes. So now we only have
11 minutes left. So as I said from here, you should watch the entire thing so you know what you have. And of course, rearrange anything that's not
in the right order. And then what you should
pay attention to now is if you have two takes of the
same thing as I do here, what you should do is put
them side by side and listen to both of them to
see which one is best. And of course, you're
paying attention to things like how's
the sound quality, how's the delivery, and also
which take is in focus. So if you're starting
out, it really might be a good idea to do several takes to
anticipate and be able to cover missed technical mistakes like missed focus. For example, here I have two different takes
of my ending spiel. I prefer my ending
on the second take, so I'll delete the
first take questions. All right, so I'll delete this. That's the first
take. I have one, my name is, oops. And then now I'm back here. I'm going to hit function
back, which is home. And then just
follow this process until you have one smooth
take of everything. And then of course,
if you recorded your voice over on camera, like I suggested, include those already where they belong
according to your script. And then if they don't have a visual or if you're reading, we'll cover those up with
Ball in the next lesson. Edna. As you're going
through this process, remember you don't have to put everything that
was in your script, in your video, because during the edit you may notice
you don't need it. Or you may notice that you didn't say it the way
you wanted to say or that you outright
said something that turned out to be incorrect. That's fine, Just cut it out. Now if you cut something out but you need something
to replace it, that's when you can
record new voice over. A few more tips for working
on your talking heads. You can already shorten
your video by cutting words and sentences closer
together, by removing arms. And as for more brevity, anticipating that you can cover those jump cuts
later on with Errol. So what is a jump cut? A jump cut is when
you cut between two frames without any way
of smoothing the transition. So for example,
this is a jump cut, getting a motorcycle that far. So first let's talk
about the difference. So that's not actually
a bad jump cut, because the composition between those two is almost
exactly the same. It's almost what we call
a match cut between two clips that are composed
almost identically. But if you're doing things where you're moving around
the camera more, then you want to cover
up those jump cuts. So for this type
of talking head, we usually cover
our jump cuts with B roll or a second angle, or a slight punch in to simulate a second
angle like this. All right, so to punch in, let's click on the Crop button. Hit Crop to Fill, And then crop ever so slightly. And then of course recompose
so we have a good frame. And then now it's not
as much of a jump cut or needs and goes first. Let's okay, I think actually
to cover up the jump cut, we need that to
be a bigger crop. But again, you need to watch
out because if you crop too much and you're not editing a four K clip in a
ten ATP timeline, then the footage might noticeably degrade if
you crop in too much. So it just depends on
how you shot your video, but this is just so you know how to smooth out a jump cuts. Let's talk about the difference. Okay, that looks pretty good and we're not losing
too much quality. It actually simulates kind of a second camera
doing a close up. Let's see that again about
getting a motorcycle that fits your first. Let's in general, it's best to have as few
jump cuts as possible. Or at least never more than
one for every few minutes, because this is jarring
for the viewer. Another thing is during
editing, honestly, I sometimes change
entire sentences by splicing them together with other sentences that
I never intended to to either shorten
how I said something, make it more concise or correct
something that I totally misspoke and then I just
cover that up with beer roll. So sometimes they'll be like a very short word from one clip in between two
other longer clips. So of course that's going
to be a lot of jump cuts, so I should cover
that with roll. And I mean that's basically
it. It's really simple. So just go through
this whole process. Apply the tips that I
gave you until you have your basic assembly with no more than one take of every
part ready for your ball. Now our video has a solid foundation on which
to build everything else, so I think this should be
pretty straightforward. After all the preparation
we did in this lesson, you learned how to edit
your talking heads. Now you should be ready to lay down the rest of your video, which we'll do in the
next lesson when we put our ball on top
of our talking heads.
30. Insert Your B roll Part 1: In the previous lesson, we laid down our talking heads which are the foundation
of our video edit. In this lesson, we'll illustrate the
concepts we're talking about and hide our jump cuts
by placing relevant bell. So first let's import the
sample footage I provided and drop them into
here, The Broll event. I won't be providing you
with actual raw footage but rather compiled clips from the many logs and reviews
I've already shot. Along with some still
photos thrown in so that we can practice working
with stills in movie. You'll also notice if you
look at the file names, that these are
already numbered and labeled according
to the order in which they'll appear
in the video. But you'll notice
here that we have an arrangement that isn't according to the number
of the file name. So what we should do here, make sure to right click
here on the browser, Sort clips by and select
Name and ascending. Now the clips will be in the order in which they're
meant to appear in the video. The reason they're
numbered, of course, is to make it easy to
just paint by number according to what I'm saying on camera in
the talking heads. And another thing
you'll notice is that several of these clips
aren't single clips, but rather montages that
are meant to go together. As you see here, I'm skimming through this one clip and it contains a number
of related clips. And also finally, my
Talking heads down here, the entire script
is set on camera, there's no voice over. So honestly, I could
technically just post this full video
without bureau. But we need to do
better than that, especially for an
educational video like this one laying down bureau at this point
Couldn't be simpler, especially if you shot listed. Well, you should already know basically what goes
exactly where. So here under my bureau event, you can search and scrub, basically using the thumbnails
to find the right clip. Now for example, if you have a longer clip and you need
to use only one part of it, say just this one clip, you can just set
in points and out points by scrubbing to the
part you want to go to. Pressing, going to the
end of that part and pressing and you can drag just that part
into the timeline. Now we don't need to do that. And we can reset this
in and out point by right clicking and press
Select the entire clip. All right, now let's begin
laying down our B roll. All right, so I'm
talking about the number of choices between motorcycles. So I selected this clip. All right, and one quick
thing just to note, if you find that your current time indicator isn't snapping, it should by default, be snapping to the starts
and ends of clips. If it's not doing
that, just press N, So I turn it off now
to turn off snapping, so it's not sticking to
the ends of the clip. And I press N again to make
it stick right anyway. So if I play this back
without turning off, the sound is overwhelming. Hey, I understand. Obviously the sound interferes. So we can turn off the sound just by
pulling this little bar down to zero in movie and it's Big brother,
final cut pro ten. When you drag Brol on top of a clip, it behaves differently. It acts as a connected clip.
So what does that mean? That means when I move the clip underneath the associated
bel goes along with it, there's like a stray frame
there that shouldn't be there. To cut that out, let's just use the direction arrows on the keyboard to scroll to
the part that's black. Zoom in a little
bit, trim the clip, and then no more black part. So you'll probably find that
on several of my clips. So always make sure to remove that little black frame from
the end of my sample clips. Okay, I know that this piece of bureau goes with talking
about cylinder size, so let's look for
that part physical. All right, so we're talking
about the cylinders, so let's drag this down here. Turn off the sound, which
is the physical volume of the cylinder or
cylinders in its engine. Okay, Again, we have
that little black part. Just take that out.
Sorry about that. So just remember when you use my footage alway, take
out the black part. Now working with still photos instead of clip is
a little different. So let's drag it down here and let's see what
I movie did with it. As low as 50 C, one to five. So I movie automatically applies what's known
as a Ken Burns effect, which is this slow zoom
in 50 C up to about 100. So this is okay with me. But I want to customize
the way it zooms in by clicking here on cropping. So here we've
selected Ken Burns, and then we can move the
start and end point. I want to move the start
point down to show the entire motorcycles and
do the same with the end. Another thing we
can do with sales, what we can't do with
video is we can make it as long as we want or
as short as we want. And if we extend the length, it's just going to
extend the length and basically slow down
the zoom in or out. You can also make the Ken Burns zoom out instead of zooming in simply by looking
for this button, the reverse button, And that reverses the start
and end frame. But in this case, since
we're focusing on the motorcycles, we
want it to zoom in. Let's watch that Peds that
range from as low as 50 C up to about 101 to five
and usually 150 CC. These small bikes are
cheap and make power. Ou all right, so I could cover up that whole
thing just with this, but I want more variety so
I'll show it in it there. So I want this clip to
cover until the next cut, so that I don't have a jump
cut as we talked about. So basically I have two choices. I can either move this
here or stretch it here. I'll go with the stretch
options as low as 50 C, up to about 101 to
five, and usually one. And let's turn down the sound. These small bikes are cheap and make power
in a friendly way. That's perfect for beginners. Now let's move further
ahead and try to use a vertical photo to see what happens when we
use a vertical photo. All right, so in the
sequence I've put here, first I have a horizontal photo. Let's put this in again. We can change the cropping, change the Ken Burns. You also have the
option to just leave it completely still by choosing crop to fill and then
just moving the crop. Just make sure not to open it up and then show the
black bars on the side. It's better not to
have the black bars, although if it can't be
avoided it's fine too. So I wanted to
focus completely on the bike this time
instead of Ken Burns, we just have a still bike image. Again, that's crop
to fill instead of Ken Burns. So
let's play that back. Sport bikes, they have
aerodynamic firings. That All right, now that I'm going to talk
about the handle bars, I want to use my vertical photo. Then let's just
finish that clip with this showing the power
of the sport bike. Let's see what's happening here. See what's happening here is
that it's basically zoomed in to take out the black bars. I movie did a perfect job of selecting which
parts to start and finish so that we could see the handle bars
I'm talking about. But another way to deal
with a vertical photo is to actually just live
with the black bars. Now let's see what happens
if I do that low aggress. Now we have a problem because
there's a clip underneath it that's showing up behind basically where
the black bars were. So how do we solve this problem? Stay tuned for part two of
this lesson coming next.
31. Insert Your B roll Part 2: Now we have a problem. Because there's a clip
underneath it that's showing up behind basically where
the black bars were. So what we need to do in
this case if you want to use a vertical photo with black bars behind it instead
of the underlying video. Slightly more complicated. So what we should do here is we need to split
the clip again. Option B here, go to
the end option B. And then we need to right click the underlying clip,
select Detach Audio. In other editing programs
you would be able to disable or change the
opacity of the clip, but movie doesn't seem
to allow you to do that. So then making sure
that the audio and the photo are
the same length. I'm going to add the photo down here to
the primary timeline and then move the audio
to connect to the photo. Then delete the visual. At the now very
sharp and stylish. They have low
aggressive handle bars. Now I can use the
vertical photo foll with black bars
without any video. That shouldn't be there. But I actually prefer how
it was originally. So let's hit command Z to undo. Now hit undo to go
back to how I like it. Okay, so as you can see here, there's a little bit of space
that shouldn't be there. So I'll stretch this to cover up the space
higher in the rev range, so you have to rev them
out to feel the max. Another type of media or
role that you might work with is the transparent
PNG, like this. One of the Honda RM
that I found online. As you see here, the default Ken Burns thing that I movie
is doing looks ridiculous on this right R M. So what
we can do here is let's go, let's go to crop to fill. It still looks ridiculous even though it's not
zooming in anymore. Then we go here. This is a special menu here on the tool bar that comes up only for the beer roll. This is the video
overlay settings, where we can change
the opacity of the cut away or we can change
its size by going here. Let's go to picture And picture. This is how we can move a graphic around by
default to make it clean. Movie makes it dissolve in. Okay. But as we notice
here, the image is cropped. So let's go back here to crop. Let's make sure we have the
entire bike in the frame, Then we go back here, Select picture in picture, we can leave dissolve
on to make it clean. And now X RM, it's just a little
bit too small. We can drag it to make
it bigger and put it here in the space where
it's most visible. Let's play that back. Dax RM. That looks good. Now we can fade it out there site
and the Honda R. And it's that simple.
Those are just different ways to deal
with various clips. As you lay down your Broll. Just follow this process to
lay down your Breall and soon you'll have a
nearly completed video. So I'll finish laying all
this roll down so that I have a final product to share with you at a different time. But for now I want to talk about some other things you
need to look into. For example, it's common during this process of laying
down B roll that you realize that you might be
missing some B roll or that you want to add to or rephrase some of what you said
in the Talking Heads. So this is where
you can of course, look for or record
additional roll and at the same time record
additional voice over. If you have a mic that
works with your computer, it would be most convenient
to use that connected to your computer and then use the native voice over
recorder of movie. By clicking here, this will allow you to
talk over your clips. For example, here,
let's disable my audio. Just for example, if I added
these clips of B roll, I could simply hit record here. There's a countdown then, yada, yada, sport
bikes and stuff. I forgot to say some stuff about sport bikes, yada, yada, yada. Using the video recorder
makes it really easy to talk over exactly the visuals that you're going to
put voice over on. So that's assuming you have a good mic that you can
connect to your computer. Otherwise you can record to
your camera with the mic you used for the talking heads or using the voice
recorder in your phone, using a good mic. Then you can copy that
file, tear computer, and import it to eye movie, and then drag it
where it belongs. So for example, it would appear here as
just an audio clip and you drag it down here
underneath your new role. And that's it, it's
pretty simple. So after your first passive laying down all your beer roll, you should go over your
video multiple times to revise and polish it
so that it's concise, clear, and to make
sure that you use the best options for
your supporting visuals. And then once you've got
some headway in your edit, let's say you just finished laying down your talking heads or you just finished
laying down your role, You should back up
your movie library to avoid any
potential heartache. So to do that, you need to find where your movie library is. It is usually here in
the movie's folder. And it's this one, this icon. And basically you just
copy this file to an external drive or automatically by using
a time machine backup. All right, so by now you
have a basic grasp of how to lay down B roll and
how connected clips work. The difference
between working with video clips and stills in movie. But feel free to step back in the video if anything
was unclear. And of course, please
don't hesitate to ask me questions
in the discussions below if you need
any clarification or if you're troubleshooting
any technical issues. Editing really is a
very technical process and it is absolutely
normal to be stumped every now and then
when you're trying to execute your vision using only the
tools that you know for now. But hopefully you're
able to use what you've learned in the
next few hours or the next couple of days to successfully lay down
all of your B roll. In the next lesson,
we'll go quickly over adding titles and
other enhancements to finish up your video.
32. Add Titles: In the previous
lesson, we laid down our bureau and polished
our edit a little bit. In this lesson, we'll add
some titles to show or emphasize information and to share things like your
social media links. A simple, clean title from
the presets available here in movie with a good type face
I think will serve best. So I want to add my
first title here where I define what I mean by
motorcycle displacement. So I'm going to choose just
a standard lower third. And this is perfect
for me because it has both a title and a subtitle. Unlike the other lower
thirds like this one. Let's stretch it out
over the entire clip. Let's add our term. Let's say it's displacement. Let's say here as you see, a nice feature here in movie is that it automatically changes the font size to fit into
basically the template, so you don't have to
worry about alignment and stuff like that.
Let's play it back. The physical volume of
this, as you can see, it also has an auto
fade in and fade out or cylinders in its engine. Bigger usually means more mass and weight, but it also usually, when I start talking about different kinds of motorcycles, for example here, range from
as low as what I can do. Actually, if I already
have a good template, tap on the old title. Hit Command C, Go over
here, hit command V, and then I can just change
the text so I don't have to drag it from the browser all the time if I want to use the
same format every time. Small bikes, and then let's
put it until here at the end, range from as low as 50 CC up to about 10015 and usually
150 these small bikes. So again, I want
to emphasize you want to keep it clean
for the titles. It doesn't look good if you
use something like this. Cheap, it make power in a print. It just looks a
little bit childish. I'm sorry, just
keep it tasteful. Basically, you get the
idea and you can just add text where you think
it's appropriate. Honestly, it's not
really necessary, but I think it helps to
keep your attention and increase comprehension
overall when you're doing a video like
this, that's informational. Other parts I would
add, text obviously, is as I go through
every category of motorcycle from here I copy, then I paste here, I'll say medium, small bikes. I'll say 200 to 300 plus CC now because it's so small. Actually, just the thing
I'm running into here is that because we have
this auto font, for some reason, this lower font got a little bigger
than I wanted it to be, Whereas this is about
the right size. In this case, I will just
manually make the font smaller just to get
the right look, et cetera, et cetera. When you watch the
video, you'll get a better idea of the different
kinds of information. I also want to see how you
execute this on your own. If you use my footage to edit, I want to see how you
interpret the use of text and how the video
is organized. All right. You know how to lay
down your titles. In the next lesson, we'll
talk about how to enhance your audio and video using
movies built in tools.
33. Enhance Your Video and Audio: Another thing we can
do now is to enhance our video a bit by working
a little bit on the colors. Our talking head
already looks good. Let's say if we go up here, you see this magic wand. This is like an auto color or auto, auto improvement
basically. And if we see what it does, it brightens up our video
and contrast a little bit. I mean, this is okay, but
it's not really necessary. But it's good too if you want to see where
your video is at in terms of is it a good
standard exposure and color in this magic wand, we'll give you an idea of
how close you are to that. But in my case, I actually
like how it looks already, even if it's slightly
slightly underexposed. But when we look at our
barrel, for example, because they come from
lots of different sources, they don't look very consistent. And there are some
that look a bit more washed out than I'd
like, such as this shot. For this shot for
example, we can go here, let's see what it looks
like if we just do auto evens out the
white balance. That's okay. That's
one tool you can use. We can try to match color to
another clip that I like. Maybe this clip since
it's very vibrant. Let's see how that
goes. Not too bad. It's a little bit of an
improvement as well. But let's see what else we can do now if we work
on it manually. What I would do is pull
this back, pull this down. This controls your shadows. I can pull down my
shadows a little bit. Red, I think means we're
crushing the blacks too much. Then highlights. Not
too much, just a tap. The rest are the
intermediate mid tones. You can individually
tweak the mid tones, as you see here is just like
three different controls for the mid tones to tweak
it to your liking. Now, a normal beginner mistake
would be going overboard. Like I said, like you put
your contrast way up here, it just looks super weird. The video falls apart
and then it gets too warm and then it
gets too bright. Don't do this. Okay. Again,
subtle changes would be best. Hit reset, then, oops, I reset everything,
including the audio. Again, let's do it. Remove the audio. Bring
down maybe not the blacks, just the lower mid
tones a little bit. Give it a tiny bump
of saturation. That's going to be subtle,
but a bit of an improvement. Maybe I need to brighten
it up a little bit as well. You get the idea. Just tweak settings and learn the language of
the different tools. Okay, this clip is another
good example to work on because it was shot at dusk. I think it lacks a
little bit of pop here. I can work on the
color temperature, make it just not this warm. It took to, you're like a Hollywood in some
foreign country look just a little bit of extra warmth to
neutralize that color. Make that T shirt match
how it looks here. Right now, a little bit, Maybe just a tiny bump of saturation. Bump up the high lights, not oh, that's way too much. Even this is already
way too much. Because you can see here that my T shirt is just
becoming pure white. So let's bring that
down just a tiny bit. And then, same thing with our
shadows on the other end. Bring it up, bring it
down a little bit. The one way we can compare is by looking at this
is our edited clip. And then go looking at the
raw clip on the browser, which is the decent change. We just made it a little bit warmer and less blue and sad. We added just that little bit of contrast that was missing. Apart from that, we can also work a little bit on the audio. Let's look at the
different audio tools. Let's go here to click on audio. Usually your audio levels
will be a little bit low. Whichever way if we hit
auto then did you notice? I'll do it one more time.
Do watch the waveforms. If I hit auto, then it just brings it back up
without clipping it, without making it too loud. And so this is an
easy way to ensure that your dialogue levels
are where they should be. Real nice tool in movie. If you know a little
bit about audio two, you can use the equalizer and kind of play around with it. There's like voice enhance
music enhance bass boost. This isn't really
necessary, but again, it's another thing you can
play with if you want. And again, I would really use this reduced backup
noise because the quality of the
noise reduction in these programs
isn't that good. And that's it. In this lesson, you learned how to play titles, how to automatically
and manually color, correct your video,
and how to tweak your audio for the
best results in movie. And that is it for day six. By now, you should know
everything you need to know to be able
to put together polish and almost finish your
video with that already. I want to say congratulations, You are so close to the finish. And if you've made it this far, and especially if
you followed along doing your work along
the way alongside me, then I salute you. That's a big accomplishment and you should be
proud of yourself. Next up, finally it's
the last day, day seven. It's time to finish and publish your video.
I'll see you there.
34. Day 7 Finish and Upload Your Video: Hello and welcome to day seven. This is it, the final stretch. And in just a few short lessons, you have a finished video
ready to share with the world. In the first lesson
on day seven, we'll go over finishing
your video by putting music and
then exporting it. And then I'll show you how to create a title, a thumbnail, and then how I upload and publish the Youtube and
share it with the world. So ready to cross the finish
line together? Let's go.
35. Finish Your Video: In the previous lessons, we finished our cut
by laying down or Talking Heads and roll
and polishing the video. Now it's time to finish
by putting music and exporting it to a format that
we can upload to Youtube. So I've got my finished
video here and we need to find some
appropriate music. Honestly, for
unexplainer like this, no music is better than bad
or inappropriate music. So to be honest, this
step is optional. But good music can also help
make a video more engaging. So it's worth trying out. Now, if you want to find
completely free music with absolutely no
copyright issues, Youtube actually provides it. You can just go to your
Youtube studio log into your Youtube account
if you already have one or create one. Now if you need to, and then
just go to the sidebar, click on audio library. And then here you've got a bunch of tracks that you
can try and listen to. You can search using these
different categories. You can sort by title,
artist, or duration. And then once you've
listened to some, I suggest you download the
ones you like pass or at least star them to make them easy
to go back to on this list. And then if you want
to download the track, you just go over here to
the right and hit download. You can also try
searching Youtube or Google for
copyright free music, as there are some more available out there that might
be right for you. Now for higher quality music, it may be a good idea
to subscribe to any one of a number of
quality, affordable, subscription based, royalty free music
sites such as Epidemic, Sound Audio, the music
bed and art list dot O. At more. Basically, for the
price of one subscription, you get unlimited access
to music for Youtube use. And some websites
like audio even offer commercial use
at no extra cost. In any case, for a
video essay like mine, I'll usually want something
upbeat but not intrusive. And definitely not
anything with lyrics. Never use music with lyrics unless you're doing some kind of montage where no one is talking and it's
perfect for the mood. Now I can take a page out of Youtuber Johnny Harris
book by looking for something under the Beats genre in whatever service I'm using. These are good tracks for more cerebral videos like mine
that don't need any drama. So I already have a
music track here, well, this one, so very
chill kind of low fi, just a nice relaxed background. So let me plop it down
here in my video. And then always
make sure to lower the volume so that it
doesn't overpower the track. I would lower it more than say the automatic
options would do. So let's have a listen
professional filmmaker who travels around
on my motorcycle. Today I want to talk about
everything you need to know to figure out how to buy
your first motorcycle. And so for this kind of thing, again because I don't
need several moods, I can just basically
loop it by doing command C and then
pasting it at the end. And the good thing
about these kind of more low key pieces
of music is that it's much less noticeable
when they loop. So I'll make sure to have it start again around where
the previous track fades. And then have a listen
instead of foot pegs, and they're super
practical and cute. The most famous examples of scooters are the iconic Vespa. Yeah, it's pretty subtle. I'm not sure if you can hear it, but that's the whole point. It shouldn't be very
noticeable at this point. I also need to echo
Johnny Harris tip of not using undeserved music
with your video meaning. Don't use music with more drama and emotion
than what you're showing on camera because
it just sounds weird. Just listen and compare this. So now let's try plopping down this more cinematic piece of music and listen what happens. I'll have it also
a little louder, so you notice the difference of what an inappropriate
mood does to a video. Listen to this 200-400 CC. This is kind of
the awkward middle between small bikes
and big bikes. There's less choice here, but you generally get more power but still
at a small beginner, friendly size of
motorcycle. Weird, right? So just avoid doing that. When in doubt, use
more low key music or like upbeat music
that doesn't have too many like sharp sounds
that will intrude in your dialogue or just
no music at all. So one more thing
is you see here now I have my
original track again, I looped it three times
at the end of the video. You can make sure to see this, drag this handle to make
it fade out smoothly. So let's have a listen next. This has been Aron Palaba. Take care and ride safe. So this is important too. If you're using kind of louder, more dramatic pieces of
music where it would feel weird to just suddenly
cut them at the end. You can use this fade and extend it for as
long as you need to. But if you have a longer video
that has distinct moods, then it's a good idea to
use more than one piece of music to note the changing moods or segments of your video. Or even to have
breaks of silence between pieces of music, because a single piece of
music can get monotonous, which is why it is a good idea if you're going to
loop your music to use an unobtrusive
sounding track that doesn't call
attention to itself. And finally, with
the music laid down, your video is done
and it's finally time to export it to a file that
you can upload to Youtube. So this is how to do
it. Go to file share. And don't pick social
platforms because this is too low resolution
and you go to file. All right, then you
can call this how to pick your first
motorcycle, Youtube. Then description
doesn't really matter. I can just delete that tags.
I'll just put my name. Whatever format, video
and audio resolution. The full resolution,
which is ten ATP quality high is good
enough. Let's not use Pros. It'll take up too much space. Then let's pick Better quality, since we're not in a hurry. Then we click next. Choose where to save
it on our hard drive. I'll save it in the
movies folder right now, because that's where
my movie library is. And then I'll just click Save. Then if you want to
monitor the progress, you see the circle up
here. You click that. Then just see that little
pie start to fill up. All right, so we'll
wait for this to finish and we'll skip
ahead to when it's done and there is our
beautiful exported video. We can use Space part to
preview. Hi everyone, my name. Skim through it, make
sure everything is there. If you have the time, it's
usually a good habit to open your video and watch the whole thing to make sure
there weren't any mistakes. Now if you want to see this
finished product so you can compare it with your own
edit of my sample footage, then you can check out the
link to the finished video in the class resources to
compare your work with mine. But I don't suggest you do
this until you try to have a crack at it yourself to do from start to finish
with all the barrel, the music, et cetera. I suggest, I highly recommend that you give
yourself that chance to be the one to figure
out how it should all be put together.
And that's it. In this lesson, we finished
our video in movie by adding music and
exporting our video. In the next lessons, we'll create the title
and then the thumbnail, and then upload it to Youtube.
36. Title Your Video: In the previous lesson, we
basically finished our video, but to make sure that this video has the best
chance of being seen. In the next two lessons, we learn how to create a great title and
thumbnail for our video. Creating a compelling
title and thumbnail are super important to give your video the best
chance of being seen. We want to entice viewers curiosity without
resorting to click bait. I mean, clickbait can work for sure, but
in the long term, it will leave a bad taste in your viewers mouths and will
lower their trust in you. The opposite of what you want to have a successful
Youtube channel. In the case of both your
title and your thumbnail, you don't just want to tell the viewer what
is in your video, but you want to convey, at least imply, why they
should watch your video. Try to think of the most interesting element
of your video, at least to a certain
target audience. And then think of a
title and thumbnail that will emphasize
that for the title, try to keep it
under 60 characters with the most important
keywords upfront. For example, don't
think saying just like top ten productivity
tips when you can say something like beat
procrastination With these ten productivity tips implying the importance of that. Or maybe even something a
little bit click baity, like this mindset
shift will transform your productivity
to kind of entice a little bit more curiosity. Just if you're going to
have a title like that, be darn sure that you're
going to deliver on that value or else your viewer is just going
to get really annoyed. Okay, so what I have here
is just a note I use, no shun, but you can literally use anything, even
a piece of paper. And a good practice
for writing titles is keeping the things I've
just taught you in mind about how to
make a good title, write at least five to
ten different titles. So this is just kind of a
classic brainstorming process where you just really dump everything that you can think of that might make a good title, and then you can
compare afterwards. And then you can
even get feedback from others to figure out which title would get
them to click the most. So don't just go with kind of the first title you thought
of and then call it a day. So put in the work to think
of several titles and maybe even your final title
will be a combination of the ideas from several
of your titles. So as you can see here, I
have a bunch of options, but they're all kind of
really basic because, well, the premise of my
video is quite basic. I think it kind of sells itself if you're the
target audience. And just a few comments. This last one, the secret to choosing the perfect
motorcycle for beginners, I think that definitely
wins in enticing curiosity. And it definitely is click
bait because in my video, I don't give any
particular secret to picking a motorcycle. So it's a risk on my part. If I use this title, I'll definitely get more
people to click on it. But I don't actually tell them any secret to choosing
the perfect motorcycle. So these are the kinds of
things you need to balance, because without a
curiosity inducing title, you also have a hard time
getting people to view it. So I think of these
as you can see, there's kind of
varying levels of them being curiosity inducing. I think the one that really
reflects best what's inside the video is like between numbers 7.9 So I'm going to think about
these and go for one of these when I
finally post my video. Now honestly, these are a little bit plain when it
comes to titles, but I think my video has a very, very clear value proposition. And if I overpromise on that, I really think
it's not worth it. I will end up just having
viewers annoyed at me. Instead of just
promising what I have, which I think is already
a lot and high value for somebody who's looking for this information. And that's it. Some quick tips on how to think of a good title for your video. So if you already
have your video, or even maybe if you
only have your script, your concept, take the time. Now, write down
five to ten titles, keeping these concepts in
mind and then compare them. Afterwards, even try to see what people think and gradually you'll hone your sense for
creating great Youtube titles. And that's about it. We've got our title
more or less. In the next lesson, we'll pair that with a good thumbnail.
37. Create Your Thumbnail: In the previous
lesson, we nailed down the title for
our Youtube video. In this lesson,
we'll work on one of the most important aspects of
getting noticed on Youtube. Your thumbnail. Honestly, like the title, there obviously aren't any
hard and fast rules here. But let me put it this way. You want a viewer to
know what your video is about without even
glancing at your title. It's easier to absorb
all the info from a thumbnail with a short
glance than reading a title. You know that old saying about a picture being
worth 1,000 words. So you can convey a ton of info and subtle hints of
what your video is about, even its mood and tone
using your thumbnail. Definitely don't take
this for granted. It's probably even
more important than your title and maybe more than anything will get people to
click or not on your video. To begin with, I might
use no shun or again, any notepad to verbally sketch out ideas
for my thumbnail. And maybe give me a rough
guide to play with. And it'll help guide me
to figure out what are the right images and elements that I need for the thumbnail. But this is totally optional, especially if you're more
of a visual thinker. Now let's open up my
thumbnail so that you can go through how I think about
attention grabbing thumbnails. So just like with
clickbait titles, there are lots of cheap
tricks to thumbnails. Like, you know, say, take
this image and you'll have an arrow pointing at some
indistinguishable object. You know, with text saying unbelievable or can't
believe I missed this. And honestly, that stuff works. But again, me, you know, just for integrity's sake,
I can't stand doing that. I prefer to stick to the fundamentals that
I'll talk to you about, which is first of course, use high quality images. You can use a relevant
screen, grab from your video, one of the most
common approaches, or you can just take a nice
photo related to your topic. In this case, I went kind of more of an in between approach. Which is a photo taken using the same set up
from my talking heads, but obviously not from my video. And it's composed in such
a way that I can build on it with additional elements. Avoid using a nice
photo that doesn't have anything to do with what you're going to
show in your video, because people will
expect to see what was in that thumbnail
image again. Ideally, if you're going to
use something like this, you have shot it
during your shoot in order to maximize
your set up. Another thing to
pay attention to is pick an image, of course, that leaves room to put text cleanly without obscuring any important
detail in your image, like your face or the
product you're featuring. In this case, it is
a clean composition, but it's kind of a busy frame. So we're going to need to use Photoshop to clean it up later. And then as you can see here, I've applied one of the oldest thumbnail
tips in the book. And the reason why every
other Youtuber is doing this in their thumbnails, that is put faces. In this case, it's probably
going to be your own face. Faces don't just draw attention. Again, we're human,
we're drawn to faces. But also your facial
expression can be powerful tool to
entice curiosity. Because it can convey a
lot of subtle information on how it's used in conjunction with your
background image, the text, and your video title. In fact, many channels
like Revzilla for their Daily Rider
Motorcycle Review series, their host Zach always
uses some kind of really ambiguous facial
expression that just keeps you guessing about
what he really thinks about the motorcycle. And it really works in
enticing that curiosity. Another thing to
consider is to enhance colors in contrast to
make your thumbnail pop. Maybe it looked fine when
it was a moving video, But for a still image, it might need a bit of
a bump of contrast. You know, more bold
and bright colors and contrast when relevant. And also avoid relying
on Youtube colors red and white so as not to
blend with the interface. Let me show you how I built
out my thumbnail here. So I have my base image here. And then I used AI in Photoshop to erase the print on my shirt so that we
have a nice blank canvas. And then again, I used
Photoshops AI to erase the background so that I have a nice very bright
attention catching, but still pleasant background. And in terms of the
facial expression, I didn't choose to go
with something ambiguous. Again, honestly, on Youtube, if you have a negative
facial expression, that will probably, that will probably
attract more views. But again, it's not my style. I want to be really honest
and I think my channel has kind of a really pleasant
personable mood and tone. So I just have a nice
natural welcoming smile for my facial expression. And now basically, I have a nice canvas for
adding other elements. Speaking of, the next
important element we can add is text. So here I have just basically
what my video is all about. My video is very, very clear about its
value proposition and its target audience. So I don't think it has to
try too hard with the text, but of course, you know, so many videos have click
paty examples of text like, I never knew this or
I can't believe this. Again, with those arrows
pointed wherever, again, please avoid doing that
unless you really, really deliver on that promise. Of course, you should use legible fonts and colors in contrast with
your background, as you see here, which is
why I erased the shirt. Because if I hadn't
erased the shirt, it wouldn't be very readable. And remember, don't make
the text too small because these will be displayed super
small on mobile devices, which is actually why
I'm editing this small and not on full screen
on a mobile device. The thumbnail can be
as small as that, which is why I'm using
such a huge bold font. Another small tip. Avoid putting anything here in the lower right hand
corner because that's where the running time will be displayed once it's on Youtube. All right, and then just
rounding out my thumbnail, I took a bunch of little motorcycle graphics
from the Internet, mask them and Ta. Again, I think my thumbnail is nice and attention catching. It looks very pleasant
and welcoming. And it could not be clearer
what my video is about. And this style, I think is
very appropriate for how straightforward my video
is and also for my style, my personal brand as a
creator, I think it fits. I understand that not
everybody has Photoshop, so if you don't have Photoshop, I suggest you try using Canva. It's free, There's lots of great templates there
for making thumbnails, and it also has a lot of
these powerful AI features for cutting out
your background and lots of different elements
that you can use. I have another bit
of homework for you. Go to your Youtube home
page or subscriptions, and take a look
at the thumbnails of the videos being
recommended to you. What about them makes
you want to click? Or maybe not to click? What do they have in common, or what do they do differently, was still remaining effective in making you want to click. Thinking about this
will help you figure out ways to make
thumbnails that are appropriate for your content
and your personal brand. And that's it. In this lesson, you learn how to create a
good Youtube thumbnail. In the next lesson,
our final lesson, we're going to open
Youtube studio and get our video ready to publish. I'll see you there.
One last lesson.
38. Upload and Publish Your Video: Welcome to the final
lesson of the course. In the previous lesson, you learned how to
create a good thumbnail. In this lesson, we'll
learn the basics of using Youtube studio
to upload your video. I suggest you do this from the desktop and not from
the mobile app to be able to access all
the features and to have more room to
easily edit your text. You can click on your face and then select
Youtube Studio here. Or you can simply type
studio.youtube.com on your browsers address bar. So if this is your first
time opening Youtube studio, it's a great user
friendly app with tons of ways to optimize your video
and your entire channel. It's worth spending time
learning all its various tools. But for now, all we
need to do is focus on just properly
uploading our video. Click here, Upload Video. Then you can select
your files here or simply drag and drop,
which is what I'll do. Then while we're waiting
for it to upload, we can already work on
optimizing the video here. We can type our title, or we can copy and paste it
from Notion and paste that. Next up the video description. To be honest, this
isn't super important. But it's helpful
to the viewer to put a short summary
of your video. Say of course, this is also
where you would put links to more information or to your other videos or to other people's videos
that you mentioned. You can also put links to
support you on sites like Patrion or Merch sites
later on and of course, affiliate links to make
a bit of extra cash, et cetera, et cetera. There's almost no limit to what you can put in
the description. But for your viewer, the most helpful thing to put in your video description would definitely be video chapters, especially if your video
is over 5 minutes long. These will help with
viewer engagement, so people know what info they're getting and
where to find it immediately to put chapter is actually all you have to do. It's a type in the time code. For example, 00 is your intro. Then I'm just going
to put this here. I don't remember the
exact time code. Let's say 230 is motorcycles
by displacement, then 340 would be
motorcycles by body type. There you get the idea, we can upload our thumbnail. Make sure that whatever format you created your thumbnail on, you exported it as a Jpeg. And we can upload our thumbnail. Here, I'll go to where
I created my thumbnail. Upload my thumbnail, and
there it is. Looks great. I think if I do say so myself, then if you already
have a bunch of videos, you can add it to a playlist. In my case, I would
add it to my right. Xp Moto logs playlist, my logs playlist, my
reviews playlist. Then generally you
should put it's not made for kids
unless it's especially made for kids because if
it's made for kids it has additional restrictions for
Youtube age restriction. We can leave that show more
if it's a sponsored video, you should definitely
check this to stay within Youtube's
guidelines. You can leave this checked up to you if you want
to leave these checked, it's not really a big effect. And now tags, you should
think of tags as what might people put in the Youtube
or Google search bar to find the information
I'm sharing? So put the most important
keywords first. It may be a few general
ones At the end, they say it's
generally better to have your first
keywords as your title. I don't know if that
still holds true, but let's put it here anyway, how to pick a motorcycle for beginners, different
things like that. Then maybe later I'd
put stuff like my name, the name of my riding playlist
and you get the picture. Avoid putting keywords
that are just going to be there because you think you'll
get more search results. The Youtube algorithm is way smarter than
you think it is, and putting these might even
hurt your search visibility. Okay, moving on, I generally
leave these as is. And then it's up
to you if you want to allow people to remix. And then this one I'll change
it to autos and vehicles, although it doesn't
really matter that much. Then I have my comet
moderation to strict. That's just how I like it. You can hide how
many viewers like the video that might help
you or it might not. We'll go to the next tab. You probably won't have this yet because you're
just starting out. Of course, I turn
mine on and later on I can decide where
to put my mid roll ads. I try not to put too many. This is where you report
on if you have anything that might be of concern
to an advertiser. I don't have any. So I'll
say none of the above. Submit rating video elements. So here's where you can add subtitles, you can
add an end screen. So if you already
have other videos, adding an end screen
is a great way to help viewers,
binchwatch your content. So let's see if I just import
them from my latest video. I don't want to put
them over my face, so I'd have them here. And this little circle is
just so that they can hover over that and subscribe this
to start a little early. So I want this to start
so much for around the time that my Altro starts. So yeah, I can just
have these here stagger the appearance
for watching. Please let me know if you have any questions in the comments. Yeah, so I have one set to
best reviewer and the other set to a video that I
want people to watch. People binge watching your
videos through whatever way, whether they're
recommended or they do it through your end screen is one of the biggest ways to gain authority in the
Youtube algorithm. Everything is fine, no copyright issues because I have a
license for the music. And then finally we are here. I want to leave it on unlisted and then save if you
edited my sample video. Do not make this video public. Okay, just leave it on
unlisted, copy the link, and then paste it into the class projects so that
I can check your work. So what I then do is I open the video page
by clicking here. So what I do now is a last check to make
sure everything is okay. If I have time, I'm paranoid. I'll watch the
entire video again. I'll leave a little
like, so that you know, it's just not so lonely. And a good practice is to leave a pin comment for engagement. Something like, just for purposes of illustration,
I won't put a link. And then I'll click here
and then pin the comment. So the Pin comment can be
anything you want it to be. It's usually some form of engagement or a message
from you so that people scrolling
down to the comments immediately have something
to read from you. Once I've checked this,
everything is in order, then I can go over
to visibility. But once you hit public, and then you hit
Save up here, boom. You published your
first Youtube video. Whether you did it in seven
days or seven months, you deserve to celebrate that. Because that was no small feat. And definitely don't
forget to share it in the class project so that
you can get thoughtful, constructive feedback from me. And yes, this includes even if you used
my sample footage, because I'd like to see how you were able to apply
what you learned and help you troubleshoot any issues that you
may have encountered. Whew all right. I
can't believe it. We're done in the next
and final lesson. I have some parting
words for you as you continue on your
Youtube journey.
39. Parting Words: Congratulations,
you've just made your first Youtube video or
you're well on your way to. This is a big step And whatever direction you decide to take on your Youtube
journey in the future, you can look back at this time. That you broke through
resistance and made this contribution to the
world and to yourself. And I want you to know that I am grateful to have been
part of your journey. And I do hope that
you'll take the time to create your class project
and share it with me for my feedback whether you shot your own footage or you
used my sample footage. And I also hope
that this won't be the last Youtube video or any kind of video that you make. You'll grow and evolve
in ability and style. The more you do this,
as you go through your Youtube journey and you start to get comments
from your audience, you should accept their feedback with an open and humble mind. After all, being on Youtube isn't just about making
art for yourself, it's about making
content for an audience. So listen to what
they have to say. You don't have to
believe everything, but you should adapt your insights from them
to your advantage. And by the way, if you
enjoy this course, could you do me a little favor
and leave a good review? Because it really
helps not just me, but also your fellow students who are looking for
a good instruction. Of course, honest
feedback is welcome as well to help me improve and make better courses
in the future. Of course, don't forget
to follow here on skill share for updates
and more courses. And please feel free
to get in touch with me on my social media
listed on screen now. Now if you want to
dive deeper into becoming a content
creator or filmmaker, you can also check out my other two courses here on skill share. With that, I want to
thank you sincerely from the bottom of my heart for investing your time
and energy with me. I can't wait to see
what you create again. I'm Aron Papa and
until the next time. Peace.
 Aaron Palabyab, Filmmaker and Photographer