Transcripts
1. Introduction: Hello, everyone. I'm
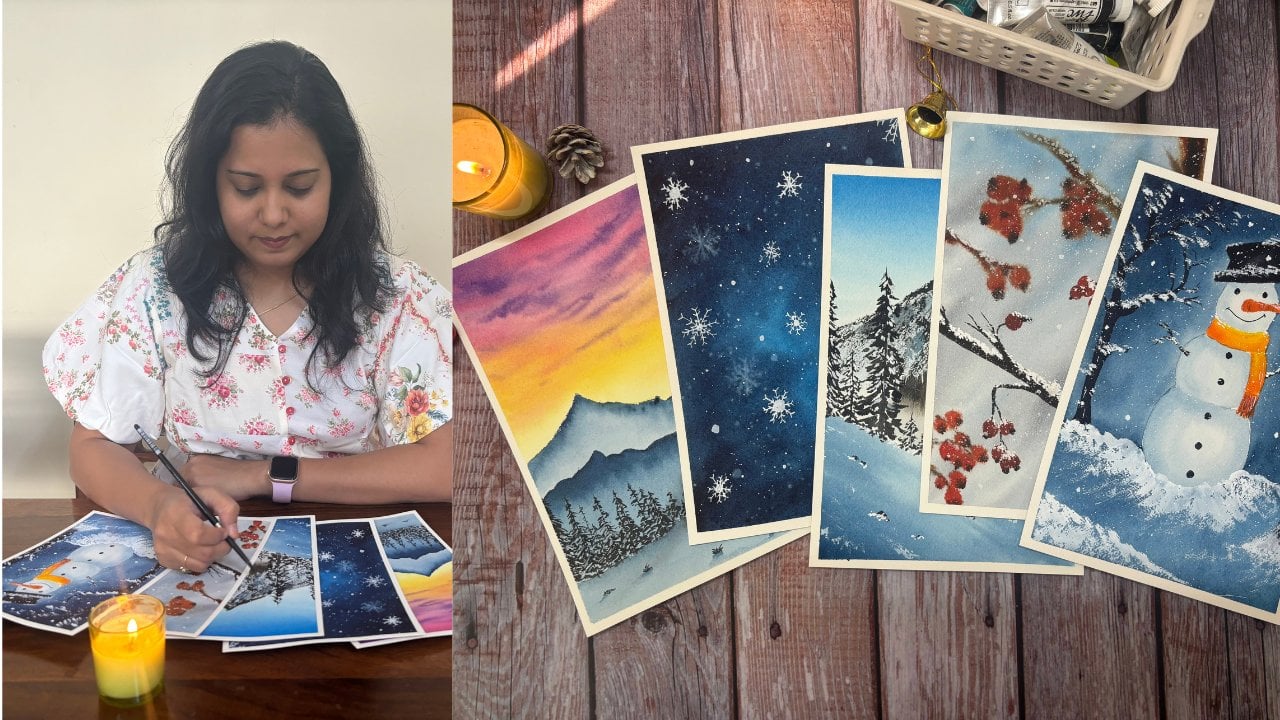
Shalika watercolor artist, and I welcome you to this class. Seven days of painting
clouds in watercolors. Clouds are one of the most beautiful and expressive
element in any sky. With just subtle shifts in
colors, softness, contrast, they completely change the
mood of the painting from calm and peaceful mornings
to dramatic stormy evenings. In this class, I will guide you to the
watercolor techniques that are needed to paint realistic and
atmospheric clouds. We will explore
wet-on-wet blending, lifting for highlights. Layering for depth
and most importantly, how to control water to
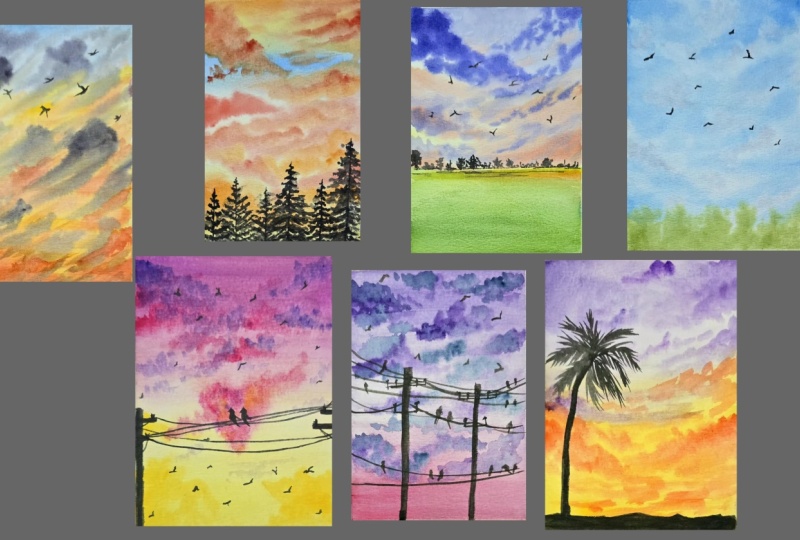
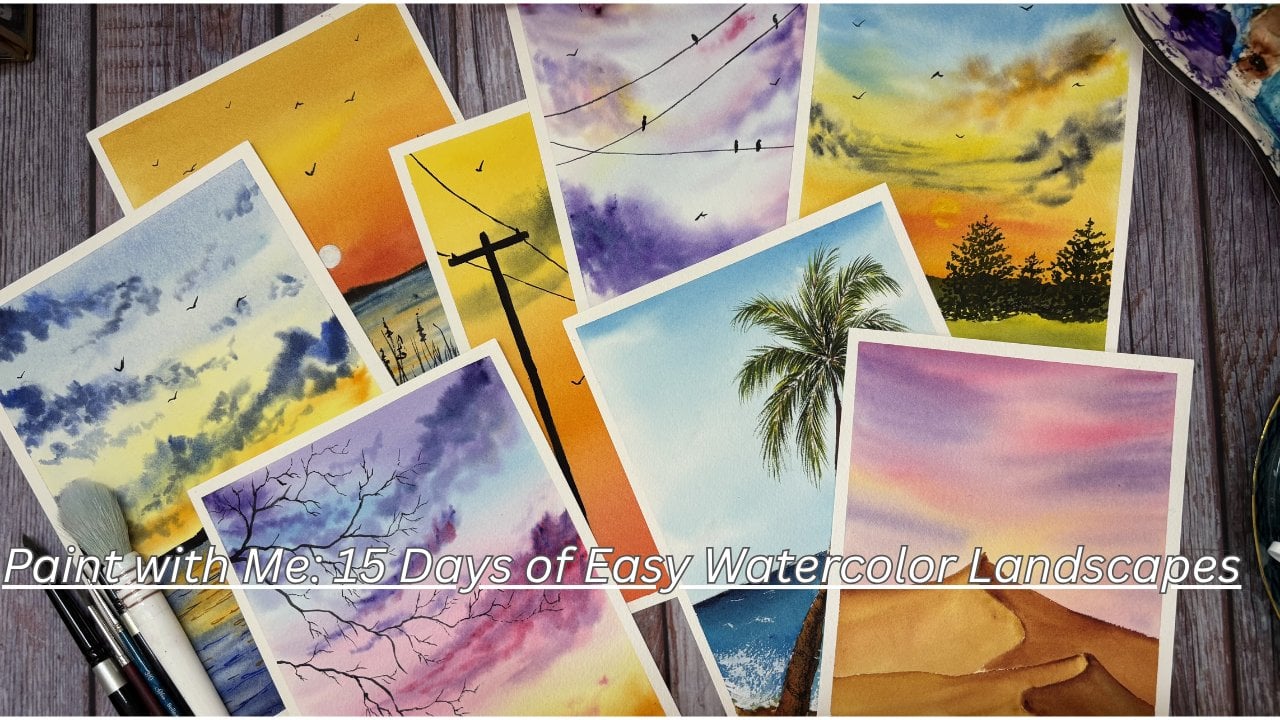
create soft glowing effects. This class includes seven
different class projects. Each project represents a
unique mood of the sky. As we move through
them, you will not only improve your
cloud techniques, but also you will understand how to paint with
intention and emotion, whether you are a beginner wanting to understand
how to paint watercolor clouds or
an intermediate artist trying to refine your
watercolor skills. This class will help you paint with more confidence and flow. So gather all the
materials that I mentioned in the next section and I
will see you in the class.
2. Materials: Let's look at the materials that we require for this class. Starting with the papers. I've used a mix of Saunders
Waterford, watercolor paper. This is 100% cotton,
300 GSM paper, and I've also used archis again, 300 GSM, 100% cotton paper. What I've done is I
have used this and I've cut the papers
into smaller bits, and this is what we will use to paint our watercolor paintings. Next, we have the colors. I've used mix of colors from
different artist brands. This is from white knights. I've also used from Shinhan
and I've also used Sennelier. The other one is MgllmiianGld. So you can go ahead and use any rando watercolors that you have. Next, are the brushes. I've used a large size
brush, medium size brush, and detailed brush
for the painting, and I've used this hake brush to apply water onto the paper. Next is a jar of water. Then we need a masking tape
to tape down the paper, and this is the
board that I will be using to tape down the
paper with the masking tape. Then we have a palette. This is the palette data I
use for my daily painting, so that's why it
always has colors. You need tissue to cap
off all the excess water. That's all required
for this class. Gather all the materials
that you have, and then I'll see you in
the first class project.
3. Day 1 - Whispers of the Burning Sky: Okay. I have my
paper here ready. I've already taped down the paper using my masking
tape onto the board. And now using my
large size brush, I will just apply an even at of water throughout the paper. Make sure that
there are no gaps, as well as there is
no pool of water that gets formed in
any part of the paper. Now, using the tissue, just tab off all the excess
water from the corners. This is to make
sure that there is no water present on the
sides of the paper. So that once when the
paper starts to dry, the water does not see
back into the paper. Okay? Just running my
brush again throughout the paper to make
sure that there is no pool of water that
has been formed. Okay, now taking my
large size brush, taking the large size
brush and cellular yellow. We'll start with the
sky from the bottom. I'm just applying
some cellular yellow. Now, using some Indian gold, applying that tone in between the yellow that
was already applied. Actually, I'll move to
my medium size brush. Now, using the yellow orange, we will add in a little
bit of orange streaks. For now, we're just working
on the first layer. This middle section
that I've kept, we will add in the
ultramarine blue. There's a very slight
tinge of blue in the sky. Be very careful as
ultramarine blue when mixed with yellow orange
gives him a brown tone, but we'll build that
all very naturally. Now again, taking
a little bit of orange and we'll just add in some streaks like this
to depict the clouds. Again, taking a bit
more of orange, dabbing of all the excess
water and trying to build in the orange
streaks of sky. You can see I've used
very less water, a lot of dense orange color. Now, similarly,
taking in vermilion, dabbing of all the excess water, taking a diluted tone for now because I'm just
trying to build in the layer and we'll add in
the vermilion clouds as well. The stop will make
it a little bit darker because we want a dark red or dark
vermilion tone over there. Light with very light hands and very less of water just
adding in these red streaks. Now, taking in red and a
mix of red and vermilion, permanent red and vermilion, dabbing of all the excess water will try to build
in some clouds. See, I'm just touching
my brush onto the paper and letting the colours and the
water do its magic. I've not taken up a very
dark tone of 4 million, and I'm just adding
in these clouds. Similarly, adding some of
this over here as well. Just tapping in the
brush onto the paper. Now, again, similarly
tapping in the brush, building on the sky. You can also use your
small size brush if your brush does not
have a tip or if you do not want this flat clouds, Now with orange and red mix, we'll just add some clouds
on this layer as well. Here on top of this cloud, we'll just add some red
as if the red tones from the top cloud and say the orange tone from the below are merging
with each other. Oh You can see almost null of the
water on my brush. I've just picked up pigments, and I'm just adding in
some darker tones on top of the already existing
clouds that we have. And here as well. Just adding in some more catone of clouds. I think we're done
with the skype if the paper has started to dry. Let's wait for this
to dry completely, and then we'll take a call if we need to have another
layer or we are good with this one.This
has not dried, but I feel it looks good, but I just feel we can
soften up these clouds. And for that, what we'll do is using we apply an even
coat of water again. Now what I'm doing is
using large hake brush, I will just apply an even
coat of water again, trying not to disturb the underlying colors
that we already have. You can see the edges
have already started to soften up now using my
medium size brush again, I will try to soften
up the clouds. Just trying to lend this out. I'm also trying to build in here some orange clouds as well, which is basically the base of your base on top of which
your red clouds have come in. Taking in red and Vermilion mix, and just trying to build
those soft clouds. The technique remains the same. I'm just trying to soften up these marks that
we already have. And I know it's very difficult, but let me try to add in some blue tinges in
between these ds as well, just to darken up or
just to make sure make these blue little
bit more prominent. It's okay if it turns purple. Little brownish, just
to show that there's a blue sky and on
top of it is where your orange and red
clouds have come in. I think they should do it. We just needed some
slight softening of the clouds that
we already have, and that's what we
have already achieved. Just trying to add in a little bit of yellow
here and there. That's the base color
that we had, right? There are sometimes
days where the sky has very small small clouds coming together and building
dramatic sky. That's what to
paint it over here. Now, let's wait for
this to dry and then let's see how this looks. Depending upon that, we would
either paint another layer. I don't think so
we would need to because I think
it looks perfect. I would turn out good. We will just add
in the black trees and we will be done
with our painting. Let's wait for this to dry and then we'll see
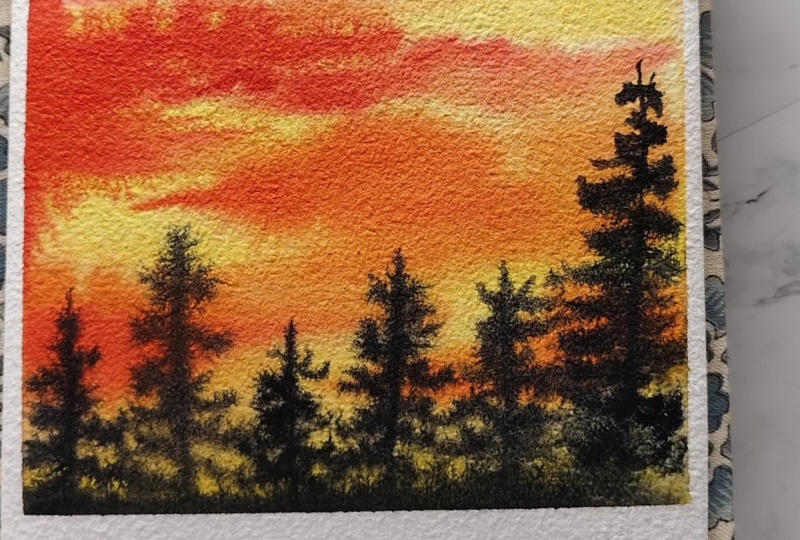
you again later. So the paper has not dried. This looks beautiful, isn't it? So now we will
paint on the trees. So I'll use my detail brush. I keep on switching
my detail brush and the medium size brush
for this and using black we'll start. From here, adding in very small small
leaves at the top of the tree. As we come down, that's where your medium size
brush will come in. And as we come down, the thickness of the leaf, it starts to build up. Now the tree just
adjacent to this one. Again, at the top, we
have little leaves. And now at the bottom is where I'll use this
thicker brush. As you start to come down, there will be multiple trees
of which the leaves would, you know, getting
grouped together. And that's why you
have the thickness at the bottom and
not at the top. A I'm just trying to darken up the leaves that we had painted
for the top trees. Okay. Now again,
painting a shorter one. So we'll continue to paint
few of the trees like this. That's what our
foreground would be. M I can see just a very light hand pressing my brush to bring
in these dot like strokes, which will then look like trees. Now, as I've come moving down, I've taken switched to
my other detailed brush, the down brush size two and continuing to
build on the leaves. And adding a little bit more of thickness
to the tree, adding in a little bit
more leaves to it. Okay. Now again, moving
to my zero size brush, adding a tree over here, and this is a very thicker one. The top ones, I'll build
it with this detail brush. But as it is a thick tree, and by thick tree, I mean, it has a lot of leaves. You see there's a difference
in the way I painted the top of this one
versus the other four, three, four that we're
already painted, right? So this one has thick leaves, and it has leaves right
starting from the top. That's why we'll be having these dense strokes coming in to depict the dense leaves. For the last tree, again, this is a dense tree, so you will have your leaves coming in directly from the top. And that's why I've started
with the small size brush, not a detailed one. Now, let's wait for this to dry. And then we're done
with a painting. So we are all done. Let me quickly peel
off the masking tape. This is the final
look of the painting. It looks gorgeous, doesn't it? Thank you for joining in
for today's class project. I'll see you again
tomorrow with another one.
4. Day 2 - Lavender Horizon: Hi, everyone. Welcome to
the New Glass project. I have my paper here ready. Using the masking tape, we will tape down the
paper onto the board. I'm running my fingers
across the tape. This is to make
sure that there is no gap between the
tape and the paper. We have a very tiny
sketch for this one. It's actually just
a horizon line which separates your
sky and the ground. Okay. That's all. Now using my hake brush, I'll add an even quart of
water throughout the paper. This is to make sure
that there is not a corner on the paper
which gets left out and also to make sure that
there is no puddle or pool of water that forms
anywhere onto the paper. Using my tissue, I will just dab off all the excess
water from the cobblers. This avoids water seeping back onto the paper when
the painting starts to dry and it avoids getting a cauliflower
effect on the paper. Just flooding my brush again to make sure that the
paper is very thoroughly wet. The more time you
spend on this step, the longer you will
get to paint your sky. I am done. Again, just quickly dabbing off
all the excess water. Using my medium size brush
and ultramarine blue, we will start with the sky. I'm purposefully keeping
little white gaps between the strokes
and the colors. This is just the first layer. You will add more as
we build the sky. Now, taking in Indian gold
and adding toll. So here. That's it. Taking in vermillion and
building on top of it. Now, taking in violet, a very diluted down, a ton down version, basically, dabbing off all
the excess water. I'll start to build in
the clouds over here. This will continue till here. Similarly, adding in another
poll over this side. And this kit. Again, table excess water and adding some purple strokes
on the left as well. Similarly the side too. As you can see, it's
very light as of now we will build on top of it. Now, what I'll do is I'll
just take a little green and close in the ground so that then because
it has started to dry, then we can just focus
on painting the sky. I've just taken
in the sap green, taking in more water. Just adding the green. To bring some contrast and
using the yellow dabbing of the excess water and just adding that to the
grass as well. I also have a little
bit of black. I just add that to get
a darker tone of green. You can use neutro tint as well and add that
to the corners. Y now again, moving on to a sky. Actually, the sky
has started to dry. Let us now wait for the
complete painting to dry. We will add another
layer of water to it where there is it
will dry at my place. But then this will also give you a better
understanding of how to cope up with your paintings if the
paper starts to dry. Let's just wait for this to dry. We will add another
layer of water and we will complete
the sky with that. The sky is coming out well, we will just try to add a little bit more of
the darker tones. Let's wait for this to dry and then we'll
come back again. Okay. The paper
has almost dried. Again, using my hake
brush and little water, I'll just apply an
even coat of water. Very gentle hands. This is just to make sure
that the paper has got wet. We do not want to
disturb the colors that we already have applied. Okay? And now, again, using my medium size brush, say ultramarine blue, We'll start I'll start adding
in some more clouds. Okay? Similarly taking in violet, tabbing of excess water, and just adding
that onto the blue. This is to give an effect of a blue and purplish cloud
that's being formed in the sky. I'll also add in some
blue, purpolish streaks. Okay. Sorry. Coming
in from the corners. Just adding a
little darker tones of orange and red clouds. And now with the purple sky, I'm using my size too brush, taking in volet and just trying to drop in on top of the already
painted purple that we have. So this basically Is to add another layer on
top of the existing one. You will have some
of the wallet clouds as a lighter tone, and you will have some as a
darker tone on top of it. This sky has a lot of small, small clouds seeping in. See here, the whole paper
has started to get dry. So I will just build here
and using very deep water, I'll just clean out the edges. Taking in a mix of
purple and blue, adding in some clouds
over here as well, and some say coming in
forming in this side. Let me just take my
medium size brush, dipping of all the excess water. Just apply an even at
of water over here just to remove or blend the harsh
edges that have formed here. Now let's wait for
this to dry and then we'll add in some
trees on the horizon, as well as some bids in the sky. Okay, so the paper has
now completely dried. Now we will add in some
trees on the horizon line. Using my own size
brush and a very, very dark tone of
green, let me see. These are the trees and
bushes on the horizon. So just add in as many trees
and bushes that you want. It's a sunset sky. So the trees are very far, so they would be darker in tone. That's why I'm using
a very dark tone of green almost
like a black color. I'm thinking I'll just
add in few birds in the sky e. So I'm just taking in black and just adding in
a few birds here and there. That's it for this
class project. Let me just peel off
the masking tape. This is the final look
of the class project. Hope you enjoyed this class. I'll see you next tomorrow
with the new class project.
5. Day 3 - Golden Hour in the Tropics: Hey, everyone. Welcome to
the next class project. Let's tape down this paper onto the board with
this basking tape. I'm just running my
fingers through the tape. This is to make
sure that there is no gap between the
tape and the paper. Else we won't get
the crisp edges. Using my hake brush, I will just apply even coat of water throughout the paper. Make sure that
there is no corner or no section of the
paper that gets left out. Also make sure that
there are no pools of water that gets formed
onto the paper. So run your brush thoroughly across the paper
and spend time on the step. The more time you
spend on the step, the longer your
paper will stay wet and the longer you
will get the time to paint on your sky. Using the tissue,
I will just tap off all the excess
water from the corners. This is to make sure that
once the paper starts to dry, the excess water does
not seep back into your painting and cause
cauliflower effects. So to avoid that from happening, which I'm just running my paper throughout the corners to
absorb the excess water. Running my brush
again. So we are set. Now using my large size brush, we'll start with
painting the background. So I'm starting
with cellar yellow. Now picking a permanent orange, dabbing off the excess water. Again, picking up yellow
and trying to blend this yellow and orange
section that we have now picking up let, dabbing off the excess water
and adding it at the top. We want a dark
violet at the top. I'm just taking a little
bit more of color. I'm just dabbing off the
excess water for here. Now, taking my
middle size brush, taking in vermilion,
dabbing of excess water, we'll start building
in the clouds. You can see I'm going with
the lighter toad first, and then we will add in the darker toe as
the second layer. There will also be
some clouds this side. And now, because violet is what is dominant
from the top right, you will also have violet clouds coming in on the yellow section. Okay. So I'm just trying to
build that now bit by bit. You can see my strokes this
time are all C strokes, either inverted C
or the correct C. So when we're trying to build
this fluffy clouds right, that's the brush stroke
we go ahead with. Also taking a little
bit more of red, but trying to add it at some
places of violet as well to show that the violet clouds and the red clouds are
blending into each other. Similarly, this side as well. Just adding some streaks of it. Now taking in more violet, tabbing of excess water, adding in some clouds at
the top section as well. The clouds where we had
already added purple, I'm just taking a little bit of a dense tone and
adding on top of it to show to get some
depth to these clouds. So basically, this does, it has some denser purple clouds on top of some lighter tones. Taking a little bit more of red, similarly trying to brighten up the red clouds as well
with another layer. On top of the already
existing clouds. This basically just tries to give a depth to your clouds with a two toned clouds
that can be seen. Okay. S here, we
have some small, small horizontal clouds. Taking a little bit
of orange, as well. And trying to add that
to between the clouds. Similarly taking a
little bit of let. Paper has started to
dress. It's very hot. Where I am west so I
cannot paint any longer, and that has got a bloom now. Just trying to add some tones
to cover up this bloom. If not, so don't be worried if something like this has happened to your paintings as well. If this happens
and once it dries, it does not look good, you can just apply an even at
of water to your painting, let it get wet again, and we just clean this
up in the second layer. Okay. So now let's wait
for this to try. And then we will apply
another layer to smoothen out the gaps and the pool of colors that
has flown into, right? So I've just reapplied
water again, and now we can again try
to build on our sky. We can see your wallet Sky. So the clouds that we wanted. You can again paint
out the wallet clouds. Similarly, the red
clouds as well. We can again build on top of it. I'm just using yellow to re wet this red and yellow are
anyways complimentary colors, they go around together. Now using red dabbing off
all the excess water, we can again build the clouds. You can see again
started building on the Clouds on top of the existing
layer that we already had. So this would actually
give another depth to your sky once it starts to dry. Okay? Taking in wallet, dabbing of the excess water, and now trying to again
build in the clouds. Now, starting from the top, just dropping in few darker
tones and letting the water, blend it out and do its magic. Now, using my clean brush, between these shades, you can also try to lift in a
little bit of color, lift off a little bit of color. This basically gives
another effect to your sky. I'm not quite happy with this
red sky that we have here. Just trying to
build on top of it. So that is supposed to be
like you have those small, small broken clouds in the
sky, right, fiery Sky. That is what it's
supposed to depict. I think this looks okay now. And similarly adding
little bit of Darkats here and there on the side to bring in that
effect. This looks better. Let's see how this looks
after this dries off. But I had purposefully added
this class to show you dad. The skies, sometimes it doesn't come out the way we want
in the first drive. You always have an option to reapply water and build
it on in the second der. That's what we have
done over here, and I think this time
it would come out well. Just trying to this section
of the cloud, right? When you see that not adding more colors is helping it out, you can lift out some
colors from the paper. That gives another dimension to your that gives another
dimension to your painting. Like, it has given some clouds, which is lighter
in shade and then some are in darker tones. Okay, so now let's
wait for this to dry, and then we will
see how this looks. This has now almost dried, and it looks beautiful as well. A dramatic sky, doesn't it? And now just to
end the painting, we will be painting
a coconut tree. So first of all, I'll just add in
black background. I say behind the rocks, there is a coconut tree
going somewhere like this. Now, let me just clean this
up using my detailed brush. Right here at the top, we will have a use the
round size brush for this. Using the detailed brush. We will just add on the gloves. Just making them a
little bit more longer. So you can play around
with the way you want the leaves to come out. On this side, you would
have leaves on both sides. Take time on the
step and just keep on adding these leaves to
your coconut or butter. Just make these ones also
a little bit longer. Just running my brush
through these ones as well. A That's it. We're done with the painting. Let's just peel off
the masking tape. This will dry out in a minute. This is the final
look of the project. Looks beautiful, right?
See you again in the next class project
till then. Bye bye.
6. Day 4 - The Quiet Blue: Welcome to the next
class project. Using the masking tape, we will tape down the
paper onto the board. Now, using my hake brush, I'll just apply even coat of
water throughout the paper. And I'll spend some time on this step to make sure that
the paper is thoroughly wet. Just applying a
little bit of water. Now, let's start using my medium size brush and
serlein blue or right blue. A blue that you have
or even a cobalt blue, we'll start painting the sky. We'll leave in some white
gaps to depict the clouds. I'm just dabbing off all the excess water from the corners. Taking a little
bit more of blue, dabbing of excess water, and just trying to add that in O the blue that
is already applied. We don't want to cover
up the white spaces, so I'm not going to
apply more blue on the areas on the white
spaces that we have, but just on the blues
that we already have. Some places are darker in
tone and some are light. Okay. I'll also just take my tissue and
dab off a little bit of water in some places to make it a very evident blue that we have evident white, little bit like a cloud shape. This is also what
we have as a cloud. Now using a very, very diluted tone
of paints gray, we'll try to add the
shadows of the cloud. See, something like this. Again, very, very light tone, and just adding the shadows
of the white clouds. You sometimes see
grayish clouds, right, something like a
shadow of your white clouds. It's a sunny day,
bright sunny day. That's why you have
these blue clouds. And when you have the sunny day, which means you have
your sun rays coming in, and there would always be
some shadow being formed. So this is the shadow
that's being formed onto the sky in the clouds. So we'll just add
those in some places, very very diluted tone of it. Again, a little bit of
gray clouds over here. This became a little darker, so I'm just dabbing
off Mike's water. And with the clean brush, add in the clouds. Okay. If you want more
white clouds to be there, just dab off some blue from your with the help
of your tissue paper, add in how the white, the diluted toad of Pains gray and see, you have
your cloud over there. Similarly, I just feel this one could be a
little bit bigger. I just dabbed off the excess
water, tapped off the color, and now using the pains gray, just adding on the shadow. That's it for the sky today. I wanted to keep it very simple and clean just for
you to know if you want to paint anytime if you
want to paint a cloudy sky, something with your
white and gray clouds. This is how you can paint them. I'm just adding in some trees because it's a full sky view, you just have some
portion of trees coming in and I'm
just adding that wet-on-wet that will also give a very soft effect in the sky. Taking a little bit of a darker green This one requires
a very limited palette. We just needed
two, three colors, and it's all the game of your water and shadows,
the white lifting. That's all. See, these clouds, they come out so well, right? You have those clouds like
structures being formed. I will just add on some
over this side as well. Okay. Again, now taking
in a very diluted tone of paints gray and just
adding in some clouds. Just dabbing off all
the excess water from the corners
to make sure that the water does not see
back in when the paper starts to dry because paper
has started to dry now. You can see these
sections it has dried and you can see the clouds
have come out very well. Now, we'll just wait
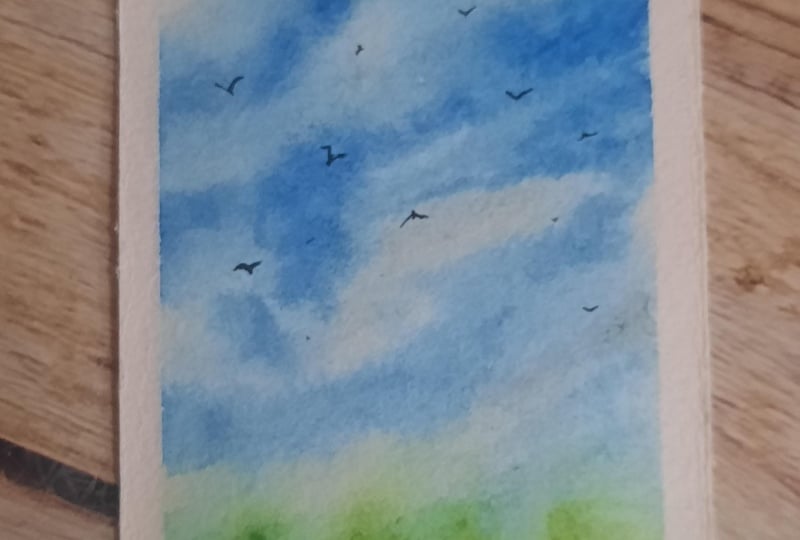
for this to dry. We will add few birds and we are good to go with
the clear blue sky. So there are paper has dried. This is looking
beautiful, right. Now we'll add my favorite
thing birds to this sky. Okay, so I'm just taking
in my detail brush, taking in black or paints gray, whatever you have, and just adding in some
birds in this sky. I think that's it. That's all the bods
that I wanted to add. Now, we will just peel
off the masking tape. This is how the final
painting looks. I like how serene and
calm this one looks. I hope you enjoyed this class. We'll see you again in
the next class project.
7. Day 5 - City Sky in Violet: Welcome to the next
class project. I have my paper here. Again, using the masking tape, we'll tape down the
paper onto the board. Okay. I'm just running my fingers onto the
tape to make sure that there is no gap
between the tape and the paper. So we are ready. Now, this one has a
very, very small sketch. So let me quickly sketch it out. I'm going to sketch
out a lightning pole. One there, and one here. That's all? Later on, we will paint it out
with the colors. So I'll just use my
eraser and very likely just lighten out
these graphite marks. Okay. We're done. So for this one, we will be using violet and quinle donned rose or crimson red as the base
color for the sky. I'm just using my
hake brush and just applying an even coat of
water throughout the paper. Make sure that you apply even coat of water
throughout the paper. There is no gap in the
paper as well as there are no pools of water that gets formed onto any
part of the paper. You can also apply
the water divingly. So all the extra
water will flow down. And then you can catch that on a tissue paper and
just wipe it off. Okay. So I think
I'm good with this. See all this extra water. I'll just dab off
all the extra water using this tissue paper. I'll just run my brush again throughout the
paper, and we are good. Dipping off all the excess
water from the corners and now using my large size
brush and crimson, apply the tone on the paper. So we're just going to apply crimson on the bottom
side of the paper. Cleaning up my brush, taking in boil it, and applying that ton from
the top of the paper. Tilting my board, and
you can see I'm applying the horizontal strokes
from top to bottom. That's it. Now, Firstle dab of all the excess
water from the corte. Now, using my medium size brush and a very dense tone of toilet, we will paint out the clouds. Okay, dabbing off
the excess water, J paint in the clouds. Again, say, here we have
a bunch of clouds come in and say towards
the bottom as well. Drop in some color and let
the water do its magic. Okay, see, I'm just
dropping off the colors, and I'm not touching anything. I'm letting the colors and
the water do its magic. I'll also take a
little bit of indigo, mixing it with violet, and just add in some
of that tone as well, the bluish violet tone. I've picked up the more wallet and whatever indigo is
there onto my brush, I've just leveraged that
to get these new clouds. Okay. What I'll do is after
cleaning up all my brush, dabbing off all the excess
water, this cloud, right, I'll just try to lift in
some color just to give it some lightning dimensions, right. These dense cloud. So the below of the dense cloud, you can lift off some
color just as to get those natural effects
where the clouds are not the clouds have some portion where it is super dark and then
there are some portion, which has light
flowing into, right? Just to get that effect, and you can see my
brush is totally dry. I'm not applying anything more or anymore water on the paper. The p has started to dry. So that's it. Just taking a little
bit more of let and dropping it off
on top of the blues. Now, let's wait for this to dry. And then we will
paint out our front. The paper has now dried. Using my detailed brush, we'll now paint out the
electric pools that we had. So taking in black and
my detailed brush, dabbing off the excess
water, will paint this out. So the first one,
we had that here. Using my zero size rush, and I'll just tilt
my board slightly. We'll add in the electric wires. That's the first one. Say
we have another one coming. I'll just add another coat on top of it being very careful. So if you are not comfortable painting with
a very detailed brush, you can also use a fine
liner, fine liner pen, basically, and using that, you can draw in these
electric wires. Oh they're all interlink. These are all criss
cross, right? You can sketch them
around the way you want. And this goes here. And see the last one
comes in from here. I see there's another
one somewhere behind just a rot, two lines coming. Now using the same
brush, same color. We'll just add in a
few of the birds. There could be some
birds in the sky. There could be some
birds sitting on the pole on the wires. Sorry, there could be some
birds sitting on the wire. So you can just add those. Now, let's quickly
wait for this to try and then we will peel
off the masking tape. This looks gorgeous, doesn't it? But what I'll do is the sky
bids because the sky is dark, they've not come out very well. So I'll just add another
coat of color on top of it. Now, let's just peel
off the masking tape. Okay, so this is the final
look of this class project. It looks beautiful, right? I'll see you again tomorrow with another class project
till then. Bye bye.
8. Day 6 - Burning Skies & Dark Winds: Hey, everyone. Welcome to
the new Class Project. Again, I'll just
tape down my paper onto the board using
this masking tape. I'll just run my fingers
onto the top of the tape. This is to make
sure that there is no gap between the
tape and the paper. So I'll apply an even at of water onto the paper
using my hake brush. I've just kept my paper
on a tilt surface. So what I'll do is
this masking tape and just keep it over here, and then we'll apply an even coat of water
throughout the paper. What this will do is all the
extra water will seep down, and from there, then I will just use my tissue to dab off
all the excess water. Spend some time on
this step as we want to paint our sky
for a longer duration. This one is a complex one. It's okay if even
if you're not able to achieve even if you're not able to achieve
the sky we want in one go. We can always rewet the paper and start building onto
our sky bit by bit. I'm just taking up a tissue. I'm just dabbing off
all the excess water from the corners of the tape. Just remove this.
Using my brush again, I'll just re wet the
paper once again. Now using my medium size brush, starting with the sky. I'll start in with
the nelar yellow. Just apply some streaks
towards the bottom. Now taking an orange. Dabbing off all
the excess water, trying to add in some of the clouds and taking
in more orange, dabbing of excess water, and just trying to add in. You can see my strokes
are all slanted and in one direction.
That's it for now. Now, I will take in paints
gray or neutral tint, dab off the excess
water, and add in. Again, if you can see
throughout the sky, my streaks are in
the same direction. This is what we want. Okay, that's it for now. Now, using again, my orange, dabbing of all the excess water, I will try to build in some clouds here. S. Okay. Now, using my size two brush, smaller size brush,
and vermilion, dabbing of all the excess water. I'll just add in few vermilion clouds at
the bottom first. Dabbing off the excess water. Just try to build in on top of the orange streaks
and the clouds that we had created,
just randomly. Again, if you see whatever
shape I start with. So if you see I have
here, this shape, the ending of
everything is a tail, which is horizontal, which is like a
stretched tail, right? Again, adding in here
has here as well. And this side very slightly. Okay. Now, picking
in neutral tint, dabbing of excess
water and starting in with some neutrint
clouds in some places. Again, I'm taking
a neutral tint, dabbing off all
the excess water. S there is a dense cloud here
and just stretching it out. Cleaning up my brush and just trying to
clean up the clouds. Now again, taking
in paints gray, tapping off excess water, trying to add in a cloud
over here, which again, then ends up at the
orange or a brown tone. So what we're trying
to achieve here is you have gray clouds at the top. But beneath that, you have your orangish and
reddish clouds. So that's the look that we're
trying to achieve here. That's the sky. We have very light tone of clouds Grey clouds over there this
section as well, right? Although we have red, but we have grayish clouds
coming in here too, blending in with your red. The red and the
oranges that we build, those were basically
the bottom layer of the clouds that we
were trying to achieve. What I also do is
for this right, I'll just take in
little dense ton of red and try to add in these
red clouds over here. Little bit more of vermilion and just building on the clouds, taking in a little bit
more of your paints gray and densing out
some of the clouds. This one as well. Again, dabbing of excess water and adding another layer of clouds
on this side too. Now, what I'll do is
I'll take in the orange, dabbing of the excess
water and just try to add some of the orange streaks
below the paints gray clouds. A paints gray and
orange will turn out to be a little bit of
brownish, which is okay. That's the tone you will get. I'll just try to lift off a little bit of
color here and there from the grays to show in the
underlying colors that we have. I'll pick up a little bit
more of gray and just try to add in some smaller
clouds towards the bottom. The paper has
started to dry now, but we still have
a little bit of bandwidth to add
those gray clouds. So I'm just taking my time to add those and
blend it out with the sky. We're just trying to lift off
some color from this side, you can also actually add
a little bit of orange. The very less of water. I can add a little
bit of orange here as well because your
sky is orangish. Decided to turn gray because of the gray clouds taking a
little bit more of pains gray and just trying to build on some
clouds here and there. Now, let's wait for this to try and then we will see
how this looks and Bass that we'll take
a call if we need to add another layer or
we are good with this. The paper has dried.
I will try to apply another layer of water and then see how we
build on this guy. I still feel it's a
little incomplete. So I've just taken my
hake brush with water, and I'm going to apply even coat of water
throughout the paper. A very, very gentle
hand, if you see, and trying to make sure that the applied colors doesn't
move anywhere. That's all. Okay. Now, what I'll do is I'll take a little
bit of blue, a very, very light diluted tone of blue, dab of excess water, and try to add
that into the sky. I think this area did not had the water applied,
so no worries. I've just taken a very
diluted tone of blue. I think I had bright
blue onto my palette, and I've just tried to
apply that on the sky. I'll build on a little bit
more on the red that we have at the bottom and somewhere in the
middle of the sky. So let's say this is
the redness of the sky. Again, taking a little bit
of darker red, this side, at least, and I'll add a little bit of
paints gray to the red. So you get a very darker tone of red coming in from
this side of the sky. Okay. Now, dabbing
of excess water. I'll just try to
blend this out with the sky that we already
have right now. Now, if you can see, our edges have also softened up. Now again, I'll move back to my small size brush
taking in paints gray. Again, we'll try to build on top of the colors
that we already have. Just trying to reapply some of the paints gray as we have some of the
colors being reapplied, the base colors, it will
come out more beautifully. Just adding in a little
bit more of paints gray to the side of
the paper as well. Now I'll take in more of orange, tap off all the excess water, and just try to add that
in some places of the sky. This side as well. In
between the grays, you have the oranges coming in. And again, picking
up the pains gray, drabbing of all the excess
water. I'm just trying to. So the grays also will have a lighter tone and a
darker tone on top of it. So assuming this is
the lighter tone. I'm just trying to add
a darker tone on top of the existing pains gray
clouds that we already. Similarly, this side as well. Smaller clouds coming in. Okay. Just trying to add
some tones this side too. Okay. I think this looks
a little bit better. Again, let's wait for this to try and then we'll
see how this looks. Just trying to add
a little bit more of grayish thin clouds. I would not want to overpower
the orange that we have, but just tinge of gray so that the gray
clouds are coming in. Okay. Well, let's
wait for this to dry, and then we will
see how this looks. So this has dried. I feel the gray clouds are all in the same
pattern, right? It's not coming out to
be very supernatural, so I will again try
one more layer, and then we'll see
how that goes. Okay. So again, taking
in my hake brush, and I'll apply an even coat of water throughout the paper. Okay, that's it. We do not want to disturb the
underlying colors. Now I take my medium size brush, take in paints gray, dab off all the excess
water and just try to add in some random paint
scree clouds as well. This is just to bring another
dimension to the painting, and also make these clouds
a little bit more natural. They all have now I
see them after trying, they all seem to just have a round structure
from the top, right? So just trying to make them
a little bit more natural. Okay? Not going to
add any other color. Others are all okay. Just trying to build
in this paint scree. Now, let's wait for this to dry, and I think this
should turn out okay. Some of them being
round is fine. I think this one will still
remain as a round one. This one, too, but
this has got split. This has got more textures now, and even this one has also
got more textures now. Me shapes, basically. So that should be fine. Stop again, waiting for this to dry. And then we will
add in the bods. I think we should be good
with the sky this time. So this is how basically you
try to build on your sky. If you don't like it
in the first layer, don't just throw it away. Reapply your water, try to
build in the colors again. Now in this one,
what we can also do is this is all dried brush. What can be done is you just try to pick up some
colors from here and there. Just picking up some colors. You can see as and when I pick, I just dab off it
onto my tissue paper. Just randomly picking
up some colors. So what it will do is, this is the third layer of the painting that
we're doing, right? So your paper
already has some of the color that we had applied
in the first two layers. So those colors, the oranges
and the yellow will pop out. That's it, I think,
between the grays. So that will add another
layer to your painting. Yep. So as I was saying, if you are not happy
with the first layer, never discard your painting. Always reapply water to the complete paper and try
to build onto the sky. Now, let's wait for this to dry, and then we will add in the
birds. The paper has now dry. Using my detailed
brush and black color, we will paint in the birds. And this time we will paint in the birds in a little
different way. Say next one is
something like this. Another one is like this. Then we have another this way. Say you have another one
flying in like this, So that's it for the painting. Let me peel off
the masking tape. This is the final
look of the painting. Hope you enjoyed
the class today. We'll see you again tomorrow
with another class project.
9. Day 7 - When the Sky Turns Honey: Welcome to the Last PlasPject. I have my paper on the board. Again, using a masking tape, we will tape down the
paper onto the board. I'm just running my fingers
across the tape to make sure that there is no gap
between the tape and the paper. My paper is now ready. Now, using my hake brush, I will just apply even coat of water throughout the paper. I will just put this masking
tape somewhere down. This will let all the
excess water flow down. Spend some time on this.
The more wet your paper is, the longer you will have
the time to paint your sky. Make sure that there is no place on the paper
which gets left out, as well as make sure
that there is no pool of water that gets formed at
any point in your paper. I'm just taking the tissue and dabbing of all the excess
water from the collars. This is to make sure
that the water does not seep back into the paper when the
paper starts to dry. Using my large size brush
and lleliar yellow, we start with the painting, starting from the bottom of the paper, applying the yellow. Now, I'm going to switch to quin radon rose or crimson red. I'm going to apply
that from the top. Playing around to create the bottom, the base
of the painting. Now, let me just
take out a little bit more of let onto my palette. And we apply let at
the top of the paper. No. I'm just tilting my board so
that the color flows freely. As you can see, I'm not
covering the whole of the pink. I've just added wallet
at the top of the pot. Now what I'm going to do is using my medium size
brush and quin rose, I'll start to add in the clouds. You can see as of now, I'm just adding in some
streaks of the cloud. As I'm painting on
top of the purple, I've taken a lot of dense color. Again, taking in
more of crimson red, dabbing of all the excess water. I'm just trying to add in a cloud which is in
the shape of a heart. Okay? So just adding in for now and now trying to
add in some clouds. Say there would be
some clouds this side, as well as very light
tones over here. Adding in some clouds this side. It's not very well visible, but that's okay because this
is just the first layer. Now, using an orange
and yellow mix because I want a
tone down orange. We'll add in some streaks in the cloud in this
heart shaped cloud. Okay. And as you can see, as well as some on
this side as well. You can see I'm playing
around with a very, very light tone and just applying some streaks to depict the cloud, there
are clouds over here. Okay. Now, taking
in bright violet, I will just add some clouds on top of this crimson
red that we have. Playing around. You can just add in the clouds
the way you want and also add in
very lighter tone of purple in some places. Now I'll just take an indigo, dab off all the excess
water and try to build in some blue clouds at
the top of the sky. Because it's the blue clouds and the crimson red that is basically getting you
the purple clouds. Just dab off all the excess
water and I'm just trying to lift in some color in between the clouds that we
have taking in more of indigo and trying to build in the blue clouds that
we painted before. Just adding at some places to darken up the blue
clouds. That's it. Let's wait for this
to dry and then we will see if we need to
add in another layer or we close in the final painting with some
bods and electric lines. The painting has not dried. Now using my detailed
brush a black, we will add in some electric
pole lines and birds. Just taking in black, dabbing off all
the excess water, and this is the for now, let me just use in my size
two round brush because I want to add in a pole
which is half visible. Say you have a pole that's here. G. And you have the
horizontal line like this and then you have
a point over here. Similarly, a horizontal line
here and a point over here. The other side of the
pole, this side, again, you just see the small rods that say this is pole now
using my detailed brush, dabbing off all
the excess water, we will add in some
electric pole lines. Now again, taking in
more black and say, there is another one that
goes from here to here. Again, I'm just adding very slowly another
layer on top of it just to give it a
little bit more width. If you don't want to do this,
you can ignore this step. Another line coming
in very slowly. Next one is from here till here. One coming in from here
to here at this point. This one also going from here to here and this could be
going from here to there. Now, we will just add in some
birds flying in the sky. Say some this side as well. Flying in the sky as
it's almost sunset, so they are going home. But they are far off, so you don't see them
very clearly on the wire, say you have two birds sitting. That's it for this class. I think we are good
with the words as well. This looks good,
right? It's like purple and blue clouds
coming from top, orange clouds, yellow
clouds coming from below, and then they merge together and form a heart and there
are these two words. It looks cute. This is the
last one that we have, let it dry and then we will
peel off the masking tape. The paper has not dried. Let's peel off the masking tape. This is the final
look of the project. It looks gorgeous, doesn't it? That's all for the last
class project of this class.
10. Conclusion: Congratulations on
completing the class. You have now painted seven
different cloud scapes, seven different moods, and that's such a
powerful way to understand how expressive
watercolor skies can be. I hope this class helps you understand that clouds
are not complicated. They are about water control, patience, softness, and
knowing when to let go. The more you practice, the
more intuitive you will feel. I would absolutely love
to see your projects, so please do upload them
in the project section. And if you have any queries, any questions, don't hesitate to start a discussion on them. I will be happy to
guide you through it. If you enjoyed this class, please consider
leaving a review. This helps me plan
my classes better. So keep looking up at the sky, keep observing, keep painting, and I will see you
in the next class. Till then, bye bye.
 Shalika Gupta, Watercolor Artist