Transcripts
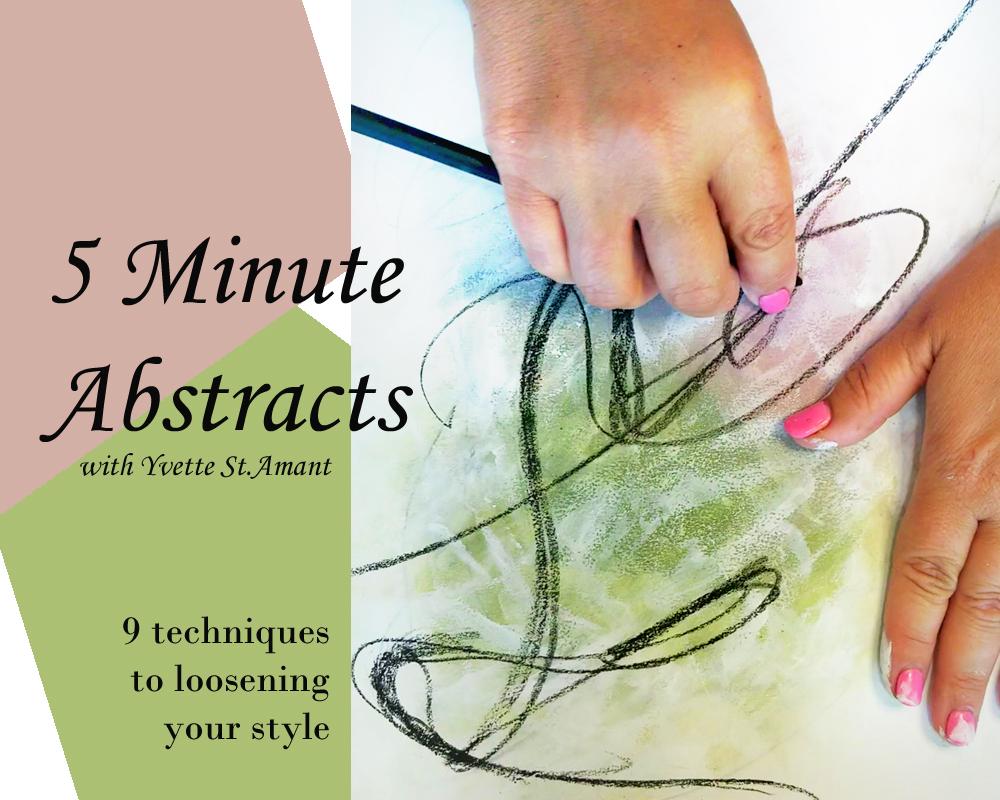
1. Intro: Hey, everybody fencing him on here. I'm in one of my favorite places that I create, and that's my outdoor living space. And I'm excited to let you guys know I have a brand in class. This one is all about expressing your inner create eight of I got to Tell You for years and years and years working with publishing industry, I'm always creating what everybody else wants, what my publisher wants, what the retailers want with the markets demanding, and sometimes it can get daunting because it's so much research involved and you're always trying to please. So there's a side of me where I take a step back and I do my own work and I get creative. And I do don't objective into scripting or I'm just creating to create. So I'm taking everything that's within me, the artists within me. I'm getting it up there on paper or canvas, and I'm worried about all the details. I'm not worried about anything else out there because I just wanna have fun. This will be a fantastic class. It's new, and I'm gonna show you a number of different techniques and they're all five minutes when I get that creative block. I just start creating abstract work or non objective. Were in two and of work to get my creative juices going. And that's what I'm gonna teach. You were gonna do some fabulous five minute abstract art. I can't wait for you all to join me. I've been out here working on some very confined hurt who was inspired by everything around me. This class is not about that. Just get ready to have fun and loosen up. I'm excited for you guys to join me. Let's get started.
2. Supplies: everyone. Thanks for joining me in this amazing class on five minute abstracts. I want to go over the supply list so you can have all your goodies prepared for your class . The first thing you're gonna need is some kind of surface to paint on. I like to use either mixed media or watercolor paper. Whatever you've got on hand is fine. Just make sure it's a little heavier weight, as we will be doing some wet painting with water color. And, uh, some acrylic thinks as well. So once you have your paper, you're going to make sure that you have assortment of acrylic paints. I won't be using the's particular colors in this class, but I will be using a variety of colors that I have on hand. This course is purely owned technique. So any colors that you have on hand is fabulous. You'll wanna make sure you have some Jess Oh, acrylic ink and, uh, some charcoal. You can use compressed or willow, uh, pencil, gel pen, black one and an assortment of paintbrushes. Just grab your favorite ones, have a bucket of water and have lots of paper towel to just to clean off those brushes and keep under your surface once you have your supplies that we can get started on your first lesson.
3. Lesson 1 Drip Technique: Hey, guys, are you ready to start your five minute abstracts? I am so excited about this class, and I'm so happy that you guys were joining me. These are going to be the colors that I'm gonna be using for the first abstract painting. Now, this class isn't about color pairing or finding a good color palette. If you want to learn more about that, you can visit. Uh, I've got two classes, one paint, like published artists, and the other one is, um, Cree Eating collections of art. No, I go extensively into picking color palettes there. So by all means, if you want to learn about color, go ahead and pop on one of those courses. The this class is purely techniques some abstract techniques. So actually have the wrong gray here gonna swap that? No, no, that's right. Great. This is about color techniques. So whatever paints you have on hand, go ahead and grab. I'm just really grabbing what's on my work surface. I work with a lot of different colors, so these are the ones that I chose. Okay, So for this first abstract painting, we're going to do a drip technique, so I just went ahead and put some paper towel under my surface so I don't get it too messy from the next video. And we are going to get be getting the surface wet. So I would a protective, uh, something paper or paper tell under your surface. I went ahead and put paying in my little palate here. And what we're gonna do is we're gonna be using some very washy pain. So have your water. I've got my very favorite watercolor brush here, but you can use bamboo brush any size. This is a size six, because I'm working with this size paper, which I believe is like a seven by 11 something or something by not 10. Something like that. Eso you can use any piece of paper as well. So let's go ahead and we'll start with the first color. And I'm going to start with my grey to begin with. Now you're gonna really water down your pain. You're going to do this to all your paints. I'm just gonna do it as I go along, Um, for each color. So this is a very light grade that I'm I'm using. Okay, so once you water down your paint. I'm gonna rinse my brush off, Okay? Because what I want is just a clean brush, um, with clean water. So I'm going to start by making globs of water. It's almost like a water tough color technique on my paper. You can't see anything yet, and then I'm going to add my color. I'm just gonna job some color on each. And now I keep putting my brush in water because I want this to stay really wet. And you're gonna add some more water. Because what we're gonna do now is we're going to tell our page or to tap it so all that paint drips down. See that? How cool is that? Okay, I'm gonna add a little more of the gray here. Groups make sure it's really watering, and I think I'll dio a little more up here in the corner. So we add some pain, add some water. It's nice and sloppy, and then you're gonna just tap tap tap, and you're going to see these drips come down. Now, what you want to do is make sure this drives before you do the next layer. So once your first colors dry you can go ahead, move onto your next color and I'm going to use my yellow oxide here. I think what I'm gonna do is actually mix it with my green just so that I don't have such a lemony colors. I want almost like a short truce. OK, here we go again. You want your paint Super watery. So I'm going to get some water on my brush and we're going to repeat. We're going to do some globs, and it's okay if you go over some of the first color. In my case, it's gray, but you want to do some overlapping up in the top down below. We're gonna leave kind of this portion, um, white, because that's where drips are gonna be. So go ahead, ad your color. See, when you jab, it'll kind of spread out, which is really 90 c get a nice effect, and you can ab as much or little as you want. Now we are going to be doing a drip, so make sure your paper is really wet. Just get a little bit more of that green in there. Okay? Lots of water. Okay. And lift your paper and let it drip. Look at that. Pretty. I am just gonna add in a kind of get this going here. So forget some on the side. Get a little bit more. This is a fun way of doing abstract art. You can see that it's beginning to kind of mimic flowers or trees. Okay, so we're gonna let this dry, okay? Now that it's dry, we can move to our next color. Now, you want to make sure that it's dry, so all your colors aren't mixing together and making mud. You want to keep them nice and vibrant. So now I'm moving over to my coral and I'm gonna add water to make this very watery. I'm gonna dip my brush into water, and we're going to add some of that quarrel. So again, we're just, you know, making some cuddles in random spots, and then we're going to take our paint and add some dabs color. If it gets too thick like this, you can just add more water. Water is your friend in this case. And if you guys want a speedier way, Teoh, dry your paper. Just use a blow dryer. Lo dried up, okay. And I find the pink a little washy. So I'm gonna add a little bit more. You can go over areas and then just add more water drip. I'm gonna leave some that aren't really going down all the way, just for some interest, okay? And we're just gonna let this dry, okay? So it's almost dry. It's not dry quite yet. What I'm gonna do is take my water watery brush, and I'm gonna take some of that watery paint that's dripping down. And I'm going to start kind of blending some color down here at the bottom. And if you want it out a little bit more, you can go ahead and do that. I'm just gonna pick up a little bit of my grey here, get some of that gray color and bring just a little bit of color down at the at the bottom . So it's not stark white, so make sure your your pain is very diluted for this. So I put a little bit of gray over here and I've got a little bit of pink, and I'm going to get just a little bit of yellow over on this side. So if there's a little bit of paint that's not dry yet. On your, um, canvas, you could just pick that up and use it. Okay, so we have just said a little bit of color down there, which is nice. I want a little bit far down here, a little more pink and a little more gray. So and you can see it's, um, so light that you're able to see the designs underneath. Okay, so what I'm gonna do now is that dark gray that I had at the beginning that I was questioning. I want to add a little bit of contrast on this. So I'm going to go ahead and I'm gonna add a little bit of gray again. We're gonna water it down, and what we're gonna do is on the areas where, um, it dripped. We're going to add dabs of dark gray. So I'm going over the gray areas, So pick whatever dark color that you have. If you're using blues and use light blues, then go ahead and find a contrast ing blue. If you're using, like a dark ping or a light pink, use a dark pink. If you used dark colors than just go ahead and pick a light color. You just want a contrast in color. Okay? And then what you're gonna do is drop that down, okay? And then you're going to take where it met up here, and we're just going Teoh spread it a bit up online there, carrying. And I didn't wait for this to dry because I wanted it to bleed. So it's playing around with your water, your brushes, your paint and just different effects. And then I am going to out a little bit of this dark gray, and I'm going to like some little dots at the top here just for a little added component. And that's it for our first abstract. You can just let it dry. Be careful when you're lifting it, unless you want it to run more. You can work the paint and the water as much as you want, but that's at five minute abstracts. This is a technique on layering your your acrylic, using them like water color and just working with the page and maneuvering that paper to get designs and you can play around. You can, you know, move your paper and different directions to see what kind of designs you have. Um I tend to do a lot of floral and nature work, so I'm always inspired by flowers and plans and spoilage. So I was mimicking, you know, some trees or some flowers. It's just an abstract way of doing it. So I hope you liked this lesson, and I can't wait to see you and the next one.
4. Lesson 2 Mark Making: So for this next five minute abstract, I'm just going to be using the same pains that I had in my last class And, you know, because most of you will probably have a lot of paint left over, so let's just use it up. This is another wash technique. We're also going to be It's a mixed media. So we're going to be using some acrylic ink. I've got my little bottle here. So we are going Teoh start. This is going to be an Asian influence type abstract art. It's really fun. I love doing this just to, you know, loosen up and play around. We're going to start with again washy pain. We already have some. I like to start with my lighter colors first, and all we're going to do is just get some color down on our paper. Now the idea is to leave gaps of white. So we're just going to get a little scribble here of the yellow. I'll get a little green as well. So we're just making some marks, Some puddles and marks. Let me get my coral. And now what? This one you're not gonna dry every time you use your color. You are just going on top. They're gonna bland. Some areas will have darker pigments. Others will blend with the other colors. So you want to make sure you're using colors that will not get muddied together. So, for instance, you don't want to use red, yellow and blue because you're gonna end up with brown. So I would try and stick with colors that, um are close to each other on the color wheel so you can use the yellow reds and oranges or blue green purples. You know, those Anil August colors that meet each other on that spectrum, and then you'll end up with, you know, a nice, clean palette like this. Um, so this is it for the paint. I've got my paint down. You can see I've left some white areas. I've got a couple strokes here and splutters. Now all we have to do is let this dry, and then we're gonna go in with Ian can have some fun. Okay, my paper is completely dry. We're going to go in with our Indian ing. I've turned my paper so that it is vertical here. Um, a lot of the art that I do like this idea in vertical panels. It's a really nice, unique composition. You can turn your paper any way you want again. I just want you to get a feel of using your paper differently. Your watercolors, your your mediums and all that good stuff. Okay, so I've got my my acrylic ink. If you haven't used acrylic ink in these little I drop tubes before, I would suggest just practicing on a piece of paper because it could really come out fast and in a blob. So if you want to just play around and get used to it, if you've taken any my other classes, I'm sure you've tried this already. So what we're gonna do is we're just going to do a free form, some lines again, just kind of sticking to one side of the page here. So I'm going to start by just adding a blob, and I'm going to work at down so you don't want to squeeze the tube any more than you have . You just want to use what is on the paper. And if it runs out, it runs out. Sometimes. What I do is if there's a lot I'll just scoop up a little bit and I can add another blood down here. Okay? So just work that whatever you feel, I added a little bit more. They're just so that I can get some darker ink. And I love my little splatters. So I'm going to go ahead and add spotters, and that's it. Look how quick that was. This is a great exercise If you want to loosen up and try, you know, um, a different style of work and just play around, have some fun.
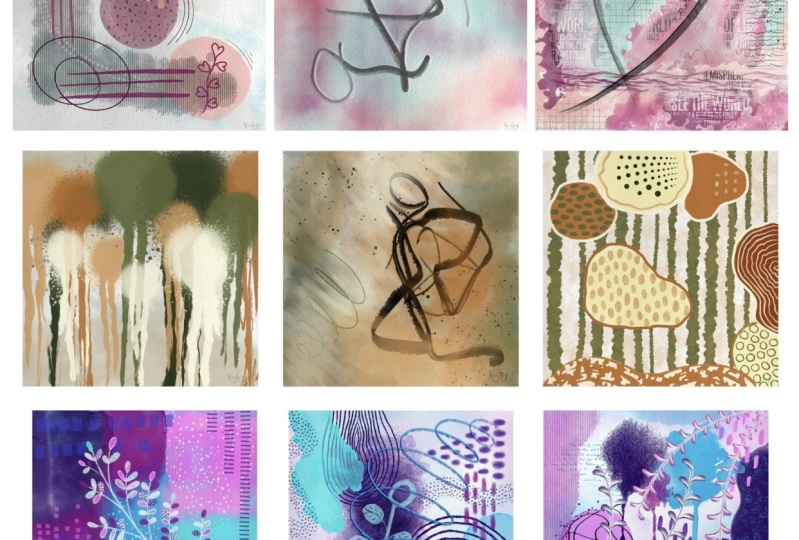
5. Lesson 3 Puddles & Doodles: Okay, So for this five minute abstract, we're gonna be using the same color palette. So I'm gonna be using, you know, that little sure truce or yellow tone with the coral and the gray. So we're gonna begin. Weps, flip that over cause I got some. It's OK. Okay. Talk to myself there. We're gonna begin. That's what I call puddle art. We're gonna be using paint, and then you're gonna also need a, um, help him. I've got my little black job in here. Okay, so we're going to start by doing, uh, pedal in the middle of your page. So I'm just using water. There was a little paint on it, and then you're gonna dip your brush in the color and you can swirl or dab it and just kind of let the paint flow wherever it me go. Let me get all the paint off my brush this time. Okay? My second color. All do over here. So, as you can see, Can't see anything on my paper because I am using, um, just water. And then I'm gonna dip my brush in the gray and just gonna make circles or a little dab to get that paint flowing. I'm just gonna add a little bit more water to make a bigger circle. Not a little more paint. OK, it's my brush off again. Again. Just using water. I'm gonna do another little puddle over here, and I am going to be using my coral. I mean, water that down a bet, and again, I just want to get some of that coral on there. You can add more water if you want. So the idea is you want some washi areas, and as this dries, you'll see, you know, more translucent areas and then areas that are thicker or more opaque with color. So once you get your puddles on here, just let it dry, and we are going to come back in with some jump in. Okay, so now our pain has completely dried. We're going to go in with our gel pen, and we're going to get some designs in here now, this is a great way of doing. If you love to draw, you can get whatever little doodles that you want on top. You can scribble, you can let loose, or you could do some designs. So I'm gonna do a little bit of both. I'm just going to start easy over here on the gray and I'm going Teoh just kind of like do some awkward, weird scribbles, get a little bit in there, and I'm gonna come in after mill dark in some of that area's up. But on this middle one, I'm gonna show you how you can, you know, just dio some designs, you know, mimicking mandalas but not getting all in there with the detail. And you can do whatever kind of designs that you want. Um, it is abstract. So you can reference what you see around you and, um, alter it however you want get inspiration or you conduce, um, intuitive work, just like best buy making lines and shapes and not really thinking too much about it. So I'm just gonna kind of repeat doing these lines and oval or teardrop shapes at the end. And I'm not, you know, I'm not paying too much attention. They're all different lengths and different sizes. And that's the whole idea. Is just kind of doodling playing around, making it abstract and not thinking too much about it. Okay, And then on this side, you can, um, Do you know just some organic shapes, Big shapes, little shapes, kind of mimicking, You know, the inside of a Citrus fruit Or, you know, some organic pods from, you know, when a coffee or why we're so just using shapes. And everybody's got their different style. You can overlap them. You can just do lying work like lines going across. I'm just working with some circles and lines, and you can even, you know, put a little shapes within it. However, you want Teoh build it up. But this is a really nice way of doing, um, some abstract art without thinking too much about it. It's very simplistic. Abstract art doesn't have to be complicating. We will get into layering colors and pains. But I want to show you just different techniques because everybody's got their own style and you're gonna feel these mediums differently. So this is just another way of doing a fun piece of abstract hope. You enjoyed it. I also want to show you something really cool, because if you put these three paintings that we just did together, look up beautiful it is. This would make such a nice display on a wall just goes to show how you can do three different types of abstract. Using a similar wash is almost like a watercolor and various mediums. But when you put them together, they just compliment each other because we happened. Use the same color tones. So I wanted to share that with you and let's just get right into the next lesson.
6. Lesson 4 Graffiti Art: Okay, you guys take two. I already did this painting, and it wasn't recording. Okay, so for this five minute abstract, this is what I like to call graffiti art. So we're going to be using just an HB pencil and some charcoal. This is willow charcoal just in the form of pencil. You can use compressed whatever Turkle you have and HB pencil regular pencils. Fine. I've got my colors here. I'm using just tones of orange and teal just gonna put that aside for a minute, and then we're also going to be using just so Okay, so let's begin. I'm using a square piece of paper this time, and we are just going to begin with our HB pencil. And you are just going to start by making some lines on your paper and scribbles as much as you want. Just scribble e scribbling. That's it. And then once you've done that, I already put some Jessa on my palette here. We're going to be getting dirty, so you're gonna dip your finger into the just so and you're going to start rubbing the just so over your pencil marks. Okay, Now what? This is going to do is seal in those pencil marks, but at the same time, you're still going to be able to see them through your paper. And essentially, what we're doing here is we are going to be creating an interesting background. And once we're done with this background, we're gonna create a nice, organic, intuitive, uh, line on top. Okay, so I've got to my just so on there. You can still see the lines. Now we're gonna go in. We're still using our finger. No brushes on this one. And I'm going to start dipping my finger in the paint. So kept the just Does not, um, dry. And I am going Teoh. Now I'm adding a little bit of that peach. Okay, so we're starting with one color here, so I've got a little bit of that peach. You'll be able to still see some pencil coming through the peach. Okay. Once you've gotten your first color on, I would suggest let it dry so that you don't start getting muddy colors. Okay, so I've left my first color dry completely, and now I'm going to go in with my greens and get a little bit of that in So you want to make sure that you're not covering, You know all your peach because you want some of that peach to come through. I'm gonna use my deeper teal here, so and you also want to make sure you keep some of that white color. Let's go. I've got a little bit of my teal on there, and now we're just gonna let this dry. Once your paint is dry, you're going to go back in with your just so now, So again, using your finger. Now I like to start with the outer edges because I want that to stay nice and white. And I do have a little bit of paint that still whipped. So it's nice to start with the outer it edges, just in case some of your pain is not fully dry. And get your Jesselyn and then start bringing it into the center. There's no right or way are sorry right or wrong way of doing this. But we are just going to be building well, the years here, please. So you want to leave some of that color exposed and start covering some of the edges, okay. And then you can start adding some more. Just so in, like, thicker layers so that, you see, see, little streaks of white that I have here. That's what you want, some thicker pieces. And then, you know, you see that good stuff coming through in the last layer. Okay, so once you have your just on there, it's gonna look muddy. It's gonna look icky, but that's okay. This is just again. It's a process of building up the background, so let your just so dry. Okay? Want to dress is dry. We're just going Teoh, repeat. So we're going to get some more lines in here over the paper wherever you want. Okay. Once you've got the lines, go in with your just so I gotta add some more here and do the same thing a layer of just so right again. I start with the odor areas because I don't want to get rid of all that color in the inside . But I do want it to be subtle. One a little papa color. So if you work from the outside in, then you're less likely toe, you know, cover up all that color. Okay, So as you can see, we've got a nice scribbling Blackground with some color put poking through. So we're going to go back in now and we're going to get a little bit more color. You don't have to wait for this to dry, so I'm going to be adding a little bit of my peach again. You can wet your finger if you want, so you can kind of rub that color, make it a little watering and more translucent and build it out to the edges. Little mix with the just so a bet, which is perfectly fine. Now I'm going to get a little bit of this sage green, and I'm going to do the same thing. Get a little bit of that green on there, and I'm going over the white. Just so areas wet your finger in this class. Your finger is your paintbrush. Okay, so I used my lighter colors first because I want them to kind of go out to the edge. And I'm just gonna drive me finger and I'm gonna take a little bit of the darker orange, and I'm going to go over some of the peach area. You're in the dark orange, and then I'm gonna do the same thing with the teal. I'm gonna get the t o but a little on my finger and start kind of brushing it in. So I always find, especially when doing abstract art is to separate your colors because it can start getting really muddy. And once you do that, you know that you can, you know, create a beautiful abstract and keep those vibrant colors. I'm gonna add a little bit more teal up here, okay? How pretty is that? Okay. And then we're going to get a little bit more just so, and we're just going to start kind of going over those white areas again. Now, you're still going to see all these nice marks behind which is nice, your pencil marks. But see how everything's kind of getting, like, mysterious and interesting. Okay, so there is my background to my abstract painting. Now, let's let this dry completely, and we're gonna do a really interesting technique on top of it. Okay, so our background is complete. Now, I This is a beautiful technique for creating backgrounds for any of your art. So if you're an artist that likes to draw and use charcoal What a great way to get an interesting background. And then you could do a beautiful, simple drawing on top. But this class is all about abstract. So that's exactly what we're going to do. We're going to do an intuitive scribble on top, and I'm gonna show you how we're going to take this little abstract chill home. New level. I'm using my charcoal. What I like to do on this process is just look away because I want my intuition to take over. And I don't want to think too much about what I'm putting on the paper. So I'm gonna take my charcoal. I'm gonna look away, and I'm just going to make a mark. So you guys get to see what I'm doing. I have no idea what I'm doing. Okay, so I'm just doing a simple shaped like that or scribble. Okay, Now I'm gonna open my eyes, see what I've done. What I'm gonna do is I'm just going Teoh, add a little more charcoal to some of these areas. I'm gonna double up. What? I already did Like that lips try to follow my lines. Okay. And then you can take your finger and start smudging it in those areas. Okay, at a little more. If you need to get that smudge going and start smudging your charcoal if you want to use a Q tip, you can I just like Teoh. Get in. What? My fingers. Okay. And you can kind of follow the shapes with your finger and then that might help. You know where you wanna add a little bit more charcoal. This munch nice is not really neat. How that Terkel's starts popping off the page. I always loved working with charcoal Teoh. It's a lot of fun. Fill in some of those areas. Okay? Just stay where the lines are. You don't want to start smudging like your Turkle up there. You know what I mean? But it's almost like a starts giving it a three d effect. And that's it. Isn't that beautiful? Amazing little piece of abstract art. I hope you enjoyed this one. This one might have been a little bit longer than five minutes, But, you know, I do talk a lot
7. Lesson 5 Ombre Stitch: Okay, So in this Knicks abstract, we're going to be doing some color blocking. And I am going to be using same colors that we used in early last video. Just make sure I have some on my palette here. Okay, So I'm using the two oranges and the greens. You want to make sure you have at least three colors I'm using for, so I'm gonna get my peach on there, and I'm just dipping my brush now in the darker orange. I'm not bothering rinsing it when I do the two orange colors because they're very similar. And once I apply the orange, I'm just gonna work it until the brush gets dry. And then that way I can, um, bring it up into the peach and I get, like, a nice blend, but I still have significant blocking of color. Okay, I'm gonna wet my branch, and I'm going to get my paint into the sage and start down here. It is a little watery, but that's OK. Get my Sajjan. And then I'm gonna go from a teal up here again. I am not, um, rinsing my brush, and I'm just gonna bring that color down into the sage, so we almost have to Grady INTs here. Okay, so I've got my teal on one side, my orange on the other. I'm going to take, um, a fan brush. You can actually use any kind of brush that you have. Let me just I don't I know that not everybody has a family rush, so I'll just use what I've got here. Just so you guys can see. So I'm gonna take my, um, peach, which is what I've got out here, and I'm gonna start kind of burning lines across. Okay, so we're going to almost create an illusion. I'm going to move over to my orange once it starts getting darker, cause you want to match the color, and I'm going to bring my peach over, so it's almost like I'm going to be stitching my paintings together. Okay, So rinse your brush, and now I'll get the teal. We're going to do the same thing moving in the other direction. So we're gonna get some teal between the lines going across, and then I'll move to the sage, okay? And what you've got is a really simplistic, abstract piece of art doing like an all brave effect, starting with color blocking. So this is a Nombre painting with a stitch effect, and it's simply just another way of doing abstract art.
8. Lesson 6 Unconventional: So I wanted to show you another way to get, um, some texture in your backgrounds when creating abstract art. And we're gonna be using some unconventional tools will be using bubble wrap. I've got, like, old credit card here, and you can use other tools such as sponges or anything with shapes eso we're going to start off we're gonna be using again the same colors we did in the last video. Plus some Jess. Oh, and we're going to get a little bit messy, and we're going to create some beautifully textured backgrounds. So I am going to start by watering down my first color, and we're just going to randomly be applying some pain. So now I'm gonna move to orange, wet your brush. You want to get a variation of, um, washy and then some areas that might be a little bit darker. So I'm just starting with one color first. This is the peach. We'll add a little bit darker over here, so we're gonna be doing several layers. Okay, so that's our washy layer. We want that to dry. Okay, Once that's dry, I'm going to be taking on my bubble wrap, and I'm going to be putting paint on it. So I'm gonna put some teal on one side, some of that sage on the other. So I'm using my other color, not the peach, whatever contrast in color that you have. And we are going to get some texture on here, so I'm just going to get some dots. Just kind of focusing. Going up. You don't want to do the whole area okay again. You want to let that dry? Okay, once that's completely dry, we're gonna work with some Jess. Oh, and I have some on the credit card, but I want you guys if you don't have a palette knife. I found mine. I'm super excited. You can use the credit card for doing this. We're gonna be doing some scraping. Make sure you have some just so available, and you're just gonna dip your your knife or your, um, card in the just So And you're just gonna start scraping? You're just so randomly for with the surface, just like so. Okay, so we're gonna be doing a couple different layers here. Okay, So I'm done with that again. Um, you know these air five minute abstracts, but I'm not counting in the drying time. I have the magic of a camera animal ajar. So trying to cut the time down. Okay, so now I want to get a little bit of you know, this bright teal in here. I just need a little bit again. I'm just kind of washing down my brush. And I'm just going to get a little washy in some areas and apply a little bit of this two year old and then just kind of bring it down. And again, we're just letting the brush crime and dry out. We don't want it to wet, and we don't want to lose all the color of the orange underneath. You see that? And it's going over the just So So if you didn't get the justice on there when you put the teal over the yellow, then it would just be a lot more diluted. I'm just having a little bit more because I want a little bit more brightness. I'm just going over white areas just on one side of the paper here. Okay, Because we're working so thin, you don't really have to wait for it to dry. I mean, it's a little bit damp, but it's still nice. Now we're going to do the same thing. We're going to dip our brush in the white and the areas where transitions to the orange lips get a little wild here, Gonna add a little bit of white just a little bit down here. There we go. So we're just adding a little bit so pretty And then I'm gonna go back in now I'm gonna use my Jess. Oh, and I'm just going to get a little bit on my bubble wrap now There's still blue on there, but that's OK. I kind of want that. And then I am going Teoh, apply a little bit of this texture on the side again. Okay. And now, at this point, we have to let it dry. And now, once it's dry, what we're gonna do is we're going to go in and brighten up a little bit of the orange that we lost here. So it is a process. I mean this this is how you build the background. Make sure your brushes pretty watery came. Just gonna now over this area again to get a little bit of that right. That's back. I got a lot of water on my brush, so I'm just gonna dab it so I can work in some of those areas just like that. Is that pretty? So we've got texture going on here. Also, have a sponge. I didn't show you how to use this, but the same thing you can just, you know, add some textures using your sponge. And these air. This is really nice for blending colors, too, if you want to kind of do, like a transition, which is what I'm doing here. So it looks very mystical. And you can bring the orange and the, uh, Thiel's together. Okay. And don't be afraid if you want to brighten up the color Still just to add a little bit more And what I like to do is just add in layers. So a lot of thin layers. So if you want a little bit more brightness over here and that Thiel, just go ahead and at another wash just like that, do you have just brightens it up, okay. And then I'm going to leave this over here. I think this is turning out really nice. The backgrounds. Beautiful. So what I'm gonna do now is I'm going to dio a design on top, and I'm just gonna be using some black acrylic paint. But this is a nice background too, if you want to use charcoal or acrylic ink on top. No, I already showed you a technique using those tools. So we're just going to use acrylic in this one, Okay? I'm just using my rounded brush here. I'm going to get some black paint on my brush, So my brushes pretty wet. I'm using not a very expensive paint here, so it's really fluid. And I am just going to basically be doing, like, an oval shape double overall design. Just like that. There's our five minute abstract. Once again, I want to show you how you can take three different techniques. And when you pair them together, they make a beautiful come position just for any space. Look at how cool this looks. We did three amazing techniques, different types of art. But just because we were using the same complementary color palette, you've just made a collection of art obstruct art. Now let's get on to our next lesson.
9. Lesson 7 Patchwork Technique: Okay, so for this next Siri's, I'm gonna be using a bunch of like peaches corals. I'm gonna add some red in there just so I can deepen up my pings and then I've got navy Teal green, blue Violet, I don't know if I'm gonna be using the blue violet. We'll find out that something about abstract is you just kind of use what's around and also white. So the first thing I'd like you to do is grab whatever paint colors you enjoy working with and get a bunch on your palate. I even have leftover pain in my other palettes that I might dabble into. So, you know, if you follow my art, I usually keep my colors simple. So as much as I plan to go bold here, it might not turn out that way. But again, this is just on techniques. So let's have some fun. So I've got a big, flat brush here. We're going to start by getting swatches of colors down, so I'm going to start with my darker colors. So I'm going to start with, um my t o. And the purpose of this is just tickets. Watches of colors down on the background like color blocking. I'm just speeding up the video a bit here because it's literally me just slapping on paint . And I'm sure you guys can get the picture just watching me paint in a little bit of, ah, quicker speed. So this is my third color. It's the Peri Winkle. So I started with the Deep Teal. Then I added the navy at it a little peri winkle. I let that paint dry before I went to the lighter colors. So now I'm adding a really light pink, and I am just literally adding some patches. You don't have to worry about the edges being perfect. It is abstract. And then I'm gonna add my darker pink. Um, I think I was complimenting the color off this coral. I usually use crushed coral, and this one was a little bit more vibrant. So, um, yes. Oh, just at blocks of colors, and you don't have to follow the exact same pattern that I'm doing. Just as you can see, I'm just putting large blocks of colors and then I'm coming in with the white and I'm adding swatches of a white, so I'm going to go over part of the dark areas, part of light areas. And now I'm adding the copper. Oh, this is why I put some of the white to is if you're putting any kind of metallic paint, you want to put a white down furs just so that, um, the metallics are vibrant because going over metallics on top of another color paint will not be vibrant unless put white underneath because they are a little bit translucent. So I'm just, uh here, playing around with the background with this watch is building up the color, making them a little more vibrant by atten a double layer so you can work these backgrounds as much as you want or as little as you want. It's just literally about technique. So get some blocks of colors on. That's the whole purpose for this, um, type of abstract. So as you can see now, I'm coming in with a little bit of ah, the deeper Navy again because I wanted a little more Davey in there. So have fun play around, get whatever colors that you like. I'm just building them up on top of each other. I probably could have stopped about 10 steps ago. Okay, now we're gonna work with a thinner brush on, and we're gonna get some white pain, and we're going to start putting some pattern in the background. And Thies, I just random you don't have to stick within, you know, one color block. You want toe kind of bring that pattern over multi layers of color. And, um, you can use dots. You can use stripes, whatever you want. So I'm drawing a little vine here because I'm gonna add, um, abstract leaf. You know how I love leaves. So I decided to use a leave. You can. You can use anything. It's abstract. Whatever you enjoy drawing it could be a flower. Could be an animal. Could be house. I mean, it really could be anything. So I'm literally just drawing some pedals. And as we move along, you'll notice I'm coloring in some pedals. Other pedals. I'm just leaving an outline. And then other pedals. I might just put some dots in. So we're doing this for a visual interest. If we colored all these pedals in white, it would look like something's kind of missing, like you cut a big hole under your paintings. So you always wanted Britain visual interest, especially to your abstracts, by bringing in different textures. So whatever kind of designs or patterns you can think of doing and just alternate them, believe some hollow, some solid, um, and just play around. It's a really great way Teoh experiment. I'm also just doubling up, uh, my white pain. So it's ah, little, little more bright. And as you can see here, I'm just adding some veins in a couple of the leaves and in the top ones, I'm adding blue veins just to Britain. Another element. And then I'm gonna connect the veins. So I'm using that kind of Perry Winkle blue. But I've had a little bit of white just so they pop. And you can also go in with different colors in these solid pedals and do you know, patterns and other colors, too. So just play around. These lessons are to give you some ideas on how you can work. You know, these backgrounds and four grounds in your abstract art. So we're gonna bring some more, uh, visual elements to the backgrounds by adding more texture. So I'm just adding some stripes here, and then I'm adding another design. So, like I said, the more pattern that you can get in the background, the more interesting your compositions gonna be. So I'm just adding some of that really light pink, and I'm creating some more pattern moving behind the leaf, everything to make the composition a little more exciting. And as you work your abstracts, you'll find spaces where you think you know you might need some visual impact. I hope you've learned a lot of tips and tricks in this abstract lesson. Um, I like to call it patchwork art, working with color blocks and then images or silhouettes on top with lots of texture in the background patterns. And this is our finished product. Let's move on to the next lesson.
10. Lesson 8 Shapes & Patterns: So for this next abstract, let's go ahead and grab our pencil. I want to make some shapes on the paper. We're just going to do some circles and some, you know, just organic shapes coming out. However you wanna have them placed and the reason why I'm having you do this is there kind of like guides? Because we're going to be coloring them, But we're gonna be doing a pattern in the background. And I want you guys to be able Teoh, know where your color blocks are, so we don't go all the way down. You'll see in a second. OK, so for this one on the music scene colors, I didn't know the other Ah, last abstract because we have it on the paper. And what we're gonna do is we're going to create, um, almost like this organic striped background. But I don't want all your stripes to be the same, uh, thickness apart. So we're gonna eliminate going into where the circles are because we're gonna put color in there. So we're gonna kind of have and you can do this with any color. Actually, I probably should have done this with maybe blue just to keep with the theme. Okay, I'm switching to Navy Blue So I'm gonna make thes stripes and navy blue And so you're gonna dio like thin ones and thick ones and you'll see the effect when we're done. What I'm gonna do is just take my white and clean up the edge Oh, so that when I put my color over, if I got a nice pop of color So once you've done cleaning up the edges, you can go ahead and fill each shape with your selected colors. I'm using the coral here, and I'm gonna use, um, just colors within my color palette and kind of alternating. You want to make sure you don't put two colors beside each other that are the same. Ah, but you know, whatever palette that you're using, select colors and just start painting in the shapes. I fast forwarded the video here so you don't have to get bored watching me paint every section of color. I know you guys can handle this and do this part on your own. We're going to go in with Earth in brush and we're going to start off by. It's almost like we're outlining this sort Go but were doing it on the inside, and it doesn't need to be perfect. And excuse me for rotating my canvas, but, um okay, I want to be able to access the paper. Uh, so I'm gonna add a couple more outlines to a couple of these shapes and they don't have to be perfect. You could make them a little wiggling, Wonky. And then once we're done, Esper gonna go ahead and start putting texture within the shapes. So, as promised, we're going to get some texture in some of these shapes now. So I'm using my peach, and I'm just gonna put some brush marks in this section and we're gonna do various ah texture within the shapes. Not maybe not all the shapes, but the idea, just like in the last video, is to bring some visual impact. We want to make sure when we're doing abstract art that the eye is moving around the page. So we have to make things interesting. And texture is a great way to do it. Just putting in some patterns and designs. So in the last class, we did color blocking, and we just outed random textures, Ah, and patterns. And in this particular technique, your drawing shapes and you're doing the patterns and textures in the background and then different ones in the foreground on top of the shapes. So I just wanted to show you different ways that you can create these abstract arts. So when creating abstract are you just wanted to take step back and see what works, What doesn't work? I'm going to add another double outline and then a circle here, and I ended up putting little patterns within the circle, and it didn't work. So what I ended up doing was just coloring in, uh, the whole shape because it just didn't work. And sometimes that happens. And that's the beauty of abstract is you just make it work. And once I filled in the shape, I just decided to extend my double line because I just wasn't liking how my I was stopping right there to examine. It s so you'll see how it improves the look of the whole composition. And here's the final painting. This is just another technique on how you can create some really, you know, nice pieces of abstract art
11. Lesson 9 Patterns & Elements: Okay, so for this abstract were using same color palette that we did in the last two videos, and we're gonna dio combination of block painting and shapes. We're gonna do, like shapes on top of shapes with color and pattern. Okay, so for this abstract, I'm going to begin with my deep teal color, and I'm using a thin brush, and I'm going to start creating a pattern on the background. We're gonna leave the background white, and I'm doing, um, lines coming out almost kind of mimicking a tree ring. But I'm not starting with a circle, so you can just create a shape off one side of the page and we're just trying Teoh, start with some visual texture in the background. So I'm going to continue doing this until I have my shape filled in. I'm just kind of doing it organically, all with lines. So once we're done with the rings, we're going to start creating swatches of color kind of overlapping thes stripes. So I'm starting with my coral. I did a circle. I'm leaving. The edge is really rough because I want, you know, as much visual texture as I can, and then once I'm done with that, I just go over to my light pink and I'm going to do a little swatch and I'm just now you could leave it if you want, like that. But on the top portion of the rings, I'm just gonna darken the color so it looks like it's overlapping that coral swatch. Now I'm going to take my Navy blue and I'm gonna start outing some texture just using a small brush. I think I'm using my number six watercolor brush, and I'm just adding some breast strokes going across horizontally. And then I'm going to switch to my fellow blue here, and I'm going to do some little lions coming up. So it's important when you're doing the patterns and textures in the background that you're using different size, um, brush strokes for this so that they're not all uniform. And it's all about feeling the canvas and the composition and just, you know, judging where you need some of that visual interest is where you gonna put the little line . So I want to start getting some elements over our swatches of color, and I'm going to get, um, some little like organic Berries. You know anything? You can really do anything. You can draw a little insects, bugs or just, you know, do more shapes if you want. But in this case, I'm doing some little like Berries. And just like in that first abstract that we did using these colors I colored some of the Leafs in It's the same here. I'm just gonna leave some hollow and I'm gonna color some in and I'm just deepening the white. And then what I'm gonna do is I'm going to add a little bit of my deep red You'll see in a minute to get a little bit of interest inside just to kind of make them pop pop a little bit more. So I'm gonna add another element of the top using my dark blue. And it's all just about looking around your composition always and just seeing what colors will go back. So I really want some contrast. So I use the dark blue and then over the coral, the white looked really pretty. So I thought I'm gonna put some leaves in coral and, uh, in white just so they pop as well. So after I sit back and look at my composition. I noticed that I want to bring a little bit more of the blues. And so I decided to add a little more texture. And I'm gonna add a couple leaves at the bottom here in the Navy blue just so that I came. Bryn, Um, some more elements off off the page and get a little more texture here to make the composition a little more interesting. So again, you know, when you're doing abstract art, you always wanna kind of step away in look at your piece of art and assess the composition . Make sure that your eyes flowing all the way around the page. And if it's not, then you know you're not John. You have to add a little more elements. I decided to add a little more texture in the leaves. And then I also felt that there was something missing in the top. Left hand corner was like a little too white. So I decided to add another swatch of blue here, and then I'm gonna add a little more texture over it. So I'm just gonna let you watch and see how I finished this painting off. So this is how I ended up finishing off this painting. And again, I just want you to see how beautiful these last three abstracts look together. Even though we use different techniques, there are similar elements, so it's just a nice way to realize that there's so many different ways that you can do abstract art. And I haven't even shown you all of them out there. These are just some of the techniques that I used, so I hope you had fun. I hope you enjoyed my course, and I can't wait to see how you guys develop as artists. Using some of these techniques is, especially if you're into abstract art. It's fun, it's free and you guys just enjoy creating and thanks again for joining my class.
 Yvette St. Amant, Published Artist