Transcripts
1. Course Introduction: Hi and welcome to my course on 3D medical animation. I wanted to take a second and introduce you to the topics I'm going to cover in this course. First off, my name is Lucas Ridley, and I'm an animator. I've worked in studios like Sony and Industrial Light and Magic on movies like Michael Bay's Transformers and Steven Spielberg's Ready Player One. The software we're going to be using is Autodesk Maya, which is the industry standard that I've used in the all the studios I worked for. You can download a free trial of this from Autodesk website. Similarly, you can download a free trial of after effects to fall along with compositing sections, where we'll take our 3D rendered images and composite them together inside of aftereffects. This course is aimed at the beginner, but there's something in here for all levels. I've divided this course into four different examples. The first one is cell division, where we'll create a cell that will divide twice. Then we're going to model and create some chromosomes and use some of Maya's motion graphics tool sets to create a crowd of them, and then we will create DNA in two different ways, a more beginner way and a more advanced way. Then we'll get into blood flow, which is the longest section of these four examples. There's a bonus section at the end of the blood flow example where we will control the blood cells to actually create a heart shape just to show the type of control that you can have with particles and these blood cells in mind. There's something for everyone in this course, so I hope you'll join me and learn about 3D Medical animation. Thanks for watching.
2. Maya Introduction: Welcome to the first class of this course. Because it is geared towards people who have never used Maya, this initial class we'll talk about using Maya for the first time and if you've already used it for the first time, then you can skip this class. If you've taken one of my other classes that discuss this, or if this is your very first time, hang around and we will explore the Maya interface together. So very quickly to move around, we need to hold down alt, and we need to have a three button mouse. Each of the three buttons do something different. In the left mouse, middle mouse, and right mouse all do something different. So play around with that, but that's how we navigate around as getting comfortable with that. So let's make a sphere real quick. If we go up here to the poly modeling tab, and we click on this little sphere here will get a sphere. You can see there're some lines around this thing and if I grab and start moving it, that's actually rotation. I can see that I've rotation selected because it's over here, selected in this little tool panel and the hotkeys for this are q, w, e, r, and q is select. So if want to select something I can click and drag or select it here. Then the next one is move, which we now have manipulators to move. We can also click in the center and move it freely around and then we saw our rotation just a moment ago. We can freely move if we click in the gray area here or isolate on a certain axis, we can scale similarly and we can see all these values changing over here in the channel box and you can see that's named right here on this tab that goes up and down the side, it says channel box and we have that open by having this little box selected up here on the top right and that toggles different menus that we can access. So the channel box shows us where the transformation information is so if I move this over, we'll see eight and I can type in here and get very specific if I want and I open up the tool settings over here and I can just dock this by dragging it and wait until this blue line pops up and then let go of the mouse, and then when I click the tool button over here again, it'll get rid of that. We can control the menus over here and it's nice to have the outliner up all the time, but you can also undock that and we can close that out and we can get back to it up here under Windows and outliner. So that's helpful. Always have up and so you can see what you're creating in the scene. Because sometimes if we're looking over here, we might not be able to see what's just off the screen and remember every little thing that we made. So it's nice to have a list and it's easier to select things from over here as well. So if we want to view this from the right side, we can go over here to the right side and try to line this up with the three button mouse thing and try to figure this out or we can just go to the right camera. We can get to that under panels and go to orthographic and go to the side view. We can also hit spacebar and you can see that it pops up these four views and we can change this one to perspective, holding down spacebar and that brings up the menu of all of Maya. So everything you see up here, you get just by holding down space so you won't have to go up here hunting stuff around. You can actually just get it right here and it's also quick to move between cameras. If we click here in the middle and then drag around, we get to see which camera when we unclick our mouse that we go to. So we can go to the left view. We can go back to perspective and when we hit spacebar over one, we can maximize it again and if we want to change the time, we can click and drag down here. We can add more frames clicking and holding this type in a number over here at 100 and don't feel like you can really break anything in here. It looks very technical and it is, but it's here to be used and free to experiment with width. So have some fun with this. We've learned how to navigate around with a camera, how to move things, and where that information is stored. The final thing that we need to do is to set our project and that's how Maya knows where to save everything. If we're going to make textures or we're going to create caches, which just means saving little pieces of this scene out and then so we can have it already processed and to bring back in or all these little things that Maya might need to save in certain locations. I need to know where it is. So the project needs to be set and we can do that by going to file set project and then navigate to a Maya folder, and I have the blood flow project set right here. It'll ask if you want to create a default workspace and you do, because that'll just store some basic things that it'll try to remember next time you open up this scene like which camera you had selected and all that little stuff. So we'll say create default workspace and so now we have the project set. I hope this has given you a little bit of comfort in navigating around, moving things and controlling the interface in Maya, I just don't want you to be intimidated by everything you see in the software. We're going to follow a step-by-step approach in each one of these little series and just follow along with what I'm clicking and you will learn how to use Maya on a project basis. So I'm not going to go through every single button. I'm only going to use what we need to do to go from a blank scene to the final render and in that process, you will learn tools. But what I'm not going to do is just boringly list off what every single thing does in Maya. I get bored by that and tutorials I watch and/or even teaching and so I love teaching projects. So that we can have a goal and try to achieve that goal and learn things along the way to that goal. I hope that you feel comfortable now using Maya a little bit and we can continue to the next lessons where we will dive deeper into the series on creating 3D medical animations. Thanks for watching.
3. Cell Division Maya 2020 update: Particle/Mesh Creation: This is an updated lesson for Maya 2020, and nParticle creation. If you're using anything before Maya 2020, just follow along in the next lessons, or if you're using Maya 2020.1 or 0.2, you can also follow along normally. In Maya 2020 and in Maya 2020.3, you need to press enter after each particle creation to create separate particles. You can select them separately. In Maya 2020.4, we're going to cover that in this video here, which is a more involved process and we need to animate with scale instead of translation in later lessons. We're going to quickly go over that creation process here. Here we are in Maya 2020.4, I'm going to go the Effects tab and go to the nParticle creation tool here, and just hold on X, so I can snap to the grid, and create these two particles. Now, I can't select them individually, so I'm going to go to Animation, Deform, and Cluster to create one cluster for both of these nParticles. Now, I can go to convert the nParticles to polygons. You can find the Blobby Radius Scale in the Attribute Editor over here. Because we have one cluster, we can actually just use the scale attribute to separate these two particles from each other or combine them together, instead of in the other versions of Maya, where we are translating individual points by separate cluster handles. If you're in Maya 2020.4, this is maybe the route you'll have to go. Of course, in future versions of Maya, you may change it again, so just be aware of those changes, and workarounds like the one we showed here, or in Maya 2020 or 2020.3, where you need to hit enter after each particle you create, so you can select them separately to create the clusters like we do in the normal course lessons following this one. Thanks for watching.
4. Cell Division Maya 2022 update: Particle/Mesh Creation: Welcome to this updated lesson for Maya 2022. I'm using 2022.1. If you are in a newer version of Maya 2022 or above, this lesson is for you because the way that you control particles have changed. Once again, every version of Maya, they like to switch things up and keep us on our toes for some reason. We are going to create the particles, and then we're going to constrain them and then animate them, and then we can see it after the fact. Whereas before, we could see it dynamically change interactively, we can't see that anymore, so we have to animate it, the constraints first, and then we can see the mesh interact. There's a little bit of a blind animation occurring until you playback. I'll show you what I mean here in a second. We want to be under the Effects tab here. Go to Effects, then go down to the nParticles menu and go to nParticle Tool. Now, we can just make four particles. I'm going to hold on X so they lay on the grid, and you can press the "Grid" button here if you don't see your grid. I'll hold down X. Then left mouse button click in these four quadrants just to make it easy on myself, and then hit "Enter". Once I hit "Enter", they will be created. Once they are created, we can go ahead and constrain them to a transform constrain. We were doing clusters last time. What we want to do is use a nConstraint. I'm going to hold down right mouse button and then go to Particles, then I can select "Individual Particles". If I hit "W" on my keyboard, then I can see the manipulator is on the particle that I'm selecting. Then I go up to the menu and choose "nConstraint", "Transform Constrain". Now, you can see it made a dynamic constraint and the outliner. It's also something we can't select here in the viewport, which is fun. Being sarcastic, excuse me. What I'm going to do is select the Particle again, and basically do this for each one. I'm going to hit "G" on the keyboard because that repeats the last action. It knows the last thing I did was create a transform constraint. It just saves me from having to go back in the menu every time. Now that I have these four, I can convert the nParticles to a mesh. I need to go to Modify, Convert, and then choose the "nParticle to Polygons". Once I choose that, I can go over to the particle shape node in the attribute editor. Once I choose that particle shape node, I'm going to toggle down the Output Mesh option here, and I'm going to increase the blobby radius scale until I can see my mesh. You can see that they start to interact there. The other thing I'm going to do is decrease the mesh triangle size. Each triangle gets smaller, which means the resolution of the particle gets higher. Once I have that done, I can begin to play with this. The one limitation I mentioned earlier is the fact that in earlier versions, if I was to begin moving the constraint which I can't click by, I can't select by selecting it in the viewport, you just select it from the outliner. If I start moving it now, you won't be able to see a change. That's because of the evaluation that the nucleus needs to do in relation to this new nConstraint where before, we were using a deformer. Having to use this nConstraint introduces that limitation of not being able to see this interaction on the fly in real time. What we have to do now is I'm going to hit "Shift W" to hit a key frame on the transforms that translates. Then I'm going to move forward in time to sometime, and then I'm going move this dynamic constraint over and have auto key frame on here, the red box here. That will set a key frame automatically for me on the value that changed. Now, when I go back to the beginning and I hit "Play" by hitting "Alt V" on the keyboard, now we can see that it is behaving in the way that it used to in the earlier versions. Obviously, limitation is that you have to go back and forth and the fact that I guess you can scrub a little bit, but because it's basically a simulation, you'll get this warning down here. You can see it says, "Warning: Nucleus evaluations skipped frame, change too large." What that's referring to is the fact that we were scrubbing and we weren't playing from the start of the simulation, which for this nucleus, you can see will be Frame 1; Start frame, Frame 1. For us to simulate this simulation, we have to play the whole thing. That's why scrubbing may give not super accurate results, and you'll want to play from the beginning. You can see how it has difficulty updating, especially if you go and reverse, it's not going to be able to keep up. But if you scrub forward, you can see what's happening. But you'll want to animate that and then scrub or playback to be able to see that change now. That is essentially the work around now that we'll have to use, at least in this version. I'm sure they will change it again in the next version, and I'll create another updated video. But thanks for watching, and I will see you in the next lesson.
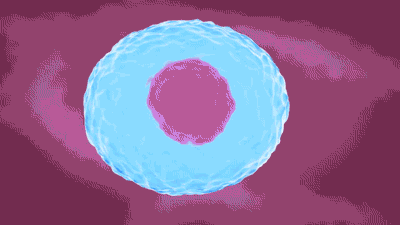
5. Cell Division 1/7 - Particle Creation: In this series of lessons, we're going to look at cell division. We are going to create essentially, I'll just show you for an example with polygons real quick, we're essentially going to create two spheres, one inside the other. If I go to four you can see the inside of this. Essentially we're going to create these two systems. Where the outside one will be the cell membrane and the inside will be like the nucleus. For this to happen, we're actually going to use particles. But I just want to show you what we're going to set up theoretically here in the next few lessons. To do this, as you can see already, we're going to need at least two elements. If we're going to divide this at least one time, we need two more, so that's four. If we're going to divide each of these two another time, that's eight. You know right off the bat, we're going to need at least eight particles, because each particle is going to represent one of these two elements. Let's get started. I'll delete these and I'm going to set the project first, go to file set projects, and I will create a new folder called Cell division. I'll set the project and I'll create default workspace. One thing I like to do too is use the project window to make all the folder, so we have a Scenes folder. I'll hit Accept. Now, when I save, it should be in a Scenes folder. Just keep things organized. Let's go to the Effects menu, and we'll scroll down to effects and then choose nParticle. We'll choose the particle tool because we're going to place them ourselves. I'm going to create four of the particles, 1, 2, 3, 4, and you can put these anywhere. It doesn't really matter. I'm going to hit Enter. Now, you can see we have nParticle1 and nucleus. Since we're going to control the animation of this, we don't need the nucleus to affect this particle system. I'm going to go ahead over to the Attribute editor and under nucleus, I'm going to turn the gravity off, because we don't want our particles to fall with gravity. Now, with the particle selected, I'm going to right-click and go to particle. I can select individual particles, and I will select one and go to the modeling menu. You can also get to what we're going to use from the animation menu as well. But basically we need Deform and we need the cluster option. I'm just going to rip this off. You rip off and use by just letting go over this little kind of a bar. With that particles still selected, I'm going to choose cluster and I'm going to select this particle over here now. I'll make another cluster. I'll choose this particle. I'll make another cluster. Clusters are essentially ways to control certain geometry and in this case particles. Whoops. I didn't have the particle actually selected. I want to make sure we're right-clicking here and go into particle and then selecting the individual particle and choosing cluster. Now, we have a handle for each one of these particles. Before we go any further, we want to rename all of these clustering handles. I'm going to select them and go to this top right area,, and we want to make sure we're on the renamed tab. You might not see this one and if you don't, you can hit this little arrow here and it'll unminimize that and maximize it into the menu. We can start typing in a new name and I'm just going to call this MembraneCluster. It'll give each one a unique name and you can see we have the four here, so now we have the cluster handles. Let's take them and hold on X and snap them to the center of the world grid. Now, let's create four more particles just as we did before. Let's go up to the Effects menu again and go to nParticles, particle tool. I'll just click anywhere and say 1, 2, 3, 4. I'll hit enter. We'll do the same thing again and I'll just speed this up because this is the same thing we did previous time. We're basically just adding clusters to each of the particles, and I'll see you in a second. Now, with all of these cluster handles made, I can rename them again and go to this rename menu and choose Nucleus. Now we can hold down x and snap these to the world center. Now, these cluster handles are each controlling the membrane and nucleus separately. But we want to be able to just control one and have them both move. Let's go in and parent the nucleus to the cell membrane of each one. We can do that by middle mouse dragging each one and to their respective numbers. We want the same numbers from the nucleus to follow the same numbers of the membrane. Now, when we move one membrane, the nucleus inside of it will follow it. Great. It doesn't seem like we've done anything here, because there are no visual indicators besides the cluster handles. But in the next lesson, we will create the actual geometry here and start animating this. I'll see you in the next lesson. Thanks for watching.
6. Cell Division 2/7 - Mesh Creation: In this lesson, we will create the mesh for the cells. Let's go to the end particle one, which is our membranes and we can also rename that, so we can keep track of the two separate particle systems. Within particle membrane selected, we can go to Modify, Convert, and go down to nParticles to Polygons and let go. Again, nothing appears to have happened but in outliner or we can see we have the polySurface and if you don't have the outliner open, you can go to Windows and Outliner. With polySurface selected, let's look at what we have in the attribute editor over here. We have the polySurfaceShape, time node, MembraneCluster and if we keep scrolling, we can see we have a nParticle1_Membrane, which is what we named it, Shape1Deformed. We want that one. If we scroll down here to output mesh, there's a lot of options here, but we're only concerned at the Output Mesh. If we increase the Blobby Radius Scale, we should be able to start to see some polygons, and I'll hit "5" to go into shaded mode. I will also lowered the mesh triangle size so it's literally the size of these triangles here. I'll lower that to something like 0.1 for now and as soon as I lower it, you can see now it becomes more rounded. I can continue to increase the scale of this since this is going to be the membrane, we want it to be the larger of the two spheres. So looks pretty good and we can always adjust these later. Now if we go into the MembraneCluster, we can drag one of these out. We can see we already have this cell division happening. That's pretty awesome. Really quickly we already have the cell division where the geometry is trying to stay together, and that's pretty great. With that in mind, let's continue on and do the same thing for the nucleolus system. We'll click on "Nucleolus" and go to Modify, Convert an nParticle to Polygons. Again, now we have this new polySurface in the outliner, and we can scroll over to the nParticle to NucleolusShape. Under Output Mesh, we can also increase this and just so I can see the mesh on the inside of this membrane, I'm going to hit "4" and start cranking up this cell membrane, oh sorry, this nucleolus of the cell. We can drop this down to 0.1 as well so we have a sphere and now we have the cell membrane and the cell nucleolus altogether. Now if we try to move the cluster, you can see we're getting cell division of the membrane and of the nucleolus. We have two levels of cell division. When we go into shading and we create the cell membrane to be transparent, will be able to see inside to this nucleolus. That'll be pretty neat. Thanks for watching this lesson, in the next one we'll begin animating these clusters and the cell membranes and nucleoluses. Thanks for watching.
7. Cell Division 3/7 - Animation Expressions: In this lesson, we'll begin animating the cells. To get started, let's first talk about what we want to do. That's essentially to create a situation where two of these cells move together and they move out here, and then one of their pairs divides again. Now we have cell division happening twice. That's just the gist of what we want to do, but we also want to add a little more flavor to this and create some little bit of wiggle in the nucleus. We can also do it for the cell membrane as well. But right now I'm just going to focus on the nucleus. Essentially we want to create an expression, so we get animation for free basically of just the cluster wiggling around a little bit. It gives some internal animation. I think it will look nice once we have the materials applied and we see a little bit of jitter in here with some activity of the nucleus. Instead of having to hand animate this thing wiggling around, we can create an expression. Instead of creating an expression on the cluster itself, which would limit us later if we want to hand animate some of the cell, we want to put the expression on something higher up. The only thing higher-up right now is currently the entire cell membrane with the cluster. We need to create something in between these two where we can put the expression and it will affect only the nucleus. To do that, we can pretty simply just group the nucleus. Also you'll notice over here that, wherever we created this handle originally and then we snapped it to the center that we have these bits of values here. If we zero these out, it would go back to wherever we originally had made that cluster. Instead of trying to zero this stuff out, if we just group this right now, it'll create zero values for the group. When I hit Command G or Control G on a PC. Now with this group, we can put the expression on the zeroed out values instead of having to mess with the nucleus. Now we can do the expression here and later, that'll free us up to have an empty channel box here. So now we can add keyframes here later if we wanted to. If we started doing all this animation and later we decide we want to animate the nucleus and we already have an expression there, then we're totally stuck. We need to plan ahead and rig this in a way that will give us the most flexibility. That's why we're going to create this empty group up here to hold the expression and will affect the child, which is the nucleus. The expression we're going to create is pretty simple. It's essentially this group1. We're going to duplicate this out for each of the axes, translateX, translateY, and translateZ. Right now I'm just showing you one line of the code. Basically we'll reference the noise command, and then we will say, do this noise command and have it be the time which we'll constantly change as the timeline is playing, this number will change and we'll times this by X, some number, which will be the frequency. How often do we want this noise to affect it? The Y, this number over here will be how far and how much we want it to affect it at this rate. It'll make sense once we start playing with this expression. But just wanted to explain a little bit. I'm going to copy this and we'll go back to Maya. With a group selected, I will select one of the options here and go to Edit Expressions, and we'll get a new window here. You can see we already have this group1 translate, and we can copy this and paste it here. But since I've already copied it from the expression itself, I'm just going to paste the expression in. We need to change these values here. Depending on the size of the scale of the scene that you're working on, these values might be different for you. But I'm just going to start with something like 1.2 and maybe 0.2. Remember, this is how far it's going to move. Since the nucleus is inside of the cell membrane, we don't want it to move outside of the cell membrane, which is not very far. You can see right here on this grid, a cell membrane is only slightly wider than two units. We want to keep this number well under two units. So 0.2 is going to do is pretty well I think, and just have some slight motion there. We can copy this whole line now, and we can paste it twice. We can change the X to Y and this X to Z. So now we have all three axes of translation. We have X, Y, and Z here, and they're all being affected by the same values. Let's change this just a little bit so that they are all slightly different in the values and the frequency of how they're affected. This will create a little more random variation, now that we have this done, we can hit Create and you can see this cluster already moved a little bit. Now if we play the timeline, you can see we already have some movement here with that cluster. I can just hide this first one so we can see it with the shaded mode on. I'll hit [inaudible] and we can see that's already moving. We got all that animation for free. We didn't have to do anything. That's pretty nice. Of course, we can always update this expression later. Let's go back and we'll do the same thing for these other groups. Let's select each nucleus and hit Command G. Now they're all children of their own group. Let's go to the second group now. We can actually just copy and paste the entire expression we already made. Let's go to Select Filter and By Expression Name. Here we have this expression 1, and that's our expression we already wrote. We'll just copy this, and let's go to group2, and we'll select any attribute over here and go to Edit Expressions. Now we can just paste this in and change this one to a two for each one of these. So now we have the same thing for group2. Similarly, we want to change these numbers just a little bit. So each cluster is slightly different from the last one. So I create, and now you can see there will be two clusters moving around. It looks like one following the other a little too much, so that was probably in our amplitude or our frequency. We can change these numbers even more to help separate those two things. Maybe I'll change the amplitude over here to 0.3 and I'll hit Edit. Now let's see if we have a little more separation here. Yeah, now they're not doing the exact same thing, which is nice. Now we can do that for the rest of the groups and go to Edit Expression, and we can just paste this in. Change group1 to group3. I'll do this for this group and the next one, and I'll see you here in a second. I'll speed up the video. Thanks. Now that we have this done, let's play this back and see all of the four nucleus cluster handles moving around. We can see we solve cluster handles in the middle and those are the cell membranes. Let's unhide the cell membranes. In the next lesson, we will animate the cell membranes and have them divide. Thanks for watching.
8. Cell Division 4/7 - Animating Cell Division: Now that we have the expressions written for the nucleus on the inside of the cell membranes, let's animate the cell membranes themselves and get the cells dividing. I'll select the top two clusters of the membrane and let's go somewhere around frame 20 and we'll hit S and when we hit S, you can see that we create a little red tick mark down here, which means there's a key frame on that frame and you can see all of these channels turned red. If we want to be very efficient, we can also just hit Shift W so that we set key frames only on the Translate. We can also right-click them and choose Key Selected. Now let's go down in the timeline to around I think frame 60. Let's just move this over a little bit and not all the way separated because we also want to take these membrane clusters and move them out to the side as well because we don't just want one moving away from it, we want them both moving away from each other. So let's go to frame 20 again, set a key frame on the Translate, go back to frame 60 and we'll pull this out to the side as well, about the same distance away as the previous one. Now let's hit Play and it's pretty basic and gets the job done. Let's see if we can't make this just a little bit better. So let's go to somewhere where they're about to split and slow them down just a little bit. Let's go to in here, maybe right in here and we'll select all the membrane clusters and we'll hit Shift W and we want to try to create the illusion that there is some friction here and some surface tension so that when they divide, they have a hard time actually separating and then when they get to this point then they would pop apart. So let's set another key frame where they're about to separate and then we can just Shift Select these last two key-frames, and then click and hold down on these middle yellow arrows and we can move the key-frames out so that we're slowing down this little section right here. So let's Play and see what happens there. You can see how they start dividing pretty quick and then when they get to where they're about to separate then they slow down. It looks pretty good. I think we can speed up this last little part, so I'll Shift Select that and go down and I think we can also do a little bounce once they separate. So let's go to frame maybe 83 and set another key-frame and we can select to the clusters and go back towards the middle here and same thing with these two and we don't want to get them so close, they actually start connecting again. We just want to give it a little bit of a balance here. So I'll go back out. Same thing with these and then we'll do it one more time or they go into very sadly and then back out again, cool. Now let's go back to the beginning and hit LV, it looks pretty good. I think we can change the timing a little bit. I think that they can use a little adjustment and the timing so that it's a little slower on the balances so we can drag these out and give us some more time here in the timeline. I'm just giving these a little bit more time each, see when they break apart now they're much slower and look a little more appropriate. I like how that looks and now we can do the same thing for these other two pairs. What we can do is actually Copy and Paste the animation we've already done and we can do that by going in the other direction. So let's focus on these two first and we wanted to buy these in the Z-axis. Let's select the first one, and we'll go to the Windows, Animation Editors, Graph Editor and with command and shift and right-clicking, I can resize and frame up how I'm viewing this so we can see that all the animation is on Translate X and as we saw before, we want to Copy and Paste this Translate X animation we've already done, and we want to put it on Translate Z over here and time. What we're looking at right here is time along the bottom and value on the Y-axis. I can isolate the Translate X and select it and I'll hit Command C to copy it and I'll go to Translate Z and I'll hit Command V and already you can see that it has pasted it in here and let's take a look at how that looks as it stands and I'll just add some more frames. We can see this goes to at least frame 230 over here so I can just type in a number here 230 and let's play it back and see if that is close to what we want. That looks about right actually. So now we need to do the same thing for this other membrane and we can actually take the animation we already have on Translate Z here and Copy that over to this other cell membrane cluster, I'll select that. I'll go to the Z Translate and I'll Paste that in here. You can see we're kind of duplicating our efforts here, we actually want this key-frame to be where we are at 120 here. We can just Delete all of these and click and drag this over to 120 and I'm shift middle mouse dragging again and let's get that on 120 and we can bring that up to be even with this neighbor key frame to the left, cool. It will be doing the exact same thing, but we want them to separate, so we need to flip this animation in this axis. We need to go in positive Z. Right now everything is going down into the negative numbers here so let's select this and we can see that this value of 1.076. Let's remember that and select these keyframes. I'll go to "Edit", "Scale." We want to scale the value here. We'll go "Value Scale." We want to go a negative one. We want to go in the other direction. We want to pivot point of that 1.076, which is right here. We want to pivot from this point and we want to scale in negative. So we want to go up this way. We'll take all of these and we'll go up here. We'll select all of them. With all those values entered, let apply. You can see it flips everything up here. That works out. Let's play this back. We can see that some of the animation isn't exactly the same because the cell membranes will lose a little bit of their volume every time that they divide. When we were doing this first animation, there was a lot more surface. This type of connection happened much closer than it does over here when we're copying that same animation. There's less surface area and they're smaller spheres now. It's not exactly happening where we want it to. Let's take both of these clusters and we can select the animation in the graph editor. Now, that we have both of the clusters, let's scale this up so we can see what we're doing. I'll hit scale by choosing R. I'm going to put my cursor in between both of these values. I'm going to move the viewport so we can see where they're touching. In this section, where my cursor is in the middle here, you can see it's right in the middle, with the scale selected, shift middle mouse and drag these in. It's a bit of a delicate process. That's why I say zoom in as much as you can because the more you zoom in, the easier it is. Again, we're in the middle of these two lines because we want to scale them evenly and just shift middle mouse drag them in to where they're touching a little more. Let's see how that looks. I think I could go a little closer. Let's do that one more time. Something like that. I'll play back. That connection looks a lot better now. We'll do the same thing to this other side. Let's choose this cluster. We can actually copy the animation again that we did on this left side. Let's go to the first membrane cluster and we'll copy the translate Z. We'll go to the membrane cluster two, which is actually the third one because we're starting at zero here, zero, one, two, three, you [inaudible] this four. You need to remember that. Let's choose the translate Z. We see that in hit, "Command V." Now again, it paste it where it was originally, but we can see what the difference is. We can drag these down to be in line with its neighbors. We wanted to start over here. Let's choose one of these other ones and see where they animation started. Frame 120 is where we started. Let's just start everything at the same frame for right now. I'll delete all of these keyframes so I have room to slide these over. We'll do the same thing for the next cluster for Translate Z, click, "Command V." I'll delete these and just drag this down. It's in line and on Frame 120. Great. Now, you can see we have the same issue though, because we copied and pasted the same cell membrane. Let's just undo that real quick and grab this second one. That's the one we want, because we want to go in this other direction. Select "command V" again. Now, we can just drag this down to be in line with that Z starting point here. I can close the graph editor and let's take a look at this. I'll go from the beginning. That's looking pretty good. I'm going to extend this out a little bit. Now we're going to adjust the timing of the animation because everything is happening at the same time. All the frames start at the same time. Let's have this settle be a couple of frame different for each one of these because they're bouncing back and forth on the same frames. Let's select the second two and will go where the bounce is, here. We'll just click and drag. We can move these down two frames. When we play back, we can see that there should be some offset here now. That just seems a little more natural because the timing of things are important. Everything doesn't happen at the same time in nature, so it shouldn't in the cell division. We'll do the same thing on these cell divisions, lets choose this cluster. We can actually offset them with each other and between the pairs. Let's select both of these again and have these two start later. Since they finished a couple of frames later. Let's go maybe four frames. see if that's a good offset. Looks pretty good. Then, we can offset this last one in the settle. Let's offset this by two frames. Then lots offset the settle of one of these by two frames as well. I'm just shifts selecting and I'm sliding everything down two frames [inaudible] V. That looks a lot more natural with each of them finishing at their own time. In this lesson, we learned to animate and create offsets and use the graph editor. I'll see you in the next lesson where we will create some shaders for this now. Thanks for watching.
9. Cell Division 5/7 - Cell Materials: In this lesson, we'll start to create materials and lighting for the cells. But before we do that, let's make a few more adjustments to the animation. I'll select all the clusters and let's add a little more time at the head of animation because currently we only have 20 seconds to get oriented and see that there's one cell here when we start to render this thing. So let's give ourselves a little more time and I'll increase the time range to 300. I'll just select all of these and slide them down in time maybe to frame 40, to have a frame 40. So we get two seconds almost to see this kind of single cell and the nucleus on the inside. The other thing I want to do is select the cell membrane and I just want to scale it down and wide. That way, it'll just not be a perfect sphere and look a little more cell like. So when things separate, it'll be flattened here. So I think that'll look a little bit better and the final render so that it's not entirely spherical. Cool. Okay, Let's select the cell membrane and we can go to right-click on the object and go to assign new material. Let's go to Arnold shader and will choose AI standard surface and if you don't have the Arnold render available, you can go to Windows settings preferences and turned it on in the plug in manager and you can scroll down to MTA, which is right here, MTA bundle, and turn that on if you're in a version of Maya before, I think 2017 or 2016.5 They only recently started to include Arnold in Maya. So this is more for the most recent packages of Maya between 2017 and 2018 and beyond. So now that we have this material selected, let's add some lights. Let's go to Arnold and we'll go to lights, sky dim light. So now let's preview what we've created by going to Arnold render preview. To initiate the render preview, we need to hit this Play button. So it's very white and that's also because our shader is white and the light is white. I'm going to first save this as materials for we go further. First let's turn off the sky dome light in the background. So I will go down in the attribute editor of the light and turn cameras to zero. So now we can just see the cells. So let's go to the material by selecting on the membrane and the outliner and go over to the AI standard surface shader. We can call this membrane and change the color to something like a blue. So we can see a little better. Let's scroll down here to transmission and turn the weight of that up a little bit and now you can see we can start to see the inside cell membrane and it's pretty distorted right now. We can adjust that by using the incidence of refraction right here. So 1.52 I believe, is a mathematical thing. You can look up on Google and sentence of refractions for certain materials and I'm pretty sure 1.52 is glass. So we actually command and middle click in this area, or we can just use the slider. We can use the slider here and we can see the distortion of the inside starts to go away. So that's pretty interesting and we can also see this before the cells divide, we can see this update, especially it might be helpful when the cells are actually dividing to see how this connection is made here. So we can see it's also fairly rough here and we're going to increase the amount of the size of the triangles down so that there will be more of them when we do the final render. But for now to speed things up, we'll keep that low. So let's go to the specular and let's just increase the roughness of the speculate a little bit. That way it'll diffuse this out in the transmission a little bit. We can also add extra roughness and the transmission attribute. So now it looks like there is actually a material this is being transmitted through the light, and we might want to also turn on the opacity. So if we go down here to geometry of the material and we turned down capacity, nothing happens. So there's one little trick and our own that you have to do to allow opacity. So let's close this for right now. So we can see this and we'll go over to the shape of this poly surface, will go down to Arnold, scroll down to opaque and see that it's checked, and we want to check this off. For this material to be transparent, we need that off. So let's turn back on the Arnold render view and now you can see it is somewhat transparent. We can look at the alpha channel and see that it is actually going through this layer. So let's go back into the material and make some adjustments. So we can turn the opacity all the way off pretty much if we wanted to. But I like to keep it somewhat opaque. We can also adjust this after we have materials on the nucleus. So let's add a material to the nucleus. I'll close this, select the nucleus and right-click on here and go to assign the material, and will add another AI standard surface. Let's make the inside of this red so we can see it. I'll go back to the Arnold render preview so we can see what we're doing and that play. Now you can see the inside of the nucleus here. So let's look pretty cool. So now let's push this effect much further. Let's create a little more disruption because these cells are very smooth all the way around. That's something you may want and that's fine. But for me, I would like to see a little more roughness here and so we have a little different surfaces to see specular highlights. So I'm going to close this for now. I'm going to select the membrane and go to deform, texture to form. I'll go over to that tree editor and the texture where it's looking for something to adjust. I'll add a fractal. I'll click the little checker box over here to the right and go to fractal and see if it makes it really crazy right now and we can adjust those settings. We can go to click this little button to get back to the texture to former tab. Of course dropped the strength. But the main thing we want to change is the direction right now it looks like it's up and down, which is the handle of the texture to former. So we can change that direction. But I would rather it be the faces, the normal of the face. So it should be shooting out in all directions in this radial fashion. So for direction we should choose normal. So now you can see it's all splayed out in every direction, but it's crazy. So let's drop the strength a little bit. So we still have that little bit of roughness, but it's not too crazy. But one issue we're running into is the fact that the subdivisions aren't great enough to smooth everything out. So we can see that we have these little pointing areas of the mesh and if we go into the Arnold render view, we'll see the same thing. We can see it's very choppy, but already it's added a lot more detail, a lot more interests I think, to the cell membranes. But let's get rid of these sharp edges for now. So with the mesh selected, we will go down to the polysurface shape of this and under Subdivision, we want to turn on the type to catclark. What this says is at render time, it will smooth out and sub-divide the surface another time. We can see it's already smoothed out all those very sharp edges and everything's looking a little more bumpy instead of sharp. That's pretty cool. The next thing we're going to do is continue to effect the shader. So let's go back into the Shader for the cell membrane and let's increase the transmission. As we increase the transmission, you can see we're losing some of the color. Under Color, let's add this blue color back in and then just reduce the saturation a little bit so it's not too crazy. I just want to make sure we're keeping this color as we're increasing the transmission. To reduce the distortion of this, we can lower the Index of Refraction a little more. Now we can come see the interior of the cell and the cell nucleus. But we still maintain these rougher outer edges. That's looking pretty good. We can also reduce this texture deformer it looks like it's maybe where we would have a nice smooth parting of the cells. It's looking a little rough, we're not getting that nice connection here. Let's go into the Texture Deformer again. We just need to drop this offset down so that we can actually see that division taking place. We can scroll back and make sure that's looking the way we want it to look throughout the whole animation. Cool. That seems to be working. Let's jump back into the material. I don't think we necessarily need the opacity here for this. I think we're going to get enough out of that transmissions so I'll scroll on here to Geometry and increase the opacity back. It's a little denser cell membrane here. I think what we need is a little more specular to see the edges of these cells. We have specular all the way up and we could reduce the roughness, but it's not really going to get us more specular. There's one more option in the Arnold Standard Shader and that is the coat and that's essentially like a top coat of a car. You have the paint and then you have a top coat on top of that. So if we increase the weight of this, you'll be able to see that we're getting a lot more white highlights in the specular areas and that's making it look a little more shiny and cell-like to me. That's pretty cool. I think we could probably reduce the texture deformer a little bit. Before we do that, let's just increase the catclark of this mesh. We had it only set to one so we have a little bit more room to increase that render time. We can go back to the Poly Surface Shape down to Subdivision and we can increase the iteration to two and we can watch it update and smooth everything out that much more. The red nucleus is dull right now, so let's go into the material of the nucleuses and we can scroll over in the attribute editor and get to the standards surface of the nucleus and let's turn on emission. Emission is essentially creating it as a light. We can hit red and we need to turn up the weight. You can see it's getting much, much brighter as we turn up the weight. Now we're maintaining that saturation while it's still inside of the cell. That's pretty cool. I think the one thing that's bugging me still is I think the texture deformer is a little rough on the cell membrane. We can go back to the Texture Deformer and just decrease the strength a little bit more. I Just want to break up this silhouette. I just don't want it to be a perfect edge all the way around. That's looking a lot better. I think we can do the same thing on the nucleuses, so let's add a texture deformer to those. Select the "Nucleus", go to "Deform", "Texture", and over here, let's make sure we choose "Normal" and map in another fractal. So its passes out and that's okay. We can just reduce the strength and decrease the offset a little bit and just keep dialing this down until we get it to be the size we want. We can also see it in the view-port over here. Split the screen a little bit. Let's drop the strength way down. Maybe turn up the offset to keep the nucleus big. It looks like we're doing a pretty good job of getting this irregular silhouette to the nucleus, so it's not perfectly round as well. The other thing that we're going to do of course, is to turn on the catclark for the nucleus. So let's go over to the Shape again and go down the Subdivision and turn on catclark and we can see it will smooth out those sharp edges again. That's looking a lot better, a lot more organic. I'm liking where this at. The only thing I'm thinking right now is it might be nice to see the texture deformers animate because if you look in the view-port here, you can see that we moved all animation down to frame 40 and the nucleuses are all moving around from the expression we created. But the cell membrane itself is completely static and one way we can adjust that is by animating the fractal of the the cell membrane. So let's go to the texture deformer here of that one and go into the texture and to the fractal. In the fractal settings, you can see down here there is actually an animated button. We can turn that on and we can just say, in the time attribute, we can just go equals time and maybe we can say times two. So we're writing an expression right inside this attribute. When we hit ''Enter'' it'll create the expression. So we're basically just saying this value should always change as the times played times two, so it should be twice as fast. If we playback, we can see it's probably way too much. So let's go into the expression. Let's eight-click on this and say ''Edit Expression''. We get this familiar window and let's say 0.5 times 0.5, so it'll be half as much as the time as played. So we'll hit ''Alt V'' to play back and we can see it's still pretty busy. I'll escape out of that and we can just keep adjusting this. I'll say 0.1 and I'll hit ''Edit'' and we can play it back again. That actually looks pretty good. It's giving it a little bit of noise to the cell membrane. It's undulating with the texture deformer. I might go down just a little bit more, 0.08 and see if that's even better. I'm actually liking that quite a bit and I think that adds quite a lot to the animation in these moments where it's completely still, and I think that looks great. Now that we have this done, let's close the expression editor and let's get into rendering. So I'll see you in the next lesson. Thanks for watching.
10. Cell Division 6/7 - Rendering: Let's get into Rendering. So let's create a new camera for the render. Let's go to panel's perspective new. That gives us a new camera. You can see it down here name persp1, perspective 1. Let's double-click that and say renderCam. Let's go to frame one. Let's zoom in. Let's get pretty close. We can go peer to the film gate and hit this little box so we can see the dimensions. You can see it says 960 by 540, and that's telling us the dimensions that we have. So let's go ahead and change those in there under settings. This little gear will next to the hyper shade with the clapper. We can scroll down and say HD, let's do 720 and close that. Now you see that updates here. So let's get pretty close to this. As this divides, let's start to back the camera. So now the camera is selected from the outliner up here. We can hit S and here we know we want to be further out. Maybe your rotated just slightly. So let's see how that goes. I think I want the camera to be started a little more over here because I want to see that division, that little moment when they split a little clear. So let's get this all the way around. This is the moment I want to see with the camera. So let's see where that goes. Play that back. Then we can keep the camera move going up here and zoom out and kind of go to a more bird's eye view. Keep rotating around. We know it's keying as we're working because we have the auto key over here in the lower right, this little red box. So that's good. We don't have to hit ass every time we want to make a key. So let's go to the end and just continue this rotation a little bit and see what that looks like. So we go out, we see the cell divide. Then this is where it gets a little wonky, it looks like. So let's go into the Graph Editor. Let's choose the rotation. Let's just hit a keyframe here. Let's keep the rotation down. So I just hit S and then I can click and drag a middle mouse. Drag this down to keep it focused in the area that we want it to be in. So that looks pretty good. Just going to adjust this tangent handle here. I can just select the tangent handle and move this around. So I think that's looking pretty good. I had all B, which is changes the background and the viewport it's about V, which is what I want. I think we can lower this, rotate X a little bit too. So let's look at these last little bit of rotations here and just keep them going. Let's find out where the Z is. The Z is not doing anything. The X is looking good. It looks like we're going, let's keep going up a little bit. Let's see what this one, yeah, that's okay. Just kind of scrub the timeline and this is just kind of noodling and whatnot. I think we do need to be over here because anytime that there's kind of weird kinks in the curves is usually indicating something is not right. So I'm editing this and to make this curve a little smoother. Then that means I'll have to go back into rotate X and probably just this a little bit. Let's see how that ends. I think that looks pretty good. I think we just need to go up a little more. So I'm choosing the Translate Y and I'm just going to pull this up a little bit, I think that will help frame up the final image here pretty well. So now we have an animated camera and we can see the cell division happening. I think it's rotated up too much. We open up the graph editor again. Sorry, this is animation for you, this just takes little tweaks and just this constant little back and forth. So if you ever get into 3D, should just start to get used to that. Because that is what 3D is all about. Just constantly making these little tweaks. So I'll play back. That's pretty good. It's going up too quick. We don't want the rotation to stay here. Now, it's this weird kind of like the camera's going up and it's rotating down, not at the correct rate. Like this is not rotating down quick enough. So I think we need to do something like this. See, this is the magic of animating, it's kind of voodoo at some point. You just kind of start moving things around until it looks right. Sometimes an experiment, that's what it's all about. So that looks a lot better. I think we're good to go now I think this is good for a render and of course, you can always render it out and re-render it. But rendering is a little expensive, so you want to make sure it's pretty locked in by the time you start rendering. Let's just take a final look at this Arnold Render Preview before we kick off a render. That looks pretty good. We're going to scrub the timeline so we can see, make sure that we're seeing actual cell division part happening clearly enough. That looks pretty good. We can see the nucleus is going apart and all of these divisions. So that's great. I hit F accidentally and we just went crazy. So because I'm in the renderCam, is that the keyframe over here and I'm going to just delete that and will pop back to where we were. But so this is looking pretty good and I think we are ready to render. So let's go into the Render Settings up here, and we'll choose the renderCam as the render roll camera. We set the image size that we wanted. Let's go to name number.extension because we want to render out a sequence when you go from frame one to frame 300. Let's name it CD for cell division. I think everything looks pretty good. So let's go to the rendering tab here, and we'll go over to render. Let's go, make sure the test resolution is at the Render Settings. Then we'll go down to Render Sequence. Make sure renderCam is selected and make sure the alternate area is also the images. Just double-checking everything. Let's hit Render Sequence and close, and I'll see you next lesson. Thanks for watching.
11. Cell Division7/7 - Background & AE Compositing: In this lesson we will composite the images that we created from Maya for the cell division. We're also going to jump back in here in Maya, here in a second, I'll show you why. I'm going to jump over there to After Effects and going to group this other one to clean up this after effects file, and to drag and drop into the group folder here, just try to keep things tidy as we go along here. I'm going to right-click and go to Import File and navigate to the cell division images folder here, and hit open, ensure it open the whole sequence and will have to interpret the footage to 24. We can drag and drop that into a new composition and make sure that we're working in 32-bit, so I'll just click this and get a 32-bit. We can play this back and we can see everything is working pretty well. But one thing when I looked at this render earlier was the fact that there's no background, and with a camera move, having no background, it's hard to have a point of reference of the camera motion. That's the reason why I think we should go back into Maya, and instead we could create a solid here and have it be some color or something and be the end of it. I think because we have this camera motion, we would benefit from having a background that matches the carrier motion, so something out of Maya. Let's jump back into Maya and take a look at making a background real quick. Let's create a sphere, and I'm just going to scale this up, and instead of using the manipulator, I'm just going to go over here and put in something really big. You can see it went from gray to being black, and that's because we're on the inside of the sphere and the normals, I'll just jump into perspective here, I'm just hitting space bar and clicking and holding down and dragging over to perspective view. The reason why it goes from gray to black is because geometry has what's called normals, and normals basically say, "tell us which way the face is facing," and right now it's facing outward. All of these things are single plane, they don't have two sides to them. The inside is usually black, and so we can reverse those normals though, so they are pointing inward. We can go to the modeling menu and go to the mesh display and reverse normals. You can see it says normals here are gray. We know that reverse isn't applying to the geometry like itself, it's just the display of the normals. You can do the math in your head on like, I'm going to display menu, I'm under the normals section, so I should do what I expected to do. I'm just going to go into object mode, and now you can see that it is in fact gray, so that's important when we put textures on this that they'll show up facing inward. The other thing we need to do is to make this not visible in the lights, because right now it's probably blocking all the light to the cell itself. If you were going to render these together, that would be a problem, and even though we're not going to render these together, let's just play this out like that's the case. We can go to the attribute editor and scroll down to the visibility options or in the shape node or shape little tab here. I don't know if you remember when we did the opaque thing, that's in here. We also have the visibility here and we can turn off, cast shadows, and we can turn off all these other things, self shadow, whatever else that you don't want the render to see. But that's enough for us, and we're actually just going to turn off this stuff because we've already rendered this and it would just take more time to render that out, so let's actually go to the render common, apply the texture based on what we can see through this view. Let's turn off the grid too so we can see it a little better. Let's right-click and go down to assign the material, and it can really be any of these, I would need really need reflections and crazy stuff, so I'm just going to choose a Lambert for now. A Lambert is just like the default Maya shader. If you make any geometry, it's going to have Lambda 1 applied to it. Let's go to the checkerboard here of the color, and we'll map in a procedural texture. Procedural means, you get it for free. Depends on what background you want, we could use simplex noise and to see it, we need to turn on six so we can see actual textures in the view port. I'm just going to call this B G, so we know background and then click this little arrow, we can get into the noise itself. I'm not too concerned with the color of the fact that it's black and white, because we can change that and after effects and compositing. I just want something that will give us some type of texture and the background so that we can see the camera motion. Let's just turn this up a little bit and crank up this, and I think something that'll give us an organic feel like we're inside of a cell or something like that. Half the time I was just playing around with this stuff and just seeing what works best. I'm not really knowing or expecting a certain result. A lot of times, especially when it comes to fractal procedural textures, it's usually hard to tell what exactly is going to be the result. So we can just play with this until we find something cellular like. You can see I've gone to the rigid or ridged, I guess, there's no noise type, and you can see the settings on the right and follow along with that. This is our background texture now, and let's go down to the timeline. I'm right-clicking and it's off screen a little bit, but there's play blast down here. I'll click the little square to the right of it, and I'm going to say from under settings. Let's make a quick time went on. I think I'm going to blur out this background anyways, so it doesn't have to be exact, let's turn off show ornaments, and browse to cell division movies is fine. Just saved C D, B G, save and play blast. Now you can see and say having a render everything with all of the headaches that comes with rendering, since it's the background, we can just do that. Now we have the background and it gives us a point of reference for the After Effects file and the camera move in here. Let's bring in the movie we just made, we'll open up this movie and drop it in here, and just for fun, let's just do a blend mode of color on the solid that we threw in there just to see how or what that does, just colorizes it a little bit. I can already tell it's a little too strong and have an over effect. I'm going to go to color correction and I'll have a curves, and I'll just drop that down, and maybe this is how the highlights appear. I can just drop these down so they're not as bright, and maybe drop the lower end dark values here. I'm going to go into the blue channel and just lift up the blues and the dark areas, see where that takes effect. Because we're colorizing it, we can't see that happen, so let's just turn that off for now and try to colorize it with curves. I'm going to lift the blues and the darks, and the whites, I'm going to go to red and just drop that down to make it more blue, or we could go the other way, of course, and make it more red since it is a cell, let's do that. I'll go back into blue, and I'll just reset that, and now I can see it's more blood like type of a color. Maybe we can just go back to RGB and darken that a little bit. When we play this back, this gives us a sense of space and a camera move, which grounds the motion and the animation a little more than if we just had a solid background. I think that's a nice little touch that we can also reduce again, I think it's a little distracting how bright it is. I think we can keep dropping this stuff and then we can color correct this to be a little more vibrant. I'll throw a curves on the cells and just increase the contrast a little bit by lifting the bright areas and darkening the dark areas, and I think that already does quite a lot. I'm going to go into the background here, I'm just going to blur it out a little bit, and we'll go into the camera lens blur. You can see we have these edges here that aren't being blurred scene when I turn on repeat edge pixels, and that gets rid of that. Let's increase the blur amount and see how that goes. I think that looks pretty good. I think the color red is a little odd, based on this type of almost pink purple that we have in the nucleus. I want to keep working on the curve color and just turn off the curves. Let's try something else, let's go into hue saturation, and there's this little colorized box down here, and then we can shift the hue around with this toggle. I'm going to crank up the saturation so we can see where we're in the hue. You actually see that bar change up here too in the effects panel. But it isn't update on map, you have to let go. Let's do something close to what the nucleus are, and then just drop the, that's bizarre, let's drop the saturation down and darken it a little bit. Let's do it even here, will do new adjustment layer, and just right-clicking here again to get that option, and hit enter to rename things, and I'm going to create another curves adjustment here, and I'm going to lower that from the middle, and I'm going to double-click the ellipse tool. If you don't see that, you can just click and hold it and you should get it down here, then I'm going to make the mask that we just made here, subtraction and toggle this down so we get to the feather and feather this out quite a bit. Now I think this looks much better. You can tell from where we started, if we didn't do that background thing, let's just see what that looks like. Let's just turn this off and turn this on. That doesn't look terrible, but I think it just adds a little more interest in, and you can follow the camera move more when you have this stuff in the background as a reference point. Yeah, and of course you know, you can change the color and all that stuff compositing and make those decisions later, which is really nice. Now that we have that, let's just add it to the render queue by going to composition, add render queue, we can scroll down and choose a codec from this menu, I like Apple ProRes 4 2 2, it's a lossless format and turn off the audio, and we're rendering a QuickTime, and I can just say cell division, I render save, and I'll render this and I'll see you all in the next series. Thanks for watching.
12. Chromosome 1/6 - Intro: Welcome to this series of lessons where we will model and animate procedurally a bunch of chromosomes. Anytime you start to model something, you always want to look for reference. So just typing in chromosome here and Google images, you can see the type of shape that they are. Sometimes there's a lot of variety in those shapes. We can also take a look at Wikipedia to get a description of what we'll be making. Essentially, chromosome is made of several different things. Tightly wound chromatids. From a distance, they will look like a solid piece. So that's what we'll focus on, is animating this last phase here. What they're calling the metaphase chromosome. I want to jump into Photoshop real quick just to draw what we're trying to make. Of course, we're essentially trying to make this X shape, and it has four legs to it. There's this dense area here which will just flow together. It's a repetitive shape in that. We can see the arms are all very similar. This section is just repeated. With that in mind, we can actually just model one of these areas. Then procedurally with some of the motion graphics tool sets in Maya, we can just duplicate those across to that side, and then we can duplicate them both down here. Then we can duplicate this whole thing out multiple times to make a lot of these and animate them as well so their positions can move. We won't have to animate each one by hand. So knowing that you have a better understanding of why, we're going to focus on just one of these little arms first and then we will duplicate those out in an efficient way so that we're not having to duplicate our efforts essentially. So we can take advantage of some of these tools in Maya, especially some of these animating ones, when later we want to have a whole crowd of these things and we don't want to have to animate each one by hand. So let's jump in Maya and get started.
13. Chromosome 2/6 - Modeling A Chromatid: So whenever I start a new scene in Maya, I like to set the project first, so I'll go to "File," set project and I'll create a new folder in the project Maya folder I've already started, and I will just say chromosome. If I can spell it correctly. Chromosome, and with the folder selected, I'll just say set and I'll say create default workspace. We can also go to project window here, just above where we clicked last time, and if we hit "Accept," it'll make all of these folders in that folder we just made. It's a nice way to quickly get all your folders made, and then go ahead and save this scene, and if I click "Save scene as," it should take me to that scenes folder just made, so it's a quick way to go about making all those folders. If we jump up one level, we can see all those folders are already made. So that's pretty efficient, and I'll just call this one chromosome. The first thing I'd like to do too, is to hit the "Anti-aliasing" button up here, and let's start by creating a tube. So we'll go to the cylinder up here under polygon modeling, and it'll pop in a tube here. I'm going to start by putting the pivot down at the base here, so I'm going to hold down D and also V, so D moves the pivot and V is vertex snap. Because I know I want this pivot to be on the lowest vertex, I can just snap it until it's at the bottom. Now I'll hit "W," to get back to translation mode, essentially, and hold X to then do grid snap to bring it up to the floor level. Now with that done, I want to create some more subdivisions so we have more geometry to work with. If I were to try to start moving this around, I'm limited by how many edge loops we have on this, so I need to add more edge loops, and when you first create any object, there's a little bit of history you can get to under the channel box here, and for this one since it's a cylinder, it's called poly cylinder. If we click that, we'll get these extra options here, and we can click one and the middle mouse drag to create more geometry. So I want the height to be more because I have no subdivisions and the height as well as the caps, I have no subdivisions there. So I want to increase those a little bit, and if you hit "Three," on our keyboard, it will smooth the object, and that's a quick way to smooth something visually but not add more geometry. There's also a smoothing option from the modeling menu but that adds a lot of geometry. Let's do that now so we can see what happens. If I click "Smooth," you can see how many more faces of this adds, and that can in turn slow down your machine. So we want to try and take advantage of keeping things as light as possible. Now we have the tube, and remember we're trying to make one leg of the X shape of the chromosome first. So we want to make this a little thinner and longer, so we can go back into the poly cylinder and we can change the radius and drop that down, and you can see if a middle mouse drag and things are moving too fast, you can actually go up here to this little speedometer looking thing and click that a few times to change the speed of your middle mouse drag once from the view-port. So maybe goes something like this, maybe add some more subdivision heights, and maybe increase the height a little bit here, and you can see it's going from the middle. So we could actually just scale this up in the y-axis by hitting "R" and then scaling it up. Then I might add some more subdivisions to the height. Basically, I want to try to keep it even, so I'll make these look square-shaped and not rectangular, each face of the cylinder that is. So with that done, I want to make a point, and I can do that by right-clicking on the object and go to vertex, and now I can select all the vertices, but with this much geometry, it's hard to select one little edge. You can say I miss some over here, so either I like to go to a new camera view, so I can hold down the space bar and click in the middle of this, and I can get to all my cameras. I can go the right camera, and now I can see and select linearly and horizontally exactly which ones I want. So we can hit "B" and we get soft selection, and then we could just scale this down to a point like this, but then we're also left with all these faces that we don't really see in the point down here, so I think it's best to get rid of those faces first. We'll go to face mode by right clicking and dragging and letting go at face, and I'm going to turn soft selections so it's easier to see. Then I'll click one face here, I'm just sending Q to go to select mode, and I'll go to its neighbor and just double-click that one and it should select all the ones around. Now, the trick to remember that is, there is a shortcut to grow a selection. So if we want to grow a selection, we should start at the center of it so let's do that from the center. Will click, and actually cylinder is a little weird because it's actually see this as a loop. Let's go to the one level up and then we can select an edge loop. Then we'll hit "Shift and period" repeatedly and it'll grow the selection out. We can grow it out to select all of the bottom faces, and we are currently in a smooth view, so we can hit "One," and make sure we have all the bottom faces, will delete those, and then we can go to the edge by right-clicking and going up to edge while our cursors over the object and then double-click the "Bottom edge now," and we can turn back on soft selection and then hit "R," to get the scale. We're going to scale this whole thing down, and it will go to somewhere around in there. That looks pretty good. So I think this could be a little skinnier, but I like the height. So to isolate the X and Z, which are these blue and red arrows here on scale, I can control click "V," vertical one, and that means scale everything but the one I'm clicking essentially, so we can click that one and scale it down to make this a little more narrow. When I hit three, you can see this top here is pretty flat still. Let's get rid of some of the geometry so that this can be a smoother edge. When we're looking at this in profile, I want this edge to be a lot smoother. We'll go back to one, and then I'll go to edge mode and turn off soft selection so we can see our selection. There's a couple of things we can do it. We can drop this edge loop down. We can delete one by holding down "Shift" and right-click and go to delete edge. Then we could double-click the center one and expand it out. We're essentially trying to reduce the amount of geometry in this area and kind of help it smooth out as much as we can in this kind of one view mug shot. I call this three and then one. We can select these edge loops and just kind of scanned them in to kind of help it ease that edge a little bit. I'll drag this one down a little bit. We're already getting this in this view so that when we smooth it, it's even more pronounced. We could probably do even more because, you know, when you zoom in on something, it might look smoother than it is, but from out here, it doesn't look all that smooth. Probably need to be a little more aggressive with us and take out some more geometry. Let's take out these two, shift and right-click and get to delete edge. Then I will drag this one out with scaling it out and then lowering it a little bit, and then scaling this one in. Let's say three and see how that looks. Looks a lot smoother, especially from a distance. I think we're getting good spot and of course we can continue to change that later. Next, let's get a little bit of a bend to this because you remember it's an x and we don't want to just rotate this and have it be a straight line. We want it to bend a little bit. For that we have a bend to former. If under the modeling tool set, if we go to the form and down to non-linear, and I'll just tear the software second. We can click the Bend to former. You can't see right now. You want to make sure that all your show things are on. These are attributes that you can see are types of objects and whatnot. Everything's on so we know it's in there somewhere. That's probably just hidden inside of the geometry. We can hit four. We can see there's that line in there. It's also been added to our out liner, which if you don't have your out liner opened, you can go to Windows and out liner and with bent handle selected now we can go to inputs of the been handle just where we are finding the cylinder options where we added more geometry earlier. We can go to curvature and a middle mouse drag that up. We can see the whole thing is starting to bend. Now that kind of looks like a banana, but we want it to be only curved at the bottom here. Let's go over to the bend and remove the high bound option so that the top part will not be affected by the bend to former. We can even move the bend to former down a little bit. If we want to get a little more curve lower, I think right in here, something like that looks good. We can change the shaded mode so we can see it a little better. I think like something like that will work pretty well. Now let's select the geometry and we're going to delete the history as a way to get rid of the bin handle. Also at the same time save this bend former deformation in the geometry here. Switch over to edit, delete by type, and go to history. Now we have this kind of permanently locked in here. Now let's hold down D and V again, there are pivot point back to the point of the chromosome. I guess this is a single chromatic, if we're being technical. Let's hold down x and get that back to the center world. That's looking pretty good. Now with that in the center of the world, let's create a little texture this. We'll go to deform and of course we can close this one out, we're done with that and go to deform and texture deformer which has a very seldom used one. For right now we can just hit create. It looks like nothing happened, but we do have the texture performer handle over here. We can go to the attribute editor and go to the textured or former tab. We can see it's looking for a texture right now, it's just black. If we drag that up, we can see it's trying to deform it in white. That's pretty boring. It's just moving the whole thing. But what we want to do is affect this with a texture so there's variation. The easiest way to do that is with procedural textures. In this case, it'll be a fractal. We'll click this checkerboard over here. We can click on the fractal. You can see it's all pretty messed up and that's not exactly what we want. Let's click this little and output here. You can see that we get back to the textured deformer tab. Under the texture deformer tab, we have a couple different options to change how it's affecting the geometry. Go onto direction, and instead of Handel, let's go to normal. That just means the normal of the face. All these faces are pointing outwards so it'll deform it in that direction. This looks like a huge, big blob right now, which is not helpful. We just kind of want to add a little bit of variation of this thing so we can just reduce the strength of a little bit. We can also go back into the texture. We could change the amplitude here. We could also increase the ratio so there's greater frequency and texture. We can go to frequency ratio as well. You can see it kind of looks like the texture itself is getting moved over this and will only be able to see it as much as there is geometry here. That's why we've put more subdivisions here earlier in the lesson. Because if those weren't here, then there would be nothing to move basically. We also need to keep that in mind when we're doing this texture deformer. That if there's no enough geometry and we're doing super high-frequency stuff. There's no texture there to describe that. We kind of have to find the sweet spot between having too much geometry and what we want to see. Let's do something like that and then go back in and output tab here are the little button up here on the top right. We can increase the strength. Then we'd also offset this to kind of keep it close to its original shape. You can see how you can quickly get out of hand a little bit. But I think this is looking maybe like we need to reduce that frequency ratio again, because I do want to see some larger pieces of texture here. That's looking pretty good and maybe just dropping the strength down. Now we have one piece of the chromatin. In the next lessons we can duplicate this out with some procedural methods inside of Maya. I look forward to doing that with you. Thanks.
14. Chromosome 3/6 - Make Tons Of Chromosomes: Now that we have this one leg modeled, we can duplicate it out with Maya's MASH tool set. It was intended for motion graphics, but you can use it in any way you want. I's basically a procedural way to duplicate things and animate them procedurally meaning you can assign values to it and even random things. So you don't have to hand animate every single little piece. Because we want a time these, we don't want to have to animate every single chromosome. So with this chromatic or this leg of the chromosome selected, we can go to mash and create mash network. If you don't see this, you either have a version of Maya that's before 2016.5, I think is when they first started to use mash. If you do have a recent version, you can go to "Windows", "Settings and Preferences", "Plug-in manager" and just make sure MASH is loaded right here. You can make those checkmarks. So with that loaded, we can go to "MASH", "Create MASH Network." We do want instances, and we can say "Apply" and "Close." You can see it merely jumped everything down. The one thing we forgot to do is to freeze the transformations of that one piece of geometry. So MASH takes the pivot and assumes the pivot is that world space. But let's undo this. You can see when we select on this piece of the chromosome. If we go to the channel box, you can see we have these values here. So zero to this little piece is actually over here. That's why it jumped everything down there, because it's taking the zero of what it's finding and its transformations. So if we want this pivot to be here and for MASH network to think this is the pivot point, we need to zero all this out. We can do that by going to Modify, Freeze transformations and it will zero everything out. So now when we go to MASH and we say Create MASH network, it will stay right there and everything will pivot where we want it to at zero world space. So when we create MASH, this is just the default. So let's go to the Attribute editor and you can see we get two things. We have the MASH menu. This is where we get to select all the different influences we want to have on this network. Then we also have the Distribute tab here. This is just the default like I said. Maya had to choose something so it shows linear and it shows 10 and a distance of 20. So this is just the default. There's a lot of other options here, but it had to pick something to give to you or give to us. So it shows this. We only want to, and we don't want it to be a distance of 21 to be nothing. Now they're right on top of each other. So I need to rotate this around. So rotate y around 180 degrees. Now we have a mirror image of itself. So the only issue with this is because we are going to duplicate the system out once again, MASH won't recognize this as a pair. It'll only take this piece if we duplicate this out, this MASH network again, to make the bottom half, it'll only take this piece. So we need to go into the MASH editor and from the menu we can select Replicator. I'll say add replicator node. Now on the replicator tab, we can save the replicants we want to have is one. So now we have the other half and it's by default just thrown out here behind it two units we can zero that out. We can drop down the rotation tab here and then rotate that down as well. So now on one little system, we have created the entire chromosome from one piece. So that's pretty cool. The one thing that we can do as well to create some variation is go into the Random node and we can left click that and say Add random node. Of course it moves everything around because usually defaults aren't what you want them to be. In this case, they're trying to move the position around. We don't want that, we want to move the rotation around. So let's add a little bit of variation here. We can also change the random seed. If this isn't what we want, we can just drag the random seed around to be something like what we want to have. So I think something like that looks pretty good. It's not uniform and you can also do this to scale if you wanted. We could click on Uniform scale so it all moves together. But I think that might look a little weird and not medically accurate. So we can just leave that alone. Now with this chromosome done, we can duplicate this network and create a MASH network of that. So to make a copy of this MASH network, we actually need this not to be an instance. We needed it to be geometry. So we can change that pretty quickly here. We can click on this middle button here. which will give us another menu and say Switch MASH geometry type. It'll give us instead of an instance node now it's a repro mash. That means this is actual geometry now. With that selected, we can create a new MASH network from it. We want this one to be an instance for sure. So I'll hit "Apply" and "Close." Now you can see that we have a copy of this whole network. So that's pretty cool. Again, this distribution is just the default distribution. We could have any kind of distribution that we want. You can choose grid and create a big distance here between them. Then we can say how many that we want in the grid and increase that number quite a bit. It doesn't slow down mile all that much really. So let's get these a little further out from each other. So now they're all in this uniform position, which doesn't look very natural. To adjust that, we can add another random node to this. So let's go to the random node in this new MASH network that we created. We'll left-click and go Add random node. We can change the random position here so that we no longer get those straight lines. We can also have some random rotation and we can slide these all the way up so they're all different types of orientations. Of course, if you don't want it to be that extreme, you can always go in and adjust these as you want. We could also make different scales, but of course again, that's a little wonky. You can have a random seed here. So that's pretty cool. We've created an entire chromosome network here without having to do a ton of work. It's pretty quick. We can rotate around and the viewport updates and everything works pretty well. So this would be fine for us, but I want to add a little bit of animation and make it look a little more organic. So let's go to the MASH network again, and let's go over to Signal. I'll click "Add signal node". You can see they've already moved just a little bit. So what signal does is it adds a signal through these positioned points and also rotation if you so choose. So we could increase this and see as we hit play, which is down here on our timeline, we could scrub through and see it animate. Or we get hit play down here. Now we get all this animation for free. We didn't have to touch, if you do the math on the grid, we probably have hundreds and hundreds of these chromosomes. We get all this animation for free. If you want to adjust it, you can adjust these sliders and dynamically change every single one. What I'll do is just reduce the noise scale. So everything moves a little bit slower. With the Play button turned on, you can actually change it in real time. So I'm going to increase the timeline. So I'll select on here and I'll say maybe 500. So I'll just give it some more road here. So when we hit play, we can have more time to see the changes take place. I'm going to turn off the grid as well so we can see only the chromosomes. I'll hit "Play" and then I'll start to slide this slider down. We can see it update in real time. Maybe 0.1, that's looking pretty good. These look like they're floating in some fluid and rotating. We can maybe increased the rotation a little bit and all axes. It looks pretty natural. So in this lesson we did a lot, we learned a lot about MASH, we learned how to duplicate a MASH network that it needs to be a geometry, this repro MASH. We learned how to get a lot of animation for free. The next few lessons we will shade these chromosomes and animate the camera and set up some lighting and rendering. Thanks for watching.
15. Chromosome 4/6 - Create Chromosome Material: Let's create a material for our chromosomes so they're not all gray. With the ReproMesh selected, let's right-click anywhere in the view-port. You could also unhide it. Anytime you make a mesh network at hides the objects, you can see the previous two objects that we made a mesh network up or both hidden. You can hit Shift H to unhide it and you can hit F to zoom in on it. We could right-click on this and go to assign a new material. Let's just create a simple Lambert shader. A Lambert is a Maya shader, so you can find it in any of these menus. Here's Lambert. I'll click that. I'll make a new shader over here and we can name that chromosome, and if I adjust the color, you can see it's not updating here. This could be a Maya 2018 issue, but if you toggle the texture node on, and it could be a mash issue as well that this is the only way that it views material as a texture. Your texture mode is six to get texture mode, you go to five and this is on our keyboard what I'm hitting. You can also see it update up here. This is the texture mode getting turned on and off. Typically, if we're not in a mesh network, you don't need the texture node on because there is no texture applied here. It's just a color but because this is a special instance with the mash network, it might interpret things differently and that's the reason why. We'll just go with that for now and pick that. We can choose any color over here that we want. If we click on the little color box, we get this little menu and we can select maybe a blue color, something brighter and something like that is working pretty well. But it doesn't look very interesting. We can make it a lot more appealing by adding a few more nodes to this material. It will make it look have this X-RAY effect so that every piece will have this rim light around it. So to do all this work, we're going to need to open the hyper shade. Now, hyper shade is just scenario where we have all of our shading nodes available to us. If we go up here to the so or we can click that and I'll open up the hyper shade, might take a second to open, here we can see all of our materials we named the Lambert2 chromosome here. If we click that, you can see we get it over here and the attribute editor and if we click these in and out buttons here, it'll map the chromosome material. To be able to apply this effect where only the edges of things relative to the view of the camera have a rim light, we need to essentially get that angle off of this piece of geometry or every piece of geometry. We need to say, this face is facing the camera, whereas these edges are facing perpendicular to the camera, pointing out to the side. As this is a cylinder, the front of its facing us and the sides are facing away, facing to the sides. So we need to get that information so we can map in and basically say where there are sides not facing the camera that should have a different type of color to it. That is called a sampler info node. We can get that by typing and sampler here. You can see sampler info. If I click that, it will create the node for us. Everything I've just described is what my calls a facing ratio. That just as the name implies, which direction is that facing facing basically. It'll make more sense once we get this connected, you can visually see the difference. Let's click this down here. Let's add a ramp note as well. We'll type in ramp and click the ramp. So we'll take this and bring it over here, and because we recently selected the blue color and the ramp, we can go to the selected color and choose that blue color from that menu. Then we can select the little white dot down here and choose the gradient of that one. We could choose the same color as a starting point and then just take the saturation down and the value up so it's brighter. Great. Let's map in the ramp for right now. So I'll go out color, goes into the color of the shader and as I do that, you can see it does update and it could be a mash issue where not all of them are updating it. So let's toggle between five and six and you can see by doing that, it refreshed the view-port. Now they all will update. This isn't the effect that we're going for yet, so we still need to keep building it. So the, the ramp is mapped into the color now. But we need to get this facing ratio information into the system somewhere. We want to get it into the V coordinate. So the U and V coordinates, to explain this, I'll open up the UV editor. You can get to from several places. You can get to it from the shelves. You can get to it from the modeling menu under UV, the editor. It's essentially a way to describe a 3D object in a 2D space. The bottom line down here is u. I'll just unhide the cylinder for right now and you can see the UV is on actually all that great and we probably have done a better job of creating the UVs. We can always update them. If we wanted to create more or different UVs, we can do that. But it's essentially a way to unwrap an object in a 2D space and flatten it out. The reason for that is so that we can apply textures to it. Because you think about like a globe, you can't take a square piece of paper and tape it around the globe. You have to cut little sections out so that the edges of the paper lineup perfectly when it's wrapped around the three dimensions of a globe. Same thing is true for every 3D object. So we describe that in a u, which is this x axis down here, and a v, which is vertical up here. It's a UV space. The reason why I described that is because in the material, the ramp is trying to figure out which direction does this blue and light blue need to go. You can see they're all going from the bottom to the top. We could update this position of the ramp and you can see it will slide up the chromosome. We'd have it just be a sharper edge, and you could update that. Because the UV space, as we saw on the UV editor, was from bottom to top here. Let's drag this back out. Now that we understand a little bit about UVs, it will make sense when we plug in the facing ratio. I'm just clicking on this little three-bar so we can flip all of these attributes over here to the right because this is the output side, and this is the input side. We want to output the facing ratio. I just selected these and clicked this button a few times. We can get it this or to the output. I'll take the facing ratio, and I'll map it into the V coordinate, and I'll let go. Instantly you can see that we're getting this effect already. It's in the opposite direction because the ramp is going in the wrong way. We can just select the ramp and swap out these colors. Just click and drag the top-little dot and flip them around. Now we can slide these out, so it's a smoother, kind of a gradient. We can see that at glancing angles, the chromosome will be brighter. It will be this other color of the gradient. You can see, the more the faces face away from us, the more they take on this color here. We can always adjust this and change it. You can tweak these values now that we have an understanding of what the UV coordinate is, and you can make it more pronounced and more dramatic if you want it to. Maybe take this all the way down. The other thing we can do, if we want to make this more bright, we can actually go past the one value that we're seeing here in value. This is hue saturation value. We can actually put in a two here and go brighter than what we're seeing. It's a little trick that's not obvious if you're just starting out in 3D that you can actually do something like that. Let's increase the saturation a little bit and get back to the blue color. The other thing we have at our disposal is the fact that we can always go back into the texture to former and increase the strength because we never deleted the history on this original cylinder. We still have that information available to us that we can increase the strength of this, and it should update all of the other ones. If we toggle through, it'll update, and you can see how it's a lot more rough here. We can pick up more of those edges and the sides of this effect happening. I think we went a little maybe too strong on the value. It's getting a little bit out of hand so we could bring that value back down to something closer to one, and something in there. Looks pretty good. It gives this x-ray type of look to it, and we could choose not to render these with a renderer. We can actually just playblast what we're seeing in the viewport. If we wanted to do that, we can make it look a little better by adding some fog to give it a little more depth. Let's go to shading from this viewport window here, and we can turn on hardware fog. Now you can see that it fades away in the distance, and we can adjust all of these settings under the option box here. I just click this little option box, and it pulls up this other window. We're going to adjust the distance at which everything starts to fade away, and we can change the color of what we're seeing. We could change it to be a similar blue color. Maybe it gets darker as it goes away. Something like that, and we can bring the distance closer to the camera. I think something maybe, actually a little lighter and something in there. Now we have a backdrop for free. If we hit "Play", we can start to see all these floating. Now, that we have this fog, it appears as though everything is floating in some type of fluid. It's pretty cool. Now if we wanted to just take this as it is. Let's just hit "Escape" so that we stop the playback. Let's reduce this backdown, so it's something manageable. We could animate the camera by creating a new one. It's throwing us back into the zero-zero space, and you can see we left that piece on hidden. We can hide that again, so we don't have this stray gray piece here. We can back up a little bit, and we can go to the first frame and select the camera either from the outliner by going to persp1, which is the perspective one, and we can hit "S". We can just scroll forward, and we can fly through this space a little bit. Let's back it out and see what that gets us. I'm hitting "Alt V" to play, is a little hot key. This is a pretty quick way to animate chromosomes in a camera and not have to deal with lighting and rendering, and a lot of technical things that can bog your machine down and take quite some time to render. We'll get into rendering in a later lesson, but I just wanted to show this method. In case you need to do this and get it out quickly and not want to mess with any lighting or shading or anything like that. Let me just bring up this bottom part so you can see it. But if we right-click on a timeline, you can scroll down and click "Playblast". If we click it, it'll just start play blasting, meaning it will render the view we see at the viewport. Let's click the options and see what we have. The first one, if you're on a Mac, this basically means quick time. If you click this one, this is an image sequence. But I would recommend for playblasts, to just go ahead and do a quick time. We can see it from render settings, or we can see it from the window if we wanted to. But the render settings are taken from this little clapper box with the gear. We can click that. It's mainly taking this one from the bottom here, where it has the image size. We could do something bigger like HD_1080. We can keep that from render settings and know that'll be 1080p. We can save it in a location and just hit "Playblast", and it'll run through the timeline and playblast this animation of the chromosomes and the camera move that we did. In the next lessons, we will actually add some light and render this out of a renderer to show you a little different option, that'll take a little bit longer, but it might look nicer in the end. Thanks for watching.
16. Chromosome 5/6 - Lighting And Rendering: In between the lessons, I took the liberty of animating the camera a little bit to get it to pass by some of the chromosomes a little more closely. You can take time to do that and just adjust the camera as needed by choosing it as the view and navigating around, and you can see here, as long as auto key is on over here, it'll set a key frame wherever you navigate to. You also just want to be careful that you lock that in, and don't move this view later. Now that the camera move is done, there's one more thing we could do. I wanted to show you with the material, because the edge that we created is cool, but it's not super bright. It's kind of dull, and there's one aspect of the mire renders that you can take advantage of, so let's map out the material. We can select the repro mesh and hit the in and out button here to map out what the connections are, and we can see this Lambert group, and we can map that out. Also, if you have geometry selected it's actually just quicker to hit this little ball, with these two little tabs here and it'll map it out. We have all this stuff set up and that's all the technical font stuff, the facing ratio and all that. We have this ramp that's made and we could just pipe that ramp into these other attributes. One that could work pretty well is actually the ambient color. We click the color of the ramp and drag it and let go over the ambient color, and you can see it brightens up all of these edges quite a bit more. Depending on the look that you're going for, you can take advantage of these other aspects of the material to increase those edges. Now with that done, let's light and render the scene. We'll go to Arnold and lights, sky dome light. Then we will choose Arnold and Arnold render preview. To see what that does, I will need to hit the play button up here. Now we can see everything is very brightly lit, and especially with that new adjustment we made to the shader. Let's check out the alpha channel because we want to be able to play our own background in compositing, and as it stands, it looks like it's all white, and we can check the Alpha by clicking this circle checker box, and we can see it's all white in the Alpha channel meaning there is no transparency. In the sky dome light, we can scroll down to the visibility and choose camera go down to zero, and we can see it update here, it's still lighting the scene. It's just not affecting the Alpha channel. We can check that again in the alpha channel C and D. We do have a black Alpha channel here, so we can put on our own background in later if we want, so that's good. There's actually one thing I want to update with this before we render it, and I want to scrub in time to somewhere where we can see it. Check out these sharp edges here, towards the ends of the tubes of the chromosomes. They're very, very sharp and it's like that on every single one. You can see it down here, and we could go in and change the original cylinder, but that might be a little more work. Let's actually do it from the repro mesh that we made and where we apply the material. If we choose Arnold here, we can scroll down and we get subdivision options, let's click that, and I'll choose type to be, actually I had this crash over here earlier, so I'm going to save this real quick and turn off the IPR render, because I think it crashes when the IPR render is on, and it's trying to add subdivisions. Let's save, and I'll turn this off while I'm doing this work, it's always just safer to do that. I'll say Cat Clark in the subdivision option here, and let's go to something like two, and what this is saying is, at render time, not in the view-port but at render time, it will subdivide the geometry two more times. If my math is right that'll make four times as much geometry, because it's splitting the faces down the middle and to the sides and all that like I thing so. It will smooth out these edges by adding more geometry there. If we go back to the Arnold render preview now that we've made those changes and hit the Play button, we should be able to zoom in here and see that indeed those ends of the tubes and the chromosomes are much smoother, and that's what I was looking to do. That's something we can do at render time. You can see this one's very smooth, so that's perfect. Great. Let's close that out. Let's go to the Render Settings, which is the clapper board we'll figure at will, right next to the hyper shade, and we need to give a name to our images, and EXR is fine. You could choose JPEG or something else, and we want a sequence, we want to render frame 1-200, and it's all grayed out. To make this not grayed out, we need to choose a named.number.extension, because you can see it says single frame right here by default, and we want multiple frames. Now we can change this to 200, and we want to choose the correct camera, and let's close this out and rename this properly to render cam. We'll open up the Render Settings again, and now when we go down to the random roll camera, render cam is an option, and let's render something like 720, and in AOVs, which are essentially render layers, we want to add Z depth pass, because we may want to use it as something like a fog like we had in the render view-port recently. We can also have to fake that with a depth pass. You could also use it to blur. The depth here of the ones in the back would be more blurry than the ones in the front I think. To add that, we need to go to the built-in AOV groups and choose the Z layer here from the available AOVs, and put it over in the act of AOVs. Now you can see it made one over here, and it put in all the defaults that we needed to be, and that works. We'll have one extra layer of the deaf pass. I think our sampling settings are fine. Basically, this top one affects everything beneath it, and I think the default was fine. We were looking through the Arnold render preview earlier, I didn't see a lot of noise or anything like that, and we'll go up to the rendering settings by going to the drop-down and choosing rendering, go to render and the render sequence tab here. I'm just going to make sure that everything is as we want it to be, and I typically like to choose the alternate directory just so that it is the one that I'm picking, sometimes it doesn't pick it up from the render settings, and when we hit render sequence and close, you can see it will open up the render view, and it'll start rendering each frame from the render view, and I would click and drag it over here, but now it gets stuck. Once you start, you could stop it and then just pick back up whatever frame you left off on by putting that in the render settings, but you just want to make sure when you start you're ready to let it go, because it's just going to start rendering from the first frame and go. It looks like it's going pretty fast, and I'll see you in the next lesson where we will composite these layers together. Thanks a lot.
17. Chromosome 6/6 - After Effects Composite: In this lesson we will composite the chromosome images we just rendered. After Effects, I will right click in here and go to Import File. I'll then navigate to the folder where I saved my images. If you chose to do the Z depth pass, there will be a beauty and a Z folder. The beauty just means everything together, lights, reflections, colors. So we'll choose that one and we need to right-click and go to interpret footage main, because we can see up here it's saying it's 30 frames a second when we know it's 24. We can assume this frame rate of 24 and hit okay. You will also see that in Maya, in this bottom right corner, it says 24 frames per second. You can change that with this drop-down menu. Back in After Effects, we can click and drag this into a new composition. Let's also bring in the Z depth layer. I'll click and drag this on top, and you can see it's totally white, but if we click and drag this little exposure adjustment, you can see we actually do have information here, this's just very bright. The only reason we can see this is because we're working in 32 bits. If you alt click this area, you can change between 18, 16, and 32. As soon as we go to eight, you can see we no longer have that information here. For it to work, we need to work in 32 bits,and that's why we also render any XORs because those are 32-bits. This only affects the view point here, and After Effects, it doesn't actually affect the layer. First we also need to interpret this right-click "Main" to footage 24. Now we can drag this out, and essentially, we need to apply this exposure effect to the layer itself. So zero that out, we go to effects of the Z layer, which I can just rename to Z and go down to color correction exposure. Just like we did with the view, we can just drag this down till we see all of the chromosomes, something [inaudible] like their works. If we apply the camera lens blur filter to this beauty pass and choose this layer, it will not respect the exposure filter. For that to work, we need to pre-compose this layer so it'll assume and respect this exposure layer as well. So we'll go to layer, pre-compose and move all attributes and then okay. Now we choose the camera lens blur option, it will blur everything because the blur map has nothing chosen. If we choose that, we can go to Z count and you can see everything in the foreground starts to be in focus and we can change the distance here and we can go further back. We can also invert the blur map if we want everything in the front of the camera to be blurry, and let's choose something in the middle. We can also increase the blur radius, we want to make things more blurry. But you can see the effect then starts to break down. Unfortunately, this is something After Effects does not do very well. What I suggest is consider keeping this blur radius fairly low, so this effect doesn't get too out of hand and have a ton of RFX. The other thing you can do is purchase a plug-in. It's called, I don't even know how to pronounce it, fresh left.com possibly. They make a really nice plug-in that I will show you how it works here in a second, but it is not cheap. You also might just want to ignore this effect, but if you're interested in this, then continue watching or just skip ahead a little bit. I'll turn this camera lens blur effect off. I'll right-click and go down to the first left depth of field, and we'll do the same thing. We need to choose a depth layer. I'll go to Z comp and nothing happens because the radius is default set at zero.Let me just start to crank this up, and you can see it's choosing the front, and so there's a couple different ways you can choose the blurred depth. You can choose it with this little picker. Let's do something back here or we can adjust the focal point here, maybe something a little closer to the camera. It just does the effect a little bit better, it's not perfect. To be honest Nuke does this effect even better than both of these things. Let's look back here, you can see the edges aren't great, but especially back in here, you can see these odd edges with the default camera lens blur filter. If we use the Fresh left version, all of those weird edges are gone, but we still have some in the foreground unfortunately. But it doesn't get us approximately pretty close to what this effect is all about. Let's just scrub forward and make sure everything's working okay and everything appears to be looking pretty good. One other thing we can try to do is actually use the blur pass as a fog layer. For us to do this, let's duplicate this layer and I'll turn it on, and let's invert it and I'll go over here and type in invert, click and drag this to this layer. Then we can set the blend mode to multiply, and you can see it adds a little bit of fog to this. The other thing that we could do is actually use this as a luma matte for a solid, if we wanted to give color to this fog, so we're going to go right-click "New Solid". Let's make it slightly blue, we turn up the brightness just a little bit. We can always adjust this stuff later as well. I'll hit okay and I'm going to drag this below the depth pass here. I'm going to choose this to be normal again, and for the dark solid, I'll choose a luma inverted matte. Now you can see that this solid is being managed by the luma values here and we can adjust that effect by lowering the capacity of this layer or increasing it and the same with this one. We can bring more of the background forward or we can knock it out more. That's a nice effect because there are so many chromosomes if we want to keep the attention in the foreground to use this type of an effect to almost cheat this fog effect with the ZDF pass is really a nice compositing trick. Now we have the chromosomes and we have our animation. We can also animate the focal length if we wanted to or the focus area rather from this effect by hitting the stopwatch and controlling the radius or the focal point. We might just crank up this radius a little bit to see how far we can push this and it looks pretty good. The only thing is you'll notice that the dark solid that we put on top now is affecting the blur that we're seeing. It's cutting out the blur because if you think about what we're doing, this is like a stencil of the hard edges of the chromosomes, but then we're blurring it underneath it, so we need to blur or both of these. We can take this depth of field layer and which save real quick. We can cut that out and we can put it on an adjustment layer, so we've got a new adjustment layer. I'll put this towards the top and I'll rename it and then paste this in here. It should affect all the layers now. That works much better, and we can reduce the blur amount now. Now we have a pretty cool effect of the chromosomes passing by camera with some depth of field and we cheated the Z depth pass to use to our advantage to create some more fog in the scene are fluid. We learned about different blur techniques and the importance of having the blur on top. The last thing I'll do is just add a another adjustment layer, and I'll call this VG for vignette and I'll throw a color correction curves. I'll just drop this way down and that doesn't actually look too bad for the whole thing, but what I'm going to do is go up here and hold down, click and go to the loop c tool, and then double-click it. Then I'm going to go down to the mask that I just made by double-clicking and go to subtract further. I'll have made a little bit of a vignette effect here. l'm just keep blurring out those edges until something that I like. It gives a nice little microscopic effect as well. To publish this as a movie, we need to go to composition, add to render queue and we can scroll down here and see we have a couple options. We can click lossless and get the codec options, which I'm just going to choose apple progress for 22 and hit okay. You can choose whatever format you want, H264 works pretty good. This has no audio, so I'm turned that off. Then we can save this wherever we want. I'm just going to choose chromosomes and hit Save. I'll hit the render button and I'll see you in the next class. Thanks for watching.
18. DNA - Intro To DNA Series: Thanks for joining me in this next series where we will discuss how to create a DNA structure. I've divided this series out into two different sections. One is more for the beginner user of Maya, and one is more for the advanced users. The reason for that is there are basically two different ways to visualize DNA. This is the more simple way where the twists that we see here are more symmetrical, they're even all the way down. The more accurate view of the DNA is actually having a major and minor groove here on the bottom left, you can see. There's a symmetry, but they're still pattern. Once you introduce this, say a symmetry, it becomes a lot more complicated to rig and to model that, so that's why I created a more advanced section where we can also randomize the base pairs and do that kind of thing. Jump ahead to whichever one is more appropriate for you or follow both of them. We'll be covering different kinds of topics and each, but thanks for joining me, I look forward to making these with you. Bye.
19. DNA - Beginner DNA: Welcome to the first class for the beginner version of creating DNA. I've started a new scene here, so I'm going to set the project, and I'll create a new folder, and I'm going to go in here and make a beginner folder, and for later, I'll go ahead and make an advance folder. Let's set the project to beginner and we'll create the default workspace, and I'll go to the "Project Window" and hit "Accept", and create all those folders. Let's jump right in and create some ladder pieces here, basically the edges of the ladder. We can scale this up. We can also use the attributes from the inputs here, the poly cylinder, we click on that and we get some more attributes. We can increase the height, and let's just do something easy for now, 10, and we'll choose a radius of maybe 0.25. We need a little more subdivisions because we're going to end up twisting this around. We need to increase the subdivision height as well. We can just crank that up and then we can move this over two units. Let's hold down the X button on the keyboard, so we snap to the grid and move over two units. Then let's duplicate this by hitting Command D and hold down X and move the duplicate over two units. Depending on how wide you want it, you could go one or two or whatever, but let's just use this for now. Then we will create another piece of the ladder here, and we'll rotate this down 90 degrees. We'll go to the poly cylinder options here and just reduce the radius to maybe 0.1, something like that. Let's move the pivot over to one edge here. I'm going to hold down D and V, and then I'm just going to drag this over and is going to vertex snap to the end here, then hold down X to snap it to the middle. Now we have it right in the middle, and then I'll duplicate this and rotate it around, and we can just do 180 here. I'll select this one, and we can group these and call these base pairs just to keep it nice and tidy. Let's jump into the front view, hold down space bar, click and then drag, and let go over the front view, and I'm just going to drag this down withholding X to the bottom around here. I might just extend these edges out a little bit so that we aren't seeing the base pair fall off the end of the stem of this. I'm going to drag this out, maybe 1.1. I'm going to select the two base pairs and go to edit duplicate special. I want to reset the setting so I'm on the same page as you guys. Copy is fine, parent is fine, and then we want to create maybe one copy per unit up, so we did a 10 unit tall cylinder if you remember. There's going to be 10 grid lines here that we can duplicate up. We can say X, Y, and Z, we want to go up in the Y, which is this middle one, so we can type a one in here. Then let's enter in a 10 here because we want 10 more, and we can hit apply, and you can see that we have this even distribution of the base pairs. We can close this out and I'll go back into the perspective mode. Now you can see basically I have a ladder. I'm going to turn off the grid for right now, and I'll turn on the anti-aliasing as well to help smooth out those edges. That's a pretty good start. Let's select these base pairs and create the shaders for them. I'm going to right-click and go to "Assign New Material", and I'm going to create a lambert, and I'm going to go over that lambert and I'm going to name these based on the nitrogenous bases. Adenine and thymine go together, so call this adenine. Let's just make this red of some kind for right now. There's one little bug in Maya 2018 where you have to open up a hypershade to get textures or not even textures, to get the color to update. That's just some weird thing. If you get that, that's the reason why you want to go in there and make sure that's happening. Then the pair for adenine is thymine. I could be saying these wrong, so excuse me if I am, but go to assign material by right-clicking on the geometry of that, then I'll create another lambert, and I'll call this thymine, and we can make a yellow color. Again, we might have to click on the shaders down here to get it's update, and now it's updated. Then let's make these shaders, right-click "New material", "Lambert", and we can call this guanine and the next one cytosine. I'm just going to go ahead and make that one as well and rename it cytosine. Let's make this a green and this one blue. We'll click on the shaders from the hypershade and try to update the viewport here. Cool. Now we have those shaders and we can go through and decide what shaders that we want to have because these are supposed to be random. We can go in and right-click and say assign existing material and go down to cytosine. Or if we want to flip it around, we can do the next one, guanine and then cytosine. But we want to make sure that of course, these nitrogenous base pairs are together at least. I'm going to just going to go through and right-click and say assign existing material for the rest of these. I'll see you in a second. Great. Now that these are added, we can always go in and adjust the material attributes and it'll update for all of them. If we don't like that blue, we can go into the guanine shader here, the lambert shader, and choose something different. We can go with a different hue. Again, the hypershade might need to be open for the materials here to refresh, which is slightly annoying. But so we make that one change to the color and then they all update. That's something that we can go through and do. Maybe the red is a little too vibrant or saturated, we can drop the saturation and change the hue a little bit. We can go through and click on these and get that update. Cool. I like how that looks and I'll close this out, and then we can select all of these pieces of geometry and go to the, "Modeling" tab here, and go over to "Deform", and choose "Nonlinear". I'm just going to turn this off by clicking this here because we want this again here in a minute. I'm going to choose the "Twist deformer". You can see it twisted the wrong way, so we can just rotate this vertically here and we go over to the "Channel Editor", and zero that out. If we go down to the twist inputs here, we see twist one, and we have a start and end angle, and we can now twist this into a DNA structure. We could also animate this twist. We can go in here on the first frame and right-click on "Start angle", and go to "Key Selected", and then move forward in time to maybe frame 90. Then we can middle mouse drag in the viewport and increase the twist to whatever we like. Maybe something like that, maybe 360. We know it goes around one time. We can Alt V to play. We can see it animating on. We've created our first DNA structure. I'm going to go to the "Show" tab and turn off the deformers, so we won't see the twist angle and the viewport. This is one way to go about it and we could continue to adjust this if we wanted to. We can add color to the ladders here. If we right-click and say assign new material and we'll choose another lambert, and we'll go over to it. We can maybe make it a little brighter, so it's white. That's a quick and dirty way on how to make DNA. We can play blast this by right-clicking and going down to playblast. We can choose our options of formats and encoding, and we can choose a location from the browse menu and hit "Save", and then hit the" Playblast" button and it will play this view and the render settings. We can get to those up here. It'll go from the presets that we have here, the image size. If you want it to be 1080 or 720, you can do that and then you can render out a movie of this animation pretty quickly. That's how you make a DNA structure in Maya. If you're prepared for something a little more advanced, follow me in the next advanced lesson and we will cover the more advanced techniques to rig and model the DNA structure in a way that we have a little more control over, and to create the major and minor grooves of the spiral. Thanks for watching.
20. DNA 1/14 - Intro To Advanced DNA: Welcome to this class on introducing the advanced DNA structure modeling. I want to do this video quickly so that you understand why this is more difficult and how we're going to approach building it. Because it took several nights of me attacking this issue from a couple different ways. The way Maya deals with certain things make that not possible. There's a very specific path we're going to take. I'm going to, in the next series of lessons, they'll probably be times where I'll say, if you don't want to know why we're doing it this way, just skip ahead, and I'm going to try to list how far in the video to skip ahead to in text at the lower third. But I feel like there's no point in you following along in this series unless I'm explaining why we're doing it the way we're doing it, and why we're not doing it all these other ways that don't work. I'll explain why they don't work, and I hope I show some of that. But I don't want to get too in the weeds with it, but I'll I'll let you know if I'm about to go down that path, you can skip ahead. This is a more complicated DNA structure we're going to try to do than what we did in the beginner class, which is what we're looking at on screen right now. This is the symmetry. This section is going to look the same as this section. Whereas the one that we're going to want to do has the major and minor grooves. They are almost parallel in a certain way. There's the minor groove here and a major groove here. This empty space here is different, whereas this empty space here is the same. It's the same distance here, from here to here, whereas this is a symmetrical. As soon as you introduce that asymmetry, it creates a lot of problems. It's not as clean and quick and easy to model it. That's why I'm separating these classes. There's a couple of things we need to do as we painting on a different layer so I'm not messing that one out. There's a couple different things we need to do. We need to be able to create this asymmetry, this pattern here, where we have the major and minor grooves here and here. We need to do this in a way that we can procedurally make the base pairs random in two different ways. One is in their color orientation. That means if we're doing red and yellow, and red and yellow, and red and yellow, the whole way down, that's not accurate. The base pairs, like you see here, we had to make this manually where the red and the yellow flipped. We had to go in here and physically click "Assign a new Shader" and do all that. That took a little bit of time. We're just doing this one little piece. A DNA is have very long strand, and there's those facts you can like go to the moon and back on your DNA strands. They're super long. We want to build this model in a way that we can do that, and have it be very, very long, but still have control over each one of these individual strands over the whole model. We have to build this in a way so that the color orientation, one, is controllable, but we control that. Number 2 is to control when this type of a pair, the green and blue, whichever we want to call this, the cytosine and guanine, or the other two, or this color. We don't want just alternating colors, they need to be like we had to hand do again, we had to hand do this beginner one where we were like, "We want two here, and the same to here, but their colors are different." We have to physically touch each one of these things. We need to randomize the random pairs. That's the second thing we need to do for the base pairs is make them random and control that randomness. That's other thing we're going to build in. Then we're going to do this in a way so that we can, like I said earlier, make it very, very long. Then we're building all this in a certain way too, so that we can unwind it like we did the other model. The issue that was so easy with the beginner model here, was that when you look down on this beginner model, and I'll try to draw this as best I can, but basically, if you look down on the base pairs are crossing this center axis on this one. Let's see, on this one, the one we're going to be making, it's more like this. They're over here, then they are over there, then they are over here. Everything's not down the center, because you have this asymmetry. To get these points to follow the stems, basically, this part, to get them to follow it as it unwinds, we're going to have to rig up our own very custom rig so that when it unwinds, those base pairs will follow, and then turn into a ladder shape when they're unwound like this. Then go into this asymmetrical pattern. That's why it's more advanced, that's why we're going to do the things in the order that we're going to do them. I'll try to explain, as we go, when there's moments where you can skip ahead if you don't care about this stuff, and you just want to know how to make the thing and what buttons to click. But I think you'll get more out of it if you stick around in watch video and hear me out on, you could do it this way, but this is where that's going to prevent you to do these other things in the future. There won't be a time like that. But I'm going to try to call it out because I think that's important to understand the thought process and problem-solving. Because all 3DS, is just understanding the tools well enough so that you can get any idea whether it's a asymmetrical, major, minor groove DNA, or whatever it is, you can get any idea, and other tools well enough and think, "Okay. This is the process that I have to do this first and this and this. That's what all of learning this is about." That's why I'm trying to make an effort to include that in these videos. Thanks for watching and let's jump into the next lesson where we'll get started in making the advanced DNA structure. Thanks for watching.
21. DNA 2/14 - Creating First DNA Strands: Welcome to the first class, where we will actually start the creation of the Advanced DNA structure. I'm going to go ahead and start to set the project here, file set project. I'm going to click the "Advanced" folder here and I'll just hit "Set", create a default workspace. I'm going to go to the Project Window option here and accept everything so that if I go to the little Current Project options over here and I select on the "Scenes", it'll go to the correct area for the Advanced scenes, so I'll just say, "01." Now that our project is set, I want to explain why we're making it the way we are. If you want to skip this and just start making it, then go ahead to the time indicated in the lower third of the screen. If you're sticking around to watch this, let's flip back to the image that we had here of the beginner lesson and what we're going to change from this. If you look at these strands here, look at how thick this strand is right here. Then if you go up here, let's just copy this and we'll paste it so we can measure, this side is the same thickness if we're looking horizontally. But as soon as we rotate this in the direction that we are indicating the tube is going in, it is quite a bit off, right? Look at this gap right here. There's a gap right here. This whole thing, right? This. We're trying to avoid this, because it's getting skinny right here, and then it's thick here. We want to create something that has the same thickness all the way down the tube, and that's why we're not using this method for the advanced lesson.You can go back and watch that to see what that method actually is. I won't recreate it here, but also wanted to just show you that there's a new option in [inaudible] where you create a helix, right-clicking on this option in the "Poly modeling shelf", and it actually does the exact same thing where it distorts. What the sorry, I'm just getting this to something where we can actually see it. We're basically looking at a doughnut that was cut in half and then stretched out. Because of that, if we look straight down, everything looks correct because we're looking at this flat surface of the doughnut. But as soon as we look at it from the side, it's skinnier, right here, where these faces are selected. This is skinnier than this area because here we're looking actually at the top of the doughnut, and here we're looking at the interior of the doughnut. That's what we're going to do here and make the strands in a different method. I'm going to delete this and get started with that. When we're making strands, we're actually going to make two sets of strands. We're going to make one that solves the problem I just talked about of not having this difference in thickness, so that'll be one strand, so it'll solve that problem. With this strand actually creates another problem, in that when we create this strand, that will solve this problem here, this thickness problem, this strand will not have a consistent edge loop. That will be the interior. The strand, let's say here, that the base pairs are connecting to, it goes through here, it's actually going to wrap around the model. If we were to connect the base pairs to that edge or those faces, then they'd be poking out this way as they go up. We want to make sure we have a consistent face loop that stays on the inside here, down the whole way. When we're creating the strands that solve this thickness problem, they create a new problem of the fact that this face is not consistent on the inside edge of the DNA structure, so we have to create a second set that will be a consistent face all the way up the spiral. That'll make sense once we get started and I'll show you what I'm talking about. We'll start the first set of the two sets we're going to create, I'm going to "Curves" and select the "EP Curve" tool, and we go to the front view holding down "Space bar" and letting go there. I'm going to hold down "X" and select at the "World Center" here I'm going up to 10 units, 1, 2, 3, 4, 5, 6, 7, 8, 9, 10, and hold down "X". Make sure to snap on the grid and I'll hit "Enter", and I made the curve this way because I'm going to go into the Curves and just rebuild it. Because if we look at the "Control Vertices" by right-clicking on this, we can see as soon as it starts twisting, there's not a ton of resolution here, so we want more points, so there's more resolution. But instead of having to select each point, we will just rebuild the curve. Also to get in and out of the component mode, there's these two buttons up here. Sometimes it's just easier than trying to right-click on this thing, go to "Object Mode", so I use that sometimes as well. Let's go to "Curves" and we'll jump down here to "Rebuild", and we can open up this "Option box" and we can see they'll be 40 new points. That's fine. Now if we right-click on this and go to the "Control Vertex", you can see there's all these points. Let's say if we "Self-select" these, and pull this out, you can see it's a much smoother distortion here instead of that jagged edge. Okay, so we have that. Now, let's turn off the "Self-select" and go in and out of Component mode. Now we need to extrude a circle along this path, so let's create a circle on the top left here. Let's pull this over in the position that we wanted to in, which is going to be two units to the right. I'm going to hold down "X" and go over two units. Now I can select the "Circle" and select the "Curve", and go to "Surfaces" and go down to "Extrude", and choose this option. I'll reset the setting so you can see what we're going to do. The two ones that are important are the Component and At path. Basically what that is going to do is when this is spiraling around, it will face the ends in the correct direction. You'll see what I'm talking about here in a second, but basically make sure these two are selected. We have to have the Curve selected here as well, so I'll hit "Apply", and you can see this is also the subdivisions here are based of how many Control Vertices were on this curve at the center here. That also indicates this is going to be a smooth curve once it's twisted around. We can change the radius of the tube itself by just adjusting the circle that was extruded, that'll change everything here. Let's do something specific like 0.25. Okay, now we have our first tube and we're creating these separately as well. Because when we create the twists, we don't want to create twists on the whole thing. In this version, we made a twist over this whole object and went down the whole thing from side to side here. What we want to do in this lesson in the advanced series, is we're going to create the two sides, and we're going to create their own twists that will go down the length of them here. What we're going to do is then move them to the center so that they both rotate around this center axis, and I'll show you that here in a second. But that's what we're also doing differently. We have this side complete as far as the model is concerned. Let's throw in that twist to form real quick, and we actually want to twist to form the curve because the curve is what's controlling this whole setup. If we go into the "Control Vertex" mode and start dragging stuff around, this tube is going to follow that. We need to place the Twist a form on that curve, so we'll go to the "Form" and we'll get on to "Non-linear twist". Now if we twist this here it's just going down around itself, and we want it to go around the center. Let's hold down "X" and then drag the "Twist a form" handle to the center axis. That way when we start twisting it, it will go around the center. Let's do a start angle of 360, so we have one complete circle if we're looking down at the top of it, because we want this to start and end at the same place when we make multiple copies of this vertically, the lineup. This is what I was talking about earlier, those options we selected for the extrusion of this circle along the path, it already set this up so that this curve didn't have to be exactly facing and rotated in that way, so that's super helpful. I'm going to speed up the video here and create the other side very quickly, and group this so we can try to keep this organized since we're going to have a couple layers here to deal with. This is the right side done. I'll speed up the video and create the left side. See you in a second. Great, so now we have the left side done, let's go over to the "Twist Handles", I'm going to select both of them and move them together now. We can type in "360" here and have what we started with from the beginner video. But we have a lot more control now that we've created separate twist handles for them. We also have a consistent volume now through these tubes they're not thicker here and thinner over here. They're the same thickness all the way through. We've solved two problems and set ourselves up for better options in the future here in the next lessons. I'll see you in the next lesson where we will create the second set of strands for the DNA, and I'll explain why we'll be doing that. Thanks for watching.
22. DNA 3/14 - Creating Second DNA Strands: In this lesson, we're going to create the second layer of these strands here. I'm going to explain why that is, why we're creating another pair just to be right on top in the same space as this. If we convert one of these to a polygon so we can look at it a little better. We'll go to modify, convert nerves to polygons, hop on the option box, make sure we're in quads, choose to control points just to make this happen quickly. I'll isolate this with this little button up here on the top middle. But basically what I want us to look at is the fact that, if we imagine that the base pairs are going to start to attach to the strand here in the center, and need to go up the center of the whole way. This is the inside loop here, and if we select that, which we did, this little red line. We can follow it up the strand and see that this strand actually twists largely, but also twist on itself. You can see that by the fact that if we look around and we look at the top, these ends at the outside edge. We started on the inside edge, but the top ends on the outside edge. If base pairs were sticking off of this edge down here, and pointing inwards, that would work for this piece of the strand. But as we go up, they'll slowly start to point away from the center. There going to be pointing to the outside of the strand. While this method solve the issue of volume, it created the issue of twist in the polygon itself. We're also going to have to address that in another way later on. But for us to be able to have a consistent edge face, that is always along the center and the inner portion of this kind of ring, if we're looking down on it, this is really, a ring. We want to have the same edge loop all the way around the faces. You can see it's twisting here as it goes up. You solve one problem in 3D and then another one pops up and then you have to solve that. That's what we're going to be doing and why we're creating a whole other set. Because we need the base pairs connected to something else. Because these are going to be identical strands, in the sense that the space they'll be occupying, we want the twister formers to control both of the strands we're going be making. We can delete these twists to form our handles that we made in the last lesson, because we're going to need to remake them when we have this next pair up. It's really easy to make this pair. We're basically just going to use boxes and we're going to create a polycube here. We're going to choose a height of 10 to match the height of 10 here that we chose when we created the curve and counted out 10 units. For the subdivision height, this is going to dictate how dense the base pairs are going to be. If we choose a height of 30, which is what I've just figured out in my own experimentation. We're going to eventually pick every other face here and a base pair is going to be sticking off of that. We're going to have this equal amount of gap here between each base pair. If you want yours to be not as dense, then choose a smaller number here, or if you want it to be more dense, choose a higher number. But this is probably as dense as you might want it. Now that we have that, let's get the pivot point down to the bottom. I'm going to hold "D" and "V" and drag it down to snap to the vertices down here, then I'll hold "x" and then I'll mouse drag to the same space as the circle or as the tube here. I can just reduce the size of this thing because it's much bigger than the tube here. If we look in the far view, we can see it's totally encompassing it. We like our height the way it is, and we will hit "R" to get scale up. We don't want a scale in the vertical axis, let's hold down control and hit the vertical axis and then every side but the vertical axis will collapse down. Let's get this somewhere, on the inside of this and let's go back to five and we can see that we've entirely encompassed that. Let's duplicate this out and then we'll drag this over to the other side. Now we have our two sets and we'll eventually hide these. But we need them again for the base pairs to connect to, and they can be the same way. Let me just hide this and do a twist to form it real quick. If I do that, actually I'll just choose one because this is how we're going to be doing it in a minute. I hold on "X" and bringing this in and let's do 360. We can see that this edge loop or this face rather, does stay on the inside the whole way up. That's the advantage of using polygons here. If we look down, we can see that there's no twisting, we're always looking at the same face down. We know the inside face is also not twisting. Cool. We can delete this twist to former. They'll snap back and solo that. Now we have our two systems, we want them each to follow the same twist to former. Let's put these in the right groups. Let me get to the front here, this is actually the left side and this is the right side. I'm just middle mouse dragging into the correct groups. And if you remember, the curve is what controls the main tube here. We just need to select the curve and this new cube that we created. Let's create a twist to former and we can put this in the group as well. Now let's hit "X" and snap it to the center. Let's do the same thing over here, hit the curve and the group, hit the twist, put that in its group, and then hold down "X" and bring this in. Cool. Now if we select both the twist handles and we twist them, we have the outside tubes holding the volume, and then we have these inside cubes that we'll be using for the base pair. They have the same face all the way on the inside to connect to. Thanks for watching this lesson. In the next one, we're going to go deeper into building the base pairs. I'll see you there. Thanks.
23. DNA 4/14 - Major And Minor Grooves: In this lesson, we will start to approach how we're going to build the base pairs. So we have the DNA looking very similar to what we did in the beginner tutorial, except for the fact that volume of the strands are now totally intact the entire length of the strand. That's really nice. We now need to approach how we're going to build the base pairs. First thing we need to understand is the fact that we need to create the asymmetry first of the major and minor grooves, because if we don't make the asymmetry first, then these base pairs will not be horizontally flat along the DNA strand. Let's select the curve, and we'll select the cube, and we also need to grab the twist handle, because the twist handle is going to move the entire thing. If we just selected the cube or the curve, and we moved it, the tube is just going to go along the twist deformer and it ends right here you can see the top of the twist deformer is done right there. So we need to move twist deformer with it, so let's select the curve, the cube, and the twist handle. We want to go up by two units. The twist deformer has a different pivot point. It thinks, let's just go back to where it started. it's starting at five, so if we type two here, it's going to go down, and if we select the curve, it's at zero, so if we hit two, that's going to go up. They're not going to move together if we type in a number up here. There's a little trick that I can show you. If we select all three of these again, everything that we want to move, we can go to the translate y and we can type in plus equals two. It's going to add a two to everything that's selected in here. So everything's gonna go up by two. Cool. Now you can see we already have this major and minor groove setup. The only thing we're dealing with now is the fact that these ends don't meet anymore. But at least we have it where if we start drawing the base pairs, they're going to be horizontal in this asymmetry of the major and minor grooves. We need to do that before we start the base pairs so that they're always horizontal. This is going to be maybe a little counter-intuitive, but let me explain what we're about to do or how I got here. Essentially, right now we're creating the offset by changing the height of one side. There's another way that we could create this offset, and that's by positioning this in another axis. So it's hard to know exactly where the other position needs to be, but now that we have it in this orientation, we can actually apply another twist deformer to everything and untwist this. Then see where each of the tubes line up, and then based off of those new positions, we know where to put the tube and then twist everything again. So let's just start that and I think you'll get as we get going. But this is one of the things that hung me up for a while trying to figure this out on how to resolve this issue of the different heights now. Same thing like we solved a problem, we got this asymmetry, but now we create another one now that ends don't line up, so we have to solve that. Let's select everything that we did to get to this point. I'll select the curves and the cube here, and we're going to create a new twist deformer. I'm going to go back to the non-linear deformers, and I'm going to create a twist. Now it's going to control everything, and we know that we were twisting by 360 degrees, so I can put that in here, a negative 360 degrees and untwist everything. Now the only difference now is the fact that we have two more units essentially because we raised it up. This is calculating a distance here, like this is an angle, you can see they're not straight yet. Essentially, we had ten units high, 360 degrees, but now we have 12 units high, and doing 360 degrees isn't going to cut it. We need to go around if ten units is each 36 degrees, that equals 360, and we add two more, that means we add two more 36 degrees onto this, which is 72. We need to add 72 of this, we can do the same thing we did earlier, say plus 72, or actually we're subtracting because we're going negative, let's say negative 72, and now they're straight. That's pretty cool. When we started this process, you can see we went two units over this way and two units over this way, then we twisted everything. We offset it vertically to get the major and minor grooves. Then we untwisted everything again to figure out where can we actually place this thing and not have to do it vertically? So we just got our answer, it's over here. Where is over there? We need to figure that out, because when we're selecting the geometry, it has all these deformations happening with all these twists, so the actual location of it is not represented here accurately. This was the position before we did all these twists on it. So now this isn't actually the position it's in. For us to find that out, let's select the cube of that side. Let me go to the cube of that side, and I can actually center the pivot there. When we select the cube, we can see that the pivot point is still back over here. If we go to modify center pivot, it's going to snap over here, and what that gives us is still not the correct values. The values haven't changed, just the pivot point did. Let's create a locator. We're going to create locator, and we're going to snap this to that position. Because it'll snap over there, you can see these numbers will update and that'll give us the correct position for this. Cool. So let's do a constraint. To do a constraint, we need to select the parent first, and that is for us this cube. Now we can select the locator, then let's go to the animation menu, go to constrain, and we'll open up the option box for parent constrain. We can actually just do a point constrain, but the habit of usually doing a parent constrain anyways, we want to make sure that maintain offset is not checked. Because that would mean if maintain offset is on, this locator would follow this cube based on its current position. We want it to do a snap to that current position, so we don't want an offset, we want it to snap there, we want to match it and be the same. So hit apply, and you'll see that it'll snap there and we get these values on this side. So what we care about, of course, is not the five, we care about these two because we don't want to have any vertical difference between these two. Cool. Let's write this down and remember it. We'll open up the text header and get rid of this from the earlier lessons. I'll copy this and paste it here. We need to remember this is x, and this is y. Now we can undo all this stuff, now that we have that information, that's all we were trying to get from doing all these crazy things. So I can delete this twist handle, it'll go back that way, then I can drop these back down to the correct height, so I'll grab this. I'm just going in reverse now, going minus equals two, so I'm bringing it back down to where it is, then I'm going to get these twist handles to go back the way they were. Go to zero, and now what we can do is move all of the stuff where we had figured out where it needs to be. So that we don't have to have a y. That y can stay at zero, so that all the base pairs can stay horizontal and they match evenly, and there's nothing missing from this side, when we're trying to attach both sides. Cool. Let's move this over to 0.618, that's a negative, we'll just copy this actually negative 0.618. So let's actually create a locator to store this information to make sure that we're snapping to that location. Just type this in. So we have a point of reference here to make sure we're snapping everything to this new location. So since it's on this side, we know it's in this one, it's this right side, we're not trying to like cross all the way over. That's not what happened when we deconstructed it earlier. We can see we actually have a problem here. The curve is centered on the rolled axis here, actually needs to be centered on itself over here. We can solve that problem pretty easily by doing the same thing we did earlier, modify center pivot. Now with the center pivot of the curve here, I wanted actually have it be on the floor. So I'm just going to hit d and v and drag this down to the floor. Now when we hold down v and middle mouse snap that to v, looks like we're having a little problem for finding the locator. Let's hold down v again and middle mouse, and we can see that we snapped it to that location. We went through the same thing with the polygon here. You can see the center pivot of that is over here. Let's center that out under itself again. So we'll do center pivot and we'll just bring this down to the floor like the other one. That way we can just snap directly to this locator by holding down v and middle mouse dragging over to it. Now it seems to think that we want to be in the pivot mode, so somehow we got into that mode, I'm just hitting d to get out of that. Then we'll hold down v and middle mouse drag, so now these are in the correct location. Now, if we take both twist deformers and do a 360, now we have the major and minor grooves and the top and bottom match. That's a huge thing that we did and figured out that we built something the way that we think we should do it. Then we ran into a problem, we deconstructed it, we found the location it should be at, and then we snapped it to that location so that we can build in this major-minor groove and maintain the same vertical horizon here for the top and bottom so that the base pairs can go directly across in horizontal fashion and have something to connect to. That's pretty huge. In the next lesson, we will actually start to build the rigs for the base pairs so that they can attach to these points along the cube part of the strands. Thanks for watching.
24. DNA 5/14 - Create Base Pair Attachment Points: In this lesson, we're going to create the rig for the base pairs to attach to the strands. To get started, I want to explain why we're doing it the way we're doing it. If you don't want to follow along with that, you can skip ahead to the time indicated in the lower third and just start in creating the rig. But for those interested to have a better understanding of why we're doing it, let's start by looking at the MASH network. Because what we're going to do is use MASH, which is a motion graphics tool set to populate the center strands, the base pairs. To populate the base pairs in the center, it needs something to attach to. We're basically going to create a landing pad for the base pairs first, and then we'll create the base pairs of the MASH network. But the reason why we're going to make the landing pad for the base pairs first, is because it needs to all be one piece of geometry. Let me just unwind these to explain it a little bit better. Let's just to show you a landing pad real quick that we're going to make. I'll do a width of maybe four and I'm just going to snap this to holding down d and x. Snap this over here so that I can just rotate it into place so it's close to the end here. Then I can just scale it in. What we're looking for is for them both to be in the center axis. For now this is close enough, but I basically just want to show you what we're going to do repeatedly. Why we're doing it this way? We're going to essentially create a bunch of these little ladders here. When we create a MASH network let's just throw in this and this is going to be the base pair, a representation of that. We want to get this base pair on each one of these ladders. The way MASH works, if we create a MASH network, we're going to create MASH network. You can see it just made a big string of these. If we go into MASH, it just has this default distribution. There's 10 points and they're all at 20 distance from each other. That's not what we want. We want something a little different. We want to apply this cylinder to this MASH. Let's go down here to the MASH network and choose distribution type to be MASH. We look at this, it's looking for an input MASH and there's one slot. But we have multiple rungs of this. We want to put base pairs all along this thing but it's asking just for one input MASH. We have to combine these. But if we combine these, how will the combined MASH follow the different axis that we're going to get in this twist? Because if you look at symmetry that it's creating, there are distances here that are closer and shorter together. It's a complicated setup that there's really no good way to do this except for creating one MASH here between these. We need to create a system where these will pin to each strand, but they're going to be one MASH. To do that, we needed to create joints, and then we will create one MASH out of all of these rungs, we'll combine all of them, and then we'll select all of the joints which are going to live in the same space as these rungs. We're going to bind this one MASH to all of those joints that are going to go up and down. Those joints are going to follow the strands. That way with this combined MASH, after we create a MASH network, we will have one MASH to drag and drop in here. That's why we're going to be doing what we're doing. I'm going to delete all this stuff and we can get started on that. First thing we need to do is to rotate these cubes to face each other. Because right now they are not doing that. If we're looking top-down, we essentially need a flat face facing each other. Let's rotate this around and point it in that direction. Let's see what we have here. Maybe something like 40 degrees. I'll do the same thing on this side, 40 degrees. It appears that they're going in the same direction, and one little cheat is actually in the top view if we plus the manipulator by hitting Plus, we can go off base of this rotation axis of the zee. You can see this blue line. It starts in the center, but it ends not even touching this one. We know that we're not oriented in the correct way. We can just rotate this and when it's as big as this, it'll go a lot slower. But let's get this blue line to go through the center of the cube. We need to do the same thing for this cube. Let's go to the Rotate Tool and with it being very large now we have this blue guide and we just need to shoot it through the center of this thing. It doesn't have to be perfect, but it does need to be pretty close in the neighborhood. Now they're facing the right way. Let's go back into perspective and I'm going to isolate this cube now. I'm just going to reduce the size of my manipulator by hitting the Minus. I want to select every other face on this side that was facing the other strand. Because this is where the base pairs are going to be sticking out of. I'm just holding down Shift and then selecting each face. To get into this mode, I right-clicked and held down Face and let go. Now we have all the faces selected that we need that are facing the correct way and just double-check they are by unsettling that. We can say the are facing the same the right way. Why did we select these? We selected these because we're going to actually apply a hair system to this. The reason why we're applying a hair system is there's a piece of hair system that we're going to use and we'll delete everything else. That piece is called a follicle. A follicle is where hair attaches to geometry. But we don't need it for hair, we need it for the base pair landing pad. We're going to create this hair system, we'll go into nHair under the FX menu over here. We're going to nHair, Create Hair and we're going to open up the option box. I'll just reset the settings so I'm on the same page here. The output, we don't want paint effects and we don't want paint effects and NURBS curves. We showed the NURBS curves. The paint effects is more about the hair and again, we don't want hair. We can choose NURBS curves instead of grid. We have faces selected, we want them just on those faces. So we'll say At Selected Surface Points or Faces. Then we can hit Apply. You can see that if we solo this stuff out, that we got a single hair or single curve and follicle on each one of the faces we have selected. That's pretty cool. We got all this other stuff that we don't need though, like a nucleus for the dynamic, solve and all that. We can just delete that or we're going to keep the hair system and the output curves for now. Because we're going to need that to help line up the base pairs. We have this side done, let's do the other side. I'll un-solo this and then I'm going to pick the cube up here, and I'll solo that one. Then I just need to make sure I'm starting and ending on the same faces. I'm right-clicking to get into face mode and shift-selecting each one of these. Now if they're selected and go back into the nHair menu, which I still have open over here and just hit Create Hairs. When we un-solo that, we can see that we also made another set here and it put those in the same hair system. All the follicles are the same. Let's actually go into component mode and group those out so we can separate them. I'll just start here and select somewhere over here and see where that leaves us. Crazily enough, I think I actually selected the exact number. That never happens. I just liked them and they happen to be, what I'm looking at is these little white dots means they're selected. I selected all of these on this side and not on this side. I know I can group this Command g and have this be the follicles on the right side. Let me swing around here because I think that's actually the left side. What I'm looking at to know if I'm on the right or left is this indicator down the bottom left, positive zee should be pointing forward, so we know now are in the front. With all of those selected, let's see what side, that's actually the left side. We know all these are the right side. Command g. Cool. Now we have the follicles. You can see that we got pretty close to pointing in the same direction because the hairs are actually going in and out of almost the exact same entry point for the follicles. That's pretty cool. Well, so just going to hit this Anti-aliasing button. If I zoom in here, you can probably see this happen. It's just going to smooth this stuff a little bit. This is with it and without it. Cool. I'll go back into shaded mode. Now we have our follicles. In the next lesson, we're going to make the landing pads and place them all along here so that there is a landing pad for the base pairs. When I say landing pad, basically, that's just me making up that term. Best description I have. It's essentially going to be a single face because the MASH network is going to look for a face center. If we had multiple subdivisions on that face, it wouldn't know where to pick and so we just want one face. We'll get into that in the next lesson. Thanks for watching.
25. DNA 6/14 - Create Joints And Parent: In this lesson, we're going to continue to make the base pairs for the strands. We have the attachment points here, on the hair system. Let's just go into Show and turn off NURBS Surfaces right now. Let me get rid of the tubes so we can actually see only the polygons and the follicles and the curves and all that stuff. Cool, so let's go over here and we're going to create the first landing pad. I'm going to hit a plane up here in the poly modeling tool set. As I mentioned earlier, the mesh network in the future is going to be looking for a face center. To make that easy and clear for it, I want to have no subdivisions here. I'm going to go over the polyPlane and choose one. It's going to have one division for each side. Now all we need to do is to get this in place and go across this span. We can do that in several different ways. I'm basically going to snap this to the curve here. There's an easy way to navigate to this area, but before I do that, I want to make sure that the pivot point is on one end. It will make this go a little easier. I'll hold down D and V, and drag over to this edge. Now I'm going to hold down C, which is for curve and middle mouse drag onto one of these two curves. It looks like the end of this one is over here. I'm just going to drag it to the end and let go. Then now I can rotate this round into the correct orientation, I'll have to zoom in so I can rotate around this. We can see just by looking at this, how flat it needs to be up against this edge. You rotate it there. I'm going to hold down or I'll hit R to get the scaling options and scale this in. Then I'll scale this over to the other side. You want to make sure it's the same. This edge is going to be not over here. It needs to be at the same edge, the inner edge. Let's do that, and now that we're close and the manipulator is off the screen because we want to look up here really close, we can actually just select the scale x and middle mouse drag and it's going a little fast. Let's go up here to the little speed dial and tag that a couple times till where it's the lowest setting. It's the lowest speed, and we can get this as close as we can. Maybe dial that back just a little bit while. It's like a very small amounts. We can maybe go two here, maybe three here. We just want to make sure it's right up against the edge because again, the mesh network is going to take the face center. If this edge was way over here, the center is not going to be in the center of these two strands. It's going to be off-center. Now that we have the first landing pad done, we need to duplicate it and move it up. Let's hit command D, and we can hold down C and middle mouse drag to this curve. It jumped off of their, so hold down C again, middle mouse drag and let go. Duplicate, hold on C, middle mouse drag and let go. We'll just keep doing that all along these rungs. This is why we kept the curves as long as we did, because we want to use those as reference points and snapping points because you can't snap the follicles. These follicles are in the center of faces and you can't snap two center of faces. We want these curves, so it just makes this process go a lot smoother. The fact that we can just hold down C and we can get to the center of these curves. We did the right number of planes because we have 15 of them and we had a subdivisions of 30 and we went every other one. That math makes sense that would behalf the number of subdivisions because we went every other one. It's 15, that's correct. We know there's no hidden duplicates in here somewhere that we accidentally made or duplicate and didn't move. Now we have those. The next thing we need to build is something for these to follow. Remember, in the previous lesson I mentioned we're eventually going to combine all of these into one mesh so that we can bind them to joints. Now we need to create the joints. Let's go to the rigging tab and we'll select this joint icon here. I'm going to left-click while holding down C onto this curve. I didn't hit it, so I'm going to retry, hold down C, click right on the curve, and then you can see when you drag down to the end. That's what we want to do. I'm going to do that again. I've created the endpoint of the joint, but I want it to be over here somewhere, doesn't have to be as exact as everything else. But now I've got that and I'm going to hit "Enter" to finish creating that joint. Now that we have that joint, we can actually just hit command D, and then drag this down and hold down C and middle mouse drag. We're going to do the same thing. Middle mouse drag, Command D, middle mouse drag. Now we have all the joints, we have all of the landing pads, and let's just hide the hair system for now. I'm going to hit Control H, to get rid of the curves because all we want to see are these joints and the landing pads. We've built the joints, but they're not following anything. If we went back to the twist handles and twisted this stuff, none of what we just built would follow. Let's just show that, if we twist this, see if I'm going to mouse drag here in the viewport to increase, this is going super slow because we still have this little speed thing on. I'm just going to increase that. You can see none of these things that we just built follow any of this stuff. That's why we made the follicles. You can see the red follicles are actually following this and they're following all along the inside faces that we wanted and why we created this entire second set-up to begin with. This is really encouraging to see the red follicles are actually working. Now we just need to attach the joints to those follicles. I'm going to go back to zero on a twist deformers. You can see the joints themselves are actually all out of whack when looking at them in this direction. That's not super clean. I don't think it would affect anything, but just to clean that up super quick, I'm going to turn back on the curves, [inaudible] Shift H to unhide them. Then I'm going to go down to the joints, I'm going to select all the joints by Shift selecting them. I'm going to command click an outliner and select the curves and isolate those. I'm going to undo that because all we want, are actually this side curves. We just want one side that we ended the joints on. I'm going to go through and command click all the joints, and then so all of those. Now I'm just going to hit C and middle mouse drag those again to get them in the right place. Because if you remember, we had another layer, we had two sets of curves acting on this. We had the ones coming in this direction, the ones going from the other direction. When we're holding down C and duplicating these, there's no guarantee of which curve we're actually making these on. We want to make sure that we isolate one side and make sure it's consistent in that way. Now if we look, now they should all line up perfectly. Cool. I'll [inaudible] those and we can re-hide the curves. It's always good to keep those around in case we need them again. Now we need to get these joints to follow along with these follicles. This side is the parent side. You can see if we select this one and move it around, this other side follows. If we select this one and move it around it, this other side doesn't follow us. We know this side is the parent side. We want to select the skip back into our orientation, looking down on the lower left, we can see that we are on the left side follicles. Now what we can do is parent the joints to the follicles. Let's pop down the left side and let's select the first follicle here. We can see it is the bottom one. That corresponds with the bottom joint. Let's group these planes for now just to create some more room so we can actually see the joints and follicles together and outliner. Again, the outliner is from Windows outliner. If you haven't gotten that by now, I apologize for that would be difficult to follow along, but hopefully you've been watching the other series and it makes sense by now of the outliners over here. Let's select the first follicle. We can see it's on bottom and corresponds with this bottom joint. We're going to middle mouse drag this and let go of it over here. We're going to do that all the way up. We're going to do the third one. Now, the fourth one, C 1, 2, 3, 4. Great. Now we have all of the joints parented to the follicles. If we turn this twist back on, the joints are actually following this side. That's pretty cool. Now we just need to get them to point in the right direction to its corresponding side over here. Let's undo the twist and I will see you in the next lesson where we will aim constraint the joints to the other side. Thanks for watching.
26. DNA 7/14 - Aim Joints: In this lesson, we'll continue creating the joints for the base pairs. So in the previous lesson, we saw if we twisted this stuff, that the joints are following, at least on this one side. So now we need to get them to stay aiming at this other side, this right side. I don't know why I keep turning to the face of this other way. We need to get them to point this right side where the joint children are over here. They need to stay pointed at this side. So to do that, we are going to create an aim constraint. An aim constraint sounds just like that. It's going to stay constrained, aiming at something. So we just need to pick what it's going to aim at, which is this right side follicle. If we select this follicle, we can see is at the bottom. The order we're going to do this in, is the parent is going to be selected first, which is the follicle. Then will select the joint, and we'll aim constraint it. I'm going to open up the constraint menu by going to animation constraint, and we have this aim constraint here. We can do maintain offset, or we can just leave it. It doesn't really matter that much because we haven't bound the geometry to these joints yet. We have the maintain offset off. When we do this constraint, this is going to snap, and point directly at it. It's already basically pointing right at it. I don't think it'll change anything. But we can just leave that off or on. That doesn't really affect anything. So we have the follicle selected, then we're going to select the joint and apply. So you can see it did shift over a little bit to point directly at that follicle. With the joint selected, now you can see there's these blue little dots in the channel box, and that means there's constraint on those channels. Now I'm just going to go through, and do the same thing for all the follicles and the joints. We're going to do this, and I will speed up the video, and see you in a few seconds. Now we made all the aim constraints. Let's close this box, and let's twist the strands, and see if the joints follow. I'll go to the twist, and we can just use mouse drag here to click that up, and look at that. All of the joints are following the strands. That is pretty cool. You can see, like I said in the one of the first lessons talking about how this is so much different. In the beginning lesson, these strands would have gone through the center here. Because of that major, minor groove they're going more along the outside. You can see that in the top view, it's pretty interesting. Cool. We've tested it, we see it works. Now let's bind all these landing pads to the corresponding joints. I'm going to undo this to untwist it. Now, I'm going to select all of the mesh here, and I'm going to combine it so that it's one mesh. We'll go to the modeling menu, mesh and combine. Now you can see we have all these empty groups over here, and it's all crazy because it has created this history for each piece. To get rid of all this stuff, we need to go to edit, delete by type, and history. Do not choose delete all by type because that means the entire scene. We just want to leave by type. So that means what we have selected. Now you can see it got rid of all those groups. We can call this landing pad. You can see it's all one piece now. But they are all in the same space as a corresponding joint. Now we're going to bind this polygon because it's one piece now. We're going to skin it to this joint. When I'm using these terms like joints and skinning, this is how people make characters in Maya. We are using all those types of tools, but we're using it in a creative way to do what we want to do. This is what I talked about in the first lesson, creative problem-solving. Knowing the tools well enough to creatively figure out how to get this done. This took me a couple days to figure it out how they should get set up. I had to know the tool's pretty well. To be honest, I'm recording this for myself as much as you guys because it's a lot to remember each step of the way. So hope you use these videos as references as much as I'm going to, if I need to do this again. Let's bind this mesh to these joints. By default Maya , if you just start selecting something, it's going to default to the joints. So we can use that to our advantage, and just click, and select everything because in the out-liner, these are all hidden as children of this follicle. It's difficult to get to all of them, and select them from that liner. Let's just take the advantage of the fact that if we try to select everything, it's only going to select the joints. So let's select all the joints, and then let's command click the landing pads. We have the joints, and the landing pads selected. Let's go to the rigging menu. Let's go to skin, we'll open up the options for bind the skin. When I say skin, it thinks the landing pads are skin, and the joints are bones if this was a character. But it's a [inaudible] But anyway, that's the name of stuff here. I'm going to reset this so it looks the same. The one thing that's important here is the max influences, and this means the maximum number of influences that any one vertices can have. This top plane has four vertices at each corner. This is going to say that five joints can affect those maximum based on closest distance, and all these other things up here. But we know that we only want this plane to be affected by this one joint. We don't want this other one, this joint down here to be effecting this plane. So we need it to turn this down to one. To make sure it's only one influence per vertices, and because these vertices are right on top of these joints. We know they're going to only be bound to the joints that run on top of them and nothing else. So let's hit Apply. Now we can close this. Let's go to show. We can just hide the joints from this menu down here, and uncheck that. Now we'll do the twist. Select the twists here, go to start angle. Now check that out. The landing pads, are following the joints, and they are making a perfect opportunity to use the mesh network to fill these with our own base pairs. Then to use the power of mesh, which is procedural animation, randomization. All of those things then we can take advantage of to-oh, it looks like we missed one down here. I'm going off on a rant, and we missed one. Let's fix this super-quick. That looks like it's a joint that didn't get an aim constraint. So we'll turn back on the joints, we'll select this. Actually let's twist this backup so we can see which one it is. This is part of troubleshooting, and why you test this stuff, to make sure everything's working the way it should be working. So yeah, it looks like I missed an aim constraint on this one because it's connected here, but it's pointing down. We know we didn't want it pointing at this one. Let's see what follicle that is. It's the right side, it's this one. Let's untwist this stuff. It's the third one down. So untwist it. The third follicle down. Select this joint, and go to constraint in constrain. Now we should be good to go. Twist that, test everything, now that one works, cool. Every step of the way, as soon as you do a step, you want to test it to make sure. It's a lot of repetitive things, it's easy to miss one of these. So that's why you always make something, and then you make sure it's working the way you expect it to. In the next lesson, we're going to create the actual base pairs that will be the visualization of this stuff. We will start to use mesh to fill this randomly, and rotate them around randomly to create the type of randomization you'd actually see in a DNA structure. Awesome, thanks for watching. See you in next lesson.
27. DNA 8/14 - MASH The Strands: Now we have the Landing Pads and everything set up and it's all working with a twist to former. We need one more step before we can start actually creating the base pairs. That step is duplicating all of this stuff out in a mash network. That's important because if we start making the base pairs now and assigned it to the Landing Pads, as is the plan. But if we did it at this stage of the game, and we did all the randomization that we wanted. They would only apply to these Landing Pads and what we want to do is create a massively long DNA strand that goes way off into the distance. So to do that, we need to create a mash network of everything that we have set up now. Then later we're going to create the base pairs and then we're going to choose the crazy long version of the Landing Pads that are all duplicated out as the input mash for the mash network. Now if we didn't want a huge long DNA strand, we could make the base pairs right now and then assign them as a mash network and assign the Landing Pads as the input mash network. If you only want this strand, you can skip ahead to those lessons where we're building the base pairs and creating a mash network of those, but if you're interested in creating a very long strand of DNA, we need to do this step before we create the base pairs. It's good to do anyways because at least you have the option now. But if you don't do it now it's going to be more difficult and you have to kind of start over from this point. We've been looking at the kind of secondary strands here. These are the squares that we were actually going to visualize this in the DNA. We need to look at the nerves curves. So let's open those backup and we hit those by the Show tab up here nerve surfaces. We check that on, now we can see the tubes. The one thing with mash before we can create it, these tubes are nurbs surfaces. Those things to be converted into polygons because mash doesn't understand nurbs. We need to go and create a conversion of this, let's choose one at a time and go to modify, convert. I'll tear this off and nurbs polygons. Let's check out the options. I want quads, control points are fine and let's hit "Apply". Cool. Now we have that done. Let's do the other side. Select the "Tube", hit "Tessellate". I'll close this out. Now let's double-check everything, every step along the way. We want to make sure everything's working the way we want it to. So yeah, these new nurbs to poly pieces, the polygons are following because they are kind of constrained in history to the nurbs curves. Let's put those in there correct groups. Let's get to the front again and we can see this right side over here. This is on the right side. We can Middle mouse drag it to the right side, then we can Middle mouse drag this to the left side, cool. We can hide all these for now because we won't be adjusting those. We actually hide the cubes as well, because we're kind of done with those. Instead of hitting "Control H", we can actually make a display layer, let's do that instead. We'll go to the bottom-right here and hit this far-right button, we'll add a display layer with everything that we already have selected. Hit that and you can see it hid everything. I'm also going to put the joints on their own display layer. I'm going to select all the joints and I'll choose a display layer and hide those as well. Now that we have multiple ones if we want to name them. Now we can create the mash network that we have for the polygons to use. Let's select the Polygons and the main thing is we just want to make sure that the middle Landing Pads are their own network, and these two can be their own as well. Let's go to Mash, Create mash network and let's make sure we're choosing the mesh option and again, just I explained why are we doing this. We're choosing the mesh option because if later, once we have the huge long strand of DNA, we wanted to untwist it as a whole, because if you think about it, these are just controlling a little section. If we duplicate this section, it's going to control each little section and it's going to look like these sections aren't connected and I can show you that later. But basically for us to use it a former later on these big long duplicated strands, we need it to be a mesh because Maya uses mesh for base for the deformers. That's why we're using mesh in our instance here. We need to make sure we have the geometry selected and then we'll go to Applying close. It disappeared a little bit and it came back. So let's go to the mash network and I'm just going to call this strands. We only have one side so let's investigate why that is, and let's change it, we'll go to the attribute editor and in mash, you can see there's a couple of different things we get by default. We get this first tab, which is basically a menu of all the nodes that we can add. Then we get the distributed node, which is just the default way of distributing things. It gives you a certain number of points and the end point, which is an important distinction between the distributed node. I will go back to the menu, the replicator node, those appear to do the same thing. But the biggest difference is the fact that the replicator node starts from the origin and spits all of these out and the default distribute node, you can see as I create more points, it's going to go from the middle almost. You're going to be picking like an endpoint and then it's distributing in the middle whereas the replicator is going to start from origin and shoot them out in a direction. We also have a distribution type. If we look in the Repro tab, which is the third time, we'll get by default. When we're using the mesh setting, we do have both of those nurbs poly, the two sides here, but we're only seeing this one and that's because we need a mash ID node, because this has an ID of zero and this one has an ID of one. Mash doesn't know that there's more than one. That's what the ID node does and so we can add that here. Now you can see we have both sets. Let's go to the mash distribute node. For distribution type, we want to choose the initial state and that means when we created the mash network, what was the state they're in? The we're in this state, they're in these locations. That's what that means. We can turn Number of points down now as an initial state, that doesn't matter as much because it's going to only do as many as there are points for which were two and the initial state, there's only two objects. When I was mentioning the replicator note earlier, it's important to remember that because that's what we're actually going to use to make the mash network go way off into the distance. We'll use the replicator node, will click on it and go to Add replicator node. It's going to give us this new tab for the replicator and we can just crank up the replicators or the replicants. It's kind of like Blade Runner reference, I guess. The default is it's going off in the Z space, we don't want that, so we'll zero that out. We want to go up in 10 because remember these units, the size of this stuff, remember we're making 10, so it's easy to remember that stuff when it's even numbers like that. We can just say 10 here, now can you know, it's all going to be connected, check that out. It says and we can just add more replicants and it'll just go as far as we want it to go, so it's pretty cool. Now that we have that we could also turn on the twist just to see that working and how that's going to work and why we needed this to be MASH and we're going to create another twist to former later. Because if we were to use these to animate, we can use these to get this into the correct position to start with, but not to animate because watch this. You can see that they are separated. Let me choose both twist handles and go to the Attribute editor, drop this down so we can control them together, you can see how each section is controlled like it's own little section. We can use this twister flower to get this into the correct orientation, so it's 360. Now it's looking correct. Then later we can apply a twist to former to this whole long strand, so there's one twist to former for this whole long strand and then we're going to unwind it with that one twist to former. We got everything in a good spot. There's one little catch and it's all these trade offs and 3D, like we did the extrusion of the curve so that we maintain the volume of these strands all the way down, they're the same volume and doesn't get skinnier and fatter. The trade-off unfortunately is it doesn't exactly match up the ends, and that's a very frustrating part of this. The way to fix this is to manually do it essentially and to be very, very careful. How are we going to do that is we're going to open up the nurbsToPoly of each of these. Remember when you create a MASH network, it hides the original. If we select this, this is the Repro node, we can see it down here, ReproMesh. This isn't the original, so if we started to edit this, it's not going to populate down the strand, so we'd only affect this intersection. We want to affect every single intersection by just controlling one, so to do that, we need to go to the original MASH, which is hidden over here, you can see nurbsToPoly, let's unhide that. It's this side right to frame up. We can adjust either this end or the bottom end, and for my money, I want to change this in because I can see them both at the same time. If we go on here, sorry, just in the bottom, then we'd have to go up and see if it connects, then adjust to it again and then go back up here. Let's effect this area, so nurbsToPoly is selected, we definitely want to make sure this is what we're actually working on. We don't want to work on the ReproMesh. I'm going to go to Edge mode and I'm going to double-click on this edge. I double-click on it, it goes all the way around. I'm going to hit four so I can see what's happening here. I'm going to hit B, so it's a soft selection, so it's not just like this weird kink where the self-selection it's going to gradually fall off and affect everything behind it. I'm going to hold down B and middle mouse drag to limit that range where it's going to fade off and affect things. With that selected, I need to go in here and just really eyeball this as close as I can get it. I'm going to frame this up and swing around and see where the pink and the yellow lines don't match and rotate that in. I can increase the size of the manipulator to help go at smaller speeds here. Now you can see where the pink and yellow start to touch. I'm just going to spin the camera around and see if that's working. I'm going to go on a shaded mode, see if that's working better. That seems to be working pretty good actually. We can go up this strand and we can see that that changed on all of this side at least. We still have this other side we need to fix, you can see it right here but that error should be right over here on this side and we fix that just by doing this one. That's because we worked on the original again, we're going to make sure we're working on the original. I’m going to hide that one, I'm going to go to this other one and unhide it Shift H and do the same exact thing. Go to Edge mode, double-click this edge, and let's take a look at this and wire-frame, it gets super close. Turn on rotation and rotate this to match this edge. I'm going to move the camera and you can see there's a gap here. I'm going to adjust that and get the camera to a view where I can see, it's hard to see the purple and the yellow line here because in wire-frame we're looking through it so you can go to shaded mode and see that as well a little easier. Just go super slow on this stuff, and just make small motions, increase the manipulator, make a small adjustment, then rotate around, make sure you didn't offset something else somewhere else. That appears to be working pretty good. We can see there's a little gap here, it was hard to see earlier. Go back into Edge mode, double-click, it, get super close on this, hit E to get the rotation up and so small. You know what the issue is, I'm touching the ReproMesh right now because you can see the soft selection is going across both spans. We want to make sure the nurbsToPoly is selected. This is just, again, you have to be super careful. Yeah, we're right-clicking and going into edge mode for the Repro Mash, not the one that we want. Let's isolate this so that we can make sure we are only selecting the original. Then we can turn isolate back off, and then zoom in here and make sure we're editing it correctly, so that was the issue. It appears this is fixed now. We can go back into the originals later and continue to tweak that if we need to. But, again, unfortunately that's just part of 3D and when you solve one problem, usually another one pops up, so you're constantly troubleshooting this stuff and trying to figure it out. We made those two adjustments and now that'll populate down the entire strand, so we got that fixed and we can no longer see those types of little gaps in the strands. Cool. Now that we have the strands, let's make a MASH network of the LandingPads. Well, I need to first drop my manipulator down because it's so big, it's off the screen. I'm going to select the twists and zero those out just to make sure everything's clean as possible when I'm making the MASH network. I'm going to go back to MASH and say Create MASH Network and again, that's going to be a MASH, Apply and Close. Now we just go back through and do the same thing we did for the strands. We go to the MASH menu, we’ll go to Distribute, turn that down to one because we just actually have one so now we don't have to deal with ID as if we’re looking in the Repro node here, the tab, there's only one option, so we’re going to have to add an ID node for this one. Now we can just go straight into the Replicator, add that, hop over there, clicking these little arrows, get to the ReproMesh, getting to the Replicator tab, and now we can increase these. Turn off the Z-direction and just go offset position ten, same thing, remember 10 up. That works and it looks like it doesn't match the number we did on the and so we can just go back in here, look the Replicator and there is 30 and match this to 30. Cool. Now that we have that done, we can use the twist and we can make sure that everything's working again. We'll do a 360 and we can see we have this massive long strand. I was going to turn the grid off and this huge long strand and we got all of it for free and the fact that we didn't have to make every single loop. We duplicated it in a way and we created this rig in a way. Then the next few lessons, when we're creating the base pairs, the base pairs on these LandingPads, we can control their rotation and their randomization. I'll see you the next lesson where we'll continue to do that. Thanks.
28. DNA 9/14 - MASH Base Pairs: In this lesson, let's create the base pairs and a MASH network for them to populate the landing pads. We'll go to the Poly Modeling menu here and we'll create a cylinder. I'll rotate this in 90 degrees. I'm going to turn the grid back on just for now. Hit F to zoom in on it. Get to the front here. I'll rotate this down 90 degrees. Go to the polyCylinder tab here and create a radius of 0.25. We can see the distance between these two points of the strands is one unit here, one unit there. It's less than three units. I'm going to make each side of the base pair 1.5. We can change that a little bit later, but just to have a good starting point. The height will be 1.5. Then I'm going to hold down d and v and snap the pivot of the end. Then we'll hold down x and get that to the center. I'm going to duplicate this, rotate it around. Now we have base pairs. I'm going to duplicate this cause we need four. We need each one for the adenine, cytosine, guanine, and the other one, I can't remember right now but we need four. Let's create shaders for these because we're going to combine the meshes and we need the shaders before we combine the meshes. It's just a little easier. I'm going to go down to Assign New Material by right-clicking on the cylinder. Now I'll go to Arnold, Shader. Giving this a color that we used earlier, it's a blue. Then I'm going to do the same thing here, assign new shader. Give this a red. Then I'm going to give this one a green, and the last one yellow. Now all four of these are round on top of each other, so you can't see them but we're going to combine the meshes of each pairs. I'm going to go to the Modeling menu, and we'll go to Mesh Combine. Then we'll delete the History on it. I'll do the same thing for these two pairs, Mesh, Combine, Delete by Type. We can add names to this. Now we can create a MASH network of the base pairs. I'll go to Animation, MASH. I want to make sure this is MASH, apply and close. Again, we need to adjust the default settings here, of course. Lets go to the Distribute node, and we're going to choose a Mesh. For that mesh, we need the ReproMesh of the LandingPads. That's why we created all of this stuff first, because we need this node to map in as a place to put these base pairs. We'll go to the base pairs MASH node, and under the Distribute area under Mesh, we're going to input this LandingPad ReproMesh into the input Mesh. I'm not going to left-click it, because then it would change all of the attributes over here to that geometry. I'm just going to hover over it and middle mouse click, and then drag and drop it. Now you can see somewhere down there are some base pairs, and it's actually the same color. Let's just go to the Method, and we're going to choose the Face Center. The reason why we made these LandingPads one subdivision is because we wanted the center to be exactly in the center of each rung, and why we were so careful on getting the edges to be the same on each sides. Now that work is paying off. Cool. Let's flood the mesh will check this box and it's going to make a base pair for every single landing pad. You already see this is starting to work a little bit. Problem is it's all the same base pair right now. If you see in the ReproMesh we have two IDs, we have a zero and one. So we need to tell mash that there are more than one ID. We needed to add an ID node. As soon as we do that, you can see every other base pair is a node of the other one. Under ID, we can change the ID type to random. Now check this out. This is the whole buildup of being able to control randomization of an entire huge long chain. If we look down this chain, you can see there's no patterns here. Look at all this. There's no repeating pattern. This is why we did what we did in this long roundabout way, is probably what it seems like, but it's paying off now at this stage. We don't like how this is set up. Maybe we're going to change the orientation here in a bit. But just to show you the power of this, right now, all of these are the same base pair here. We can actually just change the random seed. Check this out, all of this stuff. Now we can just get, move it to whatever randomization that we want. But the biggest thing is the fact that there's no pattern here all the way down the DNA strand, which is accurate to DNA. So this is all about trying to be as accurate as possible and representing medical animations as accurate as possible. Cool. We're going to leave the ID count at two because we only have two base pairs, like all DNA does. Now we need to get this orientation stuff to work. Let's go back to the mesh menu set here. Let's add an orange node. It's over here. Left-click add orient. Boom, sorry, I get excited. This stuff just works because you spend so much time and sometimes it doesn't work that when it does work, you just really enjoy it. Check this out. We have this huge long DNA strand and there's no patterns to it. The only pattern that we still need to get rid of is the fact that in these rotations, it's always blue on this side, and then it's always red on the left side. Same thing on the green, yellow. We need to figure out a way to randomize the rotations. I'm going to do that in the next lesson. I'll see you there. Thanks.
29. DNA 10/14 - Randomizing Base Pairs: In this lesson, we're going to further refine the base pairs. Let's go into the mash menu on the base pairs and let's choose an offset node. This is how we're going to change and randomize the rotation of the base pairs. I'm going to add an offset node, and nothing happens because you can see on these values they are all zeroed. If we hold down command and middle mouse drag in here, we can rotate this around. I'm just going to turn this to 180. Everything is now opposite to what it was. If we turn the strength of this node on and off, you can see it just switches back and forth, back and forth. We still have the same problem, in that the colors are all on the same side as we go around. All the greens are always on the right. How we're going to fix this is by creating a texture that we can control where things are rotated, and we're going to do that by mapping in a ramp. Let's go to that and we're going to go to the strength area down here and you can see there's actually a strength map. If we dropped that down, it's doing the same thing as the zero to one. Let's use that to our advantage. Let's click the checker box here. I'm going to add a texture node, the texture node we're going to add is a ramp. We could choose some other fractal texture, but it's going to give us some gray values, and we just want in black and white. So let's choose ramp. Now you can see that there is a pattern, and we're going to have to fix this pattern here in a minute. But the fact that all down the strand, this is affecting everything the same way because it is going down in the y axis. Let's go back here. You can see map projection axis is y, which is straight down. That makes sense why everything going straight down is the same. Let's choose something like x. Cool. Now if we go back into the gradient of this, you can see slowly from black to white. From the very end down there to the tip, we can change the tip, it is rotating 180 degrees or not, depending on this axis. How do we use this to our advantage? We need to change this ramp. Let's go from Interpolation type from linear to none. Now, we can see it is all black and all white. We can drag the white tab down here and you can see this is the bottom. This is the bottom that we're looking at. Soon as I start dragging this, it's going to affect these bottom ones. It's going to flip all the bottom ones. Check that. It's just going to go straight up the top. How we use this to our advantage, we can click this little button over here and it's going to make a little bigger version we're going to take off. We can take this, drag it down, and click up here on the top or on the color area, excuse me, and now use these to add as much randomization as we want and can control. Let's bring those in and just start playing around with this. I'm going to go back down here because this is where we can see the most examples of this happening. We can flip this back, then we can add another black one. We can see where this one stops and the next one begins. Depending on how specific you want to get and how long your strand is, I could change an individual flip rotation here if I wanted to. I could make that happen depending on how big this strand is and how particular I need to be on the separation of the black and the white stripes here. Look at this. I'm controlling an individual strand, the second one here, just by putting this black one here at this end. Let me just drag this out and so we get a little better view. I can control this bottom one. Look at that. That's how much control I have over randomization of the rotation. It's really, however much work you want to put into this of creating new areas where things are flip flopping all over the place, and it's a pretty powerful tool. It's pretty exciting to have that level of control over this. This is the reason why this is an advanced tutorials because it takes a lot more work to make this stuff, but at the end of the day, you also have a ton more control. If you get a client who's asking for a very specific thing to happen, you know how to build that control into these projects now and how to start thinking about this stuff. I'm going to focus a little more on the bottom part here because that's where we can see the most. I will see you here in the next lesson. Thanks for watching.
30. DNA 11/14 - Animating DNA: In this lesson, we'll create a little bit of animation so we can get closer to creating a render. I'm not going into detail on this because animations its own subject and we could talk forever about that, and this lessons already pretty long anyways. So I'm just going to do something fairly simple and create a twist to former on what we already have. If you remember, the landing pads are what is driving the base pairs. So we want to add a twist of former actually to the landing pads and leave the base pairs out of it. So we're going select the strands and landing pads and go to the Form, Non-linear, just tear this off and choose Twist, now, you'll have to remember too that this is the entire strand, so we're not just dealing with 360 degrees now, we're dealing with much more. So we need to be aware of how that is affecting it. If we go in pretty far in let's say 1,100, we can start to straighten this whole thing out, and we can animate this value. So let's leave this around here maybe let's start with a little bit, and we will set a key-frame let's say, clicking and say Set Key, and then go to frame 300 down here to give us a little more room, and let's bring this maybe to 4,000 something like that. I mean, even though we already created all the stuff we can adjust the density we had almost when we created it but all of this stuff is adjustable, we can change things later and there's also one little thing I do want to change. Let's take a look at this animation real quick, I'm going to select this node so we see the keyframes down here on the timeline, and I'm going to make sure right-clicking here and going down to playback speed that we're playing in real time and when I hit Alt V, just to see how quickly this is happening, and I like that. So far that's good. We have a little bit animation happening, one thing that I think could be improved is the fact that there's a straight line down all of these, and I think we could adjust that a little bit in the original base pair models. Let's unhide those, we'll go to the base pairs, let's just do one at a time. Shift H to unhide it, Alt F to frame it up, and then I'm just going to create a lattice and essentially like a cage around the mesh. I'm going to go to the channel box and increase the divisions, I believe it's going to be S, and I'm going to right-click on the lattice somewhere and go to last point. Then I'm going to select the middle lattice points might be to create a self-selection and hold down B-2 and middle mouse, drag it out, and I want to hit W and drag this point to the right or the left, whichever you would like. Then just so that this isn't lopsided I don't want to re-center these points. You can see all this updating in real time here as well. You can see these all now have this type of a little band here, the only disadvantage of this as if for some reason you are rotations aren't working correctly, that these aren't playing nicely. So just be aware you might show your hand if the rotations aren't working, if you do something like this, because down here, this doesn't look totally accurate. They should be facing more here, but we're not going to get into the weeds on some of this stuff, but just to show you the possibilities, let's get this centered up and then let's hide that and then go back to the other one, and let's just hide this lattice now. You can start grouping things and be a little more organized than what I'm doing, but that's just up to you if you'd do that. When I create another lattice on this piece and go to the lattice point and do the same thing. So we have that, and I'm just going to drag this one to the right. I'm going to re-center this. One little change I'm going to make to this is taking the lattice and rotating it around. Let's do like 90 degrees. Now, we have two different types of divisions to the base pairs. I think that gives it a little extra visual interest, especially in our animation when it's straight on, it breaks up the colors a little bit, so it's not just all straight down the center, completely linear like that. I'm going to hide all of that, and I'm going to hide the grid, and might be better if we go down this way. Maybe we can even go through the DNA. One thing about this is, I believe DNA goes clockwise and this is going clockwise. We might want to switch this up and animate the other direction. If we're going through it this way, we might want to switch that up or we could do it going this way and that would actually probably be accurate. So let's just do that instead of having to change all of our animation. It's like animate the camera through the tunnel and as it's happening, let's see. Yeah, it's pretty trippy and then we can maybe pull the camera out away from the DNA and see the whole thing about that. Let's do something like that. I'm going to go into the panels and say create a new camera, and now you can see we have person one I'm going to rename this render cam and I'm going to go over to the attribute of it and just zero everything out. For the channel boxes, a little easier to select them all at the same time, and I'm going to go out in a perspective view just to focus on the camera real quick and make sure it is pointed in the right direction. Let's point it up 90 degrees, now let's look through the camera again. Now we know we can continue forward and go right down the center of all this stuff. Let's go to frame one, and let's set a keyframe on Translate and Rotate. Let's see how far back we can start back in here somewhere, and let's travel forward and let's go to maybe 140 and go through a little bit of the tunnel and keyframe that. Then we'll go out to the end here and continue forward, but also zooming out. We tried to keep the same trajectory and maybe bring the camera along sid, so it's not totally centered up and then rotate it back. It's a little difficult to get the pivot point going the way, especially when you're looking straight up, they can get a little wonky, so you might need to go out and animate this with the perspective camera. We see we have the render cam here. We can actually go to Panels, Lay Outs, Two Panes Side-by-Side, and hold down the space bar over here and go to perspective mode. Now we can see this cameras over here, and we can get a little better control. The other thing we can do, is turn on this film gate so we can see what actually is this camera going to be looking at. You want a diagonal here maybe. Let's see what we have. We go through the DNA, it's spinning. We should be getting out of the DNA. That's pretty cool. I mean, that's pretty cool to be honest, I think that's looking pretty good. I think this might be a little sharp, this transition. Let's see. Maybe not. I think the other thing we can do, is continue this twist handle here. I'm going to go into that, see where the last frame is, and then just continue that motion towards the end. If I was the middle mouse dragged now, it's going to go to its max default for this so watch that middle mouse drag because the A59, so we don't want to do that. We can actually get the slider in here and it'll go a lot further. Let us go somewhere in there. The other thing that we can do, is open up the animation graph editor, and we can visualize the curve here to see if we're taking it too far. It looks like it's in the neighborhood, but we want it to slow down for sure towards the end. Let's take a closer look at the end. I think that works. Let's play it. I'm going to say we are going through the tunnel of the DNA, we are going outside of it, and we can see the whole thing unfolding here. That's pretty cool. I think this is working pretty well and we see all the randomization happening here. I think the one thing I'm going to improve probably in between the classes here, is this randomization. To get along randomization here, of course, we would go back into the mash base pairs. What the heck, let's just do it now, this is already a hell long tutorial. Let's go into the offset of the rotation. Remember, we did that 180 here, and we did this with that strength map of the ramp. Let's pop that out and let's find where these are rotating from. I'm just dragging one color to see if I can see something rotate, I think I see something down there rotating. Let's see, if we don't get closer. There's something down there moving. I think we're too far. Here we go, we're getting closer, closer. There we are. I'm going to drag this out and then we're down in this half somewhere. Now we can just adjust exactly to what we want. This is the beauty of putting on all that hard work earlier in the tutorial so that now it pays off. You can have a ton of control over this stuff. I'll see you in a few seconds because I'm going to take my time with this. Thanks. I think I done enough randomization now in the base pairs, and as this rotates out, we see this. The next thing I want to do is actually create a new mash network of a duplicate geometry of what we're already looking at. I'm going to select the two repro mashes of the main pieces here. I'm going to duplicate that. I'm going to group that so I know that's it's copy, and I'm going to drag this out to the side and just make a new mash network from this. I'll go to animation mash. Actually before I even do that, we really need to apply new shader to the strands because this is still the default stuff. Let's go in here and apply new shaders that'll follow the copy we're about to make. I'll right-click assign new shader, will go to the AI standard surface. For now, that's fine. We'll just call this the strands, and now let's copy this stuff so that the shaders will follow along with the copy. I'll duplicate this and then I'm actually going to just mash combine the stuff too, so I don't have to mess with the IDs and mash. Now I can take this and create a new mash network under animation, mash, create mesh network. Then one thing I'm going to change, is make sure this is an instancer since I'm not going to actually deform any of this stuff anymore, for these are basically going to be the background mesh networks. We've got this and for distribute, I might just do something like a grid and crank up the grid size pretty high. Something much higher than this, maybe 500. I think that works pretty well. Then the grid size, we need a bunch more of these. Maybe not in the Y, put it this way. Then I'm going to take everything and move it down. I'm going to go to offset, add an offset and take the position, and let's go way back in the background here so that we're far away from this stuff. It might not hurt to go back and add maybe another grid level here in the Y, so we get a little even further in space. Cool. Now we have a more dense background. Let's go to the mash menu here and create a random node here. I just want to increase the random rotations here. I'm going to spin this all the way around maybe. It's pivoting from the bottom. I'm going to keep that in mind when we're changing these rotations a little bit and then I'm going to create a signal node by going to the mash menu. The signal is essentially a way to animate something for free here. If we hit Play from the first section here, we can see all of these DNA strands moving and they're shaking a little bit. It gives us a good sense of the background and where we are in space. I might just bring some of these closer around this DNA structure because they're all up here. I'm going to create a falloff node for the offset here, because this is where we pushed everything in Y. I'm going to create a falloff object will go down to fall off object, right-click ''Create.'' So everything will pop back to where it was. Let's scale up the falloff node, so it just protects the surroundings of the main hero piece that we're animating through because we don't want any of the pieces to come into contact with that one or be so close to it that it interferes with the animation we're doing. I'm just going to scale up the falloff of this so everything stays away from it. I might throw one more iteration in the Y on the distribute, now that we've gotten this far. Then in the distance, which is going to make this much further now because these are very long in the y-axis and very small in the other z and x-axis. Now we've protected our hero piece with the falloff objects. We've got a ton of other DNA strands and they're all shaking around in the background. The one thing we need to do is adjust that animation because they're shaking a little too fast. Let's go back into the signal node and get to it here, and let's just crank down the noise scale, and let's increase, let's add some rotation here so that these are rotating as much as they're moving positions and let's hit ''Play.'' This looks pretty cool. I think the DNA moving around looks natural. In this lesson, we animated the DNA, we animated to camera, and then created a whole new mash network and created animation for the background. In the next lesson, we're going to start to deal with the materials, light the scene and get it rendering. Thanks for watching.
31. DNA 12/14 - Lighting And Rendering: In this lesson, we're going to take a closer look at the materials and start rendering. Let's focus in on the render cam by hitting spacebar in that view, and let's open up the Arnold menu here, and turn on a skydome light to start with, and let's turn on the Arnold render preview to see the basic idea that we have started with. I think that looks pretty good, I think the background could use some work, and so we can turn off the whiteness of the background camera. We could also change the color of it, but it's going to affect the lighting. We want to go into the visibility options and crank down the camera. It all depends on what look you're going for, and these types of projects is it very clean and sanitary, or is it photo real, and there should be a lot of texture. In this case, we're already doing a stylized camera move, and I think it's worth trying to keep it stylized version. Maya crashed for two times now and I think what the issue is it's trying to scrub in the timeline and have the render preview update. So I think we need to pick a frame and go based off of that. So I'm going to select this, and let's go into the render view one more time, and hopefully it won't crash because I'm not going to scrub the timeline. I think this looks like a pretty cool still frame to go based off of, and the one thing I'm seeing is these ridges on the strands, which you may or may not want. One way we can try to address that is by turning on the catclark smoothing option. So we can select on the Mash and go down to Arnold in the attribute editor, and scroll down to subdivision, and turn on catclark, and maybe increase that to two, and then turn back on the Arnold render preview, and see what that gets us. I'm just going to save quickly because Maya keeps crashing. That got rid of that rough edge we were having just a minute ago, so that's a good direction. I want to select on the strands and go to their surface, and maybe drop the white, not to be completely white would probably be best and just for fun, let's go to black, see what that is. The specular is way up. It's all the way at one, so we're getting a ton of reflection. If we just drop the specular down, maybe even increase the roughness, make this a little more smooth at least. Let me drop the weight down a little bit more, and then I think I'll do like the white a little bit now that we have the specular figured out. I think just having a soft, not super shiny shade is going to be the way to go. Maybe drop down the brightness just a little bit more so it's not so overwhelming, and I don't really mind the specular highlights on the base pairs because it gives this nice little rim, and separates each color from the other, so I'm of digging that and I might just leave that there. The other things we're going to deal with are the AOV passes because I think this will greatly benefit from faking fog with a Z depth pass which we've done, and also the ambient occlusion pass to help lock in where these base pairs are touching the strands. I think the ambient occlusion pass will help ground them in those strands. Let's go out here, and we'll open up the render settings, so we can get to the AOVs, and I'm going to go to the built-in options, and go to Z, and add that to the active groups. Then I'm going to add a custom one, and I'm going to call that AO for ambient occlusion, hit "Create" and go to select the AOV node, and for this AOV node we have a default shader option. I'm going to map in the Arnold ambient occlusion and maybe pump up the samples a little bit. Now that we have these set, we can actually preview these as well in the Arnold render preview. I'm going to save one more time again, always just being careful, now that this has crashed a couple times. In Arnold render preview, we can go up here to the top left, and now we have these two options. We can see that there indeed is an improvement on what we're seeing here, grounding these edges and I'm not too concerned with the background stuff. Let's go to the Z pass, of course it's totally white, but we're going export as EXRs, which means that's 32-bit. We can go over here to the common tab and see image format is EXR, and that is a 32-bit format so we have a huge latitude to adjust this in compositing. Let's just change the exposure and the view here and the one thing I do want to maybe adjust is how far away these other pieces are because I want a very shallow depth of field, so right in here it should be falling off and I don't want to have to adjust that and have these be too far away, so I want to maybe bring these a little closer. We can easily do that in the mash node for the background stuff, and let's just hit spacebar here to get back to the two-panel view, and select the falloff object here, and maybe just bring this down a little bit so that things get a little closer. Let's bring this all the way off and just see what happens here. There are some that will crash through if we let it, so let's maybe reduce the size this way. Let's make it really skinny and narrow so that the neighbors on either side can come in, but that thing straight down the middle won't. Let's see where the camera is, I'm going to select the camera here so it's down here somewhere, and I think the issue is is they're all pointing the same direction. I want to go to the random node of this mash and just increase the rotations here. The main issue we're going to be struggling with is the fact that the pivot point is not in an ideal position for this. Then I think we just need more variability in the rotations here. Let's just scrub through and make sure nothing is intersecting our main DNA strand. It looks like we're getting a little bit of maybe collisions here, so I might just go to the random seed to adjust that and see if we can get around that. So I like this random seed unless this one, that one looks like it's going through it. We could just dial down the signal stuff so everything's not knocking into each other as much to. Let's do that, let's dial back the signal because I like that random version. Drop-down rotation. It's hard to tell which one is going to affect it and the best way, so you just have to play with this stuff and scrub through and check it. It's unfortunate this one that random pieces knocking through. Let's try another random seed. I just want to make sure we get background DNA strands close enough to give the illusion of a lot going on in the scene. I think this is the winner. Cool. Make sure that's not getting too close. The other thing I want to fix as all these red pieces here. So the fun of this is you do have control over it, but it's just a little bit more work of course but I think it's well worth it. So this is controlled by the base pairs. If we remember and it's the offset ramp, which seem to get that out here so we can actually see it and I'm just going to save one more time and drag this out. I make a black one and just drag it through and see where it updates. So far, nothing is moving but I'm going to fix this and I will see you in a second. Now let me have that sorted out a little bit more. Let's scrub through and just double-check this is okay. Then we'll take a render preview from this section of the animation. Of course, we remember that we have the exposure way down here. Then we'll go to the Z, cutting that down. I think that's looking pretty good and we have the Z pass, we can see the background stuff's getting close enough that that'll is somewhat be in focus sometimes. I think this is a pretty good start. Let's check the Render Settings here and give ourselves a name. Choose DNA advanced and we want number named outnumber dot extension force. We're going to frame 300 and scroll down here to the render cam and let's do 720. I think everything else is okay. Let me just double-check one last time. Now we don't need maybe a few more frames. What the heck? Let's give it like maybe a little more than a second to enjoy this animation at the end after everything settles. I think I just want to extend this. It's crashing again. I'll see you in a second. So it might just crash two more times. One thing I'm going to try to change to hopefully help that out is go to the Mash editor. I just want to turn off all the background stuff. So I'm going to go over here and just click that. So get rid of all those instances maybe that'll help things out a little bit. So what I was doing was just extending the shot out a little bit and setting keyframe on the camera. Let's go over here and make sure I'm on the camera and then I'm going to middle mouse drag from somewhere over here and just copy that motion here. So it basically creates an ease at the very end here. So as we play that and of course apply that in real time. If I right-click here and choose playback speed real time. I think that's doesn't hurt especially if the renders aren't taking super long. I'm going to maybe do the same idea with the with the twist handle we have here and go into the Attributes editor, go to twist, select it and let's see. I just go into the graph editor real quick and just drag this over. I'm shift middle mouse dragging it and I think that'll help maintain a little motion as everything's come to a stop. Cool. So let's double-check the Render Settings since everything's been crashing. I'm going to save this again and we just set all this stuff one more time and I'll see you in a second. So now that's working, I'm going to turn back on the mash background stuff because I want to make sure that renders, I'm going to go the mash editor and I'll turn that stuff back on. I think this is probably the issue. I mean, it is a pretty complicated scene and so there's a reason that this is probably crashing is that. So let's go over to the rendering tab. I'll go to render, render sequence, render cam is checked. I'll put file. Again I'd just like to make sure that's never hurts to do that and then we are ready to render. I will see you in the next lesson where we will composite this in after-effects and I'll see you there. Thanks.
32. DNA 13/14 - Compositing In AE: Hi and welcome to the final lesson where we are going to composite our rendered images from Maya inside of After Effects. Let's open up After Effects and we can start to import the footage. We are to Import, right clicking in the project folder here. Go to, "File", navigate to where we have saved the images which should be in the project folder that we set inside of Maya and go into images and now you can see we have the three passes that we created. I'll start with the beauty pass, and I will convert this to 24 frames a second by right-clicking and going to, "Interpret Footage, Main, 24". Then I'm going to go ahead and bring in the other two, and I'll see you in a second. Now we have all the layers imported, we can take the beauty layer and drag it to a new composition with the button here. Now, we can see we have all the DNA and we can go ahead and drag in the ambient inclusion pass, and we can drag in the Zth pass and we should keep this on the bottom for now and hide it. I'm going to throw in a solid and for right now, let's make it some type of desaturated red color and just so we have something to compare this against. Let's take the ambient occlusion and do as we've done in the other series and turn this to a blend mode of multiply. If you can't get to the Blend Modes, hit the "Toggle Switches" down here and you get to the "Blend Modes". We're going to multiply. Now, we can turn on and off this effect and we can see it does help ground. Of course, like every time interpreting the main footage here on these other layers, I swear it's the being of my existence. Just so you know too, you can set the default in After Effects, but I'm on a roll and I hate to end things and then go preferences and then find a lot of stuff. But it is an option you can search that and if that's bugging you enough, you can change that to always interpret as 24. Let's get to a frame where you can see a little more that the ambient inclusion is working pretty well. It just helps ground everything into the strands and all the base pairs, distance between them you can see, it's not a shadowed effect, it's the fact that not as many light rays can get there bouncing around. Now that we have the ambient inclusion on, let's figure out this depth pass. If you've followed the other lessons, I'm just going to solve this here, mark this little button. I showed you on the lessons, you know that this is all white, there is information here. We just need to access it by using exposure adjustment and then precomposing this layer because After Effects won't see that exposure just went on this layer when we're trying to use it as a blur option. I'm just going to right-click and the, "Effects Controls" for this layer and go down to, "Color Correction, Exposure". I'm just going to drop the Exposure down. Oh, sorry, I'm on the offset I'm going to hit the "Exposure". What I'm looking to get is basically an entire gradient from black to white, so we are trying to get the most information out of this pass. We want to be able to see everything that's in there, but just barely cutting off maybe the very last ones into whiteness. Here you can see, I'll zoom in, what I'm looking for are these ones in the very back to start to go completely white. That way we know, this is the last point of it having any data because this will be basically one on a scale, because white to black, like a 0-1 or 1-0, so it's remapping all of these things in that way. If we clip it, now all this as one. Whereas if we brought it back, now this is 0.98, 0.99, 0.95 whatever and then one over here. I just want to make sure that the ends are actually clipped because I definitely want all that stuff to be totally blurred out later. The other thing we can do is use this as a fog layer. We did this in a previous lesson for the chromosomes and we're just going to repeat that here. If you've seen that in the chromosome, you can reference that or you can just watch this again as a reminder for how to do that. I'm going to drag this down so we can see everything a little better. Now we have this DNA pass, I'm just going to drag this to the top so we can see what's happening. We have the background pass here that we created this solid, just a solid color. I can create a track matte based on the luminance. Luminance meaning black to white, and the track matte will clip the areas out that are black and allow the red to come through on areas that are white. If we choose a Luma Matte, you'll see we get this type of an effect. That's pretty cool. I think the color we've chosen maybe isn't the best, so we can go into the, "Solid" and right-click and go to, "Generate, Fill". Now we have control over the color and we can just play around with this and find something that works. In the chromosome example we did a light blue, I want to see if we can get away with something more red. I think the issue is maybe the brightness and saturation. I'm going to toggle over to those sections and see if we can warm the surround. You can also click and drag here to drop the brightness of things. I think as we lower the brightest, we want to bring maybe the saturation back a little bit. Cool. One thing I'm noticing as we're zoomed in on this image is we're not getting a ton of anti-aliasing happening here. We can get around that a little bit by going back into interpret footage, you can see how pixelated all this stuff is in the background. Let's go back to, "Project", and we're I right-click on the "DNA Beauty layer" and go to "Interpret Footage" again. We can see that the alpha channel is premultiplied with a black color. Let's try these other options that we have go straight maybe Ignore. When we click "Ignore", you can see all of this odd fringing and the not anti-elitist edge gets smoothed. We want to leave that on to Ignore. Now we have the smooth edge and we may want to check in on our other layers except for the Z pass, we don't want to do that with a Z pass because we do want a sharp edge on that. This is looking pretty good, I think we can still tweak the color that we are choosing here. Before I do that, let's just go ahead and make a vignette. I'm going to right-click and say, "New Adjustment Layer", which is just off the screen. In the Adjustment Layer, I'm going to create a color correction, go to, "Curves" and drag this down and then rename this BG or vignette. Go to the Ellipse Tool here, and then double-click it, and then go to the Mask and Subtract and feather it out. This gives us hopefully a more microscopic feeling in effect to the color correction and help us when we're trying to decide the color for the background, maybe this is a pretty decent color after we apply the vignette. We have the background in, now let's try to do the Z depth pass because everything is in focus as it stands right now and you can see all the stuff in the background is in focus, even though it's fading off into the distance with the faking the Z depth player. Let's bring in another adjustment layer, we'll go to "New", again, that's just off the screen, I'll just drag this up so you can see it, I'm right-clicking, going to New and Adjustment Layer is down here. I'm going to call this zBlur. I talked about this in a previous tutorial, but unfortunately the Camera Lens Blur option in After Effects is not terrific. There's another plugin called Frischluft. You can Google this and it's a little bit expensive, unless you have the money to burn, I might not buy this because it also has its own issues. Let's start with what's built in After Effects, we'll go now to the Camera Lens Blur option. You can see right away we have a type of a lens blur effect, but it's happening in everything and we're missing these edge pixels. We need to turn on repeat edge pixels and go to the blur map layer. It's trying to find a layer to blur from. We need to precompose this Z pass that we used for the background here. Let's duplicate that layer, Command D. Turn it on, you can see it's getting blurred here because it's underneath zBlur pass. Let's bring in just above that and we can see that the effects are working for the exposure. All that's fine, so now need to decompose it so that the Camera Lens Blur option will recognize the exposure adjustment that we made. We'll do that, Comp 1, that's fine. Now we have it as its own precomp. We can turn the visibility off and select the the zBlur layer. Just real quick, also, if you ever get into this type of a thing it can freak people out if you're not familiar with After Effects that much. I basically have accidentally double-clicked on this layer, so it opens it up in a new tab up here. But just to get back to the composition we're working on, you can just switch back to this tab. Cool. Let's get to where we were and let's look at the zBlur options here back in the blur map, the layer is, None. Now we want to choose this precomped Z depth layer. Suppose we do that, you can see that it is actually working and if we crank up the blur radius, you can see the issues that After Effects has. You get this fringing around the edges that unfortunately is an issue in After Effects. If you were to use Nuke, this doesn't happen. It's with the exact same layers if you brought all these layers in Nuke and use the zBlur pass in Nuke which has its own compositing software if you're not familiar with it by the Foundry. It's used in all of the major movies, everyone uses Nuke. No one uses After Effects in movies for the most part at the major studios. But unfortunately, it's much more expensive than After Effects and not so this is pretty frustrating problem inside of After Effects, let's try to fix this. We're going to lock this screen here and I'm going to double-click this one, to open this in a new tab, I'm going to drag it over and let go. Now we have two windows and go into this composition so we can see these side-by-side. I am going to do a few more adjustments on this z depth pass.
33. DNA 14/14 - Depth Pass In AE: Sorry for this quick interruption. I had to take a break and check a few things in After Effects. Now I'm back and I want to discuss a little hack that I found to get rid of this odd edge that After Effects creates with the camera lens blur and depth pass. You can see it's wonky. I wanted to show you what this looks like in Nuke, which is another package. You can see in Nuke where there's absolutely no fledge on this edge. Nuke does this affect way, way better, and I just want to show you the screen real quick so you can see how, the settings that I've created just in case, a chance you have Nuke or want to use Nuke, these are the settings that I set up, and to shuffle copy the Z pass into the Z channel here so that the Z blur note down here would pick it up, and you have to get the Z blur node by going to all plug-ins, hit update, and then you get all these other options down here. Anyway, I just wanted to give you that quick other option here in Nuke. Let's jump back in After Effects and attack this with a hack. So if we go to edge, type it in to effects and presets and go to edge finder and drag and drop this in the black and white image here on the right, we're in this layer. Remember we locked in this one so we can keep them both up. We have the edge finder on, but we went to effect not the Alpha channel. We want to effect either luma, brightness, the same thing here. Now we turn it on, you can see that our edge has been feathered here. It's been blurred out. We got rid of that dark line. If I turn this on and off, you can see it come back, and it's essentially bringing in this outer edge and blurring it inside. So that gets us pretty far actually. I mean that from a distance we're on zooming in on this thing, it looks pretty fine. This the hack to get this done, of course you can see where it's not accurate here on these edges, and it blurs out the edges of this. But it's better than having a black line all the way around. You have to give and take on that. We have this hack done, which is unfortunate because it's so nice when you see this in Nuke and just how it works. Now we can unlock this and we can close this side, and go back to the main copier and fit this to the window. One last thing I want to do is just make sure I'm certain about this color and the background. We can go to hue and saturation and go to colorize, and just shift the colors around and just see if something else just doesn't stand out at us. Instead of the red. For some reason, I always just, I'm attracted to the blue backgrounds in these cases. It just seems a little more calming. Let's crank up the saturation and see if that does anything. I think for some reason the red just doesn't work for me because I think red, it's not, I'm actually seeing blood cells on such a microscopic level. I think another color, something in here could work. Dropping the saturation so it's not as strong, and we drop in brightness down. Let's see, yeah, let's drop it down just a touch. Bringing back the saturation. So having this effects works pretty well, and let's get a frame and see if it's what we're expecting, cool. It's looking pretty good. Let's render this out. I'll hit Command Shift question mark, or you can go to composition, add to render queue, and this tab is selected over here, it's an option. Let me scroll down here and choose the format, and that's the codec for the image, and I'm going to turn audio because this doesn't have any audio, and I can choose where to save it. It's saved and render this out. I just want to say a big thank you for watching these or some of these lessons. I hope you learned a lot, and that you will join me and my other courses. Thanks for watching. Bye.
34. Blood Flow Overview: Welcome to the longest series in this course which is about the blood flow in creating red blood cells. I wanted to just take a second to talk about it because it is such a disproportionate amount of this entire course. I wanted to give you a brief overview of what we'll be doing. First, we're going to model cells. Then we're going to create a particle system to control these cells with what my calls in particles. Then we're going to create fields to control the particle system, how they move and go along a path like a vein. Then we're going to just attributes to mimic real motion like the cells rotating, colliding with each other and we're going to have it where the center of the vein has faster motion. We're mimicking the fact that blood along the edge of the vein is going to have greater friction because it's closer to the vein surface. The center motion of the red blood cells, is going to be faster. We can control that and then we're also going to animate the pumping action of the heart and the pulse because when blood is flowing, it's actually pumping with the heart motion. That's not just a continuous stream, so we need to animate that and then we'll create some materials and lighting for the renders. Then finally, there's going to be an entire bonus series where we're going to take the blood cells and put them into a heart. We're going to go over a lot more about getting very refined control over this particle system we're going to make red blood cells. There are some really interesting stuff. We're going to make a few expressions that are very powerful to create white blood cells and control exactly how many white blood cells are in the stream at any given time and animate that. There's some really cool stuff in here and I hope you enjoyed. Thanks.
35. BF 1/16 - Modeling Red Blood Cell: Okay, I'm in a new scene in Maya and I'm going to first go to create a cylinder because we're going to make a red blood cell. I got to that from up here on the top left. You can also go to create polygons cylinder. I'm going to zoom in here and poly cylinder, we'll go on the height. We'll reduce the height and then we will create one more subdivision in the height and quite a few more in the caps. Okay, so if we hit three, we can smooth the model and we can see it looks like a disk. It looks like a hockey puck. That means we need to create the red blood cell. It looks like a doughnut without the whole totally out of the center. That means we need to select the faces here. Let's go to the top view by holding down space-bar, clicking in Maya and dragging over to top view. We'll right-click over the model. I'm just going to change the background by holding Alt B or just tapping Alt B so we can see the gray a little better. I'm going to right-click on the model and go down to face. That way we can select on these individual faces. I'm going to click and drag these center ones. Now I'm going to go back to the perspective by holding down space-bar and clicking and dragging up to perspective view. I'm going to hit B to go into soft selection. Now we can see there's this radiating gradient from yellow to black which indicates the amount of influence the self-selection has. We can change that radius by holding down B and middle mouse drag in here. Let's isolate in the y and bring this in a little bit and see what we have. We can go to wire frame to make sure that the middle parts aren't touching but maybe just right before they start touching, okay? Then we can go to object mode by right clicking and dragging to object mode. Go back to smooth shaded by hitting five. Let's hit the edge of this by going up, right clicking and dragging up to edge, double-clicking that edge will select the whole edge loop. Then let's just make this go further out. Let's do the same thing for these edges but bring them in. It rounds out that edge a little bit. We can check it and smooth shade it, we can see we're getting more of an inner tube look. I think that the one thing I'd like to do, instead of having this red edge, just go straight down into the [inaudible] it'd be nice to have this inner tube shape here as well. I think we might need another edge loop to make that happen. But let's just try with what we have. I'm going to double-click these edges. If you've gotten out of edge mode, you can just right-click and go back to edge mode there. Let's see if we can scale these inward. Actually instead of going from the middle manipulator, which will bring it in to the center, the top down and bottom up, let's isolate this selection by holding down Control and clicking the axis that we want to not change. We don't want to change the y-axis. We don't want to go up and down with any of these. Let's hold down Control and see if we can't go out. Then let's go up with it a little bit. Let's bring the one just inside of this one. Let's do the same thing, but bring it out a little bit. Three to check this in smooth shaded. That's a pretty good start. I think we'll leave it there and move on to the next lesson. In this lesson, we learned how to model a cylinder into a red blood cell. Thanks for watching.
36. BF 2/16 - Creating A Particle System: Now that we have the red blood cell modeled, we need to figure out a way to create the blood and that is a bunch of these basically, how do we duplicate this a bunch of times and have it animate in a way that looks like blood. One way could be to make a bunch of these so we can hit command D and we can try to space these out and rotate them and then animate them along a path. But that's a lot of work and that's not what we are going to be doing. We're going to make a simulation and a simulation full of particles and, but instead of particles, we're going to have each particle be represented by one of these blood cells. First, let's make a particle system so we can see what we're working with. Before we do that, let's make sure our outliner is open so I can go to windows down to outliner, and we see all we have in our scene right now is this cylinder, and we can just call it red blood cell one, and that's all we haven't seen. Let's see what happens when we make a particle system. Let's go up to nparticles and go down to create an emitter. We can check the option box, but all the default settings are fine. We're going to create a new solver, it can be any type. We can change all of this stuff later, so I'm not concerned with any of that, so let's hit Create. We can see in the outline or now we have an emitter, which is just what it sounds like, it's a point in space that we can move around and change how fast things are emitted and the direction it's emitted in and all of those things and then we have the particles themselves that are being emitted. How big are the particles? How long do they live? If they hit a surface, is there are a lot of friction, what are the properties of the particle itself? Then we have the nucleus, which just says, what is the world that these particles live in? Is there gravity? How much is the gravity and that type of thing. Anytime we create a meter, it'll make these three things and that's really all we need to control the simulation. Let's go down and I'll pull up my a little bit so you can see this menu that I'm going to right-click, I right-click in the timeline, we get playback speed and we want to make sure it is on play every frame, one of these two, because as something simulated, it is trying to simulate every frame down here. If we're trying to play in real-time, you might skip frames and the simulation will start skipping frames and then the simulation will be very inaccurate and you won't know what you're doing. Now that we have a selected to play re-frame, let's hit play and see what happens. Everything is just emitted, it falls down because there's some default settings here. Gravity is turned on by default, the rate at which the particles are emitted is at a 100, so it's a 100 per second is at default. We can change all of that and then we're eventually going to replace each one of these little dots with the blood cells. Cool. Let's hit stop and we'll go back to one, and you should also know that the simulation has a start frame. If we try to play the simulation from over here, you can see nucleus evaluation, skipped frame change too large. It has to start from frame one. Well, you can see it picks up there, but, you know, it's not going to be as accurate as if we start on frame one and that's why you get this little arrow down here at the bottom. Let's go back to frame one anytime that we want to see the frame start. Just to be safe, what is done in production is they usually start at frame 1001 and what that allows them to do is when they're on a big movie or something, they can have a pre-roll essentially. They can say, get smoke going because essentially, let's say this red blood cell com fire and it's been on fire for days or something, you wouldn't just start to see the smoke billowing out, it would have a pre-roll, it would have been going. Starting on 1001, it gives people the option to go back and say, start a simulation on frame 800, and then we'll just pick up where the simulation is, in the process of going on frame with 1001, which is what we need in the shot. But for our purposes, that's not as important, but that's just what they do in the movies. A little fun fact of production. Now we have the system, we have the cell, let's add it to the emitter. Let's go to nparticle menu, and we'll go down to end sensor with the red blood cell selected and we're going to instance this model onto the particle system and we can open up the option box and we can see that it already knows that we have the red blood cell selected. If we didn't, we can go over here, select it and then say add selection and we'll be back in there. Everything else is fine, it's going to automatically add it to the particle over here, because the only particle system that we have in the whole scene, so it knows that's the only option. Let's create and I'm going to hide the original just because it's not doing anything anymore. I'm going to Control H. Actually, now that we've gone to a 1001, we need to update the nucleus as well and tell it, you know what, the start frame is, 1001. You can see that over here it says currentTime 1001, start frame is one. I want that to be, the start frame is 1001 now. Okay, so let's hit play now and we can see now I just have a bunch of red blood cells and that looks like it's working, so that's pretty cool. In this class, we learned how to create a particle system and how to add our model to that particle system, and the next classes we will refine this particle system to do exactly what we want it to do. Thanks for watching.
37. BF 3/16 - Creating The Vein Field: In the previous lesson, we got the particle system working with our blood cell model. Now that we have that done, let's create the vein path that we want the particles to follow through. To do that, we need to create a curve and I find it easiest to draw curves when I'm in the top view looking down. I'm going to hold down Spacebar, click and drag over at a top view. We can see we're looking down on the nucleus. I'm going to Zoom out a little bit because when we're creating this path, we want it to be long enough to hold all of the motion of the particles. If it's too short and there's only half distance for the red blood cells to move, it's going to be really boring and depending on how we want to do it later, we might actually and cap the vein, so if all the particles get to the end of the line over here and there's a big roadblock and they start getting backed up and they can back up into whatever view we're looking at, that doesn't give us enough room to see the actual motion that we want to see. We want to see pumping red blood cells and if they're running into a roadblock because the vein is too short, then they're going to start backing up and they're not going to be pumping, they're just going to get all stuck. So it's always better to go longer and we can always make the curve shorter if we want. So I'm going to zoom out here and I'm going to go up here to the curves tab and I'm going to click this little button here, which is the Epi Curve tool and I want to make sure from the Tools menu up here, I'm going to click in the top right to get the tools pop up that it's not on linear. I want this to be a curvy vein and I want to click on the cubic and that means it will allow us to click out linear points and it will interpolate between them after the third to be rounded. So we want to make sure we're on that, so we have a nice smooth curve of the vein. We also want to go in the direction that we want the particles to go in. So we can also double-check that from our Perspective View. Let's say we want to go left to right, so that means we want to start in negative x and we can see that down here by looking at the axis little thing that to left as negative x. So when you go negative x to positive x, let's go back to the tab menu, Spacebar, click and go to Top View and so we can see left over here is also negative x. So let's go left to right and we can just click out and just keep clicking and we can adjust this layer, so doesn't have to be perfect. So let's make sure it's long enough and let's hit Enter once we're done clicking. Let's go to a Perspective View now and we can see that it is a flat line and now we can right-click on the curve and drag to control vortex to then change those points that we had created. So we can pull them up and we can also hit B to do soft select and hold down B and drag to select its neighboring partners with a little bit of fall off and let's just get a nice little kind of roller coaster, you look to this and drag these out and I'm mainly going to change the up and down because we already got the side to side from the top view. So a perspective, it's nice to get an up and down motion so that the cells have some room to like hit the wall of the vein and then collide and it creates some nice motion in the cells. I'm clicking and dragging and of course, you can make this look, however, you want it to look. It's a little repetitive because it's just kind of zigzagging, but that's okay. We can refine this stuff later if we wanted to. This kind of history and construction is always in the scene. So unless we start deleting history on things, we can constantly update this and manipulate it. So we can always rebuild this curve to if we're running out of points to drag around, you can rebuild the curve by going to the Curve menu and let's see, that looks pretty good for now, just want to make sure these are rounded out enough and kind of zigzag. So there's some kind of, it's more interesting than a straight line at least. So I'm going to right-click and go to Object Mode and on this curve we want to say create a field around it because now that we've created this curve, if we hit Play, it's not really affecting anything articles still do what they were doing. So we need to create a field and a field is essentially something that has influence over particles. So the type of field that we want is a volume curve and that means there will be a volume, kind of imaginary volume created at a certain radius around this curve and it will follow the length of it and go all the way down it and that will influence the motion of the particles. So let's go to the Fields and Solvers with the curve selected, and go down to Volume Curve, with that selected, we see we have a new object in the outliner, the volume axis field, and it's already selected. So we can see there's that kind of imaginary volume that follows the curve around and I'm going to turn off the tool menu so we have more screen real estate there and I'm going to go to the Attribute Editor and we have the Volume Axis Field tab and it has all the information about the volume axis field. We can drop down these other menus as well. So let's look at the Volume Control. We want to increase the radius it's only a 0.5 now. If we look at how big the red blood cell is, it's almost the size of that radius. So let's make it, even though this slider only goes to one and we can type in a value here, so let's say like four. So we know it's definitely big enough to hold that red blood cell in. So we need to move Emitter into this volume field because this field is limited by this volume. Outside of this, these kind of dotted cylinders, this field has no influence, but inside it does. So we need to get the Emitter inside so we can click on the Emitter and if we hold down the C button on our keyboard and middle mouse drag, we can constrain the translation of the Emitter to the curve and we want to start a little ways into the vein so that we have some room to play as red blood cells are admitted. They are getting pushed from behind because you can see here, by selecting WiMAX is field, there's also these little arrows and that's telling us the direction and that's why we also had to choose the direction as we built the curve because it'll follow that direction where you put your first to your last. So it's going from left to right with those arrows and so now that we have our Emitter in there, we also want to turn off the gravity because we don't want this field fighting the world of gravity since when blood, everything's kind of floating and for this micro purpose that we're using, we don't really want gravity. So at the nucleus selected, we can see from the Attribute Editor we have gravity and we can just drag that to zero. So now let's play back and see what happens. So now the particles are just expanding out from the center of the Emitter, so it looks like the volume axis curve is not influencing the particles enough. So let's go to the Volume Axis Field and there's two things that we can use to affect the speed at which they're moving and that's the magnitude and the along axis value and it's just as you would imagine, along axis, that's the speed along the axis of the arrows and the magnitude is essentially like a multiplier of any of these values down here, so it'll multiply against this. So you can really change either of those, but this is like an overall number the magnitude is, and these down here are individual because you could go around the axis, away from the axis, there's different ways you can do it, we want to go along the axis, want to go down and along the curve so we can increase this maybe, I don't know, let's just bump this up to maybe five and play this back and see what that gets us. So we can see it still isn't moving and you know what we need to do is we created that volume axis field, but we didn't assign it to this particle system. So let's rewind this and will bring this back down to something, the default was 0.5, so we'll just say 0.5. So we need to attach this volume axis field to the Emitter and to do that, we need to go to the Relationship Editor and that's done where a lot of these kind of editors are found are from the Windows tab and we can go down to the Relationship Editors and go down to Dynamic Relationships because we're working with a dynamic simulation. So we want to navigate to the particle and we can see that it automatically brings up the option of this volume axis field and it's not selected, so let's select it. So now this has created a relationship between the particle system and the volume axis field that we created. So now when we hit Play, it will affect the particles. So now we can see the particles are moving along the curve and as they move along the curve and they go away from it, they go outside of the range of this curve and they keep going that direction, they don't follow the curve. So let's also extend the timeline because we need a lot more time to see this simulation take place. Let's do maybe even like 2,000 and let's turn on Trap Inside the volume axis. So let's go to the Volume Axis and we'll go to the Volume Controls and Trap Inside and we can turn on to one and that'll mean one means totally definitely trap it inside and the trap radius is fine and the trap ends will mean that these won't shoot out the ends either end of this. So when we rewind and go again, we won't see them going off in this way and now they bounce and hit the side and that gets it going and we have red blood cells traveling down this imaginary vein that we have right now. In this lesson, we created a volume axis field to control the red blood cells down a vein and the following classes we're going to refine this motion to make it look like red blood cells pumping and going through a tube so that they are faster on the thinner than they are on the outside and that they bounce and collide with each other and all that good stuff. So I'll see you in the next class. Thanks for watching.
38. BF 4/16 - Adjusting The Vein Field: Now, we have the red blood cells flowing down the vein. Let's start to refine all of these more nuanced things to make this really start to look good. Let's unhide the red blood cell, Shift H and let's just apply a new share so we can see it be red. Let me get this so you can see it. Right-click and go down the menu to assign new material. I'm using the Arnold Shader, if you don't have that loaded, you can go to windows, settings and preferences, plug-in manager. It should be down here under the mtoa.bundle, and you can check both of those and then I'll load the materials. You might have to click this out and redo it, but mentioned load those then. If you don't have Arnold for some reason, you can select Lambert or a phone or blend even. But basically we just want to get a new material on here so that we can color it red just for this intermediate phase where we want to see it to be red. Let's click the standard surface and the default is white. We can go over here to the attribute editor and go to the AI standard surface. We can just rename that to be red blood cell. We can click on the color here and just change it to red, something like that. There's a bug in 2018, Maya that I'm sure they're going to fix soon. But to see those colors update, you have to open up the hybrid shade. That is this little hole up here. When you turn the hybrid shade on, you might have to select the material here, but it will update the color then. But that's just a bug. But normally, the color should update automatically, but that's just a bug we will have to work with for now. But that's okay. Hybrid shade up here in the top right, it'll take a minute to load. Then now it's loaded. I'm going to drag this off to the side so we can keep doing what we're doing. When we change this original red blood cell, we can see all the instances in the particle system have updated. Let's hide that original red blood cell. Let's increase the turbulence inside this WiMAX is filled because currently we can see the trajectory of the user just following the path of least resistance. That goes straight up, they hit the top, and they go straight down, they hit the bottom. We want these to fill the volume axis fields. To do that, we need to turn on turbulent displace. Turbulent displays basically means it'll take a noisy image. That's black and white, and it will change the position based on those black and white values as these travel through that volume of black and white. You just imagine that happening when I say turbulent displacement, that's just a normal term that even here in 2-D, sometimes that's an effect. You can find an after effects even. But let's select the volume axis field. One nice thing about this field is the fact that it has the turbulence built in, and we can actually see these things change in real-time. If our timeline is long enough, we can change these sliders as it's playing and see the effect it has. Let's rewind and then hit play. Then now I can just turn up the turbulence, and see how that affects it. See how crazy and zany they get. We don't want to get too crazy, but just a little bit. I can turn this back down, maybe point two. But see how that helps to fill the whole tube where before I just turn this off, it just was like a stream. We want that turbulence to be just influencing it enough that the points will fill out the vein. The next thing that do is to get these from being flat disks, it's actually colliding with each other. That's in the particles themselves. To effect that, we need to go to the particles. Let's rewind, and let's go down to collisions from the attribute editor. There's a lot of attributes here. It can be overwhelming, but there's not too much craziness to it. A lot of us basically in the dynamic properties and in the collisions. We'll run through some of this, but basically don't get overwhelmed with this. There's only a few things you really need to change in here. To get them to collide with themselves, we needed to turn on self collision. Self collide first. Then we need to get the rotations working because they were just these flat disks. To get the rotations to start being computed, we need to drop down the rotation tab as you would expect and say compute rotation. They just don't have it on by default, and we want that. We just need to go to rotation and turn that on. Then we need to tell the instance there, the geometry replacement, they even have in parentheses that tells you what it is. The particle is one thing, but to affect the instance here, which has this member when we replaced all those little tiny white dots with our model. That's the instance here. We want the instance or rotation to be updated with the particle. That's like another layer of just updating, hey, use the rotations on the instance as well. Now that we have rotations on, now we have this option under rotation, options rotation. We have rotation pp. The pp stands for per particle.. You can see that against a couple of other attributes like angular velocity per particle, that just means per particle, they just shorten that. We want each particle to have its own rotation. We don't want all of them to rotate the same, we want them to each have their own collisions and rotation. We want to rotate per particle. Now we hit play, let's see what happens. It spans out here under the turbulent displacement. Then these crazy spinning ones will calm down once they start colliding into things. But we also probably need to turn down the turbulent displacement a little bit. But you can see now they're not flat disks, so that's pretty cool. Let's go back to the volume axis field, which is why they're all spinning crazy. We couldn't really see that influenced before because rotation wasn't on. Let's turn down turbulence. Maybe by half even, where we are at 0.4 something, let's go to like 0.1 something. Let's play those again. We can see that those are a little less erratic. The other thing that we can do is turn on attenuation. Now we've traded off less turbulence with now we have this stream effect where they're not filling out the whole vein. There's a couple of things we can do. Let's go to the particle, and the particle has its own properties as well. It has a drag property, it has a damp mass. It is what you would think it to be. Drag, it doesn't want to move through a volume as easily as if there was no resistance. Let's actually turn that to 0.1. Then that way the rotations will be dampened a little bit. We can turn the volume axis field turbulence backup a little bit so that it'll help fill out this vein again. That's the goal. We need to go back and forth and make sure as we're changing things, we're staying true to the type of look that we want it to have. Let's rewind and hit play. We can see it's now filling out the volume, but because we've increased the drag they are not moving down the field, down the curve as much. What we need to do is increase the magnitude of that motion down. To do that, we need to go back to the volume axis field, which we are in. We can say along axis curve, let's turn this up to like two and just see what that does. Now they're moving down the curve better. There's still rotating a little crazily. The other thing, a physical attribute of something moving down too was the fact that the things closer, the edges will go slower because there's friction here. As the fluid hits the walls, things move slower because there's friction against the surface. In the center, things will move faster. That is called attenuation in Maya. We have this right underneath the magnitude. Let's turn that up by maybe 0.2, and let's hit play and see if the things that are closer to the edges will move slower. Then we'll get a stream in the middle. Let's see how that looks. We can see the things hitting the top start to slow down and things in the middle. As we're playing, we can increase this. Now we're like 0.4, let's look how this is affecting it. You can see there starts to be this stream in the middle. I think we might also need to increase the radius because things are starting to get a little bunched up here. Let's hit stop. We can go up to the volume control attributes and turn the section radius to maybe five. Trapping side is on, trap radius is okay. Let's restart that. Now we can see we have particles working. Let's turn up the attenuation quite a bit. Now we can see the ones on the outside are almost totally stopped. Let's turn this back down because we want to keep the motion going a little bit. I think something like 0.3 would be good. It's really just playing with those values. I'm not entirely sure what's the right value until I change it and see the difference. This stuff is not a science, it's more of an art to try to see what visually looks right. Is that the effect that I want? The other thing I think I'm going to do is I'm going to just stop that, and I'm going to decrease the size of the red blood cell. I'm going to hit Shift H to show it. We can see this happen actually while I do it. I'm just going to scale this down just a little bit. I think that looks better. Those little white dots are the particles, and we will get rid of those later. So it'll just be all read. But I think that's a better look. In that way, we can see individual blood cells a little clear now that the cell itself is little smaller. We can see on the center that attenuation happening, that all of these things on the inside are moving quicker and everything on the edge is moving a little slower. In this class, we learned a little more about refining the volume axis field, how the particles interact with each other and rotate. In the next lesson, we will further refine it with some animation. I'll see you in the next class. Thanks.
39. BF 5/16 - Animate Heart Pump: Now that we have the red blood cells moving in a better fashion and rotating, let's animate the influence of this field. It imitates heartbeat as blood is moved through a vein it's not a continuous stream. Its a pumping action. We can animate the volume axis field. Let's select the volume axis field here and let's go down to the along axis attribute. To set a key frame, we can go to the first key, first frame here. Let's say along axis we go right-click in here and we'll get a few options. One is to set a key and this turns red when that happens. The other thing, once we start animating that we want to do is make sure auto key-frame is on. If at any point in the future we change a value, it'll remember that and key it for us. We can turn that on down here, auto key-frame. Now to adjust this value to make it pumping, I'd like to go in the graph editor and the graph editor is just a way to represent a value changing over time. We'll go to windows animation editors, graph editor. I'm a fan of the old one. To get the old looking graph editor, we can actually go to windows, settings and preferences and we can go to animation. Scroll down and say Graph Editor UI Classic and that's just my preference. You don't have to do that. But I've been using mine long enough that I like the older version. Now that we have the graph editor open, we can navigate in here by hitting command and shift and right-clicking and we can zoom in and out vertically and side to side. We can make the graph appear anyway that we want and of course we can pan around and that thing too. This little black dot represents that key-frame that we made down here and we can see this red tick now also indicates that on the timeline in the graph editor, we can also manipulate things. I'll hit W to be able to translate something and I'll hold shift and middle mouse and drag to the right. You can see that we are too far zoomed in for it to start snapping to new key-frames as I drag nothing happened. We can see down here, it says wrong frame of 1,001 and it goes frame a 1001.1. This will only snap on frames, on full frames. We need to hit shift and command and we need to reduce this down and so now we have each grid line means a frame. When I go back to W and hold down shift and middle mouse and drag to the right. It will snap to each one of those. Let's pull this out and then now you can see this isn't a dark red anymore because there's not a key-frame. We're not moving in time. We're moving the key-frame and time. We can reduce this timeline down here to kind of see this better that we've moved the key-frame over here. Let's hit a new key-frame and we'll right-click over here set key. Now we have this new key-frame popped up. We want to pump and then die off, and then pump and die off. We want to have this second one go down to 0, and we can shift and middle mouse drag that down. We can also select a key-frame and type in a value here. The right one is value, and the left one is what key-frame it's on. We also move it in time and say instead of on frame 1,005, and want you on frame with 1,006 and we want you at 0, a value of 0. But we also have to remember the fact that a typical resting pulse rate is maybe in the sixties. So that's 60 beats per minute. That's essentially one beat every second. A second is in Maya, currently is 24 frames per second. We can see that down here and there's a Dropbox. We can get to different types of working frames per seconds and depending on if you work in television or movies, that frame rate will be different. But typically most people work in 24 frames a second. That means that for 1 second, there's 24 frames and for one beat needs to happen over that 1 second, meaning 24 frames. Let's move this down to frame 1,025, because we're starting on frame 1,001. So that means 1 second is at 1,025. As this curve represents, it shows that we're at a value of two it's being pushed down the curve at a value of two. It slowly starts to drop and then descend down into one and then slowly ends and one. That curve indicates the speed at which it changes. We can change how that curve looks. If we select a key-frame, we can select one of these little handles here and then it turns yellow and we can middle mouse drag it and turn it down so we can see it'll pump and go quickly to slow and quickly into easing into slow that is. Then when it pumps, it'll just have a more accurate representation into what a actual heartbeat does. It doesn't slowly pump and then go slowly out it pumps hard and then slow out and instead of having to key-frame this on every single frame, for these 2,000 whatever frames, however big our timeline is, we can just loop this so we can select all the key-frames, go to curves, post infinity, meaning after what we have selected and we can just cycle that we can't see it here, but we can view it if we go to view and go to infinity. That will show the cycles. If we change this value will change the infinity. We only have to do these key-frames once, and then we have them for forever. I'm going to click and drag this off so we can see what we've changed and hit play. I'll go over here two are there, so we can see that now that we're not always pumping maybe the value of two is not enough to really get things moving. Let's hit escape to stop the playback, rewind, and go back to the graph editor. It's easy as selecting that key-frame and just dragging it up. Let's go to maybe, we'll go to like ten even. Drag this handle and get that back in a linear fashion, meaning straight down. Let's drag that off and play it back. Now we can see they're pumping. But now we need to go back in on the volume axis field because they're also not really expanding out around this volume. I really want them to take up this entire vein, not just be going down the center here. Let's go to the turbulence here. We already have it open as it's playing. Let's just increase this a little bit and see if we can get these spread out. Just looped because the timeline, it gets into the timeline, I'll just start looping. Now we've spread it out. Now it's going through the whole radius of the vein, the circumference of it and it looks like we can maybe even use some more red blood cells. I'll hit stop and I'll go to the emitter, which is responsible for saying how many particles per second. Let's just increase this to 150 and let's rewind and see if that helps the density. That looks pretty good. It still looks like the red blood cells are spasming out a little bit. Let's just go and one thing to also keep in mind is how we're viewing this in the viewport isn't necessarily reflective of seeing it in real time because it's playing every frame. We aren't seeing the true motion that's actually going to be rendered. To do that, let's make a play blast. I'll hit escape and I'll stop the simulation. Let's go back to the first frame and I'm just going to right-click on the timeline. You can see the options and right-click and we can go to play blast. Play blast will just make a movie of what we see here and the window, I'm going to drag this back down because I'm just going to go from the window setting. It'll actually literally take exactly the dimensions of what we're seeing. I'm going to make a movie which for, on a Mac it says AV foundation, it might say QT on a PC, and that means QuickTime. There's basically two options; you can make a QuickTime movie or you can make an image sequence. Just for our preview purposes, I think movies are a little easier and H264 is a better, makes a smaller file. You want to save from window, because I just want to see exactly what I'm seeing in this window and we want to save to file so make sure that's checked so that you can browse to a location. We're in the blood flow project and I'd like to make a new folder and just call it play blasts, so that all of these little movies can have their own little room to play. I'll just call this Test number one. It's going to play blast the range that we have on the time slider here. This is probably a little too much for what our purposes are. I'll just reduce that a little bit and then I'll deselect everything and hit play blast. Okay, now the play blast is done. We can play this back in real time and actually see what we have been creating. This is a really good start. We have the cells animated now going at what is similar to a heartbeat. That's pretty awesome. In the next lesson, we will address the sporadic spinning here that we're finding is persisting in these red blood cells. Let's take a look at that in the next lesson.
40. BF 6/16 - Fix Particle Rotations And Collisions: We're going to solve this rotation issue that we saw last time with its rotating in a sporadic fashion. Let's address that first. If you remember, we had a turn on the rotate particles for them to begin rotating. If we select the N particle, go to rotation, we can see that there are rotate, friction, and damp. Let's just tone up the dampening to maybe 0.006 and continue the simulation. We can see all the rotations have tone down quite a bit and we can further reduce that by bringing the friction down. Now we can see everything is still rotating, but we don't have these crazy spinning red blood cells. That's looking a lot better and I think we can go forward with that one. The other thing that we get interest is how these collisions are occurring. We can see that there's a lot of intersecting where the red blood cells are going through one another. That's because the self collision property is too low. If we turn on solver display while we have the N particle selected, and remember this is where we turned on self collide, so we can see what the self collision is doing and how it's hitting each other. Under solver display, we can turn on self collision thickness and we can see it's just calculating it off of the particle that's at the center instead of the whole disk itself. Under self collide with scale, we can turn that up and increase that radius and we can even go higher than this slide gives us, and say something maybe like four, maybe 3.5, 3.75. Now we have something that will collide with each other a little better when we have these intersections. Let's turn off this solver display, and let's hit play. Now we can see they all just exploded outside of each other and now we have that much fuller look because they're all trying to avoid each other. Let's stop this and rewind it so we can see it happening from the beginning. We have these crazy erratic rotations again at the beginning, but as they go along, they'll tone down and again, if it's too much, let's hit escape. It looks like now that we've solved the inner penetration issue, that the particle rotations still need some adjustments. We'll go down to rotation and let's increase this to 0.01 and see how much that dampens the rotations. Now it's damp them quite a bit and we can bring down the friction as well, so now we get a much nicer look to the rotations. They're not as sporadic. It's constant back and forth. You solve one problem and then another one might pop up and you have to revisit the same issue that maybe you had been addressing earlier. Now that we have these working pretty well, in the next lesson, we can create a white blood cell so that we can change up what actually the blood flow looks like. Since there are white blood cells in blood, we can add those in the next lesson. Thanks for watching.
41. BF 7/16 - White Blood Cells And Expressions: In this lesson, we will create a white blood cell. Let's go back to the center of the scene and go to the poly modeling tab and hit the circle. We will select a random number of these faces by going to "Select", "Use constraints". We'll right-click and go into the face attributes and select those. Let's click "Current" and Next" and "Activate." I'll hit "F" to frame up on that and maybe increase that a little bit. Maybe decrease it. Let's see, remake the selection. Let me decrease it a little bit. Now we have a random number of faces selected, let's go to Extrude, which is this little button up here. I will close the use constraints. We have this little window here. We can say keep faces together and have that off so that we increase the thickness. The faces individually extrude and they're not all connected. Let's hit three. We can see that we made a little spiky white blood cell. Let's scale this down a little bit. Let's unhide our red blood cell here, shift h to see it for comparison sake. Let's include this in the particle system. Let's command click the "Instancer" in the outliner and say "Add selection." They'll add the P sphere. Let me just remove that because let's name that before we add it, let's call it the white blood cell. Let's redo that and say click the "Instancer" and say as selection. Now we're adding into the list. We see we have the red blood cell here and it starts numbering things at zero. Even though this is the second one, it's calling it number one. That'll be important when we are going to write an expression that tells it how often to pick to use a white blood cell on a particle instead of a red blood cell. First, we need to make that kind of index number for it to pick from. Let's go to the end particle and we'll scroll down to the per particle attribute. Because we need to define on a per particle basis a number of either zero or one. Basically, how often do we pick a red blood cell or a white blood cell? Let's create under add dynamic attributes a general attribute. We are going to make sure we click a "Per particle attribute." We will say, "Okay" and it'll pull up the expression editor and we need to name this attribute. We can name this anything, but I'll just say index per particle. I'll say, "Okay" so it adds it to the list over here, IndexPP. I'll right-click here and say "Create expression". Now we have the expression editor and we have the indexPP selected. First thing we want to do is create a random number. We want to choose an integer and we can call it i. That's the name of the variable. We'll say it's equal to random. Then we'll say a range of zero to 100. Then we'll do a semicolon. We've defined that variable is equal to a random number between zero and 100 and it'll just pick that number for us. That's what the rand expression does. It'll be a random number. We're going to make an if statement. We need parentheses here, because we're going to say inside of this if statement. Just hang with me here. I'm not the best at writing expressions. But they're pretty powerful. It's useful in this instance that we have control over something under the hood here. We're going to say if i is greater than one, which is probably going to be 99 percent of the time. A random number between zero and 100 is 99 times probably going to be greater than one. We're going to say most of the time, basically, make this thing that we just made be equal to zero. I'm just copying, pasting that and I'm going to say zero. Then, conversely, I'm going to say, if it's less than one, then this thing that we made should be equal to one. If you remember just a second ago I said, it named the red blood cell zero because when it lists things, it starts at zero. We know zero stands for red blood cell. We know one is going to stand up for white blood cell. We're basically saying, make this variable be between zero and 100. If it's over one, then be a red blood cell. If it's under one, which the only option is zero so one times out of a 100, make that be a white blood cell. We can add our semicolons here. I'm going to make sure and do that. Then we can hit "Create." Now you can see we have an expression under here, under this index that we made. We can close this out. We should be able to see now a white blood cell pop-up every 100th time a particle's created. Maybe once a second, we'll see a white blood cell might be hidden inside the red blood cells. Let's zoom in here. Let's escape and let's just adjust the expression to make sure, let's say it's at 50-50. Even though we made this expression, that doesn't mean anything, to Maya because we made this thing. Maya doesn't know what that means. We have to pipe this into the ID. We'll go into the Instancer stuff because we're going tr influence the instance an object index. We want to make that be the indexPP that we created. Now as soon as we click that, knowing C 50-50 is white blood cell and the rest is red blood cell. If we change this expression back to be one, so we can edit that, let's restart the simulation. There we go. There's one. We should have one about every second. Depending on how realistic you want your red blood cell vein to be, you can add more things like the red blood cells. You could add a virus in there. You could add a platelet. The three things in blood is basically red blood cells, white blood cells and platelets. Depending on what you want to include, to make it as realistic as possible is to basically, model this thing and then go through what I did and basically make an index. Then if we had more than one, we can just add another if statement here. We could say, just divide this up, say 20 here, 20 there. Then the other one is below ten or something, depending on the ratio we're going to have between each object. The other thing that we could do is animate this. Instead of it being one, we could have this be a value. Let's go to "Edit", "Add attribute." We're just going to call this variation. Let's call it cell variation of a [inaudible] , and integer, and scalars, fine, we'll say "Okay." Now we added this cell variation here. I want to get this into this equation. To get this location where this is, we know like this in particle shape one. Then we just made this cell variation. It should actually be in here somewhere if we reset this filter. We'll say "By object" hit "Inparticle" selected. Now if we scroll to the bottom that we refresh that when now we have cell variation. Let's copy this. We can go back to the expression name and select our expression. Instead of one, we can have it be that attribute. How cool is that? Now we can actually edit this thing. Let's turn to one. This is the same that we had. Let's turn this off. Let's edit this so it saves it. Then let's say over time, become more white blood cells. Let's say the immune system is under attack or something. Let's key select it here. Then we'll just jump ahead. Maybe to here. Let's move this key frame down to where we're at right before there. Now let's just go 50-50 on this and see what happens. Let's go back to the beginning and hit play. Now we're getting one every 100th red blood cell. Then we're about to get into the key frame territory where we're going to dynamically, we're going to change the expression and look at that. Now we're getting 50-50. How cool is that we created an expression. Then we created our own attribute over here and pipe it into our expression so that we can animate this variation. That's pretty cool. I'm pretty stoked about that. That's an example of the power of expressions. Creating your own attributes and animating them. It's pretty cool. Let's just turn. I'll delete those key frames. Whoops, I was off the screen, so I'm just bringing this up. I'm just going to delete those key frames from the graph editor. We rigged up this really cool system. That's pretty awesome. In this lesson, we learned a lot. We did some expression writing, we made our own attribute. We created white blood cells. We covered a lot of ground and in the next lesson, we will continue with this project. I'm excited to show you more of what we have in store. Thanks for watching.
42. BF 8/16 - Red Blood Cell Material: Now that we have the simulation in a good place, and we built controls for, we know how to adjust the volume curve axis field here, we known how to fix the rotation issue, we know how to add new instances like white blood cells or platelets to the bloodstream. Now let's get into more rendering issues. One thing I always like to mention is clicking the anti-aliasing button up here, just smooths everything out. I'm going to hit F to frame it on this. We never gave the white blood cell a shader. We can right-click and say Assign New Material. We go to the on Shader and go to the StandardSurface as we have in the past, and just leave that white for now because it's obviously a white blood cell. Let's move the red blood cell to the side and let's add a light into the scene now. We're going to add a spotlight and move this up and just shine this down for now. The lights are all in the rendering tab and Arnold has its own set of lights from the Arnold menu up here and you can get to them up here. The spotlight that we just made will work in Arnold even though it's not listed here. This is just more specific Arnold version of lights. Arnold is just the renderer that we're going to use, to create the final images that calculates all the shadows and rays of light and specular and the types of material of the shader is and all that good stuff. Now we have the light, we'll be able to see something once we start preview rendering. Now we have a light in the scene, let's go to Arnold and we'll go to the Arnold Render View. It'll open up a new window. We can hit this play button to see the view that's in our view port. If we want to navigate in this window like we are in this one, we can go to Window 3D Manipulation, and now we're going to use the Maya controls and it'll affect this window as well. Clearly there's not enough light, it's very dark. We can use the exposure settings here to crank this up and see artificially that it's not bright enough. We want to bring up the intensity of the light from the attribute editor. Over here I'll just say 100 and we can see the cone of light maybe is not reaching far enough. There's a cone angle we can increase in and see that change in the view part two up here. As I increase that, the cone angle gets bigger. Now we can see our models a little better, and they're very generic. There's no texture to them, there's not a lot going on. Let's adjust these to have a little more variation and make them a little more appealing. Let's go to the red blood cell first. Click on that and we'll go to the red blood cell share that we created earlier. Let's go down to the Geometry tab. We'll drop that down and we'll see option for Bump Mapping and that means just what it sounds like. We want to map in an image that will bump the surface, that'll make little bumps. Because there's no object, even glass has some variation to it so, something as perfect as this doesn't really scream red blood cell to me. We want to make some organic variation. Let's disrupt the surface a little bit by adding a bump map. We can hit this checker box over here, and we get all these list of things we're going to add to that. Out of all this list, I usually either pick a file of my own or I use a fractal. A fractal is nice because it's tillable, meaning unlike an image that the edges might not match, like the right side of the image might not match the left side. A fractal is tillable and you just don't have to worry about it as much. It looks like it's bumped too much. See how rough it became. We can turn down the bumped depth here, say 0.1. It's still a little too much, let's say 0.01. Now we're getting in the right direction here. You'll notice one thing that's a little wonky is the fact that there's all these streaks down here and there's this edge right here. That is related to the UVs. The UVs, you can think of the paper that's used on a globe. You don't take a square piece of paper and then just tape it onto a globe. You have to cut the square piece of paper at the top and bottom and make little triangles out of it so that it will wrap around the globe. You take a square piece of paper and wrap it around the globe. You have to cut it up a little bit. The same idea applies for geometry. When we look at the UVs, we can open up the UV editor. There's UV menu here, we can go to UV Editor. It will open up a new window and we can see the fractal, the bump map that we applied. This is black and white image on the background. This grid wireframe is the wireframe of our model. We can see that division here, that line right there is associated with this line around the image, around the top of the circle. The UVs aren't great. Let's give it new UVs. With this model selected, I'm just going to go and see what we get from automatic UVs. Let's just click Automatic and see what happens. Now we can see that edge that we saw earlier is gone, that was right here. In the UV window, we haves things a little more laid out in a better fashion. That's pretty interesting and it looks like it did a better job. You can see in the Maya Window, the automatic plain just projected from six different sides, and we get basically six different pieces, 1, 2, 3, 4, 5, 6. That's just automatic mapping and that does a pretty good job to get rid of those little seams that we saw earlier. The other thing we can do is increase the roughness because we have all these little pinky highlights. The specular means the reflection essentially of the material. The white means specular is on all the way, it's a 100 percent on. We can turn specular all the way off and see we have all those glimpse of light are now gone. If we leave that on one, but we increase the roughness. It'll diffuse the specular across the surface a little bit then you can see how it's less pinky. It's diffused across a greater area of the model. It looks like we're working still a little too rough now that the bump map is still too strong. We can go down to geometry where we added the bump map, and it says fractal because that's the name that we added. Instead of a checker box now we have this arrow. We can click the arrow to get into the fractal. But we don't necessarily want the fractal, we could adjust the fractal settings here which actually work. We could even leave that and but then we also go to the bump amount. Let's go back to that. We can go travel around in the node network with these two buttons. Let's just go to 0.05. We'll just make it like really subtle effect so that it's just not super smooth. That's looking pretty good. Then let's maybe increase that a little bit more. I think after we affected the fractal things turned out pretty well. The other thing that we can do is, turn on subsurface scattering. What that is is essentially, if I held a flashlight up to my ear, my ear would be red because the light would be scattered under the surface of my skin and through my blood and out the other side. But if I put a light on my bicep, you wouldn't see a difference on the other side, because there's too much to go through. With a red blood cell, it's very thin in the middle. We want to try to get that same effect where when light hits it on the other side, we can see through a little bit and it glows red. That will imply the thinness of the material, the tissue here or the cell. Let's go up to sub-surface right here in the material, the red blood cell. We'll drop that down, and we'll start turning on the weight We can see it's white because we have subsurface color of white turned on. We want to get that to be red. We can start adjusting these values, but essentially we want to see it from this side too, because that's how the subsurface works. If we look to it straight down the flashlight and the ear example, we'll just see a really [inaudible] ear. But if we look on the back side, that's where the light comes through. We can start adjusting these values to allow more light through, increase the weight. We can see where it's a little thicker here, there's less light allowed through, and there's more light allowed in the center. Once we get to the very edge, there's more light allowed in again. That's starting to work pretty well. The other thing that we can do to help this effect is to add a texture to the weight. I want to center up these two circles because of the UVs, because what we're going to try to do is create a mask and mask out everything but the center, or we're going to mask it out with a radial ramp. For the radial ramp to work, we need to have the UVs at the center of the UV space. Let's take these UVs, you can basically select the UVs by right-clicking go into UVs. We can select these and hit Command and right-click and go to UV shell. Select the shell of all those so that we can move those out of the way a little bit. Then we can take the UVs of this circle and put them on top, oops, we missed one UV there, shifts selecting it and put it on top of this one. Now we can select all of them, bring them to the center of the grid, and scale them up. It will affect the fractal, so we can see that happening, it's always trying to update in the Arnold render view. That's okay, we don't have to be too precious with that stuff. It's still looking pretty good. Now let's try in the material, we're going to object. Click on the Attribute Editor, so we get this back. Under weight, let's add ramp from the texture from this checker box, we can go down to ramp. Instead of a V-ramp, we want a radial ramp, sorry, we want a circular ramp. Now we can see, look at this effects, it's doing exactly what we want except in the opposite direction. We can drag these gradients around and get the effect that we want. Now, the issue with this border is the fact that, we moved those edge UVs out of the way. We can assign new UVs just to these edges. Let's go ahead and do that, because it looks like we're going to still have difficulty with this. Well, there's a couple of things. Let's just grab the UVs, let's go to the face of the geometry, select and shift select the next one on the line here and that'll go all the way around, we can do that again for this one. Now you can see in here we've selected these, and we can command, right-click and say to UVs. Now that we have the faces selected, we can add new UVs just to what we have selected. If you go back to UV let's just go to a planar view, and that means there's a plane. We can project from the y-axis, that means from the top down, and we'll apply. We can see in the UV editor what we just did. We made our ring because it's basically, you can see this grid now is projecting straight down on to the UVs. Because it's projecting straight down, it's keeping it in that doughnut shape, which it's putting it right exactly where we want in the UVs. We space those out, so it goes right at the edge of where it would meet. Now we've eliminated that hard edge that we had, which is great. Now we've taken care of the UVs and we can get into adjusting the ramp the way that we want. Let's to go to object mode when we select it and get into the material, we'll go through this arrow to get to the ramp. Instead of being totally black, let's increase that, and let's actually bring a wider color to the ramp, so we can add color to the ramp by clicking up here anywhere and we'll add a new point. With that points selected, we can bring that back to white so we know we're going to try to catch those edges here. We can maybe even bring this up a little bit. Select another point to drag this dark area out so that inner tube area is covered by that ramp in the thickest part of this red blood cell. Cool, so just that image is looking a lot better from when we started. We've created subsurface scattering, we've added our own ramp and adjusted the UVs. We've added a bump map, which we could adjust even more later. You can do the same process with the white blood cell and go through, and adjust the shader, but for the meantime, since going forward, I'm just going to leave the white blood cell out of this. As important as they are to blood, I just want to focus on one thing and take that as far as you can. You can do the same with white blood cell, but for time sake, let's just focus on one from here on out. It looks like we got the red blood cell and a really good spot with the materials. Let's move into creating a vein. If we want a vein tube and we can adjust some lighting properties and talk about rendering. See you in the next class. Thanks.
43. BF 9/16 - Create The Vein: Now that we have material for the red blood cell, and we aren't going to focus on the white blood cell anymore, because we could just duplicate our efforts in the same way but with color white. If we wanted to, let's go to the end particle and turn off this attribute that we created, just so that we no longer create white blood cells. I'll just simplify the next little bit, and so we want to create a tube for the vein for the vessel, and to do that, we need to start with a circle and we can go to curves circle. Let's navigate to the end of the curve. If we hold down, we have w with the Move Tool selected and hold down C and middle click and constrain it to the edge of the curve and bring it to the end. and we can rotate it roughly into place and scale it up. Then if we frame up on it, we can get really specific. This is, this is important to making sure that the tube is going to be accurately extruded because we're essentially going to take this circle and we're going to extrude it along the length of the curve. We want to match up the beginning as best that we can because that will affect how the curve is extruded to make sure that the tube matches exactly these little dotted line intervals of the volume axis, because we want those to match up. The other thing I did in between the previous lesson was I rebuilt this curve. What that means is when, earlier when we built this, if I right-click and go to Control vertex. We can see there's a lot more points here now, after I rebuilt it, and you can rebuild a curve by selecting it and going to curves and going down to rebuild. Only did was add uniform control vertices, add 40 album, and I make sure that they're in the same degree that we made the previous ones, which was the cubic. When I hit rebuild, it will just do the same thing that I just did. You're going to rebuild your curve because when we extrude this new circle out across this curve, it'll make subdivisions based on those intervals. We want enough subdivisions to describe the curves and windiness of this. Let's select the nerves curve that we position down here and the entrance exactly in line with the volume axis beginning, and will command click the curve from the outliner and go to surfaces extrude. Now we can see, we zoom in on different parts of the curve that it totally in houses the dotted line volume axis field, that's what we're looking for. You can see this line is right next to the volume axis field. There's a little gap up here. But for the most part, it, matches along really nicely. That's the importance of getting that first nerve circle here really accurate to that edge. Now that we have this tube, let's convert into something that we can use it a little more usable, and that's going to be polygons and polygons or like the white blood cells and red blood cell, nerve surfaces aren't as useful when shading and doing other things. Lets convert this to a polygon by going to modify, convert nerves to polygons, and let's turn off triangles. We want it to be quads. Let's just hit apply and see what it does for us. It looks like it did a pretty good job of recreating that. Let's hide the nerves surface. Now we see that we have the tube. There's some odd little things here and there, like this little piece. If you want to clean that stuff up, you can select the ''edge'' and shift, right click and go to delete edge, and then I'll clean up little spots like that, but it's not super necessary. Now that we have this, we get three and we have it looks really similar to the nerve surface now. What we want to do is, let's go ahead and hide this for now. Lets get the particles to a frame that we can see what's going on with them before we make this material. In this lesson, we learned how to extrude a circle along a curve, and convert that to polygons that we can use that as the vein, as the vessel of our blood flow. Thanks for watching and I'll see you in the next lesson.
44. BF 10/16 - Vein Material: Now that we have the vein created, let's look at the particle system that will be inside of it. This is totally optional. You don't have to have this vein for your renders. You can skip ahead and go to the lighting and rendering part and just render the blood cells without the vein to it. But this is just in case you want to do that aspect. Let's rename this to VeinTube and let's hide it for now, Control H. Let's play the simulation to where we can get to a section of the tube that we want to see and mock up a render for. We'll just wait for the simulation to get there. Now that we have some red blood cells in view, we can hit "Escape" to pause this simulation. Let's bring the spotlight we used to light the one red blood cell over here and let's translate it up and see what it looks like on a whole group of them. We'll just bring it in to view here. Let's go over here where there's a bigger chunk of them. Just position this right in front. Let's go to the Arnold Render view and see what we've got. I'm going to hit the "Play" button. We can see we're eventually going to need more light, but let's just raise this up a little bit, so that it affects a broader area, and then we can crank up the intensity. I'm just going to the attribute editor with the lights selected. I might even add a zero to this. That way I can drag it up a little more and increase the cone angle here, something like that. We can even duplicate this, and then drag it down and then rotate it back up, so we get not as harsh of shadows going on. There we go. I'm going to also zoom in here because I have the 3D manipulation checked. Depending on the lighting that you want to try to play to and see how it's working, you can adjust those lights anyway that you want, but that's how I'm going to do it and just reduce the bottom one. With that one selected, I'll take off a zero. Let's maybe even go less, because I do want to have some idea of the direction of the light. Of course, the subsurface scattering effect will be more pronounced, the harder the light is from a certain direction. So if we even out all the light, it'll be harder to see the subsurface scattering here in the center of the red blood cells. Now that we have that done, I can see the longer we let it go, it'll smooth out those rough specular highlights on the red blood cells. That's just an artifact of the render still working. But it looks like we might have to adjust that a little bit later too, because it is too strong, I think. But for now, let's focus on the tube. Let's unhide the tube. We'll go over to the vein tube and hit "Shift H". We can see that it doesn't totally contain all of our red blood cells. The only way we can fix that, let's just hit "Stop" here while we fix this, is we could change the trap, the radius on the volume axis field by clicking on the volume axis field and going to where we were messing around earlier, Volume Control Attributes, and reduce the section radius. That could be an option. Or if we like where we're at, which I do, and don't really want to go back into adjusting the simulation all that much, I can right-click somewhere on the tube and go to "Face". Select all the faces, and then bring up the scale attribute. Instead of scaling, which won't work, see how it adjusts the whole thing, we can actually translate based on the normal. The normal is basically the direction that a face is facing. This one's facing out here to the left, so it'll go out in this way. If we actually set a scaling, let's choose the move manipulator and hold down control. Let's go to the vertices instead. We'll right-click and go to vertex, select all of them. The vertices selected instead, let's hold down control and middle mouse drag. You can see that we're scaling from the vertex normal. It's the direction the vertex is facing. As opposed to trying to scale everything, this is quite a better option for us. We can scale that up. Now it houses all of the the red blood cells. When you zoom back in here and get back to lighting this thing and seeing the material, let's first add an Arnold shader that we can work with. So I'll right-click on the tube and go "Assign New Material". We'll go to the shader, we'll, will go to the Arnold shaders, and we'll select "Standard Surface". Let's rename this, vein, and let's turn the color to red. Remember the glitch from earlier unfortunately, we have to open up the Hypershade for this to update. The Hypershade open, let's also click the vein to help refresh. Cool. Let's see what that looks like in the render view. We'll hit "Play" again. It looks pretty lame. Let's adjust this. Now that we have this lame looking shader on the vein, let's make it somewhat transparent so we can see inside of it. We do that with the transmission tab. So let's drop that down and turn up the weight of the transmission. We can see not a lot changes. That's because with Arnold, we have to let it know if we ever want to make something transparent. We do that by going into the tube shape, which is this tab up here. We can get to all the history of this tube up here. The one that travels around with all polygons is this shape node. There's an Arnold tab under all of them. For this one we want to say "Uncheck Opaque". As soon as we do that, you can see inside the render view here that we can start to see inside of the tube. Let's go up to the vein again and go down to the transmission. We can increase that. We can see more on the inside. We can even change the color of it maybe to something a little more red. Or if we wanted to go crazy and go blue on it or something, we could do that, but that'd be a little wonky. Let's just keep it white and let's increase the roughness of the specular because this little shiny dot is pretty distracting. Increase the roughness. As we increase the roughness, you can see that spread out. We can also reduce the weight of the specular. That's pretty helpful and starting to sell this effect of translucent material that's a little rough. That way we can see through a surface here and inside to all of the particles. If we want to see them more, we just, of course, turn up the transmission weight so we can see inside. That's something you can animate as well. If we decide, you know what, we're going to reveal this thing and start with this vein, maybe do a camera move and zoom in on it, and as we were zooming in, increase the transmission, we can just right click over here and set a key, and we can see that in the render. I like where this is going and I think for a little bit of work you get a lot in return with Arnold shaders, especially. The other thing we can do is add a bump map to this. We can go to the same area we did for the red blood cell. If we want to be very efficient, we can even use the same texture that we used on the red blood cell. To do that, we can go into the Hypershade, which you get to from this little globe. With that open we can go to "Textures" and we see that fractal that we made. If we click that and we map it here in the Hypershade, we can see that goes to the red blood cell, and that is mapped into the bump., and there's that fractal. We know that's the right one that we used on the red blood cell. We can go and actually map that into the material of this tube. We can even click what you just saw me do, click objects inside the Render View, which is really nice, of the Arnold Render View. We can go back over to the material of it, and with the Hypershade open, we can middle mouse drag this fractal into the bump mapping. Once we do that, it will create a new bump node. So even though we're using the same fractal, it's going to give it the extreme bump depth that we had to begin with again, so we just want to bring that way down. Might even have to go 0.01. We can let this render a second to see if that bump is going to be too much. It still looks like a little bit of a strong effect. Let's drop that. Well, let's see it render minute. I like this streakiness. It that looks like fibers and that's coming from the UVs. I'm not entirely sure when we extruded this and converted it, I don't know the status of those UVs, but it looks like whatever is happening is working to our advantage that it's streaking along, looks like something fibrous. We can open up the UV Editor and actually see what we're working with. It does look like it's just mapped the whole length of the tube over this little square. It's going to stretch it out in that direction for sure, since it's only mapping it to a square, of course you could go in here and adjust the UVs to make that not streaky, but I think it works in the situation. The only thing we need to do is go into it, maybe knock it down just a little bit more. In this lesson, we learned how to create the material for the tube and make it so that we can see through to the red blood cells. In the next lesson, we will learn a little more about lighting and volume metrics and make some final renders. Thanks for watching.
45. BF 11/16 - Create Cache: In the previous lesson, we just finished shading the tube. For my own renders, I think I'm going to leave the tube out for now. I'm going to go and hide that. For us to light the scene a little easier. For at render time, instead of Maya having to compute the simulation and the lights at the same time, it's a little more efficient to cache out this simulation. That way we can scrub in the timeline back and forth. Up until this point, we've only been able to play from frame 1,001 and play all the way until we can stop and we can't rewind, we have to start all the way from the beginning again. But what we can do with the cache so that lighting is easier and just play back goes a little smoother. We can cache everything and that just means Maya, will save information that instead of simulating the red blood cells now, it will just load in predetermined animation that the simulation we've created has been saved out essentially. Let's create a cache we'll, close the hyper shade for now. We go back to frame one, and with nParticle selected, let's go up to the Effects tab again. We'll go over to Effects and we'll go to nCache, go down to Create New Cache, nObject and hit the Option Box. This is also part of the reason why you want to set your project. If you haven't set your project yet, you want to make sure you go to File, Set Project because this is where it'll create that directory to save all these cache files. This blood flow is my project, so I made a cache folder. Then I'll automatically name it the Maya scene name that we have so far. Then I'll just name the name of the particle and we can name it whatever we want, but I'll leave that as it is. I'll go the link the time slider, which is fine. That will evaluate every frame, that's fine. We'll just go ahead and create. In the next lesson we will pick this up and start lighting from this cache. Thanks for watching.
46. BF 12/16 - Lighting Preview Renders: Now that the cache has finished from the previous lesson, we can actually scroll the timeline and not have to simulate now. That also means that we can't make changes to the simulation without turning off the cache. It's not like we're totally stuck, but it does provide a lot more ease of use once we get the simulation nailed down. We're just going to cache it out and then it makes lighting and moving around and playing the timeline back a lot easier. Now, that we have that done, we can see that there's actually a new tab when we have the N particle selected. There's a tab up here. We can scroll with this little arrow and see that there's an N particle, one cache. We can see from the previous lesson that it has the file path that we had, the name and it's enabled. If we disable it, then the simulation would start again. But while it's enabled, the simulation doesn't occur and we're reading this cache file and not actually simulating anything. Now, that's taken place, let's look at lighting the scene. If we turn on the Arnold RenderView and hit "Play", you can see we've only lit that one little area. Let's look at what else we have at our disposal with the Arnold lights. Scroll to Arnold and we'll go down to lights and we'll create a Skydome Light. This may be the look you want to go for. If you wanted to make it very sterile, bright, this would be a good look, just out of the box, having the skylight. Conversely, if you wanted to make this look like it's inside of something, you would really want to have a tube in and model maybe some tissue around this, bringing in more tubes and shading them in different ways. This is definitely one way you could go, but it's a little too much. We can actually turn down the visibility in the camera so that it is lighting it. But if we look at the Alpha channel, we can see we're just getting that. If we turned it on in the camera, we don't have an Alpha channel. It doesn't give us a ton of room. We want to make sure with the Skydome Light selected and its attributes that's down here and camera, we can just turn that off. We can see we have this Alpha channel, meaning this black part is transparent. These two little particle dots down here, the original ones, we can just hide those Control H. We can go to white blood in Control H. We can turn back on the color now that we've gotten rid of the skylight background and the camera. This is one option style, you could go. The other option, we can reduce this and have shafts of lights if we wanted. Let's just bring the intensity of this down, maybe 0.5, make it a little bit darker. Then the spotlights really come through more now on this center section. Maybe we'll want it to highlight a certain section of this more than others or feel like we're creating more depth by adding these spotlights throughout. That's something that we could do. Now that we have that Skydome Light on and it's being lit from the bottom up. I'm just going to take this spotlight out of the equation from the bottom light and throw it over here somewhere. I can crank that up again because that was a lot lower. This one was, yeah it's like 1,000. This is on 50, so we can crank this up maybe 500, just to add some variability. Because with the Skydome Light, it's lighting it evenly from 360 degrees. There's no variation. But if we throw in a couple of spotlights, we're adding some variation to this. There's bright areas and dark areas thing. The other thing that's important about that is, if we wanted to add volumetrics to this. Volumetrics are essentially creating atmosphere in the scene. It creates diffusion in a volume that goes throughout the whole scene and it's not impacted by directional lights, which is like a sunlight. That would be under Rendering, Directional Light. I'm almost 100 percent sure the skydome lights don't affect it either. Let's click on the "Skydome Light". There might be cast volumetric shadows. It does affect it. Let's turn on volumetrics and see what happens. First let me save this before we do anything too crazy. With that saved now, let's go into the Render Settings. Up here, next to the Hyper Shade is the Render Setting option. Little clapper board with the gear next to it. Let's go over to the Arnold Render tab, and then scroll down to Environment here. On Atmosphere, let's go to the checker box and we just get a couple of options here. We want to create an atmosphere volume. When you can click that, let's restart the Arnold RenderView. Just to make sure, hit "Play" again with this Atmosphere Volume selected here. We have it in attribute editor, we're not seeing a change here because the density is at zero. We want to increase the density. With five, it really gets crazy. Sorry, at one. Let's go to 0.5, that's what I meant to do, that's still pretty intense. We can see where the spotlights have a much stronger effect than anything. We want to be aware of that when we're lighting it if we want to go the volumetrics route. Let's go to 0.1, one thing that could be cool is to create these god rays going through the red blood cells. We can see these streaks of light. But it's really distracting to see the source of this thing. We're going to want to adjust this in a way that isn't as distracting. We could bring the light out of view a little bit and maybe decrease the cone angle a little and increase the penumbra angle, which is this edge that we see here that it's really hard. We can soften that out a little bit. We can actually go pass that slider value. Let's go to like 20. Now it's really soft. We would need to do the same thing with this one. We need to pull this more out of view and maybe lower the cone angle and increase the penumbra. Now we get that softer edge. Let me go to 20. Just for fun, let's go to the Skydome Light and let's turn off Cast Volumetric Shadows, see what that gets us. It doesn't look like it made that big of a difference. Let's actually hide the sky dome light just for now. We can see, yeah this is definitely a lot more moody. Let's go to the Spotlights and just reduce the intensity a little bit and maybe just bring them in. It all depends too on what the carrier move is we're planning on doing, and I'm just middle mouse dragging in the view-port to be able to translate this on its own. We also want to start to get an idea of what's the final render going to look like, how are we visualizing this? That's going to impact the lights. I think for me, the volumetric fog is definitely too much, so let's go to the Render Settings, even though it's a really cool effect, I don't think it makes as much sense in this situation. Let's turn way down, so we do get a little bit, but not a crazy amount. But what is nice is to get this fall off in the distance so we don't really see the beginning of this, and if we adjust the lights in the right way, we can keep the lighting off of the end, inhabit trail off. I was going to keep it in this direction. It's just all depends on how you want to play this. I think the volumetric fog is still too much. What is distracting as these hard shafts of light like this is not grounded in anything, so let's turn this way down and maybe we can turn up the intensity of this spotlight again. Let's just turn them put penumbra angle a little bit, and I'm going to duplicate that, and now that we're getting rid of the sky dome light, I do want some light casting from the bottom here and just turn that down. The other thing we can do is because the red is such intense color in this render, we can change the color of the lights to something that's complimentary to that, like blue color, and that'll give a little color contrast in the render. With the light selected, we can just go through and select a really light blue, and I think that adds quite a bit. With that done, I think what would be cool to see the particles, the red blood cells pass by the camera closely and maybe paint over the tube, see this shape that trails off into the distance, flip this render for a second. We can see that subsurface scattering and really coming through too and these little center pieces. I think that's been really successful. We might need to turn down this specular or this bump, one of the two, because it does seem to be maybe a little too strong. Let's let the render finish a little more and calculate that so to see if it's actually. In the render now, yeah. That's the one bad thing, I'm trying to zoom in on image. When we have the 3D manipulator checked on, it will try to start to recalculate, so I want to check the 3D manipulator, and once this gets done rendering, I can zoom in on just the image here, or I can even zoom in now once it's trying to finish and double-check to see what's happening as it finishes. You can also choose the region tool up here and click and drag and select an area and that way we can know when it's finished, it looks like that's done. I think that actually might be okay, and I really like this depth that we get to this image to have these in the foreground and when this is being animated, of course, these will be coming at us. I think that'll be a really strong effect, and I do want to make sure that sparkles like this over here on the left side are just an artifact of that not rendering all the way, so let's bring the region tool over here and let that run out and make sure that this material is, yeah, now that it's rendering, it's smoothing this out a little bit. I think that's pretty close, maybe a little strong. Let's go into the red blood cell, scroll over to the shader, and let's go up to the specular. I think we just turned the weight down about, we'll solve the problem. Because we were at one, let that just go, and I think the bump could probably come down, attach, so let me go into the fractal and click this to get into the pumps situation. What's been happening is I've been adjusting this bump as much as I can and nothing's been happening. Then when I clicked on the in and out points of the connections of where this bump is going, it's actually going into the vein shader, so that was not helpful. We want to make sure that when we map that same fractal into the vein and into the red blood cell, when we click these in and out points, there's no guarantee we're actually going to get to the bump that we want to, so it's actually sending me to the vein shader when I'm clicking these. Instead of using that, we can just go to the hyper shade and select the bump map from the hyper shade. I'm going to increase the icon size up here so I can read the actual names, and then I'm going to hit this "End Now" button here to map out the red blood cell shader, and now I have the bump map selected for the red blood cells. Let's decrease that, maybe to 0.004. It does look a lot better to me, it's a lot more subtle. What we can do, let's just delete these snapshots from earlier of me trying to adjust the vein, and let's create a snapshot. We have this button down here, that's a little camera, we can click that, and then let's go back to what we had, which was eight. We can take another snapshot once this little section is done rendering. Let's take a snapshot there. We can actually just select them between themselves, so this was 0.008 and this is 0.004. We can see we get a more defined ridge to the cell, whereas this is just very general. I think this is a less successful because it doesn't define these edges as well. If we go a little lower and give this opportunity to be disrupted on a smaller scale, it gives us a better definition. I am going to stick with 0.004, and this will just depend on the scale that you're working at. This number doesn't necessarily mean that this is the perfect scale for everybody for this, but using the snapshots are very helpful, and again, that's going to turn that off and on over here with this little snapshot tool and delete these by right-clicking on them. I'm going to just things in the material, update little regions and compare and contrast, what exactly is going to look best. I think for me, this camera move is going to look pretty cool. Maybe we'll look down a little bit more, but in the next lesson, we'll get a camera move in here, and then we'll work on getting a render out. Thanks for watching.
47. BF 13/16 - Animate Camera: We're back. In the previous lesson we got the lighting camera decent spot and now we're going to work on a camera move. To do that, I'm going to split my view, I'm going to hit "Spacebar", go to "Panels" and go to layouts, two panes side by side. I could also get to that from up here and go into panels, layouts, two panes side by side. But I'm just so used to the spacebar. I use it here to spacebar click and go to a perspective view for this side. I want to bookmark this spot so I remember it. I'm going to click this little bookmark tab up here, and both sides are the same view they're perspective, we can see it down here. I want to make the left side the render view, so I'm going to click "New" over here, and then I'm actually going to constrain it to my current perspective view to get it in the same spot. To do that, I could go over here and try to eyeball it. But I want to get exactly in this spot before I move away from it, and I made a bookmark, so even if I move away I can go to view bookmarks and go to that bookmark. I'm right back there. Let's constrain this to this camera which is up here, it's hidden perspective. To constrain, we want to select the parent first and then command click the child, and we'll go to animation, constrain, parent and we'll go to the option boxes and uncheck "Maintain offset." That way it will snap to the position of the perspective. Now you can see we've matched that position. Now I can delete this constraint in the outliner, and now I have a good starting point of what I wanted from the perspective. Now I can take the perspective often take a look at this. I can even control this camera like I would any other object, and I think I want to raise it up a little bit. I'm going to turn on the guides for the framing. I'm going to click this little square button up here, so I can see what's the framing I'm actually going to be looking at here through that camera. Because I need to go forward a little bit to be able to look down on this vane, rotate this around, translate it. The other thing we can do is, I would like to rotate this animate, this camera around. I'm actually going to group it, so I'll have the camera selected and hit command G. Now there's this empty translation node here, that controls the camera from this new position. I have another level of control because I could set keyframes on this and up here. This is at zero, the group is and while a camera has all these transform, so I can animate the group and there's no keyframes on the camera. I can still animate that separately. But what I want to do is create a pivot point for myself here so that I can rotate the camera on that wide rotation. I'm going to hold down D, and that way I can change the pivot of this group without moving the camera that's inside of it. So I'm going to move the pivot somewhere out in front of the camera, hold down D, anytime I want to move the pivot. We are still at 0,0 because we move the pivot, we didn't actually move the whole group. That's why the camera didn't move. Now I can have a good starting point to see. I'm looking at this left view now as I move it and get this rotation in, and have direct control over that rotation and dip it down into this foreground. Maybe here and see a persp camera. Might be cool. Other thing though is, I don't think we have lights on this side, so let me just take a quick preview render and make sure we're all on the correct camera. Open up the render settings and go down to persp1. Close that and we update the full scene because I'm not seeing that camera, had to go to render, update full scene to get it to populate that camera view. Wasn't actually reading that. That's what I wanted. That's actually pretty cool. I think you could use a little more light on this side. I'm going to drag this off the screen. I'm going to hit Spacebar in here to get back to the perspective. I may duplicate this slide out and drag it over here. I'm going to move it pass, so it's not the same plane. Because remember we're going for variation. Again, even though this is an abstract version of blood flow, you still want to look for ways to do variation and not have things be uniform. Little tricky, you can use with spotlights, especially if you can actually look through them, so I'm going to say look through selected. I can know that aiming, where do I want to actually aim? The only tricky thing is that it spins you around. Might not be looking up the way you think you're looking up, so you have to move this around a little bit. Now I know I'm over the shoulder of the camera, I can go back to the perspective view, hold Spacebar. Now it's pointing in the right direction, when I go back here, I go into Arnold RenderView and let's hit "Play." Yeah, it's a lot brighter. That's probably too bright. You hit Spacebar and just drag the light over, or if we did some backlighting on this, even if we bring the spotlight down at the cells and we look through this light again. You can see where I'm pointing at exactly, maybe try to backlight it instead. Try to get some of that glow of the subsurface scattering maybe get a little closer. I think this back lower lighting makes it feel like it's really in a space. It looks like we're getting that subsurface scattering in the center of these pretty well. That's good, especially nice when there's like shadow and then there's this glow here of the subsurface scattering. You can see when these are indirect light that it doesn't work as well, and it's really when they're backlit, the front is shadowed and then we can see the subsurface scattering working in the best. Of course, these are all rotating like crazy and so they'll change every frame as it's animated. But just to have a reference point of, at least one still frame of what we're working with. That looks pretty good and I might throw a little more light in here because this, I'd rather have a gradient of this trailing off instead of it just being a rim light and then nothing back here. So I do want to see more of that. I'm going to get out of this camera view of the spotlight and I'm just going to duplicate that light, I'm going to I drag it down here. You can see, and remember that we do have the volumetric on, so we are getting that volumetric effects still, which is fine. Just drag this light out of frame a little bit. That's the one thing we will have to look out for when we animate the camera it's seeing the sources of these spotlights. We might need to adjust them later on. But I'll do the best we can for right now. Now that we have that, let's focus more on the camera move. Let's go into the group that we had. Let's name that so we keep track of it, renderCam_group. Let's call this renderCam. Let's set the keyframe I like this end position here. Let's set a keyframe on the group, then scroll forward a little bit and see what we're working with. Let's set a keyframe here and let's set a start keyframe, maybe it runs like 1760. Let's at least have maybe 6 seconds times 24, 54 something like that. Anyway, let's go over here to like 1500ths, I think that'll be enough and we can see we're just getting the start of this thing too, so I may happy to address that, or deal with that at the very beginning of that. Let's move this keyframe down, so we're more into the thick of the simulation and of course maybe you want something different than that. But for ours, let's just get a good meaty part of the simulation. Let's start over here now. I'm also trying to look at the render view, am sorry my screen is not big enough to really show all the views. But you can see where we're going to catch the spotlight over here. Let's just move that back here and compensate, we can increase the intensity a little bit maybe 800. I think that's good and that's a good starting point. Let's go back to the group of the render cam. As we animate, you can see we're probably going to go through this thing because we only have two key frames. As we get in the middle here, might get a little too close or not. Let's bring it out a little bit because that does get a little too close, just so we can see we're losing the background a little bit. Hit "E" then pull up rotation and just drag this up just a touch. Let me undo that. You can see in Maya that the manipulator isn't really moving. That's because I'm probably on world. If I hold down "E" and click in the middle here, there's different axes you can move along in world. It's always wise, always going to be this way, Z is always going to be that way, X is always going to be this way. If you want to go based off the local axis of whatever we have selected, we want to choose object. You can see that this will snap. Then we can see, constrain the axis that we're animating and it looks like we need to come up in Z only. Let's bring up some of that background in the back. I think that's enough. Yes. Well, let's scroll through this and see what we can see. It's dropped the render view and that little tab up here, so I can grab that back out. Let's scrub through. Let's make sure this is keyed. Not entirely sure, doesn't look like it made a key over here. We have that selected. Now we just need to select Z. Yes. I think I might have done that. We have object. Not entirely sure why that didn't key. Scrub through again. The other issue I'm saying is in the preferences, I don't think I have update all of use on, now that I've gone to two pain. In the preferences which I got two over here with the running man and the gear, I can go down to time slider, I can go down to update view, instead of active, I want to update all. Let's save and now when I scrub both sides of the screen, we'll update at the same time. That's definitely helpful. Let me get back down to the middle somewhere. I'm not sure why I didn't say that keyframe. We're losing the background and now I want to bring the camera up just a touch. To get more of that background back in and that's looking pretty good. Now I can see on the timeline it saved key frame. Let's just play that back. Actually, what would it be best as if we just grab a play blast real quick and check that out before we move on to solidifying this as the render. I'll play blast this real quick and I'll move the timeline down to our camera move, so 1659 and 1880 and from this view, I'll hit "Space bar" to focus in on it. I can actually and I'll just hit "Save" for now. I can turn on the lights to give a better view but of course, obviously is not very representative of what we have. We have crank the lights up to get through that atmosphere. These types of things aren't always helpful but just to see the motion of the camera, let's do a play blast. I'll right-click and scroll to the bottom down here and click the little box next to play blast. Again, go to the quick time format in H.264. Let's go from render settings this time since we are using the render cam and make sure we have got this open, the render settings and are probably going to go, let's go 720. We'll say save to the play blasts. Let's call this camera move-01 because we might do many of these and let's hit "Play blast". Now we have a plate blast on. We can double-check this camera move. It looks pretty cool. I think the one thing I would comment about this though, is the fact that because we're looking at it straight on from the RAM, we don't actually see that motion of the center moving quicker. With the pumping, we are just getting these rotation spasm, which are cool too but I think, one big thing of the attenuation that we set was getting the center to move quicker. I think that could probably be remedied by maybe covering this from another angle that was more in profile, so that we see through to the center, since this one is just more featuring the sides or if we really wanted the center to push through just increasing the attenuation and the simulation and recasting it. Let's try one more camera angle. We have this one. Let's just save that out. I didn't name that appropriately. Let's duplicate this group. I duplicate and I'll go down to render cam two and I'll call this group two. With that selected, we can do the same thing that we did with the spotlight. Just say look through selected. Of course, we're on the same spot. I think I might just unparent this "Shift P" unparents things and we can just delete that group. I'm going to center this camera out. The channel box just goes zero. I'm going to be straight on to this stream here. Let's see. I think what would be more interesting is to change the focal length. We're at a 35-millimeter. We can see focal length over here is 35. Let's crank that up to like 70. Then we can zoom out because if you think about like an electron microscope or shooting macro photography, those or at least, I mean even at 200 millimeters. Just to have the similar lensing or the camera isn't right up close to the source. I'll just check that out and make a play blasts of this real quick. Let me just double check the render view to make sure this doesn't look terrible. I think this is camera shape one. Let's hit "Play" and see. I mean, that looks pretty cool to be honest. Of course we have this light in the way. Let me just drop that out of view. I mean, I think that'll look pretty cool. I think with a very slow and of course now we can see that spotlight in a way, I'll just drag that all the way and then rotate it back up to get the same angle and reopen the Arnold render view to make sure that's the same effect. It looks pretty cool. I think we are or even maybe favoring too much at the top of the frame or this isn't just centered, sorry. This isn't just centered. I mean, that looks pretty cool to me. I think if we just do a slow camera move in, this would be pretty cool. Let's select the camera. Go to the first frame. Now with that, let's go to a different time and let's get the beginning of this thing. I think that could be interesting, just to have contrast of the two options. Let's do like 1550 and 1700. Over that period, we will zoom the camera in. This is the view we have. Let's grab the camera. Let's start it from the first frame here. We'll just sit a key frame by hitting "S" and we will go to the end. We will just dolly in here. See how far we can get. I think I'm going to move the whole thing up just to touch, so I'm going to open up the graph editor under animation graph editor. If I go to the Y translate isolate that, I can see it actually didn't auto key frame because I only moved in the translate Y over here on this last frame. I can just affect the whole animation, just bring this whole thing up, just a touch and let's see that. It looks pretty cool. The other thing we can do, actually, I want to get the graph editor back, is make this linear, so it doesn't slow down and slow up, it's just the same speed the whole time, I'll just hit the spline button here to flatten that out. I will turn off the frame, so that when I play blast, that won't be visible. Come here to play blast and can remove two and hit "Play blast". Now that we have this play blast, we can get a lot better view of this center, that attenuation going on with this other camera. Almost would like to see that go for longer to see the frame because just as we cut, we're seeing the frame fill. I think maybe even a 100, I don't know 50 or a 100 more frames. Let's just to split the difference 1770. The nice thing about doing that spline that we did on the graph editor on the camera, is we can just say select that key frame and go curves post infinity and just say linear, meaning just keep going in the same direction you're going. We don't have to actually animate more stuff, it'll just keep going towards the blood cells. I think that looks pretty cool. In the next lesson, we will finalize the render settings and kick off a render. Thanks for watching.
48. BF 14/16 - Render Settings: Great. In this lesson, we are going to look at the Render Settings and we've gotten to this point because we've finalized the simulation, we've created at model it, finalize the simulation, cached it out, we've let the scene, and now we've animated the cameras. We're ready to actually commit to rendering because we have to remember with the rendering is fairly time intensive, so we don't want to just start kicking off renders if we don't have a lot locked down. We don't want to waste our time rendering when we could make changes on the fly a lot quicker. Now that we have all this stuff locked down a little bit, let's open up the Render Settings with the gear wheel up here next to the hyper shade. We can immediately see that we have an issue here with which camera wants to render and we're in renderCam2. Let's start with renderCam2, so we'll delete that other one. We are in the right dimensions and we want to, right now it says we're going to try to render a single frame, we want to render multiple frames. We're going to go name.number.extension, and we need to list the start and end frames because we have our own little custom and frames now. Let's do 1550-1770. I have name.number.extension, EXRs are great because they're 32-bit and have a lot of latitude if you're trying to color correct. For the prefix, I'll just call this profile because we're in a more profile view with an underscore because you have to remember about setting the project as it will pre-assign the path for the rendering here. That's important and the filename is important. Now that we have profile here with underscore, we don't need that underscore because we can see what it's going to try to spit out now that we're in the thousands, it's also important to have the enough frame padding. It wouldn't hurt to maybe have an extra zero here. That's what I'm changing four, you can see it update, you might want a zero in front of there, who knows. Let's go to Arnold view and this is going to be maybe a more time-intensive thing, but open up the Arnold render view. Let's hit Play and let's select a region. Let's do something with some subsurface scattering because that's going to be important, and I'll let that finish. It's still trying to render. I can already see that doesn't look half bad. I'm going to go ahead and stop that because I've already see the parts I wanna see. I'm zoomed in on the image so, it's closer than what we're probably going to see. I'm actually surprised, it's not more noisy than it is. Typically, you need to increase the samples quite a bit. You can see there is noise in the subsurface scattering. Let's save a snapshot down here and let's increase the subsurface scattering to three and let's increase the camera samples to four. What's happening, you can see it update up here, but the number of samples, the camera samples are multiplied by all of these. So you can have individual control over sampling. How many times you want to double-check that the subsurface is going through the way it is and bouncing around and the light and the reflections. All of that's controlled here and I'm not sure if this is visible on your screen, but you can see how there's all these black little noisy pixelated dots and that's from low samples, specifically for subsurface scattering because we know the center is being affected by subsurface scattering and of course cameras going to help all of that. But that's why we bumped up subsurface scattering and the camera at the same time. So we say to snap shot of this and we've updated the settings. Let's take a new render here. This one took substantially longer amount of time to do, now that we increase the samples is going to increase the render time. Let's take a snapshot and we'll just jump back and forth and zoom in here so you can see the difference between the samples. This is the first one we did with the lower samples and then when we increase the samples, you can see how much smoother all that is, especially in the subsurface areas where there's lower light and its darker, we're getting a lot better results with a higher samples. Every time that we increase the samples, we're getting better results, but we're also trading off and render time. So we need to find a balance between nice samples and a render that doesn't take too long basically. I think this is a good starting point and of course you can always re-render, but it is a time investment thing. Let's start a render with these Render Settings and think, because we are going to be out here at this level, it will be a pretty good render. The other thing we can do, of course, is to create AOVs. Just real quick, AOVs are basically passes, and right now we only have a beauty pass which is everything. It's the lighting and the shadows and reflections and everything. We want to add an Ambien inclusion pass, which is basically a black and white image and the black areas are where, it's not shadows, it's where light has less chance to reach. Like the corner of a room, as the corner of walls meet, the light bounces back and forth more and more and every bounce, it gets less and less intense to get into the corner of a wall. We'll have this black and white image and I'll just help ground things maybe a little bit. It might kill some of the subsurface scattering though, but size to have the option and compositing. To create the Ambien inclusion pass, let's add a custom and we can just call it AO for ambient inclusion, and then we can go to the dropdown menu and select the AOV node and we'll go to attribute data and we can see that there's Default Shader option here for this AOV pass. This pass is going to render out a separate file. You can put it all in one EXR, but I like having separate files, especially if you work in after effects, it can get clunky to try to separate out render layers inside of any EXR. I like having them separate just, that's just a little cleaner. Let's go down to the Arnold Shader and we'll click Ambien inclusion. We just increase the samples maybe to five, just so it's not very noisy and then let's go to the built in AOV group and let's just grab the z and pull that over. What else we can do is actually grab the subsurface scattering. Now that we have these AOVs, we can actually preview them. Now we're in the Arnold render and let's turn off the snapshots and we can hit Play. Now, from this dropdown where we only had a beauty, we can actually look at the AOV pass. You can see on the outside everything is white, but on the inside it's black and again, that's not shadows. That's just the fact that light rays are bouncing around more and having a more difficult time reaching the center. So it's going to be darker, it's not a shadow, it's just the fact that light rays will diminish with more bounce and to get in there, it's a lot more difficult and it looks like we might need more samples. Let's grab crop region of this and make sure it's not as noisy as it looks here, which does look like it is. So we need to maybe increase the samples. Cool. I think that's good enough and that maybe even 16. Yeah. Now, that's real smooth. We should increase the samples there because it was so noisy, and then let's check out the z pass and I might need to turn that on the exposure. Basically the z pass is a depth pass and it's hard because they're all column the same plane right now. But you'll need it to be a 32-bit image because you can see we're having to lower the exposure by 10 stops. You wouldn't be able to get that with an 8-bit image like a JPEG or something and this stuff is too technical. Just ignore this. Skip ahead to the final render, but thought I might as well try to throw some more tactical stuff at you while we're at it. We can use this black line information to blur things out in compositing and not have to spend that render time in 3D. That's always good to have that option at least and then we can go to SS and man, I love subsurface scattering. It just looks so good and so here of course, we can see that we have it on its own layer. We can adjust the subsurface scattering even more and compositing by isolating this in its own layer. All of that's really good and we'll have these extra passes and rendering and compositing. Let's close that out and we'll go over to the rendering drop-down menu. We'll go over to render, and we'll click the option box of render sequence, make sure they're correct cameras selected, and I always like to say alternate output file location just because sometimes it doesn't save it where I'd like it to. So it doesn't pick up the render settings that we set up here and set projects. I like to do that and I'll just save this and I'll let this run overnight and we can look at the renders in the next lesson. Thanks for watching.
49. BF 15/16 - AE Compositing: Now that we have the renders done, let's take a look at them inside of after effects. I'm going to right-click in the project and go to import file, and I'm going to navigate to my Maya project and go to the images folder. You can see we have a folder for each one of the passes that we did. Let's start with the beauty pass. I'll just open that up. We can see that comes in as 30 frames a second. That's not correct. We set it as 24 in Maya, so we want to interpret that footage by right-clicking on it and going to Main and then choosing 24, and we can hit Okay. Now, we can click and drag this into the new composition icon, and it'll open up a new composition. It also looks like the dimensions were not carried over from Maya, the ones that we put in the render settings. That's something you might need to restart Maya and double-check. Of course it's always best to double-check those settings. You can see here we have it set as HD 720, but for whatever reason, Maya might not pick that up. Whenever you start a render sequence, like we did in the previous class, we want to go into the folder to make sure that the images are being rendered at the dimensions that we set them as. I'm going to get info here. We can see that it is indeed 640 by 360. Let's go ahead and move forward with the renders that we do have. I'll just fit this to the window so we can see it. It looks like everything's working the way I would expect it to, and all the subsurface scattering is happening really nicely. We can try to grab these other layers as well. Going right-clicking and saying file import or import file, and go to images. Let's bring in the ambient occlusion. We'll just put that on top here, and let's rename this. Now that we have more than one n, we'll say this is AO, and we'll call this Beauty. You have to hit enter in After Effects to rename things. It also looks like because it came in as 30. Now, we can see the timeline is not the synching up. So we need to interpret this footage as well by going right-clicking on it, interpret footage to be 24 frames a second, then it'll need to be dragged out here to the end. If we go to a blend mode of multiply by toggling the switches down here, we can get to the modes, and we can multiply that on top of the renders. Because we're getting this little bit of an edge here, if we lay down a background, let's bring that in. Because right now the black that we're seeing is just the black of the After Effects, it's not actually a background. If we had not turned on this background, we just have this default color. That's why we're getting these like little edges around all of the cells because they don't have anything to be multiplied on top of. We want to add a background in there and that gets rid of all those edges. Let's also bring in the subsurface scattering and see if we can pump up that effect a little bit with this pass. Go to images, subsurface, bring those in and we'll need to interpret that again to 24 frames a second. I'll drag this in on top again. Maybe on top of the ambient occlusion, because I think that'll take precedent over it. There's a couple different ways we can use this. We could just throw it on top and maybe reduce it down a little bit. But I think what might be best is to maybe have an adjustment layer and mask it by this layer here. We're going to create a new adjustment layer that we're going to use to color-correct. So right-click down here, new adjustment layer. I drag it below the subsurface scattering, and I'll call this Color. We can matte it by the Luma of this. Just to show that before we switch it over, it's going to turn off that layer so we can see beneath, and turn on in the effects tab here, add a color correction of curves. We'll just bump this way up. Another thing we can do as well while we're at it, and doing color correction is change this to be a 32-bit image composition. We can Alt click down here until we get to 32, and then go back to the effects. While this is ramped up, let's go and head down here and change the track matte to Luma matte. We can see that now this effect is mostly happening on the centers of these cells. Let's zoom in here. Right here, and you can see these cells, if we turn on and off, it helps push that subsurface scattering. That's the one nice thing about compositing is we can get it as close as we can get it inside of Maya, but then create the layers that we can use in compositing to further push that, and so we're not spending so much time re-rendering everything. If it's not exactly how we wanted it, we can just tweak things in the composite instead of waiting for a whole new render to happen. That's how we can use these layers to affect the look of the animation. Now that we have all these layers done, let's go ahead and export that. I'm going to hold down Command Shift and question mark, and that'll bring it into the render queue. I could also go to composition and add to render queue. Then I can set settings of the right codec that I want. Then we can export it out as whatever file name that we want. We're good to go. I hope this has been a helpful tutorial and I look forward to seeing you in the next class. Thanks a lot.
50. BF 16/16 - Vein Animated Texture: Now that we have done our first render, we're back in Maya and we are in our original camera that has a camera booth. So let's select the camera that we're viewing this through and go back to the range that we have the animation in. If you remember, we had the animation on the group and it rotated the camera around, so we're somewhere 1773. I have another key frame out here. This is the start position and we can go over the blood cells. For this one, let's turn on the vein tube and see how we can animate the vein tube to turn on. I did want to pause this video real quick before we move on and just say that the renders for this is taking an hour and 10 minutes of frame. For 240 frames, which is 10 seconds of animation, that would take 10 days at least but actually more. That's definitely something to consider when you're building these, is checking the render times and seeing if there's lights you can turn off, aspects of the material that you can adjust but in this case, I think it's just the fact that we have so many particles in this scene and there's a lot of light interacting with many different surfaces. In the next series, we will do a little bit of a bonus lesson and we'll reduce the amount of red blood cells and that will probably speed up our render time. You may also want to experiment with reducing the amount of the emitter. You can do that in rates particles per second. But this is a cache that we've already loaded in, so we would have to turn off the cache by going to the particle and going to in particle cache and clicking the enable checkbox off, then we can start to re-cache this or re-adjust it as we see fit as we did earlier in the class. Just be aware that this many particles will take a long time to render and back to the class. Let's turn on the vein tube and see how we can animate the vein tube to turn on. We will go over to outliner, select the "Vein tube", hit "Shift H" to turn it on. We can see the wireframe turn on. Let's take a quick Arnold render preview to see what we have. We'll make sure we are looking to the right render cam and hit "Play". I've also turned down the settings back to the defaults in the render settings, so that these render previews will happen quicker. It looks like this is working pretty well. I think the next step is to adjust the opacity because we've been messing with transmission and that is not the same as opacity. Let's go into the material and with the vein tube selected, we can go over to the vein shader and scroll down to geometry and opacity. As we scroll this down to be black, we can see that, now we can see inside the tube completely. I think the other thing we need to make sure with the tube on, since we are not going to animate it on, is to make sure that the animation that we did doesn't actually intersect with the tube itself, that will always stay above it and outside of it. It looks like that is the case. Unless render view, just to be safe, go into the animation of the render cam crew, go to Windows animation graph editor and we can look at the rotation here that we created and then we go up to rotate z to bring the camera a little further away from the tube itself. Just make sure we're clear of it. Now what we want to do is animate a ramp texture down the length of the tube onto the opacity of the shader. When we go over to the shader, we'll click the wireframe again in the tube I've selected in the render view preview as well. We want to attach a ramp to this, so that we can animate it along the UVs of this tube. If we go to the UV editor, we can see the UVs in the viewport and make sure that the ones we're viewing are the ones we want to affect. Let's go to UV and just select "Group" and we can see those in the viewport. It looks like the R-UVs are coming down the length of the UVs here. Sorry, that the UVs are going down the length of the tube in this orientation. We can create a ramp and go from the bottom of this UV space to the top and animate the opacity. Let's map in a ramp to the opacity here, highlight this checker box, bring up this now, then bring up this window and we can say ramp. As soon as we do that, we should see it update here as well and we can just drag down the light or we should be able to start to see the tube turns on. If we swap these two around, the black for the light, that will go in the other direction, so that the tube is on in the background but not in the foreground. We can also see this in UV editor, if we go to textures and choose ramp, unless Maya want to be buggy right now, normally it should show the ramp. Some reason, it is because this render preview is on, it's going to textures the ramp, try it again. For some reason, it's not wanting to display the ramp. Here we go. Now we can see the ramp texture and get an idea of the direction from black to white that it's going in. Let's turn back on the Arnold render preview and then select our region to render just so that we can speed up the previews. Now that we have this render preview, we can see that the ramp is, we've put the gradient about midway through here and we can see the tube is activated here and it stops in the mid ground. We can animate this edge to come at the camera or go away, whichever one that we want. I think it looks cool and I think this is a good starting point. So we can animate, set key frames for this, let's go over to selected position with either one of these selected and we can say set key, then we can select the other color and say set key here and then we can go to the beginning and get the position to be all the way off. We can drag both of the colors down to the end and we can set keys on both of those. Now we can see the red blood cells now throughout the whole stream and if those selected, even though we've set keys on this, we don't see the timeline. For that to happen, we need to select this ramp and we can see it inside of the graph editor, if we go to animation editors, graph editor, now we can see the position and how it's animated. We set these key frames here, first ones that are in the middle of the timeline. If we want the tube to be animated past the camera and can go on, at least by the end, let's go to the end, the last keyframe and [inaudible] maybe get a quick snapshot of the whole thing by turning off the render region. We can set new keyframes. We can even copy paste these, select in the graph editor and copy paste and then just animate from the graph editor, we can see this update over here in the ramp, so we can have control in whichever way that is easier for us to do that. Let's just drag that on and maybe we might want it to be slower when it's coming at the cameras, so these curves flatten out by the end. Just drag it down until you just see where the edges right now at camera. We can see now that tube is gone, we just got rid of it. If we drag it up, it should come back on again. Here it comes and let's just finish that off and make sure the tube is completely on by the last day of the calendar. So I'll just drag this all the way up. The other thing we're going to do, let's go to this middle keyframe. I'm holding down "K" and clicking and we can change the timeline without having to actually be on the timeline when we hold down k. That's something that's pretty handy. Now with this selected, let's try and get a better look at this edge. We can actually create a little bit of noise in this edge. So instead of it coming all as a straight edge, if you have little noise, then there's a little noise, Ashley and Tom here. Let's increase this. If we right-click here on the sample, we can actually see this edge breakup. So you turn off the noise, right-click and you see it's a flat edge, which is related and is this edge right here. If we go to noise and increase it and then right-click, we'll see it's roughed up this edge a little bit. There's only a couple bumps here, so we increase the frequency to make there be more bumps. So that's looking pretty good. So we've learned how to animate a texture to affect the vessel to being animated on. Let's turn back up the render samples in our render settings and I'll turn this back to five and three and I'll make sure that we give this a new name. Now we're ready to go to rendering, render, render sequence. We want to render cam, the original render cam. Let's make sure we choose that as well. Now I'm going to click "Render sequence" and close and I'll see you in the next class, where we will look at these renders and after effects. Thanks for watching.
51. Heart 1/7 - Preparing The Scene: In this next series of lessons, we'll discuss how to create a heart shape of the particles. We're going to start with the existing file that we have and I'm going to rename this. Let's go into a perspective view. We want to turn off the cache, because remember, we've cached this. Also this is the heart shape we're going to eventually use to put the particles inside of this heart, so we shall lift this up for now. I'm going to turn off the vein which we had animated on in the previous lessons and I'm going to go ahead and get rid of the render camps that we have. I'm also going to turn the transmission down a little bit just so we can see it as well. We can deal with that in the render time. For the particles, that was cached out, so we need to turn off the cache and adjust the particles. In this series, because the heart is fairly small in size, we can go with much less particles. I'm going to do that as well, but first, we need to turn off the cache, because we can't adjust the particle simulation until the cache is turned off. Let's go over to the particle cache, we'll disenable it by unchecking the enable box here. We'll go over to the emitter tab, and let's just turn this down to maybe 100. Let's actually have the heart be over here, so we don't have to go as far for the particles to get there, we don't have to admit as many particles. What we're going to do is essentially place the heart here. We're going to create a smaller tube and we are going to inject these red blood cells, and we're going to put the red blood cells inside of this heart and then we're going to make it pump. That's kind of the general idea of the series of these next lesson. Follow along and let's do this together. I have heart in the right place. But I think the thickness of this tube is too big for our purposes. I'm actually going to turn off this vein tube and we're going to create a new one. Let's hit Delete, and let's turn the extruded face because I believe this will adjust along with this nerve circle so we can actually just scale this down and the two will go down with it. The only other thing we need to adjust as well is also the volume access here, because we can see the radius now is much larger than a tube. Let's go down to the volume control attributes and turn down the section radius. We can see it adjust here. Let's compare that to the size. We're essentially eventually going to make a hole in the side of the heart so that the tube has somewhere to go into. I'm just going to go reset this. Let's see where we left the start frame for this. Under the nucleus, we can go down to time attributes and the star frame is at 1001. Let's just go ahead and drag our time frame down there so that when we rewind, we'll build a reset the simulation and it can turn off fully. We have the heart, we have the tube, we can essentially delete all this right half. I'm going to delete these lights as well because we can relight it later and start fresh. Leave the sky dome for now because we might actually use that. We don't need all this other tube. Let's just go ahead and get rid of that. Let's go into the curve and isolate it up here by selecting the isolate select button. Let's go on to control vertex by right clicking and dragging. Let go and then we will turn off isolate select so we can see round about where we're going to need to turn off this curve that the curve is going to end now inside of this heart. I'll go into four to see if I'm selecting the last point that I need and I'll just go out and hit Delete. You can see that takes the nerve extrusion with it, so that tube is also gone after the heart. Let's go into object mode, [inaudible] five, and now we can compare the radius. I'm trying to decide on the shape that I want this to take. I think that'll actually work. It can go in the back of the heart and then it'll fill this volume and we'll add some more fills in here to make the pumping action. In this lesson, we prepare the scene to continue to work with it and create a pumping heart of red blood cells. I'll see you in the next lesson where we will progress into using more advanced techniques to make sure that the heart is filled with red blood cells. Thanks for watching.
52. Heart 2/7 - Creating An Animated Opening: Now that we have a good starting point for our scene, let's take everything and move it to the center just so it's a little easier to navigate around. Let's select the heart, the nurbs circle, the curve, and the emitter. The reason why we're not selecting everything is because, some of these things are dependent on the others. Like the extruded surface is going to follow this nurbs curve, that it was extruded by and the volume axis field is going to follow the curve. We don't have to select everything we just needed the parent objects of things. Now we can move this over to the center of the scene so that we are in more familiar territory in the world space. I'll just move this up a little bit. Let's select the nurbs surface here, and go to modify and convert that back into a nurbs polygon again. Let's go ahead and hide the nurbs surface "Control H". We'll rename this to vein and let's take the heart and create an opening in it, where the vein intersects it. I'm just going to duplicate this just for safety. I always like to do this and call it something like a orig, like original and hide it just so in worst-case scenario I always have a backup of the original. Instead of having to go back to old save file or something like that. It's just a workflow thing that I like to do. I'm going to select the heart and go into faces. Just get a general idea by going inside the tube here with the camera and selecting everything. I'm going to go outside and just start, I'm going to actually hit this little button up here. It'll isolate the movement on two axes if you hit those little squares here. What I'm doing is, holding down "Control" to deselect the faces that we want to remain. Because we just want to create a hole just big enough for the tube. I'm just holding down "Control" and going over the model. We don't have to be super exact, because we're not actually going to even see this heart. This is just the container for the particles that will be emitted inside of them. We'll be left with the outline of this shape, but we won't actually use it. We don't have to be very particular with this. We just want to make sure we're getting most of it. I think that's pretty good. Maybe we went a little too far, just double-checking it. Let's just zoom back out, make sure it yeah. Whenever you're selecting faces, you always want to make sure you didn't select something through the object like we did there. Now we can see the manipulator is centered over here, so we know all the faces are selected over here. Let's delete those. Now we have a hole in our heart. As hopefully metaphorically, none of you do, that are listening to this. Let's duplicate this. We'll drag it over here, so we can see it. We can Shift select it and go to deformer, in the animation. We can also get to it in the modeling menu, the deformer's in both of those menus. We go to deform and choose blend shape. What a blend shape is essentially saying, one of these meshes is going to follow the other. If we select this one, we can see we have blend shape now as an input. It's set to zero, and we turn it on to one. Nothing happens because they are identical, nothing has changed. But if we leave this on at one, and we go into component mode and choose a vertex and drag it, it's going to follow. The reason that is significant is it allows us one controller to animate, to adjust many things. We could go in here and animate each one of these vertices, but that's really inefficient. The reason we're making this at all is, because once all of the particles go inside of the heart, we want to close this like a door so they can't escape. We need to create this blend shape connection so that when the particles go they can't escape. Let's go ahead and choose some of these edges. We can start closing this down. We can just drag this down. It actually wouldn't hurt if we use soft selection. I'm hitting "B", and then I'm holding down B, the middle mouse dragging to select an area. We'll just drag this down and because it's in the back of the heart too, it probably won't really matter. The silhouette is a little messed up, since we're going to be viewing this from the front. But I want to get this into a shape where no particles can escape this, because we need as much blood in the heart as we can get. We have a healthy heart. We've got that almost closed up. The other thing here, once you start getting in close, and I'm just trying to select this edge. You can see it's selecting this other edge, as well. We can go up to the tool here. I'll open up this window and under soft selection, we can say, fall off mode by surface. Currently it's a volume, so it's assuming volume around a point. It has no respect for this particular piece of geometry. It's just thinking, if you think of a volume is like fog, that fog is maybe touching over here, touching over there. But if it's a surface, it's going to start at this surface and just go out from there. Since these surfaces aren't connected and won't bleed over into trying to select that as well. That's how we adjust soft selection. Now that, that is in a good spot, let's also just view it from these other angles to make sure it's not doing anything tricky like that and reduce the soft selection size. It looks like no particles are probably going to get out of that. Now we can see if we isolate select these two, they are identical because we have this blend shaped turned on and we can animate that and to be an opening, closing for the heart. We're going to let the particles in once they're all in there or even if they're not, we can just close off this shape with the blend shape. We can continue with the simulation with all of the red blood cells inside the heart and then we can hide this heart later and just see the silhouette of the particles filling this volume. Thanks for watching, and we will continue in the next lesson.
53. Heart 3/7 - Particle Stream Into Heart: Now that we have the blend shape created for the opening and the heart, we can hide this one. We can also group these together. I'm going to Command click an outliner and then do Command G, and just say heart Group. When that glows, let's go ahead and put the original in there. Just for clarity sake, I'm going to delete that too. Now, we have the hearts and we can hide the Blinn shape one because we're not going to need to see that. Let's turn the tube and the heart into colliders. Up until this point, we've used the strength of the trapping mechanism of the volume axis field. But from here on out, we can just turn off the trapping of the volume axis field and rely on these being colliders and the red blood cells colliding with the walls of the vein and the heart. I'm going to turn that on three just so we get a better idea of what that looks like. I'm going to go up to the effects panel, go over two nCloth, even though we've been working in n particles, the passive collider button is actually in, nCloth. That's a little confusing. They may update that in future releases where they have passive collider available here and there, but even if they did, it'd be the same thing. Let's just create a passive collider. We want to do that for the heart as well. We'll say, nCloth create passive collider. You can see we have these two new nodes called nRigid. That means these things are rigids. They're not going anywhere. The particle is dynamics simulation we have is going to collide with them. Now that we have the collisions turned on, we can actually just hide these, because even with those hidden, they will still collide with them. Let's actually unhide the heart and let's rename this because it's a little confusing in here that we have heart, it's going to call out the main. Let's turn the blend shape off because we want the door of the heart to be open. Now, it's open to let the particles in. Now, let's go to the volume axis field and turn off the trap. We are going to allow the particles to collide with surface. I'll go to volume axis field. I'll scroll to the volume control attributes and trap inside, or we can just turn off. You can see it get trap radius and trap ends because that no longer matters. Let's hit play and see what we have. It appears that everything is working as we expect, and the particles are going inside of the heart. Everything is working as we would expect and in future lessons we can tweak these to make this work a little better. Thanks for watching.
54. Heart 4/7 - Filling The Heart: The particles we created in the previous lesson are emitting quicker than they can be pushed down the tube. We can reduce the emission rate, or we can also scale down the size of the red blood cell. That's really up to you, either one you want to do, so in this case, I'm going to do a little bit of both, I'm going to go to the emitter, and I'm going to reduce this by half, and test this first before I reduce the size of the red blood cell. We can see they're not getting backed up as much, they still are a little bit, but not as much. I will reduce the size of the original red blood cell, select it from the outliner and we can hit "Shift H" if we want to see it. Let's reduce it, tiny bit, I'll reset the simulation. We can see, it's also the blood cells that are getting stuck on the outside of the wall, it's the attenuation because in the center, none of them are getting stuck, but it's the ones that are getting on the outside of the wall, that's probably it as well, we're going to reduce the attenuation of the volume axis field, select that and go down to the Attenuation here, it's at 1, let's reduce that to 0.4, more than half, and that helped quite a bit. They still seem to be getting stuck there, let's reduce this all the way off and make sure that's for sure what's happening, because the other thing that could be happening is, these are hitting a dead zone in the volume axis field. If the volume axis field is smaller than the tube, then they can get outside the volume Axis field, now, the trap is off and then gets stuck there. I think that's what's happening here, you can see the difference between the radius of the tube and the radius of the volume axis field. The volume axis field is not able to affect those stuck red blood cells. We can go to a section radius and just crank that up until it matches much closer to the diameter of the tube, now we can see that none are getting stuck, they're all flowing inside the heart. Let's hide the heart for now, and we can see, after they get out of the volume axis field, there's no more force acting on them, they're just floating in space. They're not really forming into the shape of a heart yet, we'll need other fields to affect the particles to create that heart shape. It looks like the speed is maybe a little too fast, I'm going to rewind this and go to the particle, now, that we lowered the attenuation, the particles are going pretty fast, and now, that we learned the attenuation wasn't actually the problem, let's turn the attenuation back up a little bit, it was at 1, let's do half, just to create a little more natural motion. What I'm also looking for here is to get a sense of how long do we need to emit particles, and how many particles do we need to emit. This appears to be not enough to fill that heart volume, if we turn the heart back on, we can see how much of the space we have to fill, and we can just eyeball the fact that, once all of these are bunched up inside of here, that's not going to be enough, even 200 frames into the simulation, we can see where almost frame 200 or 1,200, so we can increase the emitter because we had reduced it originally, to see the particles better. Also from the previous lesson, we learned that this could also be the source of why the renders were taking so long, I want to make sure that we try to keep this lower as well, and try to be as efficient as possible. Now, let's get to frame 1,200 and compare how many we have, and it's definitely more, and we can also scale back up the size of the particle a little bit, maybe go a half between, just a tiny bit. Let's turn off the emitter around frame 1,200 and see if that gets us enough particles to emit inside the heart, on frame 1,200, I'm going to set a key, and I'll go back 1, and set a key, and let's just turn it off now at frame 1,200, so now we have, it goes to 70, and then after 70 just turns off. Let's extend the range here, we can see what happens after the simulation is done emitting particles. The volume axis field is still acting on this, even after it's done emitting, so we can see these little stragglers are still going to continue to go inside of the heart shape. This is about where we would want to close that heart-opening that we made so that we can trap all those particles inside and still, it seems like we're not getting enough particles, let's ramp this backup to maybe 100, I'll go to Windows, Animation Editors, Graph Editor, and I'll go to the Rate and increase this to 100, close that, and check this again. This seems to be doing much better, and we can also see that we're going to need a lot more time because the volume axis field takes a while for it to get all the particles down into the heart. Let's go to the heart, will unhide it, and we can see that we are going to need to close off the heart towards the end of the time range that we have, let's play the particles out and see at what point do they all enter the heart, then we can animate the heart closing. We can also see, some of these are getting stuck outside of the heart. It looks like these were hitting the lip, and maybe getting shot out the side here, but we can see around 14-15 is where we need to close the heart. But before we animate that, we need to solve this problem of the particles going out, and the first tool we have at our disposal is this blend shape. If we turn this on, let's see where it gets us, and maybe we can just leave this on at a closed amount. We could also turn on the vane, Shift H, selecting in the outliner, let's delete the history, Edit, Delete by Type, History, and let's select an edge and just extend it into the heart, so that we close this gap. Now, none of those particles should be getting lost outside, we can also adjust this one seems to be maybe too far in, and once this is done emitting and closed off, we don't want it to influence the shape, and so a lot of the heart container, I'm just going in and finding why that is the case, and adjusting this back out. It looks like we've closed that hole, and let's go back to the heart, and animate the blend shapes, so we're going to blend shape of the heart, we'll set a key, and let's just go a few frames forward, and we'll turn it all the way on, and because we have auto key on, it'll automatically set a frame for us. Let's turn the geometry back off, so that we can see, and just for simplicity sake, I'm going to select both of them and go down to Display under the Channel box, and click this far right button and we'll get a display layer, that way, we can just toggle this on and off instead of having to hide and unhide things from the outliner. I'm going to name this GEO, and that will give us an easy way to view things. Let's go back and test to see that we closed the hole that we had, the gap, that we animated the blend shape in the correct place, and we have enough particles to fill the heart. It looks like we might have been a little early on closing it. I think because we got rid of that gap, it prematurely closed down because there was more of them trying to actually get in that it slowed everything down. We can just shift, select the keyframes, and drag this all the way back, and let's replay this and turn off the visibility so we can make sure that the red blood cells are getting all the way inside the heart before we close it. Let's turn on the heart and let's go to 4, you can see there's a few strugglers here, and it looks like they got stuck maybe because we had this part of the heart too far in, it's these little adjustments you have to keep making in dealing with thousands of particles, there's going to be little issues like this that continue to pop up. The tube should go all the way inside of the heart, and the heart should surround it, that's really the best way to go about doing this. Let's make sure that's the case so they don't get stuck on the rim of the heart and any of these positions. It looks like we got that. It's far off in that those will not get caught, and just for safe measure, I'm going to open up the blend shape, and slide these down slightly more. Great. In the next lesson, we will discuss how to create a pulsating effect, and fill out the entire volume of this heart. Thanks for watching.
55. Heart 5/7 - Pumping The Heart: Now that we have all the particles inside of the heart, we need a way to control them to expand out and fully show the silhouette of this geometry and this heart. We can see there's a gap over here and this area is not getting filled, this corner is not getting filled. We need a way to further adjust and control these particles. What we're going to do is create another field with the in particle selected, we're going to go to fields and solvers. The first one we're going to do is a radial field. With a radial field selected, we're going to drag it over and up and we're going to go to the attribute editor of the radial field and we're going to go to the volume controls and instead of none, let's choose a sphere. When we choose a sphere we can see that it changes into a sphere here and we can actually just scale this up to make it bigger. We want to scale this larger than the heart itself because we want it to affect all of the particles inside of the heart. So we'll scale this all the way up because we want the heart to be completely contained within it. If we simply let it go from here, from maybe midway through where we've just introduced a new field, all the particles should go to the edge of the heart. Let's turn off the geometry so we can see that happen. I'll hit play. So now they're all just getting pushed. The problem with that is, is if they continue to go that way, that there won't be any left in the center. We want to do this in a general way so that we can continue to have some filled in the center and also animate it because we want to show that the heart is pumping. We need to turn off at the beginning because as you can see, as they get in here, they start to try to get pushed back out. So we can reduce this magnitude and then animate it once they're all inside of it. Let's go ahead and do that, we'll hit escape to stop the simulation. We'll go over to the attribute editor and in magnitude, let's just go to a one and attenuation that means the fall off towards the edges. We can reduce that down maybe a little bit because I do like the fact that they're not getting forcefully pushed against the wall of the heart. The blend shape, let's see when that turns off and that's around where we want this effect to start taking place. Go down to the blunt shape and we can see it's over here, when it's totally closed off. Let's grab the radial field, I'll go over to the magnitude and set a key. Then we will go forward and set another key. We'll actually go in the negative, so it all go towards the center. Let's try a negative five first and then let's go forward a little bit and try a positive five. Let's pull up the graph editor so we can see what we're doing a little better. Sitting F to frame up. What would be nice is if we could just do a post infinity cycle and we could do that if this first value is the same as that one but if we did that, let's just go ahead and do that. Let's see what happens here. Let's turn that off. We know when the particles first get in there, they're going to be attracted to the center. They're not going to go to the outside, which is a nice effect. So it depends on what effect are going for. If you want them to stay towards the outside as soon as they get in, then you don't want to start with a negative value because it will attract the particles towards the inside of this radial field. Let's try that first because the reason for that is that we can take it to our advantage the cycling of the animation. We can go forward in time and we can just copy and paste that with command C, command V. Because we did the post infinity cycle, we can see that the animation just cycles. We can see this from view and infinity, we have infinity on so we can see that. The one thing that I also want to change is how the curves take place. Typically when something pumps, it goes very fast out. So it goes very fast out and to have that happen we need the curves down here to be more linear. It will slow down towards the outside animation because remember positive is going out towards the edges of this radial sphere. We're going to go out towards the edge of the radial sphere quickly then we're going to slow down and we're going to reach the edge and then we're going to get slowly pulled back in and then bounce out. That's going to be the heartbeat and that's why we wanted it to be linear. Let's close this out and reverse the time and see what animation we have. Let's go ahead and turn off the visibility of the geometry and hit play. You can already see that the radial field is attracting all of the red blood cells to the center and that might be the look that you want to go for but we can also adjust that later. We can actually bake the cycle down from the graph editor and then just add one key frame at the beginning. We just want to make sure before we do anything like that, that we have the animation cycled the way that we want to. We can see to that because the radial ramp was drawing the particles in towards its center, it was done getting all the particles inside of the heart much sooner than before. That's something we need to take into effect. This is not looking too bad actually. On our first attempt we can see the particles are pumping and the aren't going too fast or too fast in or we're not losing a lot in the center. Now that we see field is influencing the particles to draw them into the heart quicker. We can adjust all of the start of animation. Let's wait and see where that actually happens. Let's turn on the the geometry here. I'm just going to hide the vein because we want to see this edge of when all the particles are inside. So I'm going to hit play to keep this going. It looks like we have so many particles that they're starting to collide with each other and they're not actually going all the way in. The other thing we could do is animate the position of the radial field to be less towards the center of the heart. Let's first grab this position by setting key-frame. Maybe down here, push shift W to only hit keys on the translation. You can also click and drag here and see key selected. Then we'll go down here to where we were and drag the radial field over here, so that it will just get the edge of this intersection of the tube and the heart and pull all the particles far enough inside of the heart to make room for all of them so that then we can close the door on them. Let's rewind and see if that affected it, and I'm going to guess that it did. I'm going to go ahead and change this animation to close the door, much sooner. Let's drag that down. Maybe in the middle here, also radial field is getting animated over, and with that selected, I'm also going to select the magnitude, and I'm going to right-click and say Sync timeline display so I know that I'm only looking at the keys of the attribute I have selected. We can see here's translate X and let's go down to magnitude, and there are those key-frames. I can move this down in time a little bit, and I think that'll be good. Let's undo that little Sync toggle thing and we can rewind and play again. Let's watch this intersection here to see if this radial field is helping draw the particles inside. I can go to forward to see on the inside, and it does look like it's helping make room for all the particles and bring him inside. That's good and it's probably going to help everything move faster again as well. When I have to adjust the animation of the door closing again, because all the particles will probably be in sooner. Note they don't have as much resistance trying to get inside. It appears we're so close to getting it. It looks like that did work, so we can probably close the door around here. Now we see there's no particles on the outside, and we can animate the blended shape. We'll click on the heart, go to the blend shape and we know 1445 we want it closed. Let's drag shift, select those key-frames and just get them down here somewhere around 1445, and close that off. Great. Now that we have that working, let's turn the visibility on here, and let's see if the animation of the heart pumping is to our liking, and enough. Now we can see all the particles are going down the volume axis field. They're getting colliding with the geometry of the tube. They're going through the opening of the heart that we created. They're getting attracted to the center of the radial field to make room, so they all fit inside the container of the heart that they also will collide with, and we're using a blend shaped to close the door of the heart and then these will start pumping as the radial field gets animated over to the center of the heart. That looks pretty darn good actually. I think the pumping action is pretty good. The one thing I would say about this is when they're all over here and around the radial field, they're just static, they're just stuck there. They're not moving at all and the one field that we can add to this one is the turbulent field. We can go to fields and go down to turbulence and turn that and create a turbulent field. The turbulent field selected, we also want to make that a volume, and let's get on the volume controls. Same kind of thing, even though this is a turbulent field. It has the same controls as the radial field. When you learn one, you can apply it to more than just that one because they have the same thing. We're turning this into a sphere as well. We're going to scale this up just like that one. But what it actually does to the particles is not the same. A turbulent field is just going to add some noise. Let's scale this up to be at least the size of the radial field. Let's get it centered on the radial field, and we want it to follow the radial field. Because remember we animated it from right to left to make room for the particles. Let's middle mouse drag this over the radial field. Now it is a child of the radial field. We can click this little plus button and we can see the turbulent field is down here, and if we scroll, the simulation isn't going to update of course, but we're just looking at that the turbulent field is following the radial field. We get some animation for free there. Let's rewind this and play again, and what we're looking for is to see some little bit of movement and noise while all of these red blood cells are just hanging out here and waiting for the rest of them to join. One other thing we need to do is to make sure the turbulent field is connected to the particles, because when we created it, we just selected it from the menu up here. We didn't actually have the particles selected and then creating it. We know that Maya doesn't really know what this field is supposed to be for, so we have to tell it. If we haven't selected the M particle and then choosing the turbulent field, turbulence, that those won't be connected. You have to go to windows, relationship editors, dynamic relationships, and you can see with M particle selected, turbulence field is the only one that is not selected. If we just click that, now we know that the particles are going to be affected by the turbulent field. What happened here, our heart went further away before the particles even got to it. The turbulence field that we added is now acting on the heart. Let's go back to the relationship editors and go to the dynamic relationships, and we can see when we created the turbulence field, we had the heart selected. The turbulence field is acting on this heart geometry. Let's just select that and make sure that's not happening. That's pretty funny. That happened, and let's go to the display layer and just turn off the visibility for the mesh. The turbulence field seems to not be affecting this as much as I would like. Whenever that happens, I would like to go in and just start cranking values until things start moving, and that's a good way to troubleshoot stuff, you do want to save, let's go ahead and just save this. When you start cranking values, that's an at-risk moment for Maya to crash. Let's get in the magnitude here and just go to like a 1000 here. Yeah, there we go. Now we know at least the turbulence field is acting on it, and we need something much smaller than 1000. We'll rewind and play back and see that indeed the turbulence field is working. We can also turn their frequency back down. We had turned that up so that when the noise is going through this and affecting it, it's bigger waves and their frequency isn't as small. Let's turn that way down. Yeah, so when we turn that way down, you can see like the wave that's affecting it is like one big wave now instead of a bunch of small ones. If we crank up, I'm on the wrong one. If you crank up the frequency again, they'll really start to move and bounce around. Let's go low with this. They're really turning, and let's turn the magnitude to half of that. We can see the particles should swarm around and they're not just stuck in the middle. The turbulence field is working on it, and it's working pretty well. In this lesson, we learned a few more fields. We learned the radial field, the turbulence field. We learned how to create colliders, create blend shapes, and get particles inside of a container like this, and then control it as we see fit. Thanks for joining me in this lesson and hope to see you in the next one. Thanks.
56. Heart 6/7 - Lighting And Rendering: In this lesson, we will light the scene and render it. But first, let's create a cache by selecting the end particle, going to in cache, create new cache, select an option box here, so we can name it, the heart cache. Let's extend the frame range a little bit, so we have some more to work with. Let's go ahead and cache that and create. I'll see you in a second. If I had asked this because we've already cached it, you can blend caches together, so you can try different caches, and then it'll do a linear interpolation between the caches, like positions over here, positions over there. It'll go on between them, a thing, but we want to play, so I'll click that, and I'll see you in a minute. The cache is finished and I'll just go to the tab here, and enable it. Because we closed it. So now that it should usually replace it, I just want to double check that because it didn't actually re-enable it, and it didn't connect that cache. I'm going to select the XML file here and hit ''Open'', and we get that cache back here and it's enabled, so everything should be working. But if it isn't, just check this cache tab and make sure what you named it is here and the directory is here and all that is correct. That's the way to troubleshoot any cache issues. Now we can scrub the timeline really quickly and see everything. Let's just turn off dynamics. I'm going to turn off dynamics. Now, we can just see the particles by themselves and playback in real-time. We can right-click down here, and go down to playback speed, choose real-time. Now we can scrub the timeline as much as we want and as quick as we want. Let's start working on the lighting now. Let's turn on the sky dome light and let's just see what that gets us. If you remember, from a few lessons ago, we did turn it off in the camera settings. If we want to see the white background or whatever color of texture we map in here, for the skylight, we need to turn on the camera to one. Let's turn that on. I'm going to pick somewhere where the heart is visible and go to the Arnold Render View and hit ''Play''. I'm going to go to the window 3D manipulation, so then I can rotate it around and use the viewport as well. It looks pretty good. I think for this example, I'm going to leave the background on. The one thing that we will miss is an Alpha channel though. That's one thing to keep in mind. But for the most part, this looks like it's rendering possibly quicker than our previous one. I had guessed that the previous one was rendering, so slow because there were so many particles in the frame. This has many fewer particles, so hopefully, this will render much quicker. Let's create a new camera. When you create a new camera, it will by default choose it as the new view. We can see this down here perspective one. I'm just going to rename that, render Cam, and let's turn on the film guide here. Let's just go back in time. We don't want to see the source of this, so let's just rotate around a little bit. I'm just trying to get a feel for what the animation is doing. We can get a good camera move here. I think the rotation of it, is a little off. I'm going to frame up on this and now the rotation is based on that object. I'm going to deselect it. I think some rotation like this into the front view, would be cool. Let's look around here. Now we get some depth. We can see these coming at us. So let's do something like that. I'm going to select the camera and go somewhere in time here, to where the blood cells already started, hit ''S''. We can go to the end. This is going to be pumping. Let's just rotate around here, to the front. I like to check how the center looks with this grid up here, so we can see the front point we want. If we want to add center, we need to line that up. Again, check that off and see this animated camera now. It looks pretty cool. I think the turbulence is maybe a little high. You could continue to tweak these values. But for the most part, that's cool. We can look at the lighting. I'm just using the sky dome, which again is just up here under Arnold sky dome light, which we are using, and does look a little low as far as the intensity. We can go up here. The intensity is at 0.5. I think that was from an earlier lesson, possibly. We can just crank that up, and it might not hurt to give it a little more direction, so to have a directional light as well. I'll hit ''Directional'' and it's probably down here somewhere. I'll just hit ''Hold down v'' to ''w'' and see if I can't get it to snap into view. The position again doesn't matter, it's just the rotation that matters, the direction, that it's going in. Let me crank up the intensity to make sure that directional light is working. It is. The shadows actually under the Arnold tab, the samples and all that. You can get to that down here. I think I'm going to go with something like that. Let's see. Just for fun, if the back lit with the subsurface scattering is better for the particles and just to see their inner quicker, I'm just going to render a region. The samples are pretty low, so I might turn that up a little bit in the render. We can go to the render settings. The first thing we need to do is to set a new range and all that fun stuff. The other thing while we're on that is just, how long the render is going to take. I might adjust what I'm actually going to render, so I can avoid maybe hours of rendering that I might not need. I think maybe around 1,100 might be a good place to start. We can see it form. You know what? I think I might even do it in maybe two parts, and render this section, and then render it from another angle maybe, something like that. You could do a little chunk, so you don't have to watch the entire thing play out, which might take a little too long. If we're looking at that right now, that's like 300 frames. That's going to take quite a while. If we're doing an hour frame that could take two weeks or something like that. We definitely want to make sure we're being efficient and the frames that we use, and also of course, if we have the resolution, it will half the amount of time. We could do like a smaller HD version, scale it up in After Effects, apply a little bit of sharpening and de-noising, and if it's seen online, a lot of people won't even tell the difference that, it was a lower res. But that is definitely an option because you have to start to get pretty smart about how you're doing this stuff. If we had more time, of course, we'd mess with the samples and all that thing. The samples were pretty high, so we might turn the camera down one, and so at 1,100. Let's get maybe 1,500. Let's get maybe 1,520. We need to make sure we select a camera. We want the render cam. We also want to make sure when we're rendering, we mean go the render tab, render and set the test resolution to be the render settings, and to make sure when we render sequence, that we have the correct render cam here. I also like to select the alternate output here, and set to make sure that everything goes there, in the correct file. Because sometimes even though the project is set and up here it says it's correct, sometimes it won't. Just to double check all that stuff. I'll just call this heart render or maybe heart pump. Everything is pretty much good to go. We have the EOBs from the previous lesson already loaded in here, if we want to use that. I will see you in the next lesson, where we can bring the stuff in After Effects and be done with the blood section of this. Thanks a lot.
57. Heart 7/7 - AE Composite Heart Pump: In this course we will composite the heart red blood cell sequence. Let's right-click and go to Import file. We'll navigate to the beauty folder. We'll find the heart pump render. Again, we'll need to change the interpret footage to 24 frames a second. We'll drag this into a new composition over this icon, and it appears that everything is working pretty good. Let's bring in the other layers. We're going to import file. Let's see if the amine inclusion gives us anything. We'll put that on top and then we will go to a blend mode of multiply. I think that'll help because this is such a bright image, and of course, we have to interpret this footage as well. But I was saying that this footage is so bright from the way we lit it, I think it will help to do an amine inclusion on top of it like this. It is giving us quite a bit, especially on the inside of the heart, we can differentiate that depth with this amine inclusion pass. Of course, as always, we could color correct this. We could drop its opacity a little bit. I think I'm going to color correct the beauty pass with a Curves Adjustment. I'll just add a little bit of contrast and trap the darks down a little bit. It appears to be getting a little saturated when you increase the contrast. I'll select, add a "Hue and Saturation" and drop the saturation just a little bit. To toggle the effects of an entire layer, it's easiest to go to the toggle switches mode here, and then just hit the fx button and I'll turn them all on and off. I think that adds just a little bit extra, might've gone too far on the desaturation. We can also look at the subsurface scattering, I'll right-click and bring that in and try to remember to interpret the footage again. I'll rename this so I can keep track of these layers by hitting "Enter." It's one of the SS, and I think I'll do a screen blend mode and see where that gets us. I think that adds a little bit of extra contrast. I might put that on top of the amine inclusion just to see how that changes it a little bit. Of course I forgot to do the interpret footage, which is always fun. Now that will sync up correctly. I think this is looking pretty good. We can continue to tweak it with colors or any other effects that we've done in previous lessons. But for this purpose, I think it does pretty well just to leave it bright, since that is a heart shape. Thanks for watching this quick lesson on compositing these images, and I'll see you in the next one. Thanks.
 Lucas Ridley, Professional Animator