Transcripts
1. Introduction: Hello, My name is Madison. I have a masters
in 3D animation. Welcome to the first
course in this series. In this course,
you'll learn how to animate most
foundational exercise, optimal bouncing ball
across the screen. Because the screen is taught
in every animation course. That's why we're starting with a to the bouncing ball
across a discrete. It will teach you
about timing, spacing, and posing, which are the
essence of 3D animation. But that's not all we
learn in this course. We will also learn it well, the animation principles
and how to animate in Maya. And it will also learn one of the most important Maya plugins for animation
called Adam bought, which is used by pro animators everywhere to speed
up their workflow. But the thing is, you
don't really need a degree to work
as a 3D animator. All you need is skills. That's why I've
created a series of courses that will take you
from beginner to probe. I don't have any unique
facet of this course is that I'm not the
only one doing it. I'm also tutoring
a total beginner to add dimension from
beginner to pro, so that you can learn
alongside her and notice any mistakes you make
and learn from our mistakes. My promise to you is that if you go to
my current Clinton, you're not only know Maya, you will also have the
same animation skills or someone who graduated from school and makes
them into Orion. That's my promise to
you if you'd rather, it will be a lot of courses. There will be a lot of hours. But if you watch all of them, do the exercises, you will
have the same skills. Or someone with a master's
degree in 3D animation. How do I know I have
a master's degree in 3D animation and I'll teach you everything I learned and more. Because I actually attended
a lot of other courses too. So I am competent attention whether literal master's degree. So you're in good hands. I have to do is
trusted can do it. You really can't
do with my eyes. Easy. If you're only doing an image and just
do the extra time. If you doubt your abilities
to be an animator, suspend disbelief, and just
do the exercises one-by-one. The first exercises
will be very boring because they'll teach you a foundational
animation principles. But after awhile,
we'll be gotten more complex and more fun stuff. But that fun stuff,
we'll build on those basic principles that you'll learn here
without further ado. Let's go and play
around with and balls.
2. The 3D Animation Principles: The thing you have
to remember about the animation
principles is that they were designed for
frame-by-frame animation, and they are very foundational. There are a universal tool
sets to help you think about animation and help you
think about after a while. Once you learn them, you
will pretty much understand them enough to go into the
basic series of courses. You will essentially be able to look at movement and analyze, Oh, here's this
principle in effect. And your staff, for instance,
you'll be able to watch an animated movie and notice
he's holding the polls. Here's a slow in and slow out. That's why therefore, it's something that
always keep in mind. So they were off tool to
help you observe reality has this fundamental principles and the order in which they're presented generally is pretty arbitrary because they're not presented in the order of
how you should learn them. But that's actually
completely not what that's going on there. The order was how
they were discovered. So the 12 principles, animations where
squash and stretch, which if you think
about for someone who only works into different but
pride frame and makes them, this is a foundational
principle because they had a very real problem
with emulating marginal bluer and give you a sense of weight
in that location, since that's very
hard to do and dry, but squash and stretch is
actually not that important. Pretty animation
across and stretch and 3D animation
is very subdued. And 3D animation you use
actually a very delicate squash. And stretch is so foundational. Shouldn't I have
to squeeze it in every pose and seen
in my 3D animation. I mean, it is the
number one principle. Elena, for beginners, 3D
animators tend to overuse, squash and stretch because
it's foundational principle, literally number one, principles of courses is the most
important principle. No, no, no, it's not The first discovered by
frame-by-frame animators, not the most
important principle. The most important principle is actually the fifth principle. So I'll actually will teach you the 12 animation principles
in order of importance. And I'll say them in the original order now and
explain how IoT to them, squash and stretch anticipation. Staging, straight-ahead
action and post post follow through
and overlapping action. Slow in and slow out. Rx, secondary reaction, timing, exaggeration, solid
drawing, and appeal. To think about this list, their stock that has no relevance
to treat the animators, e.g. 11, solid dry. This principle is essentially
your draftsmanship. Your ability to draw. Drawing is so solid. Drawing is essentially
your drawings. All the animation principles
of flight ID 3D animation, to know how to draw it
to be a 3D animator. Drawing and my ability to draw off to do with 3D animation. I Lao-Tzu, nothing. Just that people read items from school because
their philosophy, instead of solid drawing, what you have to think about
is posing. How do I pause? There is a principle that's
completely irrelevant, that actually you could remove its straight ahead
and pose to pose. And that is not actually a
principle of animation per se. It's n, the principle of
2D animation workflow. 2d animation. You can
walk straight ahead. What is working straight ahead? You let your creativity Rome, but will make them warm, dry, and feel the movement. And then draw another
drawing and just let your creativity cluster. Next you create flow and
just animate straight ahead. You know how rarely you actually animate straight ahead
into the animation. I almost never.
Why? Because it's not stopping. That's intuitive. You have to move controllers and that's cumbersome advantage of frame-by-frame
animations that is intuitive and you don't have drawing ability neural finger, you can just take a pencil and draw frame by
frame very quickly and let the animation flow from
our heart here you cannot almost always will work post false if and then bouncing ball, you'll put post, post. Even as something as simple as a pendulum, we will
work towards the poles. So it's not a principle for it, so we can cut that
out right away. Another principle
is number nine. And number six, slow
in and slow out there, kind of synonymous because
one is spacing and one this timing slow in and slow out as a team and timings times, you cannot have one
without the other, because timing is if you would set a keyframe on
this ball here. And if you set a keyframe
on frame one and use that keyframe on frame
ten, that's your timing. Spacing is how my interpolation, and that's what you
modify you things or break in Maya,
modify the spacing. That's rollout is acceleration and slow in is the acceleration. They're both equally important. They both make an
animation seamless MCAT. That actually the most
important principle, because it's actually
two principles. In one, that's the
foundation of animation, that's the essence
of 3D animation. The essence of any animation. The reason why in the original
12 animation principles, it was separated into two separate principles is
frame-by-frame animation. And you have to essentially, first time the animation
and I've got a real hassle. You actually had to create
physics equations to time realistic acceleration.
If you had e.g. a. Car accelerating,
it had to create a physical equations
to calculate the exact length each moment. Be realistic. Now extra teach
without physical equation. So you can appreciate
what my adult for it because I complained about my
other not animate for you, but I wanted you
to appreciate what my adults who realized that
I played by three manometer, we will have to actually
do those calculations. So that's what our teachers, this first course in my curriculum that will take you where you
need to be there. We'll get you to the
level of a collage grad and 3D animation track
will get you to the level of an atom school
on animation mentor or a student track that the first lesson
you have learned, timing and spacing
and this course, now we'll only focus on
understanding timing and spacing. I'll touch on
squash and stretch, but that will not be the pocus. I'll also mentioned
that this patient, but the focus will be
timing and spacing. So now let's look at the principles and I would
teach them in order, timing and spacing would be the first principle you
need to understand. And the first principle you
always have to have in mind. Second principle
would be squash and stretch because you need to know it so you don't often use it, but it is something you
need to know if you are creating cartoony animation
or emulate motion blur. And it is something
you need to learn while doing the bouncing ball. The next most important
principle is anticipation, and it's very simple. It's intuitive that
before you do an action, prepare for that action. And then you imagined by jumping ball and preparing
for the application and usage wash. You've seen wash and then it will
jump and you stretch. That's why you have to
understand squash and stretch. You understand the patient because they build on
top of one another. That's why the first animation principles,
timing and spacing, the modified list for the 3D animation principles
for treaty and matrices. This first, timing and spacing and the most
foundational principle, the second is squash
and stretch and also related because
even if something has simple or the bouncing ball, if you want to make
it a bit up healing, we need to add a bit
of squash and stretch. Because although
things don't squash and stretch in
real life as much, they still squash and stretch. The difference is that
in realistic animation, instead of squashing and stretching by
deforming something, you squash and stretch by creating different
poles. So e.g. then jump, even a bouncing ball, jump or false washes
and then drops. If you would like to
meet our human jump and he's also squash down and anticipation and then jump or bunch
stretch to be good, it has to keep the same volume. This is actually less
important for us to view your 3D animators because Maya handles that for us very
often automatically, but sometimes the risk is not ideal and you will have
to modify it themselves. But keeping the
consistency of volume, It's more of a pointer of this principle for 2D animators, meaning that if you squash
a ball or squash or pause, it also becomes wide. And if you stretch up all
that helps become shorter. Because again, if you
look at the ball, it squashes and anticipation. And while doing it, It's
keeps the same volume because you have to create a
realistic sense of physics. So when you squash
and stretch things, you need to keep this
sense of volume. This leads us to the next
principle on our list. Anticipation. Anticipation
is a very simple principle. You have to wash to squash interoperation
for something and then it's stretched
while jumping. Of course you don't
always part of stress. Sometimes you just move
the opposite direction we are making a part, prepare for our tangent
and then dissipate. It's actually also isn't very good storytelling
because it's foreshadowing, it prepares your
audience Proud movement. You have to realize that that preparation happens very quick. Now as animators we deal with
want a 25th of a second, because 1 s I spent four frames. And essentially an
anticipation pose is like four frames at malls
that poses that four frames or breakdown
cost is four frames. You can copy it like
that and TV animation. And sometimes it's two frames
you can anticipation on, literally wanted for the
thickened loops through, have to have that anticipation
for it to be good. A lot of beginner animator thing that they
need to have a like a minute long and
spatial or 100 frame and sometimes, very
often not solved. Or they might go one
frame anticipation where you don't even
see down to space. This brings us one other
principle which is called arts. Things tend to move in arks
rather than a straight lines. This makes it a realistic
sense because the tendency for us as animators would be to animate straight line
because it's the easiest. But in nature, things not straight because
that looks mechanical. They're curved. Nature is, you see, and
that's the principle. If you move your arm
and moves in an arc, an arc, if it moves straight, it will be less appealing. This is actually
be related also to the principle of curve
against straight. If you will listen to Glenn
Virchow and older artists, they would say that the
curve is the rhythm. And then here, appealing
things move around the curve, same as appealing character
designs are very often round. Another principle that's
designed to create the sense of reality plots is
a follow through and overlapping action going
over those principles are, and follow through and
overlapping action are not great and emulate reality, their principles to create
Reality Plus in animation, especially frame-by-frame
animation, you don't replicate
reality one-on-one. You exaggerate and you create Reality Plus improve reality. Because in reality, things
don't move on and off. And things are not as simple and not as polished
as a movement. Very often you do have
linear spacing in real life, but this is just not appealing. Real life is ugly. Art is pretty small from captures movie called
The dipolar express, that it's very uncanny. The movement is 100% realistic there it was motion
captured perfectly. The movement of the
muscles correspond one-on-one to the
movements of the actors. But because it
looks exactly like Acumen moves exactly
like as humans, but it isn't exactly
like a human. You see that the pigeon of difference creates the
uncanny valley effect. Here, cartoony
animation especially doesn't look like
how things move. It uses those
animation principles, especially RX follow through and overlapping action
timing and spacing, squash and stretch in
order to create Reality. Plus, you push those
principles and uninformed way which is actually denied
point exaggeration. But we won't deal
in exaggeration and practices onto further on. Those principles are not something you just know
about intellectually. They're just like
stages of drawing, of informing your
observation of movement. That you have to first
create a sense of proportions and then our
sense of picking in 3D, space, anatomy, et cetera. And those are just
ability. Ability. Is it a list of abilities? That list of knowledge
is not an intellectual. Is it Alice probability they would have to
train over and over again using those
foundational exercises until you get it. And that's what
the bouncing ball is. Not that I couldn't like. What I understand is you train it over and over again
until it's in your blood. You trained it ought to have a natural sense of
timing and spacing. That's why I asked you to
create at least three vowels on this simple exercise to experiment with the
timing that space, you have to play
around with it and see how the timing
and spacing is modified to see how things move differently by how we change the spacing even though
the timing is the same. Look at it and see, see how different it is. Look around it and see it. So you need to
learn that ability. You see follow through and
overlapping action is a very easy for this fall and we'll
learn it in the next course. I think it will be
deterred or four, I haven't decided yet, but I think it will be the force and the principal
will be taught to you when you animate
a bouncing ball with a very simple
principle to understand, if you have a bouncing
ball in that tail, one part of the tail will move differently than the first. One part of the
tail will move in. And other than that,
I also did that when you have a movement with
our character moves, his torso moves first and then his arms and then got
kind of hierarchy. This is not an
intellectual pursuit here. This is not something
you understand on an intellectual level. We will need to develop
this understanding deeply in your unconscious mind. The way traditionally artists develop this sense
it by doing like figure drawing while focusing on the action that
character matters. Because if you go down, you just focus on the
movement I was done. That's why it's
kinda pointless for an animator to do figure
drive from photos because you don't know what the movement
will figure drawing from live-action recordings from life or better yet from
animated movies. That's what my bucket Plessy teachers and
Dr. Forrest Gump. We've learned a new metric. You learn that all first
did this horse all moves. So that's where the
vein than the NAG, There's a few things
to be appealing. Don't move at the same time. Please move at the same time. It looks like cheap and
low quality and that's something your
animation supervisors and people that will
hire you will look at. Is there enough overlapping? And you really have to
understand overlap. You have to see it and feel it. And to see and feel
that you have to do a lot of exercises that
teach do the same thing.
3. Solid Drawing Vs. Solid Posing: The sixth principle is
posing and whiteboards. And six, I mean,
we set up a pause technically in the
very first principle when we do timing and spacing, I mean, it's like drawing. It should be the first one. No, no, no, no. Because into the
animation it wouldn't be the first solid drawing would be the first
in 2D animation. What I mean by apoptosis and expressive pose that
tells them ocher. And in terms of learning, you first have to grasp
the previous principles. And then you can create
an appealing polls that captures emotions and know your Reagan
signed it out and be able to quickly
pause our Reagan to post. You want to do an
exercise that I can give to you even right
now to practice, pose them to develop
disability is this. And this is also your
homework for this week, you will take a rake, take everything Maya, you learn
how to manipulate Rick's. They got one of those
gesture drawing photos or detrital figure drawing
references and post that rig in that poles
and push the poles. Here's the workflow for it. You find a photo of
someone who's kneeling, new name the poles, and you pick up a motion for that name. You pick an emotion or a state like that person is
kneeling, angry. It's verb plus adjective. That person is kneeling. Sadly. It doesn't have to be a motion. That person is kneeling, shaken way or that person
is kneeling competency, but it's an adjective
descriptor. And you pose this
pose while pushing it in such a way that
it shows that emotion, that it shows what
we wanted to convey, that it clearly shows
what you want to convey. That every thing, that
gesture drawing will teach you that everything
that digital drawing with deteriorations
3D animation. So you're really bad at drawing. You still have to
practice gesture drawing. You just practice it like this. If you're good at
drawing is actually faster to practice
this on paper, gets a good draftsman are
able to capture this kind of polls in 30 s. And it will not take you 30 s
to pause this and Maya, it will take you a
minute if you are new because the controllers
are not intuitive. So you will have to present
them in their mouse button to quickly move the controllers
and pose to this pose, let me give you a
demonstration day, e.g. I. Pose someone kneeling
in an angry way and I push polls compared to the original, that
it looks different. And that's the principle
posing you'll learn right now, but think about it
when this principle will become very important. Now come back to this principle. Remind you, when will
actually animate characters? And I will animate characters
having a specific emotion, the ball can squash angrily, but for now we'll not
overwhelm ourselves. We'll start with opposing
or flour sack lesson. Gesture drawing is used as
an animation exercise where you try to understand the
barebone essence of a pulse. That's what you
need to dry for as an animator to do
those gestures, clearly you've got those
gestures or your thumbnails that are unique drawing
for other 2D animator. And I'll teach you
that in my course. Drawing for animators will
be a series of courses, but that's what I'll teach you.
4. Composition Vs. Staging: The seventh step is staging what is stating what its
composition is, nothing more than composition. That's how you orient
your camera in Maya. That's how you can
understand it. And nine times out
of ten, if you're working on a
professional production, this will be done by your
storyboard here or director. Remember, those principles
were for the grant animators, storyboard or a director
and everyone in Disney, staging is important, but
it's actually something that you might think
of it a bit when you do your breakdowns and
you'll keep polls. This staging, composition, and cinematography
are synonymous. We have our storyboard in class that actually teaches that the moles will touch upon it
into 3D animation courses. But to actually
learn staging well, you have to study
some storyboarding because that's where the
books focus on staging. Metallography and
storyboarding are skills that are all independently
from animation. I got staging is the framing and essentially how the
camera is positioned. Frame-by-frame animators
had to be way more concerned about staging
because it's perspective. You'll see if you have
something framed differently. If you change the perspective, you have to redraw that movement from the
beginning, everything changes. You have to do a completely
different image. While in Maya, changing the staging is the easiest
thing on the planet. You just move the camera around. That's it. The camera will be set by our supervisors or
nine times out of ten, when I worked on a production, I had a specific camera shot and I had to animate
it and I was giving it and I couldn't
move the camera or the camera was set by the
storyboarding and the director, I had to just make
the characters move. So now we're at a stage where we know how
to move characters. So that gives us
two the eight point we need to understand. We developed a
more sophisticated understanding of animation and we were able to stay Dustin of someone
lifting something. And we're able to animate a scene of someone
lifting a heavy box, for instance, the feeling of heaviness is created
by timing and spacing. And you'll stage this thing like a live action film
director road. That's what it is
essentially staging. It's like this thing live
action film director will do by choosing the
right camera angle. So we're at this point. So what's the next
skill we need to develop that secondary action? What is secondary action? Well, that's easy to understand. You see.
5. Overlapping Vs. Secondary Action: Secondary action is often confused with an
overlapping action, but they are two completely different
unrelated principles. You need to understand secondary action in the
context of primary action. Primary action is
the main action that's needed to
describe the story. It is essentially what
the character's doing. While secondary action
is the body language or compliments and
supports the main action, is this how the
character is doing, the thing he's doing? Let's look at a few
public domain animations were walking is the
primary action and body language is used for secondary action to exaggerate the character's
personality for appeal. Notice how the walks
field different, even though they show
the same main action. Now let's discuss some
tips and tricks to help you create proper
secondary action. You essentially have
to ask yourself, how can I push this action? How can I use body language to exaggerate the
character's personality? Well, not overshadowing
the main action. And this brings us to a big air. Beginner animators
make where they overshadow their primary action with their secondary reactions. Secondary action has
to always be used to supplement the primary
reaction without overshadow. Here's an exercise
to help you get a hang of secondary
action poses. It's called a verb plus
adjective gesture drawing. You simply look at
a photo showing a plane main actions
such as this photo, someone kneeling, and you pick an adjective, such as sadly. Then you ask yourself, how can I add body movements, expressions, or prop
interactions to make this pose match
my chosen adjective. And then you just
draw the toes and verb plus additive combination. Here's my quick doodle of
annealing, sadly, now, find by photos are
different actions and pick five random adjectives
each for those five photos. Once you have drawn 25, I added two Verb combinations can progress to the next lesson.
6. How to Use the Animation Principles: So when do I apply the
animation principles? I mean, surely I
don't have to think about them all the
time while animating. Things to remember is a
lot of things to remember. He's theorists
specific circumstance when I have to think of timing and spacing and a different
one where I don't, if you think about it, the
12th to animation principles, that you cannot think of
them as a separate thing. Once you learn them one-by-one, you will think about
them in every post you make and everything you animate. When you animate a
pantomime shot or enacting shots of the easing, Ease Out and timing
and spacing well, think about appeal and exaggeration and all
the other principles. You'll learn them,
understand them one by one. But after awhile,
you always think of them all together at once. This is especially the
case would appeal. Pulses will have to have appeal. Your timing will
have to have appeal. Pretty much everything you do an animation will have to have appeal to that principle is something that will
inform everything. Everything you do will
have to look nice. You always ask yourself, am I pushing the poles
as much as I can? Is my timing and spacing
design such a way as to create the most realistic
and appealing movement. Every single thing
you do love to ask yourself this
question, is it appealing?
7. Why Timing and Spacing is Important: I don't want to talk
more about timing and spacing because it is the
essence of 3D animation, it's even described so
by the nine old men, if you would ask
the nine old men what the essence
of animation was, grim network, a great old
Disney animator would say, it's all in the
timing and spacing, because that's what it is. Timing and spacing is the
essence of 3D animation. If you put a keyframe and then another key frame and just let my interpellate
between the two. The result is movement, but it's not a very
appealing animation is technically those are
have timing and spacing, but the timing and
spacing isn't good. Your job as an
animator is to create appealing timing and spacing for every single
moment you animate. Timing and spacing is actually
more important than e.g. acting or pausing
for anatomy terms, timing and spacing is essentially
the rhythm of the shot. Don't BLUF always said that animation is like
a piece of music. And music is
interesting to listen to because it has a
specific rhythm in music. Just add the same note
over and over again. The dot-dot-dot. It would be very boring. That's why it is the artistry of animation to create appealing
rhythms, appealing. And animator is essentially
a musician of movement. That's what an animator is. And that's why I really
recommend you study great animation like
that by Glen Keane, e.g. towers than et cetera, James Baxter, Richard
Williams and her Goldberg. And look at the rhythm minute. It has a rhythm that
animation has a rhythm. And where does that
reside in rhythm, reside in the spacing
and endure animations. You very rarely noticed
even linear spacing, almost never, almost never
does linear spacing. That's what makes 3D
animation look flow, T, loop, or dead. It looks even spacing
happens in 3D animation. Would you let my interpellate for you when you think that, Oh, I'll just set up the basic
storytelling keyframes and Maya throw expensive, I guess my will made this
for me because why else? It would cost all that money? Yeah, yeah, Cool. Cool, tori, that's not how it works because all that is mainly
because of those models, rigs and all the other stuff. It'll be fair. It only cost that much money because
it was the first, it's really no
better in Blender. The reason why I use my over and blenders because it
has this plug-in called uninvolved would
actually does stuff that helps animators,
but that's it. So you never let my
interpellate for you. You have your keyframes
for your polls, and then you chiseled, you chiseled a break down into something
perfect, then appeal. That's what will be expected of UV every good a job
as an animator. If you make something
for YouTube, all of you to manometers,
Hulu 3D animation. They're not masters of
their crafts to be fair, you need drawing skills to be even a crappy to
the frame-by-frame animators wanted to be a crappy 3D animator who
don't need any skills at all. You just set up
keyframes and you're golden bullet to be
a good 3D animator, you actually need as much
training as a 2D animator because you really
need to develop a very good sense of
timing and spacing, a very good sense of freedom. The only way to really develop it is to do those basic
exercises that I'm teaching you and then internalized
those principles so much that you observe life. You'll be able to observe a
can moving or someone walking around you and you'll be able to analyze their
movements on the fly. So while you live your life, while you watch movies and
ever want to watch his movies. I mean, you wouldn't get into animation if you
didn't like movies, if you didn't like animation. So essentially study animation
while watching animation. But while watching movies, that's how you end up
learning animation. You build those basics. Here, we're doing those
boring exercises. And then after awhile there, so internalized that
every movement you feel, every movement you see, every movement you witnessed will become your own teacher. And to do that, you
need to develop this understanding of
timing and spacing, the most basic way
you can practice this to develop it as it's playing around with
the bouncing ball. And I mean, play around with it. You'll learn things most optimally when you
play around with it. There's nothing magical
about the bouncing ball. The bouncing ball is there
to teach you about RX, timing and spacing and
squash and stretch, play around with it, do some really bad
bouncing balls, does some really
crappy bouncing balls. But you'll learn way
more by doing like ten bouncing balls and
just allow yourself to play than trying to make
more perfect bouncing ball. It's all about quantity. There was the study done on parts in terms of our learning. One group had to make
very perfect paths, and one group just have
to make ten crappy parts. And the one that made turn crappy parts quickly learn more. So I'll just make animations. Because once you've made
like 100 animations, not necessarily bouncing ball, but drug hundred total. You'll begin to see
patterns of rhythm around you and you'll be able to learn from
every movement. You notice every movie in every animation you will
witness will be a teacher. Even a can rolling across the
street will teach you about timing and spacing
once you've trained your movement
observation muscles. And that's how you really
start to understand animation. Though, the animation
principles we're learning are nothing
more but tools that you have to
internalize for you to intuitively sense movement. And appeal after awhile, if you do those
exercises enough, this will become an Arab
unconscious competence for you. It will become unconscious and then you'll be
able to focus on ACT and you'll be able to focus on all the other complex stuff. But first you need to master the essentials to
build on top of them. So the essence of
animation is essentially good versus bad
timing and spacing. The most foundational principle that timing and spacing will make the animation loop
off or dead and boring. While good timing and spacing
would give the character Live Paint make him or her
feel alive. It's that simple. When you are Pixar
quality animation, everything is happening
in the perfect time. Every pulse is timed
perfectly at everything just feels good and appropriate
to get hired as an animator, you need to develop this
movement sensibility. Sure, if you work on television, level of polish will
not be that much. But to be able to make a limited animation
look appealing quickly, you need to be able to
polish a shot to perfection. In order to polish a shot to the extent where every frame, every element of it is optimized for appeal
and entertainment, you need to develop an
internalized sense of those 12 animation
principles which you developed by doing
those basic exercises. I had this fallacy in
the beginning of that. Oh, I don't want
to work for Pixar. There are only a few
studios that great at high-quality animations and
they animate 4 s per week. I want to animate a short film and I want to animate
it lower-quality. I want to animate it using
limited animation and I need to animated
1 min per week, like to be frozen to Y1. I do preschool level
animation, but yeah, cool, but that limited animation, that TV quality animation
is actually harder to do. You need to have
a bigger grasp of those animation principles
because then you have to simplify it in such a
way and designed in such a way that you can do
it quickly and efficiently. But the way you learn
those principles is to do the few detailed shots. That's why your demo
reel is only 1 min. And you hired in this industry
based on your demo reel and you're not getting prompts on your demo
reel by saying, Hey, I made this demo
reel in an hour. No one will care because
speed comes with practice to be able to
simplify and do it quickly, you need to first be
able to do it well, given unlimited time, that's
what your demo reel is for. To prove that given
our limited time, you're able to produce
picture quality work. That's how you'll be judged
because there are a lot of people whose demo reel
looks Pixar quality. If you're a demo reel, in terms of animation quality, doesn't look, pick the quality. It's a fail. You will not get the job because there's a lot of small schools. The maria is Pixar quality and you will be
competing with them. They will not care how much time you spend on
that demo reel. Because the unspoken secret
that this is your test, what you can do given
unlimited time, this is not your
crunch time test. The only time would
that matter if your demo reel have a piece from an actual show where they know that
you had a crunch time. Because everyone can say,
I did this shot in 10 min. No arbitrary I did intern hours, but I can say other than 10
min, that's not verifiable. But if you make a
shot that's perfect. Where every frame, which is
at 24 frames per second, every 24th of a second, is literally designed to perfection for maximum
appeal, then you're golden. Why short films are actually a really good
demo reel material. If you, you're able
to make a short film that got into a film festival
that actually really good at a resume
because short films for those festivals will
also look for that. If you're able to make a
short film on your own, That's also a good
demo reel materials, at least the highlights,
you don't want any failure in your demo reel. Your demo reel is
very perfectionist. It's your best of the best work. If they notice any
animation errors in your demo reel, you
will not get a job. My demo reel was not that bad. I mean, people looked
at it and looked cool. But oh, 1 s overlooked,
floaty, no jump. That's how controlled it is. You have to really master those principles to actually
get a drop in an image. So let's again repeat the basic concepts and
timing and spacing. Every animation is made out of a sequence of images
played in succession. 1 s generally ask 24 images. This creates the
illusion of motion. Those images are called frames, and sometimes the
frame rate does different feature
film animation. The frame rate is 24
frames per second, while in American television
it's 30 frames per second. In the European
television and movies, it's 25 frames per second. For the purposes of this course, we will all be animating at 24 frames per second
because for 1 min, less frames worry about them. For tool, we have
to be consistent. Timing spacing so important is because it's used
to convey weight. How heavy an object is. I discussed physics before, but you have to
understand some physics. Momentum is a measure
of the motion of a body equal to the product of
its mass and velocity. So that's its momentum speed. Newton's first law states that an object in motion tends
to stay in motion and an object at rest tends
to stay at rest unless the object is acted upon
by an outside force. The force that makes
a bouncing ball stop rolling is inertia, essentially the
resistance of the floor and the friction
of the floor, etc. You probably heard
the term acceleration of D, acceleration. If you have a car
and it accelerates, it takes a while to start up. And the heavier the car is, the longer it takes
to accelerate. That's our foundational
animation principle right there. Ease in and ease out is nothing more than
the acceleration. And acceleration is
the acceleration and ease out is acceleration. That's why things don't move on. Even linear or spacing. They accelerate, accelerate,
accelerate, accelerate. Various parts of your body accelerate in the accident
rate and at different times. And that's the
essence of animation to be able to convey
it in unappealing way. So what is gravity?
Gravity, is it a natural force of attraction because our
terabyte your body up on the objects near the surface tending to draw them towards the center
over the bodies, gravity in this
Earth is constant. And if you think
of acceleration, acceleration, of course, the force that's on a given
object divided by its mass, softer, higher the
mass acceleration. And that's it. That's how you
conveyed the spacing. The spacing will be slower. The heavier things is because it takes longer for
it to accelerate. The spacing is higher
if something's lighter, so things move faster for
something that's lighter or because it just takes shorter amount of
time to accelerate. The most important thing
you have to know about physics is that most things
are fully accelerated. They have the same spacing, they have the same
linear space and fully accelerated car at 60 mph will have the same exact
spacing where they're not as heavy truck or a tiny
light SportsCar. They're both running at 60 mph and they're both
fully accelerated. They'll have the exact
same spacing will be very difficult to see which car
is heavier than the other. The weight will be
shown actually when they start up or
when they slow down, the light car will start
up and down very quickly. So the acceleration
will take less frames, the ease in and ease out or take less frames and will
be much faster. Heavy objects will
have much slower. Xin, He's out. Heavy objects move slowly
because they accelerate slowly, gravity and weight something
you will have to develop an intuitive sense of animating the bouncing balls with
the bearing weight is a great way to do that. While animating the
balls of bearing weight, how much it will bounce, have hired will bounce, and how much it will roll will be determined
by the material the ball is made off because
gravity is constant, It's just different materials determine how much gravity
affects the lack of an object, the way that my
fingers are given materials constant
us now steel ball, we always have a
smaller weight than a larger steel ball unless it's made of a
different material, e.g. if the large ball, It's hollow inside, it
will be lighter, but then it will be made of a different material because
it's made amongst the areas. Well, the most
important thing about timing spacing is that
when things stop, they don't just stop, especially if they were
very fast and heavy, they stop and then settle. E.g. a. Road runner doesn't just stop. He stops and shakes
a bit and then settles into that keyframe
position or golden pulse. So what differentiates
the bowling ball from a beach ball is how
long and hangs on top, homogenous in through a
lens by air resistance, how it reacts with it hits the ground, and
how long it takes. The most important thing to
remember is that thinks of different materials were react differently and have
different spacing. I bowling ball would roll out differently than a
beach ball, e.g. timing and spacing
is who should do what determines the
rhythm of animation. We will look at those two
jumps to character jumps. One feels different,
but I actually have the same timing
differences in spacing it. Following exercise, we'll be
animating bouncing balls. And those balls will have different field depending
on their spacing, timing. And spacing is the
essence of animation, any animation, 3D, 2D, you name it, and your
job as an animator is to develop an intuitive
feel of diamonds.
8. How Exaggeration Creates Life Plus: Ninth point, which is actually the next last point
that's exaggeration. Exaggeration not pushing
the poles that I talked about in the
posing section. This is just a design principle, this is just an
understanding principle. Last two principles are
understanding principles that pretty much Caldwell
mouth of the other principles. When you're animating,
you're not animating life, you're animating life plants, and you exaggerate
certain movements. This is very noticeable and
lunate animations where things are exaggerated for appeal and to clearly
communicate the story. In real life, people's
body language is not as expressive and clear. My hunger, that's exaggerated. Text. Animators do
caricatures and create. Motion capture is not
appealing because it's Bono one copy of real life. This brings us to our
tenth point appeal. You have to realize
that in the context of 2D animation and especially to the frame-by-frame animation. The drawings were not
separated from the character. I mean, even the
in-between had to draw the characters on model
perfectly with the same appeal. So this means that
every character, every frame had to have appeal, every frame had to be
appealing to the animation. This is essentially a test. Every frame you made in your
animation and appealing. Is it something that you would freeze frame and be like,
Yeah, this looks cool. This is just a method
of testing yourself. Is every part of your animation appealing because
animation is live class. So that's up here. Now. Something that's appropriate, something that's reality plus, you can think of appeal
as Reality Plus, and it's achieved through exaggeration and
pushing the poles. So those two principles
are very connected. They're not exactly the same. That's why they're not fused together, but they're
very connected. Those are the ten
animation principles you need to learn
as an animator, you will learn them intuitively by going to the
basic curriculum. Then on top of that, we learn how to plan
out and animation and we learn timing
and acting principles. After you have double star
animation principles, learned, animation
is all about acting. It's all about getting
into the character's head. Why? Because that's
how you find that they could pause and that's how
we find the correct spacing. You record live-action
reference, act out of the pose
and then animate it. But to do that, you need to have those animation principles, at least the first age, drain from your mastery of
the first 89.10 come up. So let's start on learning. And the very first principle
is timing and spacing.
9. Timing, Spacing, and Breakdowns: We just draw out because I'm using ultra deep
program here Clip Studio to show it more clearly about the difference between keys
and break down the workflow. So normally when you
animate your concept keys, he didn't because I was
explaining content but do e.g. when the anatomy
that bouncing ball, you'd start with golden
pauses or key poses, which are essentially deposits, which are at the
highest polls us. And to conduct polls, then you can measure all. Is this smaller than this? About lecture to 5% when you can determine
the weight here, that way you can do
it consistently. So now we have those balls, you have your key poses. So what do you do then? Well, you make the breakdowns for the fear that the breakdowns is that you just don't let my
interpellate because Maya, if you let it interpolates
the way it wants, It's kind of way of thinking and doesn't
really finger just has a pre-programmed
responsible do linear spacing, linear movement. The keyframe will be exactly in the middle and it will
not look appealing. And we'll have
linear motion path. That's not at all what you want. You want that curve multipath, the motion path of our
bouncing ball is a parabolla, meaning, how about Servo? And I can think of it as a
circle, half a perfect circle. So you control the spacing
was your breakdowns. And specifically here you
would favor the top position. Here, see, the bottom
would move quickly up, and then it would favor the
top position and create an alcohol print rather
than a linear movement. And you do those spacings
using between Michigan, e.g. so simple to make
a bouncing volume. Just favorited those
two positions on top, making sure the motion
path would be in an arc. The principle of arcs, it's not that the thing
in the graph editor has to be on August just
that the motion path has to be an art because I
think very rarely moving a line unless they are
completely accelerated cars, they move in an arc. Similarly, they don't
have even spacing. They have an ease
in and ease out. See, arcs are above us. That's what it is and how
you animate a bouncing ball. That's the whole point of a
bouncing ball to teach you those principles that thinks moving arcs that you have to, you're golden poses first and then the breakdowns and
that things move in arcs. Because if you let
my interpellate, it would interpret it in
a very unappealing way. Let me just get into my end,
demonstrate it for you. Let me just quickly discuss the recommended Rx,
the bouncing ball, 1.0, the very old rate, but still works perfectly. The cool thing about
this drug is that it does squash and stretch
separate from rotation, which really helps with this new one or a two
or bouncing ball. And this is the
ultimate Rick package which is free and
it's on Behance, ultimate risks for free, all very old, but
it's still good. I'll go to this
URL downloaded for free and it gives
you a lot of balls. It gives you a
pendulum to animate, and it gives you a tail. All you need to do those
exercises that even gives you a simple walk cycle character in our basic body
mechanics character and just use those brakes,
they're very good. There's also the basics rig here that some camera
that's also good. That's it. Let's pick one
and go with it though. Just sign into b hands. So click download it to your Dropbox or looking for
the ball on ultimate goal. Then we open it in Maya, David and your Scenes folder, and then we reference it.
10. Squash and Stretch: The principal will explore in this lesson is
squash and stretch. The purpose of this principle
is to emulate motion blur, to give a feeling of weight
and flexibility to an object. Most important thing you have to remember about squash and stretch is that when
things squash or stretch, they keep their volume. When they don't
keep their volume, what we're making is
actually a smear which is used to simulate
motion blur, squash, and stretch is designed to
give a feeling of weight, anticipation, and character
to the character. It also important to understand than in more
realistic animation, the constable squash
and stretch is now applied not by squashing, stretching the rig,
by actually making wished squashed and
stretched pose us. Here the character squashed and here the character's
stretched in the scores will explore
squash and stretch and how it works by
animating a bouncing ball, the ball will
squash when it hits the ground and stretch
on it leaves the ground. When the ball hits the surface, it's cautious to
intensify the impact. And it stretches right before impact and right after impact. It's used to
emphasize weight and elasticity and exaggerating
this question, stretch out, there's divorce overall
energy and await, squash and stretch as it's
used to emulate motion blur. Sometimes it's overused in
more realistic animation, in a more realistic animation. So trust that done
in VFX Studios, it has to be used now
very subdued manner. And today's exercise, I'll actually ask you to
modify this question straight off our
bouncing ball to change it over
weight and feeling. You will be asked
to experiment with at least two different balls for your assignment
in this course, you'll be asked to push
or subdued intensity of this question stretched
to sell the object's weight and the material that's
made off you subdued is passionate stretch to sell buoyancy and push it
to sell heaviness. And it's cartoon in S is
important to remember that when you're doing cartoony animation and animating frame by frame, you are not emulating real life. You're creating life plus squash and stretch
helps you do that. It helps you make life more appealing than it actually is. And the more cartoony
your animation is, the more important this
principle will be. The most important thing
you have to remember in this principle is that the object retains its mass
when you squash the ball, is becomes shorter and
when you stretch the ball, it becomes less wide. If you don't do that,
you're actually creating something
called a smear, which is only good for
emulating motion blur. We'll discuss this technique in character animation later on. But for now, you shouldn't
concern yourself with it. It's a cartoony animation
technique which will be covered separately in
a different course.
11. Introduction to Maya and Animbot: When you open Maya,
you'll find this. The thing about my eyes
that it's not great, software is very
buggy, very bloated. The interface is not great. The interfaces on intuitive, I mean, it's industry standard, but if you're an
Indie developer, it doesn't matter to you because there'll be making
your own animation. So why am I teaching
Maya for Indiana meters? Well, there's one
reason, one reason only. And there's this
plug-in called Anim bought this product called uninvolved actually
pass capabilities that my adult in
half, Let's plug-in. It isn't free because it's
actively being developed. And it's actually
being developed with way more
passion than myself. And that's why this plugin could not exist for Blender
blender users. When they want to
pay for a plugin, they would never pay monthly. They'll find
themselves vary part really hurt to pay
$10 for a plugin, even if the plugin will
be the bee's knees. While my app people know used to pay real money for
their software. And this is real money. This is $60 per year for the cheapest version and
for the Providence $44. This is a service plugin for series animators
because it actually has a lot of features
and it actually makes my other best
animation package, or by far better than Cinema 4D, better than blender
and better than any other software
package for animation. I haven't met 2D software
package that has a plug-in that makes high-quality animation
easier than antibody. Antibody was worthless,
but with ADD embodies the best animation software
I currently available. So what's the bee's knees about? Antibodies are locked
actually, for one, it allows you to set up hotkeys for that and export them
easier than in my interface. I have my own custom shortcut
keys that I written here. Those shortcuts are all from Adam bought all of
it is done in anime, but you don't need to use my
art as vanilla shortcuts. So you can have
your own shortcut set exported and added away, which I'll actually do. But I can export it and
share it with you so you can follow along
with me very easily. I suggest that you get a one-handed keyboard
because it will make things a lot easier if gamers can
use it further silly games, you can use it for
professional work. And gamers know that
a 100-foot keyboard actually makes things way
faster and guess what? In animation, you will be expected to do things very fast. So the one on the keyboard
that I recommend you get, and you can get a different
keyboard, doesn't matter. Is the razor Tartarus
parole the cheapest, but it's the best now
that are cheaper models. I mean, you can
Google reviews if there's a cheaper model
with this is the model I recommend to animate my alike a proton in that computer in
India, 100 keyboard shortcuts. So I'll be teaching you that not every studios to use them, but I recommend you get one because it does
make fixed speed. Because in terms of
learning the software, what you need to truly know the software
is you need to know all the shortcuts and you learn all the shortcuts by
practicing the shortcuts, by fingering, imagining
you will learn a piano. You need to know where
all the keys are, a lot of the magic, a lot of the skill
and learning piano or touch typing is knowing
where the keys are. And that's way easier on
a one-handed keyboard because I don't want to have the keyboard is not
associated with letters. It's only for that program. That's while I show you my 100 keyboard
settings for Maya, I'm old enough, I might
optimize it later. The best. I'll send
you a PDF file or some kind of thing
with this kind of setup. But I'll explain it on
the videos on the fly. My biggest recommendations,
it's called 16 as control and 11 h shifts because that's akin to how
it is in a normal keyboard. And that will help you a lot in this default here,
space is good. This is also okay. This kind of up down
keys with this joystick and this 100 keyboard will actually make my, I
feel like a game. I want Maya to feel
like a game for you. This is your game controller and this is the scroll wheel. To scroll wheel does.
It's very intuitive, and this is alt button and this is a very important button. And the position here
is very ergonomic and you can do it
all with one hand, which is very good to cosine. So this is a tool
that pro gamers use to improve their workflow
and their game flow. I guess they're using it to
be more productive at games. I'm teaching you how to be a more effective animator by using tools that
programmers use, which is this 100 keyboard. It one thing that I would want
you to really learn well, and that will require
a bit of fingering, a bit of finger practice, which is keyboard, to
learn the shortcuts, to be able to do those things because I will not repeat
myself and the other videos. Don't learn those things now, the other videos might
be two over your head. And you cannot say you learn the software unless you know the keyboard
shortcuts for it, because that's how you work
quickly in any software. No professional animator goals right here and check select, and it will select
here, no one does that. And then they click lasso
tool here and move here. And they all use
keyboard shortcuts. And the keyboard shortcuts
here for my are very easy. I'll highlight them their 12th on my 100 keyboard shortcuts, which is W for move. It's weird, W for move, but it makes sense for my
art because it's translated. The move tool is not called, the move tool is called the
translate tool in Maya, and this is the most
foundational tool you'll ever learn in Maya. The move tool is your
animation friend. You'll have an
object and you will have to middle mouse click, and you will just drag it
wherever it needs to be. That's how you animate objects as if you were
manipulating puppets. That's just how you
animate in my IU, use this move tool
and new translate. And you do that with
w, which is 12, oh my 100 keyboard
shortcuts 12th, and that's main
keyboard shortcuts. You will always use W. And this is something I
want you to practice right now is switch between
the W E and R. W E and R, which is 12, 13, 141,213.14. You can notice that
you don't actually use the Select tool with animating because
as the select tool is primarily for modeling, because in my hour
when you animate you only animated properties
which are dose. You can see them here
in this Inspector, w is translate property and
you select w, which is 12th. We will modify in this
translate property here. That's this whole
maya thinks about animation because
Maya is all math. Maya is a mathematical
program that actually handles very complex mathematical
calculations under the hood and you are
just giving it to come out. You're actually doing programming
here when you use Maya. That's why my eyes
sometimes start in computer science degrees in Poland because they think, Oh, my eyes, Complex maps software lets teachers
to programmers, but my eyes not hard to learn. My *** are to understand
under the hood, you need to be really good at math to understand what's
going here under the hood. So people fingers and timid
software because it is taught that I can Computer Science degrees because there's, some people might
say it's complex, but now it's not complex. If you understand
what's happening here, what you're doing, you're changing a number
called Translate, which is essentially
coordinates. Map with coordinates. Because you're translating
the coordinates and this object has substance
such coordinates. And you are essentially changing coordinates here like if
you would do on a map, because you can type in 000 and you've changed
coordinates here. That's how you move
acute, left and right. You're changing its
coordinates in a world space. There's also objects base, but that's why you
can either use objects space or walled space, because those are
the coordinates relative to the
workspace object to coordinate and coordinates
relative to the object. And that's the
difference between world space and object space. You will actually switch with them very often while animating. Sometimes it's easier to
rotate an object space, sometimes it's easier to
rotate in other space. What it actually does,
something that comes into play later on when you will do
more complex animations. For the first few weeks, we'll be dealing with relatively simple
geometric animation. It's like the bouncing
ball, pendulum, bouncing ball with
character animations that require you to train from
world space to object space. Right now we'll just
have to understand this. I just want you to
practice for now, open Maya create a cube and
practice fingering between w, which is 12, 13, which is e, where you can
remember it with the acronym. Where, where are you? Scooby-doo? We do. Where are you? Where? Where, where w translate,
rotate our scale. Those are the default
shortcuts in Maya. Those are not my
modified shortcuts. Nine times out of ten, you'll be using w and e. Remember the acronym
where w is translate, E is rotate our scale. And in my 100s keyboard
shortcuts their 12th, 13, 14. You're going to remember them in a sequence, 12th, 13th, 14th. So very easy to remember, and that's how you manipulate in Maya, that's how you animate. You can middle click and
then when you middle click, normally when you move, you move onto axis. So you have to kind of grab those arrows here and then
move on to a specific axis. This is the y-axis, this is the x-axis, and this is the z-axis, and they're always the
same consistent color. Red is always x axis, y is always green, and z is always this. And this essentially moves
across only to AC side. And this awesome moves only across two oxide.
And this is useful. It can rotate your camera, europe video camera
by pressing Alt and left-click and you zoom in and out by Alt and right-clicking, we have a Cintiq tablet, those are buttons on your pen. Can also just use
the scroll wheel. You don't have to right-click
that often as an animator, you does the mostly
left-click, to be honest, 90% of time you will just left-click and middle
mouse-click actually got what middle mouse-click
allows you to do here with movement is middle mouse-click allows you to freehand navigate like this. You move it wherever
you want on the screen, but you're not constrained
by the arrows here, which is useful
sometimes you'll see, especially with rotation because normally you rotate
across an axis. See here you rotate across
this axis until they do. But when you create Why you scroll tastes
across the chosen x. So there's also a lot of TV animators like
to animate way. They just use the
last selected object to do this with the
middle mouse button, you actually have to go
to settings to hear this. And remember, active
handles has to be turned off and you can
always modify Maya. Maya is very modifiable. So now when we rotate using
the middle mouse button, it will rotate across the viewport access
or Wood Movement. We can just move it
whenever we want without having to be
on this controller. You see, because
normally you have to be on this controller
to move here, you can move your mouse here. This is way easier in terms
of movement and rotation. You can also do it,
but you have to select the axis and then rotate. But the middle mouse button,
you have to kind of teach it very wanna go and then you
move left and right here. To remember for this to work, you need to manipulate her, move, rotate scale
tools to address that, to view plane handle, view play handle you essentially your audit
on the view plane and move this and it moves around the view plane,
withdrawal date to, it rotates around
this view plane, which is very useful for animators because
especially in TV animation, you have to animate fast. You will be hired for
how fast you work. One exercise that I
suggest you do right now to really learn
the shortcuts is to just create a
bunch of cubes using this poly modeling
workflow here, just click on this cube,
click on this cube, click on this cube w, and just quickly move them. Move them next to each other, move them around the screen, smooth them out on
the screen like this. So yes, I would just want you to practice switching
between it and rotating desk and just play like as if you were played
with blocky display, with a viewport and
rotate this cube, a C Howard middle mouse click. It, rotates like across
the sandals or here, or we can do it like this. Here. You can do it like this to our crust, that
viewpoint handle. And now I can move
it like this to left mouse click an experiment, moving it in, rotating over
to the width of W and E. We, we, we, remember WE, WE, and you just, It's moving this like practice moving
those cubes from side to side. And you time yourself how
quickly you can move them, believe it or not. This exercise is actually an entry test for a lot
of TV animation jobs. They'll give you a line
of cubes like this, and they'll say 10
s, move them here. You have to really quickly move them because they
want you to have mastery of the software where
you can quickly manipulate, okay, and then move
them 45 degrees. Great boss. And with the middle mouse
button and our tablet, it actually is way faster. And a lot of proline animators, what they do is that they use authentic tablet or a
tablet or some kind of order tablets to
speed up the process or the manipulation boils down
to two buttons, W, E, W. And we remember it as we are that scale and
that's less important. It's very important for
modelers, but for animators, W and W and W and W and W and V. And that's 12.13 and
-100 keyboard shortcuts, 12.13 now and just practice
moving things around. Just practice doing
this in a video game, if you will learn how video
game like Fallout four, you'd also be asked all practice walking, practicing
lockdown now. So let's practice
walking together. This is your assignment
for now and not watch more until you do
this one assignment. You don't even know
how to save the file. And it doesn't
have to be pretty. Just go nuts and have fun with this as if
on a playground.
12. Let's Do Our First Ball Animation: Let's do our first
animation, maya, and learn some more keyboard
shortcuts to be masters. And the first thing you have to learn is the reference editor. Why is the reference editor so important to
reference the editor? So important because in
normal animation production, the animator doesn't
do everything. They don't model,
they don't rig. And especially big
studios like Pixar, there are separate people
who animate separately people models have, are
people who texture, because unlike 2D animation, those are completely
separate skills that have no overlap. Or it can be very good
at animation, very, very good and very
bad at rigging. It can be very good at rigging
and very bad at animation. Well, in drawing, if you have someone who's a very
good 2D animator, chances are they'll be
okay enough at painting, there'll be okay in alpha, drawing or creating
lyrics themselves, because those are all coming
from the same base scale, which is the solid
drawing skill. Well here, generally you will have already
created by someone else. That's why we'll all be working on rigs created by someone else. Starts regard free. They're all array
created by someone else. There's this Balrog that we
have, and there's other X2. And then we can
always change them without getting out of Maya
because that's the point. And is, Eric is
actually very old, but it still works
and actually even has some extra features where you can change the
bulk type here, meaning you can
make it football, can make it basic. You can make it
simple, like this. And we will work with a simple
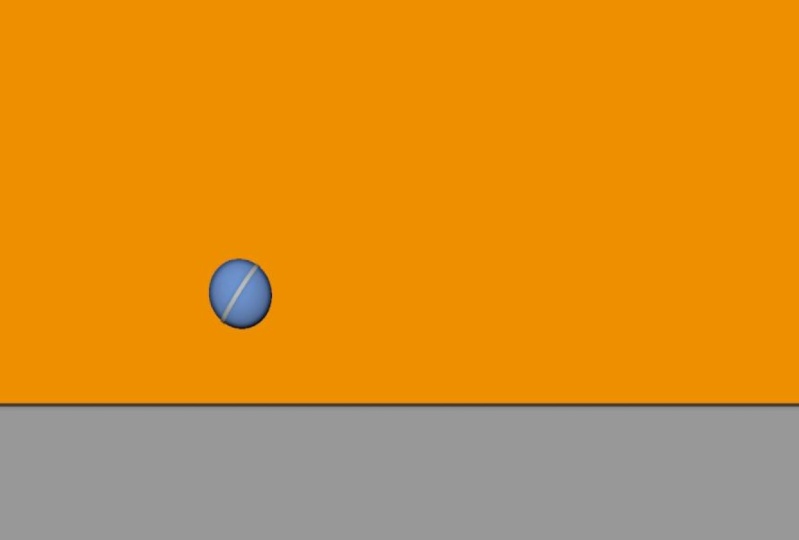
ball for this exercise, I will just do translate tool to make an animation.
How do we do it? We only use one controller. Only one. Generally an animation,
you use a lot controllers, but this is too
complicated for now. We're just 61 controller
and we kid click S, and then we use the
left and right buttons, left and right buttons to move. One, frame five, we'll
make it move here. F allows you to zoom in here, zoom in to see this whole pattern up
along this whole graph. And this graph depicts movement. So again, we have this ball
at the top arrow here. Now we'll move again,
frame ten here. And we wanted to go to
the default position. There's a dedicated keyboard shortcut to do that in anime, but it's actually
not in vanilla. My oldest uninvolved rules and its tree and my wholehearted
keyboard shortcuts, which is reset pulse. Here, hot keys, default pose, and reset post generally would have to have a
bundle of snapshot, but this is very useful. I'll see we have this
very simplistic animation I wanted to cycle so we can play blast
it and it just won't stop after one balanced we
want it to bounce forever. And you would just highlight
to this controller and click Curves post infinity
cycle and now at cycles. But this looks pretty bad. Why? Because as we learned, let's make it worse. As we learned, animation is
all about timing and spacing and we'll get a ball like that and has even spacing,
it looks bad. And let's actually
do a pro gamer move here and click Alt, Shift seven, Alt Control Shift seven on
my 100 keyboard shortcuts. And seven on my 100
keyboard shortcuts is five, so it's Control Alt Shift F5. If you don't have all had a keyboard and you
just see the ball, but we're still selected is just hidden so we can view
the animation of wealth. And I'll throw him
over this animation. Who got it as wrong? Well, the timing is
even, even timing. This becomes actually
way more apparent if we actually make it longer and
how would we make it longer? It's easy. Just select it, select
the key and we move it using the 1.2 keys, gets the 1.2 keys on my
100 keyboard shortcuts, which corresponds to the keys on the keyboard, which is 8.9. Move this left and right. And that's why I can retire with like we want to
give it more time. We want to give it seven
frames to move on way. We want to retain this one to see we timed it
very easily here. So let's say you didn't
need it the more time. It looks a bit better. Yeah. Still looks very bad. Why? Because it has even spacing. It helps them have
a D acceleration and acceleration
we talked about, it doesn't accelerate
and D accelerate. How do we do that? Well, we've changed
the tangent here. If you click the floor tangent, this tangent uninvolved will get the best tangent job done
enough, it's pretty good. So as you can see
here, it accelerating, D accelerates, accelerates when it goes up
and D accelerates at the top. And then does the opposite here. To create this kind of more
appealing about symbolic, wanted to stay in
the air for longer. I'll do we do that? Well, you wouldn't do that in production because you
create, break down the keys. You going essentially
to cook wave tangents and essentially scale this here. See, it's stays longer hair. And if you look at this
curve here, It's crazy. It's very appealing
around parabola. So as you can see, it
takes way more time up, it moves quickly, stays
in place, and then false. And this great, appealing
and more cartoony bounds. Without passion,
straight or anything. But this is actually the very first exercise you would with frame-by-frame
animation. And it's kind of a cartoony
bonds and it's actually way easier to do in Maya because
you don't need to draw. Let's see, we only
used those two keys. We only use the W key for
move and S key for S. And we created our
knife bouncing ball. We want divided using tangents. But what would happen if I didn't want to use
those tangents that I just wanted to be
professional and new, something that's considered
the best practices, simple you to essentially
create a breakdown keys, as we mentioned in old timey
Animation Productions, at the assistance
that the breakdowns and the masters did the keys. But here you could evolve. So why would you do well, a nice practice that actually
works very well is that you go to the middle and
you open an unbarred, an antibody has a magical
tool called the twin machine. What is between machine? It favors one key
over the other, e.g. in the middle here,
if we press here, it will favor one
key over the other. You see, and as you've seen, our tangents kind of messed up because we had
selected to wait it. Nano-bots thankfully
has this wonderful tool called best-case
tangent or cotangent, which removes this
kind of chicanery. So it's best to say
it twin machine, e.g. we want it to be
pretty much like this. I will create this kind
of breakdown here. We would also do the same
breakdown in the middle, and we'd create our parabola
that way instead of scoping and that in
the graph editor we created breakdown keys, which are not often
mathematically precise. So when the polishing phase, you'd also edit them like this. Well, that's just
how you animate on stepped better than
we did our lovely, more appealing animation that way with those break down keys. And you'll do them with
antibodies because the Maya doesn't have this.
This is all antibodies. Can even blend here. Who's the tangent
type very easily. And it shows you the
keyboard shortcut for it to spline tangent. And if you hover above the digitals video
description of what it does, the flow tangent,
that's actually a new thing and anime
button, it's very useful. Slider that helps you
for polishing with the keys because
that's what you do on the polish phase C. And actually I described the
oldest phases of animation. We animated the golden poses, which were those two keys. See 17.14 when you retire them to give
them proper timing. Then we added the breakdowns and then we added the Polish, where we polish this
curve or to have a very appealing
mathematically precise curve. And those are the three
phases of animation blocking, which is the key pose,
this golden pulsars, which it was 17.14
blocking plus, which is the breakdowns
and polishing, which is the
training around with the graph editor and making sure that everything works
out right here. Numerator first animation
from blocking to polish, and we only use the keyboard
shortcuts that we use. Well, we use out 11.7 on my 100 keyboard
shortcuts because wonky, that you have to
absolutely remember on the one-handed keyboard
that I set up is that 11 is Shift
and 16 is control. That's actually not the default. The default is the opposite, but this is more
akin to what's on the normal keyboard that
comparable is below shift. So that's how you do those keyboard combinations
and a very useful key, adult you have to use now
is Control Alt Shift, then is the play blast
visibility mode. And Alt Shift seven is the animation visibility
mode practice for our segment switching
between the two using those shortcuts. Again, it's this
handout given to you, so please print this
handout out because I'll be referring to this all the time
and I'll update it to one. They'd like keyboard
shortcuts and always have the newest version. So play around with those
keyboard shortcuts, please roll seven. And we just selected it with
the W key, which is 12. We created this whole
animation just with one. Controller won't translate. And that's all we'd also did S, the S key to make the keyframes. We didn't even have to
use the S key because we have this outer key toggle, which automatically sets case
when anymore with the ball. So we didn't even
necessarily need to do that, although that's
the best practice. Let's see, we made our
finished animation and we even adjusted the timing and spacing
of zinc breakdowns. And again, the way you
do with the breakdowns, it says use the tween machine
because what this does, it says favors one
pulse over the other. Here it would favor
the previous poles, which would make it near
the ground of it more. So with cooling rate, what's
called a slow out here, It's crazy slow in
that it slows down, which is acceleration that it accelerates and slows
down at the top. This is essentially the
difference between acceleration. The acceleration,
but you can see it as favoring one
pose over the other, because that's what acceleration
the acceleration is. It's a slider is what you use 90% while making poses in Maya. Like I really think that MySQL
stress without uninvolved. Here you've finished
your first animation. You made that first animation by addressing the frames
here, retrodictions. And you also learned how
to use the controllers. Because again, when you animate, you never select the mesh. In never select the mesh. You always select only
the NURBS curves, because if you select the mesh, it will have problems. And this here is a filter for it where only this
should be highlighted. All of it should
be not highlight, that should be unselected. It should only select
the nerves curves. And then you manipulate
the nerves curves by using the buttons and the 13 buttons and very rarely add our button. You don't scale. If you see
here even went highlights Coronation Street control, this part of the
switch controllers created by and moving. We didn't use it right now, but we very rarely use scale. Well, yeah, that's it. You've finished your
first animation.
13. Using the Graph Editor for Spacing: In this lesson, we'll learn
about the timing and spacing, the graph editor and
squash and stretch. This is the main
lesson of the course. I've prepared three balls. They all have the
exact same timing. By timing, in the
context of 3D animation, you can understand where's
the key frame located. They all have
different spacing and only movement is
happening on one axis. But it makes it very easy
for you to visualize this spacing in terms
of the graph editor. As you can see here, blue ball moves pretty quickly, meaning that it's large
spacing, as we can see, this ball moves pretty
rapidly then moves slower than difference between
frames and smaller and smaller and smaller
and smaller here, what this is is that on the top, the ball either in the
pose slopes and the pulse, well, here, the blue ball
slows adipose and most down the spacing becomes
progressively larger and which creates this nice
parabola shape. This is actually the
grid spacing for our bouncing ball.
Bouncing ball. The bouncing ball wouldn't lap, stay in position for awhile
and then move down to bounce up and position for
a while. Move up. While. It will be
more noticeable if we actually click Curves. Post infinity cycle declared this animation now,
her full cycle, post infinity cycle
would offset, will do that for both
of our balls curves, post infinity cycle, curves,
post infinity cycle. Now, when we play blasted will see that they
feel completely different. Why is it? I'll have
the same timing. The keyframes are on
the exact same timing. They take about
the same amount of time to move from
this key to this key. The same amount of time, but what's the
difference between them? The difference isn't spacing. Again, the spacing in the
graph editor is shown by the curves and it's
very easy to read them once you understand
what means it's basic math, this one moves up, up, up. We see that this spacing
here moves quicker, quicker in there, slows down, slows down, then quicker,
quicker, quicker. Again. The blue ball is actually the correct spacing
for a ball bounce, it eases into the top posts. And he says Alice
on the green ball, the ease in and ease out. On the bottom. It eases out or slows out. The terms ease in and
slow in are the same. Just ease in and
ease out is using 3D animation and slow
in and slow out. It's used 2D animation. So this ball slows
and slows out of this ball is actually the
worst timing of them all, which is linear timing. We very rarely use Linaro timing except for very
limited circumstances. Because leaner timing has the exact same spacing
and every ball, the spacing between
every frame is the same. We just scroll through it. You can see that
the spacing between every frame and the green
ball is exactly the same. The ball moves and every
frame, it's exactly the same. This crazy I'm very
robotic movement. It's technically the
most incorrect spacing. Now, when you do
the bouncing ball, let us the timing and spacing to create
a different field. Generally, you
don't animate with weighted tangents for the
purposes of the exercise, they're used to showcase
how timing spacing works. Let's make it so that the first pose is favored
in this bow paths. What does it mean? Favoring oppose? It means
that the animation, the spacing is closer to
that list posts for longer. There's Basing is
smaller for long curve, meaning that the
polls stays closer to the first pose for a
longer period of time. Meaning is pacing
favors this pose, this concept of
favoring its most efficiently shown
using timing charts, which is how we draw
our thumbnails, and timing charts or spacing
charts and 3D animation, or a way for you to plan out your animation and your spacing. Let's say we have those
two keyframes, a, which is the ball on bottom, be just a ball on top. And see, this shows how
close those lines are together showcases the spacing
in between the keyframes. Here at the bottom
would move very slowly with very little
spacing like this. And all of a sudden
developer would move very quickly with a very big spacing. In. There will be
a lot of space. The model will move a lot
between point a and point B. And those frames favoring apples means that you make a keyframe. Generally you make a
keyframe that puts the spacing closer together
between the posts a, and favoring pulse, which
is Portland's be in. If you haven't been
to plug in NMR, you can use what's
called a winner between are essentially favors, one pose or the other. That's all it does. It's a magical tool
because essentially you can make it so that
it favors this pulse, reverse this process
or that pose more. I'm enough, if you use weighted tangents,
doesn't work right? So we leave it out for now. This is the reason why most
animators dislike way to tangent. We will explain it. It was fantastic. We will
extend the curve here. We see that this post is favored because
it's almost stays more in this pose
and the feeling of this ball is completely
different because of it. The reason why you should avoid weighted tangents is because
of workflow regions. Weighted tangents make it
very hard for you to use the analog tools is most optimal to use
separate keyframes, which are in between
keyframes to create a pose that favors
one pulse over the other. If we favor the position up, removed it Wiener
more towards dispose. In anime bot, you will see this twinning bar
and this twinning bad will be the most useful
animation tool in Maya. It's actually a plug-in, but
almost all professionals, animators have this
equivalent tool and they cannot
innovate without it, essentially makes an
in-between frame which favors either one part
or the other poles. So here we have our post and we use it to
modify the spacing. So here we see the posts
favoring the up pose. And let's look how
this looks like. See, you modify the
complete feel of animation while the
timing is the same. It's just that the
course is favored, meaning that this
breakdown frame is closer to this frame. This is this keyframe
sold moves closer. That's favoring, and we
favor one key pose over another to adjust timing and spacing to make them more
appealing animation, to change the feel of animation. Because if you would look
at a lot of animations, they all have different rhythm. And this is what
creates this rhythm. This is a different forums
of timing and spacing. So let's play around with
the green ball here. Modify its timing spacing to
create a different rhythm. Can put essentially then
it's delete this keyframe, put a keyframe or ornamental, and just use the twin
machine to modify it. And this way we can favor of
this pulse or that pulse, this is all between
machine does. It's either favors this
pulse or dad post. And thereby changing the spacing
either makes it slow in, slow out of this pose or
slowed into this pose here. As we have learned the
rhythm of the animation, it's determined by
timing and spacing. In today's exercise, you'll be asked to have to modify
to bouncing balls. I have them both bound and create a
different feel to them. So let's do the
exercise together. Can see a lot of the feeling and the ball is determined
by timing and spacing and useful cut
key for playing back your animation to see all
that changed is Acumen. Have to set up an ad and bought. And it's play blast
visibility mode and animation of
visibility node. I have it in my one-handed
keyboard shortcuts as Control Alt Shift.
Alt Shift Seven. Just my preference. You can set it up
however you wish. Most important thing
is that you have systems shortcut
that you remember. I have mine written down
and I always have them. Handy reference animators, maya. This makes it very clear to see the different bounds of symbols. You see that this one actually feels like a bouncing ball. This one doesn't. Let's use the green one and modify it so that it
feels like a jump. How would it feel
like a jumping mole? Well, at jumping
ball would strongly favor the position inside here. Focus on jumping and
anticipate the jump, and then jump up and then
fall down very quick. And other hot key you
have to sit down. Now is hotkeys, sliders pop-up. I have it under the UK. Essentially pops up.
Your tween machine and other versions favor this
pose on the twin machine, you just click here because
this is, as we have learned, favoring is moving the keyframe closer to the previous keyframe. Those are our two
main keyframes. So those are our two key poses. This image here symbolizes
our previous key pose, and this image symbolizes
our next pose. We put it in the middle. We'll create a
keyframe that favors both equally. Well,
we don't want that. We want to create
a keyframe that favors the previous one more. See, how else could we make
it feel like it's jumping? Well, create this feeling
of weight and anticipation. We essentially have to
squash and stretch. This is where this
principle comes in. We have those break
down towards this. How would we add squash and stretch to make the ball
jump instead of bouncing? Make, well, that's simple. We'd have it squash here, and we just select
this controller. Here are some social pieces
as another keyboard shortcut, we have to use an Allen body. And this one is actually not
in the classical shortcuts, actually in the selection tools and it's select
our rig controls. This is very important to wherever keyframe to
select our red controls. That will make it way easier
for you to re-time it later. On this route timing. Timing, using analog,
it's very easy. It's a very simple process. As we said, the key essence of animation is
timing and spacing. And this allows you
to adjust the timing. If you Greg keys on all the
controllers are now rig. You can essentially quickly move all the keys and
retirement very easily. And they do have said that
Riggs on one controllers we can do here with this main
translation controller. You can simply click the keyboard shortcut for
selecting all the rig controls. Then use a magical
anime bot feature called share our keys. It shares the keys between
all the keys of the rig, meaning if there is a key on one controller and
not the other, it creates a keyframe
on all the controllers. Now the same keys or
every controller. While those that do that
does it that we can e.g. if we modify this wash here, and we then I'll select it all. And we decide, oh, I want to have a different timing
for this breakdown. We use a different keyboard
shortcut called hotkeys, and it's actually in the
recommended shortcuts, notch left or not right. This is the biggest
advantage Maya has over any frame-by-frame
animation program. In frame-by-frame
animation programs and then fairing by
frame animation period, you have to always plan out your timing very
meticulously here, adjusting the timing is the
easiest thing possible. You just select every
controller controlled six. This selects all the
controllers of the rib. And you use your
keyboard shortcuts for not left and natural. And that at least at the time. So let's adjust the spacing of the squash so that it
favors this false. So slowly moves into
the squash, squash. This person doesn't
look right because we want it to actually, when it moves off the ground, we wanted to very
quickly stretch. So we make another
keyframe and half it. Please stretch.
And then we wanted to very quickly bounce back. This gives us another
shortcut that we have to set up for our steps is actually
in between the slider. You can set up specific twin or combination like there's a
combination that it's pavers, this holes in our ratio
of two times seven, etc. This is useful, but
for the purposes of this program and
to make it easier, we'll just use this pop-up V. We made it pretty much lose this question very
quickly to one frame. And using squash and stretch
now can also add it here, that it's stretched on impact. And another keyboard
shortcut that I suggest you do is to you, if you are using a one-handed
keyboard shortcut, which I strongly recommend
to do this that you create a navigation shortcuts for
navigating the timeline. Up left and right keys. E.g. you can quickly
move left and right and create the in-between. Largest squash. Retirement. Longer stretch. Let's play how it feels now. It feels different
with the same timing, just different spacing and
with squash and stretch. And then once we discussed previously needed one of
animation principles, anticipation is
that adult repairs to drop and then moves up. We can also make this Trump
a bit more dynamic by Audra sting the timing and spacing here,
how will we do it? Will favor this pulse. Again. They were disposable,
just impurity, select this Controller. And let's hear. This uneven that
line will create a feeling that jumps
up and falls down. Let's preview it without
looking at the animation. That doesn't have a feeling
of about a ball bouncing. It feels like it's ball has
a win-loss that's home, is anticipating the jump, jumps. And false. We did achieve
this by using anticipation, which motion stretch,
and by changing the spacing this barbells, we actually didn't change it. I mean, it's still on the top on the same keyframe
as the other balls. But it either completely
different field. We played around
with the timing and spacing and completely changed
the field of the ball. That we can see. The spacing is very neatly shown in
the graph editor. The spacing's pretty
much the same and the y axis then moves
very quickly here, moves more slowly, meaning of this matrix
and gets smaller. And then it moves
quickly through it. Most. Generally you don't
use the graph editor, but for the purposes here, we can move the
curves up it higher, like this to modify the
field and even move them. Let's see how this
stretch to the front. This way it's a bit more and they're more and more and more. And then finally, we just see an animation just like
with every art you learn by making mistakes and playing around with it and modifying it. So on your assignment, I will download the
ultimate bile from BH loop animation and you just Google ultimate barbaric Maya. Then play around with
three balls and create three different balls with
different timing and spacing. And create a different field
by modifying this question, stretch and spacing
and timing spacing. We're just playing around
with two properties. The timing is the same. I'm mixed starts on frame
one for the bottom, frame 13 for the top, and free for a frame
24 for the bottom. And then just cycles infinity, the timing is the same. You just experimenting with squash and stretch and spacing. And you're just using
those two principles, those two factors to create a different rhythm and
feeling for the animation. Let's see how this
bone looks like. Again. It has its own personality
as a jumping ball.
14. How to Setup a Project in Maya: Just a quick video to nail down the point home that
Autodesk Maya 2028, 0.1, the latest release. And Maya has interactive in-app tutorial
that teachers you all the features in a pretty
much a video game format. I can guarantee
that this will be on times better experience than anything you can watch anywhere on YouTube or cetera. But those will not make
you an animator because in animation is not the
software that matters. It's the animation
principle that matter. Tomatoes, proficient. It's 2D animation. Like my teacher
Alex Williams was, he only started working in
3D animation last ten years, but worked for 20
years as an animator. The thing about him
is that he just had to learn the software
and took him like a week learn the software
because it's not the software that matters is internalizing that animation
principles that matters. You will not be an animator, terrible animator just by
watching a software tutorial. Software tutorials are kind
of useless because Maya has a great software
tutorial inbuilt in this software and more
software packages have their own
documentation nowadays, same but unity, what you need to know for coding games, e.g. algorithms, math, to know
how to code the games. And you need practice
and feedback. Similarity with
animation, you need to a step-by-step
curriculum that will train you in the
animation principles, which is what my course
series is all about. It's not about teaching
of the software. So I really recommend
you go through this interactive
tutorial that you get when you install the
latest version of Maya, you probably are
watching this in the future because this
is a pre-recorded. So just install a version
of Maya that's higher than this and install
anime button. You'll be doing good. Good. Altos teach you the
keyboard shortcuts I use for an unbarred with my one-handed keyboard
shortcuts because an unbarred is not something that comes
with the vanilla Maya. And as I mentioned before, Vanilla Maya is not
that great anatomy. Especially if you're an
independent producer, MIS, optimized for
working that pipeline, that's why you see that project
setting and Maya and let me just open up my own demonstrate what I mean
by project setting. I'll open up Maya, I actually using
an older version, but the only difference between this version and version
that's currently out, which has only released today is that it has that
interactive tutorial. But I just wanted to show you
the Set Project panel, e.g. set of products
in our directory. Let's call it test directory. Create default workspace. And you have a
product window here, open tonight difference monitor. And all it does is organizes default
folders for everything. As you see, there's a
folder called scenes where all your myosin
will be saved. Assets where your textures
would be saved and images image textures,
would it be safe? Assets is like assets
like rigs are templates, images is mostly templates, etc. This is where your render
output will come out. That's where my eye will
generally put out when you render and it will render
it out into this folder. And you can change this folder, but different folder, so you can render it out in a
different folder. And this is where it
should technically store your clips are here with movies. Here's the auto save folder, but they are generally the most important folders
are seen and source images. Because if I were to
render a picture, e.g. let's just create a
ball and that basic shader I knew material, Lambert. Make it red and
you click Render. Let's use my software. I will not teach you
a rendering Arnold and this curriculum right now, I will do it via
an ECS curriculum already talked about look death, but not I'll not talk
to use a Microsoft. So we have this, right? Would we send up this
folder sequence here? And this will be saved in
this source image folder, stress copy this way so you
can open it and explorer, say we have in this folder, this is our workspace
and sorts images, 3D Paint Textures
and rendered into images temp and
see here actually. So yes, when you have
this product pain, I made a boo-boo here. If you want to change the
folder word surrendered, and sometimes you want that. I sometimes do that. I want to render it in
a different folder. You just change it here. And what the advantage of mine over other
software is that it has this lovely organized
project pane that really helps you work
in a feature film company. My eye is optimized for working
in RStudio environment. When one person does rigging, one person does look death
and they check in and check out that file because that's
how it works in a pipeline. Let me just pause this video
and I'll demonstrate it. My eyes optimized for a studio environment as an animator, here's
what would happen. You are hired as an animator and you'll get a file called Shot dot NB would up foul shot and be someone else who
will have done the layout. And you'll just animate
you have this scene. I don't draw that well, but
you will have the scene and there'll be the
props setup for you. You just animate your work on your animation according to
what it's supposed to be. You'll get like all animate
this guy doing such and such. You'll get this kind
of brief and you'll animate your job and
you will do iterations. And then you'll send
them file called Shot dot 123, dot NB. That's why iterating
and saving is so important because they'll
expect I felt like that. And then they'll have file with this animation
where this guidance. Then someone else will get that file and
they're responsible for the lighting for
loop dev and for the effects to make sure
that the textures look nice. And my art optimized for that. Mayas, optimized
for this kind of pipeline where one person
does the textures, one person starts the rigging because you will be
given you rigs here. You're given pre-made rigs with textures and
with everything. You're not doing your own
models in a normal production. You're not doing
everything here. Your only job is to animate and you're only judged
by your animation. If you are hired as an
animator and a Pixar, you can be the best
model are on the planet. No one will care. You can be the best
rigour on the planet. No one will care. Only thing that matters is
your ability to animate it, which is not composed by your ability to know the
software inside and out. No one cares about
it. A 2D animator, like my teacher, Alex Williams, he only took a month
to retrain them to take them too
much time because it was very easy
for him to do that. Because it's all about learning
the animation principles, the same exact
exercises that you use to learn the principles
and 3D animation. You use unlearning 2D animation
like a bouncing ball, pendulum bars,
invalid character, those are all
animation exercises. You'd have a view width
to a 2D animation school. You're just doing them in 3D. Because the difference is that in 3D you don't need to draw. In this way, 3D
animations, easier. Real reason why 2D
animations used so often in production is because they can hire
separate people. Big companies want
to hire a person, does the best at only one thing. They wanted to hire
a great animator, they want to hire
a great quarter. They want to hire a great model. They don't want to
hire people who are just mediocre up something. But on the other hand, if you are an
independent freelancer and you will make music
videos for people, which is kind of what I do. Niacin, not that great. It's Maya has no
advantage in what? Anime, but does
uninvolved does actually automate a lot of things
that vanilla Maya doesn't. And in terms of software
learning my courses, more of a uninvolved
course, Maya course, because all you need for
animation, in my eyes, the thing that, that
little friendly robot will teach you in that
interactive Maya tutorial. Your homework for
this lesson is to go through that interactive
Maya tutorial because it's interactive and it will teach
you more effectively than any video course because it's interactive and it will
make it feel like a game. Bare bones, basic
introduction to Maya, but that tutorials the inbuilt in the software
and it's the best. So please use that. This will not be just
one Skillshare course. I actually calculated that this will be 50 Skillshare courses, which will be our
one-year curriculum. After this one year, you'll have a good enough grasp fundamental animation
principles to be able to go out there and
have a read of the demo reel. And there'll be some courses might take you
longer than a week. It might take you
shorter than a week, but it will be 50 courses. And if you watch them once per week and do all the exercises, the vote for hours per day
on doing the exercises. After watching through the
curriculum of 50 courses, you'll be a great animator, but you're only be
a great animator. There'll be another
curriculum of maybe 25 courses to
be our good modeler. And then another 25 square is
going to be asked sculptor. And then at 25 week
curriculum to be rigor. And then add 25
week curriculum to be screenplay writer,
screenwriter. And then 25 week
curriculum to be a storyboard or this is the
journey I'm taking you on. And this is my dream, because my dream
is for the poorest 13-year-old to be able to
learn all those skills, start learning them at
14 and then add 18. When there'll be kicked
up by their parents, there'll be ready to get a job, maybe not at Pixar about
some other animation studio. No need to get
in-depth for college. This is my dream and you can
learn it in high school. I can definitely learn
it with my curriculum. I'm, I'm confident
that I can teach you. It takes time to grasp those principles and will
require a lot of practice. But my curriculum is about
giving you an animators I, that will allow you to
observe movement and then replicate the movement
in more appealing way. You'll be able to observe
movement in live action and then you'll be able to copy
it and improve upon it. That's what an animator dot. That's the job of an animator. Observed movement
in real life and then animated and
improve upon it. Create Reality. Plus, that's the job of an animator and that's
what I'm teaching you. This course is not a software, because the software does
the easiest thing to learn. Impressed if you learn
blender or Maya, that's given because
that's easy to learn. No one is impressed by it. That's very easy to learn. What you have to learn are the animation and
art principles. And that will be an innate skill that we'll be deep
in your brain. What you learned, that
will not be a skill that you can very easily replicate. It will be hard to
replace and the company, once you learn those skills, and that's how you'll
get paid more than minimum wage because
you have that skill. Few people have you put in the work and you have skills
they have no one else has. And I'm giving you in microbrewery column it
in an affordable way. And I know my course
is not perfect. I have the visuals, I have, I have my accent, but I'm giving you a cheap solution to make
your life if you're in the same situation
on iOS where I was this 14-year-old who
had abusive parents, wanted to escape.
I'm giving you out. Now. Just follow this
curriculum step-by-step. And you will have a demo reel
and you will be hierarchal. Just follow this curriculum
and do all the exercises, and do those exercises and
do them until they're good.
15. Quick Overview of Animating in Maya: We learned a basic workflow. You'll learn the basic
workflow and now let's see the
workflow in action. When we have RAs are
keyboard shortcuts, we have to select the right
set here I have them in Maya. Arrays are black widow has a key map function here
in regular synapse and us select the correct
keyboard shortcuts that I sit up for him. Started up a new scene in Maya. We are fresh Miocene here
and we referenced our rig. And you have multiple
ballrooms to choose from because it really doesn't matter which ball rig you'll use. The same. I gave you a tree so you can
have some creativity here. Just remember the workflow
we learned previously. It's blocking, Blocking,
blocking plots and polish. Let's say I'm on a
TV production and we're doing a bouncing ball without any squash and stretch. And you have unlimited
time to do so. First, you always
block out on stepped. There are reasons for it, which I'll explain later, but now just trust me on this. So you have this first pose, some stepped, and
we're making a loop. We're making a loop where we'll select this controller and half curves post
infinity cycle C. So logic dictates that are Enter key will be the
exact same as the last key. Go to frame 24, because we are animating
at 24 frames per seconds and we want to make
a second long animation. So here in the middle we have this keyframe and we
already created a loop, c, and then the middle, we're adding another
keyframe here. Why did we do? We already have our
storytelling positive Z. I'll normally you'd block them
out on stepped keys here. So what are stepped keys or why do we use
them for blocking? You stepped key for blocking and because they allow you to not be distracted by my interpolation in professional
animation production. You don't let my interpellate. That's why there's
something called the fourth frame or 53 rule. It's kind of a rule of Tamar
and not the actual rule. It's a principle, not a rule. Generally, you don't want my interpellate
for like ten keys. Maximally, you want to let my interpellate for
like four keys. That's y to the four key rule. But blocking out on stepped keys kind of prevents you from letting my interpellate
because you don't see any
interpolation here. You see high-quality animation
is made frame-by-frame. You don't let my interpellate because my adult and have
any artificial intelligence. So you just do
everything manually. And again, now we set
up the golden polis. Remember, state one was blocking golden pulls us than breakdowns. And then pushing up the
same workflow down. Was there a 2D
animation production? And this is the same
workflow people using 3D animation production. So now we set up the column
positive because this is such a simple animation only has three
golden pause this. While you have my eye,
you can essentially move between golden pauses.
How do you do that? You called control, which is 16 on your one-handed
keyboard shortcuts and you move left and right. And this is not a
default shortcut. This is a shortcut. I set up an uninvolved two
views to 100 keyboard. See, practice this for us. I can practice moving between
key frames like list, so you can understand it. So you can develop muscle memory to be able to do that quickly. See, and those are the golden
pauses are what are called impulse and golden portrait
artist storytelling posers. The ball goes up and
then it goes down, goes up, goes down. That's all it is. But if we wouldn't
have unrelated right now as we watched
the previous video, it would look bad because it
would interpellate evenly. So the workflow is always
that you use Allen Bart, but usually use by pressing
F9 on my keyboard. And that will open
the tween machine. This panel here,
which lets you tween. And this kind of panel is where
you make your breakdowns. Very often, you often
modify them manually, but you always have to start from this,
from this trainer. And what this does is that it favors one pose
over and another. That's essentially what
timing and spacing is. Either accelerate
or D accelerate, whether it accelerates
the framers the first fall when the D accelerators
favors the last pose. And we know that
the bouncing ball, it will accelerate first and then dy accelerate
when it hits the air, and then start slow
and then accelerate, meaning it will slow into this bound here up and
we'll slow out. So this is winner. As we have learned in
the previous lesson, you could set up the correct spacing by just modifying the tangents and
the graph editor directly. Well, that's too slow for
animation production. Generally, you just add
in-between key-frames. In practice would
work like this. You just make a keyframe directly in the middle
between the golden pauses, the main golden frames. And you make a
breakdown for timing. So you're just favor
one over the other. So here e.g. between
it 40 per cent, meaning it 40 per cent
favors the last pose. Favorites dispose.
And when we supply, neither will create a parabola. And here we put this
in the middle tool. Here we all do the
opposite where favored the previous
pulse and he was in 1.2, you can retain those keys. Isn't our very important
keyboard shortcut. 1.2 to re-time the keys. And this is pretty much done. That's all. See. We already set up
our breakdowns here. We already set up
our breakdowns here. And now when we supplied will just fly and using
the flow tangent. Let's done. And of course we're all
my post infinity cycle. And we have our
lovely bouncing ball. It's done and it cycles so we can play it
backwards more easily. That's the only reason
we're cycling it. I kind of zoomed through it. So let me demonstrate it again. See, this is the breakdown
key in the previous video, we modify this kind of
curve by just clicking weight but tangents and modifying this curve
in the graph editor. But in real animation
production, you very rarely do it because
it's not fast enough. This is way quicker
workflow where you make the golden poses
and then you make a key in the middle
between those golden poses and that's where you favor
either disposed or that post. That's how you have
to think about it. This is a and this
is supposed to be. And this is the
in-between pose C and posterior has to either
flavor dispose or that pose. And you decided to
using between Machine C. As you can see when
we use this twin slider, it either moves down, meaning it moves to
this previous pose, the pose on frame one, or when we move it here, it favors that pose and
that's how we make it. Slow out or slow in C. This is slow in, slow out. This is ease out.
This is n, is out. Ease in, or ease out in slider. The funny thing is
that actually there's this slider called directly
ease in and ease out. And when we click it, it seems to be doing
exactly the same thing. So what's the difference between this and between machine? Well, those are different things if you would select
multiple keys, because if you add a key
like this, the ease in, out slider makes sense if
you would have a curve like this and you want it to just use both of those
frames at the same time. You couldn't do that
with a tween machine, that it doesn't work that
way because it between machine is optimized to
work on one key at a time. I'll easy, ease out. It just resets both keys. You see at the same time, it ignores the original values
of the keys and creates a perfect ease in
and ease out while ignoring the
original key values. So they do the same thing, but a different thing
at the same time. But for production will
use the trainer generally because you really want to
have this level of control, but that's the workflow here, allow me to demonstrate
another workflow, aldosterone little
animation from it, which is actually a
keyboard shortcut, but you can also do it
put in the menu here. It's clear animation and
I have a shortcut for it. And we'll just, and I made from the altar tangents because I think it will be clearer for
you at this point in time, this workflow will be
repeated over and over again. But I just want you
to understand that 90% of the time that's what we'll be working
with everything. And this is just the
workflow in Maya. So I can always set up the beginning and then two
keys when you make a cycle. Here we'll just have
the up key already. Technically, we
have an animation, you see, we just cycle it. We already have an
animation because we have the golden storytelling
pause this and this story is
technically told. The ball moves up and down with the problem is
that it looks bad. But for it to look nice, we have to make the
correct ease in and ease out the 12th
animation principles. This one is the principle
that gives appeal the correct spacing because
we have timing correctly, we have the correct timing. The keys are the
timing on breakdowns. They modify the spacing, the golden poses are the
timing and the breakdowns. They are there to
modify the spacing. So how we do that? Well, we use between
matching and we managed to create
the same kind of parabola we were after before, just with breakdown keys are my favorite
tangent right now, just new and antibodies
this flow tangent, it will calculate
automatically in the best flow of transition
between the keys. And that is actually
something that's very useful that vanilla
Maya doesn't have. This already works. And this was very fast to make this kind of
bouncing ball animation.
16. Introduction to the Animation Pipeline: Thinking about my eyes
that generally nine times out of ten you
will not make polygons. This will never happen because in animation
you will always be using array because there are different departments
are responsible for different things. Anatomy. That's just how this
industry works. And this comes from the fact that it takes a lot of
time to get really good. One of those things can be
mediocre at all of them, but to be really good at all
of them, it's impossible. Everyone will have
their strengths. So generally the way
the pipeline works is that you have an
idea and journey the idea has made by
someone with money. And then they get a
writer to write a story. And then they can an artist. Generally, people
who have experienced comics or figure drawing, they become story borders. Essentially, you
need to have very strong drawing skills at very strong staging and
cinematography skills. You will essentially
to call ours, and most of them end
up a storyboard. They create an automatic, which is this intercept
storyboard with audio in it. And then they use it to
design the characters. Essentially created a layout
of the poses, meaning, the environment, the model
they figures than the texture. The figures which
you can imagine us just painting the figures. Then they create the skeleton. And only then you'll be animate. Then someone after you've
finished all the animation, then I'll do the special
effects that do lightning, and they do the
rendering capacity. Any 2D VFX and motion
graphics color correction, and they'll finish it like
01:00 in the pipeline. And what you can imagine working on an assembly
far alignment or factory. Honestly at glorified
factory worker and us to do It's like a factory job. You can do remotely,
let's say it will do this is what lets understand what rigging is and why can't we
just made directly on models? For one thing, maya has some problems with
that because let's say we have created a cube here
and we try rotating. There's this thing called
the rotation order, which essentially says that in Maya the default
order is XYZ. Essentially if we rotate
Z, as you can see, all the axis C rotate with it. Then with wide x axis
rotates to somebody here. Does. So if you e.g. kind of mess around and
create this actually way easier to see on a torus. You have this if you do a lot of rotations here and
a lot of patients here, and now you try to
do a Y Rotation. See, this is what's
called a gimbal lock. Essentially, the values
are really messed. This can happen easily
if you don't have a proper summary because even help you change
the rotation order. For some more advanced story. Here's how rigging work, Snyder. What rigging is four characters is just a more complicated
version of this. You have puree eight. Click Control G to create
a group for that object. You will always have a
proper naming convention, which is like Paros, GRP. And then you essentially create a controller which
is a NURBS curves, always a NURBS curve. This is a type of object in Maya which is
essentially self and that will not be shown
in a any rendering software. And you essentially click on the nerves curves,
click on your group. And in the rigging, you got to constraint. And there's parent
constraint which constraints both
translation and rotation. Point, which is just, just translation and Orient, which is just rotation. And scale is scale,
a parent constraint. When we move this r moves. So why don't we animate
directly on geometry? It's because in every pipeline, you will have a different
person doing the geometry. And often enough
what happens is that sometimes in the
middle of production, they'll have the bright idea
of changing some details in the models while keeping
the rake and topology intact, like adding a scarves
or something. And because it's referenced
essentially a de la la, a loss due to effortlessly
changes and all scenes. It productions I worked in, they almost always did that. That's why I admire your work
on the references US and the file with the rig is like a separate file that
you don't touch. You're not allowed
to touch that file. You just referenced
it to your file. That's why MIS optimized for our studio words
are interlocked, compartmentalize,
and different apart. Additionally, the
advantage of this is that when we have
this red, right, and we move this controller
can notice that the values of this model haven't changed
because this model exists. On its own kind of
coordinate system. So they're not related. Which really helps a lot. Who actually mostly animating those NURBS curves,
meaning controllers. That's why here,
there's this option to only be able to select
certain things, right? You nine times out of
ten only want to be selecting the nerves,
curves, earaches. And it doesn't matter
if it's a bouncing ball or anything else. The only animating the RIC. This assignment now is just
create your own very simple. We're using a torus. And again, just create
a torus. But name it. Thomas, ga. Ga. Then we group it would
control G minus VRP. A naming convention
is important because rigging is mostly programming
technical people. Then you create a nerve score. Crick are to increase its
size, which is scale. Then you select the nerves
curves and the group you made a constraint and parents. Then you just animate that Rick, using the same things you
learned in previous lessons. We'll select the first frame. You essentially
kid, it was an S. And then the 20th frame here. They didn't have auto key on. Our turkey is very
important because auto key automatically keys your values, each object you
painted the values. Most people leave out a Qian So they don't have
to always remember to S. This is your very
simple assignment because this is animation. It's just pretty animation. What do you already terms
of knowing the software? You're 90% there. Because for a nanometer, that's all the software you need to know because animators don't have to model unless they're creating their own shop. Very few animators do. Of all them and maters, I know very few ever tried to create their own
short film or anything. Because it's a lot of work over diverse skills, like in drawing. You have this drawing skill and kind of everything
builds on that. In 3D, those skills
or more unrelated, being good at rigging
doesn't really make much better at animate. The better you draw, the better add-on to the frame-by-frame
animation you'll get. And the better your app
to the frame-by-frame animation to get
better at drawing. So those are more
unrelated skill sets. So we have here this, okay, I would like you
to do this active site. Clean up this pupil here. That last interface
section that to be bothered when you go to Panels
and you go to perspective, you go with layout. You always animate
with two panes. Why? Because you have one pane
for actually manipulating the controllers and
won't pay inwards. Short com. What is a sharp com? Let's actually do them all. Rf, what referencing? A reference, a camera array. What is a camera rig? It's a rig that creates more realistic camera that essentially will emulate how
our camera actually act. Because CGI cameras almost never go to Panels,
Perspective, intercom shape. And if we create an object here, or I can move this camera
or like an object rig, and it behaves like a camera. Through this, you can
create normal cameras, true view and create camera from view or creating,
just create camera. And they're always default
cameras if you progress space. Or you just go to perspective orthographic
in front and side, you will get a default cameras. Those default cameras
are generally not used for animation because non-local goat
and film, they're flat. So generally you will be
working in like something that the layout department will sit up and they'll set it up
using a camera like this. Like this. Just essentially composition
and cinematography. This is the whole
principle of staging rests on how you
set up this rig. The camera array that
I wanted to show, we didn't phrase that you
generally manipulate up in one view and see how it
will animate in another. That's actually a
workflow that you have. Because you, I always
animate to camera. You have a certain camera
shot and you animate. Another thing that
I want to note it, a practical thing,
nine times out of ten, you will get only one scene or two scenes in a movie,
like per month. Because generally the
feature quality animation is done by about four
frames per week. You'll get a shot
that's only 100 frames. You just have to polish them
in excruciating detail. In TV animation, you might get longer shots or we might
just get multiple shots. Because the max,
you'd be expected to animate this
thirty-seconds per week. And that's the max
generally it will be between 4 s to 8 s per week. So either for 100 frames, assuming it's 24 to 25 frames
per seconds, or 200 frames. So a lot of people get ambitious when they do homework or when they
create their demo reel. Your demo reel should
only be administered 30 s to a minute
because it just has to show your best animation and it has to be in everything
and it has to be perfect because they want you to be able to do
beautiful animation. What we did so far is pretty
ugly looking animation. That's not that good. It's just animation for the sake of being to
learn the software, but you will never be paid for making
animations like that. You're only paying for
making good animation. So another thing I want you to type into Google, Josh cam. And I'll give you all
into it and reference it using the control reference. Now I want you to
play around with the camera controllers in generally around the sulfur you will have to do for your job because you will
get this puppet. And you will have to spend
like an hour or even a day just playing around
with the controllers of the puppet you've
been assigned. Because they always will have their own controllers and
their own way of working. Each studio has its own quirks
and it's on rigging setup. It's not really standardized as much as you'd
think it would be. Okay, Let's go to the
homework right now. And the homework is
creating a torus. Creating a torus, leaping it, renaming it correctly
like chorus, GRP. Creating occur and
cleaning constraint, resizing the curve. So slide naming it torus, CRT controller and
selecting this and this, the controller and the group
creating Australian parent. And this is basics of rigging. Basics of bringing our
useful because then, you know, Oh, this
is what rigging is. This is what will
be provided for me. Someone spent a lot of time
making a puppet for skeleton. So this will just
give you an idea of what it takes to
make our production. All right, I have the tourist
just a little bit at today, what was I supposed to create a terrorist or
using NURBS curves, I wanted you to use
the polygon model. Because NURBS curves are doing
nowadays for controllers. So we don't want to
pile in other nerves. Yes. Alright, here it
is, your distress. No, group. G,
control G. Alright. Now renamed. Click on the click. I've been torus, dash here. Under porous, underscore. Grp. Naming conventions
are very important. Now go to Curves, nerves, curves and surfaces. Pick a circle or a choice. I like option,
double-click on it. You will get options. Angle, the radius, size, normal plot. Click our tool. Now select their nerves, curves, and the outliner. And then select the group. Select, Shift,
Control, select Yes, no shift, right-click
or control-click. Want to find more
generally it's control. And now I'll go to constraint. Is that P has a shot. Alright, well js i now if
you'd just use the controller, this one, just use the nerves. Now. Now go uncheck all the selections
order down the nerves. Here. What you can select, your generally turn
everything off other than the NURBS curves and everything. Rounded nerves, curves,
those are on those. And get through this, yes. Those are the polygons
as an animation touch. Alright, It's all net bias. Alright, if I now click somewhere else on the screen
to unselect everything and select this one
here. Yes. Okay. Now at frame one
here, w, w, Alright? Alright, click
sometimes you say v w, okay, click on frame one. Click S. Now we'll go to ten. Alright, and move it
anywhere you want. Sure. Can use the channel box or the channel box
because it's precise. Rewarm less. Now, pretty much automatic,
heated and preview. See, you didn't touch it. The polygons are doll. You've only used the parent, it's controller and
nine times out of ten, you will be using like that. They'll have their
own controllers. They're all even functions. Sometimes you'll just be
animating those newspapers. You can think of this as a stop-motion puppetry
or just array. Actually animating my personal
take on a technical level. That's what 2D animation
is, just animating. Holds the puppets have the right values
under Nicole level, that's all written out. Just playing,
learning some staff. That's how you have to
learn, play around with it. Like Jasmine does. Take some script you've learned here and just
play around with mine. What happened to the
keyframe and tenure? Wrong and delete an accident. Chief record it on. Yeah. I essentially, once
we add those poses, you modify the timing, but I'm making a
poster in between. Yeah, I didn't want to
necessarily do that. That's their problem
with animated. That's why generally
you've gone to animate straight
ahead like this. Now, you want to meet using pauses planned because it
gets overwhelming quickly. Yeah, just keyframe
here for some reason. I know why what happens
is very common. Because if you have key
using the channel box, only the channels, only the keyframes on that specific
channel show on the top. So if I tried to
translate x axis, you rotate and the y frame is not going to be showing
up your free software. Problematic. That's why there's this
shortcut in Anbar. This is specific for anabolic, which is smart keyframe, which essentially key printing all the values are on
key frame on that, all the values of
that controller under the General
recommended workflow. Because if you tried to have different keyframes
on different values, if you would just go
to channel by channel, it will make it
impossible to retard. Because right now we have all the key frames
on one channel. Extremely easy for us to go here and every
time our animation is practical reason
why you would want keyframes and set
value like that. You rarely honest you very rarely that you want situations. Mostly Polish in
the polar stage, once you have all your
key poses and you just want to not like
fine tuning, fine tune. It. Shouldn't be something
that you do as a noun, but you have this nice tool would keyframes left or right? Or you can do this. You will go and shifts
and shift select here. And you essentially can
move the keyframes. It is. Alright. Is it something that's extremely
hard and traditional? Two different by
frame animation, retiring Dan know for sure it is just like something
that's impossible. That's why most even to the
evasions bone animation. Now, generally what happens is that you block out
your CEO key poses. The director tells, oh, I want this faster or slower. And then through
frame-by-frame animation, that's impossible. Here you have two words. Here. You'll go like OK, boss. Just to make the
corrections fairly easily. Read, timing is the
easiest thing ever and you walk in a studio who will be retiring a lot because your initial time you will be wrong. Some animators actually
work with this webinar. Don't worry about timing
that all along the path. It only worry about
posing, he Posen. Then they create the tightening
from the poll from that. So that's an interesting work. I don't have a keyframe everything again,
keyboard shortcuts. I sit up in live one-on-one
and keyboard shortcut is Alt. See this swapping two keyframes since gloss to get really crazy, It's kind of flashing effect. It takes four frames for
us to register our poles, takes our I4 frames to
register our polls. And anything below four frames, registers as factory
half the room. So how do I move
a keyframe again? Nanobots, you can either lose those nuts
buttons, okay, First, make sure to do
the whole frame is selected anytime
or you can shift, select and left-click and kind of move it like
that. Which I prefer. When added shortcut
keys on my keyboard, shortcuts, which is 1.2, I believe, for the notch.
Because I use it a lot. What the shortcut keys for anime both are
actually very good. They even have some
recommended hotkeys to 0, meaning whole hockey does
improve your workflow. In animation speed is king. If you don't have it for you to get a job
in 3D animation, you really have to have this so well-trained like a video game. You know how some people
are really good at Team Fortress,
automatic for them. This is the level of
training you'll need for this viable Java. Studies have shown that
the number one reason for burnout in this industry is not having those skills
that's sufficiently trade. Get the BR employer hires you 100% expect from you to
have this trained, walk. Drinking in animation. They will not expect to teach
you on the drop of mattress you all to the
frame-by-frame animation. They did teach you
about the job you started as an in-between there. And then you kind of
learn to erupts from your superiors and Asia. Japan is worth that. Nothing. The West and the
West did our boots teach. My course. I'm school that older by Pixar, new Sky Studios and DreamWorks. I animate at it, which is really
more the M-score, a sham animal order. By that, a nation and XR. So all of those majors
have their own school. Private schools have this. Just does as good to just know the best, cheapest chosen discourse. Because the best of
the cheapest. See. And I know we're not
even bothering with timing and spacing and
all animation principles. We'll just having fun
with the software. I just want you to play
around with parenting, with framing and see what
caused the end of the day, you will learn play.
17. Learn the Interface with Jazmine : To tie, I work, teach you some Maya. Maya is very easy. I mean, the thing is
that it's intimidating because you will open up my
and you see all the menus, all the shelves, and
all them options. The thing is, is
because Maya has every single option listed here, plus an abnormal Studio, times out of ten. Guy will only work
with modeling, only work with drugging, only work with animation, only work with
rendering, and so on. Like we're only work
with motion graphics. It's like you're not expected to be a
master in all of this. The software itself
is very easy. You don't need a
software tutorial, you'll need a skill tutorial. Good at job. Do anything like a nun about just learning the
software worn by a walk? Not about them. Why are you watching
software tutorials there? Wonder boring too. It's about projects finishing salt will learn by doing. So. You'll learn by making Earth. So I'll be making some errors
deliberately and then, okay, so I open up Maya. First error is me trying to be kind of special and
use the mouse for it. If you've ever
played a video game, and that's what
being an animator isn't just playing one
video game very well. Let anyone tell you otherwise, is literally you're
being paid playing one video game very well
to a competitive level. You guys, all tree
software is pretty much the dad artists that you have. As an animator, What
are you doing actually? First you have to
understand, okay, I got this animation gig and I lied on my CV that
I'm competent. Well, first links
there, you'll get this. This, this, this,
this is both cheaper. So we have this and we want
to animate will just be easy. What is I have bought? What is animation in Maya
because my computer's not pay. They just have certain
rules that I have to do. It only nowadays
that we create AI that emulates the style
doesn't have conscious. No machine has consciousness, meaning the sense of I am. So we cannot expect Maya
to do anything for us. It's the slave would,
he talks in it. That's why slavery ended in a lot of countries
than they had computers. They didn't need to wage labor
and may be called ai will be a way to communism,
but that's beside. You open up Maya, then
you have this gizmo here, then you Maya, which
tells the top. Right, because
this is important. Maya works with coordinates. This is a map. You will have to
coordinate system, right? You have, this is zero-zero. There's even thinking
about it here. Absolute transform. It pretty much in the
corridor. That's like a map. A map, you literally
just the men on a surface level in my app. Only do other nonlinear. You would just
assign the correct coordinates to the
correct numbers on the timeline at
the end of the day, the alveolar job is the whole visual animation
principles, etc. That's just the tools
for you to do your job. Well, this is why
3D are hard way. Because at a certain
complexity level, computers are pretty bad at creating manuals
shipped with control. So we have here, the computers don't
have consciousness, they can just do
repetitive tasks. Don't have to be conscious
for something and focus on it one-by-one than
computers can make. Good art, e.g. is automatic for people and a lot of
it is very mundane. All times things
will get elected. Well, what's here? This is actually harder
because you record systems C, x, y, z. That's why animations that pool drop that will survive AI. You have to understand
a lot of the mass. Because here we have a
zero, you'll see cord. You can actually animate
it out of coordinates. We'll do it like that. Most visual people just
use the visual editor, but some people do
it mathematically. And you have here
coordinate system. And essentially it's
updated in real time. You move on the x axis. This is the x axis and
this is the z-axis. You know, obviously this is not always left or right
because you can rotate. So, but that's why you
have those arrows here and you have these
kind of this cube. Because actually the directions
here are super important. They always rule. I always see. So as you could see, they have two blue blue, blue bead after
me, blue, too low. So please, below the blue
is the cost we learn. We are doing re, re, blue, the tubular
member, it is blue. The blue. What letters? Access is blowing in Maya. The stuff that she got it. Hey, I'm editing a laugh track. Editor and I make choices. X, x is a, x is our big red. X is red. This red, X dot c. We kept on image here, X is red. The red stop sign shows bread. Now, remember, it's
red stop sign. That's like right and left. Right. And let stuff go. I can remember it
as a stop sign. Stop, don't go. And then there's UP, which is the y axis,
which is green. Why is like Yoda? Yoda levitates and goes up. Remember it's like I'm
getting read. Yet. Why? You'd go to the Louis XVI. Louis XVI. Prompt. What goal? What's blue? What blue? Goes front to back and starts with can you answer
me the question? I always want to know
something that's blue, that's called with the Z line. This is the homework
for our students here. Please come up with
something below that starts with Z and use that
to remember it. Yeah. Do it. Yes. No, I have it
live. Extra credit. You get the best credit. Get the best credit. So we have this ball, right? What's animation? When you press Enter, you toggle this software. Remember, this is the values
I want on this key frame. And if they change new pink
visual individual objects, so they change the
values to change values. So this is the first value, yes, this is just
your first value. And then like on 4.5, it will change five times in
equal increments. On default custody, you modify
this in the graph editor. And you click again. You click right and
you tell the software, you need to remember
this position. You need to remember, please. And then it will change. You have like on out offerings because it will change as mattress,
you've changed. It. Didn't change. If I moved it a bit to the
right and it's changed. Problem is that it didn't change an appealing way in terms of, and that's what the
animator has to do. Because generally hue does, does that break down frame
which e.g. it's close. It makes it. So as you can see, animation is all
about the drills manipulating those values
and their time space. Essentially be creating those
old, which is animation. Because generally,
when you work you only focus on one thing. Because my eyes really like five software ruined
one software package, like live in the same house. They generally don't only
talk to each other when they lived in the same house, but we only talk to each
other one we have to. As you can see, this, this here, this graph editor. And because we created
this breakdown frame, breaking down frame
and what happened, we made it a nice curve. C, I fix it. We made the sexy curve here. Just like a flat
dressed, nice 60 curve. That's a mnemonic to
remember it to create. So as you can see, we have the, we have the nice
curves that move it. This is the East innocent. It slows into them. Again, those
animation principles are mathematical principles. Apply or not. That would be an ease out
and false are involved. We did this, move it, click. We only really used one key. To perfect. This
pretty much requires a keyboard because it's really hard to do it via the interface. So you need to learn
your controller here, which is your, some people believe it or not actually
animate with crawlers. Yes, I actually do that. A lot of animators
use at 100 keyboard. This is essentially a
controller where you have your graphics tablet and you
have this on your left side, and you bind each of those
keys to our shortcut. You job. I animated like that. And so all I can
suggest that if you are poor animator is generally
don't use their own keys. Keyboard we got from Goodwill. Do our first animation. It will be alarmingly on and do our first animation. Here. I taught kids with autism
this and I believe in tissue. Let's do our first assignments. Let's start with one frame, one, which brings
us to this thing, magic or this is essentially
how we control the timeline. Because remember animation is about values are key for it. That's all it is. This is the keyframes
which showed the future. And this is number 40 is the present and this
is the past, the future. Here. See the time. You can see time just
goes forward and plus a. So we have here at the time. So as you can see
here, you have this. What we'll do, we'll set
a keyframe on zero-zero. Then we move it here
and move it forward. All I have now is create a ball. Let's go through
the steps again. Because studies have
shown that when something's wrong
three times people are more likely to remember. That's why it'll be repeating
salary and concept. Least three types. Got some for generally I
are some people who will not make more notes
on any horse. So yeah, I'm trying to repeat certain constant
of at least three times. So if you watch it on TV because some people will watch
it on bread mold, they can learn something. So again, create a ball which used the modeling
interface here. Because those are like shells
that show the commands here and click them and they can also use the
modified create them. This is not potent. Potent thing is like
understand because this will change its
new software created. You have to understand
what animation is. 3d animation is on a deep level. Exchanging values of
the solid is greater. The ball selected it
and you move it with the red axis of 00. And he removes 40. Or technically your
first 3D animation. Let's make it not so ugly one. So see how ban all of this to create ugly 3D animation
you already created. And it's very easy. This thing, ugly, like a very automatic see Maya
interpellate an uneven way, which makes it ugly. Make it pretty,
they're told we do. Let's back. It goes the opposite way I met. Then it already just stop it. The timing was off. So this is this first
video about the theory. And let's do this assignment. I'll have a student
of mine demonstrate. Now I would like you to play
around with the interface.
18. Animate a Bouncing Ball in Place: What up? So we'll learn the
bouncing ball animation. I have prepared this scene
for you with this rig, but I really recommend
you grade your own. You will be using the
tools you'll learn in basic Maya course where we
will create primitives, extend them, and add
materials to them, which should be something
you will manage. Because you just select them, right-click and add materials. We got and then you
put them on a layer. Let's go like this. Select them and add to do
at, to select the layer. After adding all your
environment to your layer, you make it reference
that you cannot pick it. As an animator, you will have all the options to select bones, polygons, and everything
else turned off. You only select NURBS curves because that's how
the pipeline works. Essentially have a
rigor that rigs and you animate you were
a guy in a pipe? May answer the
question. Yes. When you reference something
is the same as say, lacking a layer in
Photoshop or Illustrator. If you mean layer
referencing, then yes. Well, in terms of Ricks know
it's more reference photo where the photos not change no matter what
you do in the program. Okay. It's like if you ever did software programming is like a function that's
not separate file. Because my eyes optimized for like studio environment where everyone works on their own
files and rotate asleep. When I worked on that
animation and a production, I was given a shot. I animated it. And then there were
dailies where we pretty much it with the director
discussed it a shot. And if she didn't like something like she wanted a hat
on that character, the rigor would give me a different rig and I
would just replace it. So it's always the
same kind of workflow. But as you can see here, we'll do the most
basic exercise ever. The bouncing ball in place. It is very easy. But I really want to
over-complicate it for you because I want you to really get
the correct workflow.
19. Animate a Bouncing Ball with Jaz: Jasmine Illustrator,
first animation. The first stage we would do after we analyzed our reference, well, key this pose, right? Yes, you block out
your golden poses, which are the main storytelling
poses of your shot. I think that's keyed. Yes,
I click S, You keep out. And my 100 keyboard shortcuts
and escape the timeline on the bridge of your animation
cycle while animating, did I mess that up already? Know my eyes pretty
non-destructive. You're afraid to make mistakes. You learn by making mistakes.
These have fun with it. The Onion Skin is called, Is this the right where
it's understanding it under visualize,
make onion skin. First, you will have to select the whole rig in the
Outliner, right? The outliner is here. Then on default as
generally either work with the outline
or what random mating, select the basic ball. It will go visualize ghost selected or open
ghosting editor. It will give you more
options. Already. We don't really need
the ghosting editor. If you can just eyeball it. It's fine for beginners. They can use it both. The editor or not already
and joy just X out of it. That's fine. Okay, Cool. Where did the keyframe? Keyframes are only visible when you have your
controller selected. That's why we create a
selection set which you have under 19.100 keyboard shortcuts. And you can also open this
electro set from here. Because again, when you
select all the controllers, you will see the keys on the timeline which is
important for retirement. This is key. When did this, okay, the skin's still there. I think there's just
only one keyframe. You're changing one
keyframe, right? You only need one
controller doctrine. All controller first,
either that is Alt, S or S, two key all the
channels on that point forward. Alright, that's all keyed. Key to treat controllers. The squash and stretch up was the Move controller and
squash and stretch it out. I'm still on keyframe one here. I know both you have
to key the upper down. Sure. Them all. Okay.
You have very good. Why did Alt S I thought
that would cover all of it. Hooks up to those three
controllers selected all at once. Because in control shift
versus silicone control, then hold shift and click on
the new controller to add. Though both are
selected. And when you have a selection set, which we have under 19, you can store those selection. I click ball and it will
select all article. And so that's the selection
preset when you click on that and it just
speeds up your workflow. Yes, I'm old is important for
speeding up your workflow, which is something that
will make your life easier. Because you were actually
paid by the shot route. Or our reason we use selection sets and animation
is because they're easier, especially the useful
item button, pop up. Now go to frame 18. Now, create a copy
of this keyframe, perhaps aldose controller
selected and others. Yes. As you do this, check all those three controllers one-by-one makes sure are key. Only keep the eye controllers
we're animating who save on Maya's processing
power by using selection sets. Select all the
controllers, if you will, and then make if you manage to accomplish this goal of keeping your first two golden
posers created the extreme in the middle of the timeline and nine, right? Yes. That now on the ground, that's more than ground. If you were to just type
in zero on the controller or press the reset
button in and bought, it will get you down. What I put, I put zero and
that has more precise. You can notice
that you are right now on non-sterile keys. Make all the keys in your shots step using
an bought this year? Yes. Right-click and
stepped tangents, all keys. Right-click. Do you mean look, it's
Control Alt Shift, click stepped tangents of keys
to hold Control Alt Shift, and click on that button. Control Alt Shift, very good. You've created your first
key poses on stepped curve. Now you have to
create the breakdown poses responsible for
the timing and spacing. Remember, the ball
will accelerate, hit the ground, and D accelerate when it
leaves the ground. So we'll ease out to the
ground and ease into the air. Block out the ball first without squash and stretch
using only the male. Remember, you can always
change your timing if you keep all of
those three keys. I've showed you how to change your timing is less
than very good. Removing the controller.
Now, we want to have an increased
spacing here, so it would move more down. This pose would favor the middle keyframe
and it falls down. You can stretch out
to the Graph Editor to visualize the spacing
of the keyframes. Like this. Yeah, that helps a lot. You can draw a shift middle mouse click to drag
on this one axis. Is this Nike? I just don't see
a keyframe here. You press S while having
a channel selected. All channels when you
have one child selected, we will use our keyboard
shortcut and anime BOD POD, smart key, which I
sit up as alt S. Okay, very good. Remember who said use
your selection set key, all the keys in that area, meaning including your
squash and stretch keys, because this will help
you with retirement. Want to have some overlap here. So there's another strobe in. Okay, Let's see how
this is gonna go. How come it's not
in the other view. You gotta, you have to
select the viewport before. They definitely has
more refinements, barrier, busters, no
squash and stretch. That's the next step here. Let me check your keyframes. Select all the key
about shortcuts. I'm using the selection
set just here. All it all. Yes, that's how we name. Alright, let's see how you have keys on every three
frames, at least. You do know at
this point you can work on squash and stretch. How you would incorporate
squash and stretch. And this animation
we've made an okay, ease in and ease out. You can polish it out later. But first attempt,
this is what is squished to squash and
stretch controller, which one will use the not
to just squash and stretch. And stretch controller
in this rig is on top. You can use the y-axis to have an easier time
squashing, stretching. Okay, there we go, but
this is a bit too much. Here is, makes more sense. It seems as your key this, remember to select
all keys using your selection set and Keith on all the animatable
properties. So we can relate later read
time with greater ease. Wait, I think it turned
everything into that. But I'll Control Z because you selected
all the controllers. We're only working on the
tree animatable controller. That's why we're
using selection set. Selection sets are
important in your work as an animator or especially
we'll be using island, but there are other ways
to create selection set, but uninvolved is the full pack and stretch is probably not
keyed on the same keyframe. That's why you have this effect. It's okay to make
mistakes like that. Because it starts to show
how your squash and stretch. Not on stepped keys,
like your movement. While on normal interpolation
keys, called item keys. You can select the
uninvolved set keys and essentially
right-click all keys. Yeah, that makes way more sense. That's why you have to key
or keys on the same frame. If you make a change
during blocking. This rule doesn't apply in
the poll very last phase, the polish phase.
While blocking. It's way easier too, real time, and it's a
good workflow habit. This is actually a
very common error and 3D software for some reason there's other keyframes
missing here. Yes, because you need to keyframe getting
out of the squash. And generally you need to
keyframe on frame ten. You have to keep frame it
along with the movement. What do you do here is you will let ironing board essentially interpolating this movement
as it normally would do using either the ease in
slider or between Murphy. You can use this reset button
to reset the disquiet. Reset it. Not to move this to you. During the same frame. You'd have to select
the Move controller and use the trainer. You will need to
adjust the spacing of your bowel movement. At this stage, if your
level of expertise, you have a hard time
visualizing the animation. You can see like all
your keys and goal, the press bed guess tangent. Because a lot of beginners
find that they will have a hard time visualizing the movement on stepped
in the very beginning. The graph editor on alto will help them at least
understand the movement. Either though that's
not up best-practice, selfing dad would be
seen as an equivalent. Raining. Jasmine's animation
has some errors. You will see the air she made. This should be very sad. Not necessarily erase that. It should be really sit
out the controllers, you should use the
tween machine. Okay, where's that? We have different
interfaces, solid gold. But I don't I'm not trying
to use the tween machine. I was just trying to put the tweeter will help you like
interpolate between that, will help you visualize the interpolation
between the keys. And then you can move
between the keys leg more on or the other. So this is actually a great learning tool to see
how my old interpellate, how we can favor post a or B. Remember to play less
than the window, would have to click it before. Alright, here's my gosh, I need to work a bit on your
timing and spacing. I figured will be helpful for you to go to the polish phase, which will allow you to
better visualize some errors. In the beginning, it's
actually okay to go to the polish phase a bit prematurely because
the graph editor, sometimes we'll
explain things to you, especially in the beginning
part, symbolic violence. Select our tree controllers. You have the selection sets. And you can go and select
this tangent here, right-click and
click all oh keys. You'll be able to
visualize the timing and spacing and how this animation
will look like at once. You can notice that
there are two curves, will look like an indent. We'll just look nice. And often it's an indication that something might be wrong. It's not a guarantee. But in such simple exercises
like a bouncing ball, It's often the case. E.g. here we have a
pretty mature squash. Squash like that. This is
because the controllers, you can adjust to this question straight from
Florida controllers. The ball shoots
stretch four here. You are in the Polish space. Before you make any changes. We will make sure to change the interpolation of my I
ask keyframes and setting, because default and
the blocking phase, we use linear and step. Here we go, auto and
outdoor. Costume. To costume. Remember, feel free to make mistakes
and learn from them. Right side to have a bit of our linear interpolation there. Yeah, I was trying
to make it more. You can modify frame 15
and make it a bit more. 18. Maybe not that much. Yeah. Yeah. To test it. I remember the first balance we would have to be the highest. Don't modify the keys, get started because
then it will not stop. Also remember our
preview and now cycle, you go back one key. So the last key won't repeat. Nasmyth bouncing
ball. It's not ideal, but it's a good first step. You'll see errors or bowl. After you pass the assignment. Your thoughts about this?
How would you improve it? Well, the thing I
struggle with the most is just learning how to use the controls enough to try
to get what I'm going for, that this was 2D animation. I would be able to
solve this way faster. It makes sense, right? The learning curve is
the software or for me on not all beginners have
that Buddhist after, after Roo kind of learned a few times, there's
rarely intuitive. Okay. Okay. Well, that was mostly the
anxiety inducing thing. That's just like just
navigating software practice. It takes awhile to
get acclimated. Yeah, I do see there
should be more snap for sure that this
is very monotonous, so it's very boring. Bland. Yes. Yeah. There needs
to be more snap, but it's a matter
of RA that's more getting better with the software to really implement that. Yeah, I will do also understanding the
animation principles. Do you feel like
after this exercise to feel better
with the software? Yeah, yeah, I
definitely like I'm trying to edit this a bit more, make it very good,
pop a little better. That's a very good
attitude to have. Yeah, because this is fun. I'm just getting a
little stressed already. Yeah, This curve is way too. It's kinda like a depth seem to be Check that out. Now. Why Battersea? Yeah. Just minor, minor tweaks. See how minor tweaks can change your whole
animation, right? That's why teacher
quality animation really be judged by
level of polish. That the main differentiator between like TV quality
animation from Pixar, all hail King Julian and beautiful quality animation is the level of polish, right? Of course, if you go to wrap your 3D animation studios
like mama finger, mallet, finger, then
you'll be like mediocrity. But in general, you want to earn a decent wage
or the 3D animator, you are expected to be true quality animation
skill, right? This is easily to
hundred percent better. Just with minor tweaks
that a fair assessment, do you think? Yeah, I agree. It's at least twice as good just from slight slight tweaks. Now, it feels like
it'd be easy to mess this up with the same
amount of tweaks. So it's really you
gotta be cast surgical. Yeah. You have to be very
easy to mess it up. That's why Increment
and Save, Right, right. Which I should have been doing that I also made
the mistake of not keying stuff because I'm just still clumsy
with the software. And I wanted to give you an
example where it's okay to be clumsy into software because you're still
learning, right? I think this example
will give you heal. How many stakes are beginners expected to make and
don't feel bad about it. Because a lot of beginners are frustrated that they are not. Dreamworks animators
after 10 min? No, no, it's something you just got to have patience
with yourself and with the program
itself to where there are some things that are a little
counterintuitive at first, but then I feel
pretty good about this as a first attempt
for 3D animation. I'm looking forward
to the next exercise. So yeah, like what other
critiques would you have for this in particular? For this simple exercise,
I think it's good enough. Or you already passed
this exercise. And I hope the viewers will
also do this exercise with their first introduction to a really nice-looking possible. Yeah, I just have
patients have fun and play around with it and
don't stress yourself out. You can always just
hover over them. Now, Help menu will
pop up like this. So have fun and understand that. And but has its own
dedicated tutorials, tools.
20. Analyzing Ball Bouncing Part One: First thing you need to understand about the
bouncing ball across the screen is that you will generally have to
stick to one workflow. Workflow. We will be with
you forever in animation. The workflow is
essentially first, you do preproduction. What is reproduction? In pre-production? You essentially get her up
referenced and analyze it. How do you analyze it? You will go by it frame
by frame and analyze. Actually the thing about
analyzing references that you have to analyze
it for two things, key poses and arcs. That's because the timing, a bird, boat and spacing, but most of this is key poses, arcs and the timing and spacing. So we have here
the bouncing ball. You're kind of be acquired to pick your own bouncing ball. And let's say this
is the first frame. And then here we
have the second one. And you can notice
that it actually has. You will notice certain
patterns once you analyze them. For our example is
that each one of those balls moves on an arc. So let's watch this
ball bounce here. And essentially, the thing about this is if you would like
analyze your own reference, you would essentially
market the key poses first. On the screen here, I use a program called Epic
Pen to annotate on top. That's pretty good. While it is. Just annotate the middle of it. This is how you
will always start with like analyzing reference. This is important for
you to learn now, even though for the
bouncing ball is actually not that important, because you will be
required to analyze references for any kind
of more complex movement. When it will be
making a walk cycle, we will have to
analyze one like that. When you'll be
making acting shots, you'll be expected to record
yourself acting it out. Pretty much extrapolate the
key poses and arcs from that. Because a lot of animation is mostly pre-planning
and analysis. You'll see this is
kind of a demo. What you'd like, draw the arcs. They're all done. That the balls are
losing both length here and height here. Radically, like not
even kind of way like one-third,
one-third, one-third. And the cool thing
about a bouncing ball, why this should be your first, the first thing you
add allies is that people already analyzed
this here, e.g. in this video they
analyze, did pretty well. You see it having this much
length for this bounds. You can see they analyze
this pretty well. This video is on YouTube. Well that's a very useful video because it's first
has a section where you're able to have food edge. And then you can check if you identify the key poses
here accurately. Because those are
nothing more than the extreme golden poses. As you can see in
a bouncing ball. The bouncing ball loses
energy gradually. And so the bounds becomes smaller and smaller
with each bounce. And arcs themselves
become small, shorter, shorter and shorter. Routine March sporadically. And you could analyze
this and pretty much have a pretty
set timing for this. And that this is
something if you want extra credit you would do. But luckily enough for you, I have prepared
you on our outline drawing with pretty
much ready-made timing.
21. Analyzing Ball Bouncing Part Two: Okay, so let's analyze
the bouncing ball again. The fingers that
you have a lot of references for it because it's such a foundational exercise. If you go on YouTube and
Google bouncing ball, you'll have balls for days. And essentially you notice a lot of details that we
analyze it, e.g. you'll notice that
the spacing differs between the up and down
even in real life. And that, that's
actually something that was even described it
animators survival kit, which I described in
a different lecture. But the main thing you have to understand here is
the art principle, which is that things don't move in a straight
line in real life, even though Maya will
interpret it that way. Things moving arcs. And they also have like
timing and spacing that also arc like this. And generally, and
you can see here that I also want to
explain the spacing tarps. And this is important
because that's how you will always draw
your thumbnails, almost all thumbnails
made by animators. It doesn't matter if
it's an active movement or fighting shot. You will have to
draw this out to plan it out before animating, where you plan out your
basic space in this way. And in most animation books you will see this kind of thing. And it's essentially
those lines does signify how far
apart things are. Again, this is spacing the numbers on the
timeline or timing. You will animate a ball bounce. And this exercise, and this exercise is
actually pretty easy because it's about understanding the workflow and
the basic poses. So by analyzing our reference, Let's say we draw, drew out our thumbnails and we'll
now start animating. If you want to animate a
specific bouncing ball, you will have to also, you start with essentially
analyzing the key poses of it. So this will be a key pose, meaning Golden polls
opposes that are responsible for,
this would be 110. And here you can notice that there's a lot of motion blur. Each time there's motion
blur in our reference, it means that there'll
be squash and stretch. So e.g. this more
rubbery bowel will squash a lot while a ball
that we've made from a material that it's harder and it will create less
motion blur will watch list. And as you can see,
the motion blur gets smaller and smaller as the
ball moves to the top. And we'll have to
also capture that. Then as the ball goes down, the motion blur gets larger
and larger progressively. And that's where squash
and stretch will happen. Then there's another squash that's a bit larger or smaller, but still they're
rods like that. But right now we're
just planning out and noting the key poses and noting certain truths about the bouncing ball from analysis. E.g. we have noticed that
this ball took ten frames, this balance to
obtain ten frames. Now this one is nine
frames for each side. And if we extended this, made this longer,
this would also be, this will also be ten frames. And ten frames. While this, we would cut it
in half, is nine frames. Nine frames. And it would
get progressively smaller. It will get shorter, it will get shorter,
smaller, and smaller. This way, you have to analyze movements for those
kind of patterns. Analyzing references all
about noticing patterns and movement and noticing
that it arcs, timing and spacing and
key poses. That's all. That's what you analyze, especially in the
beginning where you have relatively
simple movements. After we get to more
complex movements such as an acting shots, you'll also be analyzing
reference for like anatomy, facial
expressions, etc. Which will require you to
understand basic human anatomy, which we'll cover in
a different course. But right now, we're mostly
focusing only on arcs, that timing and spacing
and keep polls. And the cool thing about
keyframe prose that you can only look at your people this with the
keyboard shortcuts like that. Remember to always
save your projects. Well, let's do this
with the rest of the bowl we see here. So this top side, down, up, down, up, down, up,
down, top down. Another mobile stuff down. And another smaller
balance here and down. Now just goes forward. And let's say this is the end of the timeline range for us. If we use keyframe Pro, you can essentially go range and to current and you have it all planned out
for you actually. And that's how you learn. You copy real life. So we have our timing here. I actually planned out for us and our spacing all
planned out too. We can also draw
the dose bounces out because it bounces
their time here. Here's a little tiny bounds. Then it looks like. This is essentially
a workflow you'll be using for everything, walk and everything else. You have certain
answers right now. You pretty much
have an answer here where you do well now where
I'm giving it to you. But it's even very similar
to learning math in school, in high school or
elementary school. I don't know how it works in America are
coupled in Poland, you're given like a
teacher goes through math exercises and
analyzes them for you. So maybe afterwards,
if you really try, you can solve a math
equation on your own. And I'm giving you
treating it the same way because
animation is mostly observation and analysis and mass understanding
the principles of movement and a principle of another principle of
movement, the bouncing balls. She knew that the
principle of energy, meaning that things that don't have a will of its
own lose energy. As you can see here progressively
the ball loses energy. So here on this frame, here you can see it in numbers
like this bounds here. It's already 27 to 33, it's already six
frames on each side. Here. Six. So they actually lost
most energy here. And this actually
really gets to you. This process of analysis
itself like reveals a lot of secrets about
animation to you that e.g. in real life, this
parabola is uneven because it's 55.4 here. But to push it and make
it more appealing. And we can just
added us for four. And we can make always push the, push our plan, so to speak. Here we also have four to four. We have, here, we have four. This is 4.3, but we can
essentially make it read to tree. This would be two to two. And we'd like one frame
bounds here, same here. So we already have planned out all of our timing
and spacing here. This is you pretty much made
your thumbnail this way. You've made your plan
of animation based on our reference
and we pushed it, modified it in a way
that makes sense and simplified it because a lot of design is about simplification. And how can I take
this imperfect nature, which is all randomness
and no order and make it something more appealing
and more organized. It's okay. Lesson we'll take our balls. Now, take our balls and play
around with them in Maya. And then remember, if
you're using keyframe Pro, you can always save this image. Save, save the image. You can save your screen. And here are the settings where you can save
it to Settings. You can say Michael folder,
Epic Pen screenshots. You'll have your screenshots. You can even have it
on our whiteboard. So it's nicer looking. And you pretty much
made your thumbnails on top of your reference,
which is the way easier. A lot of animators actually important those thumbnails into Maya and use them as a direct reference,
which I'll show you how. And I'll also show
you how to use an image overlay for this.
22. Let's Make Some Thumbnails: So after you essentially
analyze live-action reference, you extrapolate the key poses, which is on the red, and breakdowns, which are
responsible for the spacing. And you kind of
analyze the timing, which you are essentially
write down the prime numbers, will live action reference. You analyze it and write
down the frame numbers. And as you can see
the red ones here. First, we would plan
out at arcs like this. Arcs will be planned out because that's one of the
most important things that the trajectory of movement. As you can see, a
bouncing ball naturally creates very pretty
appealing arcs. And these arcs are
defined by the key poses. As you can see, there
are responsible for every direction change. Without them, the story
would not make sense and would nothing else
but the keyframe, key poses, and the kind of trajectory you already kind
of see what's going on here. And then you would just add the breakdowns for the timing, which is liked here. These are the breakdowns. And you have yourself up
pretty much ready animation. That's pretty much
about the texts. For to do that, you just have to analyze your live action reference
in terms of your key poses. The breakdowns you
could like figure out in my eye during
a break down face, but here I have them
provided for you. Again, we start with analyzing
the live-action reference, and then we go and pick up piece of paper or a drawing program. And we use our analysis on since getter we can draw
on top or using epic pen. You can draw on top. And then you can
either put it in Photoshop or PIP studio
or just on paper. And it will draw out your
plan of animation like it is in terms of a bouncing ball. It's kind of cool
if you wanted to make a detailed one where
the breakdowns too. But most people tom
they only their extreme poses like here in
this town name. But for you to just
practice a bouncing ball, you do well to just at first, just copy this kind of
template I've given you. After a while. You will be able to modify this and create your
own bouncing balls. So the warfarin for animations always the same everywhere. First you do your
pre-production, you analyze your
live-action reference. Then you draw out
your thumbnails to identify your golden
poses, then your extremes. Then you plan out
your arcs on paper, making sure that your
arcs are correct. And then you put your key
poses in Maya and then you create break down keys are responsible for
timing and spacings. And then eventually
wants to have a keyframe every
four frames or so. To start off time, you go to this planning phase and
the polish, the animation. So that's it in terms of
workflow and autonomy.
23. Correcting My Student's Thumbnails: Okay, Jasmine, my student, because as we all
know in this course, you are pretty much
learning along with her. In this course series. I'm taking someone who
has no knowledge of animation to a professional
level and I've kinda correcting mistakes so we can notice mistakes you might be making and essentially learn from our mistakes
before you make. Jasmine has an error here, see here the spacing small. This spacing, the spacing grow larger and then slow down here. That should start large. It should grow smaller. So the first spacing
should be B, the largest. Same here. And here, spacing grows, so it's fine. This one should be larger. Now look at your
own thumbnails and correct any errors
you might have.
24. Avoid This Rookie Mistake: Here I want to
tell you something that will be important while polishing your bouncing ball. You want to avoid
this if you have frames like that that are
so similar close together, this will create
a strobe effect. So we have two ways
of solving this. You can either make this
transition like this, where you have
bounces like this, or it can go the opposite way. Either one is actually
correct and will work. You can even make
the stretch touch the ground and running the
following motion because that way the bowl will have this very cartoony feel to it. Tex Avery and Warner
Brothers would do falls like that and
jumps like that. So this is a style one solution is used primarily in Disney. One solution to this problem was used primarily in
Warner Brothers. So again, you have your two solutions to the same problem. Another note I
want to discuss or difference between
the two studios. Generally, Warner Brothers had a more cartoony and
puppy snappy feel, while Disney had a
more flowy feel, this nice style animation,
everything is moving. There's always overlap. While in more
cartoony animation, the poses are held more. Again, the thing about animating the bouncing ball is that it's only true way
to learn, to play. Learned a basic exercise
which is very simple, but let's not cheat
ourselves here. You have to play around with
it and experiment what you can do by modifying timing
and spacing and arcs. A good exercise in this
experiment is that Asian stages to animate a
bouncing ball to music. You pick like a
rhythm or something, you put it on your
Maya timeline and you essentially animate a
bouncing ball to music. And actually are good
practice a lot of people do for their
sharps is that they pick up a piece of music that they like and they animate
the shots to that music. Because one of the
skills that you need to develop is to find a
rhythm to each movement. Because appealing movement
always have I written. And a bouncing ball especially will have a rhythm
like a pump, pump. Bottles with varying
weight will have a different rhythm like
a bowling ball will have a ping-pong ball.
25. Why the Bouncing Ball is Important: The bouncing ball exercise, which a lot of people consider
it a boring exercise, is actually one of the most
fundamental exercises. Remember, learning the
development of cognitive skills. You can imagine them
as ignoring muscles, but the difference is
it's been muscle building and learning a skill like music or animation is that you first have to
create the muscle. You have to create a proper
encoding your brain. That's the core of
cognitive psychology. If you don't encoded properly, you cannot reconstruct
it effortlessly. Remember when you
learned to walk first, took one step, then another, and then you'll
learn this forever. Even if you've got Alzheimer's, I can type even when I feel really sick and I
feel sick often, animation should be
the same way for you. The goal of this
curriculum is to make this craft as easy as pooping. Remember, while there are
12 principles of animation, there are only a few
cognitive skills required that you have to train to perfection extent
in order to get good at it. Number one skill it
will start to training from the bouncing ball
is timing and spacing. Once you master that, you will be able to
create a sense of rhythm. And you will see that each and every movement in
the universe has our rhythm. Once you master this, you will develop a
sense of rhythm. And you will see that H
and every in the universe, including any bouncing ball
you'll analyze, has a rhythm. And the more you analyze
your bowling ball and under movements tomorrow you'll
see the rhythm everywhere. Develop your animators. I, just like a musician sees that each and every
sound has a rhythm. You will be able to do that. But the movement after
you finish your training, there are people who can
play songs intuitively, simply because they
see the true rhythm of music instinctively
without distortion. To animate. This is same
as learning to draw. You're teaching
yourself to observe the truth of the world as it is, and how to push this
truth for appeal. That's why the worst thing
you can do is to learn this academically and
try to memorize stuff. Animation is a craft. Know that theoretical
discipline, historically I'll pleasure of humans halves came from the
craft, nothing else mattered. The flow state of their work was the only thing that
kept them going. Timing and spacing is the
first scale we'll focus on. Other skills will come later. Remember, an art class
is like a gym class. Every proper sportsman
will tell you that you need to train
your form similar to that, you're training your form and you'll have to train it a lot. You have to integrate through seeing of movement
in your brain by analyzing movement and analyzing at the animations of others. Practice it and
learn how to see. That's why I'm
always emphasizing analyzing live-action reference. Because by analyzing live-action
reference and animation, you're slowly teach
yourself to see, which takes a long time. That's why we'll do a lot of
animations in this course. You'll learn this the best
way through experimentation. So after you finished
your first bouncing ball, remember animations,
the art of cheating. Generally snappy, your
timing is more appealing. So the way animators
treatise that they really focused
on the key poses, hold the people this
for a long time. This is how you do limit
it to the animation, to animate is all about
that limited animation. When you hold your key poses, you can try experimenting and
did with the bouncing ball. You can notice that
it tends to be more appealing with
the spacing isn't even what a pulse is favored
in the appropriate way. It's like a rhythm
to each bounce and the snappier the rhythm is, the more appealing
it is achieved. Used in limited animation is to make key poses and hold them
for as long as possible. And whenever there's movement, you make it really fast so that people will not
see the mistake. That's the only way to make it appealing without reference.
26. Spacing Chart Secrets: Again, when analyzing your
live action reference and creating your thumbnails, which is your plan
for your animation. Don't worry about frame numbers. Worry about spacing, the
easing in and easing out. Make spacing charts which
are drawing arcs and then drawing little lines that
signify the spacing. The closer the lines are
together on thumbnail, this lawyer or your animation
is a more spaced out. They are, the faster
the movement is because less frames
are given to it. Generally in a movement because we're not
animating real life, but we're animating Reality. Plus, we want to
push the extremes are a little bit
meaning we want to make things ease in and
ease out of a movement a bit more than they
would in real life. That's why generally if you copy live-action reference
one-by-one without pushing it, it will look bad. And this is actually a secret to very pushed cartoony animation versus more realistic animation. In cartoony animation,
you will want to exaggerate the timing and spacing by making
the slow ends more slow and the
whitespaces more wide. So essentially, you'll
have a more extreme ease in and ease out even in something as simple
as a bouncing ball, you can make it more pushed by pushing the
timing and spacing. As we mentioned before. In animation, there are
things that are objectively bad and thinks that are
subjectively good or bad. No matter how good you are, you will always get notes on things that are
subjectively good or bad because you cannot
read your directors might generally they
have their own vision. But nine times out of ten, there are things that are
objectively good or bad. E.g. even spacing in a bouncing
ball is objectively bad. If you have that,
it meets your lead. My interpellate, you were not doing your job as an animator. While, on the other hand, our bouncing ball and even
a stationary bouncing ball, you'll want scroll spacing
in the beginning and then larger spacing after it accelerates in one acceleration
and the acceleration, animating the bouncing ball
trains your sense of timing and spacing and teaches
you how to notice, ease in and ease out and arcs. This is what this
exercise is truly for. It's not about all. I've
animated, a bouncing ball. I'm an animator
now know it's like a push drop to train
your cognitive skills. Which is the skill of
identifying the rhythm of our movement and identifying
the arcs of our movement, how to push acceleration
and the acceleration.
27. The Importance of Feedback: Be very demanding of yourself. Really push yourself to
do this exercise well, because if you do it well, you will drill into your
subconscious mind is the basics of
timing and spacing, which will help you with
less than a standard future. Do not underestimate
this assignment. You might think that I'll
get it done in an hour. No, you want because you
have to not only poles, those bouncing balls
from my thumbnails. You also have to analyze your live action
reference and make your own bouncing ball
across the screen. The truth is that to develop
this skill properly, you to practice
this at least 3 h per day for at least
over two years. Don't practice animation
for 3 h per day. For at least two years, you will not get the
necessary skills you require to get hired. That's the only real way to
get really good at this. Ready to sit down
and do the work. You have to do it a lot. If your first bouncing
ball is not good, One other and then do another
until you get a good one. Remember, try your best
with each assignment and try to polish them
up as much as possible. Because the way you
learn is to recreate essentially finished art pieces and something that looks good. So while this bouncing ball, I want you to analyze the live-action movements
or analyze the references and see and ask yourself
how you can push the movement even if it's
such a simple exercise. Remember, you want to
make mistakes while animating and you want
to tweak your poses. Embrace failure and fatal heart. And also you have
to learn how to embrace criticism
in this business. So show your shots to your friends and learn
how to implement nodes. Because in RStudio
you will have a shot. And during your day least you will show to a director and you show it again unless you address denotes that you are
given or you're fired. So implementing denotes you're given is also very important. Now professional. Again, animation will always be an artist is unintuitive art. That's why we always
work in phases. Because in a
professional studio, people give you
feedback every day. They show for notes and
they show for feedback. No shot in a feature
animated movie was ever created without feedback from your supervisor or director. There's always someone telling
you how to make it better. And in a studio
working for a client, It's not a place to let your
personality be expressed. You're doing work for a
client, you have a shot. Get notes, show that you implemented the
notes. That's all. You improve it, how they
want it to be improved. You give them what they want. A job in which you're
essentially a server. So again, let's
reiterated the pipeline. We get one shot and animation. Without defined camera angle, you animate that one
shot, nothing else. You get feedback
on that one shot. The things that are
objectively right or wrong, like timing and
spacing and arcs, you're expected to pretty
much have perfectly done. But there are some things
that are objectively good or bad and things that are subjectively good and bad. Most of the notes,
if you're good, will be about the
things that are subjectively good or bad, like your director's vision. If you're a director
gives you feedback on your shot and you
fail to implement it, it will be fired. So definitely learn how
to implement feedback. So get in the habit of
showing your animation, getting notes in implementing
the notes because you need that skill
in what are working.
28. Put Your Thumbnails into Maya: So we drew our thumbnails based on our animation analysis. So now we'll make our
little camera view here. We'll go into the left because we will only be
animating on two axes. Here. Let's create a
little layout here. Meaning I'll just
create a floor here. Very simple floor. We added to lay a layer, create layer from selected, referenced it so we
don't have to touch it. And now let's save our file. Colored balls, bouncing
ball across the screen, 01. And we're now, I now teach you a trick about
the determinant yelling, It's that you have picked
your camera as this. You would like it to go and
go to Camera, Lock camera. And you can go to image
plane, input image. And if you put
your thumbnails in the product for a folder
called source images, you'll be able to
import your thumbnails. And bam, we have
our thumbnail here, our plan of animation. You just have to zoom
in or zoom it in order here the problem
is in front of us. And that's makes sense. We go essentially to
translate x and put it back like 500 points. We then extended move it a bit. So here we can for awhile, we'll hide our little
background here. We will just stick to
the plan, so to speak. You can also make a transparent. But for now I think you can actually increase
that type of thing. If you zoom in with the middle, if you click to zoom in a
new president, middle Lucan. A minute. And that's why I can
also adjust your camera. They're not married
to it for now. And our own project there. I think this is, this is
a good plan of animation. But the advantage of it is
that we have everything drawn out and we
have no guesswork, and we locked the cameras, so don't we don't mess with it. But this is almost all of the
work is done for us here. Because we took our live
action referenced, analyze it, and drew a plan, and then imported
a plan to Maya. Because remember,
nine times out of ten it will be animating
in a static camera. So you'll have utils pretty
much draw on top of it. Then it's always
the same resolution or the HD resolution. You make thumbnails and
data resolution and you pretty much plan it out, so to speak, then you
just follow the plan. That's the best way to do it
because the most you have, if you have any
basics of drying, it's way faster to plan
and iterate on paper. That's why I'll make a
different course called drawing for 3D animators without talent, but that's a future course. So here we have our thumbnails. So let's import the Rick. And again, it's always
the same workflow. That's why I want you to learn gathering reference,
analyzing reference, making. Thumbnails are drawing plan
based on their analysis. Blocking out, keep golden poses, the most important poses. Blocking down the timing pauses and timing
and spacing poses, which is the breakdowns. And then polar dressed. Remember, in terms of workflow, no matter what
animation you'll do is always the same
step-by-step process. One Godot reference. It can be referenced
from other animations of the same movement and can
be live-action reference. Or if you cannot find
any reference to record it yourself
using your phone. If you don't have a phone, get our camera from
somewhere else, buy it on eBay. To you analyze the reference
and you iterate on it. You, you analyze the arcs, you analyze the
timing and spacing. You analyze the key poses. And then you put it
on paper and you try to push it on paper. How can I bake the
RPA is better? How can I make the
timing and spacing snap here and better, more cartoony? How can I push the
poses and make them more expressive than once? You've iterated on these ten
times on the same thumbnail, you'll go to Maya, import your plan in an image plane and
you have it in front of you while you animate. And then you follow your
plan and you animate, you block out your
key poses first, meaning the golden poses, which are distorting,
telling poses, and then the extremes, which are any change
in direction. Then you work on breakdowns. And you always to animate
first on stepped curves. So you first go to animation
and gold linear and stepped. And you adjust your
timeline slider to have the length
of your animation. And actually if you're working
on a longer animation, sometimes this happens when
you have a longer scene. You will still work
in like 100 frame for comments to make
it more manageable. Number error, beginning error. A lot of people will start
with frame y is zero. And that's one error. You started with frame one. Or if you're doing some previous as you and you're making
it your own shot. You can start with frame 100, because if you're doing entering a visualization work or
any simulation work you need to frames for the simulation quite
enough to start working, to load. But that's about it. We have our bouncing ball. So let's do the same
thing as always. We can select our
two controllers. Controllers, create a selection
set using an unbarred. Now let's continue this
in the next lesson.
29. Block Out Your Golden Poses: Okay, let's pose are extremes. Go on frame one. Because here we can make an exception
and move the camera here. So you can see the
frame one will be here. We will first select
our tree controllers, squash down lower, and
then move controller. And we create a selection set. And then bought the
selection set will be this icon, bottle one. We know we can also create
a selection set for the main Move controller file. Oh, maybe using
just squash ball. There you go. Then we can
select them like this. This makes it very
easy because we can tie it to our keyboard shortcut and I can just select
them, whatever. I actually have most of those things on a
keyboard shortcut, but I'll be showing
you when I use them. So okay. We select
all can be moved. We select all
controllers, heat them. And we move the ball
on the first frame and its position here. Correct? Now, if we looked at the
reference which is here, you know that the first
balance will be ten frames. We'll put the frame.
On frame ten. We put another key, laptop keys. Ball. I liked the channel
box for precision. We created our first key pose. Let's create the rest. Remember, you should
be on step two keys. Very often. It will be, they'll create one Alto key because
that's like the default. You just select E-step,
right-click stepped. And now we'll go
to frame nine now. And we'll essentially
take every one frame from each bounce, got to nine. We've positioned at
ball key frames. Now we go to the next
keyframe and so on and so on. I'll speed this up. Just simply use our
thumbnails and our reference. Now reference for the numbers. Nothing could be easier. Vandalized your reference
and now you know the timing on this space. You can see here we
have nine frames. This bounce and the next bounce, as we can see on
our reference here. Next vowel bounce. Six frames, I'll be out alive. We even have the numbers
here, six or so. We can essentially
do some math and add numbers when D7 plus
six is two to three. That's where our top. And really most of the Java was an animators to find
reference, record, reference, analyze
the reference, and analyze, analyze, analyze. Analysis is key here. Remember I'm using that key when I have a channel
bucks and I don't want it, I have a keyboard shortcuts
for clearing the channel box. Thanks to anime, but
thanks, Allan bought. Remember we wanna have a key on all the controllers as we block because that's
important for retirement. So we have the ball here. Remember when you're
making your own ball, tried to find our rid
of a lot of people. Find a rhythm,
true Sal, example, let's play this ball and hear
how it sounds like dupe. Every bottle has a
rhythm and you need to develop the sense of rhythm
by analyzing reference. There's nothing that will teach
you this other than work, our hard work an hour. Some people might be averse
to that, but that's the true. Because high-quality animations
made frame-by-frame and Maya will not do
anything for it. Especially if you
want something that will be liked for
the way it looks. Because it didn't the
animations specifically, to be fair, people
will hate me for it. A lot of its plot is
actually nothing special. It's the design and pretty much craftsmanship of the animation that
attracts people. Disney has ended job
of creating eye candy, which is essentially
creating a reality. Plus, Without did this, they wouldn't have much. Well, for sure, we essentially have to learn how
to make Reality. Plus, we want to get a job That's tries to
make film 3D fills. That's just the way it is. You cannot just be
able to know how to blindly copy reference
would practice. You have to think about
pushing it a reference. The only way to deal
with this practice, you know the principles,
you know the rules. But after awhile I can teach you the basics of writing e.g. but to be a great novelist and work professionally as
a novelist or artist. Awhile, this will come
from your working. Good novelists read
aloud and write a lot. And good animators, they
animate a lot. No other way. Remember, you can use
the channel box if fuel kind of eyeball it for now. Just follow your thumbnails
and remember sporadically, go to File Increment and Save As from here
loves to crash. And when maya crashes,
now part-time. And if we have
keyframes on all keys, don't like good
boys. Good voice. We can even retirement using uninvolved by using
shortcut keys, e.g. if I have this balanced on one or two frames and
I wanted to one frame, I can already retirement using shortcut keys and
Mikey 100 keyboard. It is 1.2 for selected etc. But I personally
use shortcut keys because I really loved
my shortcut keys. Remember you can also
use the graph editor. Yeah, visualize spacing
and if you decide, okay, in the live
action reference there, in my thumbnails and
live-action reference. Now there was this
additional balance here, and I don't like it,
so I will not use it. I can just pretty
much remove that bounds and instead
make a more of a slow and can make dose
rate of decisions. And this is an advantage
of 3D animation versus 2D animation because you see everything visible life
mathematically it can, you really polish it up To an extent due to the enemies
could never handled, especially to the
frame-by-frame animation. If you would watch, how about Disney gargoyles are
unable to series. They called poses
for a long time. They have way less acting
compared to like a Pixar movie. So really, in terms of the
craft of animation on its own, 3D animation is way
more challenging because you need to know more, because it's more,
less forgivable. I'll see you in the next lesson.
30. Block out Your Extremes: So now we're blocking
out the key poses. We've blocked out proposers decided we don't want
the last bounds, that we just want
the small bounds and then or 100 frames. This will move here
where it will slow down. So we'll just again
select our piece to move. This whole be in the
habit of keying out. So now we have our
main keyframes done. We can incrementally save. And now we'll create the ease ends because
as you can see, the ease ends here also change the direction and that's
the most important thing. But we can also keep the
tape timing and mind. Here. We go four frames in the future
here and move this ball. Remember, you can even
check the timing now and see if you like
the feel of it. See the thing about
a nation pushing down animations that
you have to play. Blast this. Look at it. My nano house catched playback, which makes it so you don't
have to play blasted. Remember play blasting. Introduce creating a video file from our animation
so you can preview it and you're all bro,
software catched playback. It's here is essentially makes sure that
you'll be playing the frames in real time with my, I struggled with in the past. But you can just play blast
and make a video file, but that takes awhile depending on how complex your animation. So I like this V0 ANOVA, cartoony feel that I'm
making the ease ends now. Preview the timing,
but if I press play, I have a short cut to flip
between the keyframes and notice those arcs like here. You essentially have to track
the arcs with your eye. So that's something that
you'll be doing a lot. You'll be flipping
between movies like this. It will be tracking the
arcs with your eyes. That's why you're
analyzing and drawing the arcs in your analysis phase. Because you'll be expected
to learn to track them. It's the cognitive scale you're training
your eye to see it. It's like recognizing
Pokey Monitor playing a lot of Pokemon games. Do you get up you two of it. Like whatever thing, when
you first learned to read, you didn't recognize words. But after awhile, I think at least 50% of Americans can now recognize words just by looking at learning to animators are a lot like learning
to read this series. Of course this is not about, I'll teach you a software because that's not
the important thing. The important thing is learning the animation prints
appealing eigenspace. Nice arcs. And remember, don't worry
about the timing as much here. Like try to guesstimated, but know that you'll be able to track it
in jet and you're expected to play blast
it and see if it works. Ready on the wall arms. Okay. Let's check our timing. Now. Remember increment and save and let's track our isn't Saudi look like I like the feel
of what this ball see. We did here. We blocked out the ease
outs because any sense, because they're responsible
for direction change. Remember, extremes
are responsible for direction change is that you can see this kind of
modifies the RPR, so we had to plan it
out, lock it out. Now, after this will block
out the squash and stretch. You can do on the numerous, why isn't everyone kind of
has its own way of doing it. But I like to kind of manually. It's the way I'm about
to read Time something. You select all keys and either shift click
and select here. Or you can select it in
the graph editor and move it by pressing Shift and
moving it like this. Or you can just use keyboard
shortcuts like, I don't. This is a stretch. Maybe a bit too big. That's very common. Arab will have. So very common error of one to make this kind
of really cartoony feel. So I'll take between machine
here, like the ball. Matchmaker did the same
pulse, that's this one. And now essentially
add a stretch here. That's why I have those
selection sets that they make. They make things a lot
easier. Just District. As you can see, this
stretches on auto key, so we already have to go
and Bartok select all 0s, solve it on the screen because I don't like it cluttering up my interface generally I have it
everything hidden, then I just look at the green. And of course here we
will have a squash. Let's have the
bigger squash here. Let's make it stretch here. Okay, Let's continue
this in the next lesson.
31. Create Your Breakdowns Part One: Well, again, here we will
use the tween machine will go ball tween. This is what it would
be in the middle, and this is what Maya would automatically do if you press
it tween and the middle, we're kind of seeing what
would my automatically do in this kind of timeline. If you like, go to the
middle of the keys, then you press the middle. Are like This. Pretty much see how Maya
would interpellate naturally. Sometimes the only
way to track with this tool, play blast it. Okay, this looks okay for now. Let's do another squash here. So here we have to read, reset to the squash and stretch. So we go to this ball
squash controller and we use the reset pulse key, which an anime bot is this key. See it zeros out everything. Generally to do this with
a more advanced read, like a character rig
before animating, to select all your controllers and create a bundled snapshot. You can read more about
it by all vary over n. And Barton rename this
description here, which is annoying,
but it is what it is. Now as you can see,
Maya doesn't do the arcs well and you have to really manually control are the breakdown keys
to keep the arcs. And this is what this exercise is supposed to teach you that, Oh look, Maya doesn't
do anything for you. It's kind of similar to what my school taught me as a kid. That you have to count on
yourself because no one will teach you anything unless
you buy my course. Then I'll teach you. Struggled guy. Here we see, maybe we can move this a bit. Here. Remember it's all
about tweaking. Animation is all about tweaking because you will not have to
get it right the first time. The leader key, you select all and right-click
and delete some time. So accidentally we'll
keep things sometimes. And that's why you have to, especially with the
squash and stretch, you have too much. Make sure that it's correct. Frame by frame. I'm going to go in and
creating a breakdown. Polo's care will create. Remember, here we
have a big splash. You can even see, no, we'll create the
squash for this pose. You can see the squash. We analyze it before. The squash will get
smaller with each bounce. So here we have like 0.5. So here we can
even copy the Val. We can like know what
value this would be. Like lower it. We can say dust. Because you can also would specifically
with the bowel bounds, you can calculate
The energy losses by how many frames it lost. So right now, this
is a difference, 9-6 frames, we analyze this. So here with this stretch, it would be about
one-third less salt want. So will essentially have at
0.3 can Avatar than equal c. So here we see
that it's smaller. Similarly with the stretcher, we can get our controller and CR bigger stretch whilst
0.8 pretty much. Here. This brings me to another
point in animation, especially if you want
to do fast animation in the animation. Because a feature
length animation you will have 1 million
controllers and you'll be expected to use all of them
in TV quality animation. The less you use, the better.
32. Create Your Breakdowns Part Two: Pretty view our animation
now and see how it doesn't look bad and
it looks pretty okay. Simple workflow, simple
recipe, and it works. Just make a keyframe
here in the middle. You are also stretch like this. Remember just kind of stretch Translate Y was about nine here. Now here it was 1.7. So here we'll have 1.6. The tweeter, too much between
are all selected balls. This. Then we select the
cache controller. Move it around. Yeah. And now we'll break it up, break down between
those two frames. Here. Say what the tweet Here. Bad. Maybe. Stretch here a bit. Like, hey, we're a bit
the previous pose. So there's more of a gap here. By bouncy. Of course, you have to
always address the arcs. That's why you drew them. As they are important
for this reason. Stretch here. Yeah. It's all about sculpting
the movement or appeal. Let's preview this. Let's preview this
MC I would place. This brings us to
another option of atom, but that is actually less known. You can go to
animation, timeline, extra tools, or auto play
blast the visibility mode. What this does is that when you, when you select play, the controllers disappear
and image planes disappears. So you'll see the animation, how you're supposed to see it. I liked the rhythm of this. Definitely has the same rhythm. Remember for an
animation movement, to read like a movement and to let my interpellate
without much errors, you would need a keyframe on
at least every four frames. That's when you can
kind of go to supply. So that's when you transition from a blocking
plus phase where you create those overlaps too
like car, line phase. So here we have four frames, so you go on in-between frames,
select all controllers. Here we essentially use this retro controller.
Controller. But here we do the
same last time. Oh yeah. Make sure that the strategy
wasn't stretches lower. Here. That's time it was six. Let's make it zero point 4.5. This is maximum
precision, just arcs. And you really will
get a feel of it by flipping between your blocking. I have controlled and
arrow keys on our keyboard and you can see flipping between the keys and
noticing the arcs. That's a technique
that's actually from 2D frame-by-frame
animation. Frame-by-frame animators have
to do it too and be fair. 3d frame-by-frame
animators to do it too. Because the timing is the
easiest thing ever in Maya. But you have to worry about
really it's deposing. That's, that's what
it'll get you. I can have like 0.0, 0.4 thread. Now, also create a tween here, arcs to speak. So you really have
to manually shape. Those are the specialty if you have a more
complicated rate, because it's just how it is. Remember they're not rewarded
for curves looking nicer rewarded for the
animation itself. Okay? Like getting better and
better with every block. See you in the next.
33. Let's Polish Our Animation: Okay, so let's continue
adding our breakdowns. These are already on tools, so these should be fine. Squash five. So let's add a one
minus zero minus two. As you can see this
question straight to get smaller with every bounce
because the ball loses energy. And that's a principle
that's important for all bouncing balls. When you will do a
bouncing ball with varying wait. There's more. Here. The squash and
stretch kind of creates issues so you have to reset it. Here. It would be
zero point -0.1. And that's the cool thing about Maya because
it lets you to, lets you create this kind
of mathematical precision. Maybe we'll add a very small
squash minus zero, -0.505. Then remember here we want
this ball to slow in, so definitely will favor
the middle and low. However the end. And you can always use
your graph editor to like teach you if the values are
getting smaller and smaller. So we can select this squash or you can select
our squash controller. We can look at the
graph editor window. You can even go to Windows
animation Editors, Graph Editor to graph editor. And we can then the, now and look at the curves here, look as load curve. And we can see that
the app curves are progressively
getting smaller. Essentially, this
is what we want. Let's preview this animation
and see how it looks like. See the timing and spacing
looks pretty good. And it's all because we
did a specific workflow, reference and reference, gathering reference,
analyzing reference, drawing thumbnails
based on the analysis, importing the thumbnails
into my IVI image plane, then opposing the
most important poses, the golden poses
which are distorted, the tailoring poses, the extremes which are
changes in directions. And then you pose the
breakdowns which are responsible for timing and
spacing and sometimes arcs. So you always work in phases, sometimes in a more
complicated shot, you break it down further phases because you
always trump your work. That's how every workflow works. Computer programmers first have a similar workflow where first write pseudocode and define what a given software has to do. And then they
essentially do the red. This is not a
programming course, but know that everything
works this way. That's pretty much
human or human progress has been made by
creating a system. I'm giving you my system, which is a proven system
so we can learn it. Then after you learn
this one system, you can maybe learn other
systems and integrate them. What for one, stick
to one process. You just have to
learn one process and one software and use it
for the rest of your life. There's nothing else you
actually need to do here. That's hard. Maybe log this out to at
least some fours or fives. Again. Select all of the
bulb controllers and say, Yeah. Also, if you ever want to
create an ease in like that, what you can do is you
can go to Windows. That's again, duplicate
the graph editor window and drag it out. And if we check the Z key here, the key which is the width, just want like a
very strong ease in. We can just use this slider to create almost a complete e is n because this kind of calculated
automatically when you use one curve that essentially
allows you to do that. In the event, preview it
using octal tangents. Can of course modify the
values to then use the ease. And again, we want
this to be smaller. I want this movement
to be really slow. Normally we would have to
adjust all the keyframes, but here we can just use the
Ethernet gets out slider. Let's look. Even at this point, we have frames that are
around every fourth key. So we can already got two Increment and Save and
go to our Polish ways. To do that. We just select, Move here and go
to Auto. Customer. Doesn't matter. We only use
Annenberg for this anyway. We'll use antibodies
for this anyway. We'll just select
ball and pick here. Best guess tangent. Tangents. Best guess that kind of guesses. What tangent to
apply here and here. And the polish phase, we
will essentially go through every curve and
make sure it works. So let's preview our
animation so far. Here. It actually has some
errors in it as we can see. I'll say here. Let's
look what's wrong. Floating. Again, we copied reality like one-on-one here. And essentially a
thing you can do make it less flow to you
is cut to the frame. And then Bob has shortcut
where you can time by just taking frames
away between two frames. I hope it does control
one and control too. See I immediately looks better. Every frame counts here. You are expected to re-time
this because timing, something that you
have to correct in 3D software
because you're not. Here, we just copied
directly from reality. And generally what
you wanna do is improve upon it and you
improve upon it by well, taking timing away mostly because things
need to be faster. Our attention spans are lower. In appealing things work fast. Actually. This frame away immediately looks better. Here. Actually add frames here. So I'll do the shortcut
key control to, well, having all key selected and I'm essentially adding and taking away keys between key poses. I would actually also add keys. Make it slower. Remember in permanent and save
my Aleks to crash. And when it crashes,
want to be happy. See, we had our poses, correct. Would now at this time we modify the timing and
you just have to play blasted a few times and see if parts of it
look floaty to you. And you have to go
frame by frame. And if you'll see, oh, I might have some
stretch here or you see some errors kind of expected
to correct them. Here. I would actually add
that stretch right here and move it
up it here. Here. Most animators say
that you should really wait till
you go to spline until you have a keyframe on every second frame
or every third. But I've found that every
term in the beginning, when you're still
learning helps you visualize the action and
actually understand that the movement better because you see how it all interpolates. So this shows the importance
of planning and animation and in polishing and tweaking. As you can tweak
this for a long, long time until it's perfect. And you can look at
the curves tool here. I can rotate this out. Men like curve. Remember to pick the
correct controller. This one. Again, if
it looks too fast, you can add frames. Take away frames. It's like really up to play, blast it and feel it at this
point in the polish phase. And this comes from experience animating and
analyzing animation. Of course, move keyframes
tool, e.g. this frame. When I moved here, or maybe you tweak it and play around
with it at this point. Let's done. Yeah, I actually don't
like those keys, so I can do an experiment to see how they would
work if I try it. This is the stage that's like the worst stage when you're working on that
professional animation. Because often enough you don't know how to
polish it correctly. And now you would like
to do this and this. E.g. here, see how
anime bot will do. Now I think this
looks a bit better. See you tweak the curves, use all the antibodies sliders and essentially polish the animation at this phase. Then we have our
lovely bouncing ball using a pretty simple recipe. Now you try to animate
a bouncing ball, fine reference,
analyze the reference. But most of all, make sure to notice any errors. Samantha, e.g. here. Somehow our ball deleted the stretch
here and that happens. We can also use this graph editor here as a
reference. I would like to. Now we see that it's meant
to be a liquid squash. Well, down in between
this one and this one. It has to be, it
has to be smaller, smaller than this one and
larger than this one. So let's play blast now. Now Fetal sweat bat are actually would remove a frame from this balance. Now, let's see how it looks like now. Often enough you
have to manually adjusted the keys
in the tangents, pretty much responsible
for like interpolation. So what we can do is
like hold Control and Shift and middle mouse button. And you'll essentially
hold shift and drag, drag only on one axis. And you can essentially this
kind of curve that way. You'll play around with
tangents and the polish phase, which is what we're
doing right now. So let's look how
it looks like now. Again, I would just looks better. Adjust the keyframes
until you get them right. Speaker. Just curves to the values with the sliders where you select them on lower than I've just drawn here. And that z, Let's see
how it looks like. Last curve here. We can also do something
called weighted tangents. What our weighted tangents, you can essentially go to our weighted tangent
and then you can extend it like this. Maybe remove this key
just to illustrate a point where we have this essentially
extended the tangent to create an ease in that way. You're essentially control
the movement curve. Because I really
want this ball to slow down for a long time and this is actually the
easiest way to do, to do it. That's because we all already
about golden poses made. We don't to actually
stress about it. We work in status. We got our lovely slow down. Again. Maybe lower values
have been less floaty. Now it looks better
in my opinion. Can we polish this
bouncing ball? And of course, polish at more than they were expected to
follow that white marble. Well, oh yeah. If you want to add a rotation, Let's add rotate the trial
adding rotation to this ball. And actually I didn't,
rotation is not that hard because it would be pretty linear. So there's a separate
rotation controller on this reg, this one. And it would rotate
only in one axis, which we will do in
the next lesson.
34. Let's Add Wheel Rotations: Now we have our bouncing
ball pretty much finished. It's pretty okay,
it's good enough. But now we have to calculate
the bowel rotations. The bowel rotations are actually a very strict
mathematical formula, which is distance travelled divided by both circumference
multiplied by 360. Then you add the existing
rotation if there is any here, the distance traveled. So what does the ball
circumference then you would take a tape measure and
wrap it around the ball. That would be the circumference. There's a very simple mathematical formula
to calculate that. It's two multiplies
by Pi, which is 3.14. We can simplify it
because Roundup multiplied by the radius and the radius amount
is very easy to see. Because when you take a ball
and you put it on a grid like here. Here, e.g. you will see that it takes
two spaces in degree grid, which means this one
grid point is 1 cm. So we know that this ball
is about 2 cm in length. So the formula would be
two multiplied by 3.14, which would be 6.28
multiplied by two, which is 12th, 12th, 56. The distance traveled is very easy to identify and
treat any software. You just take the value
that here and copy it. So we already have all
the numbers we need. We go to the rotation
and we can see it here. Okay, it in the beginning. Because we want it to be
zero in the beginning. Remove all the other
keyframes that might be here. And we just type in RFC
translate value here. We use our shortcuts
that we learned, which is divide equals 12, 56. And now we multiply equals 360. We got the appropriate
rotation value. The problem is that we don't
have the correct ease in. So take this controller. Notice that the curves
are kinda foggy. I have to add draft
to the old curves. Can also use the tween machine to help us adjust it a bit. Breaking a key. Here. There we go. We finished
our bow rotation. Therefore we finished the bowl. Next, our guide, my
assistant Jasmine, through animating her
own bouncing ball so you can follow
around with her.
35. Animate With Us Part One: Reference: Jasmine, as you can see here, we have the bouncing ball. I can give you your
homework with. First thing is ago, you go to YouTube and find some bouncing ball animation
reference for you to base your animation because we are actually replicating
the whole workflow you'll have in your job. Like watching Disney movies over and over, frame-by-frame. Google bouncing ball,
right? That's step one. You will reference and then you analyze the reference to like, notice that this is like up quicker and
it's a little slow. Regardless. We did that analysis previously
in the case of Jasmine, so she doesn't have to do it. She just has to come
sit down and animate a bouncing ball using
this girl she learned in the previous
graph as we know. In the next lesson, I will notice builds on
top of one another. A lot of tutorials don't
recognize this and kind of, and then they lose clarity
here I assume you, I integrated the knowledge from the previous lesson before
we go to the next lesson. As it's a series of progressive
skills that you need to get in order to have
a coherent whole. Animation is just
being very good. Are the few very simple skills. Do you want pre-made style nails or do you
want to challenge yourself and actually analyze a bowl and draw your
own thumbnails. You'll have two options of
difficulty for this exercise. Please pick the one
that you are willing to actually do the introductions. So if you were going to draw it, I'll nail drawn it to
note in our detailed way, like it's the most
precious will cover whenever we make a
product in Maya, we put all our thumbnails
and source images folder, and we make a folder
called Tom who may else. We put the top of Mel's
to all their Ananda. When we go to Maya and
go to Maya bounds, we go to View image
plane, import image. And we'll have our little bouncy involve thinking magic and their source images
folder where we saved it. We can find thumbnails, soft folder, you cannot find it. You can copy the address
and get to that way. Let's see, we have
created an image plane. And this image plane, we'll, we'll resize it and
then we will lock the camera. Now it's your turn. I did. I left this image
lane in a bad position. Can you make it a
good physician so they can plan out your
animation in your shot. First, let's go to View. Lock it, make sure it's locked. Camera so you don't
move your shot cow. We have we'll be
animating in 2D here. So we add, establish, establish that this
is a metric plane, is the sharp car orthographic plane as
the shot the camera, this is your camera where
you use the picker. Here. You can use the picker or
you can turn off the bigger. So here we have the thumbnails. These are Say's law and
then put them on it. Another layer. And you know, a good job playing around to
reposition this match plane. Make sure you have it in the exact position
where we will animate. Then we'll put it on a layer and reference the layer so we
will not move with accident. This is pretty much up also the part of the
pre-planning stage, setting up your
thumbnails on discrete. Very proud of you. Had to patch studio that Jasmine's do a very
good job at doing this. Hope you're also doing equally good job in
this course will also give you an example
of how much you're expected to take on
each assignment, because Jasmine's
doing it in real time. One of the biggest
problem online learners, according to some studies, that they do not
know how much time is required for a
given assignment. By giving you a recording
of it in real time, I'm able to emulate it to you and provide are
very comfortable with arrays to create
the illusion that there's a teacher with you
right here, right now. Well actually over we're back brazing you for
doing a good job, like moving this up. So we can see here, Jasmine position to this in the camera does perspective cow, we want it to animate on the
other camera on the left. And remember, screen
space is limited, so orb an ICER or UI in a way that's
very space efficient. So here we have locked camera. Here. Once we have set
up our thumbnails, we got two layers. Create layer from selected, because this creates
a layer which you can reference so that you don't
accidentally touch it. We do not Camera. Think of it as your state D while the weighing
of like welding, you do lock camera at air so you don't accidentally
touch it and make a mistake. You're doing great. We've
finished this one phase. Remember, always
increment and save sporadically Control Alt S
on my keyboard shortcut. But yours might be different. You're doing great. We always select all the
controllers we're going to animate with us. We're just good practice
so I can ground are you select squash
and stretch one. This one from lower here to create what is
called a selection set, which you can name it what
you want, Ball, Ball. And now you can select all keys. Then you can create
our selection set for today's main
controller here. And you go with vol. Remember the artistic role, avoid needless words and making the most
elegant solution. So only pick the controllers
you'll be animating, we won't be animating
the rotation controller in this exercise until later, so we can leave it onto later
and not killed on the spot. So here we go with
squash crawler. For this assignment, we only
need one squash controller, so we really only need two controllers to animate
the whole animation. So select the bowel all out
there of them are selected. But look, we don't
need this controller. What do we do? We just controller
will go ball either. Go here to remove selection. We're not know we have bought all intersect x,
both controllers. And then when you key clicking S will kit on both controllers. Theory, sometimes
it's at the bugs out, but that's a good practice
because it saves you time. You're doing great.
I'm very proud of the all the all control
selection is only there for making sure that before
we move to the next keyframe, all of them selected and
press S because then it will allow you to retain
your animation better, Okay, But reanimate
the first movement. You only select the
doll move controller. Then you really have to move the ball without affecting
daughter controllers. I really think this
format, it's good. You're doing great. Now I put it on the wrong key. That's okay. That's why 3D animation is so
easy. You can just move it. And if you have, say
like the auto key, it will update itself. Ok, jake, No, It's illusion. It higher, which means illusion in Sanskrit,
you're doing great. How many frames remaking
this new pasture set this before you doing Good? 200 frames is okay, but you can analyze the most ball bounces
are like 100 frames, but this will be okay. It depending on the ball, it will be longer or shorter. Remember, the first ball bounces
will take the most time, then they will
progressively take less time and be shorter, okay? So the whatever value you pick will determine the
number of bounces. And then you have to
make them different. Divided, like one-third plus one-third less, one-third less. You ready? This is actually a
pretty mathematical exercise if you think about it, because they're losing
energy in one-third of its energy won't hurt a
little bit, Simon, etc. That's essentially
the math behind us. Because for all
spiritual understanding of numerology and ulnar, ancient or chemical techniques, teach you the number three
is the number of appeal. So when you take
one-third of something of the neutropenia,
you're doing great. You're positioning
the key poses. And remember that
each bounce take out we were like wireframe
from each bounce. So if your loan balance
is ten for the keyframes, the next one should be taken about one-third of goods sold
should be seven keyframes. As you take back onto the way, a lot of animators first
pose their key poses and then worry about time because you will work in phases. So about the admin
demonstrated is adjustment would rather work in Valence where she animates
the key poses first. Yeah, now if you try and do
both at the same time when you're trying to
learn the software, it gets really wherever
it goes downhill. So people work. Now early
on live environment you'd like to iterate ten times when one pulls back with rho, the pupils is through
director without styling and you like look at them
and I like it isn't this. How do we move this red thing
again, that a keyframe. First select our keyframes. This is what we have. They all keyframes
Select button that we created, back off. And now you can essentially
either select them here and Shift to drag or you can ship called a Control Shift. Press Control Shift and left
breast, left mouse click. Shift drag, not a shift to drag. It's Shift. Control Shift
is just ****, touch. Then you can put shift to touch. Alright, but again, we have problems because we
selected only one channel. We wanted to select
every keyframe on this. So we're going to
select all here. Very good. You moved it already. I'm going to move it to light. That's why I moved this. Doing great Position,
two key poses. Job of doing things
than sequence. And you can notice
that banana meetings, basketball in Maya,
you might lose track. We were bouncers are How do I
delete keyframes? Shifting? Delete keyframes is
just selecting them, would right-click and deleting the heirs also our keyboard
shortcut for that, but I forgot that so that it remembers your
deleting keyframes. You have to delete
them on all the controllers because
then you will have a hard time with the
retirement saving. We deleted them on all the controllers because
they are deleting. I pose again, the proposal to do a
breakout are your key poses. And I was just trying to
delete these. I will delete. That's actually something
that's very common there. You can also select them then graph editor
and edit them right up. Then, because e.g.
you select them here. We have noticed the
adjustment here has been blocking out all
this time on that you have to use stepped keys and your first draft and face settings are here. And you go with animation. Stepped. Where all
my keyframes are. The keys, the controllers.
There are seven. Someday, you'll only interpolate on the key poses so it
won't distract you, is that workflow thing
because you only move on when you will have the
whole story depicted. Jasmine doesn't have
the whole story, the Pictet yet on step because there are all
the balls on the right, there are still not blocked out. Does a common mistake
that beginners make. Jasmine is doing a great job. You're doing great. As you can see, high-quality
animation takes a long time because you have
to print out every keyframe. That's how they do this. And if you think that you got and it's way better to learn the
proper way to do it. And then like cut corners
as the work done, not know the proper
way to do it. Wow, You're doing great. Now. Just finished the
bolster your right. As you can see, Sloan, months are often more
difficult to block out, even though they're
by definition, slower movements are movements that I require a lot
of direction change. Mib are a lot of keyframes. They're doing a good job, became blocking out the key
poses like a pro. Now, see, we'll do it here. I'm sorry, realistic estimate
how long it will take you to learn this because
you're doing it with ducts. You can notice that a
lot of effort goes into each phase because I'm teaching you this
inequality animation. And the thing about these
inequality animation is that in the eighties
and nineties or 70s, when the Yellow Submarine
got out, which was released, the height of the population, a popularity of The Beatles. They would wear like famous
singers at the time, very famous like most
payments in the world. They, no one wants to
update yellow submarine. The movement with teaching
us like intrinsic appeal. This may essentially
figured out how to make movement you will
better than reality. And that's essentially
will want characters on a character animators
are paid to do. We haven't blocked
out her key poses. Where your thoughts
on this. Very good. We haven't seen all of it. Looks actually very good. Now, the next thing we will do is it will block out today. Ins and outs, which will essentially follow the
curve you'd previously. Dose polis here, either
that one or this one. And generally here,
at this point we're kind of starting to
think about timing. We moved from the blocking
phase to block and phase two, we first blocked out our key
Boleyn poses and extremes. And now we're breaking out, blocking out our breakdowns where timing and
spacing matters. So two frames. Increments safer?
Yes. Very good. You remember incremental safe? Remember to increment
it saves periodically. Yeah, I definitely at
least once per phase. Yeah, that's probably
more frequent than that because my eyes
a bit unpredictable. Yes. Maybe not for something
as simple as this, but if you're doing something that's going
to go into a demo reel or something that is
a serious project with a budget of
the moving parts. Save often. I mean, this might be excessive. I would say this
like every 30 min of working at least grade. I remember an Alice
retired two years later. We're cool thing
about 3D animations, ability to iterate and
chain rule. Pretty much. It's okay to make mistakes here because mistakes are
easily correctable, especially compared to rule
the frame by frame animation. Where do you make a mistake? You will have to
redraw everything. And retiring as hearted. You're doing great. Maybe make the 0s and poles a bit higher so that there couldn't be more
bounciness products. I've said You're
doing a good job. And I'm saying that we can tell your mom that you don't have to draw it in 3D animation. Practical skill
sets for the future for learning the basics of entertaining movement
would just push to move with a good rhythm
and timing and spacing. And we work in phases. We first work in the main key poses and then
we worry about the timing. Remember too, when we move
to the next keyframe, make sure to set the
ball all and all deaths again because then you will keyframe on all the
key controllers. Right? And don't grade. Remember you can also
use the tween machine, which will make the closer to the keyframe in front or back the sliders
between machine. That's why there's control Z. You only see the back
offering timing, but it really helps with that
stage. I'm proud of you. We're really doing
a great job on the 1% of people go to where
you are in discourse. Than per cent of people
go to get to where you are in this course
are due our animator, you are making your bowls
and a proud of you. You are a warrior, you are. And then later you
are an animator. I'm proud of you. I'm proud. This is actually, we wrote those salts that the
timing is not that great, is because we left the
timing of this to the stage. Right now we're just, we're just looking at the key poses. Can move keyframes by
either selecting them, muckraking this switch
here is the notch switch, or it can nudge keyframes. You're all you will not use
the keyframe around witness, not just switch those
keyboard shortcuts. You can use the
switches and try it. Now, you can move
this left or right. This is the problem
in 3D animations, way, less forgiving for errors. And this happens because the z translation
on one of the keys, the key right here. You would take your
Move controller. Can under here. To see your controllers. We go Translate Z
and click the View. Normalized view
controller. We'll see. Maybe schedule it that E1. Yeah, you have extraneous Y key. That often happens. So you have to pick it out. Works. Look now this K,
c, Now it works. There's bounds put also some spacing, but
that's an Austrian. Don't remember, increment them. Say, you're doing very
good. Fabric contract.
36. Animate With Us Part Two: Blocking: Goals selection set what? You click ball all. And in an unbarred specifically, you make sure that you have
before or are we timing? You'll select all and make
sure that all the key is on all the animatable
controllers are set like, Oh, they're animatable
controllers have keys on them. That's how you every time. You essentially every time, every time using the disk, which it left or right, all the selected controllers. And I'll deselect that case. You can use a keyboard
shortcut for that. We have contained
to the number here. My Maya keyboard shortcuts, trials like black, my
favorite, my animation. You can press button one. You can re-time your
animation in Maya either by using the Nudge
tool and antibodies, or by pressing the
left mouse button and dragging around
the timeline. Once you have blocked
out your golden poses, extremes and break
down pulls us. All that's left is to re-time the animation using those tools. A lot of it will be
trial and error game. Where are you essentially
modify the keys, play blast them, look
how they feel modified. We'd play blast, modified. We play blast. And you'll do it over and over and over again until
you get it wrong. This is what we'll be
doing now with Jasmine. This process is sometimes
especially in the beginning, it takes a long time. Another keyboard shortcut you really need to learn in Maya, specifically Nan about is insert in-between scene and
remove in-between seen. What do they do? Well, they're very good
tools for retirement. Inserted in-between
seen inserts on empty frame between all
existing keys in your scene. If you use the workflow
we're using where we keep all the animatable controllers
in each and every frame. This is ultimate tool
for easy retiring. Again, can you come here in
the official documentation, you have a tip if you want
to perform other actions, are all animation
curves in your scene. You can use the select all LM curves and the
scene command found in the extra selection
tools. To income. Minds insert or remove empty
frames between keyframes, can act on selected keys or even all keys exiting the scene. So essentially, we
have our key selected, all of our controllers selected, and we use those shortcuts to either in-between frames
or move in-between frame. This is hands down
the easiest way to retire and I can
highly recommend it. Try it out for yourself. If you have
uninvolved installed. After you have read
timed your breakdowns, Goldratt poses and extremes enough that the
ball fields, okay. You move from the knocking
face to depolarization phase. We'll do that by selecting all the curves of your animation and switching them from stepped
curves to auto tangent. Or in case of anime, but you'll choose
best guess. Tanned.
37. Animate With Us Part Three: Retime: Okay, So we'll be finishing
the bouncing ball. Well, okay, let me check
on that chicken actually. And then you can move
the keyframes by selecting the selection set,
select all controllers. This one, okay,
lets see you are on a keyframe because you have
to be on a keyframe for that, right, you can click this left, right to nudge it to two
frames around frames. There's a keyboard
shortcut for that too, but let's just see
how that also click Control and left and right
to just move keyframes. Let me just see how
it looks so far. Yeah, you're right. The
timing needs to be adjusted. Floating is happening. Remember that's to be expected. We focus on polling first and now we're
adjusting the timing. A very common workflow
and TV quality animation. Where do you just focus
on the key poses and extremes and worry about the
timing and breakdowns later. No, definitely going
to need a chunk. Chunk your activities
handle things in phases. If you're trying to do
too much, in one phase, you're going to end
up goof and something up and calling yourself a
lot of unnecessary stress. Because noses fun,
don't get me wrong. There's a lot of fun, but
just learning the controls, learning how to navigate things. And you're trying to throw a
bunch of stuff out on top, like just just too overwhelming. It is looking floating.
It is a matter of adjusting the timing
and spacing here. So let's give that a go. And ball all you said, ball. All right. Then you select all the controllers and you can essentially not drunk
keyframe left or right. I personally liked
doing that sometimes, but you can also select keyframe by using Shift left-click. Select them. All right, I'll try the Shift Left click. There we go. Actually they, and
you can drag it. Drag it dumped out. Okay, interesting. You're doing you're doing it. I'm proud of it. Shifts the
leg, move the keyframes. Remember to block out the ease ends like these
poses here and here, because they also control
the curve direction. Okay? Okay, well I still just
adjusting timing or do well, because here's your
top poles, right? So it would be better
to put like move this where it was and
put out 0s in here. You did a mistake here, but it shifts,
seller, shift click. In this particular scenario, nudging it would be way easier. Napster Ron control, another
tool that you can use, which is a tool that lets increment and save
because it's buggy, is this creates essentially
a trail for you to track. If you're arcs are wrong. As you can see here. We need to create an E then
pose a greater good arc c. So we'll move this key. Press will not do it. So they would all
fall and will not drink it in the middle. Here, like two frames before. We use the Move controller. Arc healing way. We'll do the same thing
on the other side. This is a good way
to visualize arcs. I think that should go to
the right of the more, well, now the altar click button, move and adjust it. You can visualize the arc very well using
the motion trail, a tool that 2D animators, especially to the frame moody,
frame-by-frame animators. And select all controllers
and all that good practice. Here you also have to block and the ethers because the ethos about bounds know the positions at the top are
responsible for the arcs. So some people could
consider them extreme. A good way to block
them out is to essentially blocked
out two frames before and after the
main up position of the top of the doubts. Please do that. We're working in stages and
know right now we're only focusing on ease in and ease out because they
define the arcs. Extremes define the arcs. We go here, frames back. We'll go here to France back, and we'll create an event, adhere to Fred back
and cretinism. Same here on the
top position, here. Two frames back isn't, isn't, right? Let me think here. Let me get let me
get them there. Doing good. You're doing it. Thank you. If you're watching at
home and doing it, I'm proud of you too. I'm proud of you. You add the E. Oh, you gotta watch out
when you're shooting for the stars and
making arcs and stuff. Remember to make arcs like one or two
frames after domain. Yes, that's what it's doing. You can use a keyboard, mouse click right and left keys. Navigate better. Remember
to select the Move control. That's why you made
this electron says, Man and bought, make
your life easy. Very good. I'm proud of you. I'm proud of the student. We're making the arcs now. Frames before, and
he's very good. Sure it's a nice, lovely Park. You can adjust this
key in the future to, to make the arc of her. Remember, it has to be a nice, lovely, very good. In this stage, you
focusing on creating arcs. Retiring will come later
because retiring in my eyes, one of the easiest
things to do there are keyboard shortcuts that will
make it very, very easy. Also will have to make up, back down to make it more appealing arc like one frame and a
small bounce like that. You can make it one frame. Before. Jasmine's animation will
learn keyboard shortcut, which is an antibody
specific keyboard shortcut. Vanilla Maya doesn't have it, which is removing frames
between keyframes, which will allow us to very easily read time our animation. So let's go over
again the steps. One, priest work. We will draw our storyboard, draw our plan, then, put the plan. Tomorrow. After that, we'll gout are golden pose this
and after that. Lockout are extremes which
are changes in direction due to then who will
make or break downs, which are responsible
for the timing, spacing. And we'll use our hands
to make timing work. You're doing good,
you're arcs look better. I might add a keyframe here
to make this arc around, but that's small
bumps is like that. The difference is negligible, was trying to figure
out the timing here. And the smaller ones
insurgency. Yes. Admittedly enough,
you are taking your timing is a bit slow. So in some bounces, you will have to
take away keyframes. And there's a
shortcut for that if I can show it to right now. Well, I thought
maybe I'd have to push these keyframes closer. Yes, and I wanted
to show you how, okay, Matt and anime,
but there's Here, Jasmine has a lot of keyframes between this little
small bounce, which is way too
much and creates, makes the animation very slow. So what do we do? We island but has
a tool for that. It's removed in-betweens theme, which removes all the
in-betweens in that scene. I have it at Control. Alt. On my keyboard. Shortcuts are optimized. For 100 keyboards. I have one that's
controlled aid, which removes in-betweens of the selected controllers
or Control Alt eight, which makes sure that
it's in-between theme. I also have another one
that's insert in-between, seen just control nine
and Control Alt nine. So which correspond to mind
not left and right keys. You of course, can set up your own keyboard shortcuts if you don't, don't like mine. But this is what
you're gonna get. Isn't that awesome?
We'll just go. So how do we do it? Control Alt. And then you go. You see how the how easy it
is to retire and to add, you just press nine. Let's repeat this.
You know how easy it is to retire and to add, you just press nine. This is a very good workflow because you can use
keyboard shortcuts to really speed up your
retirement process. I hadn't brought, allows
you to jet ski through your animation and
really do it fast. Well. So remember, set up your
keyboard shortcuts and use them. Fast workflow is I put workflow. How Jasmine is retiring, it would speed of a tree top. I'm proud of her overall
blocking of deposits. It's okay. It's snappier. A lot of in-between frames
to make it snap here. Remember, appealing to the
animation is always snappy. Appealing. 3d animation, especially the
cartoony card is snappy. Additionally, in
terms of posting, Jasmine has no
squash and stretch, which makes the ball very sad. First at this
question is stretched and dentist justice hiring. That's why we work in face. Do you think Jasmine, this stretch and how should
this look like? This is yeah, that's a
pretty lengthy gap exactly. In between these
two frames. Right? Let's shave that. So here, e.g. we create an appealing
squatter still has to follow the path of
action, the curve. So we can create
something like that. I think of like the
middle of the arc, skewering, like the exact
center of the bowl. You want the arm to follow to be parallel to the axes like, yes, go along math tests. Like a bead and timeless, cool thing about
this bowl is that it has separate squash and
stretch controller. So we can really read good
quality rigs will have that, which we'll lose our alt S here. Yes, I was asked to key off. Okay. You select all the
controllers and then OwlTest. Okay. You're doing great Increment and Save to not lose your work? Yeah. Yeah. Yeah, every time I
did safe. Thank you. Because actually Control Alt S. Go ahead and say, cool, That's already looking
pretty good. Solid. We did some changes in
other already looking good. C, do it with us. And you also get a good result. If we come up with
arrive at about that. No, no, no, please, No, No, nobody's
asking for that. You know, will ask a survey after discourse
if they lacked my rhyme. So not already do I just
wrote it the rotate tool. Now. I now know working on rotations would squash and stretch tool. You can translate it into
the correct position. Like that? Yes. Okay. Okay. Cool thing about this rig
is that the rotations are independent from the squash and stretch so it can
worry about them. Last, everything is in place. That's already looking better. Well, I need to remove frames and sends its ball
all, then go for it. If it's electron on
ball, EM can do it. Alright, cool. Control. All eight. Yes, you are doing it. Great. Look up all the
keyframes moved to the left when you press Control, I'll do all. This might be a bit too little. Grapes. Add one more. Yeah. Nine. This stretch. Suggestion. Thank you. You're doing great. You remember you didn't
add the squash yet. The squadron also dissipate
with each bounce. So the first class
will be big and did. The next one will be
a bit smaller and smaller until the room won't be any squashing and
stretching those moral bounds. Okay, For some reason, it's staying squash, okay, I guess that's what it does. I don't know if there's
an error, it's not. But that means there's
we haven't keyed like squash and stretch and the app controller if
we create bought all. And here go on the
down pose here, right? We didn't have a key here in
this controller and we need, well, we had it in the
Move controller and that's why we call
Paul and key all. Because that's what happens when you don't do that though. Let's add some nice
wash. This from Vienna. It's not totally
vertical, shouldn't, because next we will
go to that post. Okay? E.g. here, we also need
to add some lovely to see. And here, the epsilon, lovely. That's a bit much of that work. You're doing great
Increment and Save. Remember laying around it, making mistakes with
increment is easy and safe. And that's how you learn
or make a mistake. They pay increment and save. Done extraneous key here. I was trying to
adjust something. You always do adjustments
of the keyboard. But it's like crooked
I was trying to fix. And that's because it's one of the squash and
stretch controller. We can move the squash and
stretch controller a bit. On this keyframe up, down, make it less crooked here on this screw card because these
questions Read Controllers. Yeah, Yeah, we'll just click on the squash button,
is clicked. Okay. But I'll key. Alright. Great. Blocking out on all
your controllers. Animatable controllers is
required for easy retiring. If you don't do that, retirement is almost impossible. So please do that. Save yourself some
headache in the future. I'm not giving you
many formulas in this course because I
want you to learn via playing in experimentation
and giving you tools, not rules. As Glenn said, You made an extraneous key. Here. I would suggest you delete this keyframe before this one. This one, the new one
or the other one. I can just do undo this one because it's like
the other does. Rigs the arc. You can add a one
in the middle here. We have this bill. Or we can use the trigonometry, select all, Use the tween, click tween are in the middle to see how it would interpolate. Push it towards here. As you can see, that's
how you can also create nicer timing and spacing. Okay, I see. Okay. I think given sieve can play
it to see the timing, then at the time, the third and the fourth
bounds seem to flow T will have to
adjust the timing, making them less so the
outflow to the third, the fourth and fifth
bounce feel Oh, no. Yeah, there's this gap here. You want to create
an in-between. If you want to block out the in-between frames used
to tween machine, select our controllers
and use between her. I was just trying to do the Control Alt eight
option where it deletes the in-between. That's fine. That could have just
some timing there. Yes. Let's see if that
reads a little bit better. Yeah. There's more snap there. Yes, exactly right. Timing is a good
thing to practice. This ring blocking. Blocking equals with timing. Blocky equals retirement. Use the shortcuts for them. But why were these
keyframes green? Sometimes unimportant, like it's key phrase made it using its twin machine
as breakdown keys. Okay. This is a keyframe I
made use in between machines and bought
automatically tints them. Green. Men. You have finished blocking base or
do you have a key frame? Or at least every four? Jasmine key poses are okay
with her tiny lacking. Do you know how do
you get timing? This in this bow, but this ball bounce, the timing is way too
slow. To be snappier. Jasmine can also remove some keyframes
everyday normal work. Yeah. That one's not working much. Yes. So you can remove that did not remember to be when
you remove keyframes. Remember, go to the frame
where our keyframes use control and left and right navigates to the
case where our keyframes. You can select both
right-click and delete. Now it works better because
we removed the fat keyframe. Now we can adjust the time. You're doing great.
Useful Allan bought keyboard shortcut,
this is vanilla. Maya doesn't have it. That's what uninvolved is the most popular tool
in all my animation. The allows you to play
around with the timing. Remember kids, it's not healthy to stay on the front of
the computer all the time. They copper egg and dance. Sometimes Bradley stretch. It's better for the bouncer. Still seem a bit slower, floaty. Mostly last month, right? Yeah. Yeah. The fourth and fifth month. Again, if you can always go to snap your
route, it's more appealing. And you can always say, is that cartoony style. One thing you want to avoid is bloated or loyalty and
weightless animation. Floating weightless
animation can throw your potential employer, you don't know
what you're doing. And that will prevent you from getting a job
which will be staffed. See how easy retiring is when
you use digital animation. Retiring like WP, very hard at traditional frame
by frame animation. But here it's super easy. Jasmine's bounces are better, but there's still a bit floaty. Remember, make sure
that the time of your bounces decreases
with IQ bounds, like one frame less. That's one of the dangers of this work for where
you lose count. That's why sometimes
you have to read count. How many frames each cow
is still floating here, because these have very
few frames in between. Because I've met laying off pretty much your
Oliver poses blocked out. So. Remember, play around adding and subtracting those frames. It's pretty easy. This one for bounces
way too slow. Once you have all your poses and break down poles is made. Make sure to polish
up the timing by using those two
keyboard shortcuts. This is a very cool workflow to explore and get a sense of rhythm and timing and time. Another good way
to get your sense of freedom and time
spray is to say, listen to music,
animate to music. Remember you're blocking. Blocking is not
finished until you have a like polls every two frames. Jasmine has some bowel bounces in the beginning that still needs to be made on extra key poses using
between machine. What do you think
about this current? We're at currently here with us. This bullet bounces
through slow already. I can fix Nashville to floaty. All right. Bye play blasting and then analyzing
your mistakes. You're learning. To the
issue here, this one. Maybe she may keyframes here. Like key-frame really
slows it down. Again, select all followers. Lou, you've got like five of them and it should
be like two of them. Yeah, this is excessive. I would let go of this one. So now the Euro deep, you want to remove this thing
here. It's way too long. Because remember the ball is
losing energy progressively. So this bounce would
be very short. So as to frame bounce at most. Yeah, this will make more sense because I
couldn't The other ones like mess with the
shape of the arc then. Whereas this one, this
one gets removed, the arc is still
don't remove key, or I know we're not
moving keyframes. We're removing in-betweens
that don't affect the arc. Okay. Okay. And then my God, that's why
you blocked out your extremes and pulls us know.
Alright, alright. You created the shape of the arc and movements and I can retire. Alright, the top, I
want to remove this. Now. Here. Here, yes, here, yes. Control Alt seven. Okay. Control, I'll eat. Nausea. Better now. Yeah. Again, remember in
blocking you have not finished until you are at four. Or at least in some
cases where you are in such a simple exercise on to
your app tools, Jasmine has, still has to create a lot of use the twin
machine to create the in-between poses
between her extremes here. Between this, this, there should be a pause because this
is a longer bound. Now we can push the falling by creating this kind of
conduct polls one goes up. But do you think
the timing is it list where it shouldn't be? How much we're fine? What do you think
we need to refine your It's a bit slow but
like one Frameworks. Okay. Yeah, you're right, I see that. See how easy retiring use
in Maya terms of tools. You look all the
tools to succeed. Oh yeah, this is, I feel I'm pretty okay
for this first attempt. You can create like in the
end where the ball like the accelerates and moves
up it forward and then. Slows down. That makes sense. It rolls away, but yeah,
yeah, that makes sense. I give him without the rotation, just with one yeah,
I get what you mean. Just another. On the end. That's pretty yes. It should actually take longer. So we have to add some
in-betweens too dark, right? Remember, if you add, after adding the in-betweens, what Jasmine should
do, it's greater. Break that down key
responsible for timings. Go back two frames before the end frame and use the
twin machine to like go 90%. So it favors the
movement 90 per cent to create a slow in C, it's favored the future
keyframe by 90%. And as such, it created
a nice slow it, well that's 80 to
just put it in 1996. Here we can even
extend iteration of it here to really
make it like slowing. Again, we can break down. Remember your animation
will only read if there's a keyframe like every
three or four frames, because then you, then
r i registers movement. E.g. here. Figure as fine. This movement might be
a bit, so to speak. A good thing here. What if you'd rather
than could do is like right before this frame, select all and use the tween machine to
favor this last pose. And use the squash
controller to create a stretch that will be
due longer stretch. And do Hall. Really
pushed this cartoony, this kind of thing. It has been described it before and it creates
this nice cartoony feel. Let's see how it looks like now. Lookup bounds. Well, yeah, I do agree it's
a better look in bounds, but that end bit there still looks a little
like it speeds up. It accelerates into that. Yes. We'd have to fix it. All right. We'll have to fix it. Adding more frames here
that control down. Here for a few more frames. It's the slow movements
that take the most frames. Bizarre movements took
on raw, wild, slow down. Well, let's play it
and see what happens. Yeah, still looks like. Because this
particular exercise, what we can do actually here is use a tool in anime
bought because we will be translating on
the x axis and we can use this slider called 0s. So here we can select all
those keys, right here. This one, this one, this one. We can just key more Keith here. To give some to work in. We can essentially go from here. Here. We can select all the
keys on this x axis, x. And we can essentially
select them all and use the Eden one to create
a nice straight if it's played all the
way through into. Hello, I read a lot better. Very nice. Yeah, it's definitely say that incremental today. Thank you. Alright,
now what's next? Well, now we blocked out most
of our timing and spacing. Let's just turn that kinda have planned out our of
our animation and we kind of settled on the
correct bounce, bounce. So what you do in a professional production
now is moved from stepped curves into right. Now. Didn't we need Admiral
keepers reasonably good. We can add more key poses. So there's a key pose
like every four frames. Let's check it. 123, because my alkyne, okay, interpellate
between three frames. More than that and
it will not ***. So we'll see how many reps. So that's here. This ball bounce. Good use. Because this is like No, this is 333 is also fine. There's a keyframe every three
frames, then we're good. There's less than that. You don't go to supply. And yet that's the
rule of thumb. You can kind of trust Maya to interpellate every three frames. So we can train the
system like this is like, yeah, I think we can
interpellate us. We have our frame. We have a keyframe
every three frames. So what we do, we actually go to Settings and go to animation. We pick out mix, mix, and then we select,
we can actually save a new version of our
fault call bouncing ball. Bouncing ball polish. Because this is the
polar stationary, it is scariest, face. Select bought all. And you essentially go
to best guess tangent. Numbers should have here. Let's just add it here.
Sometimes they don't have it. Best guess that. Go with it. Or keys. Now we'll see how this
animation looks at once. Almost all, feature quality
animation is on one's. Stylistically, I would, if you were making
something for YouTube, I would recommend it to
do long twos or threes. But you will need to know how to polish your animation on once. Because once all the
errors will be very visible and you
will need to read time, any floaty animation. Another thing you can
do to make sure that your animation is correct is to do something called
a play blast. Right-click here. Click play blast. And New to create a video
file of your animation, which you can preview
in any video player. Here at the end, it's a bit floaty. In this state, you can work
a lot in the graph editor. So let's just first fix this last float movement
of the ball move. But we'll do that
in the next lesson.
38. Animate With Us Part Four: Polish: First in your thumbnails
and I have them drawn here actually on discord
because I sent to you. You have some spacing errors. This polish phase,
you essentially will show your director and
I would give you critiques. And if the people skills are also send me
their assignment, I'll make a video to
critique them and put it on Skillshare for other people
to see and what you need. That's how my coursework grow. As you can see, the spacing here started up small and then grew, but we want to start with larger and then
progressively get smaller. So here there's also
an error like that. This is a common error in
more of a stylistic thing, but that's the note I would give is that Director and Jasmine. And another note I should give is actually
something that people, I want people to keep in mind. That the awesome thing
about the bowl, that, because I took a photo of our graph editor of
goods ball bounces, is that they'll have a
nice shape of a parabola. So viel balls don't have that. You might kind of thing that Okay, there's
something wrong. My timing is wrong and ask to either take away
keyframes are at them. Jasmine will now select all
her keys and all my head. She will now adjust the timing. While doing that, she'll
look at the up and down, up and down curve
as like a cheat to see where her timing is bad. And that's where I
use the Twitter. Know that's where you
take away some keys. E.g. jazz. Let's help out
Jasmine out here, e.g. we see that here the
curve is kind of math. And we shut the doors so that we see that the curve
here is kind of math. And it's because
there's like one or a frame that too much here. Because remember
we want it even on one side and the other ear. It's like 123. And here should be also 1234. Jasmine had 1234 and then 12345, which is just bad because
it makes it sold, is facing does increase. Similarly here. We want it to be 123-12-3456, and then 123456. And Jasmine has seven. So we can also take it
one keyframe away here. This one's lag in terms of boss and that's like a 1234567. It should be also 12345678. So also take this
key frame over. Here. It should be 61 234-512-3456. Here. We don't hire. Here, we can adjust the poles, it he, and add some squash. We still have here. A tool Jasmine can use
to visualize our graph. It's called a molt from trail. Motion trail is accessed
by clicking here. This creates a motion trail to contract your curves,
how they look like. Jasmine can play blasted and see how she can improve our
animation or her own now, using the tools below, so far, this stage, punishing status
and most intuitive stage, the only real way. But the polish is watch this animation
over and over again. In policy, the brave. One of the major differences between feature
quality of the nation that cool animation is how much people spend time on the stage. At the very end, it feels a bit too smooth, floaty that I'm saying. Like I'm trying to figure out where to go in the
timeline to fix that. I can help. Well, no, no. I'm just saying you would choose the move tool and the x-axis. Do you know which one? Well, no. I'm just right now. I'm just trying to figure
out where it gets floaty. And I also had the something that a lot
of dropping the ball. Right? This last
this last one here, just as stilted flow. Take away some time from it. Yeah. That's just the
easiest to either sitting here trying to figure out what to address the upset. Very good work. Remember, origins state,
you have to watch it over and over and over and
over until you get it perfect. Especially if you're working. We are featured
quality animation. To pay that job better
picture quality studio really need to have some experience
before or your belt. That's why most
animal for your bell, for you or even applied. That's why we'll
animate or start out either on TV or video game. Your demo reel, you need
to solve animation because your employer needs
to know that it was an amazing shot with
unlimited time. Then it might convince
that I can do a mediocre shot under
a lot of restraint that because you have
unlimited time for your bandwidth at
every single employer, doesn't even look at
your work history. Only evil God, you're
a bit more like moles. The medial craft. Your first job will
only look for the more. It'll be very demanding
for a demo reel, I once read a story about a guy who was a graduate
of animation mentor. A lot of money. He said, How has the Morrill
two are very low ball. It was dismissed
because there was an error in his animation. Because the way we look at
your demo reel is the first 5 s. And they're like What
they're an error and my wow. And then they will watch dress. But if they are not
wild in the first 5 s, you can put it into the no pile because that's why
even get away without demo reel that's
thirty-seconds because there's no or minimal length of it
can even go with like 15 s, maybe you could get
away with that. But I just heard
of people haven't had way better to connect 30 s. Now it's very, very
well-polished than a minute. It's not. You want to have thirty-seconds? Have I made shortly after I made the knowledge of body mechanics, feature quality, level of
polish and old possess. If you're interested in that, please share my course and by get more viewers this course, I'll continue doing
this until I get you the whole curriculum
we need to succeed. This is only the
first week here. So if you like this and you'd like my
course, please share it. Brings to walk. Hey guys, Then I'll be
motivated to make more. Because I don't know
that solos watch it. Because I really am motivated to help you learn animation
because I really think that people need to invest in skills that
are degree independent. No one cares about your degree
here or piece of paper. My master's degree in 3D
animation only helped me teach, didn't really increase
my job opportunities. You can do is add a new kind
of curves and we'll add some breakdown keys to fine
tune the curves at the end. Maybe you can increase or decrease the length of the last. Just trying to zoom in. Graph editor can also
isolate a curve. But you can do is to translate the work on
translate isolate curve, and you'll see how it
changes over time. So you can use tool to navigate
distance and then see, okay, this is how
changes might notice that this might just be too big change so we
can put them all out, put the academic, this font. Enter a bit better, isn't it? There's also a slider, Ferdinand and Bob's
kept from default. Let's see what it says. The ISA and this
slider is useful. This allows you to
cut it and analyze it for this recording. You say there's modified
at play around with it. And that's the way I did
polishing stage over, go for it, my intuition. And develop that
intuition by analyzing animations and by essentially analyzing lilacs is referenced. Ray, That's the
animation equivalent of drawing from life. Have to really learn the grammar and shape
language of movement. So this is something that
just takes a long time. Think of it as fitness. You have to do it daily
for the muscle to grow. There's lovely websites that
I've shared with you in the resources document
where people aren't alive, animation strength by frame and where they really didn't go into a for look like an animations. And later on I'll make a course specifically on how
to analyze animation. Learn from.
39. Animate With Us Part Five: Refine: Let's ask yourself,
how can I improve this ball animation and explore Maya, just
play around with it. You have it saved,
increment unsafe. There's no way. Remember,
try breaking things and fixing them because it
can always go back to the previous version and the
maze and you are learning. So I want you to around, oh, that's very good at science. There are sliders or uninvolved and read the
documentation to help. Well, you can read
the documentation, just hover over them and you'll get a description of
what each Snyder does. So if we can go through slider and essentially
read the description, if that makes sense. Adjustments I made read a bit. And it's just something
that starts to rot row the last or I get
scared, I'm I missing? There's no worry of that
because you can always refer back to the viewers at home. You also can sometimes what works in real
live where there's a direct loss of energy
doesn't have work in animation because
animation is exaggeration. But was before was closer actually to real-life
would be alive is appealing to dot PL by adjusting the timing and
pushing, adding like bus. Yes. Yasmin finished her
thymine for listening. Okay, So we pretty much finished this section
of this course. If you're watching
this on Skillshare, it will be the first week. And please finish your
homework and post it in the projects on Skillshare
and attach a video. And if you can attach
a scene sketch link and I'll comment on it
when I have the time. So I really am happy that
you've finished this course. I hope you are able to
follow along with Jasmine, see what the mistake
she made and made your own bouncing ball. I hope these tips and
tricks that I gave you, we'll help you with animating
your own bouncing ball. See you in the next
lesson and please leave a review on Skillshare or Udemy wherever you're
watching this. Thank you. And
let's see you soon.
40. Here's Your Homework Assignment: Your homework for this assignment
will be first to draw. Your thumbnails are either on paper or on top of your
live-action reference, but essentially either draw them digitally or on paper
and show them to me. You're expected to plan out. Your eye will not pass you if it goes over 200
frames because in our real life studio
production you will have a frame limit if you ever
went to college or to school. Think of it as a word
limit for your report. You will have a frame
limit in your shots in a professional
production and it's a good practice to stick to it. Now, think of it like
writing an essay for school. In school, you have a
word limit for ethane. This is the same
thing. So step one, find live-action that
reference and analyze it. Look for arcs. The key poses, golden poses and extremes. And if you can, and the breakdowns step to make thumbnail drawings
based on your planning, your thumbnail drawings to show the trajectory of movement
in your extreme poses. You can use Photoshop, Clip, Studio, or even pen and paper
and take a photo of them. And you'll import your
thumbnails into Maya. I'll show you how
you pose that you're golden poses and extremes
according to your thumbnails. Then you will use
the twin machine and older tools and Maya or
allowed to break down. Then after you post out all
the oldest you need polls, you'll be tiny around the nation using Dannon bought,
polish it up. And then finally, you'll
move from stepped keys to blind and polish out the
rest of the animation. After you're done
with all of that, you will upload your
finished animation. Since sketch, the animation along with this sketch
link to either SkillShare, Udemy, depending on where
you're watching this course. And then I'll give
you a critique. And I feel like this critique, please leave a review so I can continue making more courses.
41. You Did It! Congratulations!: You've done your bouncing ball. Now, all that's left
is to play blasted and submitted to scale
sooner for me to run you. And if you want extra credit, you'll first submitted
same sketch. And then up now both
your play blast and the same scheduling through
Skillshare. Please do that. By the way, I was very grateful
of your reading, review. Making those courses
takes a lot of time. And if you've shared this course and Levi
review the hunt, give me more resources to make the next course of this
series even better. Thank you for doing that and
see you the next scopes.
 Matt Peplinski, Best selling self help author. Animator