Transcripts
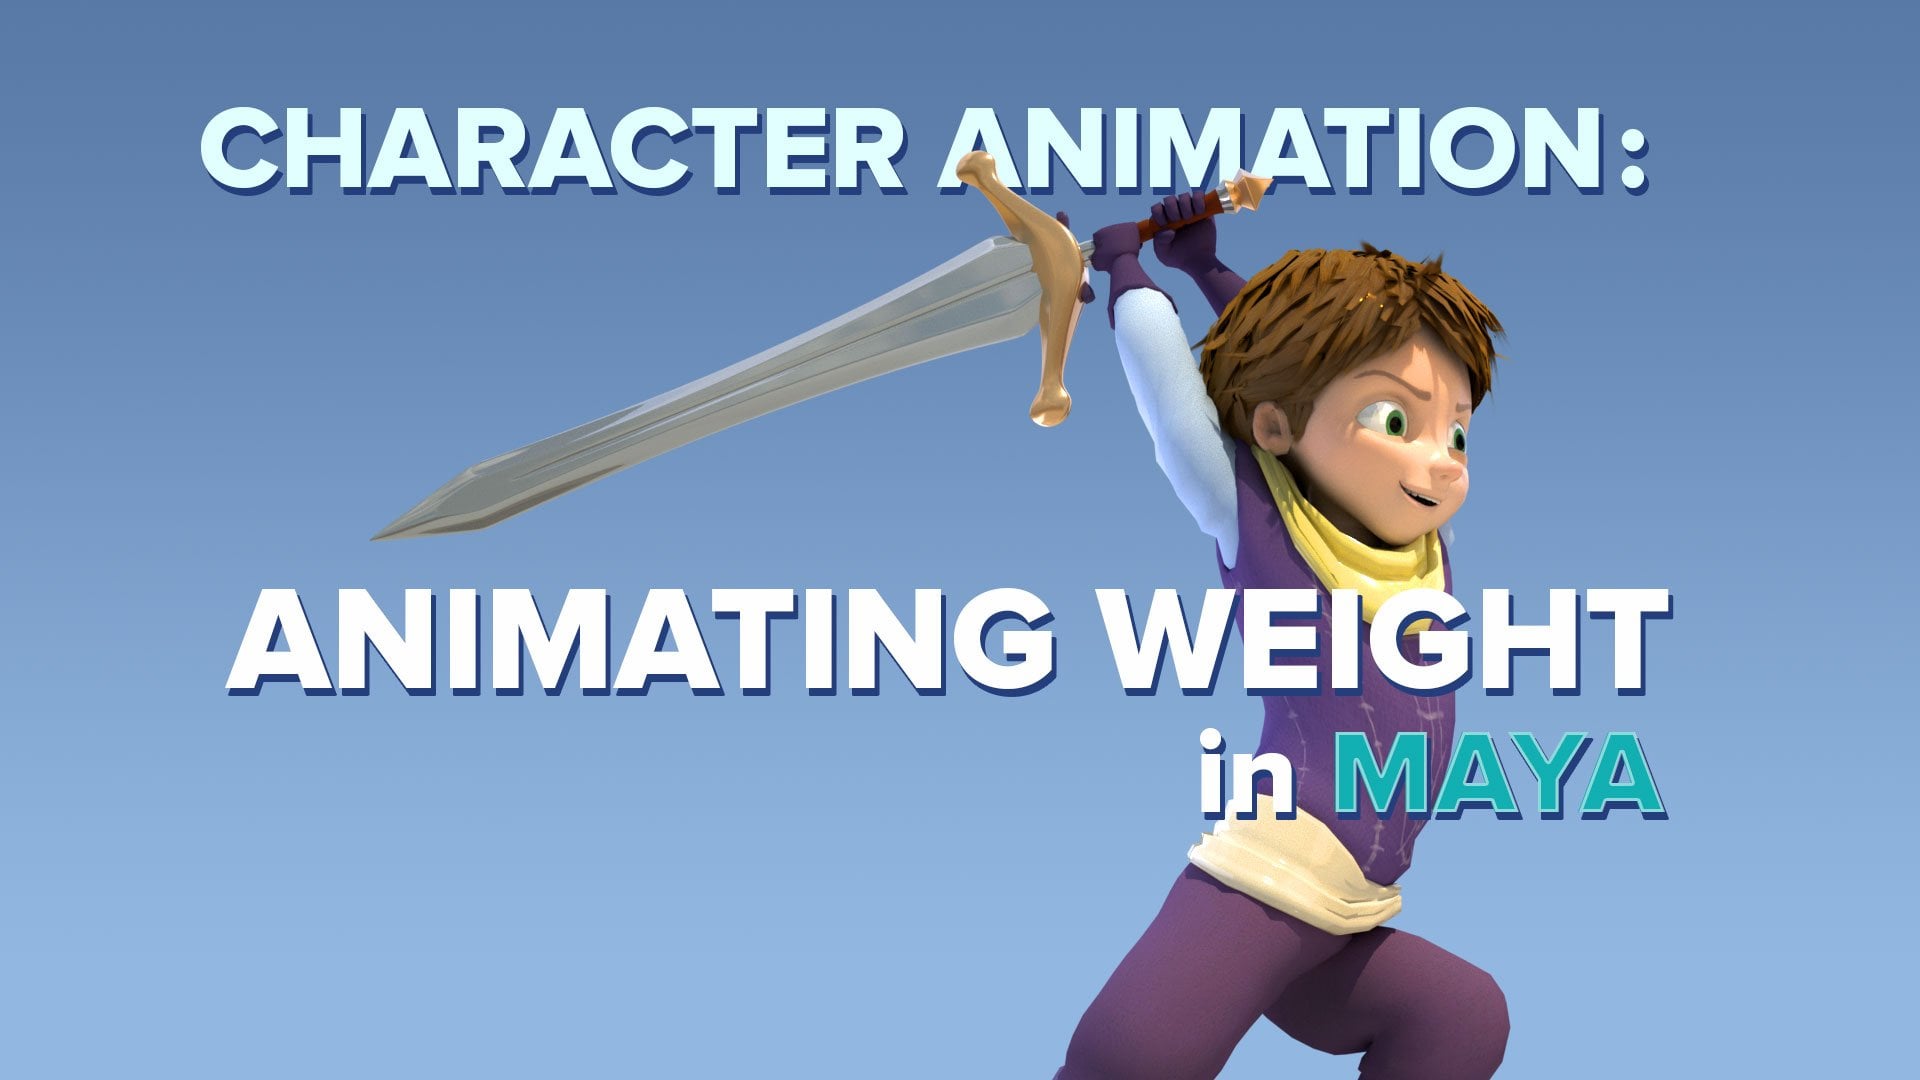
1. Introduction: Hi, My name's uni Santana and I'm a three D animator. Most of my work has been in short films, and I'm currently working in the video game industry. Now I've learned a lot of techniques across the year about order desk my, but my biggest passion is about character animation. What I love about through the animation is that you don't need to be great at drawing in order to start animating on. Animating in three D is much more like playing around with digital puppets inside a computer screen. Now I've designed this class is part of a series to teach the fundamentals of animation, which I find a missing in many other three D courses today. We're gonna focus in creating dynamic poses for animation on my approach tends to be that I give people specific tools like the ones that I do regularly at work, because I spent a lot of time posing characters for creating animations, and I teach them how to actually use those techniques in order to improving their own animations. One of the core skills of animation is learning how to create strong poses, and during this class, I'm gonna be demonstrating to you guys through examples how we can correctly identify and use specific techniques in order to design some good dynamic poses that may have strength in their storytelling potential or in their action potential. Well, then, look at some do's and dont's in terms of posing and also be giving you examples of how we can exaggerate body language or add appealed parts of the body like the face or the hands so that you're opposing gets stronger and more professional. You'll end up learning a lot about body mechanics and how to communicate things visually. Just through your posing will finish off by creating a project where we're going to create a very simple story just told in three simple story beats. This will be the initial steps of a plan for a longer animation that will go completing over future school share classes. But this lesson will be all about how to understand your story imposes and how to improve the potential of your own creative ideas for this class. You don't have to be an expert on Meyer, and you can actually follow along with any other three D software that you might be more familiar with all you need to complete the class is to have access to a computer. Any version of myrrh on to download a three D character rig. Now I'm gonna add to the resource is section on the project page of this class, A list of links to various free three D rigs for Mayer that you can use to follow along in this class. Now, if you're struggling with Maya, I've already published an earlier class where I talk about the fundamentals of spacing for animation, where I given introduction on how toe animate inside of Maya as well. This class is for people who want to learn how to animate on people who want to explore their creative ideas and how to start creating animations. So if you want to learn more about creating dynamic poses for animation, joined me in the class and they'll be looking forward to see which projects and that which ideas you guys come up with. So dive straight in
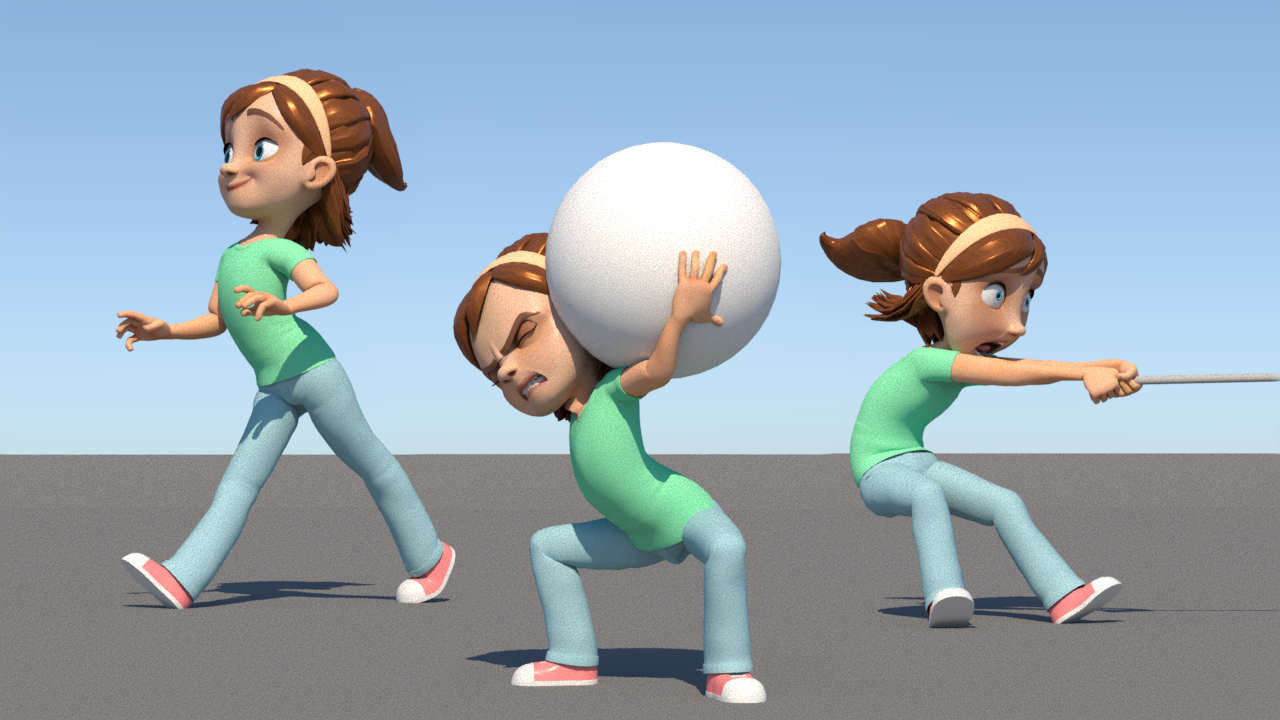
2. Key poses: So I'm going to start working with the Kyla rig from Josh Lobel on. You can use any free rig for this exercise, but I'm going to start off by creating my initial pose. And I'm gonna be using just the move tool by present W on my keyboard and moving different parts of her body around and using the rotate tool by pressing a on the keyboard and moving the limbs into position. Most of the time, these will be the only two controls that are use. Andi rarely will use scale, which Kayla does have some scale properties which can be used and also shares some custom properties as well to give shape to her eyebrows and her lips. And those can be found in the channel box layout wise. In Meyer, I will always have a camera, which is on the left hand side, which is like the point of view of the character, but also be having another view with perspective as well, where I'll be looking around and I'll always be favoring Thebe pose from the camera point of view. But I will be spinning around in the perspective, you on the right and checking that things make sense in three D space Aziz well on all very that throughout the exercise. But most of the time I'm going to be posing from the perspective camera and checking things from the final shot camera on the left hand side. So we're going to start off by building a key pose in traditional animation. Key is what animators call a storytelling pose. Some people refer to them as golden poses or attitude drawings. But regardless of what they're called, the purpose of a key is to show the audience clearly what is happening in the shot. They tend to be the most strongest storytelling poses that you would have inside of a shot , and normally they're very clearly showing out the character's emotional state or the action that he or she is trying to perform. In this case, I have Kayla talking angrily to somebody on the right side of screen on gonna use that as the beat to define all of the elements that I design for this pose. No, in three D animation, people tend to get confused with the fact that Maya has key frames as a term for any state we save on the timeline. And we have this animation term, which is a key. While animators will want to categorise the different key frames into different groups from the Maya timeline well, mostly defining them in terms of if the key frame is a key on extreme, a breakdown or in between. We'll learn more about these categories in future lessons, but just so that you know that their ways that animators can describe toe one another of what is the function of the specific key frame that they have on their timeline. Now, the way that I attend toe work when I'm designing one of my key poses is that I tend to work in a quick pass, just going from the hips, posing the legs, working my way up the spine and then out through the arms on all very quickly pose things like the face and the fingers in very rough positions to start off with. I tend to find that with this rough past, I can very quickly see what's wrong with my pose on Aiken. Spend time actually fixing the things that I see wrong to make sure that she's angry and complaining to somebody in my second pass or go over the body again and trying to work on the curves of the spine, posed the fingers in interesting and different positions on work, on the facial expressions as well, so that there are a bit more custom and they've got a nice sense of flow to them. Now animating is a sequential art form. And just like story boarding or comics, we're going to try and tell a story with the minimum number of poses possible. As a rule of thumb, I always recommend that in a sharp, you should always focus on having two or three keys, as this will improve the readability of the animation and give us a clearest sense of the action. Throughout this tutorial, you're gonna hear me again and again, referring down to simplifying things and improving the clarity of the poses. And this attention to detail is really what makes great animation stand out. As an animator, you're constantly looking at body mechanics on different types of acting beats that you put into your work, and it's important to have that level of detail put in. Even at this basic time, when we're planning out a shot by creating thes key poses. Now the face is the last thing that I tend to pose when I'm creating my keys, and that's because the face is really expressive. And it's very much a distraction for me from what the rest of the body is doing. And I want the body language in the face language to read at the same time. The face is a really malleable part of the body. It squeezes and stretches on. We should move every aspect of faces. Well, move the eyelids, move the cheeks, move the nose. It's almost as if the face was made of rubber, and we kind of like have to add that little bit of attention to the curves and the detail that we see across the different shapes of the mouth or the position of the eyes. So when we finish posing, it's a good time to evaluate how successful are Pose has been just by looking at it from all angles in the three D view port. Now, my final pro tip is that you should never be afraid when you're creating poses to look at reference. This could be a photo reference, or it can be video reference from YouTube or animated films, but I really recommend your goes to build yourself a Pinterest board with a lot of drawings and poses and illustrations, which show characters in a whole range of different emotions and different, interesting poses. You should build up a visual library about what different emotions and actions actually look like. So you've got something that you can refer to constantly, and it's not cheating to use reference. Observation is a key aspect of what an animator does, and, just like an illustrator, build an interesting pose. An animator will create interesting actions off what they observe.
3. The line of action: as a general rule, we want to avoid seeing straight lines through the body with favoring curves. Actually, so the kind of action is actually an imaginary line that goes through the body that tries to describe the entire pose in a single stroke. It's like trying to reduce all the detail of the body into a single graphic line. So we're gonna take Kayla and we are gonna have her jumping up in a ballet type pose. Now ballet is great because it has, by its own nature and nice flowing line and directionality to most of its poses. But it also is graceful, and she's meant to seem like happy and almost as if it took no effort because we're animating. We're also going to exaggerate the pose, so she jumps really high into the air, and we're going to make sure that all the limbs have this nice sense of direction to create dynamic poses. We will think about the body is a collection of graphic shapes, and the more flowing or angular those shapes are, the more dynamic the end pose will be. It's really important to create your poses by placing first the three main shapes of the body, which are the hips, the chest and the head. An animation were always simplifying our designs to make our readability much clearer. Think of the line of action as a simple C shape or an s shape. You can also create the reverse of the sea or the reverse of an s as well. Very rarely do you want some things to be liken I perfectly straight and rigid. You can also notice in the video that I take time to actually pose all of the parts of the body and all of the controllers going from the tip of the toes all the way to the hair. It's important that you add these little elements because by the 4th 3 D characters look very stiff and dead on to make them feel more dynamic. We do have to do a bit of manual tweaking here and there. So to make a strong line of action, we want to make this line as strong as possible. We're going to take it all the way up through the leg, up through the spine, past the head and right out the arms, even push the fingers along the line of action and stretch them out. So the poses even stronger and more dynamic. Now, one of the things we have to learn when posing is to know the limits of the rig that we're using. As you can see over here in the groin area. We've got this weird defamation happening on that's gonna influence. How we actually pose the leg will have to find a compromise where the legs still looks stretched and dynamic, but is not really adding those horrible creases that we're seeing here. It's also important when we're designing dynamic poses that we don't push the post so far that the character goes off. Model Kayla can be off model if we move her limbs or features so far that she starts being less recognizable as the character that she was originally designed. So even when making poses, we have to think about that. There are some limits to what we can do with the character, just so she remains recognizable. So now that we've blocked out our pose, weaken, start refining it by using the grease pencil tool. If we come up to the View port and click on the little icon that has a markup it on. It will bring up this panel and push the plus button to create a grease pencil frame, and we can select a color and a pen tool and start roughing out the line of action as an inverse C shape. Then we can go into our tools, select a new color on, and the curve can also go through the arm so we can rough that out to give it a bit of sense of flow. And then we can think about what the forward leg should flow in. So I'm just creating some curves that looked like some tangents that come out of the main line. With this set up, I'm going to use those rough curves that I made, and I'll continue modifying my pose. Now. It's a great technique to draw over your poses, because sometimes it's really hard to pose things inside of the three D view port. But as soon as you draw a curve or a few guidelines, it instantly becomes much easier to see what is wrong with you. Oppose. We again have some problem of increases appearing in the groin area, but here is where I can share with you guys. A pro tip on how to fix you opposes by sculpting them with blend shapes. What we need to do is select the mash for Kayla's leg and go into window animation editor shape editor. We'll get a new pop up window and we'll click on, create blend shape and add a new target. Now you can see that Kayla already has many blood shapes, and these allow the rig to deform. Naturally, however, we're making a new blend shape that will be right at the bottom off the list. I'll then go into the Mayas, sculpting tools shelf and choose the grab brush. I can change the size of brush by holding down the beaky and dragging with the mouse. You can also change the brush pressure by pressing M and also dragging with the left mouse button. With the grab brush, we can push the polygon of Kayla's leg around on the scream. Almost a ziff, they were made out of elastic. I can hold down shift in the left mouse button and dragon. This will smooth out the polygons. We can also take the Scott brush in areas that a heavily creased and extrude outs and polygons on make them smooth until the geometry looks nice and finished. You can push the shape of the legs with any modelling tools you'd like using any of the Mayan available tools. I'm just using the sculpt brush to do a quick job here. The blend shapes are additive shapes that work on top of the base geometry. If we go back to frame one, you'll see that now Kayla is in a T pose, but we can see some wrinkling as the blend shape is now deforming her leg. The good news is that we can key this value on and off by saving a key frame in this shape editor. So to go back to the shape editor and go to frame to weaken key the blend shape by pressing the circular button at the end of the list until it turns red. We can then come back to frame one and pull the slider to zero for the blend Shape and auto key should automatically add a key frame here for us turning the shape on and off. Now this is a demo, but if I was gonna animate a whole sequence using this technique, I'd make the blend shapes and Keith Um, just before finishing the final animation
4. The Silhouette: Now I've created a really bad pose to really showcase. What a bad to the way it looks like in this case, it almost looks like her head's growing out of her legs in the camera view. Now notice in the pose. Kayla is also holding the ball, which is facing towards the camera, and this gets lost within her head. Now the ball hands, they're all caught in within the main mass of her body. In animation, we want to make sure our characters have a clear silhouette so that we can kind of understand what's happening in the scene, even if we saw it at a glance. If we hide the floor plane in mire, we compress the turn on lights button in our view port, which is a little light bulb, or we compress seven on our keyboard, and this will turn on the lights. In our view port. The silhouette is the biggest and most encompassing shape of are. Pose is a great way of seeing the whole body clearly on. This is a great way to help us find any problems that there may be in our poses on to quickly design the shape of the body as a graphic shape. You'll see that the pose makes sense if we rotate the camera in the perspective, you to a certain degree, and that will make the throwing of this ball pose look a little bit clearer. No, it's important that if things aren't working any time in the animation, it's a good time to repose on. What we want to do is take the body and put it into a slightly different pose. We will rotate the body around slightly so that it's clearer in the camera view and will start spacing out the limbs a little bit better, will work on the torso and will work on the arms and hand poses and adjust the head position as well, just so that everything reads better from our camera. A lot of times, just by turning our character by 30 or 40 degrees might help us make the pose a lot clearer . To make Kayla's pose feel more dynamic, we're gonna look at her line of action on we're actually gonna take it and tilt it to aside so it forms mawr of a diagonal curved to screen left by having her slightly off balance it's gonna feel like she's Maurin motion on. It's really gonna help us sell the idea that she's throwing this ball with great force by keeping the balls separate from the body. We're gonna give it a more sense that it's being thrown away from Kyle is hand on. We're gonna use the rear hand on Duthie Bent foot to kind of give her a sense of balance is well so that she's almost catching her weight, Switching on our lights again. We can see how the silhouette is looking. It's a little bit clearer, but it's still not right. We can tell that there's a little bit more balance that needs to come into the pose, and also we need toe work on the silhouette of the fingers a bit more so that it really feels like she's actually throwing the ball. So the reason why creating a clear slow it is so important for animation is that when we have an animated character like Kayla, she's slightly cartoony. There's not really that much detail in her. She's a simplified version of a human being in this case. What we need to do is that we need to make her expressions and her poses much more clearer than, say, a realistic character because there's less detail that we can work on. An example I always give to students is three idea that. Imagine that you're looking at somebody on there 50 meters or 200 yards down the road that really, really, really tiny. But you can still pick up a lot of their body language even at a distance. What we're really doing is exaggerating things to make things clear. So if somebody was trying to point something out to you from far away, their gestures would be much more exaggerated. Now, that's just the way that we have to think about doing these poses. They're not meant to be realistic, but they're meant to be an interpretation of what we see in reality when posing the head. Don't forget, if your character has hair or ponytail like Kayla has toe actually pose that out as well. No, in this case, we're doing an action pose, so we're gonna drag the hair behind the head and give it a little bit of a wave so that it feels like it's court in the wind. So even though we're posing from one main camera. We are going to finish off by looking at the pose in the perspective, you and checking that it works from all angles. It's almost like it has to work like it's a sculpture more than a flat drawing. Now let's look at the end silhouette and see the final pose. There could be some improvements still, and we could even make the line of action even clearer. But now it's got a nice sense of flow to it. And the main thing that I can say about the poses, that it is exceptionally clear that she is throwing a ball on her direction and her intentions very, very, very, very clear at a glance. We want to use silhouette as a way of understanding how toe actually create good poses.
5. Weight, balance & force: Another aspect that can help us define great dynamic poses is to consider the wait for character, its balance on if it has any forces being acted on it. In three D software objects don't have physical weight when we're posing our character, where adding that physicality ourselves in the way we position the spine and the limbs. A great way of thinking about three D mesh is and characters is that they're very much like soap bubbles. They've got no physicality to them, and they're almost like ghosts as well, cause they can inter penetrate different pieces off geometry as well. So positioning thumb is really important for us as an animator. A character's own weight could be a deciding factor on if the character is athletic or light or heavy. But we can also think about a character's weight as what happens when they're interacting with objects that are light or heavy. Now let's look at this pose that we've made for Kayla. She's holding out this sphere, which almost feels like a beach ball or bald made out of light. Pulis, tiring. She's lifting it up with no effort, noticed that her limbs are mostly straight. There's no influence on her spine, that the ball is causing any weight that causes her to bend over. And she really just has to make small adjustments to her hip and raise her arm out just to stay in balance. This makes the character feel light, and it's one of the big problems that beginners have one. Creating animation, which is that they're not aware of the body mechanics of how to make a character feel heavy or under the weight of a heavy object. A good way of describing and characters weight is to think about where the characters center of gravity is in every pose that we make. Sometimes. Animators will refer to this as the location of the cog. Now, the center of gravity doesn't have to just be a controller that some rigs have. It's actually a point on the body where the characters wait is actually distributed. It's almost like the center of balance, which normally would be for a normal character under No, wait just to be kind of like slightly above the hips, depending on their design. However, when you pick up a heavy object, the location off the center of gravity moves In this case, Kayla's center of gravity will move up her body as she holds this very heavy sphere above her shoulders, almost in an Atlas type of position. To make Kayla feel like she's under a heavy weight, we're gonna take the pose and see that there is a greater variety between straits and curves through the body. But line of action isn't as smooth and clear, but actually bends in an s type of shape. We can see that her weight has changed to share the weight on the balls of the feet, and she's keeping herself imbalance by film. Lee planting her feet on the ground, her knees bend, her spine squashes. Even her expression on her face is squeezed and showing effort over here. Now again, this is an exaggerated pose. But while under the effect of weight, we can think about the body is a spring that is being compressed, and we want to put those compression lines and a good variation of straights and curves into the design and that will make the character feel like they're being held under a weight. If you're struggling, creating believable weight, you should always take up looking at good reference photos of athletes, weight trainers or whichever subject you're trying to capture in your animations. If you still struggle with these poses, another thing you can do is also jump out of your chair and actually act out the pose. This is a great way to actually feel where the weight and balance is in opposed acting. Things out could be one of the best ways of figuring out how the weight changes and shifts between one pose another. When the characters in a relaxed state they will normally be imbalance on where we're imbalance, we normally haven't evenly distributed weight. Now, in this pose, we can see that we also have an evenly distributed weight. But thanks to the physicality of Kayla, she's actually holding up her entire weight on one leg. Now, usually the straight leg that we haven't opposed will be carrying the weight. And here I'm just adding a slight bend to it to show that she's holding up a heavyweight, that her upper torso notice how her chin goes in line with the leg, and she has to balance out her leg and her arm to keep her body in balance. Forces acted upon the character could be another aspect to take into consideration, went design and dynamic poses. Most of these times these will be internal forces driven by the characters or in movement. When a character walks, they're exerting force through their muscles to move in a particular direction. But another times, some forces could be external when a character will be reacting to them. This could be like being punched when in combat or being dragged along by something most of time, you can reduce Thies to thinking about if the character is being pulled or pushed. Onda posed the character as opposing or following that main force so we can see here that Kayla is under the influence of force, which is a dog moving at high speed. Now we can notice that there is something similar to when we describe weight, which is that there is a nice variation between straits and curves in the body. We can see her legs or trying to oppose the movement, and they're bent. We can see the upper body is more being pulled along by the force. If we were to draw this out, we could see that the main force runs from screen left to right Onda. We then can look at the rest of the body. If we drew the line of action going up through the legs through the spine, it would go around the shoulders through the arms out the hands and follow the same line that the main forces on the legs would be bent. Opposing the forest by friction on. And elements like the hair would just drag along as they are loose and have no will of their own. Now, by combining where the characters weight is if they are or they're not in balance and understanding if they're under the effects of any forces, we can start to design more dynamic type of poses, and it's important to write these things down and actually start thinking about thumb until they become second nature.
6. Twinning & tangents: now to common mistakes to look out for when posing your characters are twinning and tangents. Even the default T pose that most characters come in is a very unnatural looking pose. We very rarely see people posed out like this. A twinned pose is when the limbs of the character are too symmetrical toe one another. In this example, you can see Kayla holding up her arms in the air but noticed that the angle at which the arms go up is very much exactly the same. We've exaggerated this effect is world by actually making the face as well, more symmetrical, and she's standing up in a very y like position. Now it's important that when we've got these very straight, symmetrical poses, they feel less natural. We will want to add curves into our oppose and line of action, and also we want to make sure that the limbs ca NBI at slightly different positions toe one another. Twinning can appear in any pose, and to fix it, we have to remember that our characters were are inside a three d space. We can move the limbs into a whole variety of directions and create a more appealing pose. Now these changes can be subtle. Weaken still, keep her with her arms above her head. But what we want to do is work into the pose toe, have a certain level of a symmetry, and this will make it look more natural and more appealing. We have encountered problems with tangents before, when we were looking at the characters. Silhouette, tangents appear when the character silhouette is not clear and the limbs into sect the outline of the silhouette. In this case, we can see that Kayla's rear hand looks like it's growing out from behind her ear. It's very difficult to tell where the deer and the four arm begin. We will have to move the arm out a little bit and adjust the shoulder just to make sure that it's very clear that the arm is separate from the actual head. Our goal still remains designed, the clearest silhouette possible and to allow a quick and accurate reading of the pose. Remember that poses animation are more staged than live action or in film, so we have to make sure that we reduce overlapping shapes with silhouette. Arms and fingers are normally the main offenders of thes. But remember to look out for anything that might be intersecting the silhouette of the character and see if it there's a way of clearing it up. Always aim to simplify your designs down as much as possible. Now I'm going to continue designing Kayla's victory pose, but it's important to realize that tangents and twin ings seem like very obvious things, but they do creep up in your work constantly. There's almost a subconscious nature that makes them creep into your work without you noticing. The best way to make sure that these mistakes don't happen is actually to get some good, honest feedback. This is a really important part of the animation process, and you should get used to showing your friends or fellow animators your work while it's still isn't finished so they can point out those mistakes that you might not be able to see because you've been working too long on a Siris of poses. But they'll jump out straight away to somebody who's seeing it fresh for the first time. You can also take advantage of posting your poses in the project section of the skill share page and you'll be able to get feedback from myself about your poses as well. And I might actually post some further material with some drawer overs and some videos to show people the main mistakes of what they're making when they're doing their class project . So with finished posing the victory pose on, probably it's as exaggerated as can be. It's also very asymmetrical, but it shows a very clear, distinct personality to Kaler, and it's much more interesting to look at then the default standard pose that we started off at the beginning of the video.
7. Body language: in the early stages of animation will be receiving direction normally from a script. If we're working professionally or we might be looking at a storyboard, we might just have a cool idea in our head of what we want to actually make if it's a personal project. What we need to consider is that when we're designing poses, we need to be ableto have a certain level of variety in our work and will want to create poses for the same situation but that are different in various ways. If we have a simple brief of a character has to walk across the screen. There's many different ways that they could do this mostly depending on the acting on the emotions that we want to show in the particular shot. So if they're walking excitedly across the screen toe open door or pick up cookie, they're gonna look in a specific way, and their body language will reflect this. Here we're using the posing to convey the emotions, actions and feelings of the character without over relying on dialogue or on the facial expressions of a character. If we take Kayla and we have her walking across the screen But this time in a more depressed, hunched over stance will start recognizing that the body language is conveying a completely different type of emotion. It's important that these poses are exaggerated versions of what we observe, but it's important that that exaggeration allows the body language to be very clear. If somebody is sad, we're gonna make them very, very sad. So that is absolutely clear, a cleanse the emotion that they're feeling. And again, this will be in relation to the acting and the choices that we want to make into our pose. Now it's a great exercise to design a multitude of poses for the same situation. This could be to design nine or 10 poses for different ways of walking or nine or 10 poses for how you could wait at a bus stop. But it's important that we choose one emotion for each one of thes poses, and we stick to it as a simple rule, trying to keep one emotion, toe one pose, never try to mix things together like trying to be afraid and courageous at the same time. Stick to using simple emotions at the beginning, like being angry, happy, sad, a smug aunt. Try to keep your poses in your emotions clear. So when Kayla's running across the screen scared, we're trying to get a sense of urgency inside The pose itself on was still using the same techniques that we've been using up until now. We can also look at these three different poses by the design of their line of action. On the line of action is very much defining the gesture in a very simple way. If we're looking at the excited pose, we can see that the line of action is a C type shape, curved Andi that it is pointing in the direction in which sees moving Everything is fluid and kind of like a beat. And if we compare that to the sad walk will see that we have a reversed s shape, type of line of action going through the body. She squashes down a little bit. She's a lot less confident, and even her eye line is looking downwards as well. And for the final pose, weaken see that the line of action is also a C shape, but it's much more. In a diagonal, the feet almost look like they're moving faster than the rest of her body and that again help sell this idea of being scared and having a great sense of urgency. Now, finally, it's important to point out that the body language is really working by itself, even though we have the face as well. In these poses and the emotions match the actual expression, we can kind of see that if we hide the face away, the emotion is still clear in the body language. It's important to realize that the poses, the face, even the position of the fingers all add to creating an expressive pose, and we should use the body language and the face together as two tools that allow us to better tell the expression and the emotion in these poses.
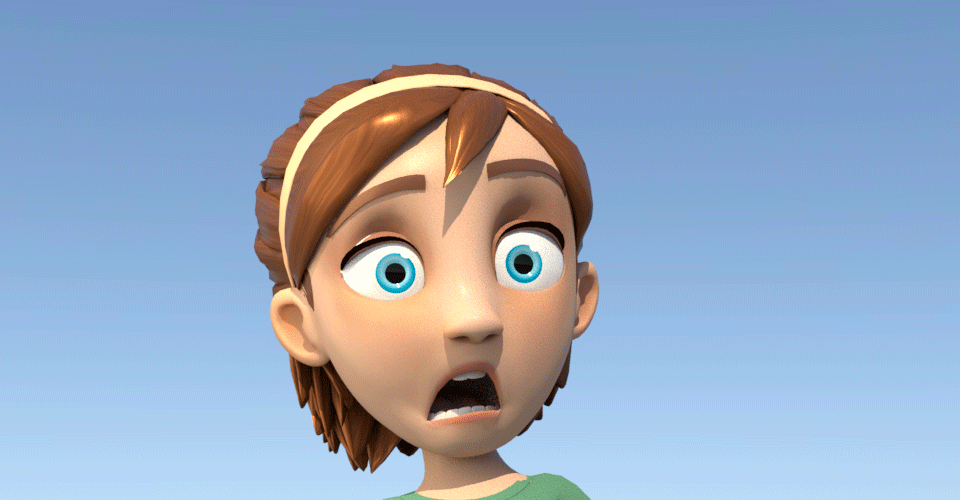
8. Posing the face: How can we create a dynamic facial pose again? It comes down to looking for some good reference on before you go scavenging through the Internet, let me recommend you and more low tech solution. Try find yourself a small mirror and put it next to your desk. Just by looking into a mirror, you can start to analyze and understand how your own face works. If you haven't got on one of these archaic devices nearby, well, you can also grab yourself a mobile phone and start taking some selfies. It's a good time to start learning how to make your own reference for animating. The first thing we want to understand about the face is how very malleable it is. It's a part of the body that we can part for. Cheeks drop our jaw wide open and open our eyes up with surprise. Now rigs like Kayla have a huge variety of controls. In order to emulate this flexibility in the face. There actually is many controls on the faces there are on the body, so when we are creating an expression of surprise, were actually stretching the face outwards. We want to make sure that there's a lot of white around the eyes, says the eyelids lift up. We're also raising the eyebrows as well. Think about it as a push and pull on the features as the drawer drops down. It also calls on the nose to be pushed down slightly along with the cheeks. Now, beginners normally pose the face and quite a stiff like manner because they focus only on posing the main components of the face the eyebrows, the eyes and the mouth. And they don't add movement to the secondary parts of the face. Opposing the face is very similar to opposing the rest of the body. We can also break the face down into a series of lines of action. However, instead of looking at lines of actions as a collection of joints like in the body will be looking at the lines that the features of the face make. One of the main features is the access that goes down the face, its line We can draw down vertically, through the brow, through the nose and out through the chin. Then we'll have a Siris of other lines that go across the face like the line that the eyebrows make the lion and shape of the top eyelids on the bottom eyelids, and we can also have another line for the top lip on the bottom lip as well. By looking at the angles and shapes we make with these lines, we can make the character's face feel less symmetrical and more fleshy and lifelike. Now that Kayla Rig also allows us to grab the eyes, mouth and other features and actually move them around the face. Aziz well, which allows us to pose, are expressions. Even better in this pose with Kayla were really trying to push the asymmetry to her and give her a cocky and smart expression. Notice how the lines of action of the features are all at an angle, so the faces squashed on camera, right and stretched on the other side. As we develop our skills, we want to be confident in showing the face in a wider variety of expressions that will always Murch. The acting choices we make for the character any time we're trying to describe the emotions in opposes is a good time to think about intensity of these emotions and cliche. A cliche is an action that we've seen many times to the point that it's so common that it's kind of lost its acting impact. A typical example would be if somebody is nervous, we would just lower their eyebrows and make them look slightly away. We will run into the creating cliches if we don't use good reference and don't really spend enough time exploring the variety of poses we can create at a planning stage. It's very important for me to explain to you that emotions have levels of intensity to them on that, if we're creating opposes, we should think about how intense these emotions are. If Kayla is embarrassed, is she slightly embarrassed because she's walked into the wrong room? She mortified for being caught cheating on an exam? Or is she embarrassed to the point of being so humiliated that she literally wants to feel like she wants to die? We all feel emotions in different ways, and we should explore different ways of betraying these emotions. In these situations, context is key. It's OK to invent a small story if Kayla is being called out to the front of the class because she's cheated on an exam because that gives me much more context on how to pose her expression than if I just had initiative paper written down. She's embarrassed again. We're taking advantage of squeezing the face, and pushing the features down will raise up the shoulders as well. And we'll give her a look again, which is in context. Toe What I understand the emotion of embarrassment. Being like now is animators. We want to develop this confidence in being able to create a variety of emotions. And some animators recommend A good way of starting out is to be able to design the generic emotions like sadness, anger, happiness, fear, disgust, surprise and contempt. Now, as human beings, we like grouping things into small groups because it makes things rational and easy for beginners to start exploring. However, by creating these small groups were really limiting the amount of expressions that are characters could betray. We already talked about how all these emotions can have different levels of intensity. But what happens if we have to create a character whose board this doesn't necessarily fall into any of thes general emotions from my point of view? But what's happening is that we're getting more specific with our creative palette. When you're starting out, it's perfectly fine to have a small slit of cliche expressions that you can come back to again and again. How weather As you learned Mawr and you practice more animation. You should make a conscious effort of expanding the range of emotions you can create, mostly by observing reference and adding to your studies. Now one more thing I wanted to point out in all of the's poses is that I've been focusing on posing the face her Vera want. You didn't notice that I also posed the characters chest, shoulders, neck to make the pose more appealing. It's important to pose the controllers that just under the camera frame, this will add an extra level of appeal to your poses. So don't just focus imposing the face alone when you have a close up shot but also remember to pose the upper body as well. One of the most important areas for myself imposing a face is getting the eye line right, making it clear as to where the character is looking. Normally we should think about posing the eyes in cinematic terms. Characters on film tend to look at specific points off the camera frame, which is normally in relation to the character that is in the previous or next cut. Characters in film don't tend to look directly into the camera, but their eyes is slightly off, favoring the left side of frame or the right side of frame. Now angers are high intensity emotion. The eyes will lock onto a subject, and the brows will squeeze down to the pupils. If we're animating this in a sequence, anger would build up across the scene so again would have different levels of the expression building up into this final outburst. Now, if we're looking at Kayla's face in the perspective, you will see that her eyes are slightly pointing in different directions. However, the eyes look fine from the camera view. It is important to know when to cheat these things, as we have to balance the advantages of having a strong eye line against having the characters. Expression viewable from all angles. In this case, had favored cheating the pose to camera, which is just because the expression will be more clear and intense and also ill have the advantage that I'm actually rendering this out as a still frame without having a moving camera. Now all of the techniques that I have laid out here are guidelines. Some of these rules can be broken, but it's important to know that when you break a rule, it's because you're thinking about adding a benefit to doing so. When we're posing the face, we should always add to the emotion of the scene and as humans will tend to empathize greatly with another person's feelings just from their facial expressions. So keep that in mind when making great dynamic facial poses.
9. Posing the hands: so we're going to finish off by taking a look at some techniques, imposing the hands now Beginners normally leave their hand poses until the very end and normally run out of time to pose them properly. The tricky thing is that three D hands start in this very neutral position, with all the fingers parallel to one another. So we have to start thinking about how to relax the hand and give it a more appealing shape . Well, first, start off by making sure that the palm is actually in an interesting angle in relation to the wrist by rotating it slightly when closing the fingers, we can rotate the finger joints at the same time. However, after doing this, we will make sure that the fingers are all pointing at slightly different angles to create a bit of a curve in the silhouette. One important aspect imposing hands is to curl the poem by rotating the cup control at the site of the poem. This will create a very natural looking curve across the top of the knuckles and help the hand feel more relaxed. Even the index finger will have a slight bend as it points forward and if we were to draw the line of action, we will see that there's a nice relationship going through the wrist, to the palm and out the finger. We're imposing the hand. We're going to think about the different shapes, like groups of the palm, the fingers and the thumb. We're gonna make sure that these groups flow together in interesting relations to one another. A very cliche. It hand poses what animates is referred to as the claw. This is normally the shape of the hand when it's reaching out for an object. But most beginners just tend to select all of the fingers and curl all of the controls by the same amount in one big block. We can make this post more interesting by adding a little bit of a cup to the hand and placing the index finger a slightly different angle than the rest of the fingers. You can think of the index finger as the main pointer for the hand, and this can lead the main direction, which the hand is moving. If we were to draw over, we can see that the main line of action flows through the wrist out the index finger and how the other fingers complement this direction. There's a secondary group. It's important to notice that the 1st 2 joints, the finger of the main ones we posed to give direction to the fingers, and we really only curve the tip of the fingers when we want to show a little bit more tension in the pose, where we want to show a character holding an object. We should start by positioning the object in the palm of the character and then curled the fingers around the object to create the initial grip. We should go checking in the perspective. You looking at the different angles to see how the fingers rest on the three D geometry. Now is a bit of moving back and forth here until the position is just right between the fingers. What we're trying to do when the fingers co around this object is to make sure that there are no gaps in between the fingers and make sure that each finger has its own direction. It is perfectly find translate the thumb or any of the joints around in three D space by grabbing their controllers and moving from just to make sure the grip is just right and looking okay from the camera. Make sure you check the perspective. You, however, to make sure that this new position is not too crazy. We're aiming to create a sense of flow going through the hand. If we draw the line of action, will see that we've got two lines one coming down the thumb and another that goes through the fingers. But it's important to realize that each finger occupies its own space. On that, the thumb opposes the direction of the fingers to creates a sense of tension in the grip. Another problematic pose for beginners is what animators refer to as the fork this poses when we have the hand open and all the fingers are stretched out outwards, we can easily add appeal to this pose. If we bend the palm and fingers slightly great bit of a curve, either forward in the fingers, curling backwards or forwards, use the cup control and angled fingers so that we're looking at creating a curve through the knuckles as well, and we'll also try to create a secondary curve by repositioning the fingers and creating a curve right at the tip of the fingers to see this clearly, let's draw over the hand and we can see that we create three main lines down the hand, one down with pinky finger, another down the index finger and the 3rd 1 down. The thumb will bend the thumb for a little bit more visual interest here. And then we'll look at the curve that we make across the knuckles, which is fairly shallow. And then we'll see that we have a slightly mawr extreme curve across the tip of the fingers . Now, the other in between fingers are just gonna follow to a placement along these curves, and they can be in a wide variety of positions. Another common pose is to put the hand into a fist. Hopefully, by now you're picking up in some ways that you can make opposes. More appealing will curl all the fingers at the same time. But we will also look at creating a small curve with knuckles. It's important to oppose all of the things individually, but I want to see a clean difference between two planes formed between first line of joints of the fingers and the second line of joints of the fingers. The position of the Thumb Waltz also show how tense or aggressive this fist pose is. So if we draw over the hand, we can now focus on the edge of the knuckles as our main defining silhouette. The fingers are then bent and pointing towards one another, closing any gaps between the fingers and this is creating a nice secondary shape. On the second joint, you can see the fist is now flowing from the lower arm and lost Lee. We can curl the thumb around to rest just under that second line of joints. Now I'm going to create a variant of the fist pose so that it's not so tense and aggressive again. We're gonna work on curling the fingers, but this time we're gonna work on the main and ring finger and curling those first. Then we're going to try and add a little bit more variation by posing the index and pinky finger at slightly different angles. Just by changing where the thumb rests on the index finger, we can change the whole feeling of the fist. Just by creating this, you might recognize somebody who closes their hands in this way or It could be an interesting choice, the same way that an actor makes a choice when performing into giving a little bit of character to the pose you're creating. So when posing the hand, look at creating a good flow between the wrist on the palm of the hand, look at the line of action running through the fingers and group them to either separate lines or planes, depending on the pose. Always remember to cup the hands, so there's a slight curve across the knuckles. Now posing hands is complicated as they have a lot of individual joints to pose, but is a great idea to make our hands feel dynamic or tents with their own line of action and a clear silhouette.
10. Final thoughts & project: Okay, so it's project time on for this project. What I want you guys to do is I want you to come up with an idea for a story for something you want to animate. It should just be one scene and I want this. I did be really, really, really short. It's a very basic idea, but it should be something like a gag or a sketch or something that would work well in a short format like vine video. You can also think about it as part of a scene of a larger animation that you might want to make at a later date. But for now, trying to keep things really, really, really simple. I don't want you to try and tell that story in just three key poses. That's it. Just three. No more, no less. And to do that, what I want you to do is to open up Meyer and to start making ALS the poses that you think you need to tell your story. Go broad, make several little poses, and later on, what we're gonna do is focus down from the three best ones that you confined that are the most storytelling poses that you have to tell your story will throw away any bad ideas of the other ones. We might come back to them later on in later classes, but we want to focus on trying to tell the story as simply as possible. Now, I find it really useful to have props like the skateboard that I'm using for this scene that I'm telling. With Kayla on you confined assets online for free, and you can download them and bring them into my or you can try to build some of your own. It's also quite handy if you've got some three D Scenario is also basic models to create, like a chair or any other items that you might need. Now, these stories they don't necessarily have to be Oscar worthy or amazingly good. We're creating a very simple structure with a beginning, middle and an end. How does the character encounter a scenario? What happens and how did they react to it? And just with those three poses were thinking again about the body language and the emotion . Now these stories don't have to be Oscar worthy, or they have to be amazingly complex. We want to try and make them very simple. Just a Have a beginning, a middle and think about a situation your character finds himself in, how he tries to resolve that situation and how he reacts to it. It can be completely unexpected, or it could be completely mundane. Try multiple ideas instead of just trying to fixate on one. Now we're going to try and create this story just like a comic book, just by using as few panels as possible but making the visual communication very, very clear. After you finished, I want you to either render out your different frames, or you can print screen them as well on put them together in a single document using some photo editing software. In my case, I'm using Photoshopped. I'm gonna lay them out like this comic panel, but feel free to experiment with how you want to present each one of these panels and choose whichever format you feel appropriate. Upload that online on. I'll be going through the community section and giving you guys some feedback, and I'll be drawing over your poses and take advantage of the chance of being able to get some feedback on your work. because it's a real key element that you have to use when you're being an animator of receiving and giving of the people feet back. Now, I can't wait to see what ideas you guys are gonna come up with for your animations. And I'm looking forward to see you guys in the next class.
 Yone Santana, Animator & Coach