Transcrições
1. Introdução ao Adobe Photoshop avançado: Oi lá. Meu nome é Dan. Sou um instrutor certificado pela Adobe para o Photoshop. Este é o seu curso avançado do Photoshop. Agora este é o curso avançado. Não é para iniciantes no Photoshop. É para pessoas que já entendem os fundamentos do Photoshop. Você tem sua maneira de trabalhar, mas sabe que há uma maneira melhor, mais rápida e mais eficiente de trabalhar. Aquela coisa que leva meia hora para fazer, você sabe que provavelmente há uma solução de um clique. Agora, se isso soa familiar, este curso é para você. Começará aprendendo todas as melhores técnicas de seleção disponíveis. Prometo que no final desta primeira seção, o que levou 30 minutos para mascarar, levará 30 segundos. Vamos corrigir as imagens difíceis, também fazer com imagens borradas, rótulos
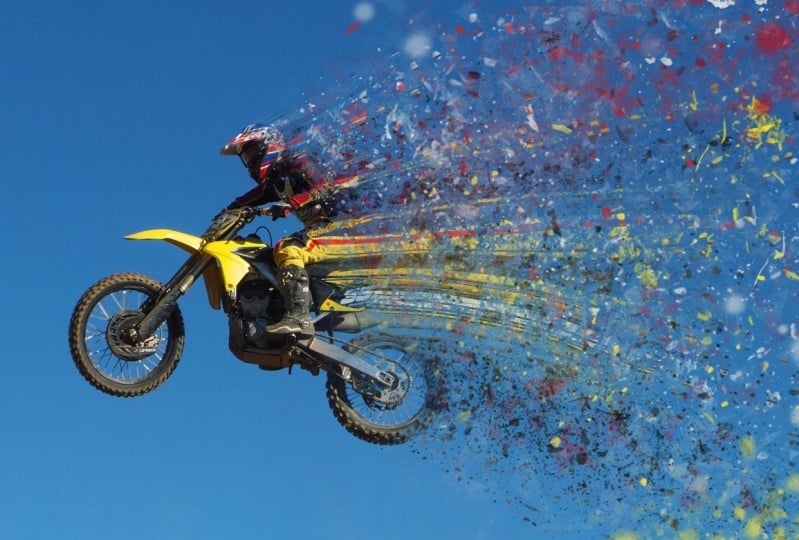
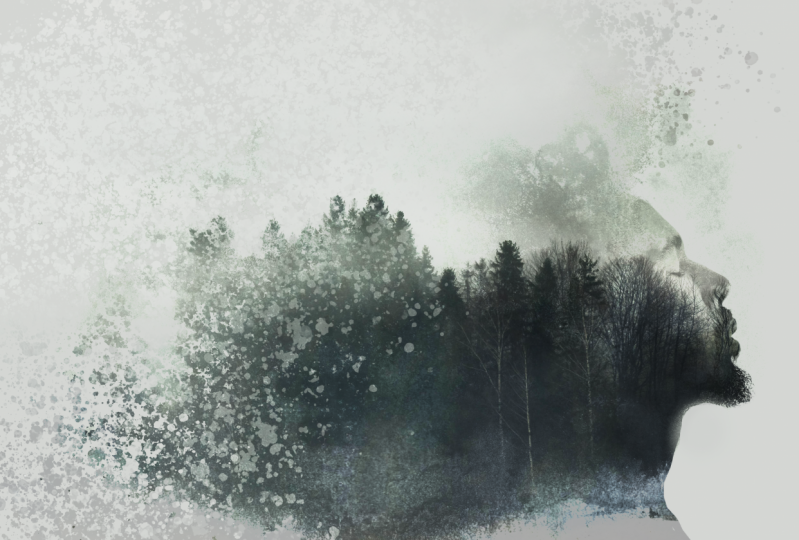
avançados e truques de enseadas e como trabalhar especificamente com a pele, além de ajustar e melhorar as cores. Você vai aprender os truques para ampliar imagens sem distorcer, o que fazer quando tudo der errado. Você vai aprender a criar mais de algo como esta grama aqui onde não havia algo antes. Você aprenderá os truques para remover de forma convincente todos os tipos de objetos das imagens. Minha seção favorita pessoal, vai mostrar como distorcer bin e remodelar imagens, vamos até fazer esse cara dançar. Ei! Eu disse dança. Você aprenderá como muitos estilos visuais de tendência são criados facilmente, fazer tons, falhas, organizar em uma classificação de cores, exposições duplas. Há muito mais também. Obtemos tricô de tipos, emparelhamento de
fontes com o Typekit, fazendo com que o Photoshop adivinhe fontes que foram usadas em imagem, cabeçalho, glifos e ligaduras para fontes. Além de variáveis, tipo aberto e fontes semelhantes, é tipotestic. É uma palavra. Você vai dominar para cima, enquanto aprende a tornar facilmente atualizáveis publicações de mídia social de vários tamanhos. Há uma grande seção sobre retoque avançado, cura avançada, clonagem
avançada e patch avançados, bem
como ajustes faciais serão um pouco mais sutis do que isso. Vamos dominar os dentes e as correções oculares. Você aprenderá a editar vídeos no Photoshop. Nós também vamos animar imagens estáticas, criando esses vídeos paralaxe, além dos gráficos de cinema muito legais ou mais conhecidos como imagens vivas, realmente ótimos para mídias sociais, eles jogam em e em diante. Você aprenderá a dominar 3D e Photoshop. Terminaremos o curso com técnicas profissionais e atalhos de maquete reutilizáveis. Agora este curso tem um foco muito forte no fluxo de trabalho. Vamos usar projetos práticos do mundo real para aprender as dicas, técnicas e atalhos para realmente moldar as horas do seu dia no Photoshop. Quem eu sou eu? Além de ser um especialista em Photoshop oficialmente certificado pela Adobe. Sou um veterano de 18 anos no Photoshop. Também posso criar vídeos de ajuda da Adobe diretamente para eles. Mais uma vez, este ano, apresentarei o Photoshop na conferência de 20.000 participantes da Adobe chamada Adobe MAX. Este curso vem com arquivos de exercícios para download para que você possa jogar junto com o curso. Ao longo do curso, também estabeleci projetos de classe para que você possa praticar as habilidades que está aprendendo. Agora, se você não se lembra da última vez que passou por todas as atualizações e atualizações do Photoshop, deixe este curso ser o seu desenvolvimento profissional completo para o Photoshop. Tudo bem, mesmo se você se considerar um usuário muito pesado do Photoshop, eu prometo que você vai encontrar coisas neste curso que vai explodir sua mente Photoshop. O que você está esperando? Assine e te vejo lá dentro. Não sei por que aponto para lá.
2. Antes de começar com o curso do Photoshop avançado: Olá, bem-vindo ao curso. Primeiro precisamos preparar algumas coisas antes de começarmos o curso. Primeiro é: baixar os arquivos de exercícios. Haverá um link nesta página aqui para clicar e baixar os arquivos que usaremos neste curso. Outra coisa a considerar aqui é se você estiver usando uma versão anterior do Photoshop. Este curso foi construído no CC 2018, então se você tem isso ou algo acima do 19, que está fora muito em breve, ele vai funcionar perfeitamente. Se você tem CS6 ou CS5, muitos dos recursos não funcionarão aqui, então provavelmente não será perfeito para você. Se você ainda quiser fazer isso talvez cerca de 60 por cento do curso funcionará totalmente bem, mas haverá pedaços onde ele só depende de recursos que ainda não existem. A próxima coisa aqui, é que só precisamos de um reset nosso espaço de trabalho apenas para que todos nós estamos olhando o mesmo. Abra o Photoshop aqui embaixo da janela, vá para o espaço de trabalho. Vamos começar com o essencial,
e talvez voltar para o espaço de trabalho da janela e basta clicar em “Redefinir o essencial” e saber que o seu se
parece com o meu até você você pode ter seu próprio espaço de trabalho, mas vamos começar com o pé direito. Tudo bem, isso é tudo para mim. Vamos começar e realmente começar a fazer coisas no Photoshop.
3. 3: Pessoal, é hora
de começar. Vamos começar
com algo chamado selecionar assunto. É uma ferramenta incrível. Se você já passou longas horas mascarando nosso pessoal, isso
pode fazer você chorar Mas não se preocupe, é
novo para o photoshop. Eu posso mostrar para você
aqui em cerca de 2 segundos. Selecione o assunto. Ele cria uma seleção
e você adiciona uma máscara. É tão fácil assim? Sim. Algumas vezes.
Vamos usar essa ferramenta
super incrível e fácil de usar. Examine seus passos, veja o que funciona facilmente O que exige um
pouco mais de trabalho. E se você já teve que
mascarar uma pessoa, prepare-se para que sua
vida seja mudada. Vamos começar agora. Tudo bem Para começar, vamos
até Arquivo. Vamos para o Open. E em seus arquivos de exercícios, há uma pasta chamada
02 Seleções e Mascaramento Vamos abrir cinco arquivos. Quero selecionar o assunto, um, dois, três, quatro e cinco. Então selecione o assunto. Abra todos os cinco. Basicamente, o que eu tentei
fazer é o primeiro aqui, assunto um é
bem fácil de fazer, e eles ficam
cada vez mais difíceis porque muitas vezes você vê tutoriais
on-line e pensa:
Sim, use essa ferramenta,
e ela é incrível e funciona perfeitamente Então você vai e usa
e fica tipo, H, eu estou fazendo isso errado, ou é bom demais para ser verdade? Muitas vezes, com qualquer coisa
no photoshop, funciona perfeitamente em
uma situação perfeita, e vou mostrar o que acontece quando isso não acontece
e como corrigi-lo Assim, podemos nos tornar profissionais e profissionais realistas. Então, vamos começar com o assunto um. Pessoal, pequenas
atualizações neste vídeo. A técnica
realmente não mudou. Eles apenas mudam
onde você pode acessar essa coisa chamada
selecionar assunto. Neste vídeo e no
resto do curso, vou mostrar
onde está o assunto selecionado, mas veja, eles o
colocaram facilmente Parece que, por que não
estamos usando essa versão? Nós deveríamos ser. É exatamente o mesmo, só que em um lugar
diferente. Se eu clicar aqui, obtenho
a mesma seleção. Outra coisa que eles
fizeram foi neste vídeo e o que fazemos muito neste
curso é selecionar o assunto
e, em seguida, clicar em uma máscara de camada. Você pode ver que há
uma máscara de camada
aqui ou você pode adicionar
uma máscara de camada aqui? Você pode pular e ir direto
ao ponto se eu for
desfazer, desfazer novamente Acabei de abrir o arquivo. Se você clicar em remover o
fundo, basicamente, ele selecionará o
assunto e adicionará a máscara de colocação. Um, vá. Olha isso. Novamente, a técnica
é a mesma, economiza em algumas etapas.
Um pequeno upgrade agradável. A outra coisa que você
notará é que eu
resolvo algumas
partes problemáticas deste vídeo, como corrigi-las com
as seleções incorretas O que você encontrará
na sua versão
e nesta nova versão do
Photoshop é que, na verdade ele faz um trabalho muito melhor do que o
que eu obtive neste curso Vou deixá-los
lá porque você obterá versões ruins e precisará saber
como corrigi-las. Você notará que sua
versão do Photoshop funciona melhor do que a mostrada
neste vídeo, o que é incrível Bom trabalho, photoshop. Uma pequena
atualização, as mesmas técnicas, mas elas foram movidas
para essa coisa chamada barra de tarefas contextualmente
sensível Uma observação: se você ainda não viu isso no curso
básico, se isso é pular
demais para você e meio que seguir por
aí e seguir o caminho, você pode pegar essa pequena barra aqui e dizer, vamos
fixar essa barra, pegar a borda aqui e dizer, fique ali,
e ela simplesmente permanecerá lá, fora do Tudo bem, continue com o vídeo. Veja essa seleção.
Agora, não se preocupe. Não é absolutamente
100% perfeito. Isso leva você a 80%
do caminho até lá. Vamos analisar a seleção
adicionando uma máscara de camada.
Clique sobre isso. Você pode ver que há alguns
problemas em andamento que podemos resolver de forma razoavelmente fácil usando uma das
outras ferramentas novas e interessantes, chamada máscara selecionada, mas
é incrível ouvir Ele usa algo
chamado adobe Sense, que é o aprendizado de
máquina de inteligência
artificial da Adobe . Eu realmente não sei qual
desses é. Mas é chique Ele examina muitas outras
imagens on-line e tenta calcular uma seleção com base
no tipo de imagens anteriores. Para ser sincero, não
sei como funciona, mas sei como
corrigir nossa seleção porque existem alguns
pequenos detalhes que são justos. Você pode ver ao redor
da cama lá. Às vezes é simplesmente perfeito. Encontrei um que era
meio bom. Fez um trabalho muito bom. Para corrigir isso, o que
vamos fazer é apenas garantir que sua máscara
esteja selecionada aqui. Não é a imagem, clique na máscara. Em seguida, clique em selecionar uma máscara. Outro recurso muito legal. Agora, aqui no topo, o seu
provavelmente está configurado com casca de cebola. Vamos contra o preto. Isso nos dará um contraste
muito bom entre o plano de fundo e o modelo. Tenho minha capacidade
redigida, se a sua não for. Agora, nesses recursos aqui, o seu pode estar todo repleto, bonito e
bonito desse jeito Está bem? Não há nada, exatamente
, que eu uso todas as vezes? Há muita brincadeira. Portanto, você pode passar 3 segundos
fazendo a máscara inicial, mas pode passar
mais um ou dois minutos arrastando esses controles deslizantes para cima e para
baixo para ver o que ela faz A detecção de bordas funcionará razoavelmente bem neste caso
devido à prática Basicamente, o que ele
faz é dar a você
uma espécie de vantagem fofa para fazer mais
alguns cálculos Raio inteligente ativado, raio
inteligente desligado. Não se preocupe muito com
o que o Smart Radius faz. Faça isso ligado e desligado, veja, isso o torna melhor?
No meu caso, não. Isso piora as coisas? Acho que vou gostar. L
deixa um pouco mais de detalhes aqui. Eu fecho a detecção de bordas. Vamos aos refinamentos globais. Suavizando isso. Provavelmente precisa de um pouco. Há alguns pedaços
um pouco irregulares aqui. Se você pensa, eu
tornei as coisas melhores ou piores? Veja aqui em cima, diz
show original. Ligue-o. Desligue isso. Nós o tornamos muito melhor. Tecla P. Você pode simplesmente
ativá-lo no teclado ver o que está entre colchetes P on, P off. Tudo bem Pena que eu nunca uso Você pode fazer um
experimento com ele e pode adorá-lo. O mesmo com o contraste.
Eu uso um pouco de Shift Edge, só para
colocá-lo em um pouco de cerveja Há um pouco de fantasmas do lado
de fora. Então, quanto agora, Shift Edge
e este
aqui embaixo é chamado de cores
descontaminadas. Eu meio que brigo entre.
Às vezes eu uso isso. Às vezes eu uso esse. Vamos ativar a
descontaminação das cores. Mostrar. Dê uma olhada
no cabelo na parte superior, então, isso meio que ajuda
a extrair a imagem
do fundo. Às vezes, está
mudando
um pouco a borda ou
descontaminando Nesse caso, estou fazendo um pouco
das duas coisas. Vamos voltar para fora. Parece muito bom. alguns
retoques manuais que preciso fazer. Falta um pouco de
ombro. O que vamos usar
é essa opção aqui. A terceira opção
abaixo, a ferramenta de pincel. Basicamente,
vou clicar e arrastar. Ele apenas adiciona o plano de
fundo de uma só vez. Como essa coisa está fazendo tantos cálculos aqui, meu travesti está demorando uma
eternidade para ser preenchido. Eu vou desfazer isso.
Vou ampliar, me mover para baixo e vou
pintar com meu pincel,
espere um segundo. Eu só vou
pintar em algumas
das áreas mais pobres.
Está parecendo bom. Há alguns ares
que eu poderia retocar. Com isso natural, ele simplesmente
pinta as coisas de volta. Eu vou desfazer
isso. Se você mantiver pressionada a tecla antiga em um PC ou
a opção Keion em um mac, é muito difícil ver
aqui na tela, mas há uma pequena vantagem
que se transforma em uma desvantagem Vou apenas desligar isso um pouco. Do ar dele. Isso provavelmente precisa de
alguns cliques, arrume a cama lá Você pode ver que é
sempre calculador. É por isso que é um
pouco difícil nessa área. Desculpe, essa máscara e selecione o
programa para ser muito rápido. Depende da velocidade do
seu computador, do tamanho da imagem, da
quantidade desses mostradores que
você usou. Estou feliz o suficiente com
isso, é uma máscara muito boa. Realmente depende de
sua posição final. Vou colocar o meu
na alvenaria, que é o assunto cinco e
vai ser muito
indulgente. Vamos clicar. O que você notará é que, se ativar a descontaminação de cores, essa última pequena opção, em vez de atualizar sua máscara de camada
atual, ela criará sua própria Eu quero transferi-lo para
esta última clínica aqui. Eu posso pegar minha ferramenta de movimento, clicar em Manter,
arrastar, arrastar, arrastar, segurar na guia e
depois arrastá-la para baixo, e uma
máscara incrível. Legal, hah. Vamos dar uma olhada em
mais alguns exemplos e nos aprofundar um pouco mais nesse
tipo de seleção de modelos. Sou um sujeito seleto dois. Vamos fazer a mesma coisa.
Vamos selecionar. Vamos abordar o assunto,
relaxar ou relaxar e nos surpreender. Este aqui é muito
diferente porque há muito mais coisas parecidas aqui, que é sempre um problema
quando você está selecionando modelos. Mesmo assim, ele fez um trabalho
incrível. Há algumas coisas
aqui em que a cor é de aqui em que a cor é jaquetas muito
parecidas com o fundo, mas vamos aplicar a
máscara e ver onde estamos Agora você pode decidir,
na verdade, é isso. Isso é bom o suficiente para mim. Eu vou sair daqui. É
uma ferramenta incrível. Muito bem, engenheiros de
software do photoshop. Mas vamos detalhar um
pouco mais. Portanto, verifique se você selecionou
sua máscara e vamos selecionar uma máscara. Você pode ver contra o preto. Ok, há alguns problemas. Agora, se na última imagem, tivéssemos uma
linha bastante consistente na parte externa. O cara tinha uma bela ponta limpa e não tinha cabelos crespos
como essa Bom, fácil de mascarar aqui. Entrar não é tão fácil. Acho isso melhor como
um processo de duas etapas. Você tem controles globais que fazem
cada borda aqui, então você pode usar seus
pincéis para fazer pequenos pedaços Acho que faço as
grandes
coisas globais primeiro e depois volto aqui
para fazer
coisas como aqui. Aqui está um pouco
de experimentação, estou apenas vendo algumas
dessas bordas, como vamos lá Vamos usar essa parte aqui.
Raio, arraste-o para cima. Estou feliz com isso.
Está ficando melhor. Lembre-se de P no seu teclado. Acho que antes eu
gostava mais. Acho que precisa de um
pouco de suavização. Há muitos,
como pedaços irregulares. Eu só vou suavizar
isso um pouco. Aí está. Comece
a ficar bonita, raio. Não há configuração específica. Depende apenas da sua imagem. Depende da aparência que
estou procurando. Eu acho que essa é
muito boa. Peaky, toque nele, toque nele. Ignore o cabelo, mas
olhe para as bordas da jaqueta. É muito melhor. Ótimo. Então eu
terminei isso agora, vou clicar em k. Porque agora eu quero voltar para ele. Então, a mesma coisa novamente, selecione uma máscara e trabalhe exatamente nisso, porque todas elas são
redefinidas para zero. Se você não tiver, e começar a
usar essa ferramenta aqui, a ferramenta redefine borda Só fica um pouco confuso. Tudo isso é tentar fazer muitas coisas
ao mesmo tempo. Essa ferramenta aqui,
brilhante, lave isso. Preparem-se, clique em arrastar, e eu estou arrastando e vocês ficam
tipo, ok, nada Espere, espere quando eu me soltar. Magia. Tão incrivelmente
selecionado aqui. Há um pouco
de fantasmas ao redor dela, que podemos corrigir, mas você vê tudo isso
aqui que não existe, e magicamente Veja isso, clique
e arraste. Tão bom. E o que eu faço é que há
algumas coisas. Uma última coisa.
As sobrancelhas precisam, apenas, de um pouquinho de trabalho Ok. O que eu faço é reduzir
o tamanho do pincel e simplesmente trabalhar
com eles por aqui. E tem um pouco aqui. A borda refinada funcionará nisso? Ah, funcionou. Achei que teria que pular para
esse pincel simples e velho, mas você me impressionou mais Legal. De agora em diante , depende de onde
você o está usando novamente. Se for contra o preto, você vai ter que passar um pouco
mais de tempo aqui. Quero falar sobre cores
descontaminadas. Não, não é para mim. Se você ativar isso, ele criará essa
nova camada com máscara. Quero voltar a
atualizar minha máscara de camada,
por favor, em vez de
uma camada totalmente nova. Ok. Estou muito
feliz com isso? Vou copiar e colar
aqui e colorir. Vamos desligar você.
Adeus, Winky Man De volta ao assunto dois. Em vez de arrastá-lo, as pessoas odeiam isso Eu odeio isso. É uma dor
fazer isso dessa maneira. Eu só vou te
mostrar outra maneira porque estamos aqui para
algumas dicas avançadas. Clique com o botão direito do mouse na camada zero. Você pode ler de outra forma, duplicar a camada e ela permitir que você a
coloque em qualquer coisa que esteja aberta, e aí está nosso assunto
selecionado cinco Clique em OK. E então pule para selecionar cinco,
e lá está ele. Ao ligar, ele vem com sua máscara de camada, o que é útil. Ele é um pouco pequeno para esta imagem e a parte superior dela está recortada Mas você entendeu a ideia
e olha aqui. Veja a seleção aqui. Boa seleção de sobrancelhas,
100% de seleção de sobrancelhas. Com um pouco de prática, se isso é algo que você está
fazendo regularmente, você pode imaginar o quão
rápido você pode fazer isso. Estamos aprendendo isso juntos,
eu estou te ensinando. Demorou apenas
alguns minutos. Tudo bem, vamos desligar esse cara e voltar ao nosso
assunto três Esse cara tem alguns problemas. Nós não somos problemas.
Vamos dar uma olhada. Vamos selecionar
e ir para o assunto. Eu quero te mostrar o que
acaba acontecendo. Ok. Vai perder partes,
é o que vai fazer. Você pode ver que há um pouco
no cotovelo aqui embaixo que simplesmente não combina Há um pouco que não
chegou lá. Tudo bem. Fez um trabalho muito bom. É melhor
esticar essas coisas, e esse é o
problema desta vez é que o fundo tem essas listras subindo pela madeira Eles causarão problemas quando tentarmos consertá-los. Então, sim, vamos um
pouco mais longe com essa terceira opção, com
alguns problemas extras porque as
duas primeiras são bem fáceis. Ainda é incrível. Vamos
clicar em nossa máscara de camada. Novamente, você pode
decidir, trabalho feito. Com ela selecionada, porém,
iremos para a máscara
selecionada. Alguns problemas. Podemos corrigir isso globalmente? É principalmente apenas o cabelo. Os lados reais
dele parecem bons. Talvez, vamos fazer um pouco de suavização só para
equilibrar um pouco O pico entra e sai. Aqui, eu poderia usar meu pincel de borda refinada.
Vamos aqui. Vamos tentar resolver isso. É aqui que descobriremos
que está funcionando, mas não. É porque há um grande pedaço de madeira escura correndo aqui Ele realmente quer chegar até lá
em vez de
ter uma boa borda nítida Para contornar coisas assim,
você realmente terá que fazer uma pintura física real usando a ferramenta de pincel. Eu tenho a ferramenta de pincel,
mas quero usar menos. Vou apenas ajustar isso
manualmente. legal de usar
a ferramenta de pincel e usar essas configurações é
que você está escovando, mas também está aplicando essa
suavização nela Há um pouco aqui embaixo do
qual precisamos nos livrar, e esse pincel
refinado nunca funcionará. Vamos arrumá-los manualmente, tamanhos
de pincel. Por que isso não
funciona? Porque eu tentei e não
consegui fazer funcionar. Há momentos
em que você
terá que entrar lá com
um pincel minúsculo Enquanto você estiver dentro,
selecione uma máscara e tenha feito alguns desses
ajustes, como suavizar, enquanto estiver avançando,
ela está se ajustando , isso pode tornar seu computador
um pouco mais lento No entanto, isso pode tornar seu computador
um pouco mais lento. Tchau Co. Então eu fiz as bordas.
Agora eu quero arrumar o cabelo. E o que eu gosto de fazer em
vez de entrar e fazer as bordas
do ar agora clicar em k e voltar. Por quê? Porque está
tentando fazer aquela suavização o tempo todo quente
usando meu pincel Refine Edge, e é que eles estão
meio que brigando com o outro. Eu
não gosto disso. Acho que isso não
me dá um bom resultado. Então eu clico em k e depois
volto direto e tudo volta para zero, vejo que a suavização está em Agora eu vou para o Refine Edge. Qual é o tamanho do meu pincel?
Isso funciona para mim. Vamos dar uma
olhada. Eu só vou esfregar na cama dele. É muito íntimo aqui
com a cama do homem. Adoro. Tudo gira em torno da combinação de ferramentas na captura de fotos quando você chega
a um nível avançado É saber quais ferramentas usar, que é a coisa mais difícil e é isso que estou
aqui para mostrar a vocês Mas também os está combinando. Agora, você pode ver aqui, isso é um pouco
problemático porque
há uma faixa de madeira
correndo até lá, e é isso que está
nos causando nossos problemas aqui O que vamos ter que
fazer é entrar muito pequeno. Essa é a maneira de
contornar esses problemas. Ficando muito pequeno, estou
pressionando a tecla em um PC. Quando digo entre super minúsculo, entro bem perto e pressiono a tecla de opção
do
meu Mckeon em um PC
e tecla de opção
do
meu Mckeon em um PC me livre delas.
Pincel ainda menor, e você pode descobrir que pode
colocá-lo novamente e retirá-lo. Então, apenas pequenas
peças. Aqui vamos nós. Pike, antes, depois.
Trabalhando por aí. Veja, parece bom. Não sei por que a barba parece
mais pessoal O homem está aqui. Tenho certeza que eu
poderia. A barba de Tran Você não precisa
saber disso. Tudo bem Agora, a orelha aqui, estou
relutante em bater nela com essa ferramenta porque ela deixará a orelha
dele toda Eu sei que é uma boa parte
sólida da pele, então vou usar minha ferramenta
de pincel e usar
apenas meu sinal negativo Vamos
aumentar um pouco, segurando a tecla menos ou a tecla antiga, a tecla de opção no meu M, a tecla antiga no meu PC,
vou dar uma volta por aqui e arrumá-la
manualmente Tudo bem, meus amigos,
você está bonito. Vamos clicar. Máscara legal. Vamos movê-lo para
esse outro documento e vou compartilhar
com você um último tipo de transferência para outro
documento, truque. Está bem? Então, fizemos o arrasto,
fizemos a duplicata. Há um
recurso atualizado antigo, mas novo. Copie e cole. A razão pela qual você provavelmente
não usa copiar e colar é que, no passado, você optou por
copiar
e colar, e isso só trouxe a imagem ou a máscara Você pode ver
aqui, não trouxe todo o pequeno grupo. Mas isso está sendo corrigido pela Adobe. Em vez de selecionar
tudo e copiar, basta acessar. Essa camada foi selecionada. Tenho essa camada selecionada
lá, basta ir copiar. Você pode usar seu atalho. Comande CN em um MAC e, em seguida,
vá até aqui e cole, e o Magic Photoshop
corrigiu e mostra a
máscara e a imagem Chega de arrastar e
arrastar até a guia. Você tem uma
versão mais antiga do photoshop, ainda
precisará fazer isso Mas a partir de 2018, você pode
simplesmente usar o comando C, o comando V, trazer coisas como chefes de
Belin, sombras e todo tipo de coisas legais agora, selecionar o Como quiser, copiar,
colar, traz tudo Vamos dar uma olhada no nosso último, e esse é o
mais difícil de todos. Ok, ainda é incrível. Vamos selecionar o assunto. Há muito
trabalho para fazer isso, quero mostrar
o que
eu faria aqui,
mas há apenas um quero mostrar
o que
eu faria aqui, pouco de trabalho manual. Fez um
trabalho muito bom na maior parte. Vou adicionar uma máscara de camada. Agora, isso não está funcionando, certo? Tem muito disso. Então, o que vou fazer é, em vez
de tentar corrigir
tudo no membro
da máscara seletora, o
que fizemos Vamos utilizar a ferramenta de
Seleção Rápida. Agora, se você é um photoshop à moda
antiga e gosta da ferramenta Magic One,
ferramenta de seleção rápida Não os usamos porque
são frágeis. É incrível. Ferramenta de seleção rápida.
Ok. Eu vou passar por
algumas partes. Primeiro de tudo, eu não
preciso de nada disso. O que eu poderia fazer é, na verdade começar com minha ferramenta de
letreiro retangular, manter pressionada a
tecla de opção no meu mac, em um PC e arrastar uma caixa ao redor dela para dizer:
eu não quero nada disso eu não quero nada Se você é como eu, você fica tipo, eu me pergunto o que ainda está selecionado. Provavelmente, uma maneira fácil é
simplesmente ativar esse botão. Meio que deixa tudo
vermelho para mostrar o que você selecionou e o que
não selecionou e desativa Tudo bem Então, de volta à nossa ferramenta de seleção
rápida. Ative o aprimoramento automático,
isso o torna melhor. Não sei por que não estaria
ligado. Vou aumentar o zoom. Acho que essa é uma boa maneira de
chegar mais perto de onde você precisa estar para fazer os ajustes
finais nas máscaras seletoras Então, vou adicionar a ferramenta de Seleção
Rápida
que é incrível. Ele mesmo aprende à medida que você avança. Você descobrirá que suas
seleções iniciais podem ser boas, mas à medida que avança, na verdade
não é só
clicar aqui Na verdade, ele está
voltando e analisando o resto
da seleção e fazendo ajustes,
porque sabe mais. Cara, inteligente. Você pode ver que isso
fica cada vez melhor à medida que aprende o que eu quero
e o que não quero Basta clicar e
arrastar até aqui
, dar uma
volta por aqui Vamos pegar muita coisa lá dentro. Agora, acho que se
eu fizesse uma grande tragédia até lá, ela começava a se
espalhar demais. Eu vou dar um passo para trás, então ele recua várias vezes, dá
um
passo para trás, eu estou
usando Apenas clicar uma
vez e uma vez é provavelmente
uma maneira melhor de usá-lo Eu ganhei e fiz isso de qualquer maneira. Vá embora Não me escute. Estou pressionando
a opção K M Mac para remover da seleção. Naturalmente, ele deseja
adicionar à seleção, mas você não pode manter
pressionada a opção Mac PC para remover
da seleção. Livre-se das coisas. Se
você se perder aqui, lembre-se, basta tocar nela
novamente, na seleção rápida. Eu uso isso
para torná-lo vermelho. Eu não uso mais essa ferramenta. Legal. Então você pode ver aqui,
azul e azul. É incrível o
quão bom fica. Provavelmente haverá alguns problemas com o cadarço Definitivamente, há alguns problemas
com o sapato aqui embaixo. E, no momento, vou ignorar
o cadarço. Caso contrário, você estará me
observando para sempre. Estou apenas dando uma olhada
, olhando em volta,
olhando em volta, qualquer coisa que eu
faça ou não queira. Está um pouco aqui. O que vou fazer
é fazer com que o editor acelere esse último
pouquinho, porque provavelmente sou
um pouco pedante Então veja então. Tudo bem, você voltou. E sim, com muito mais trabalho, mas ainda tenho muito
disso, obtive 70% de lá. Vou adicionar colocar uma máscara
e entrar na minha máscara seletora. Vou analisar algumas mudanças gerais
globais, provavelmente suaves. B a, suavize um pouco. Raio inteligente. É muito bom. Estou feliz o suficiente com isso. Eu fiz retoques
por muitos anos e você terá 100
fotos desse cara As configurações são todas iguais. Eu tenho que suavizar
e deslocar a borda, e muitas vezes você chega
ao mesmo Você brincou
com isso por um tempo. Na parte inferior, aqui você
pode dizer lembrar as configurações. Toda vez que você carrega isso de volta. Lembre-se da
última coisa que você fez, o que pode
economizar algum tempo. A outra coisa a saber é que estamos aqui, digamos, pré-visualização de
alta qualidade não
está ativada, principalmente porque leva
muito tempo para ser calculada e faz com que sua máquina
funcione muito lentamente. Então, se você está aqui e
diz, Oh, cara
, você sabe, 95% lá. Clique em OK, você pode descobrir que, nesse último
pequeno processamento, tudo termina para você Então é bom. Até o cabelo está fino o suficiente
para o que eu quero fazer. Mas agora eu poderia voltar
e trabalhar no cabelo. Ele tem um estilo de
cabelo bem fácil, como o meu. Eu sou quase careca, então me
mascarar é bem fácil. Estou perguntando a esse cara,
pincel pequeno, estou apenas testando aqui, na verdade. Eu não pratiquei isso, eu
só vou praticar. Eu gosto disso? Acho que acrescenta um pouco. Teste as cores de descontaminação.
Não gosto disso. Lembre-se de que, se você ativar
isso, ele mudará instantaneamente nas cores
descontaminadas, e vamos diminuí-lo
um pouco Ainda estou fazendo algumas
coisas estranhas por aqui. É principalmente porque o azul
dos contêineres se
estende ao redor. Acho que gosto, mas
com o valor um pouco baixo. Essa previsão também
não é novidade. Bem, pelo menos minha versão
que não estava lá antes, então estava ligada ou desligada. O que você notará
aqui embaixo diz, saída dois. Você não pode voltar para a máscara de camada
original. Vou dizer que vou
criar uma máscara de camada, mas tem que ser uma camada
totalmente nova. Seja que faça algumas coisas estranhas. Primeiro de tudo, eu não gosto disso. Provavelmente vou voltar. Você fez meu curso básico, você saberá que se
eu desativar essa máscara, você verá que ela não combina nada com a imagem
original real É por isso que ele deixa
o original para trás. Se você está
se perguntando, Cara, é uma dor. Isso apenas cria essa nova camada. É porque ele
realmente destrói o original para fazer
isso acontecer As cores descontaminam, o que na maioria das vezes
é incrível Nesse caso, eu não gosto,
então vou voltar
ao original, eu
tinha um pouco macio nas bordas, mas
estou bem com isso. Máscara bem legal.
A camada selecionada. Lembre-se, tudo que eu preciso fazer
é usar o comando C, o comando V. Traz para você a máscara de camada, bem
como a imagem. Se você está em um PC,
é controle C, controle V. E esse
cara aqui é legal. Tudo bem, espero que você tenha
gostado dessa ferramenta. É chamado de selecionar assunto. Mas espero
tê-lo tornado um pouco mais utilizável. Quando você obtém
resultados abaixo da média, você pode corrigir muitos deles na
máscara selecionada E se você tem
pedaços grandes que estão faltando, você pode usar essa ferramenta de seleção
rápida Há uma oferta combinada. Tudo bem, homens bonitos. Não sei por que acabei com
todos os caras dessa vez. Todas lindas, todas
lindas máscaras. Nos vemos no próximo vídeo para ver um pouco
do trabalho do projeto.
4. Projeto do curso — selecione o assunto: Olá, é hora do projeto da classe. Não pense nisso como dever de casa, pense nisso como maneiras de praticar o que você aprendeu para que ele afunde bem lá. Este projeto é para praticar o tema liso que aprendemos no último vídeo. Para encontrar esta lista de projetos de classe, você pode entrar em seus arquivos de exercícios e lá está. Chama-se projetos de classe. Abra e vamos começar com este aqui, selecione o assunto. Os arquivos a serem usados está em uma pasta chamada projeto zero, Vou mostrar-lhe onde eles estão, em seus arquivos de exercício baixados em 02 seleções, e lá está, lá classe projeto zero. Nós vamos usar todos os três desses. Eu quero que você basicamente apenas use suas habilidades para mascarar este aqui no número C, que é o legado e fazer a mesma coisa com esta opção B aqui. Basicamente estes dois modelos neste plano de fundo. Você terá que usar o sujeito liso e um pouco da máscara cortada. Porque é um tipo muito diferente de fotos de modelos, você vai ter que mexer com este fundo para obtê-los a tipo de, você pode ter que jogar com os níveis
deste um habitual habilidades existentes Photoshop para tentar obter eles para se misturar bem. Você pode ter que borrar o fundo, até você. Assim que os juntares e tiveres uma máscara razoavelmente boa, adoraria que a partilhasses. Aqui estão os caminhos, o Compartilhar. A maneira mais fácil é no site aqui, vá para o pote de Atribuições e compartilhe o que você fez. Às vezes é mais fácil apenas usar os comentários, mas o mais importante, compartilhar isso comigo no Instagram, no Twitter ou no meu grupo no Facebook. Se você pedir críticas, eu vou te dar algumas coisas educadas. Você pode apenas compartilhá-lo lá em cima e ignorar críticas
negativas e apenas se orgulhar do que você fez. Pratique, pratique. Vá em frente e faça seu dever de casa, e eu o verei no próximo vídeo.
5. Selecionar a máscara e alterar uma cor usando o Photoshop — faixa de cores: Aí. Neste vídeo,
veremos a gama de
cores para fazer seleções,
selecionando bananas Vamos selecionar
mirtilos e combiná-los
nessa
cena mágica e , eventualmente
, nesse tipo de confusão de coisas que eu criei
para explorar a
gama
de cores, porque é uma técnica de mascaramento muitas vezes esquecida Você pode tê-lo usado
para fazer um trabalho específico, mas ele pode ser usado
para muitas coisas. É isso que vamos explorar
nos próximos vídeos. Se você já usa a gama de cores, esses
vídeos porque há alguns pequenos
atalhos e dicas que usaremos durante
o resto do curso Então, vamos começar.
Tudo bem, para começar Vamos para o arquivo.
Vamos abrir. Em seus arquivos de exercícios, há uma pasta chamada
seleções e mascaramento Eu quero que você abra a
gama de cores um, dois e três. Vou começar
com a gama de cores um. Agora, antes de começarmos, escolhi um
exemplo bem fácil , uma cor bastante
consistente. Será uma
boa maneira de entender a gama de
cores, se você
nunca a usou antes. Mas mais tarde no
curso, o que faremos é combinar a
gama de cores frequentemente com outras técnicas de seleção,
pois ela representa
talvez 80% da
seleção e você
precisará fazer retoques
com outras seleções Essa será uma
grande diferença entre digamos, meu curso básico
e o curso avançado Vamos começar a misturar coisas quando há momentos em que você não pode simplesmente
fazer uma técnica de seleção, você precisa fazer duas, três
ou quatro Vamos entender a gama de cores. Vamos selecionar e
ir para Color Range. Agora, o seu, por padrão, provavelmente se
parece com isso. A primeira coisa que
vamos fazer é clicar
em qualquer lugar da banana e isso nos dá uma
seleção básica do amarelo. Aqui embaixo, onde diz selecionar, a sua pode ter mudado
para uma dessas cores Acho que eles nunca
funcionam, nunca, nunca. Acho melhor
ignorá-los e ir direto
para a cor amostrada Tenha a imprecisão em cerca de 100. Eu realmente nunca mudo isso
porque o que acontece? Se eu clicar aqui e
aumentar a imprecisão, basicamente ela vai chegar
e é muito boa Você pode ver que está indo cada vez
mais longe. Mas para pegar a
banana inteira, ela
acaba indo longe demais e começa a
pegar o fundo Nesse caso,
não recebeu nada disso. Vou clicar, a
imprecisão
apenas expande apenas expande Acho que deixo a
imprecisão em 100. O que eu faço é começar
com uma cor inicial e depois usar esse
pequeno ícone de adição. E clique uma vez, clique
duas vezes, clique novamente. O que você pode fazer é definir um
clique e continuar clicando, você pode clicar em segurar e
arrastar pelas coisas. Basta clicar, segurar e
arrastar para dar uma cor. Você notará que
quando eu solto, ele pega um grande
pedaço daquele amarelo Eu não tenho essas
pequenas partes N. Posso começar a clicar neles, mas geralmente há algumas cores que realmente
combinam com o plano de fundo. Eu só vou arrumá-los com
o pincel. Se você for longe demais,
clique aqui
e clique em algo Kiss, comece a escolher
o plano de fundo Acho que é um pouco difícil de
ver neste vídeo, mas posso ver isso aqui claramente. Eu pego a ferramenta menos e clico no fundo para me
livrar das coisas que não quero Além disso, volte aqui novamente, vou clicar, arrastar
e mexer, para que ele escolha
várias cores Vamos clicar. Tem uma seleção
muito boa. As duas pontas precisam ser
um pouco arrumadas. Mas vamos adicionar uma máscara
clicando no botão Adicionar máscara. Para arrumar as bordas aqui, certifique-se
de que você está trabalhando
na sua máscara, não na
sua imagem, e vamos ampliar Encontre a borda aqui, e eu
vou pintar isso. Então, vou tentar
introduzir muitos atalhos, especialmente no
início, para que
o resto da aula
flua muito mais rápido Você tem que ter um
pouco de paciência
comigo nesses primeiros vídeos para colocá-los em nosso sistema , para que possamos ir
mais rápido mais tarde. Porque o que eu
quero fazer é trabalhar na máscara. Eu
quero pintar isso. O tamanho do pincel está no topo aqui,
eu vou até aqui e o arrasto para
cima e para baixo e faço isso, M. Você deve conhecer o
atalho do I do that Os colchetes.
Está ao lado da tecla P, o
que a torna
maior e menor, mas há uma tecla extra super
incrível. Em um Mac, você mantém pressionada a tecla de comando e
a tecla de opção. Eu vou fazer o PC no set
porque é bem diferente. Ok, então mantenha pressionado o comando
e a opção no teclado. Em seguida, clique e mantenha
pressionado o botão do mouse e arraste-o para a esquerda e para a direita.
E isso determina o tamanho. Eu amo esse. Significa que posso ficar muito grande e muito
pequeno muito rapidamente. Se eu usar o para cima e o para baixo, você vê que ele também tem
dureza Então, com as mesmas teclas pressionadas, eu posso realmente obter o tamanho e
a dureza certos Se você estiver em um PC,
é bem diferente. Ok, você mantém pressionada a tecla
antiga do seu teclado? E então você clica, segura
e arrasta o botão direito do mouse,
aquele que você nunca usa. Mantenha pressionada a
tecla antiga, clique em segurar e arraste para a esquerda e para a direita e
você terá a mesma coisa. Para cima e para baixo está a dureza. É um atalho muito estranho, mas é muito bom conhecer. Haverá uma planilha de atalho
no final deste curso, como todas juntas em
um pequeno vídeo Também haverá um PDF
na mesma página,
você pode baixá-lo, imprimi-lo e
colocá-lo
ao lado do computador. Estou no meu Mac,
pressionando a tecla Control e clicando e arrastando para a esquerda
e para a direita para obter o tamanho aproximado
e, em termos de dureza, adoro qualquer lugar 85-95 Especialmente quando eu
quero uma ponta reta. Eu nunca tenho 100%. Por quê? Como
sempre há um pouco
de flexibilidade na parte externa, parece mais natural, 100% de
dureza parece muito falsa. Outro pequeno
atalho interessante é que, no momento , o primeiro plano
está definido como preto Quando eu pinto isso, ele
faz a coisa errada. Eu quero fazer o
oposto disso. O que você pode fazer em outro pequeno atalho
legal é a tecla x no teclado Veja minha cor de primeiro plano e de
fundo aqui. Se eu tocar em x, apenas na
letra x no meu teclado, ele simplesmente alterna a cor do primeiro plano e do plano Branco na frente, e eu
vou pintar isso. Tamanho de pincel menor,
mantenha pressionados meus atalhos. Você pode ver, com
alguns pequenos atalhos, que você vai retocar Áster. Se você for longe demais, fácil, posso ampliar e pressionar a tecla X para mudar para preto como
minha cor de primeiro plano e
simplesmente pintá-la minha cor de primeiro plano e
simplesmente pintá-la Eu posso fazer a mesma coisa
com essa parte inferior, mas vou deixar
isso aqui porque fica bem na minha composição
final, mas agora você pode usar a mesma coisa preta
e simplesmente pintá-la. No topo aqui, é
isso, mas eu quero? Vou voltar
para branco como minha cor de primeiro plano, tecla X. Você pode ver como é útil um daqueles que
vale a pena aprender Agradável. E isso, meus amigos, é usar a
gama de cores para mascarar uma imagem. Tivemos que usar um pouco de ferramenta de pincel para
preencher essas partes pretas, mas isso é apenas
parte do photoshop Na verdade, uma ferramenta
faz todo o trabalho para você. Então, vamos fazer muitas
combinações neste curso. O que eu gostaria de fazer
é pegar minha ferramenta de movimentação, clicar e segurar e arrastar, arrastar, arrastar, arrastar,
arrastar até o número três e deixá-la descer até
o final aqui. E vamos
movê-lo para cá. Vamos corrigir isso um
pouco mais tarde. Vamos aprender um pouco
mais sobre a gama de cores. Vamos para o Color Range two. Volte para a nossa seleção e
vamos para a gama de cores. Duas coisas que eu quero te mostrar. Um deles são os grupos de
cores localizados. O que isso significa é que, se eu pegar minha ferramenta conta-gotas e clicar em, diga que quero esse cara, mas
não quero todos os amigos dele Eu só quero ele e
outro cara aqui. Você pode ver que sumiu e escolhê-los
porque são da mesma cor. É aí que entram os agrupamentos de
cores localizados. Seu alcance
provavelmente está definido para 100%. Isso significa que está apenas pegando
tudo e você
abaixa , você pode começar a ver zeros
em nosso garotinho lá, para que ele não pegue
tudo Agora que estamos usando frutas
como essa, seria muito útil se você
estivesse tentando selecionar. Você quer fazer alguns ajustes
de
cor cor do batom, mas não nos sapatos, que
são bem Você pode clicar no batom. Diminua o intervalo e
faça essa seleção, e ignoraremos a
outra, digamos, coisas vermelhas no documento. No
nosso caso, olhos azuis. Você pode adicionar mais de um.
Eu tinha esse pequeno ícone positivo aqui e eu quero você e você. Vamos escolher dois desses caras Preciso arrumar os dois. Isso me leva
à segunda coisa que eu queria te mostrar aqui. Está aqui,
diz pré-visualização da seleção, está além da escala de cinza porque essa pequena janela aqui é
muito pequena para funcionar, tudo o que ela realmente faz é duplicá-la na janela aqui Não mudou nada.
É meio que nos
mostrando como a
seleção funciona. Um zoom, e esse cara aqui, eu quero adicionar um pouco disso, pouco disso, clique, clique,
clique, entre lá. Clicar e arrastar
pode ser muito útil. Se você entender muito
do plano de fundo, eu poderia entrar aqui
e dizer menos, eu quero menos um pouco disso.
Conserte esse também. Pegue a tecla mais, basta
arrastar até lá. Eu também tenho. Você
pode clicar à distância de um clique, D tem conteúdo ou clicar e arrastar. Vou clicar
nesse plano de fundo aqui. Eu quero me livrar
disso. É muito bom. O alcance provavelmente está
muito longe agora. Eu tenho que diminuir esse
intervalo para que ele escolha apenas esta
pequena área aqui Fazendo algo estranho lá.
Posso retirá-lo? Eu posso. Agradável. Vamos clicar. Ok. Isso é em uma máscara de camada. Como eu
fiz antes, é muito parecido com o azul, mas há partes
que eu quero retocar. Basicamente, eu tenho uma vantagem
muito boa, mas há algumas partes
intermediárias em que as cores eram
muito diferentes. Com o mapa selecionado,
vou pressionar B no meu teclado
para usar a ferramenta de pincel. Vou usar
muitos atalhos. Se eu passar o mouse sobre isso, você
pode ver que diz
a ferramenta de pincel Qualquer coisa entre colchetes
aqui significa usar a tecla B. Essa aqui é a tecla V. Você pode ver isso
entre colchetes aqui. Os que
mais usam, você aprenderá. Você pode simplesmente ir para V para
mover B para escovar. O tamanho do meu pincel está bom. Vou apenas
arrumar, não muito longe, arrumar as partes que não foram
perfeitamente selecionadas .
O mesmo desse. Agradável. Como estamos usando
essa cor localizada, você pode descobrir que
pode ter havido
outros pedaços de fantasmas por aqui.
Talvez você tenha que amarrá-lo. Você pode usar a tecla X para torná-la preta e
simplesmente pegar um pincel
grande e bonito e amarrar qualquer um desses pedaços que fazem parte da máscara
que você não deseja. Tudo bem Vamos clicar em segurar
e arrastar esse garotinho. Então mova a ferramenta,
arraste-a até o intervalo de cores três e vamos despejar alguns
mirtilos Incrível. É assim que se
usa a gama de cores para selecionar objetos
físicos
e recortá-los em
um fundo branco. Pode ser ótimo se você for
fotógrafo, ou se estiver fotografando coisas para
um site e
quiser pegar algo e colocá-lo em um fundo
transparente ou branco, basta
excluir o plano de fundo. Intervalo de cores, especialmente
se houver uma cor muito contraste em comparação com
o resto do documento. Pode ser muito
útil e muitas vezes esquecido no photoshop.
Passe o mouse para o próximo vídeo. Ainda vamos
usar a gama de cores, mas vamos usá-la de
uma forma muito diferente. Mais informações para ajuste de cores. Tudo bem, eu vou ver
no próximo vídeo.
6. Usando o Photoshop para corrigir a grama e o céu — faixa de cores: Olá, meus amigos. Este vídeo, vamos usar a gama de cores novamente, mas para um caso de uso muito diferente. Em vez de mascarar, vamos usá-lo para ajustar as cores. É algo que faço muito mais em vez de mascarar. É mais apenas ajustar coisas como se você tivesse dado uma olhada nas folhas, elas são marrons e verdes e agora, lindas verdes. Vamos olhar para o mar. Passou de azul para uma bela cor ciana tropical. Basicamente, vamos usar faixa de cores para fazer uma seleção
dessas cores e, em seguida, usar camadas de ajuste sobre elas apenas para corrigi-las. É uma maneira muito comum que eu use a gama de cores. Vamos entrar agora e aprender a fazer isso. Certo, então vou trabalhar no documento que usamos no último vídeo. Se você não tem isso ou você ignorou,
basta ir para o arquivo aberto e abrir seus arquivos de exercícios. Estamos a usar a gama de cores três. Basicamente combinamos a gama de cores três com um e dois. Temos essa composição leve agora. O que eu vou fazer é desligar o olho para os dois caras, que é a banana e o mirtilo. Eu quero o fundo selecionado, então eu quero mudar o blues e os verdes. Basicamente, cada fotografia de paisagem que
eu já tirar, eu quero melhorar os verdes um pouco e muitas vezes o céu precisa apenas de um pouco de amor Photoshop. A gama de cores é uma incrível maneira
rápida e fácil isolar essas coisas para fazer esses ajustes. Muito diferente do último vídeo, onde estávamos usando para mascará-lo completamente. Camada de fundo selecionada, Selecionar, vamos para a faixa de cores. Dependendo do que você fez pela última vez, você pode ter que mudar de volta para nenhum. Você pode ter que desligar a cor localizada, e você faz a sua parecer algo como a minha. Começaremos em 100 fuzziness-ish. Vou trabalhar no mar aqui e tem uma cor muito parecida com o céu. Então, fico feliz em trabalhar em ambos. Vou escolher os que estão aqui. Você pode ver que é clicado em um grande pedaço dele. Vamos mudar para a pré-visualização da seleção para a escala de cinza, para que possamos vê-la. Agora ele agarrou a maior parte deste mar, exceto por este pedaço aqui. Pegue o botão de mais, e vamos adicionar isso. Mas então, tem a maior parte. O único problema é que ele tem muito do céu, então eu vou diminuir a confusão. Quando eu estava usando minhas máscaras, eu não uso essa confusão com muita frequência. Mas quando eu estou fazendo essa sutil saturação de matiz muda, agora eu estou ficando para baixo e não há certo ou errado. Não há número mágico. O que você vai descobrir é que quando eu estiver fazendo isso, eu vou fazer uma vez e ver se eu fui
longe demais ou muito pouco e depois voltar e mudá-lo. Isso funcionou para mim, vamos clicar em “Ok”. Basicamente temos uma seleção de todos os pedaços azulados, e eu quero torná-los mais cianos. Em vez de fazer uma máscara em sua própria camada, a maneira mais fácil agora é clicar em ajustes. Vamos clicar em matiz e saturação. O que ele faz é pegar a seleção que você tinha e aplicá-la a esta camada de ajuste de matiz e saturação. Posso ligá-lo e desligá-lo e fazer ajustes sem destruir o fundo. Nós amamos um pouco de não-destrutividade. Tudo o que vou fazer é amar o céu azul é azul. Mas na verdade eles ficam muito bonitos quando são cianos, parecem férias tropicais. Faço isso muitas vezes com toda a minha paisagem. Vou passar por um pouco mais do ciano em vez do azul. Quanto? Se está funcionando para mim, posso aumentar a saturação só um pouquinho. Vá longe demais, mas em algum lugar aqui. Ligue o globo ocular, desligue é apenas uma maneira muito fácil de isolar cores, especialmente as genéricas como o céu, onde talvez fazer uma seleção pode ser bastante difícil. Fizemos o mesmo por estas folhas. Sempre que fotografo folhagem, eu sei que deve ser verde, mas é sempre isso como principalmente marrom, cor amarela. Esse é o caminho do mundo. Mas o que eu quero fazer para esta imagem promocional, eu quero que seja um lindo verde. Um verde agradável, rico, mas crível, é a mesma coisa. Eu clico na minha camada de fundo, e eu agarro minha seleção, intervalo de cores. O que eu poderia precisar fazer é mudar de volta para nenhum e, em seguida, clicar em um destes e é escolhido. Há tantos marrons verdes diferentes acontecendo aqui. Vou clicar em segurar e arrastar através de alguns destes onde eu sei que é uma boa representação de todo o documento. Vou clicar de volta aqui em tons de cinza. Para isso funcionar, você realmente precisa ter esse conta-gotas no plus. Basta clicar e arrastar através dele com esta primeira ferramenta não funciona, eu vou voltar para nenhum. Então eu vou definir você meu amigo, então eu vou clicar nele, arrastar até lá. Agora eu vou voltar para a escala de cinza e você pode ver que eu tenho uma boa seleção disso. Deve ter muita areia também. O marrom está fora das folhas. Os mesmos marrons que estão na areia. Vou diminuir a confusão disso. Vou pegar minha ferramenta de conta-gotas, clique uma vez aqui. Mais uma vez, só para se livrar destas areias aqui. Estamos chegando muito perto. Muito bem, vamos clicar em “Ok”, tenho a minha selecção, tal como antes. Vamos fazer ajustes, vamos fazer matiz e saturação. O que eu vou fazer é arrancar a saturação muito alta,
muito além de onde eu preciso, só que eu posso saber que eu tenho as cores certas. Quero escolher um verde que não seja tão verde, nem muito azul-verde. Quero algo no meio, bom e rico. Então eu posso abaixar isso para torná-lo credível. Vamos ligar e desligar o globo ocular nessa camada. Você pode ver o que eu estou fazendo aqui, apenas movendo os verdes marrons para um pouco mais verde exuberante. O problema com isso, eu acho que esta ilha aqui provavelmente está saturada agora. Muitas vezes, o intervalo de cores é usado em uma combinação. O que eu vou fazer é clicar na máscara, pegar meu beeky para minha ferramenta de pincel. Eu preciso de preto como minha cor de primeiro plano, lembre-se x alterna para frente e para trás. Tamanho do pincel, vamos usar nosso atalho e eu vou me livrar disso. Vou fazer a minha fuzziness um pouco mais alta porque é bastante fora de foco, tamanho do pincel para baixo. Só para retocar isso eu poderia ter baixado a opacidade deste pincel, então não é uma mudança tão drástica. Porque agora sinto que é completamente marrom. Eu realmente tinha que entrar aqui. Posso entrar com um pincel muito pequeno para consertar isso. Provavelmente o que eu faria é provavelmente apenas abaixar a opacidade do meu pincel antes de eu pintar tudo para fora e desbotá-lo para aqui. Vamos fazer isso antes de ir, vou desfazer um bilhão de vezes. Coloque todos os meus íons de volta. Não muito longe, aqui vamos nós. Com esta camada selecionada, com a máscara selecionada, ferramenta de
pincel, e eu vou mostrar-lhe um novo atalho pequeno. Nós ligamos o tamanho esquerdo e direito, cima e para baixo para a dureza. Outra coisa legal é a opacidade. Se você olhar para o seu teclado, os números 1, 2, 3, 4, 5 ao longo do topo, não os do teclado numérico. Você pode não ter um desses, mas os que estão acima das letras no teclado. Cuidado aqui onde diz opacidade. Se eu digitar as duas chaves, ela vai para 20 por cento. Cinco é 50 por cento, nove é 90 por cento. Zero está de volta para 100 largura. Se você quiser fazer isso super rápido como cinco cinco juntos, você vê que isso muda a opacidade aqui. Então é apenas uma maneira fácil de escolher uma opacidade sem ter que pular aqui e deslizar para cima e para baixo. Você pode ver o que eu estou fazendo aqui, eu só não vou reverter tudo. Principalmente para que eu possa poupar o trabalho de ter que passar e pegar entre este cruzamento das folhas e a ilha. Deixe-me ligar minha banana e meus mirtilos incríveis. Essa é uma maneira fácil de selecionar uma tonalidade específica. Muitas vezes realmente obter as paisagens, então céus e gramíneas, árvores, e outras coisas. Faça uma seleção, com essa seleção, basta
clicar no painel de ajustes. Esse ajuste pega essa seleção e a transforma em uma máscara para suas próprias camadas. Em seguida, você pode ligá-lo e desativá-lo mais tarde, não destrutivamente em sua própria camada e é incrível. Tudo bem, é isso para este vídeo, eu vou te ver no próximo.
7. Como alterar a cor da pele no Photoshop — faixa de cores: Oi lá. Este vídeo é tudo sobre o uso de gama de cores para selecionar a pele, nós vamos fazer pequenas máscaras legais como este. Podemos isolar a pele e fazer coisas como esta bonita, só para dar um pouco mais de plenitude à pele, e se você me perguntar, eu uso essa técnica para me dar um tom no meu perfil fotos de mídia social, eu vou negar. Contanto que você prometa não sair e verificar minhas fotos de mídia social, vou mostrar-lhe como usar a faixa de cores para selecionar a pele. Em seus arquivos de exercícios, abra Color Range 4 e 5. Estas imagens são de Unsplash, e esta é de Scott Waters e a próxima que faremos é de Dan 7 crianças. Obrigado, pessoal. Na faixa de cores 4, vamos selecionar,
vamos ter a Intervalo de cores e o que vamos
usar é a opção aqui que diz “Tons de pele”, então provavelmente estamos definindo as cores amostradas como padrão. Vamos ao “Skin Tons”. Se o seu não estiver, por padrão, mude-o para Tons de Cinza, sintonize para detectar rostos. Basicamente olha com dois olhos e depois ajusta um pouco. Eu acho que às vezes quem faz muito bom e às vezes não é, basta ligar e muitas vezes salvar sua seleção fica melhor ou pior, e está brincando com a fuzziness, obviamente muito alto, ele vai ter muito do fundo selecionado. Eu queria re-levantar realmente razoavelmente alto e está funcionando bem. Há muitas cores semelhantes aqui, então meu palpite é que cerca de 30-40 por cento das imagens estavam bem pelo menos colocar suas tendências que eu tenho, esta técnica vai funcionar tão bem quanto nós estamos fazendo aqui. No resto do tempo, há muita cor na imagem que é muito semelhante à digitalização nesta técnica não funciona. Eu quero dar exemplos honestos eu acho, este aqui foi muito bom, porque há uma bela definição clara entre o aqui eo fundo na maioria das partes, então com uma folha, há um bom o suficiente diferenciação. Não é perfeito de forma alguma, mas ainda há um pouco de trabalho a fazer. Vamos clicar em OK, temos nossa seleção. O que eu quero fazer é ajustar a pele, realmente depende do que você precisa fazer. Ela tem um tom de pele particularmente fino do que tudo explodido, não
há custo de cor. Então o que eu tenderia a fazer é com a seleção vamos para a vibração, eu só quero levantar isso um pouco. Ajustes, vou usar esta vibração igual. Adoro vibração. Deixe-me fazer isso direito para mostrar o que ele faz. Se você vê-lo adicionado como, Eu fui longe demais, mas é adicionado um monte de Full Nest 2. Eu não teria Gemlee tão alto, eu só estou fazendo pequenos ajustes. Ligado, fora um pouco difícil de ver. Quão longe é muito longe, tudo bem. O problema é que isso afeta muito do resto da imagem. Você pode decidir realmente este turno, tudo bem. Ninguém vai notar. Mas digamos que você quer isolá-lo só para o rosto. Agora o que podemos fazer é usar nossa ferramenta de pincel para pintá-la, e eu vou te mostrar um truque extra agradável. Se estiver a utilizar um Mac, olhe para baixo para o teclado e mantenha premida a tecla de opção. Se você estiver em um PC, mantenha pressionada a tecla Alt. O que você precisa fazer é clicar na sua máscara aqui. A coisa legal sobre isso, como você não destruiu nada ou mudou nada, bem fez preto e branco. É só mostrar uma grande versão da sua máscara, o que torna mais fácil pintar. Como minha ferramenta de pincel selecionado, eu vou escolher um tamanho de pincel apropriado, e dureza e eu obter o meu até cerca de 87. Certifique-se de preto é a minha cor de primeiro plano e apenas pintar usando o preto novamente, e apenas pintar os pedaços que eu não quero incluí-lo. Use a faixa de cores para começar e fazer muito trabalho duro, mas como tantas coisas no Photoshop, elas são tantas como todas as coisas que sabem que são executadas em seu exemplo perfeito. Neste caso, eu só vou dar a volta, há um belo sangramento preto em torno das bordas deles. Você pode não ter essa sorte. Mas como eu disse, funciona para o suficiente das coisas que eu trabalho para dar uma chance porque não demora muito, eu vou estar ensinando você como fazer isso, seguir em frente você vai ter isso um par de minutos. Para baixo preciso. Nós passeávamos coisa. Eu acho que estamos perto o suficiente para isso, estar bem, o ele, aqui é provavelmente a pior parte porque é uma cor tão próxima da pele. Mas agora acabamos de selecionar a pele. Usamos gama de cores e tons de pele para começar e depois pintamos o resto. Há muito disso no Photoshop, vamos ter uma seleção que está muito perto e então você amarrá-lo com a ferramenta de pincel, para trás para como era antes, a mesma tecla, então mantenha pressionada a opção em um Mac, alt em um PC e basta clicar na máscara novamente. Agora que a camada de vibração está apenas ajustando a pele, você vai ver aqui em cima que ela desapareceu, então eu posso clicar na palavra vibração e ele está de volta, você levanta saturação para dar, e eu tenho um bronzeado. Eu uso vibração, apenas realçar as cores se você quiser, achando que você tem, você pode usar a mesma seleção em, digamos, níveis de curvas dependendo do seu trabalho, o que você quer fazer com a pele. Quero mostrar-vos um último truque, mostrar-vos-ia alguns atalhos extras, mas seja como dou a alguém que esta rapariga tem, uma paleta de pele fina. Digamos que é a sua foto de perfil e você está parecendo bem lavado e ou não tem um bronzeado, digamos bronzeado. Então o que queremos um pouco de riqueza na pele. Este é o meu truque para bronzeados. O que eu quero fazer é que eu quero primeiro como o atalho, eu quero que a seleção de volta, que fizemos com selecionar intervalo de cores e, em seguida, apagando os fundos. Eu não tenho que fazer tudo isso novamente, o que eu posso fazer para obter a seleção é apenas manter
pressionada a tecla Command em um Mac ou a tecla Control em um PC e basta clicar na máscara e carregá-la como uma seleção. Atrás de uma pequena pista, e
eu vou fazer, eu vou fazer ajustes, eu vou dar uma tonalidade e saturação. Eu vou para as cores quanto mais jovem a saturação. Vou encontrar uma cor que eu quero que essa pessoa seja. Nós vamos estar no, nós não queremos que eles se livrem. Queremos amarelo-laranja. Ou saturação ou Pi só para que eu possa acertar minha tonalidade, porque nós não queremos que eles dessa cor. O que eu também quero fazer é brincar com meus modos de mesclagem ou meus modos de camada. Com tonalidade e saturação 1, coaching normal, e acho que isso sempre funcionou com luz suave. Ainda é muito alto, mas você pode ver que está se misturando e muito mais, e eu só vou diminuir a saturação até que seja algo como se ela já tivesse uma cor final, então eu não vou ter que fazer muito, Então o que eu estou fazendo é, eu queria mostrar a vocês aqui, mas eu vou ir muito baixo porque ela realmente não precisava com essa cor extra. Você conserta, vê o quão laranja você fez ela, você tem que decidir quão rica ela acha que eles precisam ser com o último assim também. Provavelmente vou diminuir um pouco a opacidade. Então, é tudo sobre ajustes sutis. Você pode ver que sobre e tan ambos estão ligados, ambos fora. Eu não fiz muito ajuste, porque os fotógrafos, Scott Walters aqui tinha uma imagem original muito agradável através de nós ir em seu próprio trabalho ou sua própria foto de perfil, você pode achar que você precisa ter algumas dessas configurações um um pouco mais alto como vibração e saturação apenas para dar a si mesmo um pouco de um bronzeado ou um pouco de saúde. Então, cor, independentemente de como você pensa meu bronzeado nesta garota, como você pode pensar em baixo, o que é importante é que técnicas. Então começamos com uma faixa de cores selecionada e usamos tons de pele, e como eu disse, a cor funciona muito bem em cerca de 30 a 40 por cento das imagens, contanto que haja um contraste claro com o fundo, e então você tem que sangrar o fundo com o grande pincel, disposto a cortar crucial mantendo pressionada a tecla Alt em um PC e a tecla Option no Mac. Só para conseguir que uma última vez lambeu. Torna muito mais fácil arrumar máscaras. Mesma tecla para baixo para clicar novamente para desligá-lo. O outro atalho realmente importante foi a tecla Command em um Mac ou Control em um PC e apenas clicando na máscara e você obtê-lo carregado como uma seleção. Vamos usar isso algumas vezes ao longo deste curso. Mas de-select, versão que fez você abrir a faixa de cores 5 é que vai haver muitos exemplos que simplesmente não funcionam e este vai ser um deles. Deixe-me mostrar-lhe por que está em um pouco, selecione Intervalo de cores, vamos escolher tons de pele para tomar rostos. Você pode ver que o grande problema aqui é muito semelhante ao tom pele
dela e é tudo o que está no fundo que é tudo muito semelhante. Eu posso brincar com isso por muito tempo, mas realmente não vai me dar um bom exemplo. Vamos entrar em algo chamado
carta de máscara de canal na qual faremos melhor para isso, mas eu queria mostrar alguns exemplos realistas em que não funciona. Amor gama de cores quando funciona, tudo bem, que é isso para tons de pele e gama de cores. Vamos entrar no próximo exemplo.
8. Como criar uma imagem com efeito splash de tinta em torno do texto — faixa de cores: Oi lá. Este vídeo vai levar tudo o que aprendemos com gama de
cores e colocá-lo em um exercício prático. Senti que precisávamos deste vídeo porque aprender a faixa de cores isoladamente é ótimo, mas muitas vezes você vai ter problemas quando você está tentando combiná-lo com um monte de outras coisas como digitar aqui. Então vamos fazer este exercício para fora quaisquer problemas que você vai encontrar no futuro. Além disso, nos permitirá praticar o que aprendemos até agora. Você está pronto para fazer uma tinta super smoothie? Bem, significa ser coisa de banana splash. Se estiver, vamos começar. Tudo bem. Então eu estou começando com o exemplo de mais cedo. Você poderia simplesmente pular e apenas parar na cor de fundo. Você pode decidir a coisa de salpicos de frutas. Você não tem que fazer. É um para fazer a tinta com um texto, até você. Mas o que quero fazer é abrir os salpicos de tinta. Então vá para “arquivo aberto”, você dobra uma cor seleções O2. Há uma chamada gama de cores seis e sete. Tudo bem. Então, seis e sete são apenas variantes do mesmo respingo de tinta. Vou selecioná-los. Nós vamos ter alguns problemas e eu vou mostrar como corrigi-los, então vamos mudar as cores e colocá-los interagindo com o tipo. Então, sempre que você tem espaços de tinta como
este, isso é do Adobe Stock e está em um fundo branco, o que é uma droga. Seria bom se já fosse barro cortado, mas não é. Vamos trabalhar com respingo de cor 6. Então vamos ter que usar algumas ferramentas para fazer isso funcionar. Vamos começar com selecione “Intervalo de cores”. Não podemos usar toneladas de pele quando você experimenta cores. Vamos clicar aqui, e o que podemos fazer é apertar o botão “mais”, arrastar um pouco dele. Coloque nisso também, aqui também, aqui. Eu tenho uma boa seleção lá. Se você acabou de se juntar a nós para este vídeo aqui, certifique-se de que sua visualização de seleção está em escala de cinza. Dá-lhe um bom contraste preto e branco. Vamos clicar em “Ok”. Vamos transformá-lo em um rato. Agora nosso maior problema é, você pode ver que há um pedaço branco lá, então ele perdeu isso. Então, quando eu me transformo em uma máscara e clique neste botão aqui, é feito pequenos buracos aqui. Você tem que decidir se vale a pena consertar isso ou não. Lembre-se de um pequeno truque. Mantemos pressionada a tecla “Alt” em um Mac ou “Tecla Option”. É “Tecla Opção” no Mac e “Tecla Alt” em um PC e clique na máscara, torna super claro. Vou pegar meu pincel também, que é a chave B. Estou usando meus super atalhos. Então eu estou usando y como minha cor de primeiro plano e eu estou apenas
arrumando os pedaços que eu claramente não buracos. São apenas coisas que a gama de cores deixou para trás. Quão hard-core eu vou fazer por isso? Eu não estou super preocupado. Eu não sei. Eu sei porque já pratiquei isso que ninguém vai notar nenhum desses pequenos pedaços. Mas acho que só estou mostrando a você segurando a barra de espaço para clicar e arrastar por aí. Você provavelmente já sabia disso. Sim, estamos chegando lá. Legal. Então, temos uma mesma tecla para baixo,
mantenha pressionada a opção no Mac, Alt em um PC, clique na máscara para voltar. Agora, vamos verificar isto para ver se temos uma boa máscara. Vamos mergulhar de volta
na técnica de mascaramento que usamos na introversão do curso Photoshop. Chama-se Photoshop Essentials. Mas eu quero retocar nele porque um monte de pessoas iria saltar para esta classe avançada e simplesmente não fazer essencial e perder alguma da super magia que aconteceu no curso essencial. Então o que eu vou fazer é com a minha máscara selecionada, eu vou clicar em “selecionar máscara final”. O que é realmente legal sobre isso é que você pode ver no topo aqui, está além do preto e você pode ter a opacidade direita para que você possa ver um bom contraste com o fundo. Pode-se dizer que é uma máscara perfeitamente boa. Dan preguiçoso diria, “Você está certo”, e não no cancelamento sair daqui e usá-lo. Mas digamos que é a capa ou algo assim e está acontecendo preto, o que seria difícil. Então você pode usar a gama de cores para chegar aqui. Usamos o pincel para preencher algumas partes. Vamos tentar suavizar isso, suave é um bom nesta opção. Então, onde está este suave um pouco mais alto, você pode ver exatamente como suavizar as bordas, torná-los um pouco confusos, mas tudo bem. Esta imagem também está um pouco fora de foco, e isso pode ser suficiente. Então, um atalho mais frio é a tecla P. Basta tocá-lo enquanto você está aqui e ele liga o original de volta, versão
original de foco suave, original. É um pouco lento. Então, basta digitar a tecla P ligada e desligada para voltar à maneira original que você está agora. Duas outras coisas que eu poderia fazer é mudar a borda um pouco, porque você pode ver que ainda há um pouco de fantasmas ao redor do lado de fora. Então mude a borda em um pouco na tecla P, tenha feito melhor, pior, clique em “Ok”. Se isso não conseguir, acho que as cores descontaminadas funcionam muito bem. Vou colocar a borda da mudança de volta a zero e tentar não descontaminar as cores. Você pode ver lá apenas corrige todas as bordas. É bem mágico. Agora você pode se lembrar do photoshop essencial, se eu usar cores descontaminadas, ele vai criar uma nova camada com esta máscara sobre ele porque ele faz algumas mudanças muito sérias da imagem. Então, vamos clicar em “Ok”. Você pode ver aqui que é este original em que eu estava trabalhando, e como eu uso cores descontaminadas, ele diz, bem, vamos apenas colocá-lo em sua própria camada. Porque o que você vai descobrir é que se eu clicar com o botão direito e desativar esta máscara, você pode ver que ele fez algumas coisas realmente loucas
para as bordas para torná-lo uma seleção muito nítida e clara. É incrível e podemos voltar ao original, mas é por isso que você acaba com uma segunda camada. Vou pegar nossa ferramenta de movimento, clicar em “segurar e arrastar” e ir ao meu smoothie de banana e mirtilo. Vou adicionar um texto antes de entrar em muita coloração para isso. Então, vou desligar tudo isso agora. O truque mais fixe é ver isto. Se eles estiverem sozinhos, você deseja desativar todos eles, exceto o plano de fundo. Basta clicar no primeiro. Segure, segure, segure o mouse, arraste-o para baixo até o mais de volta clicando, segurando e arrastando através deles. Só uma maneira rápida de ligar e desligar alguns deles. Então eu vou adicionar algum tipo. Então você pode pular isso, mas eu estou apenas adicionando tipo, a vara ao redor quando vamos e mudar as cores dessas tintas muda. Na verdade, o que vou fazer é fazer com que
o editor avance com esta parte. Muito excitante. Tudo bem. Estamos de volta. Coloque algumas fontes. Se você está procurando por essas fontes, eles são, este é museo sans condensado. Você pode baixar isso do Typekit grátis. Mas você realmente atrás deste aqui. Este aqui é chamado de script de máquina, na verdade re-machine script. Você pode vê-lo lá. Agora eu incluí esta versão desta fonte em seus arquivos de exercícios. Onde é que está? Está aqui em “fonte”. Agora o que você verá é que diz “Para uso pessoal”. Então, se você quiser usar isso comercialmente, contato com o proprietário deste script re-machine do Google. Você pode usar algo como “minhas fontes” para ir e pagar por ele se você quiser usá-lo comercialmente. Então esta é a versão gratuita para usar, mas você só pode usar isso pessoalmente. Eu amo isso, uma fonte tão legal. Agora eu parei aqui. Eu adicionei uma sombra, eu escolho a cor. Eu queria entrar aqui porque eu queria te mostrar apenas sob o truque. Ambos têm a mesma sombra. Aplicamos a sombra ao super, posso clicar com o botão direito do mouse em qualquer lugar nesta área cinza. Eu poderia dizer estilo de camada de cópia, clique em “smoothies”, clique com o botão direito do mouse nele e diga [inaudível]. É um truque simples, mas útil. Então agora eu quero ir e recolorir essa coisa. Está bem? Parece sangue. Não, ainda parece sangue, então eu quero fazer um tipo de banana colorida. Com a nossa camada selecionada aqui, vou para a minha camada de ajustes. Vou brincar com matiz e saturação. O problema de fazer isso aqui, se eu mudar a tonalidade, vai mudar o fundo também. O que podemos fazer é, você vê este pequeno ícone aqui, este pequeno, tem um nome muito longo, mas basicamente diz que só afeta a camada logo abaixo. Ok, então essa camada de matiz e saturação só está afetando minha cor agora. Você pode ver quando eu ajustá-lo e eu mudar essas cores de fundo em ok o verde eo azul parece muito mais agradável. Mas de qualquer maneira, matiz e saturação, eu vou escolher uma cor e o que você vai encontrar é como amarelo, algumas das cores, um direito perfeito, que é um trabalho muito bom. Vamos dar uma olhada no amarelo, e onde está o amarelo? Não encontro amarelo, onde você está? Aí você não é muito verde. Veja o problema com isso é que o amarelo acaba sendo acastanhado, ou neste caso um pouco verde. O que você pode dizer, é que você pode dizer
colorir, aumentar a saturação, e depois encontrar uma cor. Você pode chegar perto dele, mas por causa dessas cores escuras não vai funcionar. O que vamos fazer é voltar aos ajustes e brincar com os níveis. Me pergunto se afetará a camada embaixo de novo, então só o respingo de cor. O que provavelmente vamos ter que fazer é
brincar com estes cinzentos aqui no meio. Não há tanto desse amarelo escuro e
lamacento dependendo da cor que você precisa ser. Você pode ter que se ajustar ao redor com as
escuras e as luzes ok para chegar do jeito que você quer que seja. Mas estou feliz o suficiente com isso. Agora eu vou selecionar nesta camada aqui e eu quero reduzi-lo para baixo. Antes de encolher, quero convertê-lo em um objeto inteligente que ele não fique protegido direito. Ele se embrulha e eu não perco a resolução. Vou clicar com o botão direito do mouse e dizer para ser tão inteligente. Vou usar o meu comando T para transformar, vamos levá-lo a um tamanho apropriado. Agora é só mexer um pouco como o que eu, não quero fazer isso,
desfazer o comando T. Estou encolhendo, segurando Shift,
segurando Alt ou Option se você estiver em um Mac, faz tudo a partir da sintaxe, mas vamos dizer que eu queria algo assim. Eu queria interagir com o fundo, especialmente com o tipo que provavelmente é mais fácil de agarrar, esta é a minha super camada, certo. Eu só quero cutucar na frente do olho em vez de mexer com seleções, mascarar e coisas assim. Eu só vou cortar o R fora, mover isso para trás. Você vê o que eu vou fazer aqui, certo? Eu vou duplicar esta camada, ok, duplicar uma camada pode clicar com o botão direito do mouse nela e duplicá-la. Um truque extra pequeno é manter pressionada a tecla Option em um Mac ou Alt em um PC e apenas selecioná-la e movê-la. Faz uma duplicata enquanto você está movendo-a. Ok, e eu vou pegar minha ferramenta de texto, selecioná-la em tudo,
talvez alinhar à esquerda, R maiúsculo, volta para a minha ferramenta de movimento. Vai arrastá-lo atrás da minha tinta. Nós não vamos ficar muito chiques com mascarar isso quando é tão fácil apenas separar que leva para sua própria camada para obter essa interação. Agora, para tentar amarrar todas essas técnicas diferentes, usamos toda a gama de cores. Podemos abrir um arquivo em que trabalhamos mais cedo. É este aqui onde nós brincamos com a pele lembrando. Certo, então o que eu vou fazer é selecionar tudo isso. Vou clicar com o botão direito do mouse em qualquer um deles e convertê-lo em um objeto inteligente só para que haja um tipo de s-mushed juntos. Eu poderia mergulhar nele, lembre-se, clicando duas vezes para entrar. Mas realmente só para que seja apenas uma unidade. Vou arrastá-lo para o nosso pequeno exercício aqui, lá está ele. Porque este é um objeto inteligente, Eu posso encolhê-lo para baixo sem destruir a perder a seleção. vez, eu quero me apoiar em uma das técnicas de mascaramento que aprendemos no curso básico anterior para as pessoas que fizeram isso, isso é apenas prática. Prometo que não serão muito disso ao longo do curso. Mas para as pessoas que estão avançando é um truque provavelmente, você pode não saber. Primeiro, com a mudança para eu vou segurar o Comando Shift e seu colchete para trazê-lo para o topo das minhas camadas. Se você estiver em um PC, é Control Shift e, portanto, colchetes estão ao lado da sua tecla P. Segure os dois e o esquerdo mande-o para trás, o direito envia para o topo. É o que eu uso muitas vezes para dizer sempre o topo por favor. Vou pegar minha ferramenta de elipse e desenhar uma elipse em torno dela. O que eu acho é que as pessoas tendem a usar a ferramenta de marcação elíptica para fazer seleções arredondadas, mas não é o que eu quero, não é melhor. Há um caminho melhor e este é o caminho. Eu tenho minha imagem no topo, eu tenho minha elipse logo abaixo e se eu manter pressionada a tecla Option. Com esta camada superior selecionada, o longo caminho que aprendemos
no curso essencial foi que fomos para a camada e fomos para esta máscara de corte criar. Vai mostrar aqui que funciona totalmente. Está bem, mas vou mostrar-te o caminho profissional. Tudo o que você faz é manter pressionada a tecla Alt em um PC, a tecla
Option em um Mac e passar o mouse entre essas camadas, você está procurando por esse ícone. Não que, não isso, isso basta clicar nele e ele faz exatamente
a mesma coisa que ir para camada, criar máscara de camada. É só uma maneira rápida de fazer isso. A coisa legal sobre fazer isso como uma máscara é que estes são totalmente separados Eu posso mover minha elipse ao redor ou eu posso mover minha imagem ao redor. Eu posso selecionar ambos clicando no topo e segurando Shift e o segundo, eu apenas transformo ambos. Vou pegar algo assim, talvez um pouco mais baixo aqui embaixo. Vou ligar minha banana, mandá-los para o topo usando meus atalhos, reduzi-los. Agora, antes de reduzi-los, vou convertê-los em um objeto inteligente, você pode sair agora. Agora eu estou apenas tentando transformá-lo em algo meio decente em termos de um design que vai ser difícil. Isso é mirtilos onde estão os mirtilos? Aí está você, você precisa chegar ao topo também, pode realmente duplicar isso. Lembre-se do nosso truque de manter pressionada a tecla Option em um Mac ou a tecla Alt em um PC para obter dois deles, transformá-los, girá-los para que eu tenha alguns extras. Eu poderia colocá-los no caminho, os smoothies, gênio criativo. Eu vou duplicar aquele super trazê-lo para o topo. Este vai ter sabor de banana. Banana, vou usar texto branco, obrigado. Torná-lo menor, Comando T. Eu muitas vezes não uso tamanhos de fonte, ok, eu vou usar apenas dimensioná-lo para obter o tamanho de fonte certo. Depende realmente, se estamos trabalhando com digital ou tipo de impressão, teremos que ser um pouco mais específicos com tamanhos de fonte, provavelmente. Este é mais de um splash social media gráfico legal. A última coisa é cabeça, é muito para baixo, ok, com todos os gráficos extras. Vou selecionar este botão um, segure Shift e clique neste top e você pega o lote inteiro. Porque todos estão na máscara de camada e todos estão em suas próprias camadas, eu acho que s-mushed para chegar lá porque somos profissionais. Eu posso levantá-lo, quão impressionado com isso, eu estou? Parece legal, vamos apenas dizer que eu fiz um exemplo de prática disso e parecia melhor do que aquele, então eu estou feliz. Acho que gosto da cor do rosa, que meu amigo é uma escolha pessoal. Vamos terminar isto aqui antes que eu faça waffle para sempre. O objetivo deste vídeo realmente era mostrar como você acaba usando tipos de combinações de truques. O intervalo de cores é incrível, mas apenas quando você começa a usá-lo com outras coisas, outras técnicas, outras dicas, outros atalhos. É aí que você vai de um usuário iniciante para um usuário avançado. Tudo bem, então somos nós. Vamos deixá-lo lá. Vamos entrar no próximo vídeo onde vamos configurar um projeto para você fazer. Te vejo lá.
9. Projeto do curso — faixa de cores: É hora do projeto de classe. Não pense nisso como lição de casa chata, pense nisso como maneiras excitantes de testar suas habilidades porque, eu prometo, seguir comigo passo a passo é bom. Eu ensinei por um longo tempo e as pessoas que levam um pouco de tempo extra para colocá-lo em prática com seus próprios projetos são as pessoas que são lembradas por muito mais tempo. Se você quiser ir mais longe do que isso, a melhor maneira de lembrar por muito tempo é ensinar alguém, talvez
a um amigo, ou um membro da família, ou volta ao trabalho, você pode mostrar a alguém. Mas de qualquer maneira, o projeto da classe é este. Se você vai para seus arquivos de exercícios, há um documento do Word que eles chamam de projetos de classe, abra isso, e aqui está o projeto em que estamos trabalhando agora. Chama-se Color Range. Basicamente, estamos apenas tomando este exemplo e fazendo uma versão laranja, então em vez de banana, haverá uma laranja. O primeiro requisito é usar essas imagens. Eles estão em seus Arquivos de Exercício em Seleções O2. Há o Projeto Classe 1, e aqui, os arquivos que você vai usar. Você usa todos estes quatro. Comece com este fundo, ou escolha outro fundo, não me importo. Quero que faça uma seleção como fizemos com o exercício de banana com essa laranja. Há dois tipos de salpicos de tinta aqui que eu gostaria você mascarasse usando as técnicas que fizemos no último vídeo, mas eu quero que você faça laranja, então faça com sabor laranja. Use suas próprias fontes. Eu gostaria que você me mostrasse um exemplo com os carrapatos que entram e saem que você vê aqui, com o respingo que vai atrás desta carta, mas na frente disso. Esse é um dos requisitos, também. Você não tem que usar esta imagem, você poderia, mas quando você terminou, você pode postá-la como um projeto neste site aqui ou no topo aqui. Estes são os lugares de mídia social que você pode enviá-los para mim, então Instagram, Twitter ou Facebook grupo. Os links estão todos aqui neste projeto de classe. Adoraria ver o que você faz. Então faça o dever de casa, mande-o para mim. Avise-me se quiser alguma crítica, vou certificar-me de que é amigável. Vá embora agora e faça seu próprio pôster de smoothie laranja.
10. Máscara em grupo ao invés de cada camada: Oi lá. Neste vídeo vamos ver como adicionar uma máscara a um grupo. Basicamente nós acabamos de adicionar a este grupo aqui para que as coisas que estão dentro, você pode ver, ok são todos apenas mascarados por esta máscara de banana que nós fizemos. Nós não temos que aplicar a todas as camadas diferentes. Se você já fez isso antes, haverá alguns truques extras,
como um pequeno truque de intervalo de cores, um atalho para modos de mesclagem. Além disso, adicionaremos algumas Sombras para que pareça mais realista. Muito valor neste, vamos começar com apenas a máscara simples e passar o nosso caminho através. Tudo bem, para começar, vamos abrir nossos arquivos e está na pasta 02 Seleções e Mascaramento. Vamos abrir a Máscara de Grupo 1, 2, 3 e 4. Vamos abrir tudo isso. Agora, através deste vídeo, você provavelmente está ouvindo construção porque eu estive esperando o dia todo para que eu possa gravar. Lá estão eles lá. Eles não vão terminar
tão cedo, então vamos ter um pouco de bater e bater no fundo. Então vamos começar com o Group Mask 1.psd, lembre-se dele, a banana. Usamos o intervalo de cores para selecioná-los e, como vimos no início, vamos combiná-los dentro dessa forma. legal que vamos aprender é que se você estiver em um Mac mantenha pressionada a tecla Command, ok, se você estiver em um PC, basta manter pressionada a tecla Control. Se você clicar em “Máscara”, ele carrega essa máscara de volta em uma seleção. Você pode ver as formigas pequenas correndo ao redor que é legal, e outra pequena dica legal que você pode não saber é que você pode ir para Selecionar e você pode salvar seleções. Às vezes você passa um dia inteiro pegando meio de uma seleção e você tem que ir, você pode realmente salvar essa coisa. Então vou chamá-lo de Banana. Vou clicar em “Ok”. Porque o que eu quero fazer é selecionar, desmarcar e desligar essa máscara. Então, vou clicar com o botão direito do mouse onde a “Máscara de camada” está e dizer, vamos excluir essa máscara de camada. O trabalho duro se foi. Não se preocupe, porque nós o salvamos nessa seleção. Então, o que eu quero fazer? Vamos começar rapidamente para que você entenda o conceito. Então eu vou para o Grupo Máscara 2 e meu Comando C, Comando V não funciona com isso, cara, é sempre a ruína da nossa vida. O trancado. Então, basta clicar duas vezes na palavra “Plano de fundo” e clicar em “Ok”. Agora você pode usar o Comando C, Comando V e temos morangos grandes. Eu vou encolher eles e nós vamos apenas colocá-los, onde eu vou colocá-los, sobre lá para começar. Vamos pegar a Máscara de Grupo 3, fazer a mesma coisa, desbloquear o plano de fundo ou você pode fazer o seu arrastar para a opção de guia. Estou usando o Comando C, Comando V, reduzi-lo para um tamanho apropriado. Só estou fazendo metades e metades agora. Ainda não vai parecer perfeito. Acho que quero passar o conceito primeiro e depois vamos acabar com ele. Então eu tenho esses dois aqui agora o que fizemos no passado e o que você poderia ter feito como eu, é que você vai adicionar uma máscara de camada a cada uma dessas imagens. Então vamos para Selecionar,
Carregar seleção, ir para Canal, ir para Banana. Aí está minha seleção de volta. Então, sua seleção é, você tem essa camada selecionada e você vai máscara camada e então você fez a mesma coisa. Eu vou usar esse atalho legal onde eu comando clique ou controle clique na máscara. Eu vou nessa camada, vou máscara de camada e funciona certo? Mas você acaba com um monte desses e, às vezes, se você tentar fazer uma colagem, você vai acabar com um zilhão de máscaras diferentes. Isso não é o profissional afastado. Então, vamos dar um passo para trás até que tudo isso desapareça. O que vamos fazer é eu vou fazer um grupo de camadas aqui. Vou chamar isso de Máscara de Banana. Vou mostrar por que dizer banana dessa maneira, e vamos enfiar esses dois caras nela. Então, selecione ambos e arraste-os e clique neles no topo das “Pastas”. Então você sabe, eles estão lá dentro. Você sabe, eles estão no caminho que você liga e
desliga o globo ocular da pasta e agora o legal
é, com esta camada selecionada, é, com esta camada selecionada, eu posso ir para o meu Select, Load Selection, Banana, clique em “Ok”, e se eu aplicar o Máscara de camada para aquele grupo, ok, eles estão todos lá dentro. Todos felizes lá dentro. Então é só uma maneira fácil agora eu posso pegar os mirtilos, arrastá-los para dentro Voltei aos meus velhos modos de seleção QC. Porque só dentro deste grupo, eles virão para a direita. Agora você pode pular em frente. Agora vamos fazer um pouco. Vou mostrar-lhe alguns truques extras. Mas se você veio para o mascaramento em um grupo, você está satisfeito, você pode seguir em frente. Haverá algumas dicas rápidas chegando, então vou deletar esses dois caras. Os morangos vão preencher a parte de fundo em algum lugar, algo assim. Vou para o meu Grupo 3. Agora, como eu escolheria esses caras? intervalo de cores não funcionará porque há um pequeno remendo branco no meio. O que devemos chamar a isso? Coisas, mas é a cor errada. Então o que vamos fazer é usar a Ferramenta de Seleção Rápida e eu vou fazer uma Seleção Inversa. Então, usamos a Ferramenta de Seleção Rápida. Faço o meu Pincel um pouco maior e a Ferramenta de Seleção Rápida será perfeita para isso. Espero que já tenha praticado. Isso é bastante incrível. Vou torná-la uma Máscara de Camada, vou voltar para a minha Ferramenta de Mover. Vou usar o Comando C em um Mac ou Controle C no PC. Volte para este original aqui e eu vou colá-lo. Provavelmente vai redimensioná-lo um pouco,
mas antes de fazer, clique com o botão direito do mouse, “Camada 2" para ter certeza de que é um objeto inteligente, então, quando eu encolhê-lo, eu não perco aquela bela resolução que está lá. Vire meu teclado. Vamos agora fazer os mirtilos. Ok, nós já brincamos com este antes. Vou te mostrar outro truque de Color Range. No último vídeo, eu estava relutante em torná-lo como um quinto vídeo em Color Range, então eu pensei em jogá-lo aqui. Vamos para Select, Color Range e o que você pode fazer é assistir isso se eu clicar sobre os mirtilos reais e eu clicar em mais e eu adicionar mais alguns para eles e eu tentar e jogar foram Fuzziness, que funciona em um grau e eu realmente funciona ótimo quando estamos fazendo nossas cores localizadas, porque nós só queríamos esses dois. Quando você quer todo o lote, muitas vezes você está indo para este primeiro conta-gotas Olho, clique no “Fundo”. Então esta seleção, nós vamos estar selecionando o plano de fundo, mas então apenas invertendo. Então eu vou adicionar um pouco mais sobre isso, um pouco de você lá, e vai funcionar para mim, perfeito. Vamos clicar em “Ok”. Se eu mascarar agora, é o caminho errado, então eu vou desfazer e basta ir para Selecionar “Inverso”. Agora vou adicionar minha máscara de camada. Há alguns buracos nas partes brancas, mas aprenderemos outro truque em um minuto. Vá para a Máscara de Canal, que realmente consertará este. Mas por enquanto estamos usando as Ferramentas que temos e é a que vale a pena mencionar. Vamos copiá-lo, voltar para a lebre inicial, colá-lo e encolhê-lo um pouco. Aqui vamos nós, bondade de mirtilo. Você pode ver aqui alguns dos centros estão mostrando através da laranja. Então eu poderia pegar a Máscara, pegar minha Ferramenta de Pincel, encolhê-la e pintá-la de branco. Só para preencher esses caras, pequenas gotas
agradáveis e fáceis. Tudo bem, então esse deve ser o fim desta vez. O que eu quero fazer é que eu realmente quero adicionar
algumas sombras a ele e quando eu estava praticando, eu acho que
eu quero mostrar a você o problema que eu me deparei. Você pode pular em frente agora não há nada a ver com mascarar esquerda. Eu só quero mostrar como adicionar algumas sombras nele, um pequeno capítulo bônus. Então o que eu normalmente faço, e nós fizemos isso um pouco nos cursos Essentials. Eu apenas agarro essa camada, eu duplicá-la arrastando-a para o ícone Nova Camada aqui, arraste-a para o topo, venha e clique duas vezes aqui. Vou chamar-lhe sombra, nomeei pelo menos duas das minhas seis camadas. Eu dessaturado indo Command Shift U em um Mac ou Control Shift U em um PC, ou aqui está o caminho mais longo, em Imagem, Ajustes, Desaturado. Só fica a carona da cor. Caso contrário, parece estranho quando você começa a usar modos de mesclagem, ele cores tudo. Então, se eu dessaturar primeiro, normalmente o que eu posso fazer é apenas ir multiplicar e muitas vezes isso funciona, lança as sombras no fundo. Mas como o fotógrafo desta banana passou um longo tempo iluminando e fazendo com que ela pareça ótima sem sombras fortes reais, estou sentindo falta delas pelo que eu preciso dela. Então eu vou ter que acentuar o que eu realmente quero é esta linha através do meio. Eu sinto que isso dá a banana, é características de banana mais estes pequenos em pedaços. Mas também quero um pouco de sombreamento do lado de fora para dar um pouco de volume. Vou te mostrar os truques que eu costumava fazer isso. Então eu dessaturei a camada. O que vou fazer é usar a Ferramenta de Queimadura. A ferramenta Burn torna as coisas mais escuras. Você vai ter que brincar com o alcance no topo aqui. Vou brincar com Shadows, Exposições a 100 por cento. Você tem que brincar com essas configurações dependendo do que você está trabalhando, mas eu vou escovar o tamanho aqui. Estou trabalhando com sombras vai acentuar essas sombras. Eu quero realmente trazer isso para fora. Farei o mesmo com isso, quero que seja bom e forte. Isso já deve estar bem devido a ele porque há uma linha forte aqui. Eu quero fazer o mesmo para as bordas. Então o que eu vou fazer é só fazer o pincel maior. Talvez você diminua a opacidade um pouco ou a exposição e neste caso, as curvas médias é o que eu queria fazer e você pode ver o que estou fazendo. Eu só estou tentando dar algum volume ao redor do lado de fora, apenas clicando e arrastando lentamente, talvez um botão um pouco menor. Só para dar um pouco de profundidade, um pouco de giro, muito tempo. Tudo bem, agora temos algumas cores fortes. Quero me livrar dos tons médios. Só quero que restem estas partes pretas. Assim, a maneira mais fácil de se livrar de tons médios é usar Níveis com esta camada selecionada. Realmente não importa se você usar ajustes ou o outro, eu vou usar camadas de ajuste porque estamos sendo super profissionais, eu vou ter certeza que os níveis só afetam a camada abaixo. Então o nível só afeta a sombra clicando
nesse botão e eu só vou trabalhar com isso não para torná-lo melhor, mas para tentar se livrar desse tom médio cinza, você pode ver que há um controle deslizante branco aqui, jogando com o controle deslizante cinza, escureça isso. Então é isso que estou tentando fazer aqui. Só adicionando sombras. Agora vou clicar na minha "Camada de Sombra” e, em seguida, apenas trabalhar com as marcas de camada e descobrir qual deles vai funcionar. Vamos para Multiplicar. Você pode vê-lo lá. Múltipla camada é muito bom. Eu vou trabalhar o meu caminho através e se você é como eu e você odeia fazer isso,
bem, olha embora, você não está passando por todos eles e indo homem, isso é leva uma eternidade. Você acabou de terminar. Então o atalho para andar de bicicleta por estes, ok, é um atalho porreiro. entanto, você tem que estar na sua ferramenta Mover. Algum motivo que só funciona quando você está na sua ferramenta Mover e você mantém pressionada a tecla Shift no teclado e toca em mais, mais novamente, mais novamente, mais novamente a caixa pressionando o deslocamento acontecendo além de que Mac e PC apenas circula por eles. Ferramenta útil super útil. Agora eu estou realmente olhando tão Multiplica bom, queimadura
linear está bem. Deveria ter checado isso antes de assistir. Vamos ligar e desligar, você
pode ver o que quero dizer, eu quero adicionar um pouco de realismo lá dentro. Tudo bem, uma última coisa antes de eu ir, eu acabei de notar que isso está derramando aqui. Então eu vou clicar na minha máscara de camada e, como eles estão todos no mesmo grupo, amarrá-lo de volta bem. Muito bem feito, vamos para Layer Mask. Certifique-se de que o preto é a minha cor de primeiro plano. Eu vou fazer o tamanho sem escova agradável, grande e fofo. Eu só vou aliviar isso em um pequeno reflexo. Tudo bem, então obrigado por ficar por perto para a seção bônus Sombra, relacionar uma coisa realmente simples no início eles tinham apenas colocar uma máscara em um grupo de camadas real e, em seguida, jogar tudo dentro dele. Tudo bem, é isso. Vamos entrar no próximo vídeo tutorial.
11. Mascaramento avançado usando canais no Adobe Photoshop: Olá, é hora de outra ferramenta de seleção em seu arsenal. É a poderosa máscara do canal. Já está por aí há algum tempo e é perfeito para quando você precisa selecionar, digamos, relva
fora de foco como esta, lá vamos nós. Facilmente feito. Mas digamos que você já sabe como fazer uma máscara de canal. Não se preocupe, há algumas coisas aqui para você também. Imagine se houvesse um pincel, poderíamos pintar e remover todos os fantasmas. É verdade meus amigos, este pincel existe e eu vou mostrar-lhe neste próximo tutorial. Vamos entrar lá, vamos torná-lo ainda melhor. Você vai adorar o pincel. Primeiro, vamos abrir nossos arquivos, eles estão em nossas seleções de O2 e mascaramento. São todos esses caras, é a máscara do canal 1 até o O5. Uma dica rápida antes de começarmos, se você pressionar “Control” e pressionar “Tab”, no seu teclado, você pode percorrer as abas abertas ao longo do topo aqui. Isso funciona em ambos os formatos, Mac ou PC. Mas o que realmente viemos aqui são máscaras de canal. Pouco rapidamente antes de começarmos, até que o Photoshop liberou o, selecione assunto e, em seguida, selecione máscara e função, tudo o que eu fiz para mascaramento avançado foi máscara de canal. A coisa que vamos fazer agora. Como essas duas opções que aprendemos anteriormente, são tão boas, eu não uso mais a máscara de canal metade do tempo. Basicamente, eu os uso pelo mesmo princípio. Quero dizer, “foco da seta”. O que normalmente estaria aqui, deu estes dois aqui em combinação são muito melhores agora. Na minha opinião. A razão pela qual eu ainda uso máscara de canal e a razão pela qual eu ainda incluí-lo neste curso avançado, é porque , clique
livre, “select, subject”, ele tenta encontrar o rosto de uma pessoa e não há nenhum rosto para ser encontrado. Não foi possível encontrar o clique no assunto, “Ok”. Há momentos em que eu quero selecionar toda essa grama, mas é super difícil. “ Click Selection Tool” não vai fazer isso, Magic Wards não tem esperança. Eu posso fazer bem com um intervalo de cores, mas, há algumas vantagens que máscara de canal e você precisa dele em seu arsenal para ser um usuário avançado do Photoshop. Você não quer aparecer na festa avançada do Photoshop e não saber o que é uma máscara de canal. Mesmo que esteja ficando inútil. É um daqueles distintivos de honra, como um talento [inaudível] era quando você era novo. Como é que isto funciona? Eu vou fazer isso super rápido, metade para impressionar você, metade para mostrar como é rápido uma vez que você entrar no fluxo, então eu vou apoiá-lo e ir um pouco mais passo a passo. Basicamente, vamos ao painel de canais, escolhemos um destes três, o que tem mais contraste. O Blue faz, então eu vou, “Clique com o botão direito do mouse, duplique-o ,
clique em “Ok”, desative isso, depois use os níveis”. Só estou tentando acentuar o contraste entre o fundo e o primeiro plano. Estou levantando isso, tentando encontrar esse terreno médio aqui. Assim que eu clicar em “Ok”, eu posso apagar essas coisas aqui em baixo. Estou usando minha ferramenta de pincel, “definido para o normal” Eu estou usando preto, tornando-o agradável e grande. Só vou pintar tudo. Torná-lo um pouco menor pegar algumas dessas coisas e então, tem
sido um pouco mais de tempo. Eu não sou. Vire para uma seleção, volte para o meu “painel Camadas” e adicione uma “Máscara de camada”. Primeiro de tudo, reverta-o, inverta a seleção e adicione uma máscara de camadas. Você pode ver que isso vai te assustar totalmente. Mais rápido quando estiver lá. Mas acho que só quero mostrar o fluxo que estou passando quando estou fazendo seleções para algo assim e como pode ser fácil. Porque quando eu ensino como ao vivo muitas vezes as pessoas surtam porque há alguns passos. Não se preocupe, você provavelmente não vai se lembrar deles. Preciso me lembrar deles porque sou um treinador e tenho que ensiná-lo o tempo todo. Quando eu não estava, quando eu estava sendo autônomo, eu dizia, “Ok, máscara de
canal eles são bons para voltar a este vídeo e apenas passar por ele toda vez que você precisa fazer isso”. É assim que as coisas são. Há alguns passos envolvidos, mas os resultados são muito legais. Deixe-me pegar isso. Adicione-o ao fundo aqui. Você pode ver máscara bastante convincente, com muito pouco esforço colocado em obter um perfeito. Vamos voltar para cima. Vou te mostrar um truque legal é: “Arquivo, Reverter”. Porque só temos tantos desfeitos, certo? Se você for para “Reverter Arquivo”, ele retornará à data em que o documento foi salvo pela última vez. Neste caso, é muito antes de eu ter feito toda a loucura do meu canal. Vamos olhar para isso passo a passo e explicar um pouco. São os canais que fazem o trabalho pesado aqui. Basicamente canal é apenas este documento é, RGB, você pode vê-lo aqui na aba. Isso só significa que o computador faz todas
essas lindas cores de uma mistura de vermelho, verde e azul. Agora nós realmente não estamos preocupados com canais no momento, nós vamos apenas usá-los e abusar deles para obter uma seleção. O que você está fazendo é que você está olhando através de todos
estes três para o que tem mais contraste, neste caso, o azul tem um contraste muito claro com o fundo. Nem sempre é o caso, às vezes é vermelho, às vezes é verde. Alterne através de todos eles. Depois de encontrar um, você tem que,
“duplicar, clicar com o botão direito do mouse, duplicar canal”. Vou chamar minha máscara sem motivo. Vou ligá-lo e desligar esse. Não quero destruir o vermelho, verde e azul. Vou trabalhar nisso, minha mascarinha especial. Vamos deletar em um segundo. Com ele selecionado, vamos para níveis. Ajuste de imagem, níveis. Não vamos usar os níveis de ajuste chiques. Vamos usar, “Old school destrói os níveis de camada”, estes aqui. O que estamos olhando para fazer é que você pode ver que o céu aqui é bastante cinza, ainda está em cima, aumentar os brancos. Basicamente, você pode ajustar esses caras de qualquer maneira, você gosta de tudo que você precisa fazer é ter um branco muito forte contra preto. É tudo o que estou a fazer. Arraste-os para a esquerda e direita para ver. Se eu for longe demais, começa
a sangrar. Já fiz isso tantas vezes que tenho um bom pressentimento. O que você pode ter que fazer é chegar a este ponto e dizer, “Tudo bem, eu vou tentar isso”. Então volte se não estiver certo. Vou levantar os negros um pouco também. Devo salientar que estou a olhar para a idade entre isto e isto. Eu não estou preocupado com aqui porque você viu mais cedo é preto que final com um grande pincel. É esta idade, este contraste entre o fundo e o primeiro plano aqui que eu quero,
eu acho que ficar o mais afiado que eu puder. Ele se sente bem. Clique em “Ok”. Agora o que eu quero fazer é consertar essas coisas de baixo aqui. Porque eu vou usar meu pincel, já lá, colocá-lo para preto. Que dureza? Algures lá dentro, talvez. Vou pintar isto de preto. Eu vou fazer isso para baixo o fundo aqui bastante áspero e, em seguida, como eu chegar mais perto, eu vou abaixar o meu pincel e ficar um pouco mais agradável sobre toda a experiência. Porque eu sei que isso não é um buraco olhando através. Eu sei que é o céu. Eu sei que é apenas luz que está refletindo na grama. Vou entrar aqui e consertar isso um pouco. de fazermos este exercício, vamos Depoisde fazermos este exercício, vamosmostrar-te alguns truques extras para arrumares isto um pouco melhor. Você viu o resultado final aqui eu coloquei em menos esforço, e ele veio ainda com um resultado realmente bom. Máscaras de canal são incríveis. Eu tenho o básico lá dentro. Agora o que eu quero fazer é carregá-lo como uma seleção. Está bem. Você pode clicar neste pequeno ícone na parte inferior aqui, e ele carrega o preto versus branco como uma seleção. Agora, esse cara aqui, seu trabalho está feito. Eu clico em "[inaudível]" para ativar todos esses itens. Apenas certifique-se que o globo ocular está desligado em My Mask, ou você pode enterrá-lo, nós simplesmente não precisamos mais disso. As pessoas ficam um pouco apanhadas pelo canal fazendo parte dele. Realmente, nós só o usamos para sair que a pequena fusão termina aqui. Voltar para Camadas. No momento, temos o céu selecionado. Depende muito da sua imagem. Às vezes você vai ter do jeito certo, às vezes você não. Se eu clicar em “Máscara de camada” aqui, é o oposto. Eu vou para Selecionar, Inverso, e agora eu adiciono minha máscara de camada e eu pré-começo. Você pode ver que foi muito ruim lá em cima, mas ainda é uma máscara muito boa. Vou pegar minha ferramenta Move, depois vamos “Comando C” “Comando V” no meu Mac. Na verdade, provavelmente vou fazer o contrário e arrastá-lo até aqui. Aqui está o meu atalho, colchete do
Comando Shift, mande-o para trás. Controle o suporte quadrado Shift em um PC. Você pode ver uma máscara muito convincente. Vejamos algumas outras coisas que você pode fazer com máscaras de canal para tirar o máximo proveito delas. Vamos ao Channel Mask 03. Eu vou mentir. Não vamos fazer o Channel Mask 03 juntos porque é muito parecido com este primeiro aqui. Vou definir isso como seu dever de casa no próximo vídeo. Você pode fazer isso agora e pausar se quiser. O que eu quero fazer é ir para o Channel Mask 04 e 05. Estes são os que eu vou combinar. Viste-os no início. Nós tivemos os mesmos problemas; nós não podemos usar Select, Subject, mas nós provavelmente vamos usar um pouco de Select e Mask, apenas para empurrar isso um pouco mais longe. Mesma coisa de antes, canais. Eu uso esses atalhos aqui. Se você estiver em um PC, é Controle 3, 4 ou 5, verifique o atalho que está lá. Segurando minha tecla Command, eu vou 3, 4, 5. Eu não estou olhando. Eu só estou alternando através de todos eles apenas vendo. Não se preocupe aqui embaixo. Você está olhando para a transição entre o céu e o fundo. Eles são todos realmente semelhantes, na verdade, porque o fundo é praticamente branco. Sinto que é a minha vez. Você pode argumentar os três. Vou duplicá-lo. Duplicado. Não exclua, duplique. Posso dar-lhe um nome? Eu não vou dar um nome a ele porque nós vamos colocá-lo em um segundo, então ninguém vai saber que nós não nomeamos nossas camadas. Cópia azul selecionada, todos os outros desligados. Caso contrário, você começa essas cores estranhas acontecendo. Certifique-se de que está selecionado. Lembre-se que vamos para nossos Níveis, e estamos apenas olhando para aumentar esse contraste. Vou ampliar um pouco. Se formos para longe, ele sangra sobre a borda e parece um pouco não muito bom. Vou aumentar o branco um pouco para obter o céu branco puro. Sinto que essa é muito boa. Parece que é muito forte preto contra branco. Clique em “OK”. Eu diminuo o zoom. Eu vou borrar na parte inferior aqui usando minha ferramenta de pincel: bom pincel grande. Vou adicionar um pouco mais, este, prometo. Temos que ir para a seleção. Vamos carregá-lo como uma seleção. Mais uma vez, eu clico em “RGB”. Você pode deixar isso aí, não
há nada de errado em deixá-lo lá. Chegou aos Canais. Inverter a seleção. Estou usando o atalho Comando Shift I em um Mac. Isso é Control Shift I em um PC. Eu apliquei a máscara de camada. Agora vamos editar o nosso plano de fundo. Na verdade, vou trazer esse cara para o outro. Eu mudo-me para ti. Venha aqui, amigo. Quer saber um atalho de bruxa legal? Você não tem escolha. Eu vou te mostrar de qualquer maneira. Quando você está arrastando de uma imagem para outra, ela acaba em lugares estranhos. Certo? Se você fizer exatamente a mesma técnica, então eu mover ferramenta arrastar, arrastar, arrastar, arrastar, segurar, segurar, segurar. Mantenha pressionada a tecla Shift. Nós deixamos ir. Ele não coloca Willy Nilly, ele coloca exatamente no topo esquerdo. Realmente handi. Está bem. Modelamente prático. Nós movemos isso para baixo. Você pode ver que ele fez um bom trabalho, mas eu fui para um fundo tão extremo, ele passou da luz para o escuro, você pode ver o tipo de fantasma em torno das bordas. Vou te mostrar duas maneiras de consertar esse tipo de coisa quando você aprendeu antes ou quando não aprendeu. Vou clicar na minha máscara de camada. Mesmo que começamos com uma máscara de canal, mergulhamos nos canais e bagunçamos arredondados lá, ainda
podemos clicar na máscara e ir para Selecionar e Máscara. Estou me certificando de que o meu é contra On Black. Você poderia brincar com o raio. Neste caso aqui, Shift Edge provavelmente vai funcionar. Mas não funciona muito bem. Funciona muito para baixo na imagem aqui. Vou cancelar. O que quero fazer é mostrar-te um truque fixe. É para pincel habitual, pincel B, e para mudar de Normal para Overlay. Vou fazer um tamanho de pincel apropriado. Vou torná-lo confuso lá, ficar um pouco maior e tentar impressioná-lo. Olha como isso é bom. Adorei quando encontrei esta opção. Em vez de tentar controlá-lo, sempre clique na máscara, você pode apenas usar sua ferramenta de pincel com sobreposição e apenas arrumar as bordas. Não precisa ser uma máscara de canal com a qual você começou. Pode ser com qualquer máscara. Tudo o que realmente faz, ele se livra da zona intermediária. Vamos desfazer isso e dar uma olhada. Mantenha premida a tecla Alt num PC ou Option se estiver a utilizar um Mac e clique na máscara. Ele só mostra você em preto e branco, que é handi. Eu estou em Overlay Eu estou na ferramenta de pincel, preto é a minha cor de primeiro plano, e veja isso. Você pode ver que ele apenas encolhe ou pelo menos se livra do tipo de áreas cinzentas. Você pode ver que há branco aqui no meio e há preto lá, mas há pequenos pedaços de cinza. Isso é o que a opção de sobreposição está fazendo como um pincel. Eu diminuo o zoom. Eu vou virar. Vou manter pressionada a tecla Option no Mac, a tecla Alt em um PC, voltar aqui e corrigir isso. - Legal. Uma coisa que eu poderia querer fazer também, é que você pode usar a mesma chave, eu vou voltar aqui, você pode
ver toda essa área cinzenta aqui em baixo, você pode fazer o oposto. Basta movê-lo para branco, fazer um tamanho de explosão apropriado e você pode fazer algumas correções muito fáceis. Você pode vê-lo chegar muito perto da borda sem destruí-lo. Se você está usando apenas um pincel branco
, pode ser um pouco complicado. Estamos tentando ir rápido. Esta ferramenta é perfeita para isso. Arrumar tudo. [inaudível] começar. Parecendo bem legal. Tudo bem. Vai ser isso para a máscara geral. Na verdade, uma última parte. Vamos usar essa mesma ferramenta. De volta aqui no início, clique na máscara e vamos usar nossa sobreposição de ferramenta de pincel. Eu coloquei para preto agora e eu vou baixar a capacidade apenas um pouco. Se você tiver a ferramenta de pincel selecionada, a opacidade, você pode arrastá-la para baixo, tudo bem. Mas pequeno truque legal, é só tocar “2" no seu teclado, “4". Você pode ver que está mudando aqui. “ 6", “7". Está bem. Só vai abrandar para talvez 30 por cento e apenas trabalhar estas bordas um pouco, apenas este par de pedaços fofinhos que talvez não sejam super-realistas. Agora estamos realmente terminados. Isso é uma máscara de canal. Talvez marcar este vídeo. Eu sei que quando eu estava aprendendo máscaras de canal, isso seria legal, mas realmente difícil lembrar o que fazer. É bastante orientado pelo processo, mas lá vai você. Tudo bem. Vamos para o próximo vídeo.
12. Projeto do curso — máscara de canal: Eu tenho um exercício para você praticar, também um atalho. Agora, eu não tenho certeza se isso é apenas Mac ou PC, eu não tenho um PC aqui para testar isso. Então deixe um comentário para me informar se ele funciona no PC. Eu tenho meu localizador aberto aqui no meu Mac, e eu quero abrir os arquivos do projeto, então classe projeto 2 e eu vou selecionar ambos. O que eu vou fazer é parar de arrastar,
mantenha pressionada a tecla Command Tab. Command Tab, se eu pressionar o Comando e percorrer todos os programas abertos. Antes de deixar ir para o Photoshop, eu só tenho que arrastá-lo para dentro e soltar, definir um atalho. É para mim, talvez não seja para mais ninguém. Você também pode fazer a mesma coisa se eu desfazer arrastando-o aqui para baixo, apenas arrastando-o para baixo para o dock e, em seguida, para o ícone real do Photoshop. Isso também funciona, mas espero que tudo isso funcione para PC também. Porque eu sei que você pode manter pressionada a tecla Control e pressionar Tab para fazê-lo. Você vai ter que me ajudar porque eu não consegui encontrá-lo online. De qualquer forma, temos as coisas abertas. O que eu quero que você faça é mascarar usando sua máscara de canal , habilidades
incríveis, mascarar essa coisa, e colocá-lo na frente do girassol. Vejamos os requisitos. Use essas imagens. Usaremos a máscara de canal para começar, mas você pode usar a ferramenta de seleção e máscara ou/e pincel. Lembre-se que definimos para sobrepor para corrigir as bordas. Você terá que ajustar os níveis de provavelmente a grama ou o fundo apenas para fazê-los parecer credíveis, e então tirar uma captura de tela e compartilhá-la comigo, seja nos projetos aqui ou nas mídias sociais, que é tudo no topo. Boa sorte usuário avançado do Photoshop, eu vou vê-lo no próximo vídeo.
13. Como fazer seleções no Photoshop com base na área de foco: Neste vídeo, vou mostrar-lhe como clicar em dois botões, selecionar e focar a área. É ótimo para seleções porque é objeto nítido de fundo desfocado. Faz um trabalho incrível só de agarrá-lo. Há um pouco de trabalho a fazer, e vou mostrar-lhe como fazer isso neste vídeo. Eu também vou mostrar como pegar esse mesmo tipo de seleção de algo em foco e transformá-lo em uma camada de ajuste. Você pode ver a camada de hidrante e, em vez de mascará-la, estamos usando para ajustar camadas. Nós também vamos mostrar algumas coisas mais difíceis onde ele está em foco e fora de foco, mas as mãos não, mas eu vou mostrar-lhe ainda como obter uma boa seleção. Eu vou te mostrar quando der absolutamente errado e você acabar com coisas como
esta e como contornar isso e, em seguida, no final, vamos fazer um pequeno projeto onde nós cortamos isso fora e nós colocá-lo neste fundo. Semi-crível, sombras e tudo mais. Você e eu, meu amigo, vamos continuar no caminho de seleção e aprender a usar a área de foco juntos. Vamos saltar para dentro. Para começar, vamos abrir os arquivos que vamos usar. É uma seleção O_2 ainda ir para a área de foco um a seis, abri-los todos. Vamos começar com seis, e eu quero que você seja pré-pago por incrível. A razão disso funciona é porque há uma profundidade de campo realmente rasa, fundos desfocados, mas o assunto, neste caso uma flor está em foco, por isso funciona perfeitamente. O que vamos fazer é trabalhar o nosso caminho. Eu tenho alguns que são realmente fáceis através de alguns que são bastante difíceis. Observe também que esta técnica é apenas o começo, como lembrar assunto? Foi ótimo, mas então entramos nessa máscara de seleção para corrigi-lo. É o mesmo para esta técnica. Ele faz um monte de trabalho pesado 80 por cento lá e, em seguida, usamos Select the Mask para arrumá-lo. Então relaxe, relaxe e fique espantado. Legal. Agora você pode ver que as bordas estão um pouco fora. Podemos corrigi-lo com Select e Mask. Você pode pular direto para isso daqui, o que é legal. Você pode ter que ajustar o alcance focal. Mais baixo é um pouco mais executivos olhando as partes mais nítidas da imagem e se você
elevá-la mais alto, é um pouco mais indulgente, você
quer dizer isso, isso e isso? Este é muito fácil porque é muito claro, fundo muito embaçado, primeiro plano é muito nítido em comparação. que você vai ter que fazer é que você pode ver aqui ele realmente
não sabe o que fazer com essa coisa no meio. Você tem essas duas opções que pode adicionar à seleção ou remover. Basicamente pense nisso como a Ferramenta de Seleção Rápida que olhamos anteriormente aqui. A mesma técnica, você não tem que pintá-lo todo o caminho e apenas tipo de clique um pouco e ele sai e tenta correr ao redor e encontrar o que você quer dizer. Isso é praticamente tudo para este particular, vamos clicar em Selecionar e Mascarar. Agora estamos de volta àquela janela que usamos algumas vezes. É aqui, lembre-se de nossas mudanças globais, podemos usar nosso pincel fino ou o que você quiser usar agora, neste caso, raio ao redor das bordas, começando um bom trabalho. Estou vendo o meu de novo. É contra o branco, verifique contra o preto, não em preto, em preto parece bom em branco parece bom. Incrível. O que eu vou fazer com ele quando terminar, eu vou enviar para uma seleção, não eu vou sair para uma máscara de camada e, em seguida, clique em OK. Legal. Vamos ver alguns mais difíceis. Vamos pular para a área de foco 2. Agora você nem sempre quer fazer uma máscara completa como fizemos neste aqui. Às vezes, só queremos pegar uma área para brincar com coisas como os níveis ou mudar as cores, então vamos fazer a mesma técnica, mas vamos olhar para usar uma Camada de Ajuste. É a mesma técnica, selecione, área de
foco, relaxe. Você pode fazer os ajustes aqui. É muito bom. Vou adicionar esse bit e usar menos dois,
menos e [inaudível] pensar nisso, lembre-se como a ferramenta Seleção Rápida. Há um pouco aqui em baixo para adicionar, um par de seus aqui em baixo. Se você achar difícil verificar, o que está faltando, o que não está, brincar com esses diferentes. No preto. Sobreposição, basta experimentar estes diferentes para que você possa ver claramente o que talvez está faltando e dizer que preto no branco é muito bom aqui. Vou acrescentar isso, vou acrescentar isso e temos um bom começo. Você pode brincar com softenadge e ele faz, mas é apenas como apenas um tick onde você pode entrar em Selecione uma máscara. Porque somos pessoas super avançadas e
incríveis, podemos usar todos esses recursos para torná-lo bastante doce. Qual vou usar? Em preto parece bastante claro, e raio, ele está funcionando bem, talvez apenas suavizá-lo um pouco. Você não me vê usando contraste feteral muito, é apenas preferência. Brincar com eles. Estou indo um pouco alto, mas favorece a vantagem que pode ser exatamente o que você precisa. Não há certo ou errado aqui. A coisa legal sobre isso, é que há apenas sobre o que, seis ou sete opções para brincar com. Experimente sozinho. Quando terminar, em vez de ir para uma máscara de camada, o que eu vou fazer é, eu vou dizer permanece uma seleção porque, vamos clicar em Ok. Agora é apenas uma bela seleção. Agora, se eu ir para o meu painel de ajustes e dizer fazer níveis ou curvas, se eu fizer níveis, você pode ver que ele transforma minha seleção em uma máscara na minha camada de ajuste, que é níveis. Não tocou no fundo agora. Os níveis aqui eu posso passar e ele vai equilibrar um pouco. Eu quero ser realmente sutil nesses tutoriais, mas é difícil quando você está sendo sutil porque você não pode ver o que eu estou fazendo no vídeo muitas vezes, você pode ver o que eu fiz lá. Eu só escureci um pouco, mas eu só queria mostrar uma maneira extra de usar a área de foco. Pegue o material que está muito perto e realmente trabalhar nele, talvez a mesma coisa com vibração, em vez de níveis ou pouco de ambos. Agora vamos olhar para alguns problemas de usos e como contorná-los. Acho que esta é a coisa mais valiosa porque nem sempre, você vai ter uma flor perfeita por conta própria. Área de foco 3. Esta imagem tem, provavelmente o maior problema é que ela tem um ISO ou grão bastante alto, que é uma imagem, em todo ele,
ele acha difícil romper o que é afiado e o que está embaçado por causa de esse grão. Vou te mostrar algumas maneiras de contornar isso. Basta selecionar, vamos para a área de foco. Se você pode ouvir música de dança dos anos 90 em segundo plano, os trabalhadores da construção civil que partiram de ontem foram agora substituídos por montadores de
loja que amam os hinos de dança dos anos 90, que é legal, não tão bom para você e eu gravando . Aproveite a música de apoio. Você provavelmente não pode ouvir, provavelmente sou só eu. Você pode ver aqui contra branco no branco, basta pegar isso, é o fim disso. Pode achar que é muito afiado. Você pode descobrir com uma imagem realmente granulada que este nível de ruído de imagem para cima e para baixo ajudará a arrastá-la para cima, arrastá-la para baixo, ver se isso corrige para você. Eu ainda estou para encontrá-lo útil para mim muito, mas eu devo mostrar-lhe porque eu não usei que o suficiente para dizer que é como bom ou realmente ruim, dado ajustes e slider fácil. O que nós vamos ter que fazer é, há apenas um grande pedaço faltando e as opções aqui em cima em preto e branco. Não é muito útil saber o que mais preciso selecionar. O único que realmente funciona é sobreposição. Overlay nos permite ver um fantasma do fundo. Não há nenhum tipo de controle deslizante de opacidade como temos na máscara selecionada. Basta escolher sobreposição e, em seguida, vamos pegar o plus e eu vou apenas tipo de clique junto e deixar Photoshop fazer sua magia. Photoshop, você é tão bom, olhe isso. Eu só preciso de pequenos pedaços, isso assusta o meu computador um pouco, mas também questionando a Ferramenta de Seleção Rápida eu acho, sim, fazer pequenos pedaços menores é mais fácil. Sim, mas aqui está um pouco mais difícil, menos, mantenha pressionada a tecla de opção em um Mac, em vez de vir aqui para menos ou Ok em um PC para alterá-lo para menos. Não vamos passar muito mais tempo aqui, mas há duas maneiras de lidar com isso. Você pode brincar com o nível de ruído, mas também basta adicionar e subtrair à máscara e é mais fácil fazer quando você está em sobreposição. Eu vou para selecionar a máscara. Eu sempre passei por máscara selecionada para arrumá-lo, você pode ir, não, eu vou direto para ser uma máscara de camada. Impressionante, trabalho feito, e você está feliz o suficiente com isso. Então, mais tarde, você pode voltar e clicar na Máscara e, em seguida, ir para Selecionar uma máscara. Volte para onde eu vou diretamente. Eu vou suavizar as bordas, talvez a sobreposição inteligente e neste caso eu provavelmente vou precisar
usar não este primeiro, não este aqui. Eu provavelmente vou ter que usar apenas uma ferramenta de pincel velho simples porque este bit aqui, o computador não vai ser capaz de um treino a diferença entre o fundo, vamos voltar a combiná-lo. Na verdade, porque estamos aqui, podemos diminuir a opacidade do preto sobre preto só para tornar mais fácil ver o que está no fundo aqui. Porque nós temos esta ferramenta pincel aqui, que o tornam maior, dureza é, eu gosto dele entre 85 e 95 e mantenha pressionada a tecla de opção e apenas pintá-lo para fora. Talvez ele precise que a fuzziness precisa ser um pouco menor ou hotness precisa ser menor. Só para dar esse tipo de golpe com o fundo. Provavelmente é este aqui em baixo, na verdade, estou bem com isso. É incrível assim. Há um buraco no meio. Se você está passando por este curso, você está tipo, eu não me lembro,
eu não fiz a coisa escrita novamente, se você estiver em um Mac,
mantenha pressionada a tecla Control in Option, basta mantê-los pressionados e, em seguida, clique e mantenha pressionado o arrastar do mouse, esquerda e direita para cima e para baixo você obter tamanho e dureza. Para um PC é um pouco mais estranho, talvez não estranho, é manter a tecla de controle pressionada no teclado e, em seguida, com a tecla direita do mouse, como o outro que você não usa muito, o clique direito, clique e mantenha pressionado e vá para a esquerda e Certo, para cima e para baixo. Eu estou aqui, eu estou indo para ir e este aqui, em vez de apenas usar o pincel, eu vou usar a ferramenta de seleção rápida porque em vez de tentar pintá-lo para fora, porque é muito claramente diferente de o resto disso eu posso apenas tipo de clique uma vez lá dentro. Legal, vamos clicar em Ok, e uma máscara muito doce. Vamos entrar na área de foco 4 onde realmente não funciona. Vamos chegar ao Select, vamos para a área de foco. Nós vemos que é, mas ele tem esse problema de grãos novamente, onde enorme quantidade de grãos aqui, mas está tornando o fundo e primeiro plano bastante consistente e ele simplesmente não funciona e eu vou te mostrar uma maneira em torno dele. Vamos para a área de foco,
relaxar, e você só tem que chegar aqui, está tudo bem. Você só quer corrigi-lo aqui, você só precisa, porque esta é uma pessoa ou um humano, ele funciona melhor com o assunto selecionado. Selecione assuntos,
relaxe, venha, selecione assunto. Você vê lá, mágica. Eu iria começar com isso e adicionar minha máscara de camada e com o seletor ir para Selecionar uma máscara e arrumar as coisas. Fizemos isso em um tutorial anterior, eu acho que eu queria mostrar a você às vezes área de
foco não funciona e você pode ter que olhar para diferentes maneiras de fazê-lo. Já analisamos algumas seleções, máscaras de
canal e assunto. Agora o último que vamos fazer é cortar isso e colá-lo como um projeto apropriado, em vez de apenas olhar para ele e aqui está uma máscara, vamos combinar coisas e apenas olhar para alguns, tentar obter algumas coisas já aprendeu e transformá-lo em um pequeno projeto para que no próximo vídeo eu vou definir um projeto de seu próprio. Faça isso comigo, e no próximo vídeo você pode fazer isso sozinho. Quando eu cortar isso, coloque-o lá. Para fazer isso, a mesma coisa, parece que claramente vai ser bom para a técnica que estamos usando, que é a área de foco selecionada. Agora vou mudar para o branco. Sim, é provavelmente um bom ou preto, em branco provavelmente vai, é um pouco mais claro. Agora eu vou ter que tirar algumas partes, escovar calor e nós ficar um pouco para baixo. Na verdade, não importa muito ao usar a ferramenta Seleção rápida. Eu tenho o básico lá dentro e isso é muito legal. Área de foco, você governa. Vamos consertar um pouco. Vamos para Selecionar a Máscara. É muito bom compará-lo Y. Vou aumentar a opacidade agora para 100 por cento. Branco versus preto, eu sinto que branco é provavelmente um melhor exemplo de quão boa a seleção, especialmente no lado. Primeiro, eu provavelmente, vamos ver como vamos com um pouco de raio e um pouco de alisamento. Estou muito bem com isso. Está realmente arrumado estas bordas aqui. Lembre-se, eu vou ampliar,
manter a tecla P pressionada no seu teclado, esse é o original. Na verdade, não segure, mas eu só bati nele. Ligar, desligar, ligar, desligar. Bastante incrível. A outra coisa que quero fazer é que, na verdade,
são parte do original. Se eu recusar isso, eles são apenas parte da imagem original, mas eu não quero. Essas outras ferramentas não vão funcionar, a ferramenta Refinar Borda, porque isso é uma coisa tão sólida, ele simplesmente não vai fazer o que eu preciso que ele faça. Vou desfazer algumas vezes, e vou usar apenas um pincel velho. Vou escolher um tamanho e dureza, algo sobre a dureza. Estou tentando igualar a dureza da borda do que já está lá em foco. Se você está cansado desse atalho com a coisa vermelha, você pode apenas fazer tamanho e dureza aqui em cima. Mas agora eu vou manter pressionada a tecla Alt para transformá-la para menos, basta tocar essas coisas fora. Mas o trabalho manual não pode ser evitado às vezes. Vou acelerar isso porque é doloroso assistir. Isso vai funcionar para mim. Eu realmente gosto, mas eu ainda quero entrar e consertar algumas dessas pequenas bordas. São as contas de água que estão nas bordas me deram um lado irregular, truque de fotografia. Eu não fiz muito a fotografia, eu faço muitos retoques, mas nunca mantê-lo na geladeira porque acaba suando e deixando grandes piscinas de água quando você está tentando fotografá-lo. Então veja o que tende a acontecer é um
dos truques com que trabalhamos muito com fotografia de alimentos é deixar de fora. É praticamente muitas vezes classificado, mas se você cobri-lo [inaudível],
ele parece molhado, úmido e novo e não pingar grânulos de água em todos os lugares, e o preserva por um tempo. Então [inaudível] é um bom truque. Mas temos uma máscara. Queremos enviá-lo para máscara de camada. Clique em “Ok” e eu quero adicionar isso à área de foco 6. Vamos usar o nosso truque onde vamos para ir e apenas ir para o Comando C, Comando V, e ele traz a máscara de camada. Não é muito crível, mas é muito legal. Vou fazer duas coisas antes de irmos. Bem, uma máscara de camada e um dos problemas óbvios é este vidro. Vou te mostrar um truque rápido para isso. Vamos fazer a sombra primeiro. Aprendemos isso no curso básico, mas vamos recuperá-lo aqui para as pessoas que não fizeram isso. É bem chique. Bem, eu gosto mesmo assim. Eu tenho esta camada selecionada. Eu vou para as coisas, eu vou dizer que eu gostaria de uma sombra. Não me preocupo muito com a estrutura, exceto que eu quero vê-la. Eu acho que não é uma sombra realista, eu sei, mas é principalmente só para que eu possa ver como ele se parece, e brincar com a opacidade, tamanho, o quão confuso é. Vai funcionar para mim. Clique em “Ok”. Você é tipo, “Isso é terrível.” Mas lembre-se das pessoas que fizeram isso, você pode clicar com o botão direito do mouse na palavra Drop Shadow e ir para este aqui, este é Create Layer. Ele encripticamente nomeado, basicamente significa que eu vou arrancar a sombra como um efeito e olhar, projetar sombra em sua própria camada. Eu vou me mudar. Isso significa que podemos ir para Editar, Transformar e ir para Distorcer. Só vou usar o atalho porque estamos na classe avançada. Pressione Command T no teclado, se você for um Mac, Control T em um PC e mantenha pressionada a tecla Command em um Mac ou Control em um PC
e, em vez disso, mantenha pressionada a tecla Command ou Tecla de controle em um PC e apenas distorce sem ter que ir para o oficial, Editar, Distorcer, apenas faz tudo para você. O que eu estou procurando agora é olhar para a sombra em ambos a área de foco, área foco é bom, você pode ver que há um grande molde de sombra desta forma e melhorar bastante neutro. O fotógrafo, provavelmente compôs este fundo de qualquer maneira. Então, porque há muita liberdade para decidir para onde vai a sombra. Vou transformá-lo, vou movê-lo. Estou a tentar levar a base para lá. Quão realista isso vai ser? De onde vem a luz? Não sei se deveria vir desta forma ou desta forma. Está tudo bem e eu apertei Return, e agora o que vou fazer é fazer algumas coisas. Um está nesta camada aqui, eu vou jogar com um diferente, ele é padrão para multiplicar, eu vou passar e apenas escolher outro modo de mesclagem, lembre-se segurando Shift no meu teclado. Certifique-se de que você está na ferramenta Mover
e, em seguida, toque na tecla de adição e ele apenas
percorre os modos de coluna aqui e geralmente dá um que, pelo menos, chegue perto de onde você quer estar assim. Eu gosto do que bin linear faz com a palavra. Posso encontrar mais alguma coisa que eu goste? Talvez uma luz linear que eu goste, mas precisa ser reduzida, especialmente aqui fora, ou não deveria ser. Deve estar escuro aqui, mas não mais longe. O que eu gostaria de fazer é adicionar uma máscara de camada à sombra. Certifique-se de que você está absorvendo sua máscara. Pegue seu pincel, só sua chave P. Vou certificar-me de que o meu modo de pintura é normal. Nós jogamos em torno de tutorial anterior para mudá-lo para sobreposição, e em termos de opacidade, eu vou apenas remover partes dele. Mas quero diminuir a opacidade com o pincel. Vamos usar nosso atalho ao longo do topo do teclado, apenas membros 1, 2, 3, 4. Então, talvez 30 por cento, você vê as mudanças de opacidade, 40. Eu só vou construir isso. Talvez até mais baixo, 10%, apenas clicando e arrastando e absorvendo. Especialmente, talvez aqui. Lá atrás, estou tentando torná-lo um pouco realista. Estou bem com uma sombra, provavelmente precisa de mais um pouco de desfocagem. Você pode clicar nessa coisa, subir para filtrar, e usar o borrão. Vamos fazer o borrão mais tarde, não se
preocupe, todo mundo usa Borrão Gaussiano. Você pode apenas borrar um pouco mais. Uma das outras coisas óbvias que eu posso ver é que ele só tem um elenco azul para ele. Este fundo tem uma sensação amarela bastante quente para ele enquanto este tem um elenco bastante azul e está fazendo um destaque demais. Com esta camada selecionada, vamos até nomeá-lo, vamos ficar loucos, Smoothie. Com ele selecionado, vamos para ajustes, e eu vou usar o equilíbrio de cores. Qual deles está aqui? Está ali. Linha [inaudível], e eu só vou mudar o azul para amarelo. Agora, o momento está fazendo isso com a coisa toda. Se você clicar nisso, lembre-se que diz: “Eu só vou afetar a camada logo abaixo de mim.” Que é Smoothie. Agora, eu só vou aquecê-lo, ligá-lo e desligar, ligar e desligar. Chegando lá. Talvez um pouco mais vermelho e ciano. Um pouco de verde para o smoothie verde. Você gosta? Sinto que é um pouco mais agradável. A próxima coisa que vou fazer é consertar este copo. É muito brilhante comparado com o fundo. Não está mostrando através de nenhum carrapato, e você vai correr para este problema com vidro, vidro é difícil para isso. Vou fazer um conserto de homem das cavernas. Vou te mostrar o que eu faria agora. Vou ampliar. O que eu quero fazer é trabalhar na máscara. Vou usar o meu pincel. Eu vou fazer uma bela escova pequena, eu vou ter a opacidade em talvez 20 por cento. Como vai ser dureza a zero? Quero-o agradável e fofo. O que eu quero fazer é deixar um monte de brancos, essa coisa cinza. O preto é bom, o branco é bom muitas vezes quando você está trabalhando com vidro é então tons médios que são o fundo. Só vou ao homem das cavernas e fazer isso. Só estou pintando. Só estou pintando em vasos pequenos. Por quê? Porque ele está mostrando através do fundo um pouco, trazendo para o ocre vermelho que está aqui. Só estou fazendo o vidro um pouco mais translúcido. Truque barato total em vez de ficar muito complicado sobre isso. Mudar as cores e coisas funcionaria, mas se colocássemos em um fundo diferente, pelo
menos essa técnica vai mostrar mais o fundo dela. Talvez eu remova um pouco do copo também. Quero dizer, os destaques só para iluminar um pouco. Para mostrar o que quero dizer é que talvez possamos manter pressionada a tecla Option no Mac, tecla Alt em um PC e basta clicar na máscara, e ver o que estou fazendo aqui. É uma parte muito primitiva. Você pode ver que é só que agora se misturam um pouco mais. Se eu passar para o fundo, dar-lhe um nome, você pode vê-lo apenas movido para lá e assumir um pouco do fundo através dele e que deve ser isso. Este fundo aqui em baixo não me deve também. Há uma maneira de reflexão que simplesmente não aconteceria nesta área de trabalho que eu sinto. Você poderia trabalhar na imagem real e talvez escurecê-la. Eu só vou trabalhar nessa máscara de camada porque eu não quero destruir a imagem,
fazer a mesma coisa com minha ferramenta de pincel. Só vou baixar isso um pouco, só os pedaços que eu não gosto. Então, isso iria dar certo. Quanto eu gosto? Estou muito feliz. Estou bem com uma sombra, estamos fazendo coisas estranhas. Uma última coisa que notei, mas acho que isso aconteceu. Eu criei uma nova camada e porque estava entre a minha camada de ajuste e a imagem, fiz essa coisa estranha onde se tornou o que é chamado de máscara de
recorte para esta imagem que acontece o tempo todo. Basta arrastar para baixo, certifique-se de que ainda está usando esta opção. Conecte-o ao fundo, minha camada aqui vai ser Sombra Extra. Eu sempre acho credibilidade em fazer, então um pouco de pintura preta escovando. Então eu escovo, eu vou ter uma opacidade de talvez 50 por cento, eu vou usar preto. Outro atalho para você é, veja minha cor de primeiro plano e fundo, um é azul, outro é branco. Você pode clicar sobre isso para forçá-lo a ficar preto e branco. Mas verá que meu atalho foi dado, tecla D. Se eu pressionar D para voltar ao padrão, preto e branco. tecla X alterna entre os dois. Você pode ver aqui X vai cor de fundo de primeiro plano, e D define de volta para preto e branco. Aqui vamos nós. Eu só vou adicionar isso em sua própria camada. Você pode ver que está tudo bem, mas eu provavelmente quero dizer isso para talvez se multiplicar e talvez apenas baixar a opacidade dele para baixo novamente. Eu gosto de ter apenas este segundo degrau de sombra super próxima, e depois esta sombra mais wofty. Isso é tudo para este. Vamos saltar para o próximo vídeo. Eu vou definir um objetivo para você fazer coisas assim por conta própria, nós tentamos obter um monte de coisas que estamos aprendendo até agora. Te vejo então.
14. Projeto do curso — área de foco: Tudo bem. Tenho um projeto divertido para você, este tomate, aquela tábua de cortar. As regras estão no documento Word de projetos de classe. É só aqui na área de foco do projeto de classe. Ambos os arquivos estão no projeto 3 e as regras de engajamento são, você tem que usar a área de foco para começar. Você vai ter que ajustá-lo usando qualquer coisa que você gosta, mas provavelmente 'Select and Mask ', e o que eu estou interessado em é quão boa sua sombra acaba sendo. Não é um teste graduado, todo mundo vai fazer algo diferente, mas,
por favor, poste o que você faz. Mesmo que ache que é ruim, pode ser ruim, tudo bem. Seu post pode fazer alguém se sentir melhor em sua média
é seu é ruim, Isso faz com que eles se sintam bem. Além disso, estamos todos aqui para aprender. Então publique-o e diga-nos o que fez, como o fez. Se você pode fazer a opção de sombra desanexada. Podemos apenas pintar que agora é um modo de mistura que você usou, talvez você não usou preto para a sombra, talvez fosse um marrom. Tente fazer com que pareça realista. Você tem que descobrir para que lado as luzes estão sendo lançadas. Parece que deste, um pouco diferente deste. Você não precisa apenas usar esses recursos aqui,
certifique-se de fazer isso, mas você pode usar qualquer outra coisa para tipo de grau de cor ou adicionar ruído, qualquer coisa que você gosta para o projeto de classe. No final, poste em qualquer um desses lugares aqui no topo. Adoro ver o que você faz. Avante para o próximo vídeo.
15. Truque de seleção usando a ferramenta borrar: É um pequeno truque para fazer máscaras, este vídeo. Você estará fazendo muitos vídeos de mascaramento, seleções de mascaramento. Ouvi-te dizer: “Mais um dia. Me dê mais um.” Este é apenas um pequeno, e é um pequeno truque que eu queria manter aqui porque eu uso o tempo todo. É um pouco difícil conseguir lugares. Digamos que usemos esta imagem e a última. Fomos área de foco e isso funcionou muito bem até certo ponto. Nós menos este pedaço para fora como a máscara com alisamento de raio, e mudar a borda um pouco, e ele chegou a um bom ponto. Mas há algumas partes, esta parte aqui é o principal criminoso. Clique em “Ok”. Há um lá também. Vou mostrar-lhe como usar esta ferramenta de manchas. Eu uso porque vou te mostrar o porquê. Vamos fazer este primeiro. Ele é o mais fácil de conseguir. Porque eu vou trabalhar na minha máscara, e o que as pessoas tendem a fazer é pegar a ferramenta de pincel, e então eles apenas fazem muito pequena. Então, quão pequeno você faz? Vamos fazer isso para que eu possa te mostrar. Aqui, muito pequeno. Qual é a minha opacidade? Eu coloquei 100 por cento. Eu só pego esse pedaço, e então eu faço o pincel um pouco menor, e então eu fico com aquele pedaço. Sempre acaba parecendo um pouco falso, fazendo desse jeito. Vem aí a ferramenta de manchas. O que a ferramenta de manchas faz? Se eu trabalhar na imagem real, eu diminuo um pouco, a ferramenta de manchas é este dedo mindinho aqui. Ele é normalmente a ferramenta de borrão, se você segurá-lo, pegue a ferramenta de manchas. Agora aqui em cima, apenas certifique-se de que está pronto. Podias ter andado a brincar. Basta escolher um desses pincéis gerais de topo. Escolha qualquer escova. O que faremos é a força em torno de 50 por cento. Vamos definir a dureza para zero. Basicamente, se eu estou trabalhando nos pixels reais, ele apenas borra as coisas. Você pode vê-lo lá, mancha manchada e manchada. Mas se eu desfazer, essa mesma coisinha quando estou trabalhando na máscara real, faz algumas coisas muito legais. Vou escolher um tamanho de pincel apropriado e depois borrá-lo. Olhe, e solte. Ele mancha. Vou te mostrar o que quero dizer ou o que ele faz. Vou manter pressionada a tecla “Alt” em um PC, a tecla “Opção” em um Mac. Basta um clique na máscara para mostrar o que está fazendo. Eu desfaço porque a ferramenta de manchas, veja isso. Se eu empurrar da borda, o relógio acontece. Quando eu clico e arrasto, eu estou apenas segurando a tecla do mouse para baixo, nenhuma maneira vem para tê-lo. Você pode vê-lo enquanto ele está se movendo, ele lentamente torna o raio menor e a correção menor. É muito bom para empurrar essas bordas. Ligue novamente, escolha um tamanho de pincel. zoom e, neste caso, pode tornar a dureza um pouco menos. Só empurrando aqui. Você pode ver que ele apenas fica nos cantos muito rápido e fácil, em vez de fazer os pincéis maiores e menores. Vês aqui também nestes cantos? Olha como isso é legal. Para este também. Onde estava aquele? Truque sorrateiro lá. Se você manter pressionada a tecla “H” no seu teclado, então eu não poderia encontrar onde isso estava. Eu estava aqui e pensei: “Nós todos fizemos isso, certo?” Você é como, “Ok. Eu quero ir para essa outra parte”, e você é como, “Oh, cara, ela ampliou.” Você não consegue achar isso, certo? Se você manter pressionada a tecla “H” no teclado, ela se move para a ferramenta de mão. Mas a escolha extra para ele, se você clicar e manter pressionada a tecla do mouse, para
zoom total. Então você vai movê-lo e dizer, “Eu quero olhar para este pedaço.” Retoque-o, retoque-o, retoque-o, conserte-o. Mantenha pressionado “H”, clique, segurando a tecla do mouse aqui, e agora eu vou trabalhar nesta parte aqui. Você pode ver que não está começando aqui, então eu posso ter que pegar minha ferramenta de pincel e apenas começar um pouco. Voltar para a minha ferramenta de manchas, e então apenas trabalhar para fora em lacunas grossas. Divirta-se. Você vai gostar. Você pode fazer. Você pode ser também. Eu gosto disso. Beijos esses cantos bem que. Se você estiver usando uma mesa digitalizadora Wacom, provavelmente não precisaria fazer isso porque ela é bastante sensível. Você pode segurá-lo um pouco mais leve, e ele vai e empurra para baixo. Chave de espaço um, chave de espaço um novamente. Agora eu só estou me movendo, mas você entendeu a idéia. A ferramenta Borrar pode ser útil para os cantos que você precisa entrar. Só um pequeno vídeo de bónus rápido. Tudo bem, vamos seguir em frente.
16. 16: Oi, pessoal. Neste vídeo, veremos algo chamado
ferramenta
de seleção
de objetos. É incrível. Ele permite que você
leia um documento e, na verdade, identifique objetos pequenos
diferentes em uma
imagem maior e bastante complexa , com muitas
coisas acontecendo. Selecionar assunto não funciona porque há
muita coisa acontecendo. As coisas estão fora de foco, mas eu sei que
quero escolher e quero adicionar uma máscara. Olha, seleção de objetos. super fáceis de usar alguns pequenos truques para refiná-lo e
conseguir exatamente o que você deseja Vamos começar e fazer isso agora. Para começar, acesse
Selecionar objeto e
abra este aqui. Agora, aprendemos
algumas
técnicas muito legais , como selecionar um assunto, e isso funciona muitas vezes e, às vezes
, simplesmente não funciona. Há muita coisa acontecendo. Não sabe o que fazer. Vou pressionar D select,
comando D, Control D em um PC. É aí que essa
ferramenta é realmente útil. Onde está esse? Eu nem
consigo encontrá-lo. Na verdade, agora é o padrão para esse
grupo de seleção. Antigamente, uma ferramenta mágica, levante a
mão, quem se lembra de
ter sido essa a ferramenta que aprendeu A seleção rápida é muito
boa e muito útil. A seleção de objetos é um ótimo
lugar para começar. Vou te mostrar alguns prós
e contras desse. Então, o resfriamento depende de, bem, um dos problemas é que, se você tem uma máquina muito
lenta, isso pode demorar um pouco. Mines novíssimo mac.
É bem rápido. O seu pode ser um
pouco mais lento essas pequenas linhas cor-de-rosa que
correm por toda parte Essas linhas cor-de-rosa
podem ficar um pouco confusas quando você está começando, você fica tipo, o que está fazendo? Está tentando identificar
o objeto que você quer. Mas veja isso dizendo: isso é
um objeto? Você fica tipo, e. Isso
é um objeto? Que eu estou
apenas pairando acima deles Digamos que queremos essa lente
aqui se eu clicar nela uma vez. Ele faz uma seleção.
Olha isso. Eu posso apertar minha
ferramenta de máscara e tenho essa coisa selecionada. Tão legal. Vou desfazer isso porque
o que você pode fazer para ir um pouco mais longe é
dizer: quero clicar com a tecla Shift Mantenha pressionada a tecla shift, clique nela e diga “Eu quero a câmera também”.
Agora eu tenho isso. Olha isso, a câmera
e a lente. Ele faz um trabalho muito bom, mas às vezes fica confuso. Isso também está usando o
aprendizado de máquina. Você pode descobrir que eu
tenho esse problema aqui: fundo parece muito próximo daquela parte
de vamos desmarcar Há um pouco de algo
enrolado no equipamento da câmera e um elástico se parece
tanto com o fundo não
consigo discernir entre os dois Eu posso. Sou humano. Sou inteligente, mas essa coisa também está
ficando mais inteligente Você pode descobrir que, quando está
fazendo isso, ele realmente escolhe muito bem.
Digamos que não. Eu cliquei nisso uma vez
para obter a seleção. O modo objeto é um pouco invasivo, aquela coisa rosa correndo
em todos os lugares fica um pouco agitada. Vou dizer que não
vou usar sua ferramenta de
seleção de objetos , o que
é realmente incrível. Vou usar essa ferramenta de seleção
rápida e me livrar das
linhas cor-de-rosa que saltam por toda parte Isso vai me permitir apenas
adicionar esta última parte. Estou no plus, o
tamanho do meu pincel é um pouco pequeno. Usamos meus colchetes
para torná-lo maior. Seja um vídeo de atualização. Entre, mas usamos colchetes?
Provavelmente temos. Ao lado do seu Pk, o
pincel fica cada vez maior
e menor, e eu só vou dizer que
adicione esse pedaço para mim, por favor Talvez
escove um pouco menos e pronto, eu preciso daquele pedacinho lá Se tiver pedaços que você não precisa, digamos que ele escolha isso, mas você sabe que não
quer colhê-lo. O que você pode fazer é
torná-lo do tamanho de
pincel apropriado e, em
seguida, usar o sinal de menos, trocá-lo aqui,
em cima aqui, ou
manter pressionada a opção
PC anômico e apenas
pintar nessas
partes cima aqui, ou
manter pressionada a opção PC anômico e apenas
pintar nessas Vou ter que
colocar um
pincel menor lá para
deixá-lo perfeito. Na verdade, ele fez um trabalho
melhor do que eu
fiz com a ferramenta de
seleção de objetos. A seleção de objetos é
ótima para escolher partes
individuais quando o
objeto de seleção pega demais, mas talvez seja necessário
ajustá-la um pouquinho, usando algo como a ferramenta de
seleção rápida que eu usaria Vamos fazer mais um. Vamos
adicionar uma máscara. Incrível. Eu vou fazer isso.
Deixe-me mostrar mais uma neste documento que
tem alguns problemas, e mostrarei uma
maneira diferente de abordá-la. Vou voltar para
minha ferramenta de seleção de objetos. Eu vou dizer você. Eu também quero esse lápis porque quero essa coisinha
toda. Segure a tecla Shift, clique aqui também. Você vê isso, as formigas marchando correndo
até aqui, pegando uma linha rosa, indo até minha ferramenta de seleção rápida,
você vê todos aqueles pedaços Eu poderia pegar isso e
começar a pintá-los. Isso funciona. Mas porque
haverá muita pintura. Você pode ver todas as formigas
correndo por lá? Vou pegar meu laço lk. Tenho certeza que está na poligonal
poligonal. O que é essa, vá para
a ferramenta de laço poligonal. Quero adicionar à
seleção ou movê-la. Atualmente, a
maneira mais fácil é clicar nele. Você diz, eu quero
adicionar esses pedaços. Vou desfazer e
vou usar minha ferramenta Lasso e clicar uma vez Vou adicionar
à seleção, então não basta clicar uma vez, vou pressionar Escape e
desfazer para adicionar à seleção,
você segura a tecla Shift e
eu vou embora Então eu poderia ser realmente
Willy Nilly por aqui. Realmente não
importa onde eu selecione, desde que eu passe um laço
aqui e volte aqui Eu adicionei muitas linhas ou sei que estou
exagerando para obter efeito Mas voltando ao início, essa é uma maneira fácil de pegar um monte de coisas
que talvez tenham perdido. Em seguida, podemos adicionar nossa máscara de camada. Há algumas outras partes que queremos retocar e seguir em frente. Então, eu apenas uso o
pincel preto e começo a
trabalhar na
própria máscara. Já fizemos isso
antes. Aí está. A ferramenta de seleção de objetos. Funciona muito bem, precisa de
alguns retoques. Vai melhorar
com o tempo. Está usando a fantasia, o aprendizado de máquina, inteligência
artificial, não
tenho certeza do que é, mas está fazendo alguma coisa,
sendo muito bom Tudo bem. Isso é seleção de
objetos. Vou ver no próximo vídeo.
17. New10 Como usar o preenchimento de geração para substituir fundos: Um. Neste vídeo,
vamos pegar nossas técnicas
de seleção que aprendemos e usá-las para substituir o plano de fundo usando
o novo
recurso sofisticado de IA generativa chamado Gen Mas vamos levar
isso para outro nível. Vamos fazer
as coisas mais fáceis de
mudar o plano de fundo. Em seguida, vou mostrar
como convencê-lo a conseguir o que eu precisava fazer, porque
começou na
areia real da praia Eventualmente, nós
o colocamos na estrada. Vou
mostrar como estou ficando melhor em ser um designer
rápido, mandando ele fazer o que quiser. Vou te mostrar todos os
problemas que enfrentamos, por que está ajustando meu carro? Substituímos o céu, mas depois
tentamos adicionar um sol, e é
isso que obtemos. Há algumas
coisas estranhas acontecendo. Eu vou te mostrar
como contorná-los. Esse é o sol que eu
queria. Aqui está. Vamos substituir o
plano de fundo desse carro, aprendendo como
fazer com que
a IA generativa faça o que queremos.
Vamos mergulhar. Todos, para começar em
sua pasta de duas seleções, pegue o Gen Fill one e
abra no Photoshop Eu apenas o arrasto para lá
normalmente para abrir meus arquivos. Esfregue o plano de fundo,
vamos usar a técnica que usamos
anteriormente no curso, vamos usar o assunto liso O nosso é muito bom. Há
alguns retoques a serem feitos. Provavelmente deveríamos fazer isso. Então pegue a ferramenta de seleção rápida. Vou manter pressionada minha tecla
ult no meu teclado. Para pintar os
pedaços que eu não quero. Eu posso ser um pouco preguiçoso aqui porque estamos apenas
sendo um pouco preguiçosos Bom o suficiente. O legal dessa técnica é
que ela entra e sai. Você não precisa ter
uma seleção perfeita. É muito bom em misturar até mesmo as piores seleções Faça isso primeiro e depois conserte
, porque é muito generoso
e indulgente Eu entendi, precisamos
selecionar o inverso. Vamos usar nossa prática barra de tarefas
contextual. Essa aqui, selecione
inversa. Lá vamos nós. Agora vamos
para o preenchimento generativo. Vamos substituir o plano
de fundo. Não vamos cortá-lo.
Vamos apenas fazer isso
e vai colocar o Top em
tudo, vai ser incrível Vamos colocá-lo na
praia. Vamos ver. O que vamos encontrar
com esse material de gin AI? R: É perverso,
incrível e incrível. Mas agora eu, como designer e fotógrafa, estou
tentando orientá-lo para
o que está fazendo. Vamos ignorar os pequenos
reflexos na janela traseira que se encaixam Mas aí está. Aqui estão meus
detalhes sentados na praia É um trabalho muito bom. Agora, sua versão vai ser
melhor do que a minha porque
eles estão sempre a desenvolvendo. Eu tenho essas pequenas flechas aqui para atravessar. OK. Agora, eu sou tipo, o que eu queria, mas eu não
queria na areia. Então você fica tipo,
Ok, o que vem a seguir? Praia. Vou pegar
Road em frente a Bach. Sim, persuadindo-o a
chegar onde eu precisava estar. Embora isso esteja fazendo
isso, na verdade não. Vamos avançar rapidamente. Aí está. Estamos chegando lá. Isso é mais do que
eu estava procurando. Coisas ao lado de Sunny Beach. O que é incrível nisso?
Limpe e desligue o globo ocular Você pode ver o que é feito
com as sombras nas estradas? Oh cara. Muito bom em
replicar a natureza É mais difícil
replicar coisas que realmente
conhecemos em formas e simetria, como um carro ou uma pessoa Mas, cara, a natureza é perfeita. Tem algumas coisas
acontecendo por aqui. Podemos trabalhar na máscara,
mas por enquanto, cara. Agora, se esta é sua primeira
viagem pela IA generativa, algumas pequenas
coisas a serem observadas
no painel de propriedades aqui Você
notará que há variações Ele fornece três por padrão. Se você não gosta do que ele faz, continue pressionando gerar E eu vou continuar
e tentar novamente. Parece que está perto, mas não muito perto, apenas continue gerando. Demora um pouco,
mas fornecerá outras
três versões, ou você terá que
começar a trabalhar com seu prompt. É isso que chamar de “como
falar com a IA generativa”
é dar instruções Fique de olho
nessas dicas também. Eles são muito bons. Também funciona em diferentes idiomas. Se você não é um falante nativo de
inglês, você pode digitá-lo. Você pode ser mais articulado escrevendo sua solicitação
em seu próprio idioma Acho que tem 100
idiomas no momento. Provavelmente tem o seu
. Dê uma chance. Outra coisa a se notar, cara. A outra coisa a
observar sobre algumas
dessas coisas generativas de IA é
que há duas coisas Uma é que ele está usando créditos. No momento, é
muito caro para a
Adobe criar servidores, tecnologia
e outras coisas. O que eles estão fazendo
é apenas garantir que
ninguém fique louco
e esgote os servidores que estão fazendo esse processo, porque não é o seu computador que está
gerando isso. Ele vai para a
Internet, a Internet responde à solicitação, examina sua imagem e a
envia de volta ao seu computador. Você precisa de uma conexão com a Internet. É bastante exigente em termos de sistema. O que eles estão fazendo
é dizer que, se você tiver uma licença da
Creative Cloud, receberá 1.000 créditos por mês. Eu nunca chego
perto de terminar isso. Acho que não passei dos 500. Sou professora e a uso muito para meu próprio trabalho profissional. Você provavelmente acha que está bem. Verifique com seu licenciamento. Acho que o licenciamento educacional é diferente do licenciamento
corporativo Acho que você
acabou de obter a licença do Photoshop. Acho que você ganha 500. Se você tem o plano de
fotografia, acho que também recebe 500,
mas isso muda o tempo todo. Não adianta
dar fatos concretos. Agora, verifique quantos créditos
generativos de IA eu tenho e, em seguida, elabore seu
plano. O que você deve observar sobre eles é que eles podem ser
usados comercialmente Se eu estou trabalhando para uma empresa
e quero usar isso, esse material que é gerado
em segundo plano, a Adobe disse que esse
sim pode ser usado. É único. Não há problema
em ser usado comercialmente. Esse é o problema
desde o início, eles tentaram criar
algo que pudesse ser usado
comercialmente profissionalmente, então a
última coisa é que eles
podem ficar Abrimos um pequeno JPEG, mas há todas essas versões
diferentes aqui que não desaparecem
quando eu salvo meu arquivo Se você acha que está trabalhando com
imagens de alta resolução em seu trabalho e precisa e o tamanho do arquivo
está ficando muito grande, acesse aqui e exclua as
que não deseja. Exclua-os logo em seguida,
se você não precisar deles, para encontrá-los novamente
se você os perder, você pode ver este
pequeno ícone aqui embaixo, os pequenos brilhos.
Aí está. Esse pequeno brilho significa alguns
robôs generativos de IA já estiveram lá e você provavelmente encontrará todas as suas variações
como parte Antes de você ir, quero
te mostrar algumas coisas que podem
dar errado . É um pouco. Você se acostuma, mas vou te mostrar alguns
dos truques que eu uso. Digamos que eu queira
colocar um pôr do sol. Na verdade,
digamos que eu queira colocar , o que eu quero colocar? Vamos colocar uma ilha.
Vou selecionar isso. Tipo, esse é um bom
lugar para uma ilha. Todos conseguem ver a
Ilha, a Ilha errada? Alguém pode ver o que
vai dar errado? Você pode olhar ao redor da tela? Você pode ver o que
vai dar errado? É isso, é a ordem das camadas. Você precisa estar na ordem
das camadas mais altas porque ela está colocada em uma ilha Funciona? Algo muito estranho Mas não vi essa
praia, ela não estava incluída. Eu apenas olhei o que estava
diretamente abaixo dela, que era minha imagem original
e não sabia o que fazer É uma ilha, eu
acho, bagunça com meu carro. Eu vou fazer
exatamente a mesma coisa. E vou me certificar de
que estou na camada da praia, ou qualquer que seja a
camada superior Basta selecionar isso,
e vamos dizer retângulo Marko, e eu vou dizer preenchimento
generativo, vou dizer Ilha Aí está. Uma ilha real
que faz parte da minha cena. Está mexendo com meu carro. Isso traz
outro ponto positivo. Está indo muito bem. Esse é um pequeno ajuste legal. Ele tirou meu espelho retrovisor e o esmagou na Vou te mostrar outra
técnica que eu uso. Vou
desligar essa camada porque não a quero. O que acontece é que você faz essa batalha entre
o que você quer ficar e o que você quer tirar. Eu quero que o carro
permaneça inalterado
porque é bem específico, precisa
ser simétrico Eu conheço o carro, então não
quero mexer com isso. Digamos que queremos
mudar o céu. Fizemos exatamente a mesma coisa, mas enrolados em parte do carro, isso vai acabar mexendo
com o O que você acaba fazendo
é: neste caso, vou selecionar meu plano
de fundo. Eu vou selecionar o assunto. Vou inverter
essa seleção. Estou apenas preenchendo
esse plano de fundo, vou deixar
o carro sozinho. Mas eu não quero mexer
com todo o documento. Quero deixar essa estrada sozinha e quero nosso
pôr do sol no céu. O que vou fazer é
pegar meu mercado de retângulos, manter pressionada a opção K
M PC, pegar o sinal de menos, e vou começar
por aqui e simplesmente arrastá-lo e cortá-lo Acho que isso vai ser
errado porque
tenho demais porque ainda quero essa cena de praia,
mas quero ser um pôr do sol Estou pensando que, não o carro, pegou o céu, pegou um pouco
das ondas, vamos
fazer disso um pôr do sol. Vamos fazer isso e esperar
que dê errado de qualquer maneira. Pôr do sol, primeiro de tudo, eu
fiz isso na camada errada. Nossa, Den. Vocês todos viram, certo? Fez um bom trabalho. Mas não é exatamente
o que eu queria, então Ben. Verifique se você está
na camada mais alta. Pode ser essa camada vazia
ou essa aqui, o que quer que esteja no topo, e eu vou recuperar
minha seleção. Eu vou desfazer, desfazer, desfazer, desfazer, desfazer und und Tudo bem. Agora eu
tenho minha seleção. Vou me certificar de que
estou no topo e fazer exatamente
a mesma coisa,
desperdiçando mais créditos Mas como eu disse, pôr do sol. Eu nunca termino meus créditos. Eu realmente insisto
nisso há alguns meses, mas eles podem
acabar mudando isso. Só saiba que há créditos em
andamento no momento. Você pode ver o que foi feito para
remover minha praia completamente. Principalmente porque essa seleção
foi um pouco demais. Você acaba fazendo essa dança
do que ter selecionado, quanto ter
selecionado para misturá-los? Vamos fazer a minha seleção, e eu vou embora. Estou terminando de desfazer até selecionar o assunto na ferramenta
Retangle Marquee, a opção
na minha tecla M
em um PC, para
arrastá-la Eu fui até lá. Eu vou ter que fazer é ir até lá. Lá. Só para encontrar
algumas, quero manter as ondas em equilíbrio e
talvez diminuir um pouco mais um
pouco mais porque quero que as
ondas estejam lá Você acaba jogando um
pouco disso. Não existe uma regra absoluta real. Há apenas um
pouco de tentativa e erro. G, Dan, não faça isso
na mesma camada. Faça isso de novo. Lembre-se de que as pessoas se
certificam de que você está
fazendo isso no topo. Você pode ver agora
que ele realmente tem a praia e a inclui
e está tentando misturá-la. É interessante. Não tenho certeza se estou muito
feliz com isso. Mostre mais um. Não é muito
diferente do que eu tinha, então eu vou estar no topo. Na verdade, vou entrar. Vamos colocá-lo ao sol. Espero que o construa em pequenos
pedaços. Estamos tendo um bom
dia aqui, pessoal. Vou deixar essas coisas aqui
porque é isso que acontece. O seu será melhor
e mais maduro, é o que temos. Trabalho feito. Tudo bem, tente
mais uma vez então. Vamos experimentar Sun over Horizon. Ok, estamos tendo
um dia muito ruim. Alienígenas saltando de paraquedas. Lá vamos nós. O que
está estragando isso Eu não sei. Vou reiniciar o
photoshop e voltar. Você espera aí?
Tudo bem. Lá vamos nós. Tenho um sol real
que combina com a cena. Donna,
feche e abra. Provavelmente também tem algo a ver com sua seleção. Eu
fiz uma seleção maior. E então apenas digitei
sol em vez de pôr do sol e eu não entendi nenhuma outra
estranheza Aí está. Vou deixar
essas coisas no curso porque pode ser um pouco complicado chegar onde
você precisa estar Mudar completamente o plano de fundo é incrível e fácil. São aqueles últimos trechos de violino
em que todos nós queremos gostar disso e daquilo e saber que, se há pequenas coisas
rápidas acontecendo, não
é você, são eles
ou são as máquinas Espero que tenha sido uma boa vitória por meio de alguns
usos mais avançados do preenchimento generativo É uma ferramenta incrível.
Adorando o que ela pode fazer. Te vejo no próximo vídeo.
18. Fundo do projeto Gen Ai do New11: Um. É hora do projeto da aula.
Vai ser divertido. Você pode carregar cargas. Eu quero
que você saia em vez
de dar seu arquivo. Eu quero que você encontre um
único sozinho. Eu vou para o Unsplash e
coloco o carro como meu filtro O que eu quero que você faça
é, eu não me importo de onde você tira a foto
de um carro. Unsplash é bom
porque uso
comercial,
é de alta qualidade Há muitos outros
sites que você pode visitar. Seja ótimo se você tiver o seu próprio, tire uma foto do seu próprio carro Muito chato, não importa. O engraçado é que
quero que você pratique sua seleção mais
seu preenchimento generativo para
substituir o plano de fundo OK. Então, eu quero que você use as técnicas que
aprendemos no último vídeo. Em termos de plano de fundo, quero que você use o
oposto de onde você está. Se você mora na costa, escolha algo na
cidade ou nas montanhas, se você mora nas montanhas, escolha algo que seja costeiro ou apenas
algo oposto, algo que seja
diferente de você. Se você mora no Oriente Médio, escolha algo na Islândia, se você mora na Islândia, escolha algo no Oriente Médio,
sei lá. Só para te dar alguns
pisca-piscas, eu realmente não me importo. É principalmente uma brincadeira com a técnica, porque pode ser difícil conseguir
exatamente o que você deseja Quando terminar,
certifique-se de
publicá-la na
seção de tarefas do site, mas também nas redes sociais Marque-me em tudo isso aqui. Lincoln Group,
grupo do Facebook, Twitter ,
Instagram, eu adoraria
ver o que você fez. Informe-nos também sobre
os problemas que você encontra. Se você tem alguns
muito ruins, acabou com o sol como eu fiz no último
vídeo, você sabe, o grande sol gráfico.
Mostre isso para nós também. Seria interessante
ver como está indo. Seria interessante ver como a IA generativa de
cada pessoa produz coisas diferentes. De qualquer forma, aproveite, divirta-se ,
publique um projeto e nos
vemos no próximo vídeo.
19. New12 como mesclar imagens usando a Gen Ai: Um. Neste vídeo,
veremos como combinar duas
imagens reais. Usando IA generativa. Combinando-os para que
pareçam unidos de forma confiável. Além disso, abordaremos
alguns problemas que eu encontro com a
IA generativa e como contorná-los. Na verdade, deixe-me
mostrar o que fazemos. Acabamos fazendo isso,
Bush e conectando-os. Funciona. Eu mostro uma
maneira melhor de haver um pouco mais de conexão entre
o céu e a casa. Eu tento adicionar um rio e ele vai muito bem, mas
não o rio que eu quero. Porque o que eu realmente queria era
esse rio no final. Mostrarei o caminho que percorro no
processo e as ideias sobre como chegar lá usando instruções de
texto para
criar no É uma nova habilidade que estamos aprendendo. Design rápido no Photoshop. Vamos começar. Para começar, vou usar a pasta 02 seleções Há um chamado Gen
fill two and three. Esse truque em que você
os arrasta para o programa só funciona se não houver nada
aberto no photoshop, caso contrário, ele apenas
os arrasta para a coisa atual Não é o que queremos. O que eu quero fazer
é
começar com a geração 2 e
estender o plano de fundo. Vou usar a
ferramenta de corte, que é a tecla C. Vou diminuir o
zoom, comandar menos, controlar menos em um
PC e arrastar Apenas me dê um pouco
de espaço para o céu. Verifique se você está
no padrão, que é transparente, e
clicaremos em Inter Acabamos de ter um grande
espaço em branco para A Sky. Quando chegarmos a
este, vamos arrastar, arrastar ,
arrastar,
peso, peso, peso. Aqui vamos nós. O nosso é um
pouco pequeno demais. Eu vou
torná-lo um pouco maior. Agora, o que é legal
nisso é juntar duas imagens existentes em vez
de criar uma mágica Agora, o que você pode
descobrir é que isso aqui é como se fosse o horizonte, e há muita coisa
acontecendo lá. O que eu vou fazer é querer céu
genérico nesta
cordilheira aqui. O que vou fazer é, na verdade,
mascarar essa parte. Vou usar a ferramenta
retangle Marquee,
MK em um teclado, e
arrastar Eu quero esse pedaço. Vou bater,
criar uma máscara de camada e provavelmente vou
usar tudo isso. Agora, o que podemos fazer é garantir que na camada superior, não esqueça. Selecione alguns bits que se sobrepõem
e faremos isso duas vezes, porque
mostrarei alguns problemas você pode encontrar e que eu
encontrei enquanto estava me preparando
para este projeto Vou ter uma boa
sobreposição entre os dois, clicar no preenchimento urativo e
vou clicar em gerar e
esperar o Cara, é muito bom. Vamos dar uma olhada nas
diferentes versões aqui. É um trabalho
terrível conectar o que
parece que eu escolho esses dois
porque são semelhantes, têm cores
fortes muito diferentes, mas veja só, esse é
um trabalho incrível Digamos que você queira
ir mais fundo nisso. Você quer que o céu
esteja mais conectado com isso. Na verdade, isso pode
ser um sucesso. Vou deixar esse aí. Vamos desligar o globo ocular
e garantir que ele
ainda esteja no topo. Eu
vou fazer uma seleção. Como fizemos no último vídeo,
quero me conectar aqui, mas não quero que ela substitua
a casa, porque isso acontecerá. Ele será examinado
e adicionará uma nova casa. O que eu quero fazer é menos
um pedaço ao redor da casa. Você pode usar a ferramenta de seleção
rápida. Vamos usar a ferramenta assu porque não a
usamos muito Estou usando a primeira
das ferramentas assu. Vou manter pressionada a
opção no meu teclado, no meu Mac, em um PC, e vou tentar
vagamente me
livrar dessa seleção Eu tenho alguns pedaços
descendo ao lado da colina, mas não na verdade a casa em si, porque isso
acabará por mudá-la Esses são pequenos truques
que você aprenderá à medida que avança. Vamos usar o
preenchimento generativo agora e
deixá-lo gerar
sem que nada seja selecionado Veja qual é o resultado
diferente. Oh, olha isso. Oh, eu gosto disso. Muito
diferente da última, dê uma olhada e compare,
diga essa com outra. Como na verdade não nos aprofundamos
muito nessa parte inferior, deixamos muitas nuvens
como parte da seleção. Você terá que mexer com eles quando estiver se juntando, o que você quer que seja incluído
porque minha árvore sumiu Podemos decidir que, na verdade,
realmente precisamos dessa árvore
porque talvez seja importante
em termos de composição ou talvez precise estar na
fotografia por qualquer motivo Aí está. Unindo
duas imagens no Photoshop Imagens existentes, imagens reais, mas fazendo a parte intermediária
usando IA generativa Adorável. Eu adoro isso. Vamos fazer mais uma e acho que
quero
mostrar um pouco mais
das coisas que
aprendi usando a IA generativa, coisas que dão certo, dão errado Vou pressionar
C para meu croptal, vou estender
um pouco até a parte inferior aqui,
certificar-me de que está transparente Faça com que ela entre no
teclado ou clique na seta. O que eu quero aqui
é que eu quero me sobrepor. É melhor fazer uma sobreposição se
quiser que ela se misture bem. Se eu fizer isso, haverá apenas uma
pequena sobreposição. Há muitas
coisas genéricas que podemos fazer. Se eu for assim e
digitar, digamos, River, tomarei café rapidamente. Na verdade, fiz
a pior xícara de café que acho que
já fiz, de qualquer forma. Mas veja isso. É incrível. Você pode dizer
que é exatamente o que ele queria. É muito legal. A mistura das duas
cores, a profundidade. Há um reflexo
na montanha. Isso é muito legal.
Não é o que eu queria. Eu queria um pequeno riacho
correndo. Vamos deixar
essa. Isso foi legal. O que eu vou fazer
provavelmente é preencher isso. Vou
sobrepô-lo bem e em grande escala. Vou preenchê-lo com um preenchimento
generativo que o preenche ,
espero que mais flores se aproximem da câmera,
mais bebendo um
café terrível, você tenha comido Oh, é muito bom. Agora
vou dizer que, na verdade, quero um rio
correndo para usar minha ferramenta Lasso Vamos usar o
polígono, poligonal. Eu vou dizer, de onde
vem isso? Eu vou dizer,
isso vai funcionar? Eu nunca tentei isso
antes. Vamos fazer isso juntos ao vivo,
então veremos. Será que vai fazer o que
estou tentando fazer, um rio sinuoso.
Isso vai funcionar? Rio cheio generativo, café
mais terrível. Fez um trabalho terrível.
Nem sempre funciona. Isso é ruim, cara. Você espera aí? Vou tentar fazer isso acontecer e depois compartilharei os resultados. Tudo bem, igualmente terrível. Eu digitei Stream running through field, mas nunca
vamos dar uma olhada Ah, perto. Nós fechamos. Isso vai melhorar com o tempo
e, às vezes, se você
obtiver resultados errados, pode ser a
seleção, lembre-se, e pode ser
exatamente o que você escreveu. River não funcionou.
O fluxo que percorre o campo é um
pouco mais descritivo Vou tentar mais
um e mudar a seleção. O mesmo prompt. Vou desligar isso,
pegar todos os gráficos. Ah, é isso mesmo. Estamos perto. Você pode ver o que eu disse
sobre talvez desselecionar a casa real porque ela sumiu e deformou isso porque minha seleção foi concluída lá Eu vou fazer um último
e depois vou deixar você ir. Sempre se certificando
de que
você está no topo , pois isso também pode estar causando seus problemas. Eu mudei a seleção
usando o mesmo prompt. Estou ficando cada vez melhor em
fazer essas instruções. Somos
tão projetistas quanto essa nova tecnologia de IA. Oh, melhor, melhor. Não é exatamente o que
eu tinha em visões, mas você não sabe
o que estava na minha cabeça Isso é exatamente o que eu queria. Há muito reboque
e remo. Lembre-se alterar a seleção e
também brincar com suas instruções Além disso, certifique-se de estar no topo, analise suas variações e gere mais uma vez. Você não precisa ficar preso
às três opções disponíveis. Você pode continuar. O que você pode fazer,
pelo menos no momento, você pode acessar
e denunciar, você vê as pequenas
opções pontilhadas no canto Podemos entrar aqui
e dizer: “Bom, pobre”, e você pode denunciar se
for terrível
e enviar a eles uma
lista detalhada, como nossos
alienígenas saltando de paraquedas anteriormente Nós estamos lá. O que você
acha desse? Provavelmente é um pouco dominante. Mas eu ainda amo isso. É
incrível. Aí está. Isso é misturar
algumas imagens, imagem
real, céu real, parte
falsa no meio, parte
falsa no final aqui
e praticar algumas dessas
criações generativas de
inteligência artificial, e praticar algumas dessas
criações generativas de dicas e truques Espero que você goste do vídeo.
Te vejo na próxima.
20. Projeto novo13 cursos de mesclagem de imagens: Hora do projeto de uma aula. Vamos
fazer isso aqui, IA
generativa combinando imagens, basicamente as técnicas que
aprendemos no último vídeo O que eu quero que você faça
é obter duas imagens, suas próprias
imagens ou algo do unsplash ou
algo semelhante Eu quero erguer um prédio. Não precisa ser
exatamente como o meu. Não é uma antiga
casa de fazenda em um campo? Pode ser uma fábrica,
pode ser um castelo, pode ser qualquer tipo de edifício. Você pode usar sua imaginação
lá misturada com o céu. O que pretendo fazer
não é modificá-lo completamente, juntá-lo de
uma forma crível, como
fizemos. Onde está? Ou aquele que você acabou de
mostrar antes, faça uma captura de tela e
depois faça uma captura Quando você o publica
nas redes
sociais ou em seus projetos. Há uma outra
última coisinha. Vamos até aqui.
Enquanto você espera lá. Aí está,
fizemos um salto. Eu quero que você acrescente um
pouco da diferença. Eu adicionei algo pequeno
aqui. Você pode ver isso? Algo sutil, algo que
não está nos dois originais. Você vê isso? Eu não vou
te dizer o que era. Eu quero que você acrescente algo
pequeno também ao seu. Meu rio, que estava descendo pelo meio, era muito grande. Adicione uma pequena mudança, identifique
um pouco a diferença, para ver se as pessoas conseguem ver a diferença e divirta-se jogando adicionando
pequenos pedaços de IA generativa Na verdade, vou te
mostrar o que é meu só porque eu acho eles vão saber do que
você está falando, Dan. Você viu isso? Você
fez. A cachoeira. Lo. pequena cachoeira lá.
Algo interessante e único que, quando você publica ,
outras pessoas podem descobrir
a diferença. É isso mesmo. Faça o upload para
a seção do projeto. Faça o upload para as redes sociais,
certifique-se de me marcar. Eu adoraria ver o que você faz. Divirta-se Vou ver
no próximo vídeo.
21. Alterações de preferências avançadas Adobe Photoshop: Tudo bem, este vídeo é sobre alterar algumas de suas preferências para ser um pouco mais útil quando você estiver usando o Photoshop. Estas são apenas as minhas preferências, não
vamos cobrir todas elas. Apenas aqueles que eu sinto que valem o suficiente para passar algum tempo mudando, você terá seu próprio tipo de peculiaridades que você gosta. O maior aqui é essa coisa nova que apareceu. Chama-se “Rich Tool-Tips”. Ok, eles são legais. Você pode ver como isso seria incrível para novas pessoas explicando o que todas essas ferramentas fazem. Eles são um pouco irritantes eventualmente, explicando todos eles. Para desativá-los, ele está aqui em Photoshop CC e Preferências. Se você possui um PC, ele está em um lugar um pouco diferente, ele está em Editar. Na parte inferior, aqui estão as Preferências. Ok. Mas no meu Mac, eles estão aqui e nós vamos para o que diz Ferramentas, e é este aqui diz usar dicas de ferramentas avançadas, eu vou desligá-lo. Os outros que eu gosto estão sob Manipulação de Arquivos e não, não sob Manipulação de Arquivos, vamos para Performance, e este aqui, estados de história. Por padrão é 50, eu gosto de aumentá-lo para um 100, só significa que eu estou retocando. Eu posso retroceder pelo menos 100 vezes, você poderia ir mais alto, mas quanto maior isso for, lento Photoshop pode começar a correr, se ele está tentando gravar todos esses estados da história. Agora, se o seu laptop é um desses, uma mão-de-baixo e os ventiladores aparecem toda vez que você abre. Não sei, cromo, provavelmente não
é bom elevar os estados de história,
mas o meu é muito bom laptop, talvez tenha um ano e meio de idade agora e foi o topo da linha. É muito bom, se você estiver usando um iMac grande ou um PC novo e gastou algum dinheiro com
ele, aumente isso para 100. Sem problema. Experimente. Se você achar que tudo está um pouco lento, abaixe para 50. Este aqui ajuda com a minha paranóia onde você cai lidando com este aqui, eu ajudo para cinco minutos. Então esta é a recuperação de ordens. Se o Photoshop falhar e ele tiver uma cópia a cada cinco minutos, então você só perdeu cinco minutos de trabalho por padrão, será 10. Se você está abanando máquina funcionando muito mal como cada vez que você bate. Eu não percebo na minha máquina porque é muito rápido e eu não estou lidando com arquivos super enormes, então eu não percebo isso em tudo, então cinco minutos é perfeito. Se você está lidando com um computador lento e um arquivo realmente grande, você pode mudar isso porque a
cada cinco minutos ele vai ter um pouco de cintilação enquanto está salvando em segundo plano. Eu descobrir perceptível, e Photoshop não falha com muita frequência. Lá vai você, e o último aqui em preferências está sob cursores. Agora o que eu gosto de fazer é quando você está usando as dicas, vamos dar uma olhada e clique em “Ok”, então quando eu estou usando dizer, a ferramenta de pincel, você pode ver aqui o pincel é representado por um círculo gigante. Se eu for dizer algo como minha ferramenta conta-gotas, você pode ver que ele é representado
pelo conta-gotas e saber qual lado disso usar, eu acho. Eu sei que é o canto inferior esquerdo, mas eu passo por fases de não gostar disso. Eu vou dizer algo que eu faço e eu não faço às vezes eu ligá-lo e então eu tenho que dar uma aula e eu volto para o normal e parece que não me afeta tanto. Mas se eu estivesse trabalhando sozinho não tendo que ensinar e redefinir tudo, eu me certificaria de ir a este aqui diz mostrar cruzes e a ponta do pincel, que faz isso. Ok, eu tenho a minha ferramenta de escova. Ok, você vê, o centro dele agora tem um pequeno alvo, torna-se realmente útil quando você tem um pincel grande, pincel
pequeno e adiciona um pouco mais que você pode ser como, por que você está incomodando isso? Eu gosto disso. A outra coisa está sob cursores, mesmo tipo de lugar é essa coisa aqui, então em vez de a ferramenta conta-gotas olhar assim. Vai para preciso. Há muito mais, eu sinto que isso é mais científico do que é com o outro. Vou trocá-lo de volta só para que eu não assuste as pessoas no resto do curso, mas assim que
eu terminar, eu vou voltar atrás. Agora, há uma abundância de outros vão fazer como acelerar o Photoshop em sua própria pequena janela. Mas há toneladas aqui e muitos deles, eu não preciso mudar. Você pode ser mais confusa do que principal. Você pode trabalhar através de todos eles. Vamos clicar em “Ok” e outro tipo de preferência é usar a ferramenta de corte quando você está usando o corte dito, há este aqui, as pessoas não sabem que você pode fazer isso o que eles mudaram no Photoshop por padrão é quando você recorta coisas, então eu tenho que cortá-lo aqui e eu permaneço para ser um PSD se eu torná-lo maior novamente, você pode ver que ele ainda está sempre aqui e que pode ser
um pouco de dor se você só quiser cortá-lo fora e ir embora, eu só não quero você lá. É este aqui, diz para apagar os pixels cortados. Então eu apertei Return agora, agora eu volto para a colheita e ele simplesmente se foi para sempre, há também momentos em que eu quero que isso aconteça, então você só tem que ligar e desligar isso. Essa é a ferramenta de corte excluída pixels de corte, especialmente se você está lidando com fossilizes estressando você máquina para fora todas essas coisas extras podem estar lá sem nenhuma boa razão. Pode ser positivo lá em cima. Outra coisa que eu faço quando eu estou trabalhando é, cortar isso, é com a ferramenta de movimento é auto selecionar. Eu me certifico que a seleção automática está desativada, está ativada por padrão, você pode gostar disso e seu próprio grupo por padrão, quando estou lidando com grupos que farão um pouco mais neste curso, ele tenta selecionar automaticamente todo o grupo. Eu gosto de tê-lo na camada se eu estiver usando a seleção automática, mas na maioria das vezes eu tê-lo desligado. A maneira de contornar isso é se eu fizer uma nova camada, na verdade algum texto. Eu tenho meu nome aqui, apenas diz,
ok, então eu tenho duas camadas, em vez de usar a seleção automática, ok. Tudo que eu faço é manter pressionada a tecla de comando no Mac e isso muda a forma como a fenda da ordem QC aparece quando eu mantenho pressionada a tecla de comando no Mac. É tecla de controle em um PC, então eu tê-lo desligado e quando eu quero que ele ligado, eu mantenho pressionado o comando e clique na camada de fundo. Agora você vê ele pular aqui. Clique no Dan, salta para cá. Você pode ter um arquivo realmente grande e apenas segurar na tecla de comando e clicar em qualquer camada que você quiser. Mas quando você não está, significa que eu posso mover Dan, você pode ver aqui sem estar realmente sobre ele,
ok, caso contrário, ele limita selecionar em, ele estaria movendo o fundo. Outra coisa que eu quero mostrar a vocês é que diz mostrar controles de transformação. Isso é muito legal porque, em seguida, ele só pára você ter que fazer o comando T ou controle T em um PC. Ok, eles estão sempre lá. Eu vou te mostrar isso porque vamos querer
desligá-los porque eu acidentalmente liguei-os. Isso pode ser útil um ao outro Eu vou te mostrar que não é realmente uma preferência, Eu não tinha certeza onde colocá-lo e ele se encaixa com este é. Digamos que você tem uma imagem, digamos que eu vou abrir a imagem. Você o encontrou em sua máquina ou você está trabalhando para um cliente ou você está trabalhando em algum lugar e você está tipo, eu tenho uma imagem, eu adoraria usar essa imagem. Quem é o dono? Photo-shop permite que você, com algumas imagens pelo menos ir para o arquivo e ir para informações do arquivo. Lá está ele, e permite que você veja coisas como o título do documento, assim como os metadados. Está escondido no fundo, coisas que o autor
desta imagem editou e me permite fazer coisas como descobrir quem é o dono dos direitos autorais. Se fosse minha própria imagem, eu poderia adicionar minhas coisas aqui, assim como um fotógrafo. É um pouco lento usar o Photoshop, você usaria algo como o Lightroom ou o Bridge para adicionar o status como grandes grupos de imagens. Além disso, tem algumas coisas estranhas como ver os dados da câmera aqui, ele me mostra
que o gato estava tipo, é meio assustador, mas é como, eu sei que esta foto, esta foto foi tirada em um Canon 5D e aqui está uma série número. Louco, eu poderia realmente rastrear isso. Eu não sei o que fazer com essa informação, mas isso pode ser super útil se sua fotografia mostra coisas como a distância focal,
exposição, Se pára, ISO todos os tipos de coisas legais. Às vezes é mais e mais aqui. Ok. Era de Jennifer Kingdom. Às vezes não tem. Ok, então esta imagem original aqui de uma barra, fez a mesma coisa, arquivar informações, e não há nada aqui. Um dos maiores que eu acho, é olhar aqui em básico e olhar para o aviso de direitos autorais. Com isso, é protegido por direitos autorais de domínio público. Pode estar sob a Licença Creative Commons, o que significa que você pode usá-la. Isso é o suficiente disso. Vamos cancelar mais algumas preferências que eu gostaria de alterar é em seu painel de camadas bater o menu maior abaixo na parte inferior aqui é um chamado Opções de painel e aumentar isso para pelo
menos um tamanho grande como essas coisas são minúsculas, eu tenho uma bela tela grande. Você pode não ter o luxo. Clique em “Ok”. Você pode ver que eles são apenas mais utilizáveis. Você pode ir para o tamanho super grande. Eu provavelmente faria isso. Se eu só trabalhei neste grande, Eu tenho um grande monitor LG 4K e é incrível. Mas muitas vezes eu estou trabalhando no laptop está conectado a ele. Isso é muito grande, então. A razão pela qual eu recusei é só porque os cursos do Photoshop, eu gostei de tudo parecido com o seu. Uma das coisas que é realmente útil lá dentro. Tem Opções de Painel. Este aqui, não sei por que isso me deixa louco. Adicionar duas camadas, então normalmente, quando você duplica uma camada e você diz que eu quero esta, duplica-as, acaba com cópia depois, e tudo bem, mas se isso te irrita como me irrita, basta ir e virar que off adicionar cópia. Você pode editar apenas para dançar. Isso vai ser para as preferências, vamos olhar para alguns truques de fluxo de trabalho no próximo vídeo. Mas essas são as sessões para caixas, ligar, desligar coisas que eu gosto de mudar, além de olhar no próximo vídeo como acelerar Photo-shop se ele está correndo um pouco lento para você. Tudo bem, nas enfermarias.
22. Como acelerar Adobe Photoshop se estiver executando lentamente: Oi lá. Este vídeo é tudo sobre tirar o máximo proveito do Photoshop. Se você estiver trabalhando com um laptop ou iMac super rápido ou algo realmente novo, provavelmente não precisa fazer nada disso. Mas se você está lutando junto com um velho laptop de segunda mão, então este material pode ser realmente útil. O primeiro e realmente fácil é que, digamos que estamos trabalhando nisso, tem várias camadas em várias pranchetas. Você só descobre depois de um tempo que começa a ficar mais lento, mais lento e mais lento. Você pode clicar em Editar e ir até aqui e ir para limpar. Só tenho que limpar tudo, saber que ele limpa seus desfeitos e limpa toda a história e cache de vídeo. Se você está trabalhando com isso, basta arrumar a RAM que você possa voltar ao que você está fazendo. Se você tiver que fazer isso muito, você pode configurar um atalho para isso. O atalho está ali. Agora, apenas algo para estar ciente é que estou usando objetos inteligentes, todas essas fotos da Mavis. Eu fiz isso para os gráficos para o meu curso de introdução. Estes são todos objetos inteligentes. Objeto inteligente aqui, contém um arquivo muito maior, então eu estou usando aqui. Na verdade, isso tem apenas alguns pixels de diâmetro, mas está usando um objeto inteligente, que é muito, muito grande. Então, uma máquina de constrição fora. Se você não precisar dele, você pode clicar com o botão direito do mouse no nome aqui em, digamos, Rasterizar camada e que se livrar do objeto inteligente. É uma droga porque você perde toda essa resolução escondida aqui. Mas se ele não precisa ficar maior e você está apenas trabalhando com como isso precisa ficar menor. Esse é um dos truques. Agora, no vídeo anterior, vou mostrar-lhe como desfazer exatamente o que você fez. Então, sob o desempenho, assim preferências, desempenho e apostas em Editar preferências se você estiver em um Mac. Aqui em baixo, a história diz que se você aumentar para 100, pode diminuir a velocidade da sua máquina. Precisa descer o mais baixo que quiser. Onde diz que o manuseio de arquivos desliga esse salvamento automático, você pode cuidar até uma hora, assim como por favor, não bata, mas por favor corra rápido. Caso contrário, a cada cinco minutos será parar para pausar, para tentar salvar talvez um documento potencialmente grande e lento. Agora de volta ao desempenho este pouco aqui. Agora, antes de termos estágio histórico em rótulos de caso, e tamanho de bloco de caso, ninguém sabia o que faz idealmente. Então o que eles fizeram foi editar estes como três pequenos pedaços úteis. Aqui diz, se você está fazendo web design, clique neste. Se você está fazendo fotografia como o material padrão, você pode ver que ele muda aqui e grandes dimensões de pixel. Se você é um fotógrafo acordando em imagens reais de alta resolução com muito poucas camadas, este é o único a fazer. Isto é um pouco de ambas as palavras. Mas se você estiver fazendo design de interface do usuário, que eu faço um monte de e com lotes de pequenos pedaços e cargas de camadas, se você sabe, se você tem como 50 camadas,
em seguida, baixar os níveis de cache só significa que não vai tentar e como fazer uma prévia realmente boa de um zilhão de camadas diferentes. Ele só vai fazer um tamanho de azulejo muito pequeno e só fazê-lo duas vezes. Enquanto que se você está trabalhando com um enorme eu não sei o que
é chamado de dimensões de pixel enorme poderia ser como Adobe. Isso é exatamente o que é. Só significa que ocasionalmente estava indo para ir muito alto porque você provavelmente só vai ter uma ou duas camadas, provavelmente apenas uma se você está trabalhando em como um, talvez você retocar uma imagem realmente grande você pode ter apenas um par de camadas. É só tirar o máximo proveito de seus processos gráficos que você pode alternar entre esses dois, você vai esquecer. Então, apenas para a unidade padrão como eu, você pode alternar entre os dois e basicamente eu
deixá-lo na interface do usuário da web porque isso é muito da minha vida nos dias de hoje. Produtos digitais, tamanhos pequenos de arquivos, mas isso são camadas. Agora isso é o que você pode fazer para ajustar o que você apenas o sistema que você tem. Se você está procurando atualizar seu computador, se você está em um Mac e você tem um razoavelmente novo, é praticamente impossível
atualizá-lo. Esperando em torná-lo super, super difícil atualizá-los. Você pode encontrar lugares que vai fazê-lo se você estiver em um PC, é super fácil como os opostos, como você pode levá-lo a qualquer loja de esquina e obter upgrade. Se você está procurando atualizar um computador, há três coisas que você olha. O mais barato e mais fácil é algo chamado de RAM. Quando as pessoas falam sobre ter 16 gigs de RAM ou oito gigs de RAM com quatro gigs de RAM. Você pode ver que o intervalo ideal aqui está em algum lugar entre sete e 10 gigabytes de RAM. Eu tenho 16, mas o computador leva cerca de 16 gigabytes de RAM. Ele vê 13 só porque o sistema leva alguns para si e me deixa 13 sozinho que eu posso usar no Photoshop. Então eu estou bem acima do que eles, os intervalos ideais, se o seu é como quatro megabytes ou menor photoshops provavelmente não abrir essas coisas, mas mesmo como oito, então 16, maioria dos PCs que você pode levar em uma loja para razoavelmente como quanto? Acho que vai te custar uns 150, 200 dólares para alguém enfiar uma corrida nova do que para esquentar. Isso pode ser como uma das maneiras mais rápidas e fáceis de fazer seu computador funcionar mais rápido. Mas você também pode dizer que você está fazendo como eu usando o Photoshop, mas você também tem efeitos secundários e premier aberto no Illustrator InDesign. Photoshop aqui é realmente sistema exigente e dizendo, Eu quero 70 por cento do que está disponível aqui em cima então de 13 eu quero 9 dele, por favor. Você pode dizer que o Photoshop se acalme um pouco e eu preciso que o InDesign esteja funcionando muito rápido e não você. Mas meu computador é incrível, então eu ia deixá-lo lá em cima aos 70. A próxima coisa que você pode fazer para colocar seu computador funcionando muito mais rápido na minha experiência foi de acordo com o disco rígido. Então, um disco rígido típico, uma máquina um pouco mais antiga é uma unidade de fita defende como coisa que usa para a vida se você conectou o disco rígido e ele vai woh, woh, woh. Esses drives tipo são bem lentos. Photoshop também os acha difíceis de ler escrever. Se você atualizá-lo para algo chamado unidade de estado sólido ou SSD, não se preocupe muito com isso. Como se você fosse à loja de informática e dissesse, ei, eu quero uma unidade de estado sólido. Eles podem colocar isso aí para você. Custa muito mais. Pode ser o que você quer. O problema com unidades de estado sólido é, digamos que é o espaço no disco rígido. Digamos que sua unidade atual é um terabyte de espaço. A nova unidade SSD, você provavelmente não pode pagar um SSD terabyte no momento, eles são muito caros, então você pode ter que ir para meio terabyte. Então você vai perder espaço no disco rígido, mas você vai ganhar um monte de velocidade. Eu tenho um Mac velho que eu fiz isso também. Voou como se fosse como jogar na lixeira, foi frustrante. Fiz alguma pesquisa é esta unidade e deu-lhe uma nova vida. Eu tenho um laboratório de computadores onde eu dirijo aulas, eu não tenho todas essas e eu tenho mais um ano ou dois deles. Não foi caro? Mas se você está comprando, quando você diz que está indo para um site que você gosta, ufa, este é barato. É provavelmente porque o uso do estilo mais antigo de fita hidráulica girando disco rígido é em vez de as unidades de estado sólido para até mesmo obter um desses. Acho isso fenomenalmente bom. Como eu atualizei, mas com ele. A outra coisa é a placa gráfica. Isso pode ser muito difícil e problemático de atualizar se não estiver embutido na máquina, atualizar o processador gráfico faz algo melhor, é chamado de GPU. Eu não tive muito sucesso atualizando-os, mas com menos comprar um. Veja se você consegue obter o processador gráfico para ser tão bom quanto você pode obtê-lo. Mas eu não iria e atualizá-lo. Fique com o que tem em Mencius, os riscos do hardware na minha experiência. A última coisa a fazer é apenas certificar-se de que o disco rígido não está cheio. Onde está o meu disco rígido? Quanto me resta nesta coisa? Aqui está, eu tenho mais 216 gigabytes de uma unidade de terabytes, eu estou ficando para baixo tipo de como os últimos 20 por cento, mas ainda há o suficiente para trabalhar. Se você olhar para o seu espaço disponível no disco rígido, Eu não tenho certeza de como fazê-lo em um PC, mas em um Mac, sistema apenas na parte inferior aqui. Se você tem apenas um par de gigabytes, é apenas o seu computador vai ser feito isso apenas significa que o seu disco rígido está cheio e Photoshop precisa de um pedaço de espaço extra disponível, mesmo que ele realmente não
usá-lo, ele usá-lo temporariamente enquanto ele está trabalhando e ver aqui em baixo, você vê a parte inferior aqui. Este arquivo é realmente apenas 919 megabytes, mas quando está aberto, é 365 e não é muito grande imagem. Estes são apenas gráficos da web. Muitas vezes vejo algo que é, digamos, 100 megabytes no meu disco rígido. Mas aqui será como 1,5 gigabytes abertos. Apenas significa, bem, ele está aberto no Photoshop, ele precisa 1,5 gigabytes para colá-lo enquanto ele está funcionando e quando ele fecha, ele o tira do disco rígido comprime de volta para o PSD. Podemos ter ficado um pouco nerds nessa. Se você tem dúvidas, você provavelmente pulou. Vamos entrar no próximo vídeo.
23. Dicas de fluxo de trabalho e truques como um profissional no Photoshop: Olá, este vídeo é tudo sobre dicas e truques de fluxo de trabalho. Agora, toda esta seção seguinte vai ser alguns vídeos sobre ele. Este vídeo em particular, porém, é todos os pequenos pedaços que não eram grandes o suficiente para ter seu próprio vídeo apenas como um monte de pequenas coisas úteis. Alguns deles nós cobrimos um toque antes talvez
no curso, mas vamos colocá-los todos juntos aqui. O primeiro é abrir arquivos. Então em mec, porque seu mec somente se você pegar uma imagem, mantenha pressionada a tecla de comando e pressione Tab ele mostra todos os aplicativos disponíveis que estão abertos. Você pode simplesmente arrastá-lo para a coisa real. Ok. Então, basta arrastá-lo diretamente para lá e ele se abre ou você pode arrastá-lo se preferir apenas para
baixo para o seu documento e apenas arrastá-lo diretamente para o ícone. O próximo é girar sua tela. Então eu sei que estou trabalhando na minha máscara que fizemos antes. Eu tenho a minha ferramenta de pincel, e eu posso arrastar para baixo a borda deste realmente facilmente com o meu mouse. Ok. Todos os meus músculos do braço são muito bons em fazer esse movimento. Se eu tiver que dar a volta por aqui, eu não sou tão capaz de arrastá-lo. Isso foi muito bom. Ok. Então girar a tela é muito fácil, segure a tecla R no teclado, mantenha pressionada e clique em qualquer lugar. Você não está girando sua imagem. Você está apenas movendo-o para que você possa trabalhar em seu habitat natural em termos de mascaramento. Eu não tenho certeza do que estou fazendo aqui, mas você começa a idéia, segure em R, movê-lo para que você possa obter esse ângulo natural para sua maneira comenta que ter que movê-lo em torno de você disco ou de mim, eu estou apenas usando meu mouse aqui. Se você tem um MacBook Pro, acho que ele funciona em qualquer MacBooks que foram construídos nos últimos cinco anos. Você pode realmente ajustar, você não precisa apertar a tecla R. Você pode apenas usar seus dois dedos em seu touch pad e apenas rabiscar ao redor, rabiscos não é a palavra. Mas isso é bom. Dois dedos no touchpad e apenas girando. Eu não tenho que mudar nenhuma ferramenta. Ele só se move bem. Isso funciona em um PC? Acho que depende da máquina. Dê uma chance. Dois dedos, apenas dê um pouco de rotação. Como se estivesse no Google Maps. Você pode beliscar e ampliar também. Depois de terminar, você pode pressionar Escape no teclado no canto superior esquerdo e, em seguida, ele apenas recupera. Você pode deixá-lo assim o quanto quiser, ele ainda vai exportar o caminho certo para fora. Como uma coisa temporária. Tudo bem. Escapar. O próximo é Zoomify. Nós cobrimos isso em um vídeo anterior, mas eu quero amarrar aqui novamente, apenas colocar tudo junto bem. Então eu estou trabalhando por aí, consertando as bordas aqui, tocando-o para cima e eu preciso descer para o canto inferior esquerdo, talvez segurar. Você se lembra o que era? Tem uma chave, você segura, a tecla H. Apenas segure isso. Clique em manter o mouse pressionado. Ok. Estou segurando o mouse o tempo todo e a tecla H e depois solto o mouse. Ok. Só significa que você pode saltar deste ponto, em vez de fazer o velho rígido como segurar direito, arrastando você perdeu e você está tentando encontrá-lo e você está tipo, onde está? Então eu deveria ter diminuído. Ok. Então, mantenha pressionada a tecla H, clique pressionada e arraste, e então solte e ela volta para o zoom exato. Você pode começar a trabalhar bem. Ok. Outra pequena dica e truque está à vista. Se estiver a trabalhar num dos novos MacBook Pros que tem a barra de toque. Ok. Está acima do seu teclado é uma coisa meio física. Se você não tiver um MacBook Pro novo sem as barras de toque, provavelmente
ele não estará lá. Eu não tenho certeza, vá personalizar barra de toque eo que você vai encontrar é que você não pode vê-lo,
É na minha outra tela aqui, mas ele está me dando muitas maneiras de ajustar essa barra de toque, eu posso apenas adicionar coisas diferentes a ele. Vou fazer uma captura de tela e pedir ao editor para editá-la aqui. Embora você não possa ver minha barra de toque, eles estão todos balançando. Eu posso dizer realmente que eu quero ir para o que diz modo de
mistura e eu quero adicionar isso lá porque eu uso isso um pouco. Ou veja o que está no canto inferior direito, é como o do Mac. Poderíamos usar essa carga. Vamos ter certeza que isso está na minha barra de toque. Qualquer coisa que usando cargas, você pode arrastar para ele. Tudo bem. Então essa é a barra de toque. Você também pode personalizar a barra de ferramentas aqui, o que é legal. Então veja estes três pontinhos aqui. Você pode clicar sobre isso e clicar e mantê-lo pressionado e dizer, editar barra de ferramentas. Só significa que você pode arrumar isso. Se há ferramentas aqui, você simplesmente não usa, se
livra delas, digamos que o Lasso Tool Group, você simplesmente não usa nenhum desses. Você pode arrastá-los até aqui e dizer, eu não quero você. Você pode ver que ele simplesmente desapareceu da minha lista, escondendo-o bem, e você sempre pode voltar para Restaurar Padrões. Outra coisa legal que você pode fazer é, digamos que esta ferramenta de fatia foi útil, não é mais. Mas sempre que eu tocar C, eu não tenho certeza se você fez isso, mas você acidentalmente tocar C você acaba com aquele pequeno gráfico no canto superior esquerdo. Passaste eras a tentar desligá-lo. Você pode dizer desativar os atalhos para qualquer coisa que esteja oculta. Então não estamos usando esses materiais 3D, não
estamos usando a régua ou estes, ou contáveis. Ok. Todos esses, uma vez que você tem, você pode salvá-lo predefinido e você vai chamá-los de predefinições Dan. Você também pode chamá-lo de predefinições Dan. Isso só significa que, mais tarde, se você restaurar os padrões, você pode voltar e carregar, e obter todas as Predefinições do Dan. Clique em Abrir, clique em Concluído. Você pode ver aqui e a ferramenta conta-gotas, ver agradável e arrumado, agradável e limpo, nenhuma ferramenta menor um do que em [inaudível] você pode desligar apenas para obtê-lo bonito, agarrá-lo também. Mas você também vê que os que você desligou estão na dele, eles não se foram para sempre. Eles estão sob essa lista de extras. Ok. Editar barra de ferramentas, esta aqui, você pode não usar a seleção rápida. Veja em baixo na parte inferior aqui, aparece, desaparece, mesmo com este que você pode não usar. Estamos ficando muito nerds aqui. Então eu vou obter Restore Padrões. Clique bem, porque o seu precisa se parecer com o meu para o resto deste curso. Eu faria isso se não fosse um instrutor. Tudo bem. Então vamos fechar um par destes. [ inaudível] com você. Vou deixar-te aberta e podes aproximar-te. Então, digamos que você está trabalhando em um par de imagens, esta e esta aqui. Então este ele pode estar retocando e você não deve trabalhar para este grupo maior de placas ARP, vamos cobrir placas ARP mais tarde neste curso. Mas este aqui é muito bom se você ir ver,
não ver, ir para a janela, ir para o espaço de trabalho. Este aqui pode ser bom quando eu digo espaço de trabalho, quero dizer arranjado assim janela organizar e este aqui,
qualquer um destes dois eu acho bastante útil. 2-up horizontal ou vertical significa que eu posso ver este e este ao mesmo tempo. Então isso significa que eu posso estar trabalhando neste documento e arrastá-lo através apenas torna a vida muito mais fácil do que tentar usar isso na coisa da aba. Ok. Sim. Apenas os dois últimos são documentos abertos talvez uma vez para referência, ou aqui você está construindo uma montagem e apenas monte de imagens diferentes e você pode ter abas aqui também, mas tinha este documento geral aberto. Para voltar janela organizar, e este aqui diz, onde está, consolidar todas as guias. Outras coisas interessantes que não recebem o vídeo errado que são agrupadas aqui são suas bibliotecas. Vamos olhar para as bibliotecas um pouco mais. Se você não pode vê-los, vá para a janela e vá para bibliotecas. O que é útil aqui é digamos que eu tenho uma imagem da minha biblioteca. Na verdade, vamos ver as minhas imagens. Você pode ter qualquer coisa em sua biblioteca e apenas dizer, na verdade, eu gosto disso. Você pode sair e encontrar uma imagem semelhante? O que ele faz é olhar para o Adobe Stock. Você pode ou não ter como uma assinatura para isso já, mas você pode ver que ele passou e encontrou imagens que são muito semelhantes. Na verdade, neste caso eles são super parecidos porque eu os peguei de, hey olha para isso, louco que eu tenho aquele, é muito perto. Ok. Então é muito útil. Você pode simplesmente despejar qualquer coisa em bibliotecas. Não precisa ser uma imagem stock. Vamos despejar este em imagens de stock. Então eu vou limpar isso, e eu vou jogar este aqui na minha biblioteca. Então eu vou clicar com o botão direito do mouse nele e dizer vá me encontrar uma imagem semelhante, por favor, vai e verifica o Adobe Stock. Agora, o Adobe Stock é um serviço pago. Eu pago por isso todos os meses, quanto é? É como 30 dólares por mês, eu acho, você tem 10 imagens, 20 imagens, 50 imagens, eu preciso verificar isso mais do que eu precisava, pelo menos. Tudo bem. Então o meu está demorando um pouco por causa da minha mão trabalhando e alguma internet terrível no momento, mas você pode ver que ele passou e encontrou imagens stock que combinam com esta imagem aqui. Ele não está relacionado em tudo ao Adobe stock é apenas uma imagem de [inaudível] splash. Basta despejá-lo em bibliotecas e clicar em encontrar visualmente semelhante. Se você tem uma assinatura paga como eu, eu posso apenas clicar sobre este e dizer que quer baixar uma pré-visualização ou realmente apenas pagar por ele, licenciá-lo e dá-lo para mim. Legal. Então, se você está pagando pela Shutterstock ou pela iStock ,
elas são ótimas bibliotecas, mas há muitos laços legais entre o Adobe Stock. Então você pode olhar para mudar. Tudo bem, Outra dica é, se formos para o que temos, sim, vamos usar este aqui. Então há um gráfico que eu estou trabalhando para realmente eu terminei este agora, mas vamos dizer que eu tenho este tipo aqui, e eu colocá-lo em sua própria camada. Deixa-me livrar-me desta parte aqui em baixo para que fique limpa. Ok. Então, trabalhando com esta fonte aqui você pode ver que é o tamanho da fonte este é o espaçamento entre linhas ou entrelinhas. Para que eu pudesse fazer algumas coisas. Uma é que posso arrastar o ícone para cima. Ok. Eles podem ser muito úteis em vez de ter que entrar aqui e digitar e continuar, e isso me dá 72. Ok. Você pode simplesmente arrastar esse ícone para cima e para baixo. Também podemos fazer em qualquer campo no Photoshop. Então, qualquer campo que possamos encontrar, eu vou encontrar mais alguns desses lá em cima há alguns aqui. Então eu cliquei aqui. Só vou usar a tecla de seta para cima no meu teclado. Então, para cima só vai para cima e para baixo. Você não precisa segurar e arrastar e digitar. Use o para cima e para baixo. Se quiser ir um pouco mais rápido, mantenha pressionada a tecla Shift. Ele faz isso em 10 pontos em vez de um. Então, é só uma boa maneira. Então, se eu quiser ser grande, eu apenas mantenho pressionado, eu vou clicar aqui, segurar aquele Shift e apenas tocar na tecla para cima. Isso funciona em qualquer campo, não apenas em fontes. Você pode ouvir o espaçamento da linha. Não há espaçamento de linha que é clique sobre este. Então clique aqui e eu posso apenas subir, segurar, deslocar e descer, só para aumentar isso. Então, podem ser os pontos também. Então, movendo a posição X e Y, poderia ser uma camada de ajuste, eu poderia entrar aqui e dizer realmente não essa. Eu estou clicando aqui e apenas vá para cima, para baixo mantenha o turno. Ok. Isso é em qualquer campo mau exemplo, eu acho, qualquer campo clicável que tem números nele, você pode simplesmente usar o deslocamento para cima e para baixo para torná-lo mais rápido. Tudo bem. Próxima dica profissional é, para olhar nos canais e postar para ver se já existe uma seleção. Esta é uma imagem da biblioteca, eu baixei. Era um PSD e como apenas uma camada velha, e você está tipo, eu vou ter que mascarar isso. Ok. Posso mascarar isso, mas a coisa a verificar, especialmente se for um PSD e for um arquivo de um site profissional da biblioteca de ações. Pode haver, se você tiver sorte, vale a pena verificar todas as vezes, sob canais ou caminhos. Eles podem ser uma máscara salva e eles apenas escondidos aqui, veja aqui sob os caminhos. Alguém já passou por este com uma ferramenta de alfinete, e está escondida escondida aqui em caminhos. Não é óbvio. Eu posso clicar nele segurando minha tecla de comando e ele o transforma em uma seleção, essa chave de controle em um PC. Agora, posso voltar para as minhas camadas e adicionar a minha máscara. É muito mais rápido do que tentar fazer isso sozinho. Muitas vezes encontro essas coisas depois de passar uma hora mascarando algo, chegar a um ponto e eu sou como homem, eles deveriam ter feito isso antes de mim. Vou verificar os caminhos e vamos desfazer. Então, o para baixo para ambos os livros aqui, que eu
possa mascarar ambos os fora. Às vezes, os caminhos desta vez gostaríamos do pinto, ainda selecionar. Há também um aqui sob os canais. Lembre-se que fizemos a máscara do canal mais cedo, então alguém fez um desses para nós aqui também. Ali está ele. Posso manter pressionada a tecla Command e o Mac, clicar nela de volta para o RGB. Agora, eu tenho uma máscara, para aquela pequena borda lá. Não sei para que serve, mas estava lá dentro. Talvez eu precise mesmo. Então, se for um JPG, não incluirá esses dados. Mas se você baixar algo e é um PSD, Existem alguns outros formatos de arquivo que contêm isso também com um PDF, não tenho certeza, EPS, talvez vale a pena verificar. Mas acontece muito comigo é quando eu recebo material de marketing, digamos Adobe porque eu sou um centro de treinamento certificado, eles me enviam muito material de marketing. É tão plano gráfico e eu sou como hmm, como eu vou usar isso? Vou entrar em canais ou caminhos e eu vou ver, há uma máscara. Para onde foi para mim? Então, se você está trabalhando com um fornecedor vivo, e eles estão enviando esses arquivos bang, pode ser que eles estão apenas se escondendo em canais e caminhos. É onde eles olham, Há o meu tipo de crachá de certificação do instrutor
Adobe e logotipo da Adobe. Tudo isso, eu quero ter uma sombra, eu queria ser o mesmo. Então, em vez de fazer isso por camada, o que você pode fazer é pegar todos esses caras. Então eu estou clicando e arrastando através de todos eles. Certifique-se de que eu tenho todos eles, colocá-los em um grupo,
e, em seguida, ir para um FX e apenas aplicar a sombra para a coisa toda. Grande sombra. Eu só vou ter um pequenininho, de pequenino minúsculo e nem é tão pequenino. Eu tenho certeza que um girando idades agora, mas você pode ver que todos eles têm uma sombra consistente em torno deles, apenas usando um deles em todo o grupo em vez de cada um individualmente. Tudo bem. Mais duas dicas neste. Uma é, não sei por que
me sinto compelida a mostrar-lhe que esta está debaixo da ferramenta conta-gotas, a que vê a ferramenta de contagem. Eu não sei, sou eu, minha matemática, eu acho que há alguma dispraxia lá dentro, eu não sei, mas isso é útil,
veja, este é o contador. Quantos destes eu tenho? Eu uso isso para linhas e colunas e coisas que eu estou fazendo web coisas ou você pode ser, eu não sei. Photoshop é estranho, é usado por médicos, policiais e forenses. Eu ensino todo o tipo de pessoas que você pensa. Eu não sei. Eu sinto que os médicos devem ter algum equipamento especializado, mas muitas vezes eles usam Photoshop. Ok. Com imagens de alta resolução e sim, não
sei o que estamos contando, mas sei que há 20 delas. Podem ser formas, digamos que você é um arquiteto ou estou tentando inventar usos para isso agora. Vamos clicar em limpar. Tudo bem. Então eu quero dizer por último, mas não menos importante, mas é no final da minha lista aqui por uma razão. Eu uso isso, então eu era como se tivesse que ser em algum lugar, porque eles seriam uma pessoa lá fora que eles poderiam achar realmente útil. Então eu fiz uma seleção básica aqui, e a maioria das pessoas não sabe, você pode ir para selecionar e ir para transformar a seleção. Você pode torná-lo um pouco maior. Posso encolher. Eu posso transformar uma seleção como eu posso fazer qualquer outra forma. Sinto que fizemos xixi no final. Começamos com algumas coisas legais e acabamos com a seleção de transformação. Espero que tenha encontrado algo bom lá dentro. Ainda há um pedaço mais de nossas dicas e truques de fluxo de trabalho, mas eles têm seus próprios pequenos vídeos agora porque eles têm um pouco mais de substância. Então vamos em frente e saltar para um desses agora.
24. Truques avançados de camada no Adobe Photoshop CC: Oi lá. Este vídeo de fluxo de trabalho vai ser tudo sobre ir rápido com camadas. Nós agrupamos uma variedade de coisas juntos porque, por alguma razão estranha, este é o meu vídeo favorito para ensinar as pessoas, especialmente as pessoas avançadas. Eu sou como cara, isso é uma coisa legal de fluxos de trabalho. Não é super complexo. É bastante complexo. Imaginemos que é maior. Mas eu tenho algumas camadas aqui. Estamos trabalhando em uma imagem que tivemos antes. Obviamente, isso pode funcionar em qualquer imagem, mas eu quero trabalhar nesta queda de tinta na palavra super. É realmente SUPE e R em sua própria camada. Mas o painel Camadas é um pouco confuso. O que eu posso fazer é descobrir, eu vou manter a minha tecla de comando pressionada e clicar nesta “pintura” aqui. Eu tenho o R e S que é selecionado mais o zelador. Em seguida, diga Kind e clique em “Casos selecionados”. Só vai me mostrar as camadas selecionadas à frente. Havia duas camadas, eu posso desligá-lo voltando para Kind e ativá-lo novamente indo para Select it. Assim como arrumar tudo bem. Posso trabalhar nestas três camadas. Para desligá-lo na verdade, de uma forma mais fácil é apenas este como o topo baixo do interruptor aqui. Você pode ligar e desligar isso e ele salta de volta para o que você selecionou. Vá em frente, fica melhor. Vamos ligá-lo e vamos [inaudível]. Vamos ao Kind, e você tem esses pequenos ícones aqui todo mundo ignora isso. Você usa o Photoshop há anos e nunca clicou nele. Apenas mostra todas as camadas em que eles têm texto. Só nos torna [inaudível] talvez seja só eu. Agora não é só digitar. Você pode ter tipo que também tem sombras, talvez tipo e imagens podem ter mais de um em. Não é mais tão útil. Há apenas tune-type off e apenas aqueles que têm pixels ou apenas minhas camadas de ajuste,
por favor, apenas me mostre essas. Ou apenas minhas camadas vão desligar isso, apenas aqueles que eu tenho objetos inteligentes nele. Você pode ver que você vai perder [inaudível]. Lembre-se de desligá-lo quando terminar. Vamos ver alguns dos outros aqui. Então Kind podemos olhar para nomes e você pode fazer uma pesquisa ou encontrar, querer encontrar aqueles que são chamados de banana e você apenas me mostrar essas camadas. Eu nunca uso esse. Você pode estar trabalhando em algumas camadas [inaudíveis] grandes e isso pode ser útil para você. Este é muito bom. Digamos que temos algumas sombras caindo acontecendo e queremos encontrar os efeitos que têm sombras soltas sobre ele. Só aquelas camadas. Eu posso selecionar todos eles e depois ir e mudá-los. Vamos entrar aqui e desligá-los. Outro que você pode fazer está aqui embaixo, em Modo de Cor, você pode dizer não clique neste aqui, clique nesta das extremidades. Eu quero encontrar todas as camadas que têm uma multiplicação sobre eles, nenhuma tem. Você pode achar que atributos úteis. Que cores são? Objetos inteligentes, coisas que [inaudível], você pode olhar para prancheta. Este não tem nenhum quadro de arte, então este tem. Pode ficar super confuso. Vamos desligar isso de novo. Normalmente você tem isso [inaudível] ou se você está trabalhando em cima, essas coisas em todo o lugar que você gosta. Na verdade, eu só quero trabalhar neste arquivo aqui, apenas me mostre o quadro de arte de compartilhamento de habilidades. Você pode apenas ir até aqui, ligá-lo e ele só vai me mostrar a habilidade compartilhar um, não qualquer um dos outros caras. Clique neste e ele vai me mostrar apenas o padrão. Super útil, super rápido e aposto que você tem ignorado isso lá. São dois no tipo de padrão. Certifique-se de que o pequeno desliga quando terminar. Então, faça backup para este arquivo original. Agora o truque é que já fizemos isso ao longo do curso é que dizem que eu tenho minha camada de banana e eu vou duplicá-la. Eu apenas arrastá-lo para este novo ícone de camada e duplicá-lo. Vou desfazer isso. Outra maneira é com ele selecionado, mantenha pressionada a tecla de opção no mac em um PC e arraste-a apenas usando a ferramenta Mover. Só faz com que seja uma duplicata enquanto você está arrastando. Outro par de coisas como vimos no último vídeo, você pode alterar suas miniaturas. Sabemos que se clicar com o botão direito do mouse na palavra, você obtém um monte de opções. Mas se você realmente clicar com o botão direito na miniatura, você obtém um conjunto diferente. O que pode ser útil aqui, pois você pode ajustar o tamanho da miniatura, tudo bem. Mas também a chave, você vê o dito isso aqui, é o círculo que eu estou usando para cortar essa garota aqui. É como uma pequena parte de um realmente está me mostrando todo o documento. Você pode clicar com o botão direito
do mouse e dizer realmente apenas me mostrar os limites da camada para todas as camadas diferentes. Essa aqui é uma imagem bem grande, mas a banana ocupa a imagem completa. Agora o círculo faz o papel apenas um pouco mais fácil de ver agora em vez eles ser um pequeno pote como o banana.Este trabalho para ambos. Vá para clipe detalhes para o documento encadernado, banana está mostrando em relação ao documento maior dizendo com isso, e é uma máquina até você. Eu tenho que mudar de volta agora porque quando ele corre para olhar o mesmo como eu e o tutorial, tudo bem. O próximo é nomear suas camadas como. Para ser honesto, nunca nomeei minhas camadas, porque estou trabalhando comigo mesmo e estou bem que sou preguiçoso. Mas se eu estou trabalhando com um cliente, definitivamente, bem, a última coisa é que eu faço isso. Não faço tudo enquanto trabalho. Mas eu tenho que enviar-lhes um arquivo rápido inteligente que nomeei minhas camadas. Estou tentando projetar um nível de profissionalismo que não se reflete nos nomes das minhas camadas. Mas eu tenho que ir e fazer isso. Um truque legal é que as bananas estão lá. Mas digamos que vou ser sensível a maiúsculas e minúsculas. Agora, em vez de clicar duas vezes nestes dados aqui e digitar bagas, este é um atalho muito pequeno. Eu gosto, ok, e clicar duas vezes em todos eles. O que você pode fazer, eu vou desfazer é um pouco acabado de digitar banana. Basta pressionar tabulação no seu teclado e ele vai para baixo para o próximo. Nunca mais terá que levantar a conta. Banana, este aqui, posso deixar-nos a tua saturação corresponde à minha máscara. Eu só estou tendo para baixo, eu acho que é muito mais fácil mirtilos também. Vá em frente, basta clicar duas vezes em um deles e na guia através da toupeira. Tudo bem, o último a fazer com camadas é digamos que temos a camada de smoothies. Eu gosto, tem uma sombra de trabalho que eu gosto, mas eu quero aplicar essa mesma sombra de gota na banana. O que você pode fazer é clicar com o botão direito do mouse nas palavras filmes e você pode ir também, nós olhamos para isso um pouco antes, mas eu vou para copiar estilos de camada. É como eles que eu banana. Agora clique com o botão direito do mouse nele e você pode colar estilos de camada apenas como significa, tente arrastá-los de um para outro, não
gosta de duplicá-los enquanto você arrastá-lo. É move-lo, então isso é útil. Tudo bem, espero que tenha encontrado algo útil lá dentro. Eu não sei por que eu acho isso mais excitante, mas eu espero que você esteja sentado lá em casa ou trabalhando indo. Sim, essa coisinha vai mudar a minha vida. Acho que pode não mudar sua vida, mas espero que economize um pouco de tempo. Vamos pular para o próximo vídeo do fluxo de trabalho. Vejo você lá.
25. Adicione automaticamente um texto em marca d'água no Photoshop: Olá, é hora de ações. Em particular, vamos criar marcas d'água. Vamos gravar nosso costume em ação. Clique nele e basta apertar play e, em seguida, ele vai adicionar a nossa marca d'água, o autor bem no meio lá. Podemos fazer isso uma e outra vez em cada imagem. Nós também podemos fazê-lo com logotipos, então eu tenho um aqui que nós fazemos
neste vídeo em particular sobre logotipos vai no canto inferior direito, super rápido, super fácil, economizando muito tempo. Nós amamos ações. Vamos lá. Tudo bem, vamos começar abrindo nossos arquivos de exercícios. Você os encontrará nos arquivos de exercícios em preferências de O3 e fluxo de trabalho. Vamos abrir a imagem um, dois, três e quatro. Vamos começar com a imagem um. Vamos ver rapidamente quais são as ações se você não as usou antes. Tem que abrir e ir para ações. Basicamente, tudo o que eles são são passos no Photoshop, que é outra pessoa gravou. Você vai ver aqui como este aqui para uma vinheta. Se eu ferramenta para baixo, isso significa apenas
passar por etapas no photoshop é tirar um instantâneo, adicionar uma pena, fazer uma cópia da camada, preenchimentos. Todos estes passos são gravados aqui. Você pode usar alguns dos padrões. Estes não foram atualizados desde que parece que nos anos 90. Se você clicar na moldura de madeira e bater mais, ele diz que tem que ser tão grande e você tem uma moldura de madeira muito dos anos 90 ao redor do lado de fora. Você pode adorar. Lá vai você. Basta clicar nesse botão. Você pode ver aqui que temos imagens. O quadro pode ser desligado. Basicamente, alguém antes de nós criou esta moldura de madeira, gravou, salvou-a como padrão uma vez no photoshop. Eu estou indo para o arquivo revert, isso vai para ir, há apenas muitos desfazer. Provavelmente acontece, uma parte dela volta, de volta ao início. Você pode brincar com esses. Há mais alguns aqui. Há alguns, digamos, toma uma correção. Posso rolar até aqui. Este painel é um pouco difícil de usar. Eu não vou mentir para você, e a maneira mais fácil é dizer girar para cima os padrão, pegar algum texto, em seguida, mover para, você pode ver que ele tem apenas tipo lá. Isso significa que este precisa ter uma camada de tipo selecionada e antes de eu cabeça, reflexão de
borda e, em seguida, eu jogo. Ele vai me dar um efeito aquoso Ripley, e você pode ver que há super linhas e algumas delas são mecânicas e muitas delas estão fora. Vamos olhar para fazer o nosso próprio e vamos fazer-lhe especificamente a marca d'água. Vamos ao arquivo, e vamos reverter. Eu vou clicar em carrapatos a correção e apenas bater na lata de lixo para me livrar deles. Não são apagados para sempre, eu posso voltar e pegá-los. Basicamente, tudo o que vamos fazer são tipos e tomadas no meio e gravados ao mesmo tempo. Quero registrá-lo nestas acções predefinidas. Vou clicar neste que diz que vou fazer uma nova ação, esta pequena página enlatada. Vamos para o nome e vamos chamar este, marca d'água. Esta vai ser uma marca d'água para apenas texto. Você não pode dar teclas de atalho. Mas se você é como eu em um Mac, nenhum desses funciona que vai abrir o iTunes ou qualquer outra coisa. Vamos apenas clicar em gravar. Agora você tem que ter cuidado. É lembrar de cada coisa que você faz. Isso vai gravar botões indo e nós piramos. Eu faço de qualquer maneira. Lembre-se que vai gravar cada passo. Nossos passos vão ser, então eu clicar na ferramenta de texto. Vou escolher uma cor para o meu tipo. Vou clicar uma vez aqui e digitar. Esta não é a minha fotografia, esta é uma de Unsplash, então estas são as fotografias de Paul Haumann. Eu vou fazer com ele. Eu tinha a capa que eu montei quando se você é como
eu, eu nunca consigo lembrar que chave é em um PC ou Mac. Basta manter pressionada a tecla alt ou opção e apenas esmagar as teclas. Esse é o meu método de qualquer maneira até eu encontrar os direitos autorais, tive sorte. Sendo uma marca d'água, você decide o quão grande é. Só estou transformando. Diga que quero que seja tão grande. Eu vou diminuir a opacidade e eles vão minha ferramenta de movimento, e eu vou apenas digitar qualquer um dos números no meu teclado. Você pode ver que eu defini a opacidade para 50%. Uma coisa que você pode ter que fazer é, é um pouco feio, mas vai ficar bem contra fundo preto ou escuro, mas vai ficar um pouco perdido aqui no branco. Muitas vezes, uma maneira fácil de ter as duas maneiras em vez de apenas criar duas ações separadas, é apenas adicionar uma sombra para ela. Sombra solta. É bom para mim, significa que pode ser visto aqui em cima e aqui em baixo, tudo bem. Abaixe a opacidade novamente, você pode começar a ver que está gravando tudo, então eu não estou indo em um método muito linear aqui. Estou resolvendo isso. Você pode passar por e excluir estes depois se você
quiser [inaudível] tudo bonito e bonito, você não precisa embora. Eu nunca faço. Eu queria isso, eu queria estar no meio, e vai ser isso. Vou apertar o botão de parar. Está gravado agora. Vejamos a imagem dois. O que precisamos fazer agora é reproduzir aquela coisa que gravamos aquela ação. Se eu tocar agora, vai tocar de onde este pequeno iluminador cinza. Então eu vou fazer a camada de movimento. Você precisa clicar de volta lá por algum motivo, não bateu em play e ele vai correr através deles. Veja, ele vai passar através de um relógio de Lee de volta. Eu sei que você ainda usa pivô para gostar de ver uma tupla através de todos eles de volta. Você pode ver lá eu adicionei uma marca d'água. Vá para cima. Vamos ficar um pouco mais avançados e vamos dizer que queremos atualizá-lo porque vamos ter problemas como este, tudo bem. Digamos, vamos fazer duas coisas. Eu quero colocar uma imagem nele em vez de texto. Eu vou para o arquivo, reverter, volta ao início, e em vez de fazer este aqui, vou girar tudo, então é bom e arrumado. Vou criar um novo. Este vai ser chamado de marca d'água, mas este vai ser o meu logotipo. Em vez de apenas digitar e eu tenho um logotipo que já fizemos e eu cliquei em gravar. Basicamente é a mesma coisa. Nós vamos para o arquivo, colocar incorporado no entanto, em vez de digitar texto. Nas suas preferências de O3, há logotipo branco e clique em lugar. Vou dar para o tamanho certo. Isso funciona para mim. Entre no meu teclado, você pode ver que é lugar de gravação. Eu baixei as baixas de opacidade para cerca de 40 por cento, na minha sombra de novo. Aqui vamos nós. Vamos fazer algo ainda mais avançado porque basicamente podemos parar isso agora e ir brincar. Na verdade, vamos fazer isso. Vamos parar com isso. Vá aqui, volte para o topo, aperte o play, e ele vai e traz através do meu logotipo. Vá em frente, vai batê-los no próximo vídeo, no momento em que estamos apenas fazendo a ação e vamos mostrar-lhe como fazê-los para muitas centenas de imagens de uma só vez. Esse será o próximo vídeo. Então, arquivo, ele voltou a ser revertido. Vamos voltar a este. Outra ação um pouco mais aconselhada, NAS. Nós fizemos isso, mas vamos dizer que queremos ajustá-lo novamente e fazer outra coisa. Queremos colocá-lo no canto inferior direito assim. Nós já criamos isso. Como vamos editá-lo? O que podemos fazer é dizer aqui nesta fase, que quero começar a gravar novamente. O que você vai fazer a partir de agora? Vamos adicionar a essa lista. Eu quero mostrar-lhe um pequeno truque de como fazê-lo no canto inferior direito, porque não é tão simples quanto parece, é uma pequena solução alternativa. O que precisamos fazer é selecionar ambas as camadas e, em seguida, usar as funções de linha aqui em cima. Mas não funciona porque o fundo, este fundo aqui, porque está trancado, nos
dá dor a todos. Tudo o que precisamos fazer é clicar duas vezes no plano de fundo, clicar em OK. Você deveria dar um nome a ele. Então podemos usar o recurso em vez de apenas como deslocamento clicando como fazemos aqui em cima, podemos usar como um recurso automatizado que as ações é como um pouco melhor porque seu gosta de ir para aqui, apenas indo selecionar todas as camadas, acha isso mais fácil. Então, no topo, aqui podemos ir, eu gostaria de ir para a direita, e então eu quero ir para baixo. Você pode ver aqui está apenas alinhando as camadas atuais que eu selecionei. Aquele faz o fundo, aquele faz o esquerdo. A próxima coisa que eu quero fazer é ter apenas o logotipo selecionado pela última vez e eu queria mover para cima e para a esquerda. Você pode ver lá na minha pequena dica de ferramenta lá está dizendo, subir 32 pixels e através de 44. Isso é legal porque significa que vai funcionar bem para retratos que vão ficar na parte inferior direita e eles simplesmente saem, que conta como um espaço. Faz sentido. Deixa que pare. Espero que se eu for para a imagem três, eu posso voltar para o logotipo da marca d'água, tocar em play e editá-lo. Poderia ter inferior direito e dizer inferior esquerdo antes, mas apenas sai alguns pixels dentro, tente aqui para um que é como ele. Apenas uma forma diferente, [inaudível] para este início que já tem uma forma diferente. Vamos apagar o texto que eu vou buscar e é bom lá. Vá em frente. Meus amigos, vai ser isso. Para obter a criação de marcas d'água que faz, texto e um logotipo. O próximo vídeo, na verdade, o segundo depois deste, próximo faremos algumas ações mais avançadas. O vídeo depois disso, vamos fazer lotes para que possamos fazer um zilhão de imagens diferentes, tudo de uma só vez. Te vejo então.
26. Lotes ou processo de várias imagens ao mesmo tempo no Photoshop: Vamos agora dar uma olhada em adicionar nossa marca d'água a um grande grupo de imagens em vez de apenas uma de cada vez. Vamos olhar para dois recursos, um é chamado de lote, e um é chamado de processador de imagem. Ambos são grandes e maus. Ambos têm o rápido, por isso vou mostrar-vos os dois. Eles praticamente fazem o mesmo trabalho, mas eles têm algumas configurações extras que valem a pena explorar. Criamos nossa ação no último vídeo. Caso contrário, criaremos uma ação em um segundo, mas digamos que a criamos e vamos para o arquivo. O que eu mais uso está sob scripts e é chamado de processador de imagem. Tudo o que dizemos é: “Que imagens você quer selecionar?” Nas suas preferências de O3, há uma pasta chamada exemplos de lote. Vamos apenas clicar em abrir. Essas são as imagens que nós vamos aplicar, nós apenas não chegar a quatro, mas você pode para centenas. Você pode incluir todas as subpastas dentro de uma pasta. É de onde estou a tirar as imagens. Onde eu gostaria que eles fossem? Você pode salvá-los na mesma pasta, tudo bem. Ou você pode dizer, “Eu gostaria de colocá-los em uma pasta lisa na minha área de trabalho.” Vou ligar para este, processador de imagens. Criar. Clique em “abrir”. É de onde eu quero tirá-los. É aqui que quero colocá-los. A coisa legal sobre o processador de imagem sobre lote, nós vamos olhar para comparar os dois. Uma delas é que você não precisa aplicar uma ação. Você pode apenas dizer, na verdade, eu não quero executar uma ação em tudo. Ajustar. O que eu quero que você faça é salvar um JPEG que é igual a cinco, que tem uma largura e altura disso nessa pasta particular. Então, tudo o que você usa é basicamente redimensionar e salvar como um JPEG. Bom para imagens cruas, você pode aumentar isso super alto. Você pode nem se preocupar com o tamanho da imagem, é apenas para que você obtenha alguns JPEGs e processá-los em massa assim. Isso não é o que eu quero fazer, eu quero um JPEG, mas eu também quero executar essa ação e nós vamos
usar os ticks de marca d'água, o que nós fizemos. Tudo bem, relaxe e corra. Abre em flicks e flashes. Na minha área de trabalho eu deveria ter processador de imagem, JPEG, e há minhas imagens com marca d'água. Vamos um pouco mais além e ver por que usaríamos lote sobre processador de imagem. O estranho é que o processador de
imagens e lote foram desenvolvidos por pessoas diferentes em momentos diferentes, e eles apenas penduraram em torno de ambos no Photoshop porque ambos têm pequenas peculiaridades que se suportam. A coisa boa sobre o processador de imagem é, você pode apenas salvar como um JPEG, você não precisa executar uma ação. O lote é diferente. É tudo sobre executar ações. Eu gosto do processador de imagem porque é bem simples. Lote embora tem um monte mais detalhes que podem assustá-lo, você é como [inaudível]. Não é muito, mas vamos passar por isso. A mesma coisa, em minhas ações padrão é a marca d'água que eu fiz. De onde vem a fonte? Vou escolher a mesma fonte de antes. É um O3 preferências e fluxos de trabalho e é chamado de exemplos bash. Às vezes você encontra imagens que dizem que elas se
abrem e que podem ter avisos de perfil de cor, e isso pode estar fazendo com que o processador de imagem, que fizemos antes fique ruim. Você pode clicar sobre isso e dizer, na verdade, se ele tem que, você usou o espaço de cor errado, basta dizer suprimir isso para mim. A outra coisa boa que isso tem está aqui, você pode dizer na verdade no momento que ele vai apenas salvá-los como ele fez para o processador de imagem, mas o que eu posso dizer é que, na verdade, eu gostaria que ele lhe desse um nome. Vou chamá-los de “casamento do Dan em fevereiro de 2019'. Você poderia adicionar essas fotografias estranhas, mas você entende o que quero dizer, e eu posso somar. Eles podem ser chamados IMG 77421, e você apenas dá a eles um nome real. Então aqui, em vez de uma extensão que é like.JPEG, eu vou dizer que eu gostaria de dar-lhe um número de série. Na verdade, vou dar uma carta em série. Ele vai ter um, b, c, d. Então eu vou colocar na extinção, que é JPEG. Você pode ver um prédio aqui em cima, o casamento de
Dan em fevereiro, que é seu primeiro lote. Então eu vou adicionar uma letra de série no final, um a, b, c, d. Na verdade, você pode ter um 100, então você pode ir para um número de dois dígitos no final lá, O1. Na verdade, o que eu vou fazer é aqui em cima, eu vou colocar um pouco de hífen depois para que fique melhor. Na verdade, não está saindo como um presente também. É apenas um exemplo que eu coloquei lá dentro. Ele tem algumas peças extras, mas vai ter um pequeno problema. Vamos clicar no destino. Para onde é que ele vai? Vou colocá-lo na minha área de trabalho, e este vai ser chamado de lote. Batches core, ele tem recursos extras, mas há algumas coisas extras que você precisa fazer se você quiser usar esses recursos extras. Apenas clique em “ok”. Ele vai rolar e vai dizer, “Ei, eu não sou um JPEG porque eu tenho mais de uma camada. “ Diz: “Preciso ser um PSD.” Vou clicar em Salvar. Eu poderia ir agora e escolher JPEG, e clicar em Salvar. É mais rápido do que fazer você mesmo, mas ainda assim, você está tipo,” Oh cara, o que aconteceu? Isto era para ser super preso. “ Vou mostrar-te como contornar isso. Funciona. O único problema é que ele surtou porque processador de
imagem tem a capacidade de forçá-lo a ser um JPEG, ele apenas diz, “Você é um JPEG.” Enquanto isto diz: “Vou guardá-lo como seja o que for necessário.” Neste caso, ele precisa ser um PSD a menos que você diga ser JPEG. Ainda está comigo? Lotes recursos extras, mas tão rápido, para contornar isso, eu vou excluir isso. Vou mostrar-te para contornar isso. Eu vou abrir qualquer imagem porque tudo o que eu realmente quero fazer é abrir minha marca d'água, entrar aqui e eu preciso adicionar uma última coisinha. Vou tocar no play. Vai passar por uma edição. Marca d'água. Eu vou descer aqui. Eu vou bater recorde e eu preciso ir para este menu voar para fora aqui
no painel de camadas e dizer nivelar imagem. Agora, ele não quer ser um PSD, para que ele pare, eu vou arquivar, reverter, fechar isso, não queria mexer com isso. De volta à mesma coisa. Mas por causa de ajustar minha ação, temos que adicionar aquele pouco extra lá dentro. Espero que agora eu possa ir para automatizar, eu posso ir para lote. A mesma coisa deve funcionar. Clique em “ok”. Ele agora corrige e faz eles para ter um pouco de olhar. Lá vamos nós, alguns pequenos recursos extras, mas tivemos que fazer um pequeno passo extra lá. Quero ficar ainda mais malvada, está tudo bem? Se você já acabou de dizer processos de imagem é bom, vamos continuar. Você está autorizado a seguir em frente. Mas se você quiser, você vai ficar por aqui e você pode não. O que vou mostrar é o redimensionamento da imagem. O problema com
o uso do tamanho de imagem do editor de processo de imagem é que você precisa especificar o tamanho, o que é uma droga. O que eu quero dizer é que 500 pixels, mas não a altura, eu só quero dizer, eu quero que você seja o maior tamanho que 500 pixels porque ele está indo para um site. Sou fotógrafa de casamentos, tirei muitas imagens. Eu quero que eles tenham um tamanho nominal, caso contrário eles vão ser muito grandes para carregar. Mas porque temos retrato e paisagem, não
quero que tenham 500 pixels de largura. Eu quero que a borda mais longa tenha 500 pixels de largura, então vamos ficar impertinentes. Vou abrir minha imagem novamente e este texto de marca d'água aqui. Antes de eu fazer achatar imagem, o que eu gostaria de fazer, na verdade eu posso fazê-lo depois [inaudível], Eu vou bater recorde. O que vamos fazer é em vez de dizer o tamanho da imagem e mudar isso, o problema é que temos paisagem e retrato. Nós vamos usar este pequeno recurso especial e ele é chamado de imagem de ajuste automatizado. Digamos que queremos 800 pixels. Eu queria restringir dentro destes dois, não vai forçá-lo. Só que estas são as maiores dimensões, que vão fazer o que quisermos. Vamos clicar em OK. É parar? É fecha e não salvá-lo. Vamos tentar outra vez. Vamos para o arquivo. Vamos automatizar. Vamos para lote para que em um texto de marca d'água, eu poderia ter renomeado que um para dizer redimensionar bem, pode acabar tendo dois deles. Um que apenas faz a tomada, alguém que faz o redimensionar bem e para manter todas essas coisas. Eu acho que é isso. Vamos clicar em “ok”. Chutar para trás. Relaxe, espero. Tudo bem, vamos. Eu acho que ele reaved sobre o topo dos que eu fiz, lote quem eles são. Vamos verificar os tamanhos. Obter informações. Você pode ver aqui que tem 800 pixels de altura. Considerando que este aqui tem 800 pixels de largura. Espero que me siga até lá. Acho que ele até me perdeu um pouco. Basicamente, o processador de imagem é rápido e fácil. Se você precisar de mais detalhes como renomear como você passa, k lote é incrível. última pequena coisa em que adicionamos os automatizes foi uma imagem de ajuste frio que funcionará tanto para o processador de imagens quanto para o lote, não importa. A grande diferença é que mais uma vez para esperar afundar nele para mim talvez seja que você tem essas opções ok. Para dizer que talvez haja alguns problemas em sua abertura e está causando problemas na versão do processador de imagem, você pode dizer realmente apenas suprimir essas coisas. Também podemos adicionar o nome aqui, mas ambos não fazem um bom trabalho de redimensionamento. Nós apenas fizemos isso com a ação em si usando essa imagem de ajuste. Acho que já me convenci. Espero que entenda, vamos passar para o próximo vídeo antes que meu sucesso exploda.
27. Como colocar muitas imagens em um arquivo do Photoshop rapidamente: Ei aí. Este vídeo nós vamos pegar um monte de arquivos que nós fizemos, ok? Eu tenho todas essas capturas de tela, coisas que são realmente parecidas e eu só quero adicioná-las a um arquivo do Photoshop em um grande objetivo, em vez de copiá-las e colá-las. Mostrarei a você o recurso que acabou de despejá-los todos em um arquivo do Photoshop, tudo em camadas facilmente. Então eu só vou fazer isso em uma espécie de quadro de humor. Faço isso o tempo todo quando tenho ideias para projetos. Especialmente se eu tenho que lidar com um cliente, eu mostro-lhes um quadro de humor como este para é, este é este não é o meu trabalho, é o que eu estou olhando para fazer que é, eu entendi o seu breve direito? Poupa muito tempo. Eles podem olhar para isso e ir, isso não é o que queremos com os Comic Sans. Tudo bem, vamos falar disso agora. Tudo bem. Para começar, tudo o que você precisa fazer você não precisa ter nada aberto. Ok. Realmente não importa o que o Photoshop parece talvez o trabalho possa ser aprender. O que você precisa fazer é ir para Arquivo e descer para Scripts. Tem esse aqui. Diz carregar arquivos na pilha. Você pode escolher se deseja selecionar os arquivos ou carregar uma pasta inteira. Eu só vou clicar em “Arquivos”, clique em “Procurar”, e suas preferências de O3 e fluxo de trabalho. Vamos clicar no inspirador,
manter a tecla Shift e clicar em “Inspirations 7". Então nós temos todos eles selecionados. Clique em “Abrir”, relaxe e assista. Clique em “Abrir”. Você pode decidir como por mim, como dissemos no início que estamos fazendo quadros inspiradores. Acabei de tirar screenshots em todo o lugar e é um para carregá-los em um arquivo. Você pode dizer, capturando algo em um tripé que talvez está se movendo e você quer como tentativa de alinhar as imagens, eles vão tipo de alinhar exatamente, meu eu apenas todas as imagens muito diferentes. Então não vai funcionar. Eu estou usando isso de uma maneira, mas há muitas outras vezes nós somos como realmente só quero despejar muitas imagens no arquivo Photoshop. Talvez queiras tentar alinhá-los. Talvez sejam exposições diferentes que você fez em uma imagem ou algum tipo de lapso de tempo, e você pode decidir o que deseja juntar tudo como um objeto inteligente no final. Eu não quero fazer nenhuma dessas coisas que eu quero relaxar, relaxar. Qual o total de photoshop? Porque a alternativa é “Abrir arquivo” e, em seguida, copiar colar, fechar. Você quer salvar drama [inaudível], para ver todo mundo aqui meu arquivo mais recente, ok, eu tenho um monte de imagens que vão acender juntos. Você pode ver os nomes dos arquivos lá. O que eu quero fazer para o meu quadro de humor aqui é que eu peguei meu cripto. Vou arrastar isto até aqui. Não faço ideia do tamanho que vai ser escrito. Eu só vou me mudar lentamente. O que eu faço quando estou fazendo um quadro de humor é decidir quão grande eu quero coisas diferentes em termos de como, digamos que estou enviando para o cliente sobre minhas idéias sobre o que estamos fazendo haveria algumas coisas que eu gosto SAP proeminente e algumas coisas que são sutis. Eu uso o tamanho para mostrar como, eu acho, você se sente importante para o tema geral, coisas diferentes. Gosto deste tipo de paralelepípedos juntos, sobrepostos. Nada é realmente como não é, eles não são seus projetos, certo? É só dar uma ideia ou um humor do que você quer fazer. Eu poderia dizer algo assim e arrastá-lo para lá também. Eu acho que nós aprendemos pilha de carregamento é muito rápido. Agora eu estou apenas mostrando o que eu faço em termos de, eu vou fazer uma nova camada. Vai ser no fundo. Vou encher com, provavelmente não preto, vou escolher verde cinza. Vou pegar todos esses caras e colocar uma sombra neles. Agora, estranhamente, você não pode editar opção em todos eles de uma vez. Você pode usar nosso truque onde você colocar uma pasta, adicionar uma sombra para a pasta e estigma Moreland, que só ficar fora do tópico agora. Fique por aí, há uma dica aqui em algum lugar. Ok. Eu vou para o lado. Você pode ver como com todos eles em um grupo. Eu posso adicionar uma sombra a esse grupo e você pode ver que eles vão chegar lá. Isso pode ser o que você quer. Mas o que eu quero é que eles individualmente tenham sombras. Vou recuar até me livrar daquele grupo. Vou adicionar sombra a um deles. Sombra solta. Vamos por aqui, tamanho, então você clica com o botão direito do mouse em
um deles ou aquele em que você tem a sombra,
vá copiar, então você pode aplicá-los todos selecionando esses outros seis aqui, clique com o botão direito do mouse nele e diga estilo de vida ritmo. Agora, isso terá sombras individuais em vez de todas em um grupo. Cabe a você o que quer fazer, certo? Você pode brincar com as camadas, ok, trazer isso para a frente, talvez por cima desses caras obter isso como, eu não sei, cores misturadas, coisas de
humor acontecendo. Atalhos para mover coisas para cima e para baixo. Digamos que eu quero que isso esteja na frente agora, queria estar lá, mas eu quero na frente “Command Shift” e o segundo dos colchetes, que é “Control Shift”, colchetes em um PC, colchetes são os que estão ao lado da tecla P. Traz tudo para a frente. O primeiro vê-o para trás, que está atrás da minha caixa cinzenta. Agora o que eu quero, selecione-os todos exceto o fundo e mova-os para lá e para o quadro de humor do Dan. Outras pequenas dicas onde eu obter minha inspiração de Jim, realmente dizer que eu estou fazendo isso aqui é minha placa de humor de design de interface do usuário. Acho que a maioria dos dispositivos é de algo chamado Dribbble. Dribbble com três Bs. Eu falei com na UI aqui e é apenas a curadoria do site é muito incrível e é bonito onde você pode encontrar todas as coisas. Há uma sensação muito dribbble para ele, mas muitas vezes são coisas com que eu realmente posso me relacionar. Pode começar a seguir as pessoas. Você pode enviar suas coisas aqui. Outro lugar realmente bom e não tem olhar realmente diferente para ele como Behance, Behance
jubilante por alguma razão. Só tem vibrações diferentes em termos de qualidade ou não a qualidade, o estilo, ok? Dribbble tem este muito mais ilustração, limpo como gráficos criados por computador onde, como Behance, tende a ser muito mais deste tipo de coisa onde há uma mistura de que, mas há, eu não sei se há uma vibe diferente para ele. Que mais pixels e granulosidade em Behance, até você. Espero que um desses seja novo para você. A outra coisa que quero te mostrar antes de ir, é por causa da Niice, Niice com dois “I “, terá cartas extras. Nice é livre para se inscrever, ok, e você cria seus próprios quadros, basicamente apenas quadros de humor. Isso é o que eu estava fazendo, um pouco de lixo de mão e eu queria idéias já que eles fizeram jogá-lo no Photoshop, eu o joguei neste programa aqui. A coisa legal sobre isso é que ele faz tipo de redimensionamento realmente rápido e fácil. Você vê isso? Ok, então eu posso ir para você, eu quero que você seja uma parte menor disso e ele faz um corte muito legal e permite que você tipo de dizer, eu gosto deste aqui, eu quero torná-lo maior. Fica muito grande. É muito legal. Você também pode exportá-los como PDFs, sombreá-los com um cliente como este. Muito legal. Você ganha um par de pranchas grátis e então você tem que pagar. É bem barato. Você deveria se inscrever para esses caras. Eu amo a Niice. Tudo bem. Vamos ser nós. Vemo-nos no próximo vídeo.
28. Características estranhas do Photoshop e easter eggs: Olá, este vídeo está cheio de coisas aleatórias que não vão ajudar o Photoshop, mas eu acho que você precisa saber, se você vai ser avançado, você precisa saber como fazer coisas como você não pode fazer tom em torrada, como fazer bananas aleatórias aparecem, como mudar a cor de fundo para rosa, e este pode realmente ser tão útil. Podemos mudar o que aparece no fundo aqui para ser algo mais útil. Provavelmente, mais do que quantas camadas você tem, mas provavelmente não muito mais. Este é o vídeo do direito de passagem de pessoas avançadas. Vamos primeiro, vejamos uma coisa estranha e
útil no Photoshop, vamos abrir qualquer imagem. Basicamente, eu só vou usar a imagem 4 da nossa pasta O3 do fotógrafo Alexander Andrews, apenas uma vez algo aberto. Por quê? Porque essas telas iniciais não têm muitas partes. Se você não gosta desses tela inicial, você pode ir para “Janela” e obter um “Espaço de trabalho” em vez de estar no status estar em “Essentials”. Depois voltamos a ser como o Photoshop costumava ser nos bons velhos tempos. Independentemente disso, vamos ter um arquivo aberto, vamos olhar para baixo aqui, por padrão, esta pequena sessão aqui que você provavelmente nunca clicou, você provavelmente já viu o tamanho do arquivo pode estar aqui embaixo, mas há algumas pequenas coisas que você pode mudá-lo para que podem ser úteis para você. Digamos que você é realmente hardcore em seus perfis. Você calibrar quedas é RGB, este sempre olhou para baixo e ir é RGB ou CMYK ou o que quer que você esteja usando. Outra útil, as dimensões do documento são legais. Mostra que são 2000 por 2000 e 72 PPI. Outra coisa pequena é que, realmente não importa qual destes você selecionou, ninguém. Se você clicar sobre ele e clicar e
segurá-lo, ele lhe diz o básico. Largura, alturas, quantos canais ele tem, você pode ver que são oito bits por canal, isso é o que o 8bpc significa. Vamos falar sobre bits, mais tarde, você também verá a resolução, que pode ser mais fácil do que ir aqui, e então ir para o tamanho da imagem. Vamos dar uma olhada em alguns outros. escala de medição, bom se você estiver lidando com fazer coisas de taxa de tamanho riscado, as eficiências são pesadas em um link, eficiência está em 100%, isso significa que o Photoshop está funcionando tão bem quanto possível, dando-lhe os recursos que você deu a ele. O que eu quero dizer com isso é lembrar que nós tivemos aqui preferências, nós fomos para o desempenho, e nós dizemos que aqui vai ter essa quantidade de RAM, vai ter essa quantidade de RAM. Demos a ele tanta RAM, o que você pode fazer é ver aqui em baixo o quão eficiente, quão bem está funcionando. Se eu tentar estressar, vou estressá-lo, tentar fazer algo assim eu entrar, vamos fazer isso mudar. Está funcionando bem, se você achar que explode, cai abaixo de 100 por cento por todo o tempo, está
se esforçando muito, mas não pode funcionar tão rápido quanto poderia, então só pode ser útil. Você pode gostar, homens são minha máquina lenta, talvez seja, talvez não seja. Isso irá dizer-lhe se é apenas o Photoshop
passando por seus movimentos ou se suas máquinas estão segurando isso. Você pode voltar para o vídeo acelerando Photoshop se você precisa atualizar as coisas, não
pode realmente mudar para eles muito, mas, hey você pode achar útil. Timing, eu ainda não descobri o que isso realmente faz. Acho que é para a tarefa que você deu, levou 0,2 segundos. Ferramenta atual não é tão útil em movimento para a exposição de 32 bits, vamos olhar para isso quando fizermos um 16, 32 bits mais tarde. Salvar progresso, quantos objetos inteligentes você tem, quantas camadas você tem, para mim muitas vezes é tamanho de documentos, que é o que é iniciado com, por
isso que ele está neste vídeo aleatório. Mas este é o curso avançado, precisamos aprender com coisas de fonte. Agora vamos entrar nos ovos de Páscoa, o que é um ovo de Páscoa? Basicamente, é apenas um pouco de código que os desenvolvedores do Photoshop, os caras da Adobe que escondem coisas no cofre, eles podem esconder coisas em pequenas surpresas como ovos de Páscoa. Nesta versão do Photoshop, há um casal, há uma banana, e às vezes eles não fazem absolutamente nada, exceto, o que eu acho útil para fazer é mudar essas coisas nos computadores das pessoas que estão fora de férias. Quando eles voltarem, eu perdi sobre este e mais óbvio é,
veja este pequeno três pontos aqui, a barra de ferramentas de edição,
segure-o, clique em “Editar barra de ferramentas”, e se você apenas manter pressionada a tecla Shift, seja Mac ou PC e basta clicar em “Concluído”. Você pode ver o que mudou aqui. Tem uma banana, não faz nada, exceto que é engraçada e nunca desliga também. Bem, você pode desligá-lo, então se você decidir que isso não é uma boa idéia, clique e mantenha pressionada, volte para aqui, e se você pressionar a tecla Command no Mac, e clicar em “Concluído “ou tecla Control em um PC para que ele gire -lo fora, para as minhas costas em, Eu amo que de volta em, segure “Shift” clique em “Concluído”. O outro é torrado, este é um pouco mais escondido e é divertido saber se há uma festa no Photoshop e você está lá e você não sabe sobre o brinde, você vai ser convidado a sair. Em um Mac, acesse o Photoshop, clique em “Preferências”. Agora lembre-se em um PC que está sob edição e longe para baixo aqui para preferências, e eu quero estar no que diz Interface, e é apenas esta coisa ao longo do topo aqui. Normalmente, bem, normalmente apenas o seu trabalho é mudar a cor da interface. Você pode gostar disso só porque os bons velhos tempos do Photoshop costumavam ser assim como a cor branca. Agora é nesta cor escura de humor, agora o truque é manter a tecla shift pressionada e manter pressionada em um Mac, mantenha pressionada a tecla de opção e clique sobre isso. O aciona no modo de brinde de caminhada, se você estiver em um PC, é Shift e mantenha pressionada a tecla ALT, e dê um clique. Agora que está torrada, faz o mesmo trabalho, apenas brinde. Você também pode fazer, uma vez que você está aqui, fazer o primeiro passo para nós que é shift e alt ou option, e dar-lhe um clique. Agora você pode manter pressionada a tecla “Shift” e manter o comando pressionado em um Mac, ou deslocar e controlar para baixo no PC, e você pode alternar entre cores de café e cores torradas. Se você for para a conferência do Photoshop, você verá esses caras pequenos em camisetas e pedaços de coisas assim. Você está no piscar de olhos, piscadela, aperto de mão
secreto não faz absolutamente nada. Mas você precisa saber que os ovos de Páscoa uma outra coisinha que eu vou jogar aqui é este fundo porque nós estávamos olhando para as cores da interface. Só me fez pensar neste cinza escuro e o fundo está bom. Você pode não gostar, você pode clicar com o botão direito do mouse e dizer que eu quero preto. Você viu que a interface mudou o plano de fundo antigo, mas não esta como área de área de área de trabalho. Clique com o botão direito do mouse e cinza escuro é o normal, mas você pode passar e escolher. A outra coisa que você pode fazer quando seus amigos estão fora ou seu amigo em escolas longe é ir para selecionar cor personalizada e apenas colocá-lo como algo terrível. Então você vai, eles não foram autorizados a mudar de volta, eles ficam loucos. Eu tenho um fundo rosa, que está machucando meus olhos, então eu vou voltar para decorar. Essas são as características da erva daninha e o vídeo de ovos de Páscoa, vamos entrar na próxima seção agora onde paramos de corrigir imagens. Não há mais configurações e técnicas de fluxo de trabalho com ouro sai do nosso sistema. Agora estamos prontos para ser super-eficientes e aprender coisas mais avançadas, vamos fazê-lo.
29. Como ampliar imagens sem ficar desfocado no Photoshop: Oi lá. Neste vídeo, vamos olhar para ampliar as imagens muito além de onde elas devem ir. Todos temos empregos assim. Alguém diz aqui: “Aqui está um pequeno jpeg. Eu quero que você transforme em um outdoor.” Vamos passar por diferentes formas de ampliação e o tipo de efeitos diferentes. Nós vamos até mostrar-lhe pequenos atalhos legais sobre como compará-los todos em três pequenas janelas todos os detalhes de frango decidir qual algoritmo de ampliação vai funcionar melhor para nós. Vamos entrar agora, tudo bem, vamos abrir o arquivo em O-4 consertando imagens e é chamado de redimensionamento 1. Certo, então há diferentes métodos para redimensionar. Neste momento, este documento tem 2000 pixels. Lembre-se do nosso atalho aqui, clique nisso, e isso tem 2 000 pixels de largura, mas precisamos dele para o nosso outdoor, ele precisa ser enorme. Nós vamos elevá-lo até como 8000 pixels de largura. Você pode estar apenas fazendo uma pequena mudança. Talvez não algo tão grande, mas está sob a imagem, vamos para o tamanho da imagem. Aqui, o que vamos fazer é dizer que precisa estar abaixo de pixels, agora precisa ser 8000 pixels. Certifique-se de que a imagem de nova amostra esteja marcada. Por padrão, todo mundo apenas o deixa no automático. problema com o automático é que há algumas outras configurações lá que podem ser ótimas. A coisa que vamos fazer também é fazer isso um pouco maior, porque é bom vê-lo em vez de aquela pequena janela. Basicamente automático vai escolher esta primeira configuração aqui fora deste grupo. Estas são todas as configurações automáticas de ampliação. Há apenas um para reduzir e, para ser honesto, você pode testar esses outros, porque não tem que ser apenas para o alargamento. Você poderia usar isso para reduzir. Ele só vai dar-lhe olhares diferentes e você pode encontrar um destes melhor para a redução. Mas, em geral, o alargamento existe. O mais problemático e os que vamos manter este vídeo. Automático está escolhendo este, e tudo bem. Mesmo se você usar automático há se você mudá-lo para ele e dizer, Eu quero usar este real preservado detalhes, Eu posso brincar com o ruído reduzido e apenas decidir você pode ver antes, depois. Você pode ter um pouco mais de controle até mesmo com aquele. Agora, uma coisa boa que você pode fazer para comparar esses três, você pode apenas ser super rápido e fácil e apenas ir na verdade, eu ia alternar através de um, este, e apenas decidir quais são bons para você. Então você pode decidir que este método rápido, fácil e de serviço é apenas bom o suficiente. Você pode apenas olhá-lo e dizer, porque este aqui preservar detalhes 2.0, é o novo para photoshop CC 2018. Mas ainda não é padrão, mesmo que muitas vezes tenha um acabamento melhor ou, pelo menos, um acabamento diferente. Então decida qual destes funciona para você. Se queres a minha humilde opinião, esta aqui funciona melhor. Há uma mistura de ruído, mas também um pouco de nitidez que acontece em torno de áreas de alto contraste. Acho que fica bom quando chego a tamanhos maiores. Se quiser ser um pouco mais científico sobre isso, vou te mostrar um truque legal, então apertei cancelar. O que podemos fazer é ir para a camada, vamos para a camada duplicada. Vou fazer três versões disto. Eu vou dizer em vez de duplicar esta camada, eu vou realmente colocá-lo dentro de um novo documento. Vou chamar um suíno opção dois, vamos chamar a opção um. Clique em “ok”. Está pegando esse arquivo, se
duplicando, e se intitulando opção um. Então é apenas um completamente separado. Isso é o mesmo que fazer o arquivo salvar como. Vou duplicar três vezes para comparar as três opções diferentes. Voltar para redimensionar um, voltar para camada, duplicar camada, novo. Vou para a opção dois. Voltamos para o primeiro e vamos para a terceira opção. Você pode passar por tudo isso se você é tipo “cara, este é um trabalho super importante.” Você não pode apenas usar o ampliador... Você pode usar os redutores, os gradientes, porque quem sabe qual pode ser o seu conteúdo? Pode ser repetindo padrões ou gradientes ou um estranho material 3D trippy. Então, brinca com todos eles. Vamos fazer estes três e fechar o original. Minhas opções 1, 2 e 3 são exatamente as mesmas. Vou começar com a opção um e vou para imagem, tamanho da imagem. Eu vou para 8000. Vou dizer “você é a primeira opção”. Certo, preservem os detalhes. Clique em “OK”. Vá para esta opção dois, faça a mesma coisa, tamanho da
imagem, e vamos preservar os detalhes dois. Vamos elevá-lo até 8000 pixels. Clique em “OK”. Mesma coisa com três. Vamos usar nosso atalho, opção de
comando três, opção de controle. Então eu comando a opção I para ir para o tamanho da imagem ou opção de controle I. 8000 e vamos para a última opção. Clique em “OK”. Agora queremos compará-los. Agora você pode simplesmente percorrer eles se quiser,
você pode manter pressionada a tecla de comando em um Mac, tecla de
controle em um PC. Se você está em um Mac agora, então eu vou segurar o comando e apertar a “tecla apóstrofo”. É geralmente amarrado com que ondulado [inaudível] Estou apenas alternando através das abas. Nós olhamos para isso mais cedo. Se você estiver em um PC, você segurar guia de controle, Eu acho que para mover através deles. Você só pode ver a diferença. Opção um, que é o padrão. Opção dois, opção três. Acho que neste caso a opção dois é provavelmente a melhor. É uma mistura de um pouco de nitidez, mas não é muito leitoso como esta última opção. Vamos ainda mais longe para comparar os três. Vamos ter que abrir a janela e ir arranjar. Vamos dizer três na vertical. Você pode estar comparando quatro opções ou seis delas dependendo de quantas você tem aberto. Eu vou para este três-up vertical, ele só me mostra todos os três aqui. Vou estar nesta primeira opção. Vou movê-lo para onde o olho está. O que você pode fazer, em seguida, é
ir para a janela, voltar para a mesma coisa ou ele vê um intervalo e dizer realmente apenas coincidir com toda a localização zoom e rotação. Então eles vão igualar. Então você pode começar a fazer algumas comparações. Outro atalho pequeno é, lembre-se de mudar e arrastar ao redor tipo de movimentos um ao redor. Certo, usando sua ferramenta manual. Mas se você segurar, na verdade eu disse turno e eu, então se você segurar o espaço no seu teclado e apenas clicar e arrastar, ok? Você pode movê-lo. Mas se você segurar o botão de espaço e mudar, ele faz todos eles ao mesmo tempo. Primeiro, vamos organizar e combinar tudo, então podemos manter pressionado o botão de mudança e espaço. Podemos dar a volta e dizer: “
Tudo bem para os dentes”. Acho que este aqui é o melhor para a minha opção. Vai ser sempre pixels. Há um grupo aqui com o qual talvez não me agrada. O que eu poderia fazer é parar de misturar algumas dessas imagens, então estou mascarando cápsulas. Depende de quão quente você precisa ir aqui. Meu conselho é não me ouvir ou outra exposição
photoshop dizer que você tem que usar detalhes 2.0, faça o teste você mesmo. Não demora muito e depois decide, sim, esse é o que funciona neste caso com esta imagem. Pense neles como opção um, dois e três. Tudo bem, antes de irmos, a última coisa que você pode fazer é ir até a janela, organizar, consolidar tudo em abas só para obtê-los todos de volta até como
esta estrutura normal de guias antiga que tínhamos antes. Nós não cobrimos redução principalmente porque, na minha opinião, eu não tenho problemas para reduzir imagens. Deixo-o ajustado para automático e ele escolhe este aqui e funciona bem. Mas novamente, se isso não acontecer por você, passe, teste todos eles, veja qual deles funciona para você. Tudo bem, isso vai ser o fim. Vejo você no próximo vídeo.
30. Correção avançada de cores e tom usando níveis no Photoshop: Oi lá. Neste vídeo vamos olhar para níveis avançados. Vamos definir saldos de branco, vamos ajustar canais separadamente. Vamos olhar para pequenas opções legais que nos mostram coisas como recorte para garantir que não destruamos a imagem. Vamos olhar para algumas opções, vamos saltar para lá agora. Antes, depois, vamos chegar ao nível avançado. Em suas imagens para O4 Fixing Images, abra os níveis um e dois. Graças aos fotógrafos Jeff Finley e Jacalyn Beales. Eu mencionei isso no primeiro vídeo, mas qualquer coisa de Unsplash, Eu adicionei o nome do fotógrafo real porque eles doaram essas imagens gratuitamente para o mundo e você pode usá-los comercialmente também. Basta ir a unsplash.com e verificar estes fotógrafos. Vejamos os níveis avançados. No curso essencial, cobrimos o básico. Vamos entrar um pouco mais fundo agora. O que eu vou fazer é ir para ajustes, e eu vou clicar em níveis para ter certeza que é uma camada de ajuste,
e um dos recursos legais no Photoshop é apenas clicar no botão automático, chutando para trás e dizendo, “ Photoshop, faz a tua magia.” Está muito bem feito. Vou ligar e desligar os olhos. É muito agradável. Mas o que você provavelmente não sabia é que eu vou desfazer, você pode manter pressionada a tecla Alt em um PC ou a tecla Option em um Mac e clicar em Auto. Ele só lhe dá, que é o padrão quando você clica em Auto, estes outros Autos. Legal. Você pode apenas trabalhar o seu caminho através e dizer, “Este é o Auto que eu quero?” Não se preocupe muito com os nomes. Pense na opção automática um, dois e três, e veja qual deles funciona para você. Se você descobrir que depois de um tempo você está, “Eu sempre prefiro este em vez deste aqui
”, você pode defini-lo como o padrão para aquele auto. Digamos que não gostamos de nenhum dos Auto, vamos clicar em “Cancelar”. Uma das coisas boas que você pode fazer é esta fotografia aqui instantaneamente quando eu vi,
eu estava, “Isso vai ser fácil com esta ferramenta aqui”, a Ferramenta de Balanço de Branco. O que você pode fazer é dizer ao Photoshop que eu sei, clique sobre isso, eu sei que isso é branco puro, provavelmente. Deve ser só um cartão branco impresso. Se eu clicar nele, ele faz ajustes como sendo branco puro. Ele ajusta por canal em vez de apenas deslizar esses três pequenos ajustes, e realmente vai em todos os canais e faz um ajuste porque ele sabe o que é o branco e tenta contrabalançar isso, nós temos uma tonalidade azul para ele, o que não é errado. É exatamente o que essa imagem foi filmada. Tem aquela sensação de mau humor do Instagram, e é por isso que os fotógrafos usarão algo assim. Acabei de ir para a Amazon, e se você colocar em cartões cinza ou cartões de balanço branco, você acaba com essas coisas. O que eles vão fazer é colocá-los em uma fotografia. Vamos configurá-los ao lado do assunto,
então, em vez de fazê-lo no Photoshop mais tarde com essas configurações de branco, cinza e preto. Você pode dizer ao Photoshop o que é preto, o que é cinza, o que é branco. Você pode fazê-lo em sua câmera antes de realmente tirar a fotografia. Você pode definir o balanço de branco, o cartão cinza de 18 por cento e o preto. Perfeito se você fizer fotos de produtos e você pode muito bem passar o tempo lá com sua câmera ficando tudo pronto em vez de ter que
consertar tudo aqui no Photoshop mais tarde. Estamos felizes com isso. Vamos para os Níveis 2. Vejamos alguns outros recursos avançados. Em Ajustes, vamos para Níveis, e o que queremos fazer é, digamos que só queremos arrumar isso dessa maneira. Isso é geralmente o que você faz com os níveis. Traga estes dois [inaudível] de cada lado. Antes, eles estão a meio caminho acima da colina de ambos os lados, e em seguida, usar este controle deslizante cinza no meio aqui para decidir qual caminho ele precisa ir, se ele precisa ser iluminado em tons médios, ou escurecido para baixo. O que é realmente legal é se você está arrastando esses caras, porque depois de um tempo, ele começa a ficar tão preto e você começa a perder detalhes, mas isso acontece bem cedo. Mas é difícil saber quando isso começa a acontecer corretamente. Se você manter pressionada a tecla Alt em um PC ou a tecla Option em um Mac enquanto você arrastá-la, você
pode ver que você tem essa cor estranha que aparece, e isso está apenas mostrando para você aqui, praticamente nada está sendo cortado. Quando se aproxima desta colina, é um pouco difícil de fazer. Estou apontando com o nariz. Consegues ver a árvore aqui em baixo? Está muito escuro aqui,
então, à medida que tornamos as coisas mais escuras, você pode ver que está começando a se ajustar. Isso tudo está se tornando uma cor. Só estou a avisar-te do que está a acontecer. Você ainda pode ter que ir para ele. mesmo com os brancos, clique, segure e arraste. É exatamente o oposto, eles inverteram as cores para mostrar o que vai começar a se misturar tanto quanto os brancos vão, e são todas essas nuvens brancas aqui atrás. Você ainda pode ir em frente e fazê-lo, não é errado. É só mostrar a vocês que vai haver perda de detalhes aqui, e porque é a parte de trás das nuvens, eu estou bem com isso. Vou certificar-me de que coisas como os olhos e
outras coisas não sejam cortadas arrastando isto para dentro Agora este truque aqui não vai esperar
pelo cinza porque ele está baralhando entre esses dois,
essas pontas cortadas, mas isso é apenas embaralhar entre eles. Você verá que há muitas configurações que
permitirão que você faça isso no painel Ajustes. Se você começar a arrastar muitas dessas opções diferentes, como curvas e exposição, se você manter pressionada a tecla Alt ou a tecla Option em um Mac
e, enquanto estiver arrastando, ela lhe dará uma pequena visualização visual do que você pode ser Destruindo potencialmente. Vou redefini-la para os padrões para voltar ao início, e quero mostrar-vos outro pequeno truque. Estamos lidando com canais RGB. RGB, você provavelmente sabe, é vermelho, verde e azul, eles compõem esta imagem. Em vez de lidar com todos eles de uma só vez, você pode realmente olhar para os diferentes canais separadamente, e ajustá-los separadamente. Ele lhe dá muito mais ajuste fino, especialmente quando eles são elenco de cores. Você vai descobrir que você pode corrigir a conversão de cores em níveis, e você não precisa saltar para o equilíbrio de cores como o ajuste. O que quero dizer é vamos começar com vermelho, e fazer o mesmo. A meio caminho daqui ou apenas no início da colina aqui. Vamos fazer o mesmo pelo verde. Você pode usar seus atalhos. É manter pressionada a tecla Alt em um PC e toque em 3, 4, 5. Você pode ver que ele alterna entre vermelho, verde e azul. Em um Mac, é Opção 3, 4, 5. Eu vou fazer o mesmo aqui, trazer esses caras para dentro, e você pode ver que começou a chegar a uma cor mais natural. Há alguns tons médios que eu quero ajustar. Acho que é muito difícil ajustar os tons médios usando essas coisas separadas, eu prefiro ir para RGB e fazer todos eles em um grande movimento. São coisas mais avançadas do Photoshop. Auto, se você manter pressionada a tecla Alt ou Option e clicar em Auto, você receberá alguns ajustes extras. Você pode ser capaz de definir o equilíbrio de brancos aqui para as nuvens. Você pode clicar neste branco e clicar nas nuvens. Acho que me dá um resultado exato usando a natureza como pano de fundo, mas adicione algo artificial como papel branco. É muito bom. Lembre-se também de manter pressionada a tecla Option em um Mac ou Alt em um PC, você pode verificar se você está recortando alguma coisa. Não tenha medo de pular e consertar os canais vermelho, verde e azul separadamente, e vai ser isso. Estamos todos ignorando as montanhas de forma estranha. Não os vi até a metade deste vídeo. Eu fiquei crescido sobre isso, mas eu sinto que precisa ser reconhecido antes de passarmos para o próximo vídeo. Dan, próximo vídeo.
31. Curvas avançadas no Adobe Photoshop CC: Oi lá. Este vídeo é tudo sobre tirar mais das curvas. Vou mostrar-lhe algumas funcionalidades ocultas na secção automática. Eu também vou mostrar-lhe como realmente trabalhar
no documento, em vez de aqui no painel de curvas, Eu basicamente dei a maioria das dicas neste vídeo é um par mais para pendurar rodada. Vamos indo. Abra as curvas de arquivos 1 e 2 da sua pasta O4. Temos estes dois que vão trabalhar. Este aqui é muito escuro. Nós vamos para ajustes e vamos para curvas como fizemos com rótulos é um recurso automático que é curvo, começar. Eu vou desfazer, quem se lembra do que eu
mantenho pressionado para clicar em ordem para obter recursos extras? No Mac, mantenha premida a tecla Option e o nosso PC, mantenha premida a tecla Alt. Significa apenas que vai para o padrão para melhorar o brilho e o contraste. Você pode simplesmente clicar e ver se um desses outros modos automáticos são bons para você. Porque o que você pode fazer é considerá-lo como um padrão e, em seguida, vê-lo fazendo um grande grupo de fotografias, você pode configurar uma ação e, em seguida, ele vai lembrar o que você fez aqui. Digamos que não queremos usar auto, vamos ter que manual. A primeira coisa que as pessoas geralmente ignoram com curvas é o controle deslizante para baixo aqui, você pode ver que o Histograma está todo agrupado no lado escuro da imagem. Não há nada acontecendo neste branco em particular. Eu gostaria que nós fizéssemos nível apenas colocar isso em. Vai trazer muitos dos nossos trabalhos. Nós vamos realmente cortar tudo isso. Quanto recortamos, lembre-se da nossa curva de show, mantemos pressionada a tecla Alt em um PC ou a tecla Option no Mac. Eu posso arrastar isso para cima e você pode ver que não
há nada, há um pouco de especificações aqui e então você pode começar a ver até onde você quer ir. Cabe a você. Você pode decidir, na verdade, que eu quero cortá-lo até aqui porque eu estou bem com essa perda detalhada. Ele realmente bateu na imagem antes mesmo de ajustar as curvas. Agora, com curvas, muitas vezes é uma de duas coisas. Arraste isso um pouco para baixo e, em seguida, um pouco dependendo da sua imagem ou é o vice-versa. Apenas aqui, ou é pequena curva S ou pequena curva Z dependendo da sua imagem. Este aqui tem de ser para baixo e aquele tem de ser para cima. Você acaba enchendo com isso um pouco e está um pouco desconectado. Voltar uns passos até voltar ao zero. Vou arrastar isso de novo. Em vez de arrastar estes pequenos pontos, o que vou fazer é fazê-lo no documento real. Isso é o que esta mãozinha aqui faz. Clique nele, e o que ele faz é que você pode ver pequenos pontos se movendo para cima e para baixo no meu histograma aqui, olhe para aqui. Você pode vê-lo saltando para cima e para baixo. Significa que quando eu decidir como, eu sei que é preto, tudo bem,
mas esses jeans aqui precisavam ser mais brilhantes para que eu pudesse clicar em “Segurar” e arrastar para cima. Você pode ver o que ele está fazendo com meu Histograma aqui, pegando essas cores bastante escuras e apenas levantando-as com ele. Você pode apenas trabalhar em diferentes áreas. Você pode decidir isso, eu vou me recuperar porque eu quero te mostrar um exemplo, mas eu só vou arrastar isso para baixo ou estes precisam ficar um pouco mais escuros. Isso precisa ficar um pouco mais brilhante. Você só trabalha por aí e começa a coletar pontos de
uma forma mais orgânica ao invés apenas ir até aqui e desenhar uma linha, alguns pontos aqui. Agora, a outra coisa como fizemos nos níveis é que você não tenha medo de pular e ajustar os canais vermelho, verde e azul separadamente. Você pode ver aqui no canal azul, eu estou usando o outro dedo arrastado coisa e eu posso apenas decidir se eu quero que esse tom em particular seja mais azul ou menos azul. Eu posso apenas encontrar nossos ajustes. Green, quero tentar sair desse meio tempo. Nós meio que custo verde acontecendo lá, mesmo se você não gosta de usar esta ferramenta e você gosta de ajustá-los, você pode fazê-lo por canal. Eu quero mostrar-lhe em curvas também, e isso em uma coisa arrastada não é apenas em curvas. O que quero dizer é essa coisa de mão de lápis. Muitas das outras ferramentas têm. Vejamos, digamos, matiz e risco de saturação. Este aqui, e pode ser muito útil para se eu clicar nele e dizer esta camisa azul aqui, se eu clicar e arrastá-la para a esquerda e para a direita em vez de cima e para baixo, mas eu cliquei, ele pulou em vez de desfazer. Começou como mestre. Como eu cliquei e arrastei ele vai, hey, você clicou na ciência, você deve dizer isso. Isso é muito útil. Escolha a cor certa e, em seguida, você pode arrastá-la para a esquerda e para a direita dependendo da saturação. Você pode simplesmente ir, digamos mais prático usando e clicar e arrastar isso um pouco sobre isso, batê-lo um pouco, vez de ter que adivinhar o que é ou usar o conta-gotas. Verifique as diferentes ferramentas de ajuste como você está usando-os
tão seguro quanto pouco em arrastar coisa dedo. A outra coisa que você pode fazer é, se você clicar e arrastá-lo como saturação, você também pode fazer matiz segurando o em um Mac, é a tecla Command em um PC, pressione a tecla Control. Se eu segurar isso e arrastar em vez de durante a saturação, você pode vê-lo? Será que a tonalidade apenas a nossa maneira muito rápida e
fácil de mudar a demência. Outra coisa que eu quero mostrar em curvas é como vamos usar o segundo ajuste é, vamos para curvas. Gosto desse visual de moda. É um tom azul, laranja ou azul e amarelo dependendo do que você está procurando. Acho que a maneira rápida e fácil de conseguir esse visual de moda são curvas. Clique no canal azul, pegue a rolha no final aqui e arraste-a para cima. Bem no final, arraste-o para cima e arraste este para baixo. Dificilmente você pode ver o que eu quero dizer é, fotografia de
moda, cor azul azul-azulada, e em super rápido e fácil de fazer, não demora muito. Vamos olhar para uma versão um pouco mais detalhada disso. Estou indo de talvez um grande riacho, talvez entender o que quero dizer. Olhando bem, olhando revista de moda. Adoro aquele olhar dourado rosa e azulado. Isso é alguns usos avançados do painel de coops. Uma coisa que eu devo notar se você veio do essencial, curvas e rótulos não fazer exatamente a mesma coisa. Não quero meter-me em sarilhos, mas estão a resolver o mesmo problema. Estamos tentando trabalhar em coisas como a exposição e o colorcast. Eu fui trabalhar em lugares onde,
oh meu Deus, você está usando rótulos. Por que você está usando rótulos? Curvas são muito melhores. Eu fiquei melhor em décadas, então vou para o próximo trabalho e tipo, bem, por que você está mexendo com curvas e por que você está usando rótulos são muito melhores? Não há certo ou errado. As pessoas ficam um pouco apaixonadas por rótulos versus curvas. Não se preocupe muito. Eu uso rótulos muito mais porque eu estou apenas fazendo ajustes rápidos e simples. Só abrirei curvas se quiser entrar nos detalhes mais finos. É por isso que você provavelmente vai encontrar fotógrafos
tendem a usar curvas muito mais você encontrar se você é uma fotografia, você vai encontrar muito mais tutoriais usando curvas por causa desse detalhe mais fino. Para mim, estou mais no espaço de design. As fotografias muitas vezes são linhas, muitas vezes não tão particulares sobre o detalhe hardcore. Ambos são ótimas ferramentas, mas você provavelmente não precisa de ambos ao mesmo tempo. Ou os rótulos vão ou são curvas ir. Vamos entrar no próximo vídeo.
32. Nova expansão de 17 geração versus extensão consciente do conteúdo: Ativado. Neste vídeo,
veremos como usar
a ferramenta de corte para
gerar um plano de fundo de IA. É uma dica extra agradável e fácil. Escondido dentro da ferramenta de corte. Você pode usar algo
chamado expansão generativa. Como mágica, podemos criar todo esse fundo extra que era a
foto original lá. Brilhante. Para expandir um pouco
essas imagens, vou
mostrar algo chamado escala sensível ao
conteúdo. Em vez de gerar
um novo plano de fundo, podemos simplesmente
mover as coisas. Então, os mesmos objetos originais, e isso distorce os bits Super divertido. Super fácil. Vamos começar. Tudo bem. Para começar, quero que
você abra dois arquivos. É chamado de Gen
Crop one and two. Está em sua dobra de cinco recortes,
alinhando e distorcendo.
Abra os dois. Vamos pegar a ferramenta de corte e eu vou clicar de uma só vez. E eu vou dizer que quero
um pouco mais à direita aqui. Na parte superior, por padrão, você provavelmente está em transparente. Transparente só vai
deixar um grande buraco lá. O que queremos é uma expansão
generativa. Existe a versão de
inteligência artificial. Essa é a versão antiga.
Funciona. Isso é melhor. Deixe-me mostrar a vocês dois em
comparação. Aí está. Esse está usando a coisa
mais nova e sofisticada
chamada expansão chamada Este está usando o mais antigo e que está em um cabo com reconhecimento de
conteúdo. Ele está usando as informações da imagem para
tentar preenchê-la, enquanto a
expansão generativa vai para a Internet e
descobre
o que está na imagem e usa seu banco de dados para descobrir
o que mais poderia estar lá Agora, quando você
está usando a expansão generativa,
usando esse criptol
e arrastando-o para cima, não
há diferença
entre
aumentá-lo e selecioná-lo e usar Eles chamam isso de expansão generativa. Está usando a mesma tecnologia,
fazendo a mesma coisa. Porque se eu tivesse escapado para lá, você
pode ver se eu clicar na
minha expansão generativa aqui, ainda
tenho minhas variações, ainda
posso mexer
com o que está acontecendo lá e ainda consigo
digitar Vamos adicionar um pouco de pedra. Vá.
Realmente não importa ferramenta de
corte usando expansão
generativa ou fazendo isso de outra forma. Na verdade, eu vou fazer isso para que você
saiba do que estou falando Quando você faz
algo maior ou tem um buraco para preencher, e o preenchimento é transparente, e eu vou até a minha ferramenta M
para marcar, seleciono tudo isso e simplesmente clico em Gerar,
fazendo a mesma coisa Mesma tecnologia, porque eu tenho uma
seleção diferente, porém, posso obter um resultado diferente, mas estamos forçando o computador a fazer a mesma coisa. Ah, cara. É muito bom em prever
o que poderia ter acontecido. Ah, muito bom. E, estranhamente, acredito que aquelas
pedras estavam lá, e eram falsas De qualquer forma, onde algumas
dessas coisas com
reconhecimento de conteúdo ainda são
realmente relevantes, vamos abrir mais
alguns arquivos. Então, em seus arquivos de exercícios, quero que você
abra o conteúdo ciente. Onde estamos? Content Aware ,
um, dois e quatro. Pergunte-me por que pulamos três. Mas condomínio, um, dois e três. Vamos começar com este aqui. Quando uso o preenchimento generativo, obtenho um resultado muito diferente Eu quero estendê-lo, dizer desta forma e eu
vou para você, eu vou para a
expansão generativa. Isso é legal. Mas isso vai ficar lá. Todo mundo vai
ficar, isso vai gerar coisas novas. Mas o que eu quero
fazer é, na verdade , aumentá-lo e movê-lo usando
exatamente os mesmos objetos. Mas isso é muito legal. Onde algumas das
coisas relacionadas ao conteúdo são úteis? Eu desfaço isso. Digamos que
eu queira torná-lo maior, então vou usar croptol, vou usar transparente
e vou
dizer que quero que seja
um pouco maior, porque
talvez seja uma
postagem quadrada no Instagram para a qual eu precise O que vou fazer é selecionar a
camada desejada, vou editá-la. Vou usar essa aqui chamada Content Aware Scale. A mesma tecnologia da extensão
de reconhecimento de conteúdo. Mas está mais em um documento de
transformação. Está mais em uma caixa de transformação. O que eu posso fazer
é deixar as coisas assim e ir embora. Você pode ver, é o
mesmo, mas diferente. Está criando mais plano de fundo. Vou fazer um turno para fazer com que
chegue direto. É usar os objetos, não gerar novos objetos,
assim como movê-los. Não funciona
em todos os casos. Esse é ótimo
porque tem muito fundo branco, mas pode ser muito útil. Um pequeno
recurso extra avançado para você. Olha esse aqui. Este será perfeito para isso. Você pode usar este
generativo para expandir ou estender porque o plano de fundo é
tão indulgente, experimente Vamos usar o cryptal, a chave C. Vou apenas adicionar um pouco
mais, na verdade, dos dois lados. Estou pressionando a opção
KPC para obter os dois lados. Agora, com a última selecionada,
vou até ela, onde escala, e Sim. Vamos, eu não preciso
segurar nada, e provavelmente fazer um turno inteiro
para que suba, isso. Mais informações. Essa é a escala sensível ao
conteúdo. O que isso faz é como arrastar coisas em
vez de criar coisas novas. Apenas uma
maneira diferente de fazer isso. Vou usar muito o preenchimento generativo, mas há alguns bons
casos em que a escala sensível ao conteúdo funciona Digamos que esse
aqui. Não queremos gerar um novo plano de fundo. Nós só queremos
estendê-lo para a largura aqui. Novamente, croptl, estou
em transparente,
mantendo pressionada minha opção, KonaMPC, obter um O problema que você
pode ter é se eu for editar e acessar o
conteúdo em uma escala, pressionar minha tecla Shift e arrastar a do lado direito
aqui. Na verdade, vou
segurar a opção shift n,
aquela opção shift n alt em um PC. Você vê que funciona. O fundo
fica magicamente maior. O mesmo acontece com o céu, muito
bom para objetos naturais. Realmente não podemos
dizer o trecho. Eu faço um ótimo trabalho nisso. Mas dá para ver a elasticidade do
cara, olha só. Se você quiser
usar isso e houver apenas uma coisa causando
problemas, eu vou escapar. Vou usar
nossa nova ferramenta de suíte para a seleção de objetos. Está embaixo, dependendo qual você selecionou pela última vez, vou pegar e
segurar essa quarta ferramenta,
pegar a ferramenta de seleção de objetos Vou pegar meu
homem. Seleção mágica. A seleção também pode ser muito difícil. Você não precisa se preocupar
muito com isso. Eu quero que você suba para selecionar. O que podemos fazer é dizer: quero salvar essa seleção. Vou ligar para um cara. Agora vou desmarcar
tudo, selecionar de selecionar. Agora, quando eu uso exatamente a
mesma ferramenta, na verdade, vamos para a ferramenta de movimentação, para que ela interrompa a seleção de objetos. Vamos editar,
ir para a escala de conteúdo
como fizemos antes, mas agora há uma
opção aqui que diz: você
gostaria de
proteger alguma coisa? Aquele cara para quem eu salvei
a seleção. Agora, quando eu a escalo, segurando a opção Shift, você
pode ver que ela cuida
daquele sujeito no meio. Ok, então depende do
que você está procurando. preenchimento generativo e expansão generativa são brilhantes na maioria dos casos, mas às vezes você só quer criar algo maior sem gerar
novas coisas falsas É aí que a escala com
reconhecimento de conteúdo é boa. E se você estiver
enfrentando problemas, economize um pouco e
poderá prever essa área e escalar com reconhecimento de conteúdo. Então, algumas
dicas avançadas para você. Eu vou ver o próximo para você.
33. New18: a ferramenta de remoção no Photoshop: Um. Neste vídeo, veremos algo
chamado ferramenta de remoção. A ferramenta de remoção remove coisas. Bom trabalho em. Mas funciona com
a mesma tecnologia. Você viu isso?
Simplesmente fui embora. É uma tecnologia muito semelhante ou é a
mesma tecnologia do preenchimento generativo, exceto que é usada para peças
mais pequenas Você pode ver isso? É
mais como um pincel? Eu posso simplesmente pintar coisas e removê-las
em
vez de fazer seleções e
obter todas essas variações É destrutivo
trabalhar na camada. Ótimo para arrumar
coisas pequenas em uma imagem. Nós faremos isso por este.
Remova um monte de coisas. O último exemplo, meu favorito, try and remove, que
dá terrivelmente errado. Quando uma pessoa é adicionada. Falaremos sobre
maneiras de se locomover para garantir
que você não tenha humanos
mais assustadores
que não existiam Mas ainda está muito bom
. Tudo bem. Vamos entrar e
conhecer a ferramenta de remoção. Tudo bem, para começar a
digitar seus arquivos de exercícios, no fold cat five cropping Aligning distorting, Remova a ferramenta. Como um,
dois e três. Abra-os no Photoshop. Encontre a ferramenta removida.
A ferramenta removida pode se mover. É novo. No momento, está embaixo do pincel de cicatrização
de manchas. Procure os
band-aids aqui, vá até aquele
chamado Remove tool. A ferramenta de remoção deve ser
chamada de ferramenta super incrível. Está usando IA generativa para
remover coisas, em vez talvez, se você costumava dizer o carimbo da ferramenta de clone
ou algo parecido, esteja usando uma tecnologia sofisticada Escolha um tamanho de pincel apropriado. Vou subir até 150 e vou clicar
e arrastar sobre isso. Clique em Segure,
arraste com o mouse e solte. Ah. Corrigi isso magicamente Vamos nos livrar
disso, colorir. Olha. É espetacular. Agora, a diferença é que, digamos, vamos
fazer esses dois aqui. Vou pintar
aquele cara e depois garantir que você pegue tudo. Em seguida, vou usar
o preenchimento generativo. Vou usar a ferramenta Lasso. Estou usando o Straight Edgy. Vou clicar
uma vez, clicar duas vezes. Novamente, assim como fizemos
com a ferramenta removida. Vou me certificar de que se
sobreponha bem e bem. E eu vou atingir o preenchimento
generativo. Ele vai usar
a mesma tecnologia. Não vou colocar nada
lá dentro e ele vai gerar, vai preenchê-lo. A diferença aqui é que ele fornecerá um resultado
muito semelhante, mas está gerando isso aqui com o painel de
propriedades. Tem uma camada separada. É massa, eu posso
ligá-lo e desligá-lo. Foi adicionada uma caixa, não
é bem o que eu queria. Mas eu tenho todas essas opções
diferentes. Há mais do que isso. Está fazendo a mesma coisa, mas a ferramenta removida é
mais rápida, não me importo,
livre-se dela. Eu usaria a ferramenta
removida para mover muitas pequenas
coisas das quais você
realmente não precisa de muitas variações em
uma camada separada. Você percebeu que, quando
usamos a ferramenta removida, agora
há
camadas extras sendo feitas. Depende de você, qual deles
você quer usar? Depende se você está
apenas movendo poeira,
arranhões e pequenos pedaços
de coisas e muitas delas, pintá-las pode ser
muito rápido e fácil Porém, o que você precisa fazer é verificar se você está na camada que
deseja remover. Se eu clicar nessa camada aqui
e fizer isso, ela não funcionará. Vamos tentar mais um desses. Aqui eu escolhi um exemplo muito
bom aqui. Eu trabalhei muito bem.
Funciona muito bem neste telefone. Mas se eu começar a remover
grandes pedaços aqui,
como por exemplo, esta tigela Se eu remover isso e
deixar a sombra lá, ela tentará misturar a sombra. Mesmo se eu tentar
remover isso e a sombra, pode ficar complicado É aqui que você pode
querer usar o preenchimento generativo, pois você terá
opções diferentes e poderá brincar um pouco mais
com elas Mas para pequenas coisas, a
planta desapareça. Vamos dar uma chance. Você
pode trabalhar com isso mais de uma vez. Não há razão para não? Há uma sombra,
há uma sombra lá. É muito rápido, muito fácil. diz sobre o tamanho do arquivo que existem essas variações aqui no painel de
propriedades, mas a desvantagem é que
não há variações no painel de
propriedades, você não pode editá-las. Haverá um tempo
para um pouco dos dois. A única coisa que você precisa fazer é ver se consigo fazer
isso acontecer novamente. Se eu remover uma pessoa. Primeiro de tudo, deve escolher
um pincel maior. Em vez disso, vou
passar anos colorindo isso. Você espera lá. Eles falam
em mal. Vamos dar uma chance. Removendo uma pessoa.
Fez um bom trabalho. Mas mesmo com o preenchimento generativo, vamos nos livrar do
preenchimento generativo e começar a querer você Teremos mais variações. Remover alguém completamente
que está tão entrelaçado, como se o cabelo estivesse se misturando Sempre vai ser um pouco complicado mudar nessa E eu posso usar o preenchimento generativo, mas eu escolheria essa opção
porque você tem mais variações com
as quais brincar Eu sou bom para pequenas coisas. Para se livrar de coisas mais
complexas, use o preenchimento generativo
porque pode haver algumas combinações e seleções
diferentes que você precisará
fazer . ' Eu fiz um trabalho muito bom. Eu retiro isso. O
preenchimento generativo é incrível A única coisa que
você vai precisar. Vamos desligar essa
se você esquecer alguma peça. Mesmo com a ferramenta de remoção, vamos fazer o preenchimento generativo Se eu fizer isso e chegar perto, mas digamos que você
esqueça alguma coisa. Ele sempre tentará se misturar. O que foi deixado para trás.
Você será muito decidido com o que
deixar Você pode ver que
deixamos aquela mão lá? É aqui que é generativo. Eu sei. É isso que é mais engraçado Bem, espero gerar, substituir
ou eliminar essa pessoa, mas vai voltar para casa.
O que fazemos com essa mão? Eu sei. Oh, funcionou bem. Mantenha-a com um ombro na
mão que se estenda ao redor. Veja se não temos nada
O que é uma perna lá embaixo? Quem está aí? Então, pés?
Ela está ajoelhada É a mão dela. Está conectado
a ela e sua mão. Ah, bom. A demonstração que eu fiz foi
melhor? Você espera lá. Vou ver se consigo
fazer isso acontecer novamente. Vou deixar a mão
inteira para ver se consigo fazer isso. Eu vou desligar tudo isso. Você come lá. Tudo
bem, eu posso ver isso. Aí está. É confiável, mas também muito estranho.
Eu tenho um mais estranho. Dê uma chance a este. Eu tenho um cara muito assustador que tinha
três olhos olhando para cima Isso vai melhorar,
mas é melhor lembrar
que, se você deixar isso aí, ele
tentará fazer isso. Se você tem alguma coisa acontecendo, tente levá-la de volta
à sua seleção. Eu posso ver que há minha seleção. Se eu deixar isso, posso ver onde ele está
tentando adicionar tudo. Está tentando falsificar
essa parte de volta, está tentando mover essa parte volta para dentro e está
tentando conectar tudo isso Apenas tenha cuidado com
suas seleções. Nós vamos. Tudo bem. A ferramenta de remoção é boa para muitas pequenas
coisas. Só precisamos que ele desapareça. Coisas pequenas fazem parte
de um objeto maior. Mas se você precisar fazer coisas
maiores e complexas, use a mesma tecnologia, mas use o preenchimento generativo Isso foi uma seleção,
preencha-a com nada e ela deve
lhe dar algumas opções. Tudo bem, é isso. Te
vejo no próximo vídeo. Eles tinham uma mulher assustadora que estava em segundo plano, não
vestida Mas é muito bom
, próximo vídeo.
34. Truque de cortes que excluem o pixel e revelam conteúdo recortado no Photoshop: Oi lá. Este vídeo vamos olhar para a onda e extras maravilhosos quando estamos olhando para a ferramenta de corte como todos esses tipos diferentes de grades de corte. Analisaremos a exclusão de pixels, como recuperá-los, como endireitar imagens, que você saiba que a linha do horizonte é perfeitamente reta. Além de algumas outras dicas. Vamos entrar agora. Para começar a partir da sua pasta de recorte O5,
abra o Crop 1 e o Crop 2. Começaremos com a Colheita 1. Técnicas avançadas de corte, pegue a ferramenta de colheita, passo um para baixo. O primeiro é por padrão, provavelmente
está em Sempre Mostrar Sobreposição, que na maioria dos casos é a Regra dos Terços. Se eu clicar uma vez em qualquer lugar aqui, você terá essa regra de terços que você pode amar. Só ajuda a equilibrar as composições. Você não vai passar pela regra dos terços aqui. Vale a pena verificar se você nunca ouviu falar sobre isso. É muito útil quando você está compondo uma imagem, decidir onde ela realmente cai dentro desta grade pode ajudar com o desequilíbrio de simetria. Eu disse que não vou explicar, então vou parar. A primeira coisa que faço é desligar. Eu não uso isso. Eu só acho que está no caminho, então eu nunca mostrar sobreposição, mas vamos dar uma olhada em algumas dessas outras grades. Não os uso, mas pensei em mostrar-te só porque há alturas em que há pessoas que gostam destas coisas. Eu só quero que você saiba que esta é uma opção,
Golden Ratios, Golden Ratio Spiral. Não sei por que isso estaria aqui, uma colheita. Você pode ver isso e ir embora. Oh, meu Deus. Não acredito que não sabia que estava aqui. Mas para mim, eu só entro e digo, “Nunca Mostrar Sobreposição”. que você pode fazer é, se você escolher um, você pode pressionar a tecla O no teclado. Então, o e apenas para percorrer todos eles para que você possa, eu acho, se você está cortando e você quer olhar como, como ele
se parece com uma regra de terços versus proporção de ouro. Eu não quero descartar, é apenas algo que eu não faço. Vou a um “Never Show Overlay”. A próxima coisa é apenas certificar-se de que você pode excluir pixels de corte ou não. Com isso desligado, se eu descer aqui e começar a cortar ou manter pressionada a tecla Shift para bloquear a proporção deles, então isso não faz isso. Mantenha a tecla Shift pressionada apenas para se certificar de que está cortando bem e ainda se encaixando em um quadro. Se eu cortar isso aqui, excluímos pixels, desligamos. O que acaba acontecendo é que se eu clicar nele novamente, você pode ver que as coisas ainda estão lá no fundo. É muito não destrutivo. Eu liguei-o e apertei o botão “Retornar” É muito diferente. Esses pixels estão nas bordas. Eu tinha ido para sempre, terrível entrou. Vou escapar e vou desfazer. Você provavelmente sabia sobre isso porque nós cobrimos isso mais cedo. O que eu quero mostrar é digamos que você faz para um corte ou você abriu um documento do Photoshop e já foi recortado. Está sendo cortada aqui. Agora que você pode girar o corte apenas arrastando-o para fora aqui. Coisa antiga estranha usando a ferramenta de corte no Photoshop. Digamos que temos isso, temos que desligado. Sabemos disso por aqui, mas só queremos expandir. Isso é mais tarde, nós cortamos, nós o reabrimos mais tarde e eu digo, “Eu conheço essas coisas por aqui.” Então você está tipo, “O que você faz?” Tipo, “Como você faz isso se expandir de volta?” O que você pode fazer é ir até Image e há um que diz Revelar Tudo. Ele vai realmente expandir seu Canvas para corresponder ao que estiver em segundo plano. É uma ótima maneira como desescolher algo, um documento do Photoshop para ver, na verdade, o que está aqui? Porque às vezes você pode ter pedaços cortados que estão por aqui. Talvez tamanho de arquivo grande sejam apenas pedaços da imagem que você deseja ou precisa ver para lembrar a Imagem, Revelar Tudo. Esqueci que o último pedaço de corte avançado é o endireitar. Vou voltar para a ferramenta de colheita. Aqui, parece bem reto, a linha do horizonte. Há uma opção aqui só para verificar novamente. Eu clico sobre isso e traço uma linha através do horizonte. Não é uma boa frase, mas entendes o que quero dizer. Eu me certifiquei de que se sente bem e você pode ver que está cerca de 0,3 graus fora. Eu clico nisso. Você pode ver que isso endireitou tudo para mim. Torceu a imagem um pouco, então está enrolado em um ângulo. Se eu apertar Return e agora eu sei que a linha do horizonte é perfeitamente reta. Vamos levar isso um pouco mais longe com a colheita para obter este fora muito mais. É bastante óbvio. ferramenta Cortar, agarrar Endireitar, clicar e arrastar sobre ela. Mas o que vamos fazer é, se eu fizer isso e formos, você pode ver no topo aqui que há toda essa lacuna extra. Eu vou arrastar isso para fora porque vamos dizer que eu quero girá-lo, mas eu gosto. Se eu tivesse devolvido é girar em torno dele, mas há essas lacunas por aqui. O que podemos fazer é antes de usar straighten, basta ativar o conteúdo ciente. Como nós o contemos com preencher o curso essencial, whoop, ferramenta errada, endireitar. Verifique se o conteúdo está ativado. Veja isto. Se eu arrastar isso ao redor e expandir agora, e eu apertar retornar, dar um segundo e ele deve preencher todos os buracos, muito legal. Há um pequeno problema com a árvore lá. Mas para ser honesto, não tenho certeza de quem notaria. Uma fotografia visual [inaudível]. John Tyson pode não estar tão impressionado. Se você está usando endireitado apenas para incontinente, nós estamos em e ele apenas vai e preenche. Você pode fazer de outra maneira. Digamos que você fez isso e você não ativou isso, ou que você tem uma versão ligeiramente anterior e ela não está disponível. Quero endireitá-lo. Só vou endireitar a linha do horizonte. pixels excluídos estão desativados, então eu vou pressionar Return. Eu sei que há algumas coisas lá fora. Lembre-se da nossa camada de truques. Foi “Reveal All”. Não é, está sob Imagem, Revelado Tudo. O que eu posso fazer é agarrar, salvar minha ferramenta Varinha Mágica, clicar nessa, segurar Shift, agarrar aquele pedaço, agarrar que pedaços. Agarrando todos esses pequenos triângulos que restam, toque para selecionar. Vamos para Modificar e vamos para Seleção Expandida. Porque no momento, se o fizermos, eu mostro-te. Simplesmente entra. Ele preenche e funciona continha uma forma de preenchimento. Mas se eu desmarcar, há uma pequena faixa por fora. Só preciso fazer essa seleção um pouco maior. Selecione, Modificar, Expandir. Você pode se contrair lá também. É legal, e é expandido por pixels de cobre. Talvez três não importem muito, só para se sobrepor. Deixe-me fazer a mesma coisa. Ele preenche conteúdo ciente. Esperemos que agora, mágica. Ele preenche essas bordas. Trabalho médio aqui em cima, mas um bom trabalho nos outros cantos. É isso com a ferramenta de colheita. Vamos fazer outro corte de alguma forma. Vou transformar-me em mais três vídeos de recorte. Haverá truques interessantes. Vamos pular para o próximo agora.
35. Cortar e girar automaticamente documentos digitalizados no Photoshop: Você fez uma varredura com seu scanner. Tecnologia antiga quando a fotografia só podia ser impressa. Não se preocupe, podem ser recibos. Qualquer coisa que você tem um grande grupo, de que você quer todos cortar e girar em pequenos grupos separados, há apenas um pequeno botão. Também vou mostrar-lhe como remover os cantos arredondados que a década de 1980amou tanto, você pode ver que este canto está feito, este não é. Mesmo com isso, Eu fiz este slide facilmente, rápido e levantar os cantos arredondados sobre o lado para mostrar-lhe. Além disso,
conheces a minha família, nem sequer perguntaste, mas não tens escolha se queres aprender a técnica. Vamos saltar para dentro. Na pasta de recorte O5, abra o corte e gire 1. Isto aqui é um scan de um monte de imagens minhas quando era criança, meu irmãozinho. Quero digitalizá-los todos em massa, não
quero ter que digitalizá-los individualmente. O problema é que eu fiz isso de propósito para girá-lo, então é um pouco mais difícil de cortar, queremos deixar o Photoshop fazer todo o trabalho. Estamos usando fotos aqui, eu faço isso também para recibos. Eu preciso digitalizá-los e enviá-los para que eu apenas
coloquei quantos eu puder caber como Tetris no scanner, digitalizá-los e acertar o corte automático, e girar, é muito fácil. Arquivo, vá para Automatizar. e este aqui diz Cortar e Endireitar Fotos, relaxar, relaxar. Você pode vê-lo no topo aqui é o meu original, e então há outra guia, todas as imagens. Ele não sabe qual caminho é para cima, então nós vamos ter que ir e girá-los, e eu vou te mostrar alguns outros pequenos truques, mas isso é o básico. Digamos que este aqui, que sou eu quando criança, tempo de história da
família, que é minha mãe e meu irmão mais novo, que sou eu e meu pai, e esse é meu irmãozinho. Aquele pequeno B está pendurado na cama do meu filho. Vamos consertar este, meu irmãozinho. Imagem, Rotação de Imagem, vamos no sentido horário. Se você é como eu, você tem que desenhar o relógio no céu, você nunca pode se lembrar. Mas digamos que esses cantos aqui, até agora temos usado como a última ferramenta de 'zoom'. Vamos voltar para uma das ferramentas que aprendemos no curso essencial. É uma escova de cicatrização. É uma ideia de banda. Aqui. Agora, se você não o usa por um tempo, é muito melhor, porque ele está usando conteúdo sensível, então basicamente eu uso Content-Aware com preenchimento, mas mais como um pincel, então vai ser um pouco mais fácil. Pegue nosso tamanho, isso é meio apropriado e apenas pinte as bordas. Pode ser rápido e áspero. década de 1980, eles adoraram os cantos arredondados. É incrível, o pincel de cicatrização. Vou te mostrar outro truque que eu faço. Digamos que não esse, este aqui. Não tinha cantos arredondados, mas ainda há como aparar ao redor do lado de fora. Eu vou girar. É no sentido horário, relógio no céu. O que podemos fazer como uma ferramenta liso, então Controle A em um PC, Command A em um Mac. Em seguida, há esta é a opção aqui que diz Selecionar, Modificar e Contrato. Quero trazê-lo um pouco. Agora, por padrão, isso está desativado porque estamos usando os limites do Canvas como o lado de fora, ele não funcionará a menos que liguemos isso, então até que ponto você quer entrar e eu vou entrar [inaudível] e clicamos em 12 e loop. Só para que eu tenha isso,
juntando o lado de fora. Vou inverter a seleção. Command Shift I ou Control Shift I em um PC. Então nós preenchê-lo com continuar um filme. Agora, só para você saber, eu uso tantas vezes que eu adicionei o atalho. Havia um atalho no meu Mac, eu não consigo lembrar o que era, mas se você olhar para o seu e você está em um problema Mac é, é que o atalho para abrir algo como iTunes ou algo assim, eu fiz minhas próprias costas indo para baixo para atalhos de teclado porque eu usá-lo com tanta frequência. Vá clicar em OK. Acho que é uma maneira fácil de obter as bordas. Se você estiver fazendo muitos desses, isso pode ser facilmente uma ação Selecionar Tudo,
contrair 10, 12 pixels, preencher Content-Aware para que estamos salvar, fechar. Ou você pode ir embora agora porque eu vou para a pista da memória. Olha, meu pai, oh cara, ele era jovem. Ele ainda tem o bigode. Pedaços dele está aqui. Mais do que eu, pelo menos, que ele não passou em seus genes. A mesma coisa, aqui. Provavelmente só precisa entrar um pouquinho. O legal é que vai se lembrar da última coisa que fez. Você pode se transformar em um pouco rápido usando atalhos e outras coisas para impressioná-lo e para mostrar que você pode nos transformar em como uma pequena linha de produção. Faz você inverter a seleção primeiro caso contrário. Vamos ver o que Content-Content-Consciente nos encheu Vá para o próximo vídeo agora. Invertendo seleção, só estou terminando isso. Parece bom. Já fizemos isso, esse é o meu irmãozinho. Ele é mais novo que eu, mas tem o dobro do meu tamanho, mas tão alto quanto eu, mas duas vezes mais largo. Você não precisa saber disso, mas porque você ficou por perto até o fim e conheceu a família, eu vou te mostrar um pequeno truque. Eu vou, Arquivo, Fechar, porque eu já fiz essas varreduras e eu não preciso delas novamente. Digamos que você fez isso, e você está trabalhando em coisas, e você não precisa de um monte de coisas abertas porque você está brincando, eu vou te mostrar um atalho mais legal. As pessoas não sabem que você pode ir. Arquivo, Fechar Tudo, o que é útil. Eu só quero sair e fechar todos estes Concluído, Aplicar a todos e apertar Não Salvar, e apenas fechá-los todos em um grande movimento. Outro truque é que isso só funciona em um Mac, tenho certeza. Se eu for o Comando W para fechar, e em vez de vir aqui para não salvar, eu apenas aperto Comando e qualquer que seja a primeira letra, então se eu for Comando C, ele vai cancelar Comando, S vai salvar, Comando D vai, Não Salvar. É um atalho? Se eu estiver fazendo atalhos com o teclado, ambas as mãos sobre ele, eu não gosto de pensar, agarrar meu mouse e movê-lo para baixo e clicar novamente. Poderia ser só eu, Close, Não Salve, Comando W, Comando D. Qualquer que seja a primeira letra. Me deixe uma nota nos comentários se houver uma técnica para fazer PC também, para ajudar pessoas de PC para fora. Para o próximo vídeo.
36. Imagens anguladas para corrigir o corte de perspectiva do Photoshop: Oi lá. Este vídeo, vamos olhar para a ferramenta de corte, mas a ferramenta de corte perspectiva. Vamos corrigir correções,
digamos, neste prédio aqui, parece bom e reto agora, como se estivéssemos fotografando de frente para frente,
vamos até um pouco mais longe e remover essa distorção da lente aqui onde está dobrando, apenas para arrumá-lo, eles vão cobrir direito em ser uma parede de tijolos legal legal legal, super plana, super reta. Vamos entrar agora e aprender a fazer isso. sua pasta de recorte O5, pegue Perspective Crop 1 e 2. Vamos começar com o Número 1. É apenas para imagens, como é realmente difícil de obter, especialmente quando você está fotografando algo na parede, você quer que ele seja perfeitamente reto. Talvez seja para Lookbook ou fotografia, alguma arte, pode ser um cartaz ou um outdoor, algo que você quer ser direto, mas não é. Eu tenho um ângulo muito extremo aqui, mas muitas vezes é apenas algo que eu estou apenas tentando colocar bem na frente. Alinho minha câmera e ainda há um pouco de perspectiva, especialmente quando você está fotografando algo grande como um outdoor, você simplesmente não pode evitar a perspectiva. Vamos usar esta ferramenta aqui. Clique e mantenha pressionada a ferramenta Cortar até encontrar a ferramenta Corte em perspectiva, e tudo o que você precisa fazer é clicar em todas as bordas. Como isso é preciso, você gasta com isso ampliando e ficando perfeito o [inaudível] que bom que bem, o [inaudível] o sal. Vamos dar um testamento a isso. Clique em todos os quatro cantos aperte “Return” no seu teclado e lá vai você. Ele endireita-o. Esta é uma imagem estranha. Acho que é para ser desta altura, porque a fonte parece boa. Se você achar o seu como super alto e magro, você pode desfazer
e voltar, e tentar entrar nos cantos um pouco melhor ou apenas esticar um pouco. Isso me leva ao quão legal [inaudível] é. Eu sei que a ferramenta Cortar é C, assim é Culturas Prospectivas, é também o atalho C. Como faço para alternar entre eles? Então, se você segurar a tecla Shift no teclado e tocar nisso, eu sei que V é a ferramenta Mover, C é a ferramenta Cortar, mas se eu continuar pressionando C, não passa como o resto deles. Você segura o turno e ele só muda para tudo isso. Você pode vê-los lá. Segurar “Shift” tocando em “C” alterna todos eles e isso é verdade para qualquer um deles. Faço muito pela ferramenta Marcação de retângulo,
que está na ferramenta Marcação, mas se você segurar “Shift”, você poderá ver que ela alterna entre elíptica e a ferramenta Marcação de retângulo. De qualquer forma, “Shift C” até chegar à ferramenta Cortar e eu só vou expandi-la. Eu seguro Alt quando eu arrasto os lados. Isso geralmente é um PC ou uma opção em um Mac apenas
para que
ele fique distante de ambos os lados e eu só vou usar minha transformação apenas para decidir como eu me sinto quando eu fotografei. Não é a minha fotografia, mas coisas que podem ser um pouco deste apenas ajustando para obter um perfeito. Vejamos outro exemplo, este aqui. Colheita de perspectiva 2 e este é um edifício. É impossível colocá-la nivelada porque não temos um seletor de cereja ou a lente certa, então queremos endireitá-la. Vamos seguir estas linhas. Vou clicar uma vez aqui em cima, clicar uma vez ali, clicar uma vez aqui em baixo. Você está tentando seguir as bordas. Clique em todos os quatro cantos. Se você errar, você pode arrastar essas coisas depois. Quando estiver pronto, clique em “Retornar” no teclado. Apenas endireita, como se você estivesse olhando diretamente. Esta imagem em particular, por causa da lente, é um pouco curvando-se aqui. Um truque extra. Se você lidar com objetos maiores, você pode corrigi-los usando o filtro e o que diz correção de lente. Agora, se você fotografar isso, o que pode acontecer é que os dados do JP vêm através e ele diz a você o Modelo
da Câmera , a Lente, as Configurações [inaudível] tudo isso e se isso acontecer, ele pode fazer algum para corrigir o que você está trabalhando. Alice não, então eu quero ligar a grade, abaixo aqui de baixo para que possamos ver isso. Você vê que ele se curva lá fora. Apenas para corrigir a distorção da lente, rápido e fácil, clique nesta opção superior aqui. Diz remover a distorção e basicamente você arrasta para o centro ou para fora do centro, para obter mais fisheye ou menos fisheye. Então, estou me arrastando. Você pode ver que está indo para o outro lado. Então eu vou arrastá-lo de volta. Estou segurando meu mouse para baixo o tempo todo, apenas pequenos passos e estou tentando igualar a grade. Ele estava se curvando agora lentamente, mas certamente, você pode ver lá agora, eu tenho uma bela borda reta lá, borda reta lá. Um pouco fora daqui e isso é culpa minha por não passar um pouco mais de tempo com a Perspective Crop. Eu só cliquei o lado de fora. Eu posso corrigir isso agora apenas clicando em torno das bordas novamente, mas sendo muito mais reto por aqui. Digamos que só queremos clicar no interior disto. Eu só quero straight up [inaudível]. Eu vou ser muito mais perfeito lá. Este aqui precisa de um pequeno ajuste. Eu preferia ampliar, apertar “Return” e agora eu tenho uma parede perfeitamente reta. Essa é a ferramenta Perspective Crop. O objeto pode estar deitado no chão, em cima de uma parede, e adicionamos um pouco de extra quando olhamos para a Correção de Lentes. A Correção da Lente não precisa ser usada apenas quando você estiver usando esse Corte em Perspectiva. Você pode usar a Correção de Lente para qualquer imagem. Vamos entrar no próximo vídeo.
37. Como cortar o branco longe da borda de uma imagem no Photoshop: Oi lá. Este vídeo, vamos olhar para aparar, dizer algo assim, se é uma digitalização, há sempre uma área branca que eu não preciso, e simplesmente apará-lo magicamente até a borda
dos pixels sem mexer com a ferramenta de corte. O mesmo aqui onde abrimos um arquivo ilustrador, é essa transparência misteriosa que apareceu aqui. Não é o que eu preciso, eu só quero cortá-lo, então isso é bem do lado de fora. Pronto para ir, deixa-me mostrar-te como agora. Para começar, vamos apenas abrir o Trim 1.jpg por si só primeiro. Este truque é escaneamentos gratos ou qualquer coisa que é apenas sobre um fundo branco. Realmente não importa o que é, mas eu costumo lidar com coisas com um esboço, trazê-lo para o Photoshop. Eu vou usar os níveis só para obter que bons, fortes brancos e negros, e então eu só quero aparar tudo. Vá por cima de lixo de varredura extra ao redor, é
claro, aquelas coisas brancas extra ao redor do lado de fora. Basta ir para a imagem, ir para aparar. O que ele vai usar, ele vai usar qualquer que seja o pixel de cor no canto superior esquerdo, que é branco, ele vai usar isso para aparar. Isto está em um fundo azul. Ele usaria azul como é a cor da guarnição. Você pode decidir apenas cortar fora o canto superior esquerdo, inferior direito, Eu não tenho certeza por que você não fez isso, mas vamos clicar em OK. Apenas apara o que temos. Legal. Guarde, documento agradável e limpo. Muito mais fácil do que tentar arrastar a ferramenta de corte e tentar colocá-la lá e obter as idades. Vejamos o segundo exemplo. Vamos para o arquivo aberto, mantenha isso separado porque é um arquivo de AI, o Adobe Illustrator. Ferramenta de corte, ele vai deixar todos os padrões e clique em Ok. Por causa da maneira que isso construiu, isso acontece de ser muito com logotipos que eu tenho de pessoas, você abri-los e Photoshop é essa caixa transparente mistério. Você não sabe de onde veio, mas você não precisa, então você quer aparar isso e parece exatamente o mesmo. Você vai para a imagem e você vai para aparar, mas há outra opção aqui que diz pixels transparentes. Eu quero que você remova todos os pixels transparentes, por favor, e obtê-lo para uma boa forma arrumada. Diga que isso talvez seja um PNG ou JPEG e você está pronto para ir. Boa dica simples, útil de vez em quando. Próximo vídeo.
38. Alinhar automaticamente camadas no Adobe Photoshop CC: Oi lá, Neste vídeo vamos olhar para alinhar imagens. Por que estou fazendo isso? Neste caso, nossa fotografia minha mesa e eu preciso do rótulo de exposição para minha mesa para que eu possa ver todas as minhas placas de som de vento que eu uso para ajudar a tornar o som neste microfone mais agradável, mas por causa desse nível de exposição, eu não posso ver qualquer coisa na tela. Então eu mudei minha exposição para que eu possa ver a tela, mas então os fundos muito escuros, o que eu faço? Eu mascaro um e misturo-os juntos. Mas como eles não se alinham,
eu fecho estes portáteis,
você pode ver que eu fecho estes portáteis, eles não se alinham. Vou mostrar-lhe como fazer neste exercício, como magicamente alinhá-los para que perfeito com o clique de um botão, então podemos mascarar a exposição mais baixa com a maior exposição e o mundo é um lugar bonito. Vamos começar. Primeiro, há duas maneiras de fazer isso. Há o jeito do homem das cavernas que faria primeiro. Nós vamos ao File Open,
abrir o auto alinhado um e dois,
e então eu vou te mostrar outro caminho. Em ambos os sentidos é útil. Este aqui tem a minha baixa exposição para a minha tela e este tem a minha alta exposição e tudo o que eu vou fazer é ir selecionar tudo, copiar este e colá-lo. Eu os tenho em cima um do outro, mas eles não se alinham porque eu estava de mão segurando isso e enquanto eu ajustava minha exposição, idade vai se contornar. O recurso auto alinhado é selecionar o topo, mantenha pressionado Shift, clique no último, vamos pensar em um dois, você pode fazê-lo com 1.000. Eu provavelmente deveria saber que Photoshop iria pirar, mas você pode fazer isso com 10 ou 100 talvez. Todas as imagens que você deseja alinhar vão até Editar e há uma aqui chamada Auto align layers. Deixe-o para auto, parece sempre trabalhar em auto, vamos clicar em ok. Magicamente protuberante no topo fora do abaixo você pode ver a linha de telas perfeito, subir. Agora vamos juntar esses dois para se juntar a eles em um doente. Quero mostrar-te o outro caminho. Esse é o jeito do homem das cavernas e se há apenas algumas imagens, é o que você precisa fazer. Há outra maneira e um arquivo, vamos para scripts, e olhamos para isso mais cedo quando olhamos para carregar muitas coisas em uma pilha, a coisa legal sobre isso é que eu quero carregar ou alinhar um e dois, mas vamos dizer que há um 100. Você definitivamente quer usar este recurso automático. Tenho que alinhar, mas também tentar alinhá-los também, então ele só vai fazer ambos os processos de uma só vez. Ele vai colocá-los todos em um arquivo em vez de eu vou copiar e colar e ele vai tentar alinhá-los, relaxar, relaxar. Com apenas duas imagens, realmente não importa para que lado você vá, mas com muitas delas, é mais fácil usar esse script. Agora estamos usando para níveis de exposição, pode ser apenas que você tem que se
mover para obter toda a frente de um edifício, digamos, ou em vez de fazer exposição, você faz como distância focal, você está tentando obter focos diferentes sozinho. Seja como for, o que eu preciso fazer é eu preciso, vou colocar este no topo e no escuro. Porque o que eu quero é realmente ter a tela, que eu posso ver neste, mas é muito escuro aqui atrás aparecer nesta imagem porque este, eu posso ver todos os fundos, eu preciso combiná-los para. Com auto alinhar dois selecionados, eu vou pegar minha ferramenta de seleção rápida, eu vou arrastar uma caixa por aqui, um trabalho muito bom, e eu clicar aqui também. Há um bom trabalho que eu vou entrar é um pouco aqui que provavelmente precisa de um pouco de amor. Estou mantendo pressionada a tecla Option no Mac. Op em um PC chave apenas para corrigir isso, você poderia usar a ferramenta menor, a ferramenta menor polígono, que tem uma borda reta. Como você faz a seleção, eu vou adicionar uma máscara, e um presto, e ambos combinados. A de cima são apenas as telas e esta de baixo aqui preenche o exterior. Este top aqui, o que eu poderia fazer. É o fim do tutorial. Vou passar agora e mostrar-te o que faço quando estou a tentar misturar os dois. Vou adicionar rótulos a esse pequeno erro. Isto é apenas para a camada por baixo e agora eu vou, eu vou fazer com que pareça mais crível que foram muito escuro este, muito detalhe. Só estou encontrando afinação fina o que parece real, mas ainda legível. Enquanto antes do membro, totalmente ilegível. Tela Zheng, exposição diferente, Eu posso ver mais ou em um par de últimas pequenas coisas que eu quero fazer para retocá-lo, mas você pode ir agora. Isso é só eu perder e prestes a consertar isso, então a maneira mais fácil seria pegar a colheita dois e apenas tipo de como encolher e eles cortar todos esses tipos de pixels transparentes fora e ninguém sabe para isso. Mas vamos experimentar sem novas ferramentas legais que eu vou usar, a ferramenta menor como. Você disse que eu estava usando a ferramenta mágica para agarrar as bordas daqui e você provavelmente notou pequenos pedaços brancos de mijo no canto e eu ignorei. Eu não deveria ter vindo aqui para me arrepender e te mostrar um lugar melhor. Vamos usar a ferramenta menor, o polígono ou a ferramenta menor, que é a versão de borda reta. Eu só vou fazer isso manualmente, então eu vou clicar uma vez,
clicar duas vezes, e eu estou me certificando de que eu sobreponho isso em uma quantidade razoável. Clique uma vez, venha todo o caminho de volta ao início e quando ele se aproxima do início, você vê que pequeno círculo aparece, isso significa que é seleção completa. Agora, para adicionar à seleção, eu vou manter pressionada a tecla Shift, eu vou talvez começar aqui embaixo. Uma vez que você começou a editar, você pode lamber fora do turno porque se você realmente não quer fazer linha reta, então basta mudar para começar. Clique por aqui, não queremos mais tempo para um pouco estranho, aquele. Shift para chutar indo clique uma vez, em seguida, link ir shift, por isso está terminando, mas não está tentando fazer linhas retas. Você pode ver como sobreposição eu estou lá e turno começar qualquer maneira que você gosta de fazer uma seleção. Então nós vamos como Editar, Preencher e eu não tenho idéia de quão bom ou ruim isso vai ser, vamos apenas ver. Não a cabeça é um bom trabalho, embora seja uma loucura. Como se meu quadro estivesse magicamente maior. Estamos usando alguns dos números, meu microfone vai um pouco maior, a mesa não é tão ruim, é um pouco estranho perspectiva, isso é bom. Quero dizer, bem, está acontecendo aqui embaixo. O cobertor que eu tenho preso ao meu quadro branco. Por quê? Porque se não o fizer, aquele quadro vibra de alguma forma. No microfone em vez de eu soar cristalino, parece que estou gravando no banheiro. Eu perdi um pouco lá boa idéia. A última coisa que quero fazer é talvez as bordas aqui tenham um pouco de branco. Você pode vê-lo vindo por aqui. A coisa legal, lembre-se, temos nosso doce novo truque quando clicamos na máscara, selecione a máscara. O que eu vou fazer é eu vou mudar a borda e nós sempre entramos, eu vou sair só para expandir um pouco. Aqui em cima vamos dar uma olhada nas camadas, mostrar o original, apenas expandido um pouco mais. Meu favorito, ele favorito,
favorito qualquer coisa o tempo todo. Lá vamos nós clicar novamente, ir para aquela borda realmente forte lá. Essa não é uma foto particularmente boa que eu mostrei agora é a mesa que eu estou sentado, apenas como um exemplo, eu quero arrumar esses tubos, esses cabos agora eu fiz este disco, e enquanto parece legal, eu gosto dele. Eu fiz isso, eu fiz um grande cume exatamente onde o mouse vai, que não o torna inútil, mas isso faz um disco terrível para qualquer um usando um computador de qualquer maneira ou fazer uma linha, você pode estar pensando em sua cabeça, o
que não o torna inútil,
mas isso faz um disco terrível para qualquer um usando um computador de qualquer maneira ou fazer uma linha,
você pode estar pensando em sua cabeça,
pode pensar em estanho e as boas maneiras na minha situação de usá-lo. Eu uso isso para exposição. Pode ser links focados, pode
ser apenas você tem imagens que você só precisa se alinhar. Algumas pessoas fazem isso onde você tem como um arremessador e você diz ok, todo mundo diz, caramba, e a maioria deles olha, exceto Sandra. Sandra e todos olhando para a câmera. Mas na próxima foto, Sandra está olhando, mas Dave não está. Não sei quem são essas pessoas. O que você pode fazer é alinhá-los e mascarar o rosto de Sandra em um deles e tê-lo, então Dave e Sandra estão olhando ao mesmo tempo. Oh, meus amigos, isso vai ser ainda vamos entrar no próximo vídeo.
39. Como remodelar imagens usando a distorção de marionete no Photoshop: Oi, aí. É hora do Puppet Warp onde vamos fazer o monstro dançar, vamos fazê-lo coçar a barriga, vamos distorcer os carrapatos para se encaixar em outras formas. Então vamos pegar nossas novas habilidades, e vamos cortar essa videira, vamos dobrá-la em uma nova forma para que possamos adicionar um fundo,
adicionar algum tipo, e então obter o tipo para interagir com a videira. Obrigado, ferramenta de dobra de marionetes. Vamos aprender a sua magia. Vamos começar com a abertura da dobra dos fantoches 1, 2 e 3. Começaremos com dobra de fantoches 1. Agora, o que eu fiz neste aqui é que isso está em um PNG, então isso tem um fundo transparente. Tudo até agora tem sido um JPEG, que é forçado a ser um fundo branco. O bom disso é que basicamente já está mascarado. Isso seria verdade se você, digamos, desenhasse isso no Illustrator ou obtivesse de um site de biblioteca de ações. Se você não fez, você vai ter dois mascarar para fora para começar. Faremos isso em um dos outros exemplos, mas no momento, saiba que está em um fundo transparente. Só vamos tornar as coisas super fáceis. O que precisamos fazer é ir para Edit e descer para Warp de Marionetas. Tudo o que precisamos fazer agora é prender o monstro aqui em alguns lugares diferentes. Você precisa de pelo menos dois, então um na mão, um na axila. Faça as duas axilas, as duas mãos, os dois pés. Alguma outra articulação? Ele tem uns quadris lá, e eu pego ele uma vez nos chapéus. Será isso por enquanto. Esta malha aqui é útil, e desligá-lo porque eu quero fazer isso,1, 2, 3. Oh, coça o traseiro dele. Vá em frente. Isso significa que você pode desenhar seus personagens em uma forma de peixe estrela e, em seguida, reajustá-los dependendo do que você deseja fazer. Consegues fazê-los dançar? Sim, podemos. Se encontrares isso, digamos, estás a mover isto e, digamos que movemos este, e o meio dele está a mudar-se para cá. Então não está fazendo o que você quer exatamente, você pode adicionar pinos mais tarde, um no nariz, para que eu tenha um pouco mais de controle. Quero uma gravata borboleta lá. Assim, quanto mais pinos você tiver, mais você forçá-lo a permanecer em diferentes partes. Digamos que queremos que ele coça a barriga. Com esse pino selecionado clicando nele, há uma opção aqui chamada Profundidade do pino. Então eu quero trazer isso para a frente ou enviá-lo para trás. Então traga este para a frente. A outra coisa que podemos fazer é olhar para a rotação. Então, se eu clicar nisso, posso girá-lo mantendo pressionada
a tecla de opção em um Mac ou manter pressionada a tecla em um PC. Então, eu vou ampliar. Assim, você pode ver, mantendo pressionada a tecla de opção no meu Mac ou mantenha pressionada em um PC,
eu posso girar essa tecla . Torneira Tippy. Este monstro é um amante do país na sabedoria. Você pode dizer. É assim que você sabe que meu pai gosta de uma música, ele não dança. É isso aí, tippy tap? Você vai notar algumas coisas estranhas acontecendo, não se preocupe, estamos presos neste meio termo de dobra de marionetes. Não podemos fazer outras coisas. Pode ver que está tudo acinzentado? Quando você terminar, você tem que entrar no seu teclado ou clicar neste pequeno tick aqui em cima, e então ele vai e redesenha corretamente. Então não se preocupe se as coisas estão um pouco estranhas, uma
olhada quando terminar. Agora, a coisa estranha sobre isso, não a coisa estranha, mas a coisa a notar é que isso está fundido lá para sempre. Não há como fazer isso agora. Então, se eu fosse fazer isso corretamente, eu me certificaria de ter uma cópia duplicada disso. Então eu tenho dois deles. Você pode obter todos esses diferentes movimentos de dança. Vejamos outro uso para a ferramenta Warp de Marionetas. Digamos que temos esse coração aqui, e queremos colocar um texto nele. Então eu vou pegar a ferramenta de texto, eu vou clicar aqui, eu te amo. Vou selecionar tudo. Eu vou colocar, eu não vou me preocupar muito, eu vou escrever mais ou menos o tamanho que eu preciso. Porque infelizmente o que ele faz é que apenas para obtê-lo aqui, mas agora o que eu quero fazer é ficar um pouco mais alongada, eu tenho arrastar em todos esses ícones para torná-lo menor. Por isso, fecha. Agora, eu quero forçá-lo para os cantos como você viu no início. Se eu for para Edit e for para Puppet Warp, ele diz que não pode fazer com tipo, nem pensar. Nós temos que rasterizar o tipo, que significa que ele vai se transformar em pixels, e nós não podemos editá-lo mais tarde a menos que, eu aperte cancelar, clique com o botão direito do mouse nele e diga, você é um marcador de objeto inteligente, então você pode fazê-lo. Vá para Dobra dos Marionetes. De quantos pinos vamos precisar? Provavelmente muito. Tentando clicar e arrastá-los. Eles tendem a se mover. Vamos começar com estes aqui no topo de qualquer maneira. Este aqui, eu vou clicar e arrastar,
eu quero ir lá, eu quero você lá em cima, adicionar outro alfinete. Eu quero que ele se dobre. Você pode fazer algumas coisas divertidas com o tipo. Acho que estou gostando menos desse exemplo. Parecia uma boa idéia, e eu estava brincando com isso antes, e parecia que saiu bem. Entendeu o que quero dizer, certo? Isto é o que estamos a fazer. Rotação vem a calhar, lembre-se de manter pressionada a tecla de opção em um Mac ou mantenha pressionada em um PC, eu provavelmente vou ter que gastar muito mais tempo forçando isso aqui. Nós provavelmente queremos ir para Editar, Transformar, e então há um lá dentro chamado Warp. Isso provavelmente vai fazer melhor. Aprendemos isso no curso básico, mas estamos fazendo coisas adiantadas agora. Então podemos usar a dobra dos fantoches. Entendeu o que quero dizer? Quando terminar, clique em OK. Agora, você meu amigo, também pode ter algum tipo interessante. A coisa boa sobre isso é porque é um objeto inteligente, você pode desativar e ligar este filtro de mapa. Você pode escalá-lo para cima e para baixo. Ele vai desligá-lo temporariamente, escalá-lo para cima, retorná-lo. Vai aplicá-lo de volta. Uma coisa que você não pode fazer é que você não pode ir e editar o tipo e tomar a forma corretamente principalmente porque era formas específicas. Lembre-se, nós fizemos isso. Se eu fizer carrapatos diferentes, não vai funcionar da mesma maneira. Veja isso, eu clique duas vezes para entrar em Eu te amo, e vamos dizer que agora eu te odeio. Por isso, vou guardar isto e fechá-lo. Você vai notar que não. Essas coisas não combinam, então você vai ter que refazer. Provavelmente, os pinos ainda estão lá. Você pode ir e editá-lo. Vá para a ferramenta Pin de marionete, você pode ver que ela criou a malha com base nas palavras amor,
então o ódio não se encaixa mais lá. Escapar, desfazer até que esteja parecendo meio decente. Vamos para este terceiro exemplo aqui onde vamos reorganizar uma vida real. Você viu no início onde nós conseguimos crescer através do tipo, mas você pode fazê-lo para o tecido que está fluindo ao vento. Você quer remodelar tudo aqui. Isso está apontando para as direções erradas. Então este vai ser mais longo. Vamos reutilizar os recursos da ferramenta Puppet que já aprendemos. Então, se você veio aqui pela ferramenta de dobra de marionetes, você pode ir embora agora. Se quiser ficar por aqui, faremos um pequeno projeto juntos. A primeira coisa é que isso é fundido no fundo. Então eu preciso mascarar. Olhando para ele, de todos os meus truques de mascaramento, eu estou pensando que uma máscara de canal vai ser isso. Como é que eu sei? Porque antes deste vídeo eu olhei para ele por um pouco mais. Não, não vai funcionar. Esse é o problema, eu acho, quando você tem essas novas ferramentas de mascaramento, saber qual escolher se resume à experiência. Então, se você é novo, você pode acabar perdendo um pouco de tempo tentando gama de cores, mas coloração não vai funcionar porque há uma cor tão diferente entre este, este talo, estas folhas aqui. Então vamos fazer uma máscara de canal, que fizemos em um vídeo anterior. Tão vermelho, verde e azul. azul tem o preto muito claro contra o branco. Então eu vou duplicar o laboratório. Se não te lembras da máscara do canal, talvez
tenhas de saltar para trás e testar essa. Vamos para Imagem, Ajustes e Níveis. Não vou usar o do painel de ajustes porque estamos neste mundo de canais estranhos, temos que usar o painel de níveis da velha escola. O que quero fazer é tornar os negros um pouco mais negros. Você pode ver que já está recebendo uma máscara muito boa. Há estes pedaços aqui. Se eu tentar pegar esses, mas mesmo assim eu vou longe demais, e eles estão potencialmente indo muito preto diferente da minha máscara, então eu vou voltar um pouco, devemos ficar com os brancos? Nós não precisamos. Vamos clicar em “Ok”. Então está quase lá. Há algumas partes que ainda estão transparentes. Você poderia usar seu pincel preto como fizemos antes. Mas outro pequeno truque legal é, se eu aumentar o zoom e meu pincel preto me faz parte do caminho. Se eu pegar o pincel, tão preto é minha cor de primeiro plano, virar para o tamanho do pincel, algo, dureza em cerca de 90, eu vou ter minha capacidade em 100. Vou pintar estas veias porque não quero que elas sejam transparentes. Mas digamos que cheguemos perto da borda. Você pode obter um pincel muito pequeno e apenas trabalhar o seu caminho para os cantos, mas o truque legal é usar a mesma ferramenta de pincel, mas usar esta chamada de sobreposição como o modo de pincel. Veja isso, eu posso colocar essa tinta na borda aqui. Vá em frente. Os tendões meio tons ou cinza em preto, deixando o branco. Isso significa que você pode chegar muito perto da borda. O que eu costumo fazer é diminuir a opacidade, então não é vicioso. Veja, eu só pintei algumas vezes ao redor das bordas aqui. Quero que haja um pouco de transparência ao redor das bordas, mas não muito. Você pode ver aqui eu posso continuar pintando isso. Não tenho que me preocupar muito em me aproximar dos lados. Posso deixar um pouco de transparência lá. Controle L. Uso uma escova ligeiramente efervescente, um pouco mais forte, podemos ficar aqui por um tempo. Vou continuar a fazer isto. Vou pedir ao editor para acelerar um pouco. Estamos de volta e a única coisa que fiz foi mudar para o modo
normal de mistura só para preencher algumas destas veias aqui. Por que eu não estou fazendo absolutamente perfeito é porque você vai ver no exemplo final, um pouco de transparente folhas fluorescentes é realmente bom. Vamos carregá-lo como uma seleção. Volte para o RGB, vá para camadas, e se eu adicionar uma máscara de camada, será o caminho errado. Antes de fazer isso, eu vou obter um select this e agora eu vou adicionar uma máscara de camada. Nenhum dos recursos automáticos membro de trabalho selecionar intervalo de cores áreas de foco assunto. Você tem que voltar para a boa e velha máscara de canal. A próxima coisa que vou fazer é checar a máscara contra o preto só para ver o quão ruim minha seleção estava no tipo, não é tão ruim. Se não era tão bom e não estava tão feliz com ele ao redor usando esta ferramenta de pincel aqui, o pincel refinado para apenas tipo de trabalhar as bordas em qualquer peça que eles precisam de fixação e apenas trabalhando que um. Você pode jogar foi deslocado novamente, descontaminar cores. Estou feliz com como ele vai cancelar, porque o que eu quero fazer é que eu vou colocar uma cor de fundo e assim por diante nova camada. De que cor vou usar a ferramenta de gradiente. Vou usar nossos gradientes radiais, vou usar este primeiro aqui, que é a mistura de primeiro plano e fundo. Minha cor de primeiro plano aqui vai ser, eu quero um marrom quente. Vai ser claro na cor de fundo que eu clico. A mesma coisa neste preto acastanhado. Encontre alguns para usar apenas um pouco de cor, apenas não muito. Você pode ir o preto da meia-noite ou aquele preto quente. É o que eu estava recebendo, porque vai ser neste contexto. Eu posso clicar com o botão direito do mouse no fundo ou cinza claro apenas para que eu possa vê-lo um pouco mais fácil. Agora eu tenho que cortar, eu quero adicionar algum tipo,
eu vou digitar, “PARA CRESCURAR”. Selecionado tudo, uma cor, branco, tamanho
da fonte, você pode arrastar o ícone, algo assim. Muitas vezes eu apenas uso minha tecla Command T ou T Controlled apenas para alterar o tamanho da fonte. Vamos pô-lo um pouco mais pequeno. Agora o truque é fazê-lo entrar e sair. O que vou fazer primeiro é duplicar este sujeito. Eu tenho um backup se eu precisar voltar para ele, eu vou desligá-lo. Eu faço dessa coisa um Objeto Inteligente, para o meu topo, clique com o botão direito do mouse nele. Objeto inteligente para que agora quando eu ir usar minha ferramenta Pin de marionete ou a ferramenta de distorção de marionete. É um efeito que posso ligar, desligar e ajustar. O que eu estou tentando fazer agora é que eu provavelmente vou
executar um monte deles onde eu sinto que o foguete vai. Queremos reorganizar isto aqui. Quanto mais desses você tem, mais controle você tem, mas menos fluido parece. Vou colocar um em cada uma das folhas, cantarolando muito, estou trabalhando. Fazíamos coisas indo lá embaixo. Pensamos, então perguntamos o que vai acontecer com ele. Também vai parecer diferente porque vai ser uma máscara diferente. O que vou fazer agora? Provavelmente vou deixar este pedaço de peixe. São estes aqui que eu realmente queria parecer que ele está saindo disso, eu vou perder o elevador, este aqui em cima e você pode ver agora o poder da ferramenta de dobra de marionetes. Só estou tentando posicionar isso de uma forma que fique bem com o texto. Quero que pareça que está saindo entre o W aqui pode sair daquele poço também. Em outro aqui em cima, e talvez esses aqui vão dar a volta aqui, enrolar em torno disso. Você está vindo aqui, lembre-se de girar enquanto você mantém pressionada a tecla de opção ou nos cantos em torno de onde estava. Aperte Return quando terminar e agora está dentro e fora do pote. Como é que fazemos isso? A maneira mais fácil é realmente ter, ignorar esta coisa aqui. Isso pode ser confuso, eu deixaria lá, mas quero deixar isso claro quando estou ensinando isso para todos. Vou puxar isso lá para cima para que fique um pouco mais agradável. O que você faz é que você tem uma cópia aqui em baixo, nós vamos nomear, vamos chamar este um videira 1. Eu vou duplicá-lo arrastando-o para aqui, eu vou ter um acima. Esta vai ser a minha videira 2, deve ser abaixo e acima. Mas de qualquer maneira, eu tenho dois desses agora. Como atrás do texto e um está na frente do texto. Com este em cima, adicione uma máscara de camada e apenas pinte você, esta é a parte onde fica um pouco estranho, então adicione uma máscara de camada, pegue seu pincel. Certifique-se de voltar para o modo normal. Certifique-se de que o preto é a sua cor de primeiro plano, escolha um membro de tamanho. Vou manter pressionado o controle na tecla Option no meu teclado e arrastar para a esquerda e direita e RPC mantém pressionada a tecla Alt no teclado
e, em seguida, usar o botão direito do mouse, arrastar para a esquerda e para a direita, para cima e para baixo. Da última vez que eu vou te dar isso [inaudível], anote. Eu estou indo para algo dureza cerca de 90, e agora você vai pintar, dizer que eu quero vir na frente disso,
mas atrás do QC e ir direto para a borda lá. Na verdade, eu poderia colocar essa videira, droga, zoom em um pouco, eu vou desfazer algumas vezes. Veja isso pode ser muito brutal com ele, você
pode ver que eu posso clicar sobre isso tudo. Porque há algo por trás dele preenchendo essa lacuna, parece muito bom. Ficar com este que eu quero talvez isso é talo indo na frente que eles têm e não esta folha deve tê-lo de volta. Acabei de fazer a tecla X alterna as cores de primeiro plano e plano de fundo. Se eu acidentalmente cliquei que, mas muitas vezes como não, X key, apenas acenar, executado sendo preto de volta. Eles vão embora,
decidem o que querem na frente e o que querem na parte de trás. Para um pouco de um ziguezague procurou
saber saber [inaudível]. Você pode ler que a tecla G, X em um rosa que volta para dentro e para fora. Ela não pode executar de novo, e eu vou precisar de mais disso aqui em baixo porque é simplesmente ilegível. Isso comportamental, desculpe caras, você vai ter que ir por baixo talvez para fazer isso, aquele pequeno cara cutuca para fora. Provavelmente vamos ter que fazer também é há um pouco de fantasmas por fora. Eu vou saltar de volta para selecionar máscara e olhar para contratar a máscara um pouco ou não colocar-se através da dor e apenas ter um fundo branco com texto colorido. Você não tem que se preocupar com isso, eu vou de novo, então vamos voltar a isso. Que os meus amigos são a ferramenta de dobra dos fantoches. Se você gostou, ele também está integrado no Adobe Illustrator. Mas fica muito emocionante quando estamos trabalhando em algo como Adobe After Effects, eu cheguei à rede costeira, você pode ir dar uma olhada, mas o verdadeiro benefício é que você começa a animá-lo. Onde temos um negócio por aí, batemos no “Return “e é um fusível assim. Depois de falsificações permite que você tipo de em tempo real, balançar ao redor e ter esta videira como se movendo e crescendo e balançando. Se você fez essas cores, você vai se lembrar desse cara onde o fizemos dançar. É isso para a dobra dos fantoches. Vejo-te no próximo vídeo.
40. Exercício do curso — distorção de marionete: Oi, é hora do projeto de classe novamente, você estava pensando, “Ei, não há mais projetos, isso é incrível.” Surpresa, sair para mais coisas baseadas em ferramentas e
entrar em mais parte da parte baseada em projetos do curso. Neste, o que eu quero que você faça na sua pasta de corte O5, há um chamado exercício de classe 1 e há dois aqui para este exercício. O primeiro, este monstrinho, quero que você se reforme em uma pose diferente, totalmente até você, mas experimente com essa largura de pund, seus braços e pernas. O outro é o projeto mais longo ou uma parte mais longa deste, exatamente como fizemos no final do último vídeo, eu gostaria que você mascarasse isso usando qualquer técnica que você quiser. Este aqui gama de cores meu trabalho porque é uma diversão mais consistente, você pode usar uma máscara de canal qualquer coisa que você gostaria, mas eu quero que você combiná-lo com seu nome, use seu nome ou quaisquer palavras que você gosta. Mascará-lo, movê-lo para que ele interaja com um tipo de alguma forma, e fazer esse truque onde ele mergulha e sai. Você provavelmente vai ter que voltar e conferir o último vídeo, mascará-lo primeiro, então você tem duas versões dele, uma em cima do texto, uma abaixo do texto, e você mascarar a de cima, Então eu quero que você compartilhe comigo. Você compartilha este em particular, eu quero saber que técnica de mascaramento você usou. Seria interessante ver o que todo mundo faz. Tudo bem, está no seu arquivo de projetos de classe basicamente tudo o que eu disse, sim, vá em frente e palpável. Vejo você no próximo vídeo.
41. Como alterar a perspectiva no Photoshop Perspective Warp: Oi lá. Neste vídeo, vamos aprender como usar distorção perspectiva para fazer isso, ver todas as linhas batendo fora e em todos os tipos de direções,3D presto. Vai direto para um dos usos típicos para dobra de perspectiva. Outro uso, porém, é este. Este é o meu contentor original, mas preciso que vire numa direcção diferente. Imagine se você pudesse voltar no tempo e movê-lo, essa é a ferramenta de distorção perspectiva no Adobe Photoshop. Vá e aprenda a usá-la agora. Estes dois arquivos vão ser Perspective Warp 1 e 2, nenhum corte embora nós vamos estar fazendo uma coisa semelhante. Vamos começar com a perspectiva warp 1 e neste caso, a lente para obter esta foto com todo o fundo que você pode ver é distorcida as linhas aqui, nada é realmente reto. Esta é uma opção perfeita para Editar, distorção perspectiva. Agora, para ser chique, devemos convertê-lo em um objeto inteligente primeiro. Então podemos ligar e desligar esse efeito mais tarde. Então, Edit, dobra de perspectiva. O que você faz é clicar uma vez em qualquer lugar, o que lhe dá o seu plano facial. Basta arrastar os cantos para que você esteja cobrindo exatamente um rosto da igreja. Eu só estou arrastando isso ao redor e o jeito que eu estou alinhando é obviamente que há uma linha clara no fundo aqui e a profundidade. Mas há outra regra de terços aqui. Eu estou arrastando isso por aí porque eu realmente quero, você pode ver lá. Agora. Sinto que é uma linha reta ou um plano reto que atravessa. Quero fazer com que a cruz perca até sentires que estas linhas se alinham. Você pode ver que um ali se alinha com o telhado de refinado lá. Agora queremos este outro avião aqui. A maneira mais fácil de novo é cíclica por aqui e apenas desenhando estes eu vou juntar-me ao primeiro e ele simplesmente encaixa-se a ele. Então tem sido um pouco de tempo minando isso. A mesma coisa. Eu quero, esta é a linha que está de baixo para cima. Eu quero ter certeza de que este guia aqui se alinha com o telhado e que deve me dar alguma forma. Basicamente ele só diz ao Photoshop sobre os dois aviões com que estamos lidando. Há duas fases. Há layout que acabamos de fazer, e então você se move para dobra, e aqui é onde a magia acontece. O que eu quero fazer é dizer todas essas falas. Eu quero que você seja reto para cima e para baixo. Agora o trabalho é muito bom com apenas caixas. Mas como esta é uma igreja em
seu telhado inclinado e há um pouco de estranheza acontecendo aqui,
eu estou meio que seu telhado inclinado e há um pouco de estranheza acontecendo aqui, fudge isso levantando um pouco. Você pode ver que eu realmente posso manipular a vida real como transformar essa coisa em volta. Quando terminar, clique nesse carrapato ou clique em “Padrão” e vamos ativar e desativar essa mufla. Vejamos outro exemplo. Este contêiner aqui pode ser o exemplo mais perfeito disso porque é bom e quadrado coisas na praça, as coisas podem ficar um pouco estranhas e também, como você sabe, se há uma pessoa parada na nossa frente,
nós vamos para ficar distorcido e não vai ser tão realista. Há como uma tempestade perfeita que precisa acontecer para que esta ferramenta seja incrível, mas é definitivamente bom o suficiente, mas quando o exemplo é certo esta ferramenta é bastante incrível. O que é isto? Aqui vamos nós, aqui vamos nós. Este é o meu primeiro avião, eu deveria ser mais perfeito com ele. Você pode clicar uma vez e, em seguida, basta arrastar para ele. Outro pequeno truque é clicar e arrastar e chegar perto. Você verá essas duas linhas serem destacadas e elas se encaixarão nela. Aqui vamos nós, meu amigo, nós viemos meu amigo. Em vez de apenas endireitá-lo, que não é o que eu quero fazer agora que ele é bom e reto, o que eu quero fazer é tentar e virar ao redor. Ele vai mudar de layout para dobra e o que eu posso fazer é um pequeno truque é que eu posso segurar Shift pressionado e clicar nesta linha aqui. Você pode ver isso meio que tranca na minha linha reta para cima e para baixo jogando e isso significa que sempre que eu arrasto um desses, você vê que o de cima vem junto para o passeio bem, você pode ver que eu posso virar essa coisa ao redor. Agarre com um pouco de língua como fora casas olhando. Mas você pode ver que eu estou fazendo parecer que o recipiente estava realmente virado para o outro lado quando foi fotografado. Quão bom é isso? Esqueci de transformá-lo em objetos inteligentes. Então eu vou clicar em Retornar no meu teclado. Você já viu, todas as coisas viraram e eu vou usar meu desfazer,
desse jeito, daquele jeito, daquele jeito, desse jeito, continue. Vamos voltar para este aqui e terminá-lo porque eu quero preencher isso com o conteúdo que sentimos. Mas não posso porque é um Objeto Inteligente. Então eu tenho que destruir todo o meu bom trabalho. Vou clicar com o botão direito e ir para este que diz Rasterize Layer se livra de todo o meu trabalho duro. Mas agora eu vou usar meu retângulo Mockito apenas para desenhar um par de caixas rápidas segurando a tecla Shift para adicionar a seleção. Eu deveria usar a ferramenta de laço sendo preguiçoso. Você já viu isso antes de qualquer maneira, vamos começar a editar, ele tem um preenchimento, continuar a reabastecer. Magia, eu adoro isso. A natureza faz tão bem com a natureza. Continue com recarga apenas como mágicas em cima, particularmente este por idades e eu ainda estou super impressionado. Isso é warp prospectivo. Uma coisa antes de eu ir
, pode ser muito bom para fotos internas também. Se você tem, digamos que a visão interna de uma casa ou um quarto pode ser uma boa maneira de endireitar as paredes, se como esta imagem que está sendo distorcida. Mas assim que você adicionar como objetos grandes no meio da sala ou especialmente pessoas ou objetos
reconhecíveis que não podem parece manchado como essas manchas janelas é bom. Eles podem ser alterados ângulos na multa, mas se havia uma pessoa lá foram ligeiramente ampliá-lo eles estavam destinados a ser. Simplesmente não funciona. Portanto, mantenha-o em seu kit de ferramentas para aqueles momentos que você precisa dele rápido e fácil de usar, mas ele não funciona perfeito todas as vezes. Vamos para o próximo vídeo.
42. Como colorir imagem preta e branca no Photoshop: Oi lá. Neste vídeo, vamos adicionar cores onde não havia nenhuma. Truques fáceis com modos de mistura. mesmo aqui com este vestido era realmente um tipo de cinza e nós precisávamos adicionar cor todo o caminho através de
pegar algo que já era bastante vermelho e apenas
realçá-lo pintando uma cor em cima e, em seguida, encontrar uma cor apropriada modo. Muito bem, vamos aprender a fazer isso agora no Photoshop. Tudo bem, para começar, vamos para 06 cores e abrir os modos de cores 1, 2 e 3. Vamos começar com colorir uma imagem em preto e branco e, em seguida, vamos trabalhar através apenas alguns ligeiramente mais difíceis onde nós realmente queremos realçar cores embotadas para fora. Vamos usar modos de cor, então seja o modo de cor 1, e vamos criar uma nova camada. Vamos até dar um nome, vamos enlouquecer. Camada de cor. Isto não é essencialmente um preto e branco imagens, mas queremos colorir as pétalas porque
não há pigmento real lá que podemos dizer, a tonalidade e saturação para mudar. Este aqui tem um contraste fácil com o fundo. Vamos usar a ferramenta de seleção rápida para fazer uma seleção rápida. Certifique-se de que você está na camada certa, na camada de fundo, e eu vou arrastar para fora. Vamos olhar para um exemplo que é menos fácil porque este tem um fundo claro e agradável. Além disso, ele tem como filtro de óleo bonito. Lembra-se disso do último prato? Tinta a óleo. Eu não fiz isso. É da fotografia daqui. Eu tenho isto. Está parecendo bom. Há umas coisas no meio. Vou segurar a tecla Alt e me livrar dela. Por enquanto, está tudo bem. Você pode ver o meu demorando um pouco. Há duas razões. Eu tenho o aprimoramento automático ligado, retarda a máquina, mas também estou tentando filmar ao mesmo tempo, o que enfatiza meu pequeno computador. Está além da camada de cor. Vamos escolher uma cor de primeiro plano, eu escolho este rosa. Vamos usar o nosso truque. Lembre-se, mantenha pressionada a tecla de opção no Mac, o em um PC e pressione a tecla de backspace. Ele apenas preenche nossa camada com nossa cor de primeiro plano. Legal. Agora vamos usar nossos modos de mesclagem, e isso vai colorir. Então dissolva, não vai funcionar, se funcionar. Escurecer, multiplicar é sempre bom para começar. Trabalhe até encontrar algo que goste. Agora novamente, lembra qual era o atalho para isso? Certo, porque os modos de mistura são uma dor para se trabalhar. Lembre-se, esteja na sua ferramenta de movimento, a chave tem que estar nela. Mantenha pressionada a tecla shift e use o sinal positivo. Temos um atalho à mão se você estiver fazendo coisas como ok, então editamos uma cor sutil usando luz suave. Isso é muito legal. Só vou encontrar uma coisa. Ok, está por cima, mas eu gosto, queimadura de cor. Digamos que uma seleção não é possível, não tenha medo de parar de pintar. Este vestido aqui, eu preciso recolorir. Então, nova camada. Vou escolher a cor do primeiro plano. Vai ser vermelho. Indo usar uma ferramenta de pincel. Antes de começar, eu só vou tipo de pintar em uma grande bolha para que eu possa encontrar o modo de cor que vai funcionar. Volte para sua ferramenta de seleção, mude e a tecla de mais até encontrar algo que funcione para você. Você pode estar fazendo olhares diferentes. Algo que funcione para você. O que estou procurando? Eu estou indo para luz suave novamente, eu não estou indo para como vermelho saturado, e porque isso é apenas muito difícil de selecioná-lo, nós apenas vamos pintá-lo em. A coisa boa de pintá-lo, o que já está no modo de mesclagem só vai torná-lo um pouco, porque é bastante indulgente. Se você pintar sem ele estar em luz suave você pode passar idades tipo de tentando corrigir esta borda quando, de fato, o modo de mistura é bastante indulgente. Tão leve e eu só vou trabalhar meu caminho em torno disso. Agora, em termos de tamanhos de pincel, vamos apenas escolher algo que funcione para a imagem. Em termos de dureza, tente combinar com o que existe, então há um pouco de embaçamento na borda. Vou baixar a dureza para cerca de 80. Apenas meio que trabalho meu caminho ao redor. Um pequeno truque legal é que você pode clicar uma vez, dizer que você tem uma linha razoavelmente reta. Você pode ver esta parte aqui. Eu posso clicar uma vez, mantenha a tecla Shift e clique novamente e junta-se aos dois pontos. Acho que é uma maneira rápida. Não vai funcionar muito bem com o tecido aqui, mas vamos dizer que a sua coloração de um edifício, você pode clicar uma vez, mantenha o turno e clique novamente e junta-se os dois bits para cima. Eu vou acelerar isso agora, apenas tipo de trabalho meu caminho em torno de colorir meu vestido. Às vezes, esses trabalhos são longos e tediosos. Te vejo em um segundo. Tudo bem, estamos de volta. Você percebe que eu deixei os cantos só porque é mais fácil fazer isso, em vez de pegar um pincel pequeno e simplesmente ir para todos os cantos. É mais fácil, provavelmente, pintar tudo e passar por cima das bordas e,
em seguida, usar a ferramenta borracha. Estou mudando para a ferramenta de borracha aqui e só vou ficar menor e simplesmente excluí-lo. Ok, é mais fácil cortar o excesso do que é. Tentando entrar lá com um pincel bem pequeno. Legal. Vou acelerar de novo e fazer o resto das esquinas. Tudo bem, você está de volta. Uma vez que você tem que aqui, se você está imaginando uma cor diferente, você pode ter esta camada selecionada e eu posso usar meus ajustes e eu posso usar matiz e saturação, ter
certeza que está afetando apenas a camada abaixo e tipo de começar a ajustar isso para talvez mais saturação, menos saturação, escolher uma cor diferente e decidir tipo de, precisamos que esta cor seja. Muito bem, outro truque com modos de cor é melhorar a cor. Você pode passar para sempre tentando pegar a cor deste vestido e tentar como
levantá-lo para fora, mas não há um monte de informações de cor lá. É muito fácil entrar, fazer uma nova camada. Vou usar a ferramenta conta-gotas para chegar perto da cor. Então aqui, minha cor de primeiro plano, você pode ver que é realmente meio lavado em vermelho. Eu só estou indo para um tipo de empurrar para cima. Estou ajustando a tonalidade, casos na mesma zona, mas só quero que seja mais brilhante. Quão brilhante? Podemos ir bem, porque podemos abaixá-lo mais tarde. Usando nossa opacidade ou escolher um modo de mistura diferente, e é o mesmo princípio de antes. Se você estiver fotografando produtos, ou, neste caso, você quer tornar o vestido mais brilhante ou mais rico. Em vez de usar dizer, vibração. Pegue a ferramenta de pincel. Escolha um belo pincel grande. Vamos começar apenas pintando nos pedaços grandes e indo para a nossa ferramenta de movimento, segurando a mudança e apenas pressionando até encontrar a cor que funciona para nós. Onde está um que trabalha para mim? Luz suave novamente está funcionando para mim. Depende da cor e da imagem em que você está trabalhando,
e então, muito mais precisamente do que eu, você vai e trabalha o seu caminho ao redor. Você pode ver que você apenas tipo de fazer essa cor, não
havia nenhuma maneira de obter essa cor para aquela vibração usando dizer, matiz e saturação. Legal. Vou ampliar, usar um pincel e pedir ao editor para acelerar. Ok, agora que está feito. Arrependo-me de usar luz suave, claramente falsa. Podemos encontrar outro modo de mistura que tentaremos em um minuto. Mas vamos também olhar para a opacidade e apenas uma espécie de deslizar para baixo até você encontrar alguma maneira. Uma espécie de crível. Parece que tudo parece bem. Ligar, desligar, ligar, desligar. Está cheio, rico, não
está exagerado. Você pode discordar. O que eu também poderia fazer é, eu poderia realmente adicionar uma máscara de camada e há algumas partes que são apenas muito ricas. Você pode ver aqui que é realmente escuro, mão
insaturada, mas ele tem muito rico. Adicionei uma máscara de camada usando minha ferramenta de pincel, usando preto como cor de primeiro plano. Eu só vou baixar a opacidade aqui em cima tocando as três teclas, talvez em 30% apenas para tipo de começar a trabalhar fora alguns desses pedaços onde, não deveria ser tão rico. Não há necessidade disso ou não é crível. Há alguns pedaços aqui em baixo que só precisam estar cheios de ricos. Mais crível. Estou dizendo que sim. Tudo bem, então isso é colorir imagens em preto e branco e realçar cores que já existem na imagem. Vamos para o próximo vídeo.
43. Como criar um efeito duotônico no Adobe Photoshop CC: Oi lá. Neste vídeo vamos ver como criar o Efeito Duotone. É rápido, é fácil, mas vamos entrar um pouco mais fundo para ter um pouco mais controle sobre o que fica coberto usando formas e círculos. Vou mostrar-lhe alguns bons lugares para encontrar gradientes em termos de cores. Tudo bem, vamos entrar. Tudo bem, da pasta de cores 05, abra Duotone 1 e 2. Vamos começar com Duotone 1, e vamos olhar para o básico. Há muitas maneiras de recriar o efeito Duotone. Eu acho que a maneira mais fácil é ter a camada selecionada, ir para ajustes, e ir para este aqui que diz Gradient Map. Clique nisso, clique nesta barra que atravessa o meio. Há um monte de pré-ajustes. A maioria deles terríveis. Vamos primeiro olhar para obter algumas cores. Vou clicar bem neste,
e vamos para janela, extensões, temas do Adobe Color. A primeira coisa que você precisa fazer é trocá-lo para explorar, e ele apenas lhe dá acesso aos mais populares deste mês. Você pode brincar com o mais popular de todos os tempos, esta semana. Desça até encontrar algo que goste, este parece bom. Não posso dizer essa palavra. A melhor maneira é clicar neste pontinho e dizer, adicionar às minhas amostras, por favor. Se você não pode ver suas amostras, a biblioteca pode abrir, mas não se preocupe, isso fecha. Verifique se você pode ver um painel de amostras. Se você não puder, vá para uma janela, vá para amostras,
e agora, quando você clicar em seu mapa de gradiente, você pode dizer Eu quero você, ou clique duas vezes sobre isso, e então basta clicar em. Você pode ir para baixo e dizer que eu quero talvez esta primeira cor. Uma das cores precisa ser escura. Se não for, acabas com coisas estranhas a acontecer. Um deles precisa estar escuro para preencher todas as sombras, clique em OK. Então um deles precisa ser leve, então clique duas vezes naquela casinha. Isso vai funcionar. Clique em OK. Não tenha medo de colocar uma terceira cor. Tudo o que você faz é clicar em qualquer lugar ao longo da parte inferior aqui com essas guias na posição, então aí você obtém uma terceira cor. Você pode ter um quarto e um quinto também. Para se livrar deles, clique em manter pressionado e arraste para baixo. Basta arrastá-los para baixo, eles simplesmente desaparecem. Há um aqui, e, em seguida, clique duas vezes e pegue uma dessas cores do meio a partir deste. Um desses dois só para preencher os tons médios. Então, com um pouco mais de controle, você pode pegar esses diamantes. Você pode ver o que ele faz. Ele só força essa cor a ocupar um pouco mais do gradiente, e você pode decidir como você quer fazer isso. Se você não pode ver o dominante deste lado, basta clicar em qualquer uma das casas e decidir onde é este local. Tecnicamente não é mais um Duotone, é como um Tritone. Vamos fazer o que vimos no início onde transformamos em texto. Pegue a ferramenta de texto, clique uma vez. Que marca é essa? Não reconheço esta marca no sapato. Se você sabe o que é, me avise. Parece Etnies. É a única marca de patinação que me lembro da minha juventude. Escolhendo uma fonte grande e grossa. Eu estou indo para ir muito além do tamanho neste estilo super gráfico. Vou ficar ainda maior. Código em. Agora o que precisamos fazer é transformar este texto em uma seleção porque eu quero colá-lo em que por padrão com qualquer camada de ajuste. Você recebe uma máscara de camada vazia, apenas útil em vez de você ter que adicionar uma. Quero transformar isso em uma seleção. O truque é manter pressionada a tecla Command no Mac, a tecla Control em um PC e clicar no ícone. Não funciona se você fizer o mesmo e clicar na palavra real aqui, então mantenha pressionada a tecla Command e clique no ícone. Transforma todo esse texto em uma seleção, e então eu termino. Vou ajustar esse texto, clicar na minha máscara de camada, e agora eu poderia subir para editar,
preencher, preencher com preto, ou eu tenho preto como minha cor de primeiro plano talvez apenas força a ser preto e branco. Alterna para trás. Use os cortes naturais. Preto a cor do primeiro plano. Quem se lembra de como preencher com cor de primeiro plano? Isso é certo. Você mantém uma opção e aperta backspace ou delete. Se você estiver em um PC, é o backspace Alt. Era o que eu queria. Na verdade, vou desfazer isso. Vou inverter a seleção primeiro, então selecione inverter, e então eu vou preenchê-la. Esse é o olhar que eu queria. Duotone número 2, vamos ter um pouco mais de controle sobre como o gradiente é aplicado. fundo, selecionado, ajustes, mapa de gradiente. Eu vou te mostrar outro pouco, não é realmente um truque, é mais apenas onde eu pego minhas cores muitas vezes. Chama-se Grabient é como os gradientes que estão aqui. Vou usar este aqui. O que você faz é clicar sobre isso e pegar esta primeira parte, o código de cor hexadecimal. Vá e clique no seu gradiente, clique duas vezes na primeira pequena amostra, e basta colá-la aqui em baixo. Essa é a cor do meu punho, e depois esta aqui. Clique duas vezes aqui, então este é o meu gradiente. Agora podemos brincar com isso um pouco como fizemos no último para
ajustar o que é afetado e o que não acontece. Mas muito mais controle pode acontecer quando você clica em OK e coloca uma camada de ajuste preto e branco entre gradiente e fundo. Então eu vou até os ajustes. Eu vou para preto e branco, que é este aqui, e apenas certifique-se que está abaixo do gradiente. É preto e branco, vamos desligar o de cima. Se você não usou preto e branco, ele vai apenas converter em tons de cinza. É um afixo, então permite que você decida as leituras. Eles são escuros ou são claros? Vamos desligá-lo, para ver se há um azul no chapéu. Em vez de apenas deixá-lo como padrão, você pode pegar os cianos e dizer que na verdade eu quero ver um pouco de controle. Com todos eles combinados, você pode começar a decidir o que é aplicado ao Duotone e o que não. Legal. Trabalhe seu caminho, decida como você quer que isso seja aplicado. Em pesado com isso e talvez apenas para risos, vamos colocar algumas bandas nele ou talvez um círculo. Eu vou pegar minha ferramenta de retângulo, e eu vou desenhar um retângulo maior que passa por aqui. Só vou ter a certeza que não está misturado com o meu pequeno grupo aqui em baixo. Vou fazer isso um pouco maior para que você possa ver. Eu vou pegar e cor de preenchimento diferente, cortesia ou talvez. Isso foi legal. Eu vou pegar esse, e em vez de aplicá-lo como um mapa de gradiente que se aplica à minha imagem, eu vou fazê-lo realmente para os retângulos. Eu usei a ferramenta de retângulo real aqui embaixo, que me dá algumas opções aqui, meu painel Propriedades, você pode clicar duas vezes neste relógio, aplicar um gradiente em vez de um mapa de gradiente. Isso só pode ser aplicado a essas formas, não à nossa imagem original. Precisamos do Mapa do Gradiente, mas há outro truque que podemos fazer com formas. Eu vou fazer o quê? Eu vou clicar neste pequeno gradiente na parte inferior aqui, e clicar sobre isso como antes. O que eu quero talvez eu vou girar em torno dele, então é por ali. Feche-o, mova a ferramenta, dobra
dos anos 80 vindo para cima. Agora o que eu poderia ter que fazer é encolher um pouco. Agora vou encontrar um modo de mistura que funcione. Talvez o meu atalho. Eu vou mudar para mudar e bater mais e apenas trabalhar através de coisas que eu disse que gosto. Isso é um hidealight legal. Hidealight o que é legal também. Eu quero dois deles, mas isso ia ser um pouco menor. Você pode fazer a mesma coisa com um círculo ou uma estrela. O que você quer fazer é olhar as capas de discos de David Bowie para obter sua inspiração para eu nem sei o quê. Veja, eu tentei girá-lo e não mudou. O gradiente lá não virar, mesmo que eu virou isso em torno, você vê os equivalentes atuais para ficar no topo. Com isso selecionado, ele está na verdade em uma correção. Se você clicar duas vezes em sua forma aqui, ok, você pode entrar aqui e dizer que realmente eu quero revisitar. Você pode correr em círculos. Não sei, sinto que era necessária uma lacuna. Ali está o Duotone. Tomamos um pouco mais de controle usando toda a camada de ajuste preto e branco e espero que algumas novas maneiras de encontrar cores. Vamos entrar no próximo vídeo.
44. Projeto do curso — duotônico: É tempo de projeto de classe novamente. Em seus arquivos de exercícios, há 06 cores, há uma pasta de projeto de classe. Há duas imagens para trabalhar, duotone A e B.
Você pode escolher qualquer uma delas ou ambas e as regras são muito fáceis. Crie a imagem duotônica, escolha as cores da maneira que quiser, mas eu gostaria que você fosse mais de uma forma usada. Nós fizemos as listras no último, você círculo, estrela, ziguezagues, e certifique-se de compartilhar comigo ou nas tarefas aqui no site, ou comigo nas mídias sociais. Twitter é, “Dan ama Adobe”, ou Instagram é, “Traga seu próprio laptop”. Para idéias, pule para ser corcundas. Falei em duotone e fiz uma busca. Você pode ver muitas idéias legais para as coisas. Lembro-me daquele tipo, já os tinha visto antes? O mesmo com dribbble. Ambos os sites de inspiração para mim. Mas você pode ver um olhar muito diferente. Este é muito ilustrativo, tem muitos elementos de interface do usuário para ele onde, como Behance, tende a obter mais em que impressão barra foto retoque lado da vida. O Behance é de propriedade da Adobe. Um truque legal do Photoshop para o caso de você não saber. Estou dizendo que enquanto você está trabalhando nisso e você tem uma conta Behance, você deve se inscrever. É um lugar incrível para ter seu portfólio funcionando. Eu sei que sempre que eu estou contratando um designer gráfico ou um web designer, eu vou ao Behance para encontrar pessoas em vez de procurar em classificados. Ou seja, procure o Behance porque sei que todos em Behance estão à procura de trabalho. Há freelancers à procura trabalhos
laterais hustle e tem detalhes de contato lá e um bom portfólio. Você pode ir até aqui se você tem um arquivo e você pode ir compartilhar no Behance. O que você fez você faz em casa, você não precisa salvá-lo como um JPEG e, em seguida, fazer login no Behance e, em seguida, enviá-lo. Você pode apenas clicar sobre isso, e ele carregá-lo magicamente. Você pode adicionar alguns detalhes por meio do Photoshop e nem precisa abrir o Behance. Outro atalho estranho é este aqui. Este pequeno botão de partilha. Isso aqui, apenas diz que vou editar no meu Lightroom. Vou enviar para um e-mail. Novamente, ele apenas salva toda a coisa de salvar JPEG e armazená-lo em algum lugar. A razão pela qual eu não o uso muitas vezes
é, ele não tem Instagram. Ele tem Twitter e Facebook, Instagram estão segurando e eles são API. Eles não deixam as pessoas carregarem coisas que não são diretamente do celular. Não há nenhuma versão como desktop dele que é uma dor. Mas você pode adicionar à sua conta do Flickr diretamente daqui. Isso pode ser um atalho extra, faça um duotone e te vejo no próximo vídeo.
45. Como criar efeitos de falha no Adobe Photoshop: Oi lá. Este vídeo é tudo sobre o efeito de falha. Nós vamos pegar essa imagem, e balançá-la ao redor para parecer que está distorcendo, deixando algum tipo de pinceladas para fazer
parecer que todos os tipos de coisas grungy Matrix hacking estão acontecendo. Vamos entrar no tutorial. Em sua cor 06, abra o efeito de falha 1. Vamos fazer uma falha e um efeito glífico. O que vamos fazer é clicar duas vezes no fundo e esta vai ser a camada ciana. O glófico é que o olhar ciano e vermelho óculos 3D tipo coisa. Vou duplicá-lo. Em vez de arrastá-lo para baixo, um atalho mais frio está com este selecionado, vá Comando+J. Esse é um corte crucial que não aparece em lugar algum. Não há nenhuma versão longa que você só precisa saber, mas como você é avançado, você sabe que Command+J apenas duplica a camada. Outro truque legal se você tem muitas camadas, se você selecioná-los todos, aperte Command+J, ele rode-los juntos e faz uma cópia, então apenas uma pequena camada. De qualquer forma, Comando-J. Este aqui vai ser chamado de vermelho. Dois canais, o que eu preciso fazer para tornar esse efeito anaglífico é clicar com o botão direito em vermelho, ir para Opções de Mistura. Há algumas maneiras, Effects, esta é mais fácil. Mas não é mais fácil, mas é a maneira que temos usado até agora. Há 10 maneiras de fazer tudo. Eu quero vermelho, então eu estou desligando tudo menos o canal vermelho. Ciano, a mesma coisa, vá para Modos de Mistura. Este aqui, vamos assistir apenas ao vermelho, e deixar uma cor ciana para trás. Você não tem que fazer isso vermelho, ciano, você pode brincar com sintonizar esses diferentes dentro e fora para obter cores diferentes. Para fazer o tipo de falha manual, basta pegar a ferramenta Letreiro Retângulo. Eu só vou pegar um pedaço dele. Estou usando a camada vermelha, e vou pegar minha ferramenta Mover. Eu só vou arrastá-lo para este caminho. Você vê que você tem aquele efeito anaglífico. Para a ferramenta Letreiro. Vou pegar esse pedaço. Vou pegar ciano. Deixe-me só mexer e decidir quanto efeito de falha você quer. Vou acelerar isto. Eu só vou pegar algumas peças e mover tudo. Agora queremos fazer aquela coisa balançante. Há duas maneiras de fazer isso. Desta forma, isso parece mais agradável, mas é super lento em seu computador. Eu vou fazer um arquivo, salvar apenas no caso de ele falhar. Eu vou pegar o aqui, a ferramenta Smudge. O seu provavelmente está definido para borrar ou borrar. Escolha um tamanho de pincel. Eu escolhi um bem grande, o meu é como 900. O conjunto de força 52, não
é assim tão importante. O importante é ir devagar. Veja isso, eu só vou clicar em segurar e arrastar para a esquerda. Ainda está funcionando. É bem assustador, está
se movendo lentamente para lá. Se você mexer, mexer, mexer, mexer, sua máquina, o ventilador vai entrar e vai ser bem lento. Então eu vou trabalhar em ciano e isso é legal. Se está feliz em trabalhar tão devagar, tudo bem. Você pode definitivamente usar esse efeito. O que eu quero fazer é mostrar-lhe uma maneira diferente. Vou usar o liqueficador, então Filter, Liquefy. Você pode ver que só está me mostrando um dos canais. Isso é bom. Aqui, você pode mostrar o pano de fundo para mostrar todo o lote. Mas ainda estamos afetando essa camada ciana porque a selecionamos, mas podemos ver que lista tudo. Vou usar este primeiro pincel aqui, o Warp Avançado. Escolha um tamanho de pincel, comece a trabalhar. Não vai funcionar se o fundo estiver ligado, então não tenha isso ligado. Escova tamanho acima, e eu gosto muito de fazer um movimento, então esquerda, direita, esquerda, direita. Não parece muito excitante aqui, mas vamos voltar. Porque faz parte do canal, está fazendo coisas legais aqui. Voltar e fazer algumas experiências. Estamos usando a dobra avançada. Você pode experimentar com digamos, Pucker ou Bloat. Vou usar o Bloat naquele canal. Eu falo pincel, e vou fazer algumas coisas aqui só para ver como
fica quando as coisas ficam inchadas. Você pode ter que brincar com tamanho e reescrever. Eu posso estar indo um pouco rápido demais ou um pouco lento demais. Vamos adicionar um giro só porque. Você pode ver o que está acontecendo. Voltar para a ferramenta Dobra Avançada. Vou fazer algumas coisas neste limite. Eu não vou fazer isso. Vamos apenas tentar alguns pequenos pedaços que acabaram de adicionar aqui. Não quero destruir Spice, ele só vai parecer estranho. Incrível, clique em “Ok”. Para adicionar os pincéis, não vamos
fazer isso com esses canais, vamos apenas fingir. Nova camada aqui, este vai ser o meu pincel vermelho. Vou pegar minha ferramenta de escova. Vou encontrar aqui. Na nova versão do Photoshop,
bem, a versão atualizada, se você não pode ver estes geral seco, molhado, você não vai ver gotejamento e fumaça. Esses são os que instalei separadamente que
fizemos no curso essencial do Photoshop. Mas espero que você tenha uma versão mais recente do Photoshop e você pode ver pincéis de efeitos especiais, aqui está algumas coisas muito legais. Qualquer um desses, eu só vou escolher Spatter Supremo. Isso vai funcionar para mim. Preciso escolher uma cor. Vou usar a ferramenta conta-gotas. Vou escolher um pouco de vermelho para começar. Só estou usando o vermelho que veio daquele canal. Voltar para a minha ferramenta de pincel, torná-la grande. Eu só estou tentando fazer algumas coisas de spluttery. Talvez, um pouco demais. Esse pincel é um pouco legal para mim. Vou fazer outro no canal ciano. Aplicando no canal ciano, vou ter apenas um pincel ciano. Pincel ciano, eu ia usar o ciano, tem um bom pedaço dele lá. Só estou fazendo algumas coisas para parecer que é grunhido e distorcido. Algumas bem grandes. Alguns realmente grandes na frente, eu poderia fazer em sua própria camada porque ver estes grandes aqui, eu queria sentir como se eles estivessem perto da câmera. Eu só vou borrá-los para fingir que profundidade de campo, Borrão, Borrão Gaussiano. Parece que estão fora de foco e perto. Você gosta? Eu faço. Muito bem, meus amigos, esse é o efeito de falha. Fizemos apenas dois destes. Você poderia separá-los todos para que você pudesse ter vermelho, verde e azul. Você poderia experimentar ir para CMYK e dividir quatro canais. Vamos entrar no próximo vídeo.
46. Projeto do curso — efeito de falha: Oi lá. Tempo de exercício de classe, em sua cor 06, abra o projeto de classe e há eles chamam de Glitch Effect A. Como fizemos no tutorial anterior, eu gostaria que você experimentasse com a ferramenta Borrar e a ferramenta Dissolver. Você os separa em duas camadas, vermelho e ciano ou RGB vai ver meu k e fazer algumas distorções, mas o que eu gostaria que você fizesse é realmente adicionar algum tipo também. Você digita uma camada de texto, você duplica-a exatamente como fizemos com a camada de imagem para que você tenha que digitar camadas. Um será vermelho, outro será ciano, e fará algumas distorções com isso também. Está tudo listado aqui nos seus arquivos de exercícios e certifique-se de compartilhá-lo comigo. Eu posso ver o que você fez. Dê-me cinco. Agora você não precisa usar esse arquivo de projeto. Você pode ir para Unsplash e encontrar sua própria imagem. Fica bem no seu portfólio. Para o próximo vídeo.
47. Gradação de cores com efeito laranja e azul-petróleo no Adobe Photoshop: Oi lá. Este vídeo, vamos olhar para a classificação de cores, especificamente este tipo de laranja azul-petróleo e lavar os negros um pouco. A classificação de cores é apenas um termo genérico usado para descrever a
alteração das cores de uma imagem de propósito para um efeito. Pode ser para mudar o humor, para implicar uma hora ou um lugar, como uma mesa de olhar para cima ou muito. Faremos algumas versões deste aqui. Começa assim, termina assim. Faremos um terceiro que é um pouco mais difícil. Vamos fazer isso agora no Photoshop. Dos seus arquivos de exercícios, 06 cores, abra a classificação de cores, um. Agora, em um tutorial anterior, eu mostrei a vocês aquele truque barato rápido e sujo para obter o tipo de visual azul, amarelo, tipo de visual de moda. Estava em seu painel de ajustes, clique em curvas, e então basta ir para o seu canal azul, direcionar as cores claras para baixo e os pretos para cima. Você acaba com tão perto, mas não 100 por cento lá para aquele olhar de moda que nós vamos para. Estamos procurando aquele olhar laranja e azul-azulado. Então eu vou dobrar minhas curvas. Eu vou mostrar a vocês, é um longo processo para se configurar, mas uma vez que você tem que configurá-lo, você pode usá-lo uma e outra vez para sempre. Grite para o Whip Floppy, que eu aprendi essa técnica apenas lidando com ela. Assim, a maior parte do trabalho é feito em seu painel de ajustes. Você pode ver que eu fechei amostras só para este. Clique duas vezes nessa guia e feche, a que eu quero é o mixer de canal. Vamos usar alguns desses no
seu painel de ajuste que aposto que você nunca usou antes. Bem ajustes, misturador de canal, espera e espera aí mesmo. Então eu voltei do futuro, porque eu cheguei ao final deste tutorial, e há um monte de clicar nisso e arrastar isso e muitas configurações, e eu disse para vocês no tutorial mais tarde, você vai ouvir em um pouco, que eu deveria ter escrito isso para você. Então eu voltei, para colocá-lo na tela para todo
o tutorial para que você não tenha que pausar, ir e digitar, pausar. Aqui está aqui, eu estou indo para tipo de obter o editor para editar aqui em baixo, todo
o tutorial em algum lugar. Então não é tão difícil. Tudo bem, voltem para ele então e o que quer que ele veja, o canal de saída mudando para verde, basicamente nós queremos virar verde e azul para cima. Então queremos que o verde seja zero e o azul seja um 100. Eu só cliquei neste primeiro e bati para baixo. Então viramos isso, vamos para o azul e fazemos a mesma coisa. Quero virar verde e azul. Então verde é agora um 100 e azul é zero. Parece que nós até que você clique no caminho para baixo, ele é, ele tem a coisa toda selecionada e, em seguida, jogar com um modos de mistura. Só que o seu caminho para encontrar um. Você pode começar a ver, mesmo com a pele escura, que tem aquela laranja e seu brilho para ele já. Provavelmente é um pouco extremo. Vou procurar um que funcione para você. Você gostaria de clarear lavado. Preciso preencher algumas das outras cores. Então você pode ficar feliz apenas com isso. Vamos um pouco mais longe e vamos adicionar outro ajuste, e é este que ele chamou de Cor Seletiva. Troque-o daqui para o vermelho, provavelmente está em ataques por padrão. Se a inscrição sobre meio caminho e manivela os amarelos para cima praticamente todo o caminho para cima. Para preencher esses tons médios, vamos para os neutros e vamos mexer com ciano e preto para assinar. Se baixarmos. Se baixarmos ele vai trazer um pouco mais ataques para os tons médios são menos dentro. Isso vai depender da sua imagem também, então não tenha medo de ir mais ou menos dependendo do que você está trabalhando. Eu só meio que pratico com esta imagem e brincar com negros também. Tudo bem, isso parece bom para mim. O que eu gosto sobre o efeito laranja até é que velho minhas fotos de digitalização familiar em que lavado para fora preto, que efeito Instagram olhar bem porque no momento que os negros para ricos, Eu queria que nos sentissem velhos. Como se tivesse sido baleado nos anos 80 como efeito de qualquer maneira. Então nós vamos para os ajustes chegaram aos níveis. E a maneira mais fácil é este pequeno controle deslizante aqui em baixo que nós não usamos muito. Isso só vai cortar e dizer, eu não quero nenhum negro realmente forte. Caso estande a Pré-visualização ligado e desligado em pinos se você quiser sim, você quer perder suas costas fortes. Cabe a você ter os brancos que você pode desenhar para baixo um pouco também. É como
retoque de fotos contra-intuitivo, que eu vou fazer os brancos fortes e negros fortes. Mas para este efeito eu sinto, então há um pouco de trabalho trazê-lo para aqui, como eu tenho praticado isso. Só nos levou alguns minutos. Você vai ter que pausar o vídeo e digitar tudo, assisti-lo algumas vezes, mas uma vez que você fez isso, o legal sobre isso é que você pode simplesmente abrir outra imagem e abrir calibração 23. Em vez de ter que digitar todo esse lote, eu posso voltar para a minha imagem original, apenas tê-lo aberto, selecionar todos os três desses segurando Shift, agarrando todos eles usando minha ferramenta Mover e apenas arrastando-os para esta aba aqui. Suba, leve na mesma coisa, arrastado para este último, e eles se conectam. Agora, as configurações que eu fiz para esta primeira fotografia foram bem para ele. O segundo funciona muito bem para este último, nem tanto. Vai ser assim, se você está olhando para ajustado, o principal culpado é este do meio aqui. Este dá-te todos os teus ajustes. Chama-se Cor Seletiva, e no topo aqui, você vai mexer com verdes e neutros do MBA, o que funcionou para isso primeiro e depois precisa ser mudado. Você pode ver que ele pode meio que baixo a ciência que ele tem que estão criando eles porque não há muita coisa acontecendo. Sim, isso é provavelmente querer ser ainda reto e o neutro
é, vai me dar um pouco de ajuste aqui. Então, sinais à esquerda, ciência. Decida onde quer que esteja, pretos para cima, negros para baixo. Tudo bem e eu gosto mais disso. Agora, o principal problema com este aqui é que não há uma informação clara para começar. Então só saiba que imagens mais coloridas vão acabar com esta laranja realmente forte até que você vai ter que provavelmente descer,
diminuir a opacidade dele, e esta aqui, porque não há nenhuma informação de cor é vai ser um pouco difícil. Mas acho que temos o olhar, talvez não
sejam os níveis. Tudo bem, vai ser isso. Vamos pular para o próximo tutorial.
48. Projeto do curso — gradação de cores: Oi lá, é hora do projeto de classe, agradável e fácil, se você segui-lo através do último tutorial. Você pode simplesmente pegar seus níveis e colocá-los nos dois arquivos que eu lhe dei em 06 cor sob projeto de classe. Há Color Grading A e B. ajustes
maiores, eu no tutorial anteriormente provavelmente fui um pouco extremo porque eu quero expressar esse efeito, mas para ser inteligente sobre
isso, é tudo sobre sutileza. Eu adoraria ver sua sutileza ou sua extremenidade e eu também gostaria de ver seus próprios exemplos ou uma fotografia pessoal ou você pode ir para unsplach.com também, e há muitas imagens ótimas para começar a trabalhar. Se as publicares nas redes sociais, talvez dês ao fotógrafo uma nota alta e marca-as. Diga obrigado pela imagem. Se o fizeres, podes agradecer à Eagle e ao Alikh, não tenho de dizer esse nome. Isso é perto, e mostre a eles o que você fez. Certifique-se de me mostrar também, marque-me para que eu possa dar uma olhada. Certo, próximo vídeo.
49. Truques e dicas avançadas das bibliotecas CC do Photoshop: Olá, Este vídeo é tudo sobre bibliotecas CC. Mesmo que você já os esteja usando, vamos passar por algumas dicas e truques mais avançados, então fique por aí. Só para que você saiba, as bibliotecas da CC não funcionam em todas as licenças do Photoshop. Você pode ter o que é chamado de licença de máquina que acontece frequentemente em universidades, algumas empresas maiores, não há personalização, não quero dar meu endereço de e-mail. Tudo bem, então
abra, tem uma janela e tem bibliotecas. Ele está integrado em todos os produtos da Adobe. O que eu vou fazer é realmente apenas clicar minha pequena seta dupla
aqui em cima para que seja totalmente fora e você pode ver que eu uso bibliotecas um pouco. Desça aqui, tenho todas as bibliotecas acontecendo. O que vamos fazer é criar uma nova biblioteca, dar-lhe um nome e vamos chamar isto, PS Advanced um pequeno fictício que eu vou apagar,
como diz, tudo o que você precisa fazer é clicar em segurar e arrastar coisas nele. Vou dar-lhe um nome para tornar as coisas mais fáceis mais tarde. O legal das bibliotecas é que elas são intercambiáveis entre outros programas. Digamos
que, se você estiver usando o InDesign e aqui, verá minha nova biblioteca que criei. Photoshop avanço e eu posso começar a arrastar imagens e entre si. Bastante vago, mesmo com After effects, depois de bibliotecas de efeitos, lá está ele, então todos os produtos da Adobe têm bibliotecas CC, então Adobe XD, Illustrator, Premiere, Character Animator, todos eles acessam as bibliotecas. Isso torna legal para compartilhar coisas que são normalmente parte para trocar como amostras e dizer estilo de personagem. Estou no InDesign e tenho meus estilos de personagem, vou apenas clicar nisso. Você pode ver que é um pequeno ícone que diz ir para a minha Creative Cloud, aqui está o meu estilo de personagem. Por algum motivo, os estilos de parágrafo não são intercambiáveis entre Photoshop e o InDesign, mas eles são entre o InDesign e o Illustrator, então você pode encontrar alguns deles esmaecidos, mas digamos que gostamos disso. Além disso, nós estamos aqui e nós gostamos desta cor então eu vou destacar o texto aqui e aqui sob bibliotecas CC feitas na parte inferior há um pouco mais que diz, eu quero arejar os tiques, não, apenas o texto, cor e clique nele e é uma amostra lá. Volte para o Photoshop e, em
seguida, a magia acontece. Hack legal. Eu vou mudar o texto, então aleatório, eu escolhi esta cor aleatória mais cedo na classe, acontece que é exatamente a cor limpa codificada. O que eu posso fazer é clicar no estilo de personagem, que está usando a mesma cor que este rosa, mas você começa a idéia. É ótimo para criar suas cores corporativas em um programa, adicionando-as às bibliotecas e elas estão disponíveis em todos os programas. Agora a coisa interessante que você pode fazer é digamos que você tem um documento como este e há muitas partes nele, o que você pode fazer aqui em suas bibliotecas, há esta pequena opção aqui que leva seu documento e carrega quaisquer estilos de caracteres de uso e cores que você tem estilos de camada
como últimos estilos, como sombras, realmente útil, quaisquer objetos inteligentes, depende do que você quer fazer. Vou desligar isso porque o que acontece é que ele
os tira deste documento e os liga a bibliotecas CC. Isso pode ser uma das desvantagens, mas é apenas uma das coisas a observar quando você está usando bibliotecas é que ele realmente quer retirá-los deste documento e vinculá-los. O problema é que, se você excluir a biblioteca ou enviar esse arquivo para outra pessoa, ele aparecerá com um erro dizendo: “Ei, não
consigo mais encontrar a biblioteca, da mesma forma que o InDesign funciona, então depende de você Só saiba que você não pode desligá-lo se precisar. Em criar biblioteca, você pode ver aqui ele é jogado nas imagens. Você pode ver este aqui, especialmente ele é jogado na imagem que está
nesta máscara, mas ele é puxado para fora da máscara, o que é legal. Vamos colocar o original da minha divisão de tinta, que é o vermelho antes da camada de ajuste. Depende de você, eu vou arrastar o amarelo, tem minha banana, tem todas as cores que eu usei e todos os estilos de personagem. Aí está a minha sombra também. Isso poderia ser útil se você pulasse para cá e você fosse como esse texto aqui. Eu quero que você tenha um estilo de camada e você pode ver aqui que tem uma sombra caída agora, apenas um pequenino, mantendo tudo agradável e consistente. A outra coisa a notar é que, você
pode ver que ele criou sua própria nova biblioteca, então ele não foi para PS avançado ele entrou
no nome deste arquivo real que eu tinha aberto lá é 08, então lá está ele. A outra coisa a notar é que ele não colocou a imagem de fundo. Porque a imagem de fundo está bloqueada, a ruína da nossa existência no Photoshop. Por que está trancada? Só causa problemas. Clique duas vezes, dê um nome, Beach. Se você nomear sua camada, o nome da camada será trazido aqui, então eu estou apenas arrastando para isso. Você pode vê-lo lá, incrível? Agora, um dos problemas ou pelo menos o que eu achei desafiador no início foi, quando eu arrasto isso, é um arquivo vinculado, eu clico em “Retornar” também como vinculado, mas então eu enviei para outra pessoa e eles não têm uma conexão com o meu CC então ele vem com um link ausente ou uma
das vantagens e um dos problemas é que se eu mudar o original, ele vai mudar em cada documento que está ligado. Digamos que eu queira tornar isso único para cada imagem, então eu não quero que elas estejam mais conectadas à biblioteca. Você pode contornar isso apenas indo até aqui e enviando este que diz compartilhar link ou colaborar, que permitirá que quem você enviá-lo, tenha acesso à biblioteca CC também, para que os links funcionem. Também é ótimo se você está trabalhando com um colega, mas digamos que você simplesmente não quer que ele se conecte, você quer que ele saia daqui, mas você não quer que ele conectado, há duas maneiras. Se você já o arrastou para fora, você pode simplesmente clicar com o botão direito do mouse
e dizer link incorporado e esse pequeno ícone irá mudar e apenas mostrar que é um objeto inteligente agora, mas não conectado. Outra maneira mais fácil é enquanto você o arrasta para fora, em vez de apenas arrastá-lo para fora assim, que lhe dá a Nuvem, mantenha pressionada a tecla de opção em um Mac enquanto você arrasta ou a tecla Alt em um PC. O que acontece é que ele o despeja em tamanho real sem nenhum link para a biblioteca. Agora falamos sobre alguns dos problemas e como contornar isso. Por que estamos usando bibliotecas para gráficos, é para coisas úteis como esta. Se eu entrar no Illustrator, digamos que desenhamos esta raposa incrível, mãos para cima quem fez o meu curso de Illustrator? Você se lembra da raposa, mas queremos usá-las em outros programas. Digamos que queremos usá-los para o Photoshop. Vou às minhas bibliotecas. Eu vou clicar aqui e eu vou dizer meu curso PS Advanced, eu só vou arrastá-lo para dentro, lá está ele lá. Mas no Photoshop, a coisa legal sobre isso é que se eu for para o meu PS Advanced, lá está ele, arrastá-lo para fora e ele é tudo vitória e bom, mas eu não vou segurar nenhuma chave. Eu quero que ele seja realmente conectado
à biblioteca porque eu quero clicar duas vezes no item da biblioteca, ele abre no programa original que ele fez, é exatamente como arquivo temporário aqui. Digamos que eu passe e mude uma das cores. Algo óbvio, vamos salvar, apertar Fechar, voltar para o Photoshop e deve ter atualizado. A razão pela qual não é e eu acho que eu quero deixar isso
aqui porque você pode ver aqui em baixo, ele está tentando, eu estou em uma conexão de internet muito lenta aqui no momento eu estou esperando a fibra
para ser instalado então nós estamos lidando com bin placa móvel, esta é pode ser a nossa realidade. A Creative Cloud está realmente indo
pela Internet para se atualizar e você pode ver que está carregando todas essas coisas e essas coisas que eu criei em um arquivo bem grande. Está ocupado a fazer isso antes de ir e fazer os meus pequenos ajustes do Victor. O que eu vou fazer para tentar e espero acelerar é ir a este aqui e dizer, “Desculpe amigo, eu vou apagar você”, desculpe por isso. Apague o maiô também, porque esse é um arquivo grande e você pode ver instantaneamente ele se arredondou para o meu pequeno arquivo de vitória, paire sobre ele. Dá a você como, hey, eu quase em que e meu 24 por cento para o material da minha biblioteca, havia algo que eu coloquei na minha biblioteca. O que era isso? Não me lembro, mas acho que é útil saber. Quando eu tinha fibra, eu nem sabia que isso era um problema. É só desde que eu estou neste novo escritório aqui me
preparando e eu percebi que é confiança na Internet, mas você pode ver, eu estou atualizado. Uma coisa que eu quero compartilhar é dizer que você está trabalhando em um arquivo e você está trabalhando com outra pessoa e você tipo, na verdade eu adoraria compartilhar os arquivos. Há duas opções aqui, estas colaboram e vinculam. Compartilhar Link é o que eu gostaria com alguém que eu quero ter acesso aos arquivos, mas eu não quero que eles sejam capazes de excluí-los, modificá-los e editá-los. Colaborar seria alguém que fosse um colega, alguém de confiança, e isso poderia ser feito para um cliente, ou apenas um designer júnior, ou apenas alguém que eu não o faça para mexer com minha biblioteca. Tudo o que ele faz é enviar um e-mail, dizer que permissões eles têm, o que eles podem fazer. Uma vez que você tenha colaborado, o que você pode descobrir é que você está trabalhando em um documento e ele simplesmente desaparece e você é como, então se você colaborou com alguém e eles foram e vão eu não quero isso e excluí-lo, como fizemos aquela imagem de maiô, ele vai vomitar um erro quando você abrir o documento e você verá um pequeno ponto de interrogação aqui nesta pequena Nuvem aqui. O que você pode fazer é ir, eu me pergunto para onde as imagens foram. Vá até este pequeno menu maior, e vá para baixo que diz Ver itens apagados. Ele lança esta página e você pode ver aqui, todas as coisas apagadas das minhas bibliotecas. Legal, nunca se foi para sempre, você pode entrar aqui e dizer, eu quero essa coisa aqui e eu quero restaurá-la. Você pode passar e excluir permanentemente coisas porque esse arquivo está ocupando um pouco de espaço no disco rígido. Com minha licença de código criativo, eu recebo 100 gigabytes, então eu não acho que isso é normal, eu acho que eu tenho uma especial porque eu não sou um instrutor certificado. Mas de qualquer forma, eu posso clicar nele, apertar “Restaurar” e ele aparecerá de volta na minha biblioteca. Outra pequena dica é, digamos que, você pode dizer aqueles que você compartilhou com outras pessoas. Você vê aquelas duas cabecinhas ali, isso significa que eu colaborei com elas. Vou ao Adobe Logos. Compartilho isso com meus colegas porque
todos somos certificados e todos usamos os logotipos da Adobe. Digamos que eu queira trazer, eu vou apenas usar o Photoshop, mas em vez de trazê-lo dessa maneira, o que eu vou fazer é manter pressionada a tecla Option ou a tecla Alt em um PC, e eu dou meu logotipo aqui e é perfeito. O link está quebrado, mas eu quero religá-lo novamente. Gostei dessa conexão, mas a conexão se foi. O que você não pode entrar aqui e basta clicar com o botão direito do mouse e dizer re-link para sua biblioteca. Você pode realmente vincular novamente a outro arquivo, o que é legal, então você tem uma versão atualizada do logotipo do Photoshop. Você pode acessar um link para ele na área de trabalho, como o InDesign faz com sua pasta de vinculação. Aqui embora eu possa re-link para gráfico, e este é um dos estranhos que você gosta, diz, você recebe este aviso e afins, o que eu faço? E digamos que eu queira me conectar a este. Digamos que é um produto diferente e é um design diferente e eu estou ligando novamente para, em vez de re-vinculá-lo de volta ao Photoshop, eu estou revinculando para animar. Esta é a coisa escondida lá em baixo, isso é muito importante. Re-link,
relaxe, e os diferentes tamanhos. Mas você entendeu a ideia. Aquele cara agora está ligado à biblioteca, tem uma nuvem de novo. Eu posso desfazer e, na verdade, eu poderia apenas revinculá-lo ao arquivo do Photoshop apenas para provar que ele pode ser feito e porque o Photoshop é do tamanho certo, ele vai corresponder. Mais avançado material de biblioteca CC é esta pequena opção aqui, que diz pesquisa Adobe Stock, ou você pode usar esta pequena versão aqui em cima, quem vai usar esta visão aqui vamos dizer que eu preciso de uma foto do sol para concluir meu projeto, eu estou indo para ir para ações da Adobe. Tenho licença, por isso é muito fácil para mim. Eu tenho 10 por mês, eu acho que porque a minha licença é de cerca de US $35 por mês, eu acho, todas as coisas. A coisa legal sobre isso é que eu não tenho que sair para o lado, eu posso realmente apenas ir para aqui e dizer licença e salvar para a minha biblioteca. Eu fui aberto, então se eu for para o meu PS Advanced, e agora eu clicar sobre
isso, ele vai realmente tirar crédito da minha conta e baixá-lo ou eu posso apenas fazer esta opção aqui e apenas fazer uma pré-visualização e ele vai baixá-lo para aqui, mas vai ser uma versão com marca d'água. Posso pairar por cima aqui para ver quanto tempo vai demorar. Está feito, o que é bom. A coisa legal é que se eu fizer isso e eu conseguir aqui, tem uma marca d'água, tudo bem. Vou arranjar provas para o meu chefe ou para os meus clientes e faço algumas coisas para isso. Digamos que eu faça alguns ajustes nele, torná-lo preto e branco sem motivo. Eu vou adicionar um filtro como liquefeito, então como algumas coisas sérias. Não posso liquefazer a máscara real, você precisa liquefazer o sol real, então eu vou fazer algumas modificações sérias, gastar um tempo razoável. Lindo, e o cliente diz: “Sim, eu gosto da opção A, vá e faça.” Em vez de baixá-lo e tentar zombar de tudo de novo, o que você pode fazer é clicar com o botão direito do mouse nisso e dizer imagem de licença, e ele dispara e você não faz nada. Eu não vou desperdiçar um dos meus créditos agora, mas ele apenas se ajusta, a marca d'água desaparece e torna-se um documento de alta resolução. Este número desaparece, é muito fixe. Se você estiver usando algo como Shutterstock ou iStock ou qualquer um dos outros estoques. Eu uso o Adobe Stock, eu adoro. Tem vídeo também. O que também é legal sobre isso é digamos que esta imagem no
fundo aqui, a imagem de fundo. Um monte de coisas acima dele, oh pequena dica, se você manter pressionada a tecla Option e clicar no globo ocular, é a tecla Alt em um PC, ele desliga todas as outras camadas, mas a que você selecionou ou clicando nele novamente vira Todo o resto deles de volta. É Alt em um PC, Opção no Mac, basta clicar no globo ocular. Ou outra dica sobre as Bibliotecas da Creative Cloud é digamos que gostamos dessa imagem. Este é de Unsplash, o fotógrafo é Greg Kantra. Eu gostei da imagem, mas eu preciso de outro ou algo semelhante. Os clientes voltam e dizem: “Eu gosto,
mas tem a sensação certa, mas não é a imagem certa, talvez não a pose certa.” O que você pode fazer é que você pode editar para a biblioteca e, em seguida, fazer alguma maneira louca você pode clicar com o botão direito do mouse e dizer Encontrar Similar. Vai para o Adobe Stock novamente, lembre-se estes são pagos, como eu pago meus $50 por mês, eu deveria saber disso. Mas vai explodir e tentar encontrar imagens que combinem com esta e é assustadoramente bom. Photoshop não devia ter ideia do que está nesta imagem, mas a Adobe estava a trabalhar numa coisa chamada Sensei, que é o nome da Inteligência Artificial. Cara, eles estão procurando dentro de imagens tornam-se cores assustadoras, a pose como algumas delas são perfeitas. Agora posso fazer download de pré-visualizações ou das versões de alta resolução e começar a trabalhar nisso. Só para que saibas que dentro deste rapazinho aqui, podes clicar e dizer, na verdade, eu conheço um vídeo, não fotografias, e vamos sair e fazer isso também. Vetores, material editorial, material premium. Você pode ver que há carregado e se o meu não era super lento, ele iria parar de jogar como eu rolou sobre isso, como você pode esfregar para trás e para frente, mas pobre internet está lutando, você pode ver aqui em baixo tentando fazer como Uma coisinha. Eu vou desligar vídeos, desligar backup, e quando você terminar embora para voltar para bibliotecas, basta clicar nesta pequena cruz aqui para dizer ir embora visualmente semelhante. Uma última coisa. Não é bem bibliotecas CC, mas vale a pena mencionar porque muitas pessoas não sabem sobre isso. Se você acessar seu aplicativo da Creative Cloud, aqui no Mac, ele fica no canto superior direito em um PC, acho que está no canto inferior direito, você está procurando essa coisa claramente CC na nuvem. Vá para Ativos e vá para Mercado. O mercado é realmente útil basicamente tudo o que
é, é que eu vou desligá-lo, você também carrega para cima assim. É absolutamente gratuito, gráficos comercialmente utilizáveis. Não vai haver imagens como esta, mas há muitas coisas úteis aqui. Digamos que você precisa de alguns ícones de mídia social porque você está fazendo uma simulação, você pode ver aqui um monte de ícones diferentes Mock ups, gráficos
vetoriais, todas as coisas que podemos usar. Talvez você precise de algo como, eu não sei, às vezes você só precisa de algo como uma flecha e você está tipo, eu sei que eu posso ir encontrá-lo de algum site livre, mas movendo-se como você gosta de feio. Por alguma razão, as setas são mais importantes do que parecem. Passaram horas procurando a seta para a direita, clique neste pequeno download, ele vai para minhas bibliotecas CC avançadas, clique aqui, dê um segundo, venha na internet, lá está. Então, nem se preocupe com a visualização que esta miniatura está demorando muito para baixar. Você pode arrastá-lo para fora sem se preocupar com isso muitas vezes e ele não faz nada. A visualização leva mais tempo do que o disparado real menos. Agora eu tenho um Victor escalável, e o que eu poderia até fazer é manter pressionada a Opção e
arrastá-la para que ela seja ou Option em um Mac. Então, não está conectado. Agora eu posso adicionar algumas cores e gráficos, eu posso clicar duas vezes nele. Vai abrir porque é vitorioso ou um SVG no Illustrator. A vida é boa, cara
, fica ainda melhor. Como poderíamos melhorar? O Competitive Illustrator volta ao Photoshop? É quando você começa a procurar, digamos que você está fazendo maquete, então nós vamos fazer mock-ups apropriadamente mais tarde. Mas digamos aqui que preciso de fazer uma maquete para o livro. Em vez de pesquisar livros brancos no Google, você está procurando um livro modelo, você está fazendo um gráfico de eBook. Aqui, eu vou pegar todas as categorias que eu realmente vou para a colocação. Para colocações, muito legal. Você pode ver essas diferentes categorias de pesquisa e procurando colocação porque ver estes, eles estão prontos para ir PSDs. Você pode dizer se eles são PSDs ou não, se você clicar sobre eles, Veja ele diz lá, Eu sou um PSD, mas é tudo mascarado e pronto para ir. Eu vou mostrar que você quer baixá-lo já porque você pode ver essas coisas que demorando um tempo, eu vou pular em qual deles tem. Alguma razão para eu ter muitas das minhas bibliotecas, então esta aqui, livro de capa dura. Vou clicar duas vezes nele para abri-lo. Ele se abre no arquivo que foi criado, neste caso é o Photoshop. O que é realmente legal sobre isso é que você pode ver que o fundo está separado para fora tão já mascarado. O que fica ainda melhor é, vamos dar uma olhada um pouco, qual livro estou olhando para um olhar para o livro da frente. Isso é uma coisa legal e você apenas desliga isso no livro. Mas digamos que este aqui, diz o seu projeto aqui. Eu acho que até te diz que se você fizer uma cabeça grande como, clique duas vezes nesta camada e arrastá-la de volta. Clique duas vezes no ícone do objeto inteligente, ele abre esse objeto inteligente em uma janela diferente. Está a dizer que estou a faltar algumas das fontes. Você pode acertar o Resolve, eu vou dizer não resolva. Você pode ver aqui que são todos os pedaços e pedaços que compõem a capa. Lá está o livro, ele está aberto em uma nova aba, todos os pedaços que estão dentro dele. Foi tudo, e deixe uma camada lá dentro. Dizem que fazemos o livro incrível do Dan. Vai ganhar muitos prêmios de design especialmente quando isso acontece. Oh, sim. Eu vou salvá-lo e eu vou fechá-lo. Porque já foi inventado em um livro. Olhe para isso, está sendo distorcido e movido por aí. Homens, até mesmo as sombras de queda no fundo, todas as camadas separadas lá como sombras que estão no topo. Sombras usando uma camada de sombra. Olhe para isso. Você vai encontrar muitas dessas coisas brancas que comercialmente utilizáveis gratuitamente. Só está lá em cima no mercado. Cara, eu tenho que descer. Se você já sabe sobre
isso, pode não ser tão excitante, mas isso me excita. Lembro-me da primeira vez que o encontrei, meu, que vezes cibernético. Essas garrafas de vinho nos muitos cadernos, cartões postais, cartões de visita. Você já viu como, oh cara, há pessoas que inventam esses cartões de visita bem rápido, agora você sabe. Há um truque barato que a maioria das pessoas não conhece, guarde-o para si mesmo. A última coisa que vamos fazer é seguir para o próximo vídeo porque vamos passar para a tipografia na próxima seção. Então vamos até aqui e vamos começar a olhar para coisas como Typekit e obtê-los a maior parte do que indo aqui para dizer, e para voltar para fora disso, vamos começar a trabalhar em fontes, mas vamos fazer isso em o próximo vídeo. Amigos, espero que você tenha encontrado algo útil ou novo nas Bibliotecas CC. Vamos pular para a próxima seção, que é topografia.
50. Truque de tipo avançado e fluxos de trabalho no Adobe Photoshop: Oi. Ali. Este vídeo é tudo sobre o tipo avançado. Vou mostrar-lhe como tirar o máximo proveito do Typekit, como encontrar fontes visualmente semelhantes, como definir favoritos, como usar fontes de tipo aberto, fontes variáveis. Começa com uma coisa muito legal e útil, e eventualmente, entramos nas ervas daninhas com uma coisa nerd como anti-serrilhamento e fontes CSA. Além disso, ficar ao redor até o fim, eu salvei uma coisa legal chamada Font Pairing para o final onde nós passamos. Descobrimos como combinar fontes, títulos e cópia corporal, só para nos livrarmos da correspondência normal de fontes. Te vejo então. Vamos começar. É uma longa. Para começar, abra qualquer arquivo. Dei-nos um só para termos algo para usar. Está na Tipografia 08. Chama-se tipo um. Obrigado, Kai em Herzog. Vamos pegar a ferramenta de texto. O primeiro truque é se eu subir até aqui para as minhas fontes. É uma lista das minhas fontes, mas elas são muito pequenas. primeiro truque é ir para Type, ir para Font Preview Size e ir para Enorme. Significa que quando eu voltar, vai me dar um tamanho de amostra melhor. Você pode escolher extra grande. Enorme pode ser enorme. De qualquer forma, vamos apresentar rapidamente o Typekit. Se você já está usando, incrível, vamos superar isso muito rápido. Se você não estiver, a versão skinny é cair em suas fontes aqui, clique sobre este que diz fontes cabeça do Typekit. Um site vai abrir. Aqui está. Estou conectado à minha conta da Creative Cloud. Há uma opção de navegação aqui. Vou ignorar este primeiro pedaço, vamos voltar a isso. Aqui embaixo, todas essas fontes são comercialmente utilizáveis que eu posso usar de graça. De graça, isso significa que eu os licenciei por meio da minha licença da Creative Cloud. Nós vamos meio que amarrado a isso. Não me custa nada. Aqui em cima, o seu provavelmente vai ter o texto de exemplo da palavra. Preciso da palavra “olá” para o projeto. Você pode digitar Olá e olhar aqui e dizer : “Quais fontes eu quero usar? A coisa boa sobre eles é em vez de um site como uma fonte “1001 Free Fonts” ou duff, ou o que você vai encontrar são fontes que são um pouco mais utilizáveis. Eles têm muitos glifos e ligaduras que precisamos para outras línguas. Se você precisa de uma fonte em forma de um cacto ou uma fonte de sangue pingando, você provavelmente tem que ir para aqueles outros locais que não aqui. Algumas coisas muito bonitas. Digamos que eu gosto deste. Eu só clico nele. Posso entrar e dar uma olhada em quais níveis existem em termos de brancos, larguras, esse tipo de coisa. Você pode vê-lo aqui e você pode ir para este que diz Sync All, e que vai baixar em Photoshop, Bendesign Illustrator, super legal. Este aqui só tem uma fonte na família. Você pode descobrir que há uma série de estilos diferentes das fontes, pesos para a fonte, e você pode sincronizá-los todos. Não há nada a fazer, que é começar a trabalhar no Photoshop. A outra coisa que você pode fazer no Typekit é não esquecer essas coisas aqui. Digamos que você está procurando um serif laje, ele vai e apenas resolver todas as fontes que ele tem disponível para você nesse estilo. As grandes serifas pesadas nas bordas aqui. Você pode estar procurando uma fonte manuscrita ou uma fonte de cabeçalhos versus uma fonte de parágrafo. Fica muito detalhado, os pesos, as larguras, que altura x ele tem, super útil. Este eu acho útil, escolher uma fonte para um cliente que tem essa lista estranha na fonte de linha de base. O cliente volta e diz: “As fontes estão todas misturadas.” Você é tipo, “Não, não. Eles são feitos para ser assim.” Você passa o resto do seu tempo tentando rastrear essas coisas para cima e para baixo. Essa é a versão magricela do Typekit. Vamos aplicar essa fonte. Sincronizará em segundo plano enquanto minha Internet lenta faz sua coisa. Veremos se um lazer aparece, e de alguma forma, excedi muito o meu limite de sincronização. Não sei como fiz isso. Não contes à Adobe. De volta ao Photoshop, você pode ver que isso acabou de ser atualizado aqui. Diz que está sendo adicionado. Vou clicar aqui e digitar Hello. Vou selecioná-lo. Eu vou encontrar, lá está ele. Ela está pronta para ir. Vou usar a cor também. Bom. Vamos levantá-lo para que você possa ver. Muito grande. Vamos entrar em coisas mais avançadas. Quando estou trabalhando com minha ferramenta Tipo aqui, porque passei tanto tempo pensando nas fontes Typekit que eu preciso. Lembre-se, eu só tenho cem. Estas pequenas configurações aqui são muito importantes para mim. Se eu clicar em Typekit, ele só vai me mostrar as fontes que estão vindo para baixo do Typekit, e muitas vezes, isso limpa todo o lixo e apenas obtém minha lista de fontes em lista utilizável de fontes que eu escolhi para diferentes projetos. A outra coisa que você pode fazer é certificar-se de que você desliga a alternância, caso contrário, ele vai sempre experimentá-lo. Digamos que estamos usando um par de fontes uma e outra vez, que novo e aqui, bater a estrela e pegar aqueles que você usa muito, talvez Ariel porque você tem que porque você tem clientes. Digamos que aqui em cima, vou usar Museo para o meu negócio e digamos que este aqui. Vou adicionar uma estrela a ele. A coisa boa sobre isso é que você pode simplesmente clicar na estrela. Ele só lhe dá os que usam estrelado, além de todos os pesos que vão junto com ele. Só arruma essa lista. Se você é como eu e você viajou pelo mundo como um designer freelance e você se apropriou como um zilhão de fontes em sua vida,
cara, a fonte significa que você pode ser muito durão. Este próximo pequeno recurso onde ele diz que o filtro é o mais importante. Filtrar aqui, eu quero passar por todas as minhas fontes e escolher as fontes de script. Agora, a coisa mais louca sobre isso é que eu não marquei. Isto é do Typekit. Typekit, quando adicionado uma tag a ele, para dizer, “Eu sou uma fonte de script.” Este aqui está no meu computador. Muitos desses tipos antigos aqui, esses TTFonts, eles são apenas coisas que estavam por aí no meu computador, mas de alguma forma, o Photoshop sabe qual é uma fonte de script e qual não é. É bananas. Se você alguma vez tentar fazê-lo usando seu livro de fontes, eu não usei essas coisas biblioteca de fontes por um longo tempo. Mala, essa era a única. Você se lembra de tentar resolver suas fontes em Suitcase? É bom porque não temos mais que fazer isso. A filtragem passa e diz: “Quero todas as fontes escritas à mão do seu computador.” Esta pode ser uma fonte que você baixou de 1001 Fontes Grátis ou Font Squirrel. De alguma forma, ele sabe. Certifique-se quando você terminar, embora, voltar para Todos porque ele permanece naqueles. Pode ser confuso. Digamos que escolhemos uma fonte e diz ano passado, e gostamos. Eu gostei. O cliente diz: “É um pouco feminino demais para o cartaz do Colorado aqui.” Vamos torná-lo mais principalmente, mas semelhante. Imagine se houvesse uma maneira de ter a camada de ticks selecionada. Está na minha ferramenta Mover. A camada de tick selecionada, vá para a ferramenta Tipo. Você não precisa destacá-lo, mas eu posso ir até aqui e olhar para isso, um ondulado. Ícone mais estranho do mundo. Eu não sei como isso funciona, mas é o “Mostrar fontes semelhantes”, dar um clique e ele passou por todo o
meu tipo e coincide por último com todas as outras coisas que combinam com ele. Você pode ver, estes são os que todos na minha máquina sabem. Eu sei. Curls, não é perfeito, mas passou por aqui e apanha-os todos. Bastante incrível. O cliente diz: “Você tem que usar Comic Sans.” Você é como, “Oh, não.” Vamos ver se encontramos algo parecido com Comic Sans, mas não é Comic Sans. Não vamos nos meter em sarilhos com a loja de design. Aqui vamos nós, olhe isso. Olha para aquele, Proxima Soft. Eles nunca vão saber. Há mais algum aí? Mesmo isso, desde que não seja Comic Sans. Agora, só para você saber, os que têm as estrelas aqui são os que estão na sua máquina. Eventualmente, você chega a essa linha que diz: “Ei, agora
estamos mostrando fontes que baixamos,
não baixamos do Typekit, mas estamos mostrando a você, pré-visualizando do Typekit.” Isso não funcionará até que você clique nesse botão, mas como faz parte da sua licença, basta dar um clique. Digamos que Sofia. Vamos dar um clique e ele vai sincronizar e funcionar. É bem mágico. Você pode ver lá Sofia Font Pro foi instalado. Eu ainda estou pensando [inaudível]. Para onde foi? A Sofia. Aqui está ali. Olá. Vamos ficar ainda mais avançados e eu vou escolher Lust, eu realmente gosto. Digamos que quero este aqui, na verdade, não. Gosto do itálico. Agora, se você escolheu uma fonte que é uma de duas coisas, é uma fonte Typekit ou essa fonte O, fonte de tipo aberto. Fontes de tipo aberto e fontes Typekit são as mesmas que vêm do Typekit, mas ainda é uma fonte de tipo aberto. Os que não são ruins, mas os mais antigos são aqueles, esses tipos de fontes verdadeiras, esses TT. Eu vou fazer isso. Se você estiver escolhendo uma fonte, escolha um O ou um TK, e não garante que isso funcione,
mas é mais provável que isso aconteça. Se eu destacar a palavra H, você pode ver que está me dando alternativas para essa seleção. Esta é uma maneira fácil de encontrar os glifos e/ou ligaduras para diferentes conjuntos de fontes. Eu vou para onde está? Gosto do itálico. Na verdade eu estou indo para um regular se eu destacar o H, você pode ver que há uma alternativa real que os designers de fontes escolheram e eu posso escolhê-lo para o meu design. mesmo com o E. Se eu destacar isso, não a coisa toda, só o E, paira sobre ele. Vou passar a bordo aqui. Mas você entende o que quero dizer. Há todas essas coisas que você gosta, cara, como eles fizeram isso? Muitas vezes, com o tipo, isso faz algumas lindas ligaduras. Isso também é o que acontece. Às vezes você tem fontes em seu computador e ele diz, “Você tem Ariel, mas você tem Ariel pro.” Gosta da mesma fonte. Todos esses glifos extras e ligaduras, ou alternativas contextuais, como você vai chamá-los? Há outra maneira de encontrá-los, bem, se isso não aparecer para você, uma de duas coisas, a fonte, mesmo que possa ser uma fonte de tipo aberto, simplesmente não tem ligaduras. Bem, pode haver uma provisão para a qual você pode ir e atualizar. Muitas vezes é o que você tem que fazer dizer que eu estou fazendo corpo pode ser bom para um grande cliente e eles têm multi-lingual ou multi-linguagem. Eles podem ser uma versão das fontes como Garamond, mas eu preciso do Garamond Pro porque eu preciso de toda a erva extra, sotaques acima das letras dizem para o romance irlandês ou casar de onde eu nasci, essas línguas usam todos os tipos de extras para ajustar as letras latinas. Você pode dizer que eu realmente não sei como isso é chamado, os pequenos pedaços de chicote texano. Se você não tem, ele, pode não estar na fonte. Mas verifique novamente em Photoshop, as Preferências vão para Tipo e, em seguida, aqui há uma que diz Ativar alternativas de glifo de camada Tipo. Se te cansares dessa coisa aparecer, podes desligá-la. Ele está ativado por padrão, então provavelmente ainda está ligado talvez. A outra coisa que você pode verificar para 100 por cento saber se ele tem ou não, ter a camada de fonte selecionada e ir para Janela e você está procurando por este chamado Glifos. O meu é padrão para Alternativas para a Seleção porque é isso que está fazendo. Quando eu segurar a seleção, me
dê alternativas para ela. Vou mudar para a fonte inteira. Vou fazer isto maior. Agora eu posso ver todos os extras que ele tem ligaduras, alguns apenas pontuação extra, todos os pedaços e pedaços aqui. Oh, eu amo o R. Eu preciso encontrar um uso para o R. Vamos fechá-lo. Uma das outras coisas que vou mostrar antes de irmos é
que é nova, mas velha. Foi algo que foi apresentado
há muito tempo e nunca decolou, mas está voltando. São fontes variáveis frias. O que são eles? Eles são bem mágicos. O que você está procurando
é, não importa qual deles realmente grande demais, enorme. Vamos para o extra-grande. Eu vou pegar o meu, realmente não importa se você está usando este ou a ferramenta de texto, eu vou para aqui agora, só para misturar isso. O que estamos procurando é que vimos tipo aberto, pode ver open type var, fontes variáveis? Vou clicar neste. Você não terá muitos na sua máquina. Eles são muito caros para comprar. Tem outro ali. Você só tem que rolar. Ainda não há pesquisa aqui fontes variáveis completas. Você vai ter que fazer uma rolagem séria. Você provavelmente não tem muitos. Eu vou usar este aqui, fontes Acumin Variable e o que você está indo para obter, você pode ter que estender seu painel de propriedades para ver a coisa toda. Este pedaço e você gosta, “Mmh, o que isso faz?” Imagine se você pudesse ter uma fonte que tivesse, eu vou colocar isso em zero, peso
variável, não apenas como luzes, luz condensada
extra. Olha para isto. Você só arrasta. Tem um zilhão de propriedades diferentes. Fizemos tudo certo com a fonte do Hector para colocar um golpe em torno dele para torná-lo mais pesado. Isto aqui é realmente projetado por alguém todos esses tamanhos diferentes para que ele lê bem como bonito. É o mesmo com os pesos. Eu posso olhar para a largura, eu posso abaixar isso para fazer uma fonte condensada ou comprimida itálico. É bastante incrível. Se você está encarregado de escolher uma fonte e você sabe que vai ser, digamos que você está trabalhando em um lugar e é enorme. Eles fazem documentação científica para energia atômica. Eu não sei por que eu escolhi isso, mas eu sinto que eles vão precisar de muitos pesos e tamanhos
diferentes, inclinações e idiomas. Uma fonte variável pode ser ideal para você. Digamos que você está fazendo um monte de design web ou design de aplicativo de interface do usuário no Photoshop. Só para que saibas, estamos a ficar mais nus e nus aqui. Digamos que eu estou projetando e no Typekit aqui, uma das opções é aqui em cima que diz Incluir famílias somente web. Digamos que escolhes uma fonte e gostas do Mighty Slab, é fantástico. O que você precisa fazer é apenas verificar se ele realmente uma fonte
Web e não apenas uma fonte de desktop porque você quer usar isso em seu aplicativo ou seu site para falar qualquer fonte, porque queremos carregá-lo com CSS em vez de ser uma imagem. O que você está procurando enquanto essa coisa está carregando e girando um tempo você
pode ver que a opção significa que eu posso baixá-lo da minha área de trabalho. Essa opção significa que ele está disponível como o Typekit chama no kit e você pode carregá-los em um kit. Web stuff baixando para o seu computador. Isso está disponível para projetos web, então isso é incrível. O que eu quero fazer é voltar para o Photoshop, nós escolhemos nossa fonte. O que é aquele? Poderoso Slab 1. Acho que não tenho essa. Só vou escolher outra coisa. Algo corpo-ish, Roboto. É como a antena da Internet. Você está procurando uma fonte de cópia corporal, Roboto é um bom. YouTube usá-lo, [inaudível] também. Mas precisamos usá-lo muito pequeno. Isto é apenas uma simulação de lembrar no Photoshop. Isso não está saindo para um site ainda, mas eu preciso usá-lo muito pequeno e é feito para pixelar como ele fica muito pequeno porque não há muito espaço para ele. O que você pode fazer apenas para ter certeza que é legível, antes de tudo não use branco. Tem um preto. Nós vamos olhar, então eu tenho esta camada selecionada, Rello. Na verdade, o que eu poderia fazer bem aqui é, logo depois do Rello, eu vou colocar em um espaço e eu vou Type, eu vou para Paste Loren Ipsum. Eu tenho muitas mensagens aqui para que você possa ver isso um pouco mais fácil. Basta ritmo em uma quantidade arbitrária de Loren Ipsum, bastante na verdade. Eu entendi a idéia. Mas é bem pequeno. O que você pode fazer apenas para ter certeza que ele está fazendo o melhor que pode ou olhar tão bom quanto ele pode neste maquete é com um menos selecionado, vá para a sua ferramenta de texto, há esta opção aqui em cima. É a suavização de serrilhamento da fonte. Não se preocupe muito com isso, mas uma fonte acaba parecendo essas coisas horríveis. Há um pouco de magia que vai em cima dela para suavizar as bordas. O computador faz isso como mostra para você. Não se preocupe com isso também. Basicamente, você tem opções para dizer ao computador para redesenhá-lo de maneiras diferentes. Posso clicar em “Sharp”. Foi assim que veio. Crisp, Forte e Suave. Você pode ver que na verdade é a mesma fonte, mesmo peso, apenas redesenhado ligeiramente diferente. Você pode achar que a sua fonte e sua cor e pode apenas precisar de um diferente destes para ficar agradável em sua simulação. Ele ficará perfeito em seu site porque o navegador o desenha, e digamos que você não está fazendo coisas da web, você está apenas fazendo um design normal de folheto. Vou aumentar a fonte. Quando você chega a um certo tamanho, não
importa mais. O que não importa? Não é tão importante. Vou falar de algo para dizer que isto é uma cópia do corpo para um panfleto que estou fazendo e quero que seja mais fácil de ler. A camada selecionada, ferramenta de texto e apenas trabalhar o seu caminho através, decidir afiada contra nítida, forte contra afiada e eu apenas corrê-los uns contra os outros. É difícil dizer a diferença entre esses dois. Eu gosto mais forte, tão forte e suave. Vence fortes. Incrível, tão ótimo para fontes pequenas. Normalmente é simulação, Ts e Cs no fundo e isso é chamado de anti-serrilhamento. Digamos que você está fazendo web no trabalho de interface do usuário, vamos olhar para cima fazendo exportação web adequada
no final desta série de vídeo, olhar para exportar. Haverá uma seção sobre exportação para Web. Mas quando ouvimos que todo esse tipo de coisa é com essa camada selecionada, você pode ir para Camada, há um que diz Copiar CSS. Não, SAG, eu quero ir o que este é Copy CSS e este é um bom caminho, fácil. Você pode colar isso em um e-mail e explicar ao seu designer ou desenvolvedor que é esse tamanho de fonte, é essa família de fontes, há a cor. Ele dá a eles todo o código para garantir que sua simulação corresponde ao que eles constroem no site. Há alguns que você não precisa. Se você não é um web designer, tudo bem. Basta enviar para eles tudo isso, se você é um web designer, você vai perceber que você só precisa de um par dessas coisas. É legal. Eu até faço uma aula baseada no nome aqui. Se você nomear suas camadas, direito, você pode nomear suas classes. De qualquer forma, se você está interessado em web design ou entrar nele, Dreamweaver pode ser um ir e eu tenho um curso para isso. Autopromoção desavergonhada. A segunda dica de que foi escrito aqui é sombras e você diz : “Eu sei o que é uma sombra.” Só quero te mostrar uma coisinha estranha que você pode fazer com sombras. Digamos que eu quero que este texto aqui tenha uma sombra, então com a camada selecionada, FX, Sombra, o que você pode fazer é dizer que você gosta dessa sombra, mas ele precisa de outro, você pode realmente pressionar Plus e ter dois sombras, o que é louco, talvez não louco. É útil. O que está no fundo aqui, eu vou realmente fazer maior e terrível vamos por ali. Vai distanciar-se um pouco. Vou diminuir um pouco a opacidade. Vês o que estou a fazer aqui? Eu adicionei duas sombras, então vamos desligar o globo ocular. Há um que é muito apertado ao redor do lado de fora apenas para dar a plenitude à esquerda, e então este outro que é mais alto, que vai ajudá-lo a sair do documento. Estamos entrando nas ervas daninhas aqui. Uma última pequena característica antes de irmos é a fonte aparecendo. Se você não está fazendo digitação o tempo todo, mesmo que você esteja,
eu, eu fico com as mesmas fontes. Vais ter alguma coisa desenhada ultimamente? Provavelmente é Lust, e provavelmente é um Museo arredondado para o tipo ou é Roboto. Para sair disso e nem um cliente ou outro conceito, há um termo chamado emparelhamento de fontes. Não é realmente um recurso aqui, apenas algo que você pode ir e fazer. Vou te mostrar o que quero dizer. Tudo o que eu fiz foi eu fui para o Google e eu digitei pares de fontes Typekit e eu apenas cliquei nos três primeiros resultados, porque o que aconteceu é designers melhor do que eu, Carrie Dills tinha passado algum tempo passando por um fontes correspondentes para títulos e cópia do corpo. Você só passa e diz, “Oh, eu gosto dessa combinação”, e depois descobre o que é. Esta fonte é na verdade a mesma fonte, tão sexy. Outros, este eu acabo em um pouco typ.io bibliotecas Typekit. Eu acho isso como bom ou você pode ver realmente ele usado no trabalho de design com cores e você pode ver aqui este aqui está usando essas duas fontes. Outro aqui, estas duas fontes. Apenas algumas combinações de emparelhamento de fontes realmente agradáveis que você pode ir agora baixar Typekit, que você
possa obter o mesmo efeito. Outro aqui, apenas mytype.co. Há um monte de pares de fontes. Há um monte de pares de fontes aqui. Clique em “Typekit”, há uma carga de emparelhamentos de fontes aqui também. Mas não pare por aí. Faça uma pesquisa de imagem do Google para o emparelhamento de fontes Typekit, veja se você consegue obter os antigos sucos de combinação de tipos criativos fluindo. Isso é tudo para truques de tipo avançado e fluxos de trabalho não desaparecem. No próximo vídeo, vamos fazer um pouco mais de tipos, isto é a ver com fontes correspondentes. Vamos saltar para o agora.
51. O Photoshop pode adivinhar sua fonte usando a ferramenta Match Fonts: Oi lá, neste vídeo é tudo sobre tirar gráficos. Eles têm fontes que são apenas esmagadas nele que nós não conseguimos descobrir, nós não sabemos quais fontes são, não é editável. Photoshop tem um recurso incrível chamado Match Font. Temos algum sucesso. Este aqui eu sinto como se estivéssemos muito bons, combina com essa palavra. O mesmo com inteligente aqui, temos este muito bom, talvez um branco ligeiramente diferente é necessário. Vai muito bem para este e vai terrivelmente errado para este. Se você sabe o que é essa fonte, deixe-me saber nos comentários, e ele vai muito bem com este, surpreendentemente, alguma forma ele sabe magicamente que tipo de letra é essa. Vamos ver isso agora no Adobe Photoshop. Para começar em 08 Topography, abra Match Font, 1,2,3,4,5. Então vamos trabalhar nosso caminho através de fácil a duro e falar sobre as diferentes instâncias. Muitas vezes eu estou trabalhando através um site como Behance, procurando idéias e inspiração, e eu sou como, “Oh, eu gosto desta fonte aqui.” Então eu cliquei nele, carreguei-o, fronteira aqui, e eu sei que não é do tipo editável, então como eu vou descobrir isso? Photoshop, tipo Match Font. Então eu tirei uma captura de tela, e nós a temos aqui no Photoshop. Então, para isso funcionar, precisamos pegar a ferramenta “Seleção”, a ferramenta “Letreiro retangular” em particular, e ela não gosta quando você agrupa muitas linhas, então eu vou desmarcar isso. Eu vou pegar o que tem mais personagens nele, este aqui, e então eu vou para “Type”, e eu vou para este que diz “Match Font”. Relaxe, relaxe dependendo da velocidade da sua internet. O que ele faz é verificar duas coisas; ele verifica seu computador, então ele procura por coisas que já estão em seu computador. Ele também e vai e verifica Typekit para dizer, “Ei, eu posso ter esta fonte aqui também.” O que eu estou procurando é tentar descobrir qual deles é, e o único problema é que a amostra aqui não
pode ser editada ainda que será um grande truque. Se eu pudesse digitar Assassin, eu poderia ver isso porque eu estou lidando com o “A” e o “S”, há uma correspondência. Provavelmente é este, e provavelmente você tem que passar e baixar um monte deles. Então não está no meu computador porque estes não correspondem, mas estes estão disponíveis no Typekit e tudo o que eu tenho que fazer é decidir sobre este aqui.Goes off e começa a sincronizar. Para “Bold”. Vou ver se isto funciona. Eu totalmente não fiz isso de antemão para tornar tudo simplificado. Talvez eu devesse. Pode ser o branco errado. Talvez vamos reduzi-lo, é o branco errado, mas eu acho que é exatamente a fonte certa. Então eu vou até “Bold”, e eu vou ter que ir até a final do Typekit, pegar emprestado e baixar todos os brancos diferentes para tentar igualá-lo. Quando isso saiu pela primeira vez e eu fiz meus tutoriais, funcionou 30 por cento das vezes. De alguma forma, a Adobe tem edições melhores e tem mais fontes em sua biblioteca Typekit, então parece funcionar como eu diria 70 por cento do tempo, apenas escolhe a fonte. Vamos dar uma olhada em alguns truques. Então vamos ter que “Match Font”, e digamos, este aqui. A mesma coisa, eu quero dar adereços para as duas pessoas de quem eu me apropriei de fontes. Esse cara é chinês e eu não sei como pronunciar seu nome, ou dizer, mas é ele. A outra é a marcação Pantera Negra de Andriy Bata provavelmente vamos executar essa também. De qualquer forma, eu gosto do design, eu quero a fonte. Como é que eu descubro isso? De volta aqui. Mas vamos fazer um pequeno truque. O que eu vou fazer é pegar a ferramenta “Type” e apenas digitar a palavra “Smart”, levá-lo a um tamanho mais ou menos certo, em algum lugar lá dentro. Por quê? Porque é um pequeno truque pode fazer, talvez a ferramenta Letreiro retângulo, é a coisa para dizer ao Photoshop para verificar o EPA, você não precisa realmente estar na camada que você está verificando, ele vai olhar através de todas as camadas. Você tem 100 deles, e ele só vai verificar o que vê. Mas se eu tiver o meu “Camada” selecionado aqui para “Tipo”, podemos fazer este truque 'Este é provavelmente apenas mostrar-lhe. Isto vai para Match Font. Faz a sua magia de fonte. Se você é como eu com uma conexão lenta à internet, essa coisa continua atualizando.; Eventualmente, ele vai parar. Então fonte está disponível e o que eu estou procurando é assistir isso; isso está no meu computador, eu posso clicar nele. Você pode ver que eles estão tão perto e é mais fácil confirmar que a amostra não funciona. Então você pode obter clique sobre estes e apenas trabalhar o seu caminho através. O problema com esses é que você tem que baixar cada um desses que está bem, é mais fácil do que adivinhar. Posso dizer que está perto o suficiente. Você pode ver que o M é muito diferente. Ele se resume à linha de base nesta versão, não para aqui, eu poderia agora saltar para “Typekit” e apenas verificar imediatamente para ver se há como versões diferentes, talvez há uma versão glifo do M que é usado, talvez haja uma versão de exibição. Vou clicar em todos estes e ver qual deles pode funcionar. Aquele cara parece aproximado, vamos fazer isso. Eu deveria praticar essas coisas de antemão, como os problemas reais do mundo real e coisas que podemos ter. Vamos clicar em “OK”. Vamos ver se faz isso, Proxima Nova Extra Condensado. O que você está calculando? Acho que podemos ter feito isso, mas talvez não a versão extra ousada diz que temos que olhar. Não há outro senão um extra ousado, então eu vou ter que ir ao “Typekit” agora, e aposto que se eu procurar por Proxima Nova, haverá um bando de brancos que eu poderia usar, e eu aposto que eu iria encontrá-lo. Eu recomendo isso de qualquer maneira. Então, basta ter seus ticks na “Type Layer” e basta usar sua ferramenta “Retangle Letreiro” para selecionar a fonte. Vejamos alguns mais difíceis. Vamos olhar para este aqui. Então, fotografia do mundo real. Para isso funcionar, ele precisa ser reto e você pode apenas clicar duas vezes no fundo, vir T para girar, apenas chegar perto, e o que podemos fazer é usar nosso truque que usamos anteriormente. Lembra-se daquela colheita de perspectiva? Então mantenha pressionada a ferramenta de corte agarrou o corte em perspectiva, e isso é muito fácil porque é cantos completos que eu posso facilmente trabalhar fora das bordas, clique em “Rotina”; Eu acho que perspectiva é um pouco errada, é um pouco espremida de largura. Vamos ver como funciona de qualquer maneira. Então, ferramenta “Marquee”, arrastar a caixa em torno dele e ir para digitar, nós vamos fazê-lo. Eu provavelmente limpo o pontinho usando o pincel de cura, mas aposto que vai funcionar. Este eu testei, digite, Match Font. Isto aqui talvez precise de um pouco de nitidez, só
vamos ver o quão bem ele faz. Você pode ver que ele está me dando alguns bons exemplos. O que eu deveria fazer também é fazer o meu pequeno truque com a camada. Mas não vamos voltar atrás agora, vamos em frente e lidar com isso. Então este aqui é como, quão perto isso vai chegar? É sequer uma fonte? Provavelmente é, talvez. Vamos dar um gostinho, vou clicar duas vezes no fundo. Vou usar uma técnica diferente para alinhá-lo. Então eu vou usar um comando R, ou controle R em um PC; Basta abrir nosso rolo e eu posso arrastar um, você atacar do centro do rolo para baixo e eu arrastá-lo mais ou menos sobre lá. Com a camada selecionada comando T para girar, onde você pode ir para editar, transformar girar, eu vou obtê-lo. Perto da linha de base. Agora a minha ferramenta Retangular Letreiro. Vamos confundir um pouco com todas essas coisas extras no fundo, mas vamos dar um testamento, vamos para “Type”. Vamos também “Match Font”. Às vezes aparece com um pequeno erro aqui em cima dizendo: “Sem chance ou você precisa refinar sua seleção um pouco melhor.” Até agora não se saiu bem. Então dê uma olhada, não, vamos cancelar e fazer o que eles disseram. Vou copiar e colar isto na sua própria camada. Estamos a fazer hackear porque só queria saber a fonte. Então o que eu vou fazer é usar a ferramenta “Borracha” para se livrar de qualquer coisa que eu não preciso e você usa rótulos apenas para ver se eu posso me livrar de alguma largura, realmente acentuar esse tipo. Vamos ver como isso vai correr. Talvez precise de um fundo branco, quem sabe? Faça Q para reiniciá-lo para preto e branco padrão, X para trazer o Y para a frente e mantenha pressionadas “Option” e “Backspace. Então, com isso selecionado, venha comigo. Vamos fazer “Match Font. Vamos avançar com isso. Tão rápido encaminhado porque ele não obteve, eu obtive em um exemplo anterior, então eu vou apenas trabalhar através dele novamente. Só estou escolhendo isso porque talvez sejam letras claras do que essas. Vamos dar mais uma chance, vamos acelerar novamente, e eu verei no final e veremos como funciona. Não, vamos tentar o lado. Aqui estamos nós de novo, não trabalhando, eu realmente não senti que eu tinha um resultado melhor da última vez, mas eu não gravei isso, foi apenas prática. O que eu faria agora é ir a um site chamado “WhatTheFont”, e eu tentaria lá dentro. Eu acho que é melhor? Eu não fiz isso o suficiente para compará-los muito perfeitamente, mas saiba que há um outro serviço chamado “WhatTheFont”, grande nome. Eu diria que este é um JPEG e experimentá-lo, e então. Vamos para o último que é super difícil, e espero que este seja bom e eu me sinta um pouco esvaziado até o último. Vamos selecionar este e vamos para “Type”, “Match Font”, eu vou acelerar. Agora estou me sentindo melhor sobre isso. É como se não houvesse nenhuma maneira em que você deveria saber onde a fonte está, a luz de ação ao vivo em uma parede, e você pode ver que ela voltou com alguns, talvez não perfeito, eu vou ter que
trabalhar meu caminho através e tentar e descobrir qual deles é. Mas eu sinto que pode ser um desses brancos talvez diferentes. Você pode ver talvez este aqui, bem perto. Então terminamos em um alto com fontes correspondentes. Se você é realmente díspares, você pode passar por e remover o fundo e apenas desenhar uma rodada um pouco, talvez em usar a ferramenta Caneta para redesenhá-lo e ver como ele funciona. Mas saiba que esse recurso está lá, muito legal, que vai ser o fim lá. Vamos entrar no próximo vídeo.
52. Adicionando corretamente as pranchetas ao seu fluxo de trabalho no Photoshop: Oi lá. Este vídeo é tudo sobre pranchetas. Para começar com irá mostrar-lhe apenas o básico, mas apenas rapidamente, então vamos entrar em um pouco mais do material avançado profissional divertido. Dizendo por aí. Então, para criar uma prancheta, vamos criar um novo documento, de qualquer maneira. Tudo o que você precisa fazer é, nós vamos estar fazendo um pacote de captação de mídia social. Vamos criar um modelo para o novo perfil do Twitter, perfil do Instagram e fotos do perfil do Facebook, além de atualizar todas as fotos de capa para ele e, em seguida, olhar as imagens de postagem reais em tamanhos diferentes para todos os diferentes plataformas, tudo em um arquivo. Essa é a vantagem das pranchetas. Vamos começar com o Facebook e sua foto de perfil no momento é uma lula de 180 pixels. Como queremos que isso seja pranchetas, vamos ativar esse cara, clique em Criar. Você, meu amigo, tem um documento com uma prancheta. As pranchetas são distinguidas por estes como pequenos grupos aqui. Digamos que você não fez isso. A maioria das pessoas não. Eles fazem o, como eu faço isso uma vez que eu tenho uma coisa arquivo? Digamos que começamos sem transformá-lo em uma prancheta. Para transformar isso em um arquivo de pranchetas, tudo que você precisa fazer é ter sua camada selecionada. Se você tiver várias camadas, basta selecioná-las todas e, em seguida, ir para o menu de saída
no painel Camadas e escolher esta aqui diz, prancheta de camadas. Seja o que for que você selecionou, ele usará esse tamanho [inaudível] aqui embaixo, você pode ter que redigitá-lo se você tiver algum derramamento fora das bordas aqui. Agora nomear sua prancheta é muito mais importante do que nomear camadas. Isso vai nos poupar tempo, porque prancheta é tudo sobre fazer muito trabalho ao mesmo tempo. Então da próxima vez que tivermos que fazer
isso, é super rápido e fácil. Então, embora eu seja um pouco preguiçoso com a nomeação da minha camada, a nomeação
fora de borda é diferente. Eu dou a ele o nome do projeto, a data, a plataforma em que ele está indo, e potencialmente o tamanho, só para que você saiba o que normalmente entra em um nome de prancheta, muito nerd. Isso é para minha atualização do Photoshop. Então, sempre que eu lanço um curso, eu passo e atualizo todos os meus perfis em todos os lugares. Este é o Photoshop essencial. É feito em julho. 2019. Este é o perfil do Facebook. Por que parece tão longo e todo esse hífen? Isto é só eu. Você pode usar sublinhados, você pode usar códigos. Como se isso fosse muito longo. Você pode usar como 0719. Você pode ficar chique com ele, mas funciona para mim. Vou clicar em Criar. Então, digamos que queremos adicionar outra prancheta. Há duas maneiras. Ambos exigem que você entre na ferramenta prancheta. Pegue a ferramenta prancheta, ele está se escondendo embaixo, secretamente embaixo da ferramenta Mover. Se você quiser apenas duplicar isso, eu vou duplicar este porque eu preciso que este sujeito seja o meu perfil para o Instagram. Então tudo o que eu fiz foi clicar duas vezes aqui e eu vou dobrar. É assim que você renomeá-lo, clique duas vezes nele aqui, painel Camadas. Então este é o mesmo, exceto que este é o Instagram. Outra maneira de adicioná-los é, usando esta ferramenta podemos subir aqui, e onde está este tamanho, Ii você tem o selecionado e você escolhe, iPhone seis. Vai mudar o que você selecionou, que pode ser o que você quer. Vou desfazer. Digamos que queremos acrescentar, neste pouco mais. Então eu quero acrescentar, iPhone 6. Você está fazendo um web design ou desenvolvimentos de um aplicativo, você precisa do tamanho seis do iPhone. Um pouco lento com a atualização destes. Enfim, o iPhone 6 é um pouco velho. Mas se você clicar em qualquer lugar, aleatoriamente, você obtém iPhone tamanho seis. Excluindo uma prancheta, basta clicar nela. A maneira mais fácil quando você trabalha com pranchetas é clicar no nome em vez de tentar clicar nas bordas, basta pressionar excluir no teclado. Agora, vou adicionar alguns gráficos. Vou te mostrar algumas coisas extras. Vamos trazer uma imagem. Nós vamos para o arquivo e nós vamos para o lugar incorporado. Vai para onde quer que tenhamos selecionado. Eu tenho essas pranchetas selecionadas no momento. Na sua pasta de 09 pranchetas, pegue Daniel Scott. É um objeto inteligente. Vou escalá-lo para algo assim. Olá, eu. Preciso fazer meu perfil no Twitter agora. Se eu for para a minha técnica aqui, prancheta, clique nela. Agora eu quero duplicar. Só faz um novo. Porque eu vou usar muitos dos mesmos elementos, então eu quero duplicá-lo. A maneira mais fácil é manter pressionada a tecla Option em um Mac ou a tecla Alt em um PC ao clicar nesse sinal de adição. Agora estou usando o da direita. Você pode desfazer. Use o que está na parte inferior, depende do seu fluxo de trabalho. Eu vou atravessar esse caminho. Você pode ver que traz tanto nome que é legal, mas também quaisquer imagens que estão lá. Este aqui é agora, Twitter. Outra maneira de fazê-lo é ferramenta prancheta novamente e apenas segurando a tecla de opção em um Mac, tecla Alt em um PC e apenas arrastando o nome. Você tem que arrastar o nome, faz uma duplicata também, trazendo junto tudo. Você pode ver o meu, eles estão assustados um pouco. As pranchetas são estranhas. Eles estão por aí há algum tempo. Acho que a melhor maneira de lidar com eles é ter certeza de que há uma boa distância atrás deles. Você pode ver que eu apenas usei a ferramenta pranchetas e arrastando-os. Porque eu sou um cara muito legal e inteligente para ter certeza que eles estão todos alinhados. Mas eu acho que um pouco de distância significa que eu não acabo sobrepondo e pulando navio nesta outra prancheta. Se você está achando-os duros, afrouxar a pilha um pouco. Aquela, então, tudo o que fiz foi ligar e desligar o globo ocular e ele voltou à vida. Isso não acontece com muita frequência, só que neste vídeo, eu vou deixá-lo em. Se você precisar mover um monte deles, digamos que você deseja movê-los todos para baixo, você pode simplesmente mudar clique em todos eles também. Vai parecer que eles estão destacados. Você também pode mudar, clicar nelas no painel Camadas e mover uma delas e elas aparecerão para o passeio. Certo, então esse é o tipo de introdução às pranchetas. Vamos entrar no próximo vídeo. Vamos entrar em algumas coisas mais hardcore. É hardcore como pranchetas ficam. Te vejo lá.
53. Como adicionar corretamente imagens a uma prancheta no Photoshop: Oi lá. Este vídeo nós vamos olhar para adicionar gráficos corretamente. Eu digo corretamente para que possamos, modo que quando precisamos atualizar isso, podemos atualizar várias pranchetas de uma só vez. Falar sobre fluxo de trabalho, configurá-lo corretamente, não demora mais você só tem que saber o que fazer. Deixa-me mostrar-te como. Agora, quando você está trazendo gráficos, até agora, nós temos feito um monte de abertura e apenas copiando através. Então, pelos arquivos de exercícios, vou levar Daniel Scott. Posso me certificar de voltar à minha ferramenta Mover e copiá-la. Não há nada de errado com isso. Eu só tenho que ter certeza de onde eu arrastá-lo para, cortando em qualquer prancheta antiga, especialmente com uma imagem grande como esta, e quando eu fazê-lo em, certifique-se a primeira coisa que eu faço é convertê-lo em um objeto inteligente. Mas mesmo fácil, Eu vou excluir que um lá, é ter prancheta selecionado, e ir para Arquivo, e ir para Colocar incorporado, ou Vinculado, o que funciona para você. Embedded vai colocá-lo dentro deste arquivo do Photoshop, então ele está sempre aqui. O arquivo é um pouco maior, mas acho que é muito útil. Vinculado é quando você está lidando com arquivos enormes, ao contrário InDesign, ele mantém o arquivo em outro lugar, que
significa que você não pode perdê-los, mas mantém o Photoshop marcando de forma agradável e rápida. Vamos usar o Place Embedded e em vez de Daniel Scott, vou usar o logotipo do Photoshop [inaudível] Place. Há um tamanho, sim, que funciona para mim. Torná-lo apenas um pouco maior para caber no meu perfil e este aqui, eu vou duplicar através. A outra maneira de trazê-lo é talvez da sua biblioteca. Vou à minha biblioteca, na qual já tenho o meu gráfico. Lá está ele, eu posso arrastá-lo desta maneira. Você pode ver aqui eu arrastei para dentro, mas eu ainda estou, eu tenho este aqui destacado. Então essa coisa acabou vai, bem, eu não posso dizer isso porque eu não estou na prancheta e este é apenas um dos problemas com pranchetas, é que você tem que ser bastante intencional. Se eu voltar agora, ele não acabou no lugar certo, mas como eu estava dizendo ao Photoshop que eu deveria estar aqui, ele enlouqueceu por um segundo. Isso está tudo bem. Esse nem é o gráfico que eu quero. Quero a bandeira. Onde está a minha sinalização de certificação? Lá estou eu. Estou na exportação certificada pela Adobe para o Photoshop. Volto e acrescento isto aqui. Cole isso. Onde vou enfiar? Eu estou dentro. Certifique-se de que é um arquivo Local ou Incorporado, arrastou-o da biblioteca, ou se você copiar e colar, em seguida, certifique-se de que é um objeto inteligente. Porque o objeto inteligente é realmente o que queremos aqui para atualizar lotes. Digamos que queremos passar de um para outro, eu preciso deste logotipo Expert aqui. Eu posso clicar, segurar, esquerda errada, ok. Clique nele, segure e arraste-o enquanto mantém pressionada a tecla de opção no Mac ou no PC. Para chegar a este aqui eu posso manter pressionada a
tecla de opção no meu Mac ou tecla em um PC e eu posso arrastá-la. Isso funciona algumas vezes. Acho que com um objeto pequeno, tudo bem. Com estes objetos maiores, digamos como esta imagem aqui atrás e eu tento duplicar isso ali, é feito bem. Porque você está assistindo, a mesma coisa nas costas tornando-o menor. Você vai notar que meu fundo, aqui entrou nesta cor estava aqui. Só vou deletar, não preciso. Então, arrastando, está tudo bem, agora [inaudível], mas ele tem problemas. Então, o que você faz? A maneira mais fácil é dizer que eu quero isso aqui agora, então eu vou, você vai levá-lo para a posição certa para este aqui se você quiser que ele seja feito aqui. Aqui a coisa boa sobre o uso desta técnica, ele deve acabar no lugar certo ou grosso modo. Então MLA como painel aqui, vou clicar com o botão direito do mouse no logotipo. Eu vou dizer duplicar meu amigo, e eu vou dizer, o que você quer que ele vá? Eu vou dizer esta prancheta, que é o meu perfil Instagram, por favor. Dê o mesmo nome e ele se move. Isso é muito útil quando se tem muitos objetos. Digamos que eu vou criar algo novo. Vou saltar para a minha ferramenta de prancheta, atalho para isso. Se você estiver procurando atalhos, mantenha pressionada a tecla Shift e V e ela apenas alterna entre a ferramenta Mover e a ferramenta Apple. Eu quero um novo documento e vai ser a foto da capa para, digamos, usuários do Facebook. Um 51 por 310. Não se preocupe muito com os tamanhos aqui eles parecem mudar o tempo todo. Apenas Google, Facebook foto capa 2019. A foto da capa é direcionada a partir da foto de fanpage. Há todos os tipos de coisas diferentes. Basta verificar o que você está fazendo. Mas saia daqui, nada está acontecendo. Posso clicar uma vez, então vou deixar minhas coisas do Facebook aqui. Se eu clicar em ambos, mover, mover, e esse vai ser o meu pequeno grupo no Facebook. Vou dar-lhe um nome. Agora o que você encontrará com pranchetas é esses guias ficam confusos. Vou ter um vídeo completo sobre como trabalhar com pranchetas um pouco melhor. Mas só porque precisamos dele agora, se você Comando clicar na seta sobre ele, isso significa que fecha todos eles de uma vez e apenas parece arrumado. Onde está o meu Facebook? Copie isso como minha foto de capa do Facebook. Agora estamos ligados. Não há razão para você não arrastá-lo para mantê-los juntos. Não afeta nada aqui, exceto quando exportamos. Só significa que esta página vai ser direto para esta página, o que pode fazer sentido. Legal. Agora quero um pedaço de coisas. Quero que tudo neste gráfico seja movido para cá. A maneira como faço isso é ter todos selecionados aqui. Meu Photoshop essencial, Instagram, tem todos os bits que preciso, então estou selecionando todos eles. Clique com o botão direito do mouse em qualquer um deles, vá para duplicar e, como antes, basta escolher o que você queria ir. Foto da capa, tudo bem. Esperemos que aqui agora, é tudo pedaços. É por isso que estamos usando objetos inteligentes, eu acho, é que estes podem ser redimensionados agora. Meu logotipo do Photoshop pode ser maior porque é um arquivo [inaudível] dizendo com minha coisinha nervosa e mesmo com este tipo de gráfico aqui. Objetos inteligentes, é muito maior do que para o que estamos usando. Vejamos outro tipo de problema que acontece que queremos tentar mitigar. Esta imagem não é muito grande, tente quebrá-la. Olha como é grande, está sobrepondo esses caras. Não vai a lugar nenhum, mas está bem, acontece comigo o tempo todo quando você não está aqui. Sai disso, foge disso. É como o Lar e não sabe para onde ir e acaba lá atrás. Por ali. Eles estão muito próximos, eu fui bom demais e os mantenho distantes. Digamos que este é o seu problema, certo? Você está tentando, onde foi parar? Acabou por aqui, mas você gosta.
Não, não, não, apenas seja, por que você não, por
que, e agora está lutando. É bom. Digamos que você, meu amigo, vive aqui, você não tem permissão para se mover, com essa camada selecionada, há essa opção aqui e isso só diz, você meu amigo, não vá a lugar nenhum, você está fundido a esta prancheta, evite aninhamento automático. Você pode ver basicamente ele apenas bloqueia, mas a coisa legal sobre ele é que ele ainda pode ser movido apenas não fora de sua pequena casa. Legal. Selecione tudo em sua prancheta, e basta clicar nisso. Certifique-se que ele vai ficar lá. Vamos ver outra coisa, duas outras coisas antes de irmos. Um deles é, você cria esta prancheta e você simplesmente não quer mais eles por algum motivo. Eles são apenas, você criou duas pranchetas, você é como onde todas as peças, você quer ver tudo. O que você precisa fazer é selecionar todos os nomes da prancheta. Então vamos usar nosso truque onde mantemos pressionada a tecla Command em um Mac, tecla
Control em um PC, basta clicar na seta e podemos segurar Shift e clicar em todos eles. Vão para suas camadas. Uma mosca aqui fora e há uma que diz Desagrupar pranchetas, não está lá. É aqui em cima, está sob camada, e lá está, desagrupar pranchetas, e isso apenas coloca tudo, apenas vai, sem limites, aqui estamos todos nós. Poderia ser legal quando alguém te envia um arquivo e está tudo confuso, e desfaça isso, porque não era isso que eu queria fazer. Farei a última coisa. Não há realmente qualquer prancheta que você pode pular junto, estou apenas mostrando o conteúdo para o qual nós escalamos. Porque nós queremos isso para o resto do tutorial e Man, é bom para quando você está fazendo essas formas de caixa pequenas estranhas, e ele tem um problema com, eu quero usar escala contínua, não funciona. Infelizmente, ele não funciona em um Objeto Inteligente. Vamos ter que clicar com o botão direito do mouse e dizer Rasterize Layer. Não é exatamente o que eu quero fazer, mas é o que eu tenho que fazer para fazer isso funcionar. Então, agora edite Content Aware Scale e eu vou ajustar, magia até mais fundo. Minha sombra fica maior, estou feliz com isso. Voltar. Agora eu vou transformá-lo novamente em um Objeto Inteligente porque mais tarde eu vou duplicá-lo, e eu quero usá-lo. Vou enviá-lo para trás, e isso será suficiente para este vídeo. Há mais coisas de pranchetas para vir, então confira o próximo vídeo.
54. Usando objetos inteligentes e revinculando imagens no Photoshop: Oi lá. Este vídeo é tudo sobre como fazer o nosso dinheiro valer a pena com todo o esforço que investimos. Garantimos que sejam objetos inteligentes. Por padrão, estamos ligando eles sem saber. Vamos começar. Digamos que é o próximo curso que estou fazendo, mas porque eu preparei tudo isso, é reutilizável. O que é legal sobre isso é, digamos que agora é hora do Photoshop. Este pequeno gráfico aqui precisa ser ilustrado, então o que eu vou fazer é com ele selecionado, eu posso clicar com o botão direito do mouse no nome aqui e ir para este, este é Relink para Arquivo. Posso sair para o meu arquivo de exercícios, 09 pranchetas, logo Illustrator, clique em voltar. Esta é a parte satisfatória, não é. Clique em “Ok”. Veja esta atualização de todos os gráficos. O mesmo se aplica a fotos minhas. Você pode clicar com o botão direito neles em qualquer lugar porque é o objeto inteligente e eu fiz isso no início. O que pretende acontecer é que, à medida que o duplicamos, ele aparece para a direita e eles ainda estão ligados. Digamos que não é isso que você quer. Você quer outra cópia de mim, mas não quer ligar porque quando você atualizá-lo, não é o que você quer. Vou fazer uma duplicata assim, essa é a má maneira. O que eu posso fazer é, neste slide aqui, eu posso clicar com o botão direito do mouse nele, e há uma opção que diz um 'Novo Objeto Inteligente', por favor, mas via cópia. Só significa que ele vai fazer um novo objeto inteligente, mas então não ligado. Estes dois parecem iguais, mas não têm essa ligação como todos os outros. Vamos fazer isso, vamos atualizar este aqui. Eu vou clicar com o botão direito e eu vou para Relink para Arquivo, agora
é Daniel 2 lá dentro, agarrá-lo. Você pode ver que ele atualizou, ele atualizou, ele atualizou. Agora você verá que eles não atualizaram perfeitamente no local certo porque eram imagens de tamanho diferente. O que eu realmente queria fazer por você é tornar as imagens perfeitas, todas alinhadas. Isso não seria realmente realista quando você vai e usa e você fica tipo, “está quebrado?” Mas isso acontece de ser uma imagem diferente. Ele não corrige tudo completamente, as imagens são apenas escala diferente. Eu selecionei os dois, eu segurei Shift pressionado. Meu truque é, digamos que estou clicado aqui em baixo. Eu mantenho minha tecla de comando pressionada, mantenha pressionada a tecla Control em um PC e clique nessa cor. É ele ali. Se eu segurar a tecla Command e Shift, isso está em um Mac, tecla Control e Shift em um PC. Você pode clicar em mais de um em dois diferentes para cima, porque eles são tão semelhantes. Por que estamos fazendo o perfil do Instagram diferente do Facebook? Os tamanhos diferentes, mas o principal no Instagram tem um grande problema nenhum. Eu estou trabalhando no Instagram um, eu vou fazer uma nova camada, está bem no topo e usar minha ferramenta Elipse, apenas para começar no canto aqui, tentar obter elipse e inverter a elipse. Vou preenchê-lo com vermelho, desmarcar e diminuir a opacidade, apenas digitando minhas teclas numéricas apenas no topo, porque o Instagram é círculos. Você tem que fazer alguns ajustes para o Instagram. Perfeito. Eu posso decidir que isso não é relevante lá. Mas eu quero isso lá porque eu quero mostrar a você minha pequena absorção legal, na verdade. Ele desapareceu daqui? Eu não sei. De qualquer forma, atualizar objetos inteligentes é fácil. É tão fácil para qualquer coisa que você tenha vinculado a partir da biblioteca, mas um método ligeiramente diferente. Arrastamos estas bandeiras da biblioteca. Você provavelmente não fez porque você não criou uma biblioteca, eu fiz. Você poderia ter importado esses arquivos, mas digamos que você os tinha em sua biblioteca e você os traz, o que você pode fazer é abrir a biblioteca. No meu caso, é a minha biblioteca de logotipos da Adobe. A mesma coisa aqui no seu painel Camadas, mas em vez de usar Revincular Arquivo estava indo para revincular ao gráfico, Gráfico de
biblioteca, e dizer selecionar e revincular. Eu vou dizer 'você' e depois para baixo, este pequeno botão, 'Relink', e ele se foi e religá-los todos. Agora estamos fazendo isso para perfis de mídia social. Agora essa coisa vermelha não deveria estar lá é apenas temporária. Eu faço isso muito para dizer web design ou design de aplicativo, todos os princípios são os mesmos, mas os objetos inteligentes fica ainda mais agradável porque você acaba tendo dizer um logotipo, que está em todos os layouts diferentes, talvez apenas tamanhos diferentes para corresponder às diferentes viewports, além de você ter talvez uma navegação que seja consistente em todas elas, ou rodapé que atravessa todas elas. Você pode apenas obter todos os tamanhos diferentes? Você pode ver como isso seria útil. Isso é suficiente para este vídeo, vamos cortar o um em dicas e truques para usar texto e visualização agora que nossos ascendentes estão ficando um pouco mais complicados, mas vamos fazer isso no próximo vídeo.
55. Truques avançados de velocidade para atualizar pranchetas no Photoshop: Estamos entrando no “nitty-gritty”. Vamos entrar em alguns truques de velocidade mais avançados para pranchetas. Eu não tinha certeza do que chamar isso, mas eu estava ficando sem nomes. Vamos fazer coisas boas em pranchetas. Vamos começar com o texto. Vou pegar a ferramenta Type. Vou clicar em Segurar e arrastar uma caixa, ou se você clicar em Segurar e arrastar, ela lhe dará uma caixa de largura fixa. Nós vamos dizer, “NOVO ILLUTOR DA Adobe - CURSO AVANÇADO.” De qualquer forma, corte um pouco de texto. O atalho para o Photoshop se você realçar o Texto e ir Command, Shift, use a tecla de ponto ou a parada completa. Isso é Control Shift, e não sei como chamá-lo. Eu chamo isso de parada completa, mas já fui corrigido muito sobre isso. A chave de período ou isso é o maior que, menos do que então. Sim, eles estão no teclado. Tenho um tamanho, vou escolher uma fonte. Experimente. Vou usar o Roboto. Vou usar negrito. Passei um pouco de tempo escolhendo minha fonte. Um pouco maior, legal. O que eu quero fazer é tentar me poupar algum tempo fazendo algumas quebras de linha. Ainda não parece bom. Entendeu bem a ideia? Com o último texto selecionado, então o trouxe aqui. Estou de volta à minha ferramenta de movimento. O que você pode fazer é eu vou para minhas bibliotecas PS avançadas. Mas é selecionado aqui, você pode acertar este pouco plus e você pode dizer realmente eu quero o estilo de personagem aplicado ao Photoshop. Você os vê lá, e eu dou um nome a eles. Este vai ser o meu título. Posso chamá-lo ou algo útil. Isso significa que mais tarde,
em um documento completamente diferente ou em uma prancheta diferente aqui estamos trabalhando fora. Vamos fingir que não é do mesmo tamanho. Font, estou escolhendo outra coisa aleatória. Com essa camada selecionada aqui, eu posso apenas clicar sobre isso e ele vai e corresponde a ele. Coloque, consistência em todas as pranchetas. Outro aqui para como T's&C, eu tenho alguns textos ou textos aleatórios que eu digitei. Eu clico uma vez, colado, muito grande. Com o último selecionado, eu posso apenas clicar sobre este outro aqui, eu chamei de Roboto, mas na verdade é chamado de T's&C. Eu descobri qual é o tamanho mínimo de fonte que eu preciso para a minha publicidade e eu posso colocar no meu texto. Agora, uma pequena nota é que tanto no Illustrator quanto no InDesign, outros produtos da Adobe, eles se usam bastante, por designers gráficos são todos os três desses produtos. Mas o que ambos os outros produtos têm, que eu estou esperando Photoshop vai ter muito em breve. Só para o caso de já ter. Muitas vezes você pode dizer estes T's&C, aqui você digitou, você pode selecionar nele e há uma opção que diz adicionar texto. Não é o estilo de caractere, nem a cor do texto do texto físico real. A coisa boa sobre isso significa que qualquer documento em que estou, no Photoshop, Illustrator, InDesign, eu poderia simplesmente arrastá-lo aqui e ter o texto
que eu preciso e, em seguida, adicionar um estilo de parágrafo a ele. Mas saiba que há nesses outros dois produtos que são bastante úteis se você também estiver fazendo seus anúncios no InDesign ou no Illustrator. Você terá um bom trecho de textos lá pronto para ir com o tempo. Pode ser o seu endereço ou grupo de endereços de e-mail, um número de telefone, endereço de e-mail, endereço
físico, esse tipo de coisa. Não Photoshop ainda. Então, outro pequeno truque é novamente, pranchetas e bagunçado aqui, nós sabíamos o truque de antes, é Comando, e se você clicar nas setas, eles vão fechar, eles vão abrir. Outro pequeno truque é aqui em cima este é Kind, você pode clicar sobre este que diz Artboard. O que ele faz é, ele só mostra as pranchetas ativas. Se eu clicar aqui, ele me mostra este. Então, apenas agradável e arrumado. Mas eu vou até aqui, ver o que acontece com minhas camadas. Eu vou clicar neste no canto superior esquerdo, eu estou um clique em algo aqui, eu vou clicar em algo na saída aqui, e segure Command e clique neste logotipo. Porque ele pulou para aquele, você pode ver que ele só está me mostrando esse cara, muito melhor maneira de trabalhar. Mesmo se eu clicar no nome no topo, você vê apenas salta para o logotipo do Instagram, e lá eu posso trabalhar neste. Este aqui, apenas agradável e arrumado. Você pode desativá-lo clicando em pranchetas. Agora volte para Kind. Você será bem-vindo. Isso é tudo para truques avançados de velocidade. Vejamos a última, onde analisamos a exportação de pranchetas.
56. Exportar pranchetas como PDF e separar JPGs no Photoshop: Certo, então é hora de exportar. É aí que a nomeação de pranchetas com super útil. Se você ainda não fez isso, basta clicar duas vezes sobre ele e [inaudível] um, dois, três, dê um nome aqui que seja útil, especialmente quando você deseja atualizar seus arquivos se você fizer alterações. Você pode clicar aqui uma dica pouco agradável é que você pode bater guia. Tab, tab, tab, tab. Significa que você pode continuar digitando ou copiando e colando os nomes. Então vamos emprestar nomes. Na verdade, este aqui está errado. Cobrir. Isto é para ser o Instagram. Eles não têm uma imagem de capa, mas eles têm isso é para seus posts. Deve estar em uma colheita para um quadrado. Ok, não acho que isso passou muito bem, mas vamos exportar todos esses arquivos. O que vamos fazer é ir para o arquivo, vamos explorar, e vamos começar com a exportação de arquivos. PDF É muito fácil. Vamos fazer isso em segundo, mas na maioria das vezes eu quero explorar um grande piloto JPEGs. Então eu posso agora ir e enviá-los para as diferentes plataformas de mídia social. Coloque o meu na minha área de trabalho. Aqui está. Vá para o nome. Este aqui é um apenas um prefixo vai editar até o fim. Eu não quero que nada edite para ser nomeado o bem aqui, este aqui exportar itens selecionados, me
armazena em cache todas as vezes. Ok, com isso ligado, ele só vai exportar o Instagram que eu tenho selecionado. Posso desligar o tipo de arquivo. Posso decidir que vou usar JPEG e as opções de exportação não estão ativadas por padrão. Você liga e decide como, que tipo de qualidade você quer lidar. Espero que na minha área de trabalho. Obrigado, Photoshop. Você está aí? Está bem. Tudo pronto para ir. Temos JPEG todos bem nomeados. Além disso, o que é realmente legal sobre isso é se você fizer uma atualização. Então vamos para este e eu bati inverso. Vou fazer o mesmo por este. Eu faço o mesmo para este por uma razão negativa caso contrário, além de ser fácil de ver, eu posso ir para o arquivo e apenas executar essa coisa novamente, porque eu nomeei todos eles em placas para arquivos, colocá-lo no mesmo lugar no meu desktop, que isso se lembraria do que eu fiz. Clique em “Executar”. Sob minha área de trabalho agora, você pode ver lá ele não gostava de fazer duplicatas dele, então você tem que ter cuidado com isso, eu acho, mas é bom deixar as coisas atualizadas, prontas para ir. Alguém fez uma mudança. Eu posso apenas executá-lo. Agora, se você precisa apenas executar um deles, digamos que só este mudou, está invertido e agora é preto e branco. Só que este precisa ser atualizado. Este. - Sim. Então, basta clicar com o botão direito do mouse e ir para exportar como. Aqui você pode dizer que eu quero que você seja JPEG, eu quero que você seja 80 por cento. Usando o nome certo, eu posso clicar, “Exportar” colocá-lo na minha área de trabalho. Ele vai substituí-lo [inaudível] por favor. É uma maneira fácil de fazer apenas uma. A outra coisa que você pode fazer é exportar um PDF. Exportar, vamos para pranchetas para PDF onde ele vai,
ele vai para a minha área de trabalho. Isso está usando o nome do arquivo agora não minhas pranchetas. Vou chamar este como meu ilustrador. Estou ficando preguiçoso, avançado. 19 de julho. Este vai ser o meu A porque eu vou mostrar a vocês uma visão B com algumas configurações diferentes. Legal exportar pranchetas selecionadas. Não, eu quero todos eles, não apenas o que eu selecionei aqui. Essas duas opções, documento de várias páginas só significa que eu vou ter um PDF com cinco páginas e você clica neste e você vai ter cinco PDFs tão separados. Até você, vai fazer isso, incluir nome ascendente, que será nosso teste A e B só para mostrar a diferença, vai executá-lo sem ele, e você terá o que você imagina, certo? Acabou de receber um PDF para o shopping. Desktop aqui. Onde está ele, ali está ele, abre-os e eu tenho um PDF porque é pequeno. Não está olhando tão grande para a visão super grande e tem toda a minha peça por páginas. Agora, há uma maneira no Adobe Acrobat de garantir que, quando o documento for aberto, ele seja aberto em um tamanho de 100% como aqui embaixo. Não o tamanho completo onde ele vai caber visível, flicks nós faria. Não consigo me lembrar do topo, minha palavra principal é, sinto que tenho que encontrá-lo no Acrobat, mas não, isso pode ser feito. Vejamos a outra opção. Alguém Photoshop. Nós estamos indo para exportar, nós estamos indo para subir quadros para PDF. Boa navegação, pode colá-lo na minha área de trabalho e dar-lhe o mesmo nome de antes. Este vai ser A. Vamos começar com B. Eu fiz. É meio estranho. O outro era B? Oh, cara, é tarde. São 10:30 da noite e eu desligo isso. Volta sempre a ligar. Várias páginas. Eu só vou sintonizar incluem nome ascendente em, hit, run, kick back, relax, e nós temos um PDF ligeiramente diferente, que você pode achar útil porque ele descreve. Porque o outro PDF só tem um grande tipo de pilha de formas que todos parecem muito semelhantes, especialmente essas imagens de perfil. Eu fiz, eu comecei com B? Tudo bem. Então z tem
isso, ele é estendido para cima para fora e nós temos apenas texto em torno das bordas para baixo, apenas para ajudar se ele está provando ou verificando, apenas saber do que estamos falando. Muito bem, meus amigos, chegamos ao fim das nossas tábuas. É tudo o que sei sobre eles. Vamos passar para alguns tutoriais mais emocionantes do Photoshop. Vejo-te amanhã de manhã quando estiver fresco e começarmos a retocar. Tchau agora.
57. Truques avançados de pincel de recuperação para retoque no Photoshop: Oi lá. Este vídeo é tudo sobre passar por alguns pincel de cura, dicas e truques
mais avançados. Você provavelmente já sabe como usá-lo. Eu só vou te mostrar o que eu faço para fazer isso ir rápido e para te dar alguns melhores resultados. Vamos saltar para dentro. Tudo bem. Para começar, vamos abrir “Healing 1". Obrigado, Bruce Dixon. Antes de
começarmos, vamos usar o pincel de cura, é a ferramenta mais avançada. Mas eu só quero lembrá-los que o pincel de cicatrização, que é este aqui, o automático, nós não o usamos por um tempo, ele ficou muito melhor, especialmente com a introdução de conteúdo consciente. Quando estou fazendo retoques profissionais, é como 70 por cento do trabalho, é muito fácil. Um par de truques para obter um bom uso dele, é certificar-se de que você está trabalhando em uma camada separada. Vamos chamar este retoque. Certifique-se de que a amostra de todas as camadas está ligada, caso contrário, ele não vai funcionar porque ele vai chegar através desta camada inferior, mas tudo vai acabar nesta camada que nós podemos desligar depois. Então escolha um tamanho de pincel, escolha uma dureza e clique em “Uma vez”. Isso é simplesmente incrível. Não quero chegar muito perto das bordas. maior parte do trabalho é feito com esta ferramenta. Dicas para usar esta ferramenta. Digamos que temos um grosso, queremos livrar-nos deste cabelo comprido, podemos pintá-lo, mas acho que quero mostrar-te o meu truque. Você clica em “Uma vez”, mantenha pressionado “Shift” e clique novamente e ele se junta às duas linhas. Se você tem uma longa cena que você precisa corrigir, você pode clicar em “Uma vez”, mantenha pressionado “Shift” e clique novamente e ele apenas se junta os dois para cima. Como usamos sua própria camada, você pode começar a ver que tudo está em sua própria camada de retoque. O que vai acabar acontecendo é, você vai acabar indo longe demais e você precisa discar de volta. Com esta camada selecionada e sua ferramenta de movimentação selecionada. Eu estou em uma opacidade de 100 por cento, eu vou apenas digitar cinco no meu teclado e então 50, então é apenas muito mais fácil. Eu não estou nem olhando para isso ou arrastando, eu estou apenas olhando para a minha imagem super de perto, estou apenas tocando. Se batermos rápido, como se eu digitasse 33, eu recebo 33. Indo para obter fatos de identificação, eles ainda estão lá, eles são apenas fortemente reduzidos, mesmo um pouco menos, pesadamente, mas mais realismo. Mas digamos que o pincel de cicatrização não está funcionando para você em sua instância. Vou desligar essa camada e criar uma nova. Este vai ser o meu retoque dois. Vamos usar o pincel de cura por si só agora. Vou te mostrar como usar isso porque não cobrimos o essencial. Então, o que vamos fazer é clicar e manter pressionado o pincel de cura, pegar o pincel de cura. Funciona da mesma maneira, só que tenho muito mais controle. Pincel de cura de pontos apenas vai e encontra pixels e ele vai adivinhar. O que você pode fazer é manter pressionada a tecla 'Opção' em um Mac ou a tecla 'Alt' em um PC e clicar em um alvo. Apenas diga, eu quero usar este pedaço de pele, por favor. Não escolha apenas qualquer coisa, escolha esta parte de todo o caminho até aqui. Isso é 'Opção' em um Mac, 'Alt' em um PC e você clica uma vez e então eles vão. Isso não vai funcionar, porque eu não fiz isso. Esta camada atual, eu quero provar todas as camadas, por favor. Defina o destino novamente e agora clique e arraste. Veja quando estou arrastando, é um pouco difícil de ver, vou fazer o editor ampliar. Você pode ver o alvo clicando e arrastando e se movendo. Você pode ver de onde ele está puxando. Só como um bom trabalho, só te dá um pouco mais de controle. Você clica em arrastar e soltar. Fica mais chique se você abrir a janela e ir para a que diz “Fonte do clone”. Ele funciona tanto para o selo da ferramenta de clonagem, que faremos no próximo vídeo quanto para este pincel de cura. Você pode ter mais de uma fonte. No momento, é apenas usando isso, ele está puxando deste documento em particular. Se eu clicar lá, é onde está. O que você pode fazer é, você pode configurar um grupo, pelo
menos cinco pontos diferentes que você deseja extrair. O que eu vou fazer é, eu vou dizer, eu quero um pouco de textura leve aqui. O primeiro será a minha luz como opção. Esta próxima opção aqui, poderia ser de um documento completamente diferente. Basta abrir e roubar isso, ele vai carregar na fonte do clone. Mas eu quero uma textura média, aquela ali. Se eu usasse isso apenas quando há uma ISO realmente alta e há um grão real na imagem e você precisa combinar com o grão. Neste caso, estamos combinando a textura da pele, mas você entendeu a ideia. Então eu defini um ponto médio aqui, mais escuro, mais
escuro, mais escuro e aqui vai ser muito bem, algo que é a parte mais escura da pele, provavelmente aqui em frente. Agora, quando eu estiver trabalhando, eu posso vir aqui e dizer que na verdade esta peça aqui provavelmente vai funcionar com a primeira que eu tirei. Outra coisa, este aqui é um pouco mais leve, então eu vou para esta opção mais leve. Aqui está o meu meio, um pouco mais escuro o meio. Eu realmente não estou tomando a escuridão disso porque o pincel de cura vai combinar com as cores, mas a textura que aparece nessas áreas escuras, você acaba sendo um tipo diferente de grão
neste material que estão nas áreas mais claras. Novamente, você pode decidir sobre a textura da pele. Você pode ter, número um são coisas deste adesivo claro na testa. Você pode decidir o número um aqui é a textura da pele da testa. Número dois, é o mais pobre aqui, do nariz, há um pouco de pêlos minúsculos que estão lá. Vamos levar isso um pouco mais adiante. Se eu for honesto, mesmo quando eu estava fazendo retoques em tempo integral, eu não usei esses pontos com muita frequência,
há muito disso. Vou mostrar-lhe um pouco mais do fluxo de trabalho que fiz. Mas eu quero mostrar esse recurso porque algumas pessoas realmente gostam dele. Digamos que estamos trabalhando em bom e perto, barra de
espaço é obviamente muito útil. Outro realmente útil é ter muito apertado e eu preciso obter um novo ponto de amostra do outro lado do rosto. Então, “Barra de espaço”, clique e arraste e eu posso encontrá-lo. outro lado do rosto provavelmente não é o queixo duro. Quando eu descer até o queixo e lá está ele. Não é particularmente difícil aqui, mas vamos dizer que eu quero ir para um lugar que eu não tenho certeza ainda. Digamos que eu queira ir até a testa, em vez de clicar, arrastar e arrastar, segure a tecla “H”. Clique e mantenha pressionada a tecla “H” no seu teclado, então clique e mantenha pressionada a tecla 'Mouse' e você pode ir até aqui, clique em “Ir”. Clique e segure a tecla “H”, mova para baixo, comece a trabalhar no braço. Isso significa que eu sempre tenho meu pincel de cura selecionado e o H apenas mover para a ferramenta de mão temporariamente. É como se nunca tivessem uma janela que costumava estar aqui em cima. Outro truque útil é, Eu gosto de mover o objeto ao redor, especialmente quando eu estou trabalhando em, dizem as bordas aqui. Você pode usar esta ferramenta aqui, a ferramenta de rotação, bem, há a ferramenta de mão lá. O que eu faço, é no pincel de cura, basta segurar a tecla “A” e arrastá-la por aí. Eu decido que vou trabalhar aqui. Eu só vou me mover ao longo desta borda. Eu os acho, especialmente com o meu [inaudível], minha amplitude de movimento é muito melhor quando eu tenho essa coisa girada para um ângulo que se adapte aos meus movimentos do pulso. “ Escapar” para se livrar dele. Se você tocar na tecla “A”, ela se move para ela. Então você tem que voltar para o pincel de cura. Se você clicar e segurar a tecla “A”, é apenas temporariamente fazê-lo, mesmo com a tecla “H”. O mesmo tipo de princípio. A última coisa que vou te mostrar é isso alinhado dentro e fora. Há momentos em que é ótimo e momentos em que não é tão bom. Então vamos dizer que eu estou fugindo para voltar para fora daqui, resolução em 100%. Vou te mostrar o que ele faz. Vamos ampliar. Com ele alinhado, o que vai acontecer é, se eu definir meu ponto aqui e eu começar, eu gosto disso, mas eu começar a arrastar através, você pode ver o pequeno alvo e se eu soltar porque eu cheguei perto da borda, então eu venho volta novamente e começar a desenhar novamente, você
pode ver, ele vai de volta para onde eu comecei. Está perfeitamente alinhado de onde quer que isto esteja. Isso realmente não importa, você pode ver, ele continua seguindo. Tem exatamente 200 pixels de diâmetro e 200 pixels abaixo. Não importa onde você está, acabamos aqui, você pode ver, está pegando pedaços do queixo lá. [ inaudível]. Bem, digamos que só temos um pedaço de pele bonita, o resto precisa de muito trabalho. Você pode configurá-lo lá e não importa onde você está, eu posso clicar aqui agora e você pode ver, ele ainda está puxando daquela imagem original. Não está mais alinhado. Se você tem um e você está construindo, não tem que ser para salvar a pele, alguma alvenaria ou grama, você só tem um bom patch e você quer continuar voltando para isso. Qualquer problema com isso é que você vai ter repetição potencialmente. Tudo bem. Vai ser isso para o pincel de cura. Vamos seguir em frente ao carimbo da ferramenta de clonagem. Não pense em pular essa. O pincel de cura, sim, levou muito do trabalho do selo
da ferramenta de clone, mas eles são alguns truques legais que eu vou mostrar a você, que tornam útil para entrar em seu kit de ferramentas. Te vejo lá.
58. Não se esqueça de clonar com a ferramenta carimbo no Photoshop: Oi lá. Este vídeo é tudo sobre o selo da ferramenta de clone. O pincel de cura é incrível, mas há apenas momentos, especialmente ao longo de onde há bordas como este anel de nariz aqui, nós só precisamos de um pouco de ajuda de selo de ferramenta de clone. Se você já sabe como usá-lo, há um par de pequenas dicas aqui que você pode não saber sobre, então aguarde, e vamos clonar a estampagem de ferramentas. Vamos abrir a ferramenta de clonagem 1. Trabalhando nesta imagem, há partes dela que vão ser fáceis de fazer com o pincel de cura, mas vai haver algumas peças difíceis vão precisar de algum selo de ferramenta de clonagem. Estes pontos aqui, pincel de cicatrização vai ser o único que eu vou usar, apenas indo para trabalhar neles. Agora, quando você estiver trabalhando lembre-se desfazer, certifique-se de que você tem sua própria camada. Você toca, você pode desativá-lo para ajustado mais tarde. Aqui está perfeito, e então chegamos a este nariz anéis, digamos que queremos removê-lo. O problema é que se eu tentar
pintá-lo, vai ficar todo leitoso e yuck através dele. Vou desfazer. Vamos começar com o nariz interno aqui. O selo da ferramenta de clonagem é como o pincel de cura que aprendemos no último vídeo, podemos definir um alvo. Vamos dar uma olhada rápida. Se eu definir um alvo do olho aqui e pintar, que isso quando eu pinto, finalmente ir agora o Pincel de cura tentaria e misturado, enquanto o carimbo da ferramenta de clone não faz nada disso. Basicamente apenas uma cópia e colar, mas em um pincel. Isso é útil é dizer ao longo dessas bordas aqui é muito claro. Eu não quero que ele seja leitoso e culpá-lo como o Pincel Curativo faz. Eu quero definir um alvo, digamos, talvez esta narina e eu quero pintá-la aqui, mas você pode ver que o ângulo não está certo. Este é o lugar onde eu acho que o pequeno truque é para o selo da ferramenta clone em maiúsculas girando em torno dele. Nesta origem do clone, você pode obter uma janela. A fonte do clone é um ângulo aqui e você pode arrastar isso ao redor, e você pode ver que eu posso arrastar e levantar e direito para tentar obtê-lo para que ele alinhe. Há um atalho para movê-lo. Se você manter pressionada a tecla de opção em um Mac e a tecla Shift ou Alt em um PC e mudar
e, em seguida, tocar na tecla de listagem ou na tecla maior que para girá-la. Você pode ver no meu selo de ferramenta de clone que está indo como pequenos incrementos. Se você precisa fazer um grande furto, provavelmente
é melhor arrastá-lo por aqui. Você pode ver que eu tenho aqui. Eu só estou batendo em volta, segurando até só para chegar onde eu quero. Agora, mesmo que eu esteja puxando daqui, sorte, ele vai manter essa imagem. Não nos levou um pouco disso. Dizendo com este h aqui, eu vou, você pode ver que ele se lembra das rotações, que não vai funcionar. Você realmente não precisava ser rodado por aqui. Agarra esta parte. Eu vou girá-lo. Sempre tem o
ladoda pista lado , bem
como as outras partes vão ser apenas o pincel de cura de pontos. Você vai fazer um ótimo trabalho com isso aqui. Principalmente pintou tudo. Bem, um pouco de teatro que deixei para trás. É uma mistura de ambos. Uso o carimbo da ferramenta de clonagem o tempo todo? Não, é uma vez de vez em quando, vamos fazer a mesma coisa aqui. Vou te mostrar um último truque. Eu vou pegar você e eu quero pintar sobre este pedaço precisa girar apenas um pouco. Posso usar meu atalho. Digamos que é como arrastar essa coisa dessa maneira. Você clica em segurar e arrastar e se você segurá-lo por tempo suficiente e arrastá-lo, você pode começar a ver o que o original está sendo girado com. Você não pode entender a menos que esteja usando o tempo todo. Basta arrastá-lo de um lado, verificar, arrastá-lo para o outro lado. Mas o que você pode fazer é que eu vou reiniciá-lo. Se você precisa ir e grandes incrementos, digamos que você definir um alvo para lá e ele precisa ir para cá. O que você pode fazer é clicar uma vez lá dentro, colocá-lo onde você precisa que ele esteja e, em seguida, mantenha o shift e apenas use sua seta para cima e você pode vê-lo se movendo por lá. Estou aguentando e ele está se movendo em pedaços maiores. Este é mais rápido, não o ângulo que escolhi. Não é a parte certa da área, mas acho que só queria te mostrar. Vou redefinir isso, definir meu alvo, e ele precisa girar um pouco. Lembre-se Opção Shift e eu estou usando vírgula ou o maior que. Se você estiver em um membro do PC, é Alt e shift. Vai pintar por aqui e pintar um pouco também. Outro pouco, batata em torno de um pouco mais, vai como o ângulo certo. Agora, eu posso pintar aqui para uma panela. Aqui vou usar um pincel pequeno. Aqui em baixo, mas precisa girar. Gire em torno apenas para ir em torno desse canto, e zoom para fora e provavelmente precisa de um pouco de trabalho na mão, bem como onde ele se junta os dois. Porque está na sua própria camada, ligue-a, desligue-a, ligue-a, desligue-a. Um pouco de trabalho lá que eu quero voltar e fazer. Espero que tenha aprendido algo novo sobre o selo da ferramenta de clonagem. Vamos entrar no próximo vídeo.
59. Como usar a ferramenta patch para retoque no Photoshop: Oi, aí. Bem-vindo ao Vídeo da ferramenta Patch. O que é que ele faz? É muito bom em duplicar pessoas, mas esse não é o seu uso principal é realmente bom para
se livrar de objetos grandes de uma só vez. Ele é usado bastante em retocar para mover coisas como sacos sob seus olhos, mas é apenas um monte de área de superfície para mudar. Meu uso favorito, Dan brilhante, não tão brilhante Dan. Brilhante, não brilhante. É ótimo quando você está estressado porque você não gosta de ser fotografado e há pessoas assistindo que você não conhece. Estressado, acalmado. Vou parar de falar de mim
na terceira pessoa e vamos entrar na Ferramenta de Patch. seus arquivos de exercícios, abra “Ferramenta de Patch 1, 2 e 3". Vamos começar com o número 1, então a versão skinny é Patch Tool apenas remove as coisas. É como o Pincel de Recuperação de Pontos com o selo da ferramenta de clonagem, mas tem seu próprio propósito. É assim que eu estou usando o Pincel de cura de pontos e em outro tutorial, no curso Essentials nós apenas pintamos as pessoas, que funcionavam na maior parte do tempo. Mas digamos que este aqui porque esta pessoa cruza o fundo aqui. Estamos apenas deixando o Photoshop adivinhar, e ele fez um bom trabalho. Há uma falta aqui para desfazer e fazer de novo. É uma daquelas ferramentas onde você só tem que cruzar os dedos. Às vezes é ótimo e às vezes, muito ruim. Eu vou voltar de novo. A Ferramenta de Patch estava escondida embaixo do resto desses Pincéis de Cura de Manchas. É mais sobre pensar que a Ferramenta de Patch é intencionalmente. Vou desenhar uma caixa ao redor do lado de fora dele. Eu digo caixa, linha rabiscada, clique e arraste ao redor do lado de fora. A coisa legal sobre isso é ter certeza que você define uma fonte e, em seguida, basta clicar, segurar e arrastar e você pode ver o que eu estou fazendo aqui, eu estou intencionalmente dizendo, “Eu quero que você use esta área aqui, [inaudível]. Ele faz um trabalho muito parecido, mas eu lhe dou alguns limites. Vou para “Desselecionar”. Há um pouco de trabalho lá que eu poderia trabalhar com o pincel de cura de pontos. Mas para ser honesto, se eu mostrasse essa imagem antes, mas você não notaria. Às vezes fico um pouco pendurado em fazer detalhes que tipo, “Isso é um detalhe?” Não, isso é apenas parte das imagens originais. Vou ignorá-lo. Agora, a única coisa e o que fizemos nos tutoriais anteriores é que todos ganhamos. Nova camada, certifique-se de que está selecionando todo o caminho para cima, não funciona. Você realmente tem que estar na sua camada original, você deve fazer um backup primeiro, o que eu não fiz. A maneira rápida de fazer isso é clicar e arrastar isso para baixo ou simplesmente segurar “Command J” ou “Control J” em um PC, e é apenas qualquer lay que você tenha selecionado ou grupos de camadas que o tornam duplicado. Eu já [inaudível] a parte inferior esquerda, então vamos continuar. A outra coisa a saber sobre o Patch Tool é essa coisa aqui, você precisa arrastá-lo por aí e eu sou muito bom com isso. Este é um retângulo que eu poderia apenas usar minha ferramenta de retângulo,
em seguida, mudar para a ferramenta de patch, e puxar de [inaudível] ir em frente, que você
possa usar o último tutorial, a ferramenta de seleção rápida, o que você quiser. Você não precisa usar essa ferramenta de seleção interna. Outra coisa a fazer com a Ferramenta de Patch, há algumas coisas que vamos aprender sobre ela. A outra coisa a saber sobre isso, porém, é se eu for para “File Revert”, que é apenas um útil, nada a ver com a Ferramenta de Patch. Isso leva você de volta a quando o documento foi
salvo pela última vez , e então vamos desfazer um milhão de vezes. Digamos que tenha outro uso. Eu tenho meu Patch Tool aqui, eu vou fazer a mesma coisa sinuosa. Não é ruim. Na maioria das vezes você deseja usá-lo para o código-fonte. Este aqui você pode usar Destino. Estamos fazendo uma coisa diferente agora. Estamos dizendo que, em vez de você remover, eu vou arrastá-lo aqui e assistir isso. Tem um cara novo. Eu uso isso? Nunca. Está lá e estamos ficando avançados e você pode ter um bom uso para isso. Vamos para a Ferramenta de Patch 2,
então, em termos de retoque, muitas vezes é o Pincel de Recuperação de Pontos um pouco Carimbo da Ferramenta de Clone, enquanto com a Ferramenta de Patch 2, há dois lugares onde ele é usado e é qualquer coisa que é uma grande parte que precisa ser atualizada. Na verdade, vamos ao “Command J”, desta vez e vamos chamar um retoque e pegar minha Ferramenta de Laço, e eu vou pegar tudo aqui embaixo. Em vez de Destino, certifique-se de que ele está no código-fonte, clique em “Manter” e arraste-o para um pouco de pele agradável. Deixe ir. Vou para “Desselecionar”. Você pode ver lá. É bom para fazer pedaços maiores. Você já assistiu a qualquer canal do YouTube na Patch Tool, basicamente, essa é a única coisa para que ele se acostumar. Para adicionar um pouco de grandiosidade extra a ele. Vou desfazer antes de fazer isso. Aqui atrás eu fiz a minha seleção. O que eu vou fazer é que há um pouco conhecido recurso no Photoshop. Não é apenas o Patch Tool, veja como eu faço isso e ele pode ficar muito falso rapidamente porque nós temos rugas sob nossos olhos. O que podemos fazer é antes de tudo, é que o que quero mostrar está em Editar, e este aqui diz, “Fade Patch Selection”. Agora isto vai dizer: “Desvanece, seja qual for a última coisa que fizeste.” É muito útil. É como um Desfazer, mas tem um controle deslizante de opacidade. Eu não fiz nada e eu posso encontrar apenas um meio feliz em vez
de ser perfeito apenas um pouco aqui. A última coisa sobre isso é se eu clicar em “Ok”, “De- select”, eu posso um pouco desse fundo através, eu poderia fazê-lo baixando a opacidade
da camada se você é como, “Por que você não faz isso?” Mas isso me permite fazer isso por ação de seleções ou algumas delas você não quer que seja completamente desbotada. Alguns deles você quer se desvanecer mais do que outros. Eu vou pegar isso. Estamos ignorando a corrente para ela no fundo. Este aqui eu fui para desaparecer, mas eu quero que não seja tanto quanto o primeiro. O outro truque aqui é “Comando H”. Dependendo se você estiver usando um Mac ou PC, se você estiver usando um PC, ele funcionará, removerá as extremidades da marcha apenas temporariamente. No meu Mac aqui, é um atalho que é usado tanto para o Photoshop quanto para o sistema operacional Mac, e Photoshop, isso é, “Ei, você
quer dizer como esconder o Photoshop ou ocultar os extras?” Queremos esconder extras. A seleção ainda está lá para “Command H” ativá-lo e desativá-lo novamente. Isso só significa que quando eu faço o desvanecimento porque é um pouco difícil ver as bordas. Se eu tiver um “Desvanecer agora” e eu arrastá-lo de volta sem aquela seleção lá, só se torna um pouco útil. Encontre um meio feliz e você pode ver, você pode individualmente desvanecer peças. Você pode achar isso útil. É ótimo para patches grandes, portanto, a ferramenta de patch. Por que eu acho que é super útil é aqui sou eu, me brilhante. A Ferramenta de Patch foi muito boa no Command J. Agarrou a Ferramenta de Patch. Vou desenhar isto por aqui. Pedaços brilhantes de pele, é muito bom para isso. Agarre tudo isso. Mantenha-o mais específico. Agarra esta parte. Adeus, Dan Brilhante. mesmo com a testa aqui. Eu não fiz nenhum pedaço brilhante de testa fora. Ficando e desligando. Se você tentar e fazê-lo individualmente com o Pincel de cura de pontos, você pode ter sorte, mas esta intencionalidade lembre-se, a ferramenta de patch, vai dizer para ir aqui exatamente. Muito bem, Patch Tool. Isso é que você fez. Vamos entrar no próximo vídeo.
60. Exercício do curso — retoque: Oi. É hora do projeto de classe. Na sua pasta 10 Retoque é outra pasta chamada Projeto Classe. Dentro está o Retouch 1. Obrigado, Nino Ubezio. Em seus projetos de classe, essas são as três ferramentas que eu quero que você use para praticar. O pincel de cura, mas não o pincel de cura local, use o menu deles. Seja intencional. Acostume-se a isso, definindo alvos, se você não fez isso antes, certificando-se de que está em nossa própria camada, que o retoque passe para a camada inferior. Você vai ter que usar o carimbo da ferramenta de clonagem, especialmente nesta parte aqui. Especialmente com as cruzes de camisa aqui, você vai ter que girar um pouco também para combiná-lo,
provavelmente, ao longo das costas aqui também. Essa vai ser provavelmente a parte mais difícil. Tirando isso, a parte mais difícil. Vamos usar a ferramenta de remendo. Isso vai ser bom para esses pedaços maiores da corrente na camisa aqui, assim como as seleções e movê-lo para o outro lado. O resultado final é que vou remover algumas das manchas do rosto dele, a corrente se foi, e pronto. Quero mantê-los bastante naturais. Esse é o seu trabalho. Eu não me importo se você for um pouco
exagerar praticando ou se você manter super sutil, mas eu adoraria ver o que você faz. O último passo aqui é compartilhar comigo ou através das tarefas aqui com comentários ou me ouvir nas mídias sociais. Instagram é trazer seu próprio laptop. Marque-me nele e eu verei. Eu sempre comento para ver o que as pessoas fazem. Isso somos nós. Vamos entrar no próximo vídeo.
61. Como retocar no Photoshop usando reconhecimento facial do Liquify: Oi lá. Este vídeo é sobre o uso de liquify para retocar especificamente usando o reconhecimento facial de photoshops. Quando você pensou que este homem não poderia ficar mais bonito, cinco cabeças, testa, queixo feminino, apenas arrastá-lo para fora. Todo mundo parece bonito com olhos maiores. Olhe para mim. Nós estamos indo para ir de smack para acessível, lábios de homem
sorridente bem, definitivamente precisamos de lábios maiores. É tão fácil, vamos ver como fazê-lo no Photoshop. Para começar, vamos para 10 retoques e abrir liquefy face ciente um e dois. Vamos começar com este demônio bonito e vamos usar filtro, e vamos usar liquify, mas vamos ser profissionais. Vamos clicar com o botão direito do mouse em segundo plano e dizer que você é um objeto inteligente punhos para que possamos ligá-lo e desligá-lo. Bom comparar nossos ajustes e depois desligamos se formos longe demais. Nós vamos tão longe nesta. Porque sou eu, posso distorcer meu rosto o quanto eu quiser. Você também é. Eu lhe dou permissão total. Agora, se você abrir, às vezes
é saltar para cara a cara de qualquer maneira. Se não passar de dobra para a frente até este pequenino aqui, ferramenta facial. De alguma forma magicamente, toda vez que abro uma imagem com um rosto,
parece saber onde estão os olhos, o nariz, a boca. Como o reconhecimento facial é incrível onde ele é apenas incorporado no Photoshop. Tão fixe. Você tem duas maneiras de distorcer rostos ou ajustar. Você pode fazer isso genericamente aqui. Há este pequeno menu suspenso aqui. Tem seu rosto afastado liquify ou você pode fazê-lo realmente na obra de arte real. Vamos fazer as coisas genéricas e você pode. Vamos fazer os olhos primeiro. Vamos nos certificar de que não precisamos,
mas vamos conectá-los para que quando ajustamos um lado, ambos aparecerão. Pode ser muito útil quando há uma perspectiva estranha. Você sabe que os olhos da pessoa são do mesmo tamanho, mas apenas o ângulo do rosto. A curva, em seguida, as pistas apenas faz parecer um pouco estranho. Você poderia vir aqui e quebrar o elo e mover um maior que o outro e fazer o outro menor. Está bem, então. Agora, você pode apenas trabalhar o seu caminho através destes. Vou ligar tudo isso porque é só experimentar. Você pode esticar a altura dos olhos e a largura separadamente do tamanho geral. Você pode incliná-los. Digamos que eu queira inclinar esse cara um pouco para baixo. Só preciso girá-lo. Você pode ver? Nós vamos nós vamos. Amplie um pouco mais. Distância entre os olhos, se desejar, os olhos estavam um pouco mais distantes ou um pouco mais próximos. Há um controle deslizante para isso. Nariz, boca, são todos ajustáveis. Mas o que você pode fazer é com essas ferramentas selecionadas você pode realmente fazê-lo na arte. Você pode decidir que todos esses pequenos pontos têm um tipo diferente de ajuste. Você está procurando os pontinhos brancos. Altura do nariz, largura do nariz. Um dos meus favoritos, os lábios eu posso apenas aqui você vai então, olha para isso. Não agarrei meu lábio inferior. Parece que levei um soco. Realmente depende de quanto do lábio você pode ver. Se você não pode fazer isso aqui, você pode entrar e realmente ir para a ferramenta azul. Eu vou escolher um tamanho de pincel e eu vou apenas expressar meus lábios manualmente. Lá vamos nós. Agora, se voltarmos ao reconhecimento facial, provavelmente vai pegar esse lábio muito melhor. Este é um cone. Você pode dar um sorriso a si mesmo. É estranho fazer isso a si mesmo. Eu estou sorrindo, ele está sorrindo. Esta foto está indo para como legal treinador sério Photoshop. Agora divertido, instrutor Photoshop acessível. É incrível como ele se tranca em todos os músculos diferentes. Para mim, o que eu realmente quero é um belo queixo grande. Aqui está. Parecendo viril. Agora posso continuar e me ajustando. Entendeu a ideia, certo? Reconhecimento facial, incrível. Você pode ajustá-los globalmente aqui ou apenas no estranho. Basta dar uma volta e decidir o que você quer fazer. Outro a mencionar é, e provavelmente para mim o mais, é a minha testa. Disseram-me que tenho cinco cabeças, principalmente pelo meu irmãozinho. Posso reduzir isso um pouco. Preciso de um Photoshop e talvez uma franja, minha franja na metade da parte de trás da minha cabeça agora. De qualquer forma, se você for longe demais, você pode clicar em “Redefinir”. Vamos clicar em “Ok”. Como fizemos isso em seu próprio filtro inteligente, podemos ligar e desligar. A única outra coisa para realmente compartilhar com você é que podemos fazer com grupos de fotos, o que é bastante incrível. Quando digo grupos de fotos, quero dizer grupos de pessoas em fotos. De alguma forma, o reconhecimento facial funciona para muitas pessoas. Mesma ferramenta, eu deveria ter feito um objeto inteligente primeiro, mas o que você pode fazer aqui em cima, você pode selecionar as diferentes faces. Você pode ver o rosto. Só da esquerda para a direita. 1-2-3-4. Posso escolher a quinta pessoa e dizer que meu amigo precisa de olhos maiores. Você, meu amigo, precisa sorrir mais. Lá vamos nós, todo mundo. Ele está sorrindo. Ele está sorrindo. Ela não está sorrindo o suficiente. Vamos lá. Vamos lá. A única coisa que vou fazer antes de irmos é dizer que quando estou retocando, muitas vezes o truque principal é fazer os olhos um pouco maiores. Você não quer ir longe demais. Fomos muito longe neste tutorial. Nós só os puxamos porque é engraçado. Mas quando você está fazendo retoques de série, é tudo sobre os dias sutis. As pessoas parecem mais felizes, saudáveis, mais bonitas quando seus olhos são maiores. Vou trancar esses dois juntos e vamos fazer os olhos desse cara. Você acaba fazendo como esses pequenos ajustes sutis. O que você está procurando é isso. Lembras-te do Gato e das Botas? As pessoas ficam mais bonitas quando seus olhos são maiores, especialmente quando suas pupilas são maiores. Lembro-me que costumávamos fazer era pegar a ferramenta inchada. Alguns cliques vão ficar bem. Mas você entendeu a ideia. Fiz um monte de trabalho para uma empresa de roupas de natação que fez um monte de roupas de banho Neems. O que o diretor de arte queria era que ele queria caras, mas ele os queria bem femininos. Acabamos mexendo com as maçãs do rosto e mexendo com o rosto para dar-lhes um pouco mais características femininas em vez do que
o que fizemos comigo quando nos damos uma boa e grande linha de desenho grosso. Se você já usou liquify para fazer isso antes, foi realmente difícil fazê-lo naturalmente. Agora temos apenas ir sliders. Não acredito como é bom. O truque para nós como usuários de photoshop é o quão sutis precisamos ser como, especialmente se você está fazendo trabalho para, digamos, modelos, retratos. Você não quer que seu produto final não se pareça com a pessoa especialmente mexendo com os olhos. Ele não sobrevive a esse tipo de coisas, você pode acabar mudando uma pessoa que não se parece mais com essa pessoa. São apenas pequenos ajustes sutis. Você não quer que eles entrem em uma entrevista e as pessoas não os reconheçam. Ei, isso não está nas suas fotos na cabeça. Mas abaixar suas cinco cabeças para uma testa, estou bem com isso. Esse cara aqui tem um chapéu, então ainda funciona. É bastante incrível. Vamos clicar em “Ok” Desfazer, desfazer. Olha como este homem é muito mais bonito. Bem, meus amigos que é dissolver usando reconhecimento facial. Vamos entrar para o próximo vídeo onde eu definir um projeto de classe muito emocionante
62. Como usar o ponto de fuga para criar designs no Photoshop: Oi lá. Quero colocar este desenho nesta parede. Vamos usar uma ferramenta subutilizada no Photoshop chamada Ponto de Fuga e olhe para isso, move-se ao redor das paredes, perspectiva é tudo muito incrível. É um pouco agitado, mas não dá para bater em perspectiva. Olhe para isso. Vamos aprender a fazer isso agora no Photoshop. Para começar, vamos abrir dois arquivos da sua pasta 10 Retoque, há o Ponto de Fuga 1 e 2. O primeiro é um JPG, novamente ele vai abrir sem qualquer aborrecimento. Como o segundo é um arquivo AI, Adobe Illustrator, ele vai aparecer com esta pequena caixa PDF de importação. Agora, neste caso, o meu é padrão para um 1164, eu acho que é o tamanho original. Isso é algo que você pode ter que fazê-lo apenas dependendo da imagem que você está usando. Tente primeiro, seja qual for o tamanho que vier, mas então você pode ter que redimensioná-lo, porque se for muito grande ou muito pequeno, não vai parecer certo. Não se preocupe, por enquanto, eu me certifiquei que funciona perfeitamente e eu clico, “Ok”. É apenas um gráfico que acho que fizemos isso no curso avançado do Illustrator. Se você está interessado no Illustrator e texto blobby 3D, você pode ir para conferir esse curso. Para isso funcionar, precisamos estar no Ponto de Fuga 2. Vamos para Selecionar “Todos” e, em seguida, ir para “Editar” e “Copiar”. Podemos ir para a prancheta, não
precisamos mais disso. De volta ao Ponto de Fuga 1. Vamos para “Filtro” e vai para “Ponto de Fuga”. Ponto de Fuga nos permite criar um avião. Vou desenhar o que eu acho que é um quadrado aqui, porque o Photoshop não sabe que temos que contar. Temos que dizer, “Vou começar por aí e descer até lá”, talvez você possa seguir as linhas dos tijolos e voltar, até que ponto? Vês que estou a tentar alinhar essa linha, estou a voltar para cá, tudo bem para mim. Clique uma vez e, em seguida, chegando, você
pode ver que eu estou tentando alinhar essa linha azul seguindo o cume dos tijolos, que é surpreendentemente difícil. Quero que o último seja direto para baixo. Acho que estou lá, legal. É um pouco difícil de ver porque é azul, espero que você possa vê-lo. A forma como testamos se funciona ou não, onde a perspectiva é boa. Há um desses quadrados brancos no meio. Aqui está o primeiro, há um no final e algures no meio. Se eu pegá-lo e arrastá-lo para baixo, você pode ver que ele está seguindo a alvenaria. Se o seu estava errado, você chega ao topo, aqui estou eu arrastando o do meio de cima agora, se eu chegar ao topo aqui, vá devagar. Este programa aqui, é um pequeno mini-programa como Dissolver, exceto que este trava o tempo todo, na minha experiência. É uma ferramenta incrível que está lá há muito tempo, mas ninguém a usa. Eu não acho que ele recebe muito amor de desenvolvedor, de qualquer maneira. Diga que não se alinhe como o meu, você pode pegar esses cantos e ajustá-los. O que vai acabar acontecendo é, eventualmente, você vê o de vermelho? Se ficar vermelho, diz: “Não há chance de que seja uma parede quadrada.” Esse é o Photoshop dizendo: “Nem perto, isso é fisicamente impossível, é uma parede torcida. Se ficar amarelo, diz: “Você está perto de uma parede”, enquanto fica azul diz: “Essa é uma forma plana viável com a qual eu posso trabalhar”, azul é bom. Uma vez que você tem, você pode clicar em “Ok” e sair e copiar esse gráfico. Já fizemos isso direito. Fomos Editar, Selecionar, Todos, Copiar. Tudo o que precisamos fazer agora é ir para “Colar”. Estranhamente, não podemos usar a versão longa. Estamos neste mundo em extinção. Você só tem que usar seu atalho. No meu Mac, é “Comando V”. Em um PC, é “Controle V”. Então você pega este com os pontos ao redor do lado de fora, basta clicar nele, segurá-lo e arrastá-lo e espero que venha, surtando, arrastá-lo novamente. Tudo bem, começou a funcionar, vou deixar isso aí, porque é assim que o ponto de fuga funciona. É um pouco agitado e desajeitado. é muito legal, incrível hack. Eu posso deslizar isso para baixo e eu sei de novo, eu combinar com a perspectiva, muito legal. Tudo bem, quando você ficar em posição, você pode querer redimensioná-lo. Assegurei-me de que os nossos ficheiros que estavam a trabalhar nesta turma funcionassem bem com ele. Você pode achar esta imagem muito grande e você não pode contornar. Provavelmente é mais fácil voltar para o outro arquivo e redimensioná-lo e antes de copiá-lo. Mas se você quiser você pode, aqui há uma opção de transformação, esta ferramenta aqui e agarra os cantos. Eu posso mudar e posso encolher para baixo e levá-lo para todo o tamanho que eu quiser. Não tenha medo de diminuir o zoom. Às vezes, as transformações acabam sendo muito fora das telas um zoom direto para fora. Você pode ver o trabalho transformar uma alça aqui fora. Quando você estiver feliz com isso, vamos clicar, “Ok.” Está fundida lá dentro. Tudo bem, nós fizemos isso da maneira rápida, suja e ruim. Por quê? Porque está fundida ao fundo. Eu vou desfazer e eu vou te mostrar alguns truques legais. Vamos um pouco mais longe. Primeiro, vamos fazer uma nova camada, certifica-se de que a camada está selecionada. Não há nada nele. Volte para “Ponto de fuga do filtro”. Certo, vamos arrastar nossa parede de novo. Certo, minha primeira parede, não foi um sucesso. Não é maneira de desenhar e eu vou arrastá-lo para o chão. Está chegando perto. Este aqui deve dar-nos uma boa indicação. Você pode ver que não está alinhando o chão. Incrível. Arraste o de cima para cima. Também não é perfeito. Tudo bem. Uma vez que você tem sacudir ao redor, você pode adicionar outro avião. Para fazer isso, mantenha pressionada a tecla “Command” em um Mac ou a tecla “Control” em um PC e você está
procurando qualquer uma dessas opções do meio, não os cantos. Ok. Há um meio que fará o andar ao lado, mantenha pressionada a tecla “Command”, clique em “Hold” e arraste para fora. Você vai ver, “Ei, vá para o chão também.” Faremos isso de volta, Wall também. Vou clicar nisto. Você tem que clicar neles para fazê-los ativar. Basta clicar neles. Estou usando essa ferramenta aqui em cima, o padrão é essa ferramenta. Este plano traseiro, Veja esta pequena alça aqui, mantenha pressionada a tecla “Command” novamente, vai “Control” tecla em um PC e arrastá-lo para fora. Você pode ver que este aqui não funcionou muito bem. Só não está combinando com o ângulo. Não é que isto não seja uma parede quadrada. Pode não ser, mas é provavelmente apenas o ângulo do comprimento eram apenas muito perto e o comprimento mais denso com esse material para ele. Podemos balançar estes pequenos aviões. Lembre-se e estes são obviamente bons para fazer paredes, mas realmente bom para capas de e-book. Como você está fazendo um e-book. Você pode fazer a tampa frontal e a espinha e você pode jogar seu Mockup sobre ele e ele se dobra ao redor. Mas vamos balançar esse cara aqui. É a mesma coisa. Você pega a alça do meio e apenas mantenha pressionada a outra tecla que está em um Mac, “Alt” que é “Opção”, Em um PC, é “Alt”, ok e basta clicar em “Segurar” e arrastá-lo e ir devagar. Vá muito devagar. Você pode ver que é um pouco estranho. Ok, vá super devagar. Se encontrares, movendo-se por todo o lado, sim. Ok. Balançando e você pode ver esquerda e direita, balançar como uma porta. Estou a tentar fazer com que a minha parede se alinhe nos tijolos. Na verdade, vai ter que balançar um pouco. É muito irritante. Ok. Eu sou um profissional feito isso muito. Ainda estou achando muito difícil aqui. Bom. Eu balancei perto dos meus tijolos. Está trazendo muito bom. Segurando nada agora, basta agarrar a borda que o estende para fora e ele vai para a distância. Isso precisa de um pouco mais de balanço, mantenha pressionada a tecla “Option” em um Mac, tecla
“Alt” no PC e vá consertar. Porque é muito difícil. Você pode fazer este. Esta é provavelmente a mesma chave. Um pequeno truque é clicar lá dentro e usar suas setas para cima e para baixo, para chegar perto. Estou feliz com isso. Agora, quando
colarmos, como antes eu já copiei antes de entrarmos aqui. Você pode voltar para fora. Você pode clicar em “Ok”, ir e copiá-lo, manter a cópia, redimensioná-lo se precisar. Volte aqui, vá para selecionar “Filtrar ponto de fuga” e eu vou voltar linhas azuis, ir “Colar” e então você pode clicar, “Manter” e arrastar. A coisa legal sobre isso agora é que uma vez que ele pára de surtar. Aqui vamos nós. Vamos dar a volta à parede. Também falou sobre a pixelização. Irá assim que apertarmos “Return”, só está tentando fazer sua coisa, que
pudéssemos ir, adorei. Tudo bem, eu vou para aqui, eu vou colocar isso na parede e ele transforma-lo. Eu não vou transformá-lo e talvez nós vamos clicar em “Ok”. O grande truque foi porque usamos uma camada separada. Você pode ver agora que ele está em sua própria camada e esse é o ponto de fuga. Antes de irmos e eu vou mostrar como eu faria neste caso, zombar um pouco melhor. Nada mais a ver com o ponto de fuga, só dicas e truques. Fase 2, eu primeiro faço é com este lay selecionado, Eu trabalharia em meus modos de mesclagem. Quem se lembra do atalho para modos de mesclagem? Sim. É ter certeza que você se muda para, caso contrário, não funciona. Mantenha pressionada a tecla Shift e toque na tecla “Plus” no teclado. Eu trabalharia até aqui para ver se é algo que funcionou para mim. Eu vou ser como, já praticado. Ok. Eu sei que não há nada, o que eu fiz foi levantá-lo normal e o que você pode fazer é eu quero carregar isso como uma seleção. Ok, há um membro truque, eu posso segurar, comando e clicar no botão “Miniatura”. Ele só carrega tudo na camada como uma seleção. Se você estiver em um PC, ele terá controle e basta clicar no botão “Miniatura”. Eu vou desligar essa camada porque o que eu quero fazer é, Eu vou minha camada de fundo e uma cópia e colar. Porque o que eu fiz foi eu só quero um pedaço disso. O que eu queria era tudo isso apontando aqui, ok, que o grupo que vai entre os identificadores de tijolos chamava apontar mas há algo e isso vai entre eles, eles são brancos. Eu quero que eles sejam realmente negros. Eu inventei isso. Como se inventa coisas aqui? Eu sei que é controle eu ajustes e
lá está. Eu inventei isso assim. Isso é preto. Não preciso que seja azul, vou apertar “Command”, “Shift”, “U”, que acha que é preto e branco. Isso deve estar aqui para comandar o turno U. Aqui é um dessaturado. Por quê? Eu só estou procurando sombras ou eu só quero que as luzes na escuridão se apliquem a esta coisa aqui, que é muito forte, é cristalino, é perfeito. Eu não quero isso. O que eu vou fazer é ligar todos eles de volta. Eu vou ter esse cara acima deles e então eu vou encontrar um modo de mistura para
isso para misturar na cor que tem sido em cima da parede. Não é brilhante. É uma multiplicação. Significa o que você está olhando para a frente. Se você está apresentando isso a um cliente como um Mockup, você pode apenas deixá-lo colorido, olha como vai ser incrível. Mas se você está procurando por fingir, essa é luz fria, luz linear, luminosidade. Acho que estou feliz com a luminosidade. Certo e luminosidade, vou diminuir a opacidade da luminosidade para que ela esteja lá sem distorcê-la demais. Foi assim que eu fiz. Mas você pode fazer também é que você vai descobrir que esta coisa aqui tem um bom pedaço de grão nele. Onde está a minha visão, aqui tinha não é como perfeito porque é melhor. Com essa luz selecionada, podemos adicionar um pouco de ruído falso. Certifique-se de que é um objetos mais inteligentes, para que possamos desligá-lo mais tarde. Filtrar ruído, adicionar ruído. O que vai decidir quanto disso eu quero. Vamos fazer barulho, literalmente barulho, provavelmente uns. Só estou a adivinhar. Mas adicionando um pouco de ruído para tentar combinar, talvez a ISO seja a do fundo pode ajudar. Outra coisa que pode ajudar é adicionar um ruído correspondente ao fundo. Está destruindo o fundo só para misturá-lo, mas é isso que estou procurando. Estou procurando que pareça realista. Não foi objeto selecioná-lo. Vou voltar ao meu barulho. Vou usar este aqui, porque deve aplicar o mesmo barulho que fiz da última vez. Ok. É só para que eles combinem um pouco mais destruindo o fundo. Mas acho que há mais consistência nisso. Isso é zombar do design usando o tesouro escondido. Isso é um ponto de fuga. Vamos entrar no próximo vídeo.
63. Ponto de fuga — clonagem e cura em um ângulo: Oi lá. Este vídeo é sobre usar o ponto de fuga para fazer algumas coisas complicadas onde precisamos remover essas luzes ao longo do topo, mas há alguma perspectiva estranha acontecendo. Temos de repetir esta parte nesta perspectiva estranha e depois aparece o ponto de fuga, ajuda-nos, dá-nos 80 por cento do caminho até lá. Há um pouco de conserto para fazer, mas vamos explorar como usar o ponto de fuga para clonar e curar em perspectivas estranhas. Tudo bem, para começar na sua pasta de retoque 10, pegue o ponto de fuga 3. Digamos que nosso problema é aqui, queremos remover essas luzes. Por que razão? Eu não sabia, mas é um bom uso do ponto de fuga. Digamos que o arquiteto, o designer de interiores, não gostava mais deles ou digamos que é graphidio ou lixo ou algo diferente de luzes; só
precisamos nos livrar deles, até mesmo de uma pessoa. Como fizemos no último, precisamos nos sentar, provavelmente
é melhor trabalhar em sua própria nova camada. Depois vamos para Filter, depois vamos para o Ponto de Fuga e temos de lhe dizer o avião. Neste caso, eu quero tipo de clicar aqui e vir aqui, atravessar aqui. É muito fácil porque há um tipo razoável de linhas de ponto de fuga a seguir. É mais difícil quando é como um solo natural com tantas coisas do tipo de arquitetura estrutural do Google. Clique uma vez e desaparece porque diz que não há chance de ser um objeto plano. Eu meio que usei o top aqui e adivinhei. O que eu vou fazer é arrastá-lo para baixo com cantos para que eu use o que eu penso, não
é perpendicular que eu quero, a palavra está em um ângulo reto. Isso vai fazer. Eu sei que esse tipo de cruzes ali. Uma vez que você obtê-lo e você vê algo no objeto, obter o seu ângulo reto talvez, é que eu posso arrastá-lo para fora agarrando o meio. Agora isso é azul diz que eu acredito em você, eu confio em você, isso é o que você diz que é. Agora, eu poderia fazer este outro avião aqui. Lembre-se que eu posso manter pressionada a tecla Command e arrastar o ponto do meio para fazer uma nova parede. O que descobriremos é é mais fácil trabalhar em um avião e depois no outro plano, caso contrário, a estampagem da ferramenta Clone acaba correndo pelas paredes e parece um pouco estranha. Outra coisa a saber é, digamos que passamos algum tempo fazendo este avião ponto de fuga ficar bonito, eu acho que basta clicar em OK e depois voltar para ele. Então está comprometido com a história, porque o ponto de fuga tem uma tendência de falhar, apenas foi a minha experiência. Pelo menos quando ele cai agora meu avião ainda está aqui. Se eu passar meia hora aqui retocando e ele cai, eu tenho que voltar e sentar no meu avião e é doloroso. O que vamos fazer é usar isso aqui, é chamado de ferramenta de carimbo. Basicamente é uma mistura do selo da ferramenta Clone. Essa não é a palavra, é chamada de ferramenta Carimbo Clonar ou Pincel de cura. Eles são a mesma coisa, basicamente você sintoniza a cura dentro e fora aqui. Com isso desligado, é apenas o carimbo da ferramenta Clone. Com ele ligado, ele começa a misturar cores. Neste caso, eu quero que a cura esteja ligada, e em termos de alinhamento, dependendo do que você quer fazer, eu quero oferecer neste caso, eu vou mostrar-lhe o porquê. Em termos de pincéis, eu vou ter o meu em cerca de 150, quente em 50. Copie isso para o seu neste exercício. A primeira coisa que precisamos fazer é definir um alvo. Definir um destino é como a outra ferramenta, você mantém pressionada a tecla Option em um Mac e a tecla Alt em um PC. Você pode dar um clique em algum lugar onde você quer começar, então eu vou dizer lá. O que você vai ver é, ver o alvo verde, é de onde ele está roubando. A coisa legal sobre isso é, veja isso: quando eu meio que movo meu mouse para baixo, sem fazer nada, eu meio que movo meu mouse e você pode ver as mudanças de perspectiva, e isso é o que torna essa coisa perfeita. O que torna essa coisa grata como roubar conteúdo daqui e colá-lo aqui embaixo porque se você gastar tempo e alinhá-lo, isso vai ser sempre o maior problema de todos é alinhar isso. Vou trazer isto para aqui e alinhá-lo. Isso mesmo, clique e arraste. Vá em frente. Parece ter se misturado bem. Isso nos leva a isso alinhados. Com ele ligado, assista isso, se eu clicar e arrastar, e então soltar e clicar e arrastar novamente, você vê que é meio que começar onde eu levantei. A cruz verde continua começando lá atrás e isso pode ser bom, mas há muitas ocasiões em que você desliga isso. Eu vou desfazer algumas vezes porque o que eu quero fazer é dizer que eu quero que você roube, porque este é o meu único pedaço realmente bom que não tem nenhuma luz nele. Todo o resto é um pouco estranho. O que eu quero fazer é clicar, segurar e arrastar, e quando eu soltar, ele volta para a cruz verde, volta para lá. Vou voltar àquele laboratório originalmente amostrado e alinhá-lo novamente. Esta fila vai ser sempre a nossa ruína. Agora eu não vou para a esquerda e para a direita, eu deveria. Eles vão subir porque está ficando na borda, você vê isso? Acho que é um ponto importante. Se eu subir, você pode ver minha cruz verde eventualmente se aproxima da borda, e eu acabo com esse tipo de linha estranha que aparece ao longo do topo lá. Só vou me certificar de que trabalho para baixo e posso usar um pincel um pouco maior. Vou começar por aí. Vou começar de novo, pintar por cima e ir embora. Vamos para frente e para trás um pouco, então estou pegando as duas linhas e solto. Não é para largar antes de começar a misturar as coisas. Não suba, já te disse isso. Vou pegar essa parte aqui, só para consertar essa parte aqui, modo de mistura, grandiosidade. Não suba, apenas desça. Eu posso fazer isso. Vamos colocar isso aqui, eu vejo o alvo aqui tentando fazer a linha se alinhar. Você pode começar a ver que eu tenho um pouco de duplicação acontecendo, eu acho que é apenas um dos não prós ou contras, é só que eu tenho que ser um pouco mais cuidadoso do que eu estou sendo. Vou tentar corrigi-lo passando por cima, e tentar acertar o espaçamento. Você pinta ali. Vou preparar outro por aqui e mais um aqui em baixo. Tudo bem, eu vou tentar obter esta última parte aqui, dando a fila para cima, vai. mesmo com esses caras, eu vou definir um alvo aqui e tentar alinhar e colá-lo. Fique de olho no cursor. Você pode ver que essa linha de perspectiva não
tem perfeitamente aqui, então eu poderia apenas usar um pincel menor, então eu não estou meio que destruindo isso muito. É inquieto, não vou mentir para você. Escolhi um exemplo muito confuso, poderíamos ter escolhido uma parede de tijolos como todo mundo faz. Linhas arquitetônicas, muito mais difíceis. As pessoas vão notar. Pincel menor. Muito bom. Certo, esses caras aqui, eu realmente não posso me livrar dessas linhas no ponto de fuga porque não havia nenhum desses que não tinha um. Eu vou clicar em OK porque isso está em sua própria camada e tipo de sintonizar isso ligado e desligado, vamos ver. É brilhante? Isso é muito bom. É foto-realista? Provavelmente não. O que eu vou fazer é usar dizer algo como o Pincel de Cura Mancha, para arrumar isso. Pincel de cura de pontos, talvez a ferramenta Patch. O problema com a ferramenta Patch é que isso está em sua própria camada, que é muito legal, mas a ferramenta Patch não funciona quando há duas camadas separadas, então, se digamos, clique em ambas e Command E, Controle E para fundir-se juntos. Vou pegar uma camada de mesclagem de layout. Agora esses caras precisam de um pouco de trabalho. Vou usar minha ferramenta Lasso para pegar isso,
pegar minha ferramenta Patch, encontrar um lugar que eu goste, e apenas trabalhar meu caminho através de consertar esses caras. É tudo perfeito, é muito melhor do que tentar fazê-lo em uma transformação. O que você pode fazer agora é voltar para o ponto de fuga e trabalhar este último avião e ver se você pode duplicar isso algumas vezes. Eu vou fazer isso. A última coisa que devemos fazer é este último avião aqui. Gostaríamos de pendurar sobre ele. Vamos para a nossa Camada,
para Ponto de Fuga, e mantenha pressionada a tecla Command e agarre este avião. Vou clicar neste avião, apertar Deletar, na verdade Backspace para me livrar dele. Livrou-se da coisa toda. Isso está tudo bem. Colocar você, não gosta,
vê amarelo, desculpe amigo, isso não é uma parede, você pode ver por que isso não é bom. Legal, azul é melhor, incrível. Deixe-me pegar o carimbo da ferramenta Clone. Provavelmente vou ficar bem e depois volto. Vamos fazer isso. Filtro, Ponto de fuga, caso morra. Tudo bem, eu vou tentar replicar isso uma e outra vez aqui. Temos que torná-lo um pouquinho menor porque eu não quero trazer as linhas de cima. Carimbo de ferramentas de avião, quero você amigo. Vou descer um pouco, já que não está agarrando a borda, um pouco maior. Eu posso definir o meu alvo apenas um pouco dele através. Vou tentar pintar-te, até aqui. Com o Pincel de cura ligado, ele vai tentar misturar o branco que estava lá, então eu vou desligá-lo. Eu só quero o bom velho, Clone selo ferramenta porque as cores estão se misturando muito bom. Eu agarro esta parte, definir um alvo, por ali. Pegue um pouco. Aqui estão algumas atualizações. Agora que eu tenho todas essas cores aqui, eu poderia ir e agarrar Pincel de cura para obtê-lo para se misturar agora, eu posso ver pedaços de branco tipo de cutucando através, então ele provavelmente vai misturá-lo. Veja, é uma espécie de puxando pedaços das luzes para fora, então o que eu vou fazer é pegar minha ferramenta Seleção e apenas ter certeza de que isso não é, apenas um pouco mais baixo. Agora usando meu selo de ferramenta Clone, eu vou dizer sim, vou tentar fazer isso melhor. Tudo bem, esta parte aqui também. Lindo. Vamos clicar em OK. Tudo bem, e está em sua própria camada, e nós consertamos o telhado. Você pode ver como o ponto de fuga nos levou 80 por cento lá, 90 por cento lá, alguns retoques com a ferramenta Patch ou o Pincel de cura de pontos. Certo, então esse é o ponto de fuga
, tem algumas peculiaridades. Edite em seu kit de ferramentas do Photoshop incrível. Mas como vimos aqui, ele precisava de um pouco de amor extra, talvez o pincel de cura de pontos, a ferramenta de remendo, mas pode ser super útil para manter esse tipo de coisas grandes trancadas. Certo, vamos para o próximo vídeo.
64. Exercício do curso — ponto de fuga: Ei lá, é hora do projeto de classe na sua pasta 10 Retoque sob o projeto da classe, há esses dois pontos de fuga A e B. Quero que pegue essa baleia, fizemos uma aula ilustrada e coloque-a neste prédio. Eu quero que você zombe disso como fizemos no primeiro
dos dois vídeos de ponto de fuga onde nós zombamos do graffiti na parede. Quero que o envolvas em volta do edifício. Pode ser pequeno neste edifício. Pode ser enrolada em torno de ambos os edifícios, talvez na lateral, depende de você. Eu queria sentir como se estivesse lá. Eu também gostaria que você fizesse é eu quero que você remova as antenas ao longo do topo e tire essas luzes aqui da frente. Quando terminar, gostaria que compartilhasse comigo, para ver como ganha. Duas imagens, mas são baleias no prédio, removeram as luzes e as antenas. Para o próximo vídeo. Depois de fazer o dever de casa, fique aqui. Voltarei quando você terminar.
65. Corrigindo e retocando o tom de pele no Adobe Photoshop: Oi lá. Este vídeo é tudo sobre como fazer seleções muito rápidas para a pele. Neste caso, aquecemos um pouco a pele dela e este aqui, removemos um pouco do molde vermelho do rosto dela. Isso é tudo sobre como obter essa seleção de capas realmente rápida usando o Adobe Photoshop. A primeira coisa é [inaudível], abertura tom de pele um e dois. Tom de pele um que vamos apenas selecionar e apenas aquecer a pele, e tom de pele dois nós vamos remover apenas um pouco de gesso vermelho. Vamos voltar a uma ferramenta que já usamos antes, eu a mantive nas seções de retoque, tinha que saber onde dividir essas coisas. Mas eu pensei que se você voltar para este retoque é um bom lugar para ele. O que queremos fazer é selecionar todos os tons de pele e sob rigorosa faixa de cores, nós ignoramos anteriormente. Há uma opção que diz tons de pele e parece muito bom. Há uma opção que diz para pegar rostos e eu acho que isso pode ser bom e pode ser ruim. Acho que neste caso não está funcionando tão bem. Eu quero alguns desses tons médios aqui na pele emparelhe-os em fuzziness, alto, baixo. Eu não quero obtê-lo para que ele está recebendo um monte de pele, mas não muito do fundo. Essa coisa aqui, pense nisso menos é detectar rostos e pensar opção um, opção dois. Opção dois está bom para mim agora, se o seu não está fazendo o mesmo que o meu, você pode cortá-lo em escala cinza aqui e vamos clicar em “OK”. Com essa seleção, eu posso ir para ajustes, então vamos dizer que eu só quero aquecê-lo, mas eu acho o mais útil, é usar saldos de cores, isso como pequenas escalas aqui este equilíbrio um, você pode jogar em torno de todos esses três tons provavelmente médios vai nos dar o nosso mais ajuste. Eu só vou me aquecer, então vá de azul para amarelo de ciano, só um pouco vermelho. O globo ocular ligado e desligado apenas para aquecer a pele. Agora o que você também vai notar é que ele pegou um monte de fundo, agradável, maneira
fácil de corrigir que é pintá-lo para fora na máscara. Mas vamos usar o nosso truque, mantemos pressionada a tecla de opção em um mac ou a tecla alt em um PC e basta clicar na máscara, fica totalmente preto e branco. Então, quando estamos usando nosso pincel dois, preto como minha cor de primeiro plano, mega tamanho, dureza, eu escolho isso. Porque o que eu quero fazer é, eu quero deixar os tons de pele, mas eu não quero mexer com as cores quentes que estão em suas roupas, que estão na alvenaria. Certifique-se de que não é uma sobreposição santa, defina o normal. Overlay pode ser útil, nós olhamos mais cedo, mas neste caso eu só quero tirar este cinto muito rápido. Apague o zoom para o lado. No momento em que estou tirando da máscara, disse que não está funcionando com essa pele. Agora, quando voltarmos a ligar a mesma coisa, mantenha pressionada a tecla Option no Mac ou a tecla alt em um PC, agora ela só deve estar afetando a pele. Ela tinha pele amarela? Um pouco demais neste tutorial, eu acho que eu estou tentando ir um pouco longe demais. Vou clicar nele de novo, abaixe isso um pouco. Você pode até baixar a opacidade de toda esta camada, controle deslizante de
opacidade para baixo, apenas um pouco para cima. Estava um pouco cinzento antes de eu fazer isso. Vamos olhar para outra maneira de fazer isso, tom de pele dois, isso acontece muito quando você está filmando algo como um celular, onde você tem algumas leituras na pele. Vou te mostrar um truque para a pele. Começamos da mesma maneira, vamos selecionar,
vamos para a faixa de cores, escolhemos tons de pele, cara a tomar neste caso funciona muito bem. Fuzziness, talvez onde estava, ir para a seleção. Agora cabe a você se você é uma pessoa de curvas ou níveis, sou mais de um homem de níveis eu mesmo. O que vamos fazer é em vez de tentar ajustar a coisa toda, trabalhamos apenas no canal vermelho, há informações em todos esses três canais. Você pode ver verde e azul estão no meio aqui, mas vermelho, ele vai inchar para o lado. O que podemos fazer é mudá-lo, podemos mudar os tons médios e talvez até alguns dos mais escuros. Só para remover um pouco do vermelho, ligado, desligado. Está puxando um pouco da cor vermelha aqui. Eu vou usar a minha opção, para todas as chaves e apenas pintar os pedaços que eu não preciso. Há uma maneira fácil de selecionar a pele e alguns truques extras para trabalhar em sua máscara. Você pode seguir em frente enquanto eu passo um tempo. Vamos clicar nele. Pincel grande, lembra daquele atalho? Se ainda não conseguir lembrar, clique em Control e Option arraste a tecla para a esquerda e para a direita. Em um PC, você mantém pressionada a tecla Control, clique e arraste o botão direito do mouse,
o pesado, o botão direito do mouse,
clique pressionado e arraste-o para a esquerda e para a direita, cima e para baixo como dureza. Clique novamente na opção. Apenas a pele, apenas esperando no canal vermelho, e neste caso eu removo muito da mão também. Porque está aqui embaixo, está um pouco arrumado nele. O que vou fazer é pintar para o outro lado. Um pincel menor, eu vou bater no meu teclado para trazer branco para a frente, eu vou pintar isso para fora. Novamente, quando você entrar nos cantos, eu faço isso e então alternar x para voltar para a chave preta e apenas pintá-la, porque é, muito indulgente, porque é sobre esta coisa preta aqui. Pinte isso e nem vou me preocupar, talvez seja o raio. É assim que se seleciona tons de pele. Você pode estar aquecendo com equilíbrio de cores. Você pode estar removendo alguns dos vermelhos. Se tem um elenco ciano ou verde, você faz a mesma coisa, mas vamos para o canal verde em níveis, ou azul, verde ou vermelho. É isso para este, eu vou te ver no próximo vídeo.
66. Retocar os olhos aprimorando no Adobe Photoshop: Oi lá. Neste exemplo, vamos pegar nossos olhos e dar um pequeno impulso a eles, aprimorando o que está lá, usando o esquivar e queimar e a ferramenta de esponja, vamos fazê-lo agora no Photoshop. Tudo bem, para começar a partir da sua pasta de retoque de lata, abra “Olhos 1". A primeira coisa que vamos fazer é duplicá-lo. Com a camada selecionada, “Command J” ou “Control J” em um PC para duplicar a camada, você pode até dar um nome, chamá-la de Retoque. Agora, este vídeo é tudo sobre melhorar o que está lá. Os vídeos depois disso, vamos olhar para fingir um pouco mais. Vejamos o aprimoramento em vez de fingir neste vídeo e veremos até onde chegaremos. A primeira coisa que vamos fazer é saturar os olhos, então os olhos castanhos, vamos torná-los mais castanhos. Clique e mantenha pressionada a “Ferramenta Esquivar” até encontrar a ferramenta Esponja. A ferramenta Esponja tem dois modos, dessaturar e saturar. Queremos insaturar e transformá-lo para o pincel, queremos algo que vai caber em torno da pupila e mudar a dureza. Eu tenho minha dureza totalmente difusa de zero. Em seguida, com o fluxo, em algum lugar no meio. O que vamos fazer é trabalhar lentamente. Quando eu digo devagar, está em 40 por cento, está indo muito rápido, 52 exatamente. Não se preocupe se você for longe demais, nós vamos discar isso de volta com a opacidade. Tudo bem ir longe demais. Este outro lado ele vai entrar em crise, porque não há muita cor saturada aqui. Eu posso continuar trabalhando nisso, eu posso trabalhar um pouco, mas eventualmente você vai descobrir que ele está lá, mas é um pouco pixelado, não é incrível. Esse vai ser um dos problemas. Bem, não os problemas, mas uma das coisas que encontramos quando estamos retocando, digamos que este lado aqui, é uma luz muito forte sendo usada. Este lado vai ser sempre mais escuro, você vai ter que viver com ele se você quiser que isso seja natural. Não se preocupe, vou te mostrar como fingir. Digamos que isso funcione para nós. Ok, está saturado agora, vamos olhar para trabalhar com as luzes e escuras. Basicamente queremos fazer o brilho mais brilhante e as pupilas mais escuras e talvez um pouco do lado de fora também. A melhor maneira de fazer isso é, é no mesmo grupo, esquivar e queimar. Esquivar deixa as coisas mais brancas, queimar torna as coisas mais escuras. Vamos pegar o pedal. Vamos iluminá-lo primeiro e o que vamos iluminar? Vou iluminar os destaques. Quero que os destaques fiquem mais brilhantes. Exposição é o quanto disso está sendo aplicado. Vou ter o meu baixo o suficiente. Vou clicar nisso algumas vezes só para iluminar o brilho. O mesmo lado, não muito longe do lado, porque talvez este seja mais escuro por uma razão. Você pode decidir que você quer clarear alguns dos esfíncteres aqui também. Você vai para os tons médios, e eu vou destruí-la. Mas talvez este lado só precise de um pouco de iluminação. Vamos fazer o mesmo com os olhos, neste caso, por causa dos olhos são bastante cinza, vou usar os tons médios, vou mantê-lo bastante baixo e simplesmente não muito. Você sempre vai longe usando a ferramenta de queima. Tudo bem, podemos abaixar, não se preocupe. É assim que estamos fazendo. Sim. Última ferramenta é a ferramenta de gravação, e se você é como eu procurando atalhos, você pode mudar para a ferramenta de gravação, e alternar entre essas duas ferramentas, não é um problema. Mas se você estiver na ferramenta de esquiva e quiser começar a gravar algo, então você está se esquivando do olho e, em seguida, você deseja gravar esse bit, basta manter pressionada a tecla “Option” em um Mac ou a tecla “Alt” em um PC. Nada realmente muda por aqui, exceto que agora essas mesmas configurações estão sendo usadas para a ferramenta de gravação. Você pode ver que eu posso escurecer meus tons médios ou vamos fazer isso o longo caminho, ir para queimar ferramenta e eu vou escolher um tamanho aqui para a pupila, escurecer em que para cima, mesmo outro lado, escurecer isso acima. Isso passou por muito grosso, então eu vou diminuir a exposição. Sim, é longe demais. Mas agora podemos, com esta camada selecionada, ir para a capacidade e apenas baixá-la para algo credível. Ligue e desative esta camada. Você pode ver que nós trabalhamos os olhos acima sem ter que forjá-los. Escolhi esta imagem porque está no meio. Os olhos não são totalmente obscurecidos e pixelados, mas não é uma imagem fotográfica super alta resolução. Acho que há um pouco de realismo aqui. Primeiro, saturá-los usando a ferramenta de esponja,
em seguida, esquivar e queimá-los, esquivar faz os brilhos mais brilhantes, os brancos dos olhos mais brilhantes, ea ferramenta de queima que acabamos de usar para as pupilas e eu usei um um pouco ao redor da borda para definir o olho um pouco mais. Vamos girar camadas de retoque para que possamos diminuir a opacidade. Vou te mostrar outra maneira de fazer isso e está fingindo? Não. Eu diria que isso está melhorando. Vou desligar minha camada de retoque e fazer um método diferente. Este vai ser o meu retoque 2. O que eu vou fazer é pegar minha ferramenta de pincel, escolher um tamanho de pincel que se encaixa com o globo ocular lá. Dureza, eu vou aumentar a opacidade para que você possa vê-lo lá. Sim. Hotness, vou ter cerca de 80. Agora, vou escolher uma cor de primeiro plano que corresponda à cor dos olhos que eu quero. Digamos que, em vez de torná-los verdes ou azuis, vamos apenas melhorar a marrom lá. Vou escolher uma cor laranja quente, okree. Na verdade, vou diminuir a sensualidade um pouco mais fofa. Vou trabalhar no olho aqui, bonitinho das cavernas. Certo, faça o mesmo do outro lado. Reduza o zoom e, em seguida, é apenas encontrar um modo de mesclagem. Lembre-se que tivemos o problema antes de, não
há muita tonalidade no olho para destacar, lembre-se que tentamos usar uma ferramenta de esponja. Agora, com esta camada selecionada, vamos trabalhar através dos modos de camada. Lembre-se que o atalho é mover ferramenta, mantenha pressionado “Shift”, e toque na tecla “Plus”, ou você pode fazer o caminho mais longo, basta continuar clicando sobre estes até encontrar algo que é, digamos, esquiva de cor, vamos continuar e ver O que mais está lá. Esquiva de cor. A saturação é bastante agradável. Esquiva de cor é um pouco extremo, por isso vai depender da cor que você escolheu, digamos que você escolheu olhos verdes, você vai encontrar um diferente destes vai funcionar. Digamos que o desvio de cor é legal, parece um pouco vampirey, mas vamos baixar a opacidade para algo mais crível. Ligue, desligue. Nós ainda podemos passar e duplicar esta camada e não usar a saturação, mas definitivamente usar o esquivar e queimar, onde você está? Dodge, só para tornar isso um pouco mais brilhante, ele pode queimar segurando a tecla “Opção”, apenas para escurecer a pupila lá. Mesmo outro lado, escurecer a pupila, tocar isso. Apenas uma maneira diferente de chegarmos a um lugar semelhante e isso está principalmente mudando a forma como conseguimos a cor. Havia cores existentes que pudéssemos realçar ou temos que fingir? Ligar, desligar. Essa é a segunda versão ligada e desligada. Eu só estou arrastando através destes olhos. Vamos ligar este aqui onde fizemos a saturação com a ferramenta de esponja em vez desta. Este contra este, você decide, eu acho que eu gosto deste, mas eu acho que eu gosto desta saturação apenas para baixo um pouco mais, um pouco mais crível. Tudo bem, é isso para a fase 1 do retoque dos olhos. Vamos entrar na fase 2 onde fingimos. Mas com fingindo vem alguns resultados surpreendentes. Está bem, vemo-nos no próximo vídeo.
67. Retoque os olhos com um pouco de imitação no Photoshop: Oi lá. Neste vídeo vamos retocar os olhos com, vou dizer fingimento médio. Vamos adicionar todo esse lindo detalhe no olho. Sabemos que provavelmente está lá, mas é cinza leitoso na fotografia real. Vejamos como criar isso agora no Photoshop. Tudo bem, a primeira coisa é que se você estiver trabalhando através dos tutoriais, você pode salvar e fechar o último. Vai economizar como um PSD. Então o que eu quero fazer é apenas reaberto no JPEG novamente. Então, de “10 Retoque” abra “Olhos 1" e estamos de volta aqui. O que queremos fazer é pegar o “Painel de Ajuste” e vamos usar “Níveis”. O que realmente queremos fazer é que não estamos muito preocupados com o resto do documento. Estamos só a aproximar os olhos aqui, queremos realçar os olhos. Quando digo melhorar, não estamos aqui para torná-los perfeitos. Só queremos mais cor. Ok. Apenas uma cor mais rica, mais clara, até mesmo um pouco extrema. Ok, então não estamos preocupados com isso, estamos apenas pegando um pouco, vamos dar uma olhada “On” “Off”, apenas muito mais luz aqui nos olhos. A próxima coisa que queremos fazer é remover esta máscara. Você pode clicar na máscara e apenas dizer “Inverter”. Então não estamos realmente removendo, estamos apenas pintando tudo de preto. O que queremos fazer é com nossa ferramenta de pincel, ter branco como a cor de primeiro plano e em termos de tamanho, ele vai ficar super pequeno e super macio. É menos cinco pixels dureza de zero. Vamos diminuir um pouco a opacidade; quando eu digo um pouco, muito e, em seguida, zoom in. O que queremos fazer agora é desenhar as pequenas linhas que aparecem nos olhos, mesmo que sejam muito grossas. Então vamos descer ainda mais pequenos, dois pixels. Dependerá da sua imagem, mas algo pequeno assim. Porque o que estamos tentando fazer, vou mostrar-lhe este exemplo: você pode ver esse tipo de zoom ascendente de um olho. Você pode ver todos esses detalhes aqui. Isso é que tipo de Via Láctea linhas
impressionantes aqui realmente ajudando a imagem a se destacar. Além disso, queremos este tipo de ondulações aqui. Então vamos usar isso como um guia visual. Porque o que vamos fazer é traçar pequenas linhas. Uma vez que você começa, tem que parecer um pouco estranho e você diz: “Não tem como isso funcionar. Mas vamos continuar construindo. O que você vai descobrir, se você é como
eu, eu posso desenhar bem elaborar desta forma, fica um pouco estranho. Então o que você pode fazer é segurar a tecla “A”, segurá-la, segurá-la, segurá-la, clicar e arrastar, soltá-la. Isso significa que você pode tipo de trabalhar em torno deste olho, no que talvez apenas um pouco mais de seleção natural. Não se preocupe se não é tudo perfeito,
ok, porque esse tipo de coisa de loopy cruzada eclosão é bom. Além disso, vamos desligá-lo um pouco mais baixo mais tarde. O que estamos fazendo realmente é, nós realmente não estamos desenhando sobre ele, nós estamos apenas mostrando através de nossa máscara,
se eu “Opção” clicar na máscara, ou “O” clicar na máscara, nós estamos apenas fazendo pequenos buracos nela para que possamos ver através. Se eu desativá-lo, este tipo de ilumina a área. Isso é o que faz parecer um pouco mais natural do que talvez apenas pintar com a ferramenta Dodge. Continue indo. Continua a sobrepor, a trabalhar à tua volta. A tecla “A”, se você quiser se livrar dela,
ok, você não gosta mais da rotação da
tecla “Escape” meio que a leva de volta à estaca zero. Chave “A” outra vez. O que eu vou tentar e fazer agora é eu vou tentar e fazer alguns desses pequenos loops. Agora, estou usando meu mouse principalmente porque se eu usar a Wacom, ela sai muito melhor. Muitas vezes as pessoas não estão usando como um tablet. Tablet, a coisa boa sobre isso é que você vai acabar tendo um pouco estes são bastante como linhas de gordura ou pelo menos eles não são afunilados no final. Portanto, se você estiver usando uma mesa digitalizadora Wacom, acabará com linhas adulteradas mais agradáveis. Se você estiver usando uma Wacom, poderá achar seu resultado um pouco mais agradável. Tudo bem, você pode começar a ver que está chegando lá. Então eu apertei “Escape”. Há alguns pedacinhos do lado de fora aqui que eu preciso remover. Eu fiquei um pouco louco com isso. Então, com uma máscara selecionada e ter preto como minha cor de primeiro plano, eu só vou pintar estes para fora apenas para que ele não está vindo ao longo dos tempos aqui, não é realista. Agora estamos lidando com cores mais claras. Você pode fazer a mesma coisa, você pode pegar uma “camada de ajustes”. Eu vou desligar este, ir para “Níveis” e neste eu vou escurecê-lo e fazer a mesma coisa. Clique na máscara, inverte-a, volte a
ligar a outra camada. Com este no topo, eu tenho minhas camadas selecionadas, eu só vou pintar em alguns dos pedaços mais escuros. Mesma coisa, mesmo tipo de pincel. O que eu tenho? Dois, três pixels, não me lembro. Certifique-se de que o branco é a sua cor de primeiro plano e apenas tipo de tinta em alguns destes outros pedaços. Vou aumentar minha opacidade de linhas para talvez 60 por cento. Talvez algumas linhas mais curtas, diminuir um pouco. O que você acha? É meio legal? Desligue estes, ligue estes. Isto vai para o meu pouco de falsificação, aquele retoque de consciência limpa. Eles provavelmente estão lá dentro, eu só os trouxe para fora. Você pode ver meu desenho terrível na verdade meio que acrescenta a este efeito. O que eu poderia fazer apenas para terminá-lo é camada de fundo, Eu vou duplicá-lo porque eu vou fazer alguma esquivação sobre isso. Esquivar tem que acontecer nos pixels. Então é destrutivo, então eu vou fazer em sua própria camada. Dodge ferramenta como no último, Eu vou ajustar e melhorar estes um pouco, desdefinir os tons médios, não é o que eu quero. Quero pegar os destaques. Eu tenho a minha exposição muito baixa e eu vou apenas estourar estes um pouco. O mesmo com os olhos, não muito. Na verdade, há necessidade de ter tons médios porque o bastante cinza eles não estão operando como, nós sabemos que eles são brancos, mas [inaudível] vê-los, é meio que tons médios. Faremos o mesmo aqui. Só por um bocadinho. O mesmo para isso. Eu vou trocar a ferramenta de mistura, ok, e eu vou misturar a íris, eu quero dizer íris. Verá que não o temos aqui. Então eu vou pegar ambas as camadas, eu vou para a minha ferramenta de movimento, mantenha pressionada a tecla “Opção” no Mac, tecla
“O” em um PC para duplicá-las. Você pode ver, eu só estou movendo a máscara, o que é muito legal. Então, mesmo que este lado aqui seja muito mais escuro, ele não está trazendo todos esses pedaços de luz é apenas trazer a máscara através, mostrando através da versão mais escura deste olho; bastante realista se você me perguntar. Você poderia ir e refazer para o lado também, se você quisesse. Se você sentisse que havia alguns pedaços repetidos que eram bastante óbvios. Acho que está tudo bem. Tudo bem, então vamos comparar. Vamos olhar para o fundo estava aqui. Vamos manter pressionada a tecla “Option” em uma tecla Mac “O” em um PC e ela apenas desliga todos, exceto por este e todos de volta ligados, todos ligados, todos desligados. Vamos olhar para este olho especialmente, o meu olho favorito, é o olho bom. Mas eu poderia fazer com a esquivação lá. Sempre vá para longe, abaixe um pouco. Ligado, desligado, um pouco mais agradável. Novamente, clique em “Opção” ou “Alt”. Estou feliz com isso. Tudo bem. Se você não está feliz com isso, nós vamos roubar um truque do último tutorial. Ok, então apenas uma nova camada em cima de tudo o resto. Vamos chamar isso de cor de um olho. Vamos usar nosso modo de mistura novamente. Ferramenta de escova, Eu escolhi A, cor para os olhos, pode ser uma cor diferente. Vou usar a mesma cor marrom, minha opacidade. Ok. Certifique-se de que as bordas de seus pincéis uma espécie de difusa para que você não entrar no branco dos olhos. Você pode colorir tudo. É bem básico. Uau, ferramenta muito simples de fazer. Não está mudando a cor. Você pode mudar totalmente a cor se você usar verde ou azul. Agora, o truque é encontrar um modo de mistura credível. Como fizemos antes, mover ferramenta, segurar “Shift”, apertar “Plus” e apenas trabalhar o seu caminho até se tornar como um vampiro lobisomem; Cor para acoplar e procurar algo um pouco mais crível. Ok. Color Dodge está funcionando para mim, apenas a opacidade. Então eu só vou tocar as chaves de número 50. Eu vou descer para talvez 30 por cento, ligar, desligar. Agora vamos verificar. Vamos manter pressionada a tecla “Option”, a tecla “O”. Tudo bem, parecendo legal. Se você ainda quiser mais, há mais um vídeo de retoque dos olhos onde fingimos totalmente. É meio assustador, mas é meio divertido. Funciona 60 por cento do tempo, todas as vezes. Te vejo lá.
68. Imitação total de olhos credíveis no Adobe Photoshop: Oi, aí. Este vídeo é tudo sobre fingir completamente um olho, nós pegamos a imagem original aqui, nós preenchemos todos os detalhes no olho
fazendo algo um pouco assustador com este aqui. Hora de ficar arrepiante. Da sua pasta de retoque 10, abra os olhos um e dois novamente. Talvez seja necessário salvar e fechar o exercício anterior. Tudo bem, então um olho assustador dois, e sim, é o que você imaginou. Eu achei isso, olho pode ser porque tem uma pupila cheia aqui, então eu posso usá-lo para todos os tipos de situações. Que tipo de situações? Um olho está piscando, um olhos fechados, um eu estava um pouco mais baixo do que o resto deles, isso está realmente fora de foco, então os dois vídeos anteriores não vão funcionar. Vou pegar minha ferramenta de seleção rápida, e vou selecionar tudo isso. Há alguns pedaços aqui em cima que eu não quero. Não se preocupe muito com isso. Este é um tutorial bastante indulgente ou não, nós fizemos a tecla Alt ou a tecla Option, apenas para arrumá-lo um pouco. Vamos ver o que parece é uma máscara e ele vai, “selecione uma máscara”, e apenas arrumá-lo um pouco, provavelmente algumas penas, vai ser bom. Não muito e vou mudar a borda para dentro, um pouco, suavizar um pouco. Vai funcionar para mim. Vamos clicar em “Ok”. Este olho agora vai ser movido para este jazigo aqui. Você pode copiar e colá-lo e simplesmente arrastá-lo para dentro assim. É muito grande e, em seguida, reduzi-la. Eu vou chegar perto de onde eu precisava ir. Agora, o truque é estar em apenas ver quando você vê dois
deles, um deles azul, um deles não começa assustador. Isto fica menos do que estes assustadores à medida que avançamos, prometo. Indo mais ou menos em posição, talvez um pouco maior. Piscando na máscara. Vou pegar minha ferramenta de escova. Vou trabalhar com o branco e o preto. Vou ter este tamanho de arneses é zero. Mas, eu vou diminuir a opacidade dele, apenas digitando a tecla numérica no meu teclado, você pode ver opacidade 30, 40, 20 ou 42. Os 20 por cento, eu só vou trabalhar esta parte no topo aqui com pálpebra é, e o mesmo com esta parte aqui. Talvez apenas um pouco maior para obter estes e eu vou fazer a mesma coisa para este cada um aqui tem apenas muito afiado. As luzes estão batendo no caminho certo. as luzes lançarem desta forma, você pode ter que virar o globo ocular para cima se suas luzes baterem na direção errada. Porque pode parecer um pouco estranho do que parece no momento. O que eu realmente vim buscar é querer todos esses detalhes aqui. Em vez de desenhá-lo à mão como fizemos no último vídeo. Agora vou clicar no meu real, não na máscara. Vou clicar no bruto real. Vou trabalhar o meu caminho e tentar encontrar um modo de mistura que funcione. Vamos usar movimento de atalho para, Shift plus,
ajuste, plus vai para a frente menos vai de volta para as opções. Que fixe qual doge cor. Você pode ver lá menos assustador. Mas temos um monte desse tipo de detalhe lá que talvez seja um pouco mais natural, mas não é necessariamente esse olho de pessoa. Estou feliz com isso, voltamos a cor doge. Vamos dar uma olhada no que mais temos. Isto vai funcionar? Provavelmente não muito brilhante. Vamos passar pelo núcleo de exclusões. Eu guardo isso aqui porque há um monte de apenas
passar por isso e ir que funciona, mas aquele não funciona. Neste caso, o doge colorido funciona para mim. Eu vou apenas duplicar esse olho aqui para adicionar o detalhe nele. Está se misturando bem com o fundo. O que posso fazer é duplicar este fundo novamente. Vai ser um laboratório de retoque porque eu queria doge e queimá-lo. Doge, faça qualquer clique. Você pode executá-lo em torno de cada aqui porque estes doge cor modo de mistura responde a ele. Vai alegrá-los. Provavelmente não foi o que eu queria, desfazer, agora você pode. Eu mudo a ferramenta Burn mantendo pressionada a tecla opcional, a tecla alt, basta dobrar a sintaxe aqui e diminuir o zoom. Verifique o que fizemos. Vamos manter pressionada a tecla Option no Mac, tecla
alt em um PC, eu realmente gosto disso. Agora, neste caso, já existe um forte elenco de luz. Veja o reflexo ali. Se o seu não, você pode adicionar outro para apenas adicionar outra camada. Este vai ser o meu destaque. Pegue a ferramenta de pincel e solte os pincéis e aqui é um monte tudo depende de qual versão do Photoshop você usa, passar e descobrir que você pode escapar com assassinato em termos de reflexão, às vezes a luz forte que está vindo de um painel de janela ou, neste caso, é um pouco de uma mistura vindo para as árvores neste caso. Eu vou para pincéis de mídia seca e eu vou escolher um desses. Vou usar este aqui. O melhor lápis de carvão do Kyle. Eu vou ter branco como a minha cor de primeiro plano Eu estou acordando sobre este deitar aqui e zoom em e eu vou apenas adicionar o meu próprio. Que tamanho de escova. Este aqui, eu poderia diminuir a opacidade um pouco também. Deve fluir neste caso. Só estou adicionando isso e tentando pegá-lo um pouco. Faça o mesmo para este lado. Ainda não está pronto. Porque o que eu quero fazer é, uma vez que você chegar aqui, jogar com um modo de camada novamente. Eu confio muito em modos de camada no Photoshop só porque eles são muito úteis para mesclar coisas. Veja lá melhorou. Tão diferente do normal, então olhe um pouco menos que dê uma
olhada em qualquer outra coisa lá dentro. São modos. Achamos que off-line é o ideal para mim. Dando-me uma consistência diferente neste olho mais claro neste olho mais escuro, você pode baixar a opacidade dele um pouco para baixo. Tudo bem, nós estamos realmente feito agora, mantenha pressionada opção, segure em Option ou Alt, dê um clique no último. Certo, uns olhos bem legais. Eles não são dela, não tudo de qualquer maneira. Tudo bem, então vamos ser nós. Há três maneiras de fazer os olhos, melhorá-lo, um
pouco de fingimento, e então usando o olho assustador, eles terão que colocar. Espero que os tenha achado úteis. Vejo você no próximo vídeo.
69. Projeto do curso — olhos: Certo, hora de um projeto de classe. Você deve ter notado ao longo deste curso que eu às vezes chamaria de exercício de classe, às vezes projeto de classe. Você provavelmente já viu isso. Vou tentar lembrar de chamar de projetos de classe a partir de agora. O que eu quero que você faça, nós passamos por três maneiras diferentes de fazer os olhos, realçando-os. Lembre-se de evitar, queimar e aumentar a saturação usando a ferramenta esponja. Esse foi o primeiro. Embora fizemos uma camada de níveis de ajustes, poderíamos usar curvas, e então pintamos essas linhas. Então o último, fingimos totalmente. Usamos os olhos de outra pessoa, encontramos um bom modo de mistura, e usamos isso para criar o detalhe no olho. Em seus arquivos de exercícios sob 10 retoque no projeto de classe, há pelo menos três. Clique no seu caminho através de todos os três. Com as três técnicas diferentes, aperfeiçoe e pratique suas habilidades, e depois compartilhe comigo. Quando você compartilhá-los, eu adoraria saber o que você fez, qual técnica você usou, talvez uma mistura de ambos. Mal posso esperar para ver o que você faz. Para o próximo vídeo.
70. Como clarear os dentes de forma realista no Adobe Photoshop: Oi lá. Este vídeo é tudo sobre clareamento dos dentes antes, depois, antes, depois. É fácil de fazer e a coisa legal sobre, é que uma vez que você fez isso uma vez, você pode reutilizá-lo repetidamente. Pronta? Esse é o depois. Pronta? Antes, depois, antes, depois. É um belo truque de retoque. Vamos aprender a fazer isso agora no Photoshop. Para começar a partir da sua pasta de retoque de estanho, abra os dentes 1 e 2. Vamos começar com o número 1. Para começar, vamos fazer uma seleção básica real. Vou usar a Ferramenta de Seleção Rápida, ampliar, tamanho da escova, só
vou escolher os dentes, mas não as gengivas. Mas não estamos passando muito tempo aqui. É fácil apenas obter a maior parte do trabalho e, em seguida, escovar
nas bordas usando sua ferramenta de pincel um pouco mais tarde. Não pegue as gengivas. Mas novamente, nós vamos resolver isso mais tarde, então não se preocupe muito com isso. A maioria dos dentes. Primeiro, precisamos de uma cor consistente, porque há pedaços de branco e pedaços de amarelo. Você pode ter pedaços mais escuros de marrom lá também. O que precisamos fazer é obter alguma consistência. A maneira mais fácil é ir para o painel de ajustes. Vamos usar a tonalidade e a saturação. O que queremos fazer é colorir. É estranho, mas pelo menos é uma cor consistente. Não queremos ser sempre cor-de-rosa. Aumente a saturação até encontrar, você quer uma cor amarela. Sei que só estamos tentando nos livrar do amarelo, mas vou te mostrar o que quero dizer em um segundo. Se você encontrar um amarelo quente, apenas algo assim. Em seguida, aumente a saturação para baixo, porque se você for saturação zero, ninguém tem dentes brancos ou pelo menos dentes cinza, então você precisa de um pouco de amarelo lá dentro. Esse é o truque. Porque não é perfeitamente branco, eles precisam ter algum amarelo lá dentro. Vamos desligá-lo. Muitos amarelos e inconsistentes amarelos, enquanto apenas um pequeno toque sutil de amarelo. Essa é uma parte. A próxima parte é que precisamos torná-los mais brancos, ou pelo menos parecer mais brancos. O que vamos fazer é pegar a ferramenta Retângulo, escolher uma cor de preenchimento de branco, e apenas certifique-se de desenhar um retângulo em todo o lote de dentes cobrindo-o. Quero mascarar este branco nos dentes. O que eu poderia fazer é manter a tecla Command em um Mac ou Control em um PC, para obter essa seleção e ter duas seleções funcionando. Eu apliquei uma máscara de camada a este também, mas o problema é que vamos acabar tendo que ajustar algumas camadas diferentes. É um estágio como este onde é realmente útil
ter essa máscara de camada em um grupo e apenas ter tudo dentro dele. Vamos ter três camadas: rótulos, este retângulo branco, e esta tonalidade e saturação. Vamos fazer com que todos usem a mesma máscara. Vou desfazer isso. Eu quero a seleção que é legal, e eu quero excluir essa máscara de camada para que eu tenha clicado com o botão direito do mouse nela. Vou selecionar os dois, acertar esta pequena pasta aqui em baixo, colocar em um grupo, e agora aplicar a máscara de camada a esse grupo. Só significa que esses caras aqui não precisam de suas próprias máscaras individuais. Isso não parece incrível. Vamos consertar as bordas. A primeira coisa que você quer fazer é ter seu retângulo selecionado, e nós vamos jogar com o modo de mesclagem. Lembre-se de arquear em um deles, então, certifique-se de que eu estou na minha ferramenta de movimento, segure Shift, aperte mais, e apenas siga o seu caminho até encontrar um que você sente que funciona. Provavelmente vai ser branco macio. Mas nem sempre é. Acho que quero que tenha um trabalho e encontre um que funcione. Branco macio aqui torna agradável e branco. Provavelmente um pouco forte demais, então vamos baixar a opacidade. Novamente, não estamos nos preocupando muito com as bordas, vamos descobrir isso. Para verificar o quão longe chegamos, quem se lembra do que eu posso clicar aqui apenas para ligar essa camada por si só e desligar todos os outros. Você se lembra? Sim, você faz. Se você estiver usando um Mac, é uma opção e dê o clique no globo ocular ou Alt em um PC. Definitivamente mais branco, não super crível ainda. Vamos fazer mais duas coisas. Um deles são os níveis; só precisamos aumentar. Isso é muito lavado em muitos lugares aqui. Mas vamos criar níveis de ajustes. Aqui estamos apenas olhando para talvez trazer os negros um pouco, só para que haja um pouco mais de contraste nos dentes. Não quero ir muito baixo com os tons médios, vamos manter esses bons e altos, e talvez um pouco alto aqui e os destaques. Cabe a você. Esses níveis precisam ser baixados um pouco? Talvez essa tonalidade e saturação? Precisa de menos amarelo, talvez só um toque? Antes de ir e ajustar todos estes três, vamos misturar as bordas um pouco melhor. Você poderia ir e ver como você vai bem apenas selecionando a máscara. Indo para selecionar a máscara, e para ver como você vai com pena. Provavelmente vou começar com pena, e depois escová-la. Esta foto está bem? É um pouco melhor. Desfazer, refazer. Isso pode ser suficiente para você, mas você pode ter dentes no fundo aqui, vamos ligar e desligar este. Estou bem com isso, na verdade. Eu poderia penas um pouco mais, mas eu também quero mostrar-lhe, vamos apenas trabalhar na máscara com a ferramenta de pincel. Certifique-se de que você está em sua ferramenta pincel aqui, eu estava usando um pincel especial, voltar para pincéis gerais e apenas escolher o primeiro. Vou ter o meu fluxo a 100 por cento e talvez diminuir a opacidade deles um pouco. O que estou tentando fazer aqui é, só precisa
haver um pouco mais de uma mistura realista entre o chiclete. Se a sua seleção foi realmente ruim, você provavelmente tem que ir e passar um pouco mais de tempo
certificando-se de que há transição entre os dentes e as bordas aqui. Apenas trabalhando as bordas, apenas um pouco para ter um pouco de realismo entre a transição de brancos perolados, para este mais escondido debaixo do lábio. Deve ser um pouco mais escuro. Talvez não esses caras. Definitivamente aqui nas gengivas, você pode ver as gengivas acabaram ficando bastante brancas. O que eu vou fazer é entrar nesta pequena área aqui, eu vou para uma opacidade de 100 por cento, eu vou pintá-la. Alterne a cor do primeiro plano e do plano de fundo
aqui usando a tecla X e pinte-a novamente. É mais fácil entrar nos cantos dessa forma. Fazemos X, pintamos se fora, X novamente para alternar de volta. Preto não é meu primeiro plano. Estou feliz o suficiente. Agora temos nossa mistura funcionando melhor. Temos um passeio pelo seu escritório, ou pela sua sala de estar, onde quer que esteja. Porque depois de olhar para ele por um tempo, torna-se realmente difícil saber se você foi longe demais ou não longe o suficiente. Vá fazer uma xícara de chá, volte e olhe para ela e diga, “Hmm, isso é crível?” Se você achar que não é depois de uma pequena caminhada ao redor da sala, entrar e começar a trabalhar através dos níveis. Clique na parte níveis e decidir, eu preciso de mais disso, menos disso? Será que toda a camada precisa ser virada para baixo em termos de opacidade? Triângulo branco aqui. Nós escolhemos branco macio, você pode tentar um modo de mistura diferente. A opacidade pode ser necessária para diminuir um pouco. Sob matiz e saturação, precisa de mais amarelo ou menos amarelo? Demasiado bom. Vamos para a grande revelação. Vamos manter pressionada a opção, clique no nosso globo ocular, ou alt, muito melhor. Se eu fechar um olho. Não tenho certeza do porquê. Sempre que eu estou verificando, eu sou como, “Sim, parece bom. Feche um olho, ele fica bem em um olho. O outro olho?” Duvido que isso ajude. É o que eu faço. Agora, uma vez que você passou um pouco de tempo criando essas três pequenas camadas, você pode totalmente reutilizá-las. O que vamos fazer é agarrar o grupo. Esta vai ser a minha camada de clareamento dos dentes. Digamos dentes 2. Este é um exemplo um pouco mais realista. Acho que ninguém chega tão perto. O que você acaba com é genérico. Esta fotografia não é incrível. Se você ampliar, fica um pouco fora de foco. Mas os dentes precisam ser consertados. Maré para cima. Não são dentes terríveis, mas precisam de uma pitada de tinta branca. Ferramenta Mover, selecione o grupo, Comando C, Comando V. É trazido através desse grupo de clareamento. Tudo o que precisamos fazer é clicar com o botão direito do mouse, excluir a máscara da camada, ter
certeza de que esta caixa branca está sobre seus dentes. Você pode apenas fazer essa caixa branca enorme para que a próxima imagem que
você usar, você não precisa ser tão específico. O que vamos fazer é clicar na luz de fundo. Vamos adicionar uma máscara de camada. Um pequeno truque legal é, em vez de adicionar uma máscara de camada e, em seguida, tentar pintar tudo ou preenchê-lo com preto, o que você pode fazer é clicar na máscara de camada, manter pressionada a tecla de opção em um Mac, tecla Alt em um PC e ele apenas aplica uma máscara de camada, mas a versão invertida. Em vez de uma máscara branca, é uma máscara preta. O que podemos fazer agora é pegar nosso pincel, e começar com a Ferramenta de Seleção Rápida ou simplesmente começar com o pincel como eu sou, escolhendo uma dureza que corresponda às bordas dos dentes aqui. Estou usando branco como cor de primeiro plano. Minha opacidade subiu 100 por cento. Eu vou reduzir a opacidade para algo como 50 tocando cinco no meu teclado, e apenas lentamente mas seguramente trabalhando os dentes. Mais uma vez, provavelmente teremos que fazer alguns ajustes, níveis e a tonalidade e saturação para tornar essa coisa credível. Mas você fez quase do trabalho no grupo. Há apenas alguns ajustes que você precisa fazer. Olhando muito melhor já. Lembre-se da tecla R. Se precisar movê-lo. Escape para girá-lo ao redor. Estou deixando um pouco de amarelo nos cantos. Não quero ficar muito longe da vida real. Muito melhor. Ligar, desligar. Agora você pode passar, largar isso, e decidir se eu preciso mexer com os níveis um pouco mais? Talvez abaixá-los um pouco? Levantá-los um pouco? Faça seus pequenos ajustes. Demasiado, muito pouco, um pouco. Legal. Matiz e saturação, estou feliz com a forma como a saturação é. Legal. Opção clique, on, off, on, off. Que meus amigos é como branquear os dentes usando uma mistura de matiz, saturação, uma grande camada branca velha e níveis. Agora, com níveis, que às vezes é opcional, nem sempre precisa dele. Fez nestes dois exemplos, mas muitas vezes não. Se você mantê-los em um pequeno grupo agradável, você pode reutilizá-los em diferentes documentos. Muito bem amigos, vejo vocês no próximo vídeo.
71. Projeto do curso — dentes: Olá a todos. É hora do projeto da aula. Eu vou sentá-lo solto em um projeto que começamos em um tutoriais anteriores, o que fizemos com os olhos. No seu 10 Retoque sob o projeto da classe, há um arquivo e o acordo Eyes C. Nós fizemos os olhos, eu espero que você tenha feito isso. Não se preocupe se não tiver, mas pegue esse arquivo e vamos trabalhar nos dentes. Os dentes dela são perfeitos, então vamos ter que ser razoavelmente acertados com este, mas usar as mesmas técnicas. Haveria uma camada de matiz e saturação, talvez uma camada branca com o modo de mesclagem, e nós vamos ajustar os níveis. Eu quero que você veja se você pode obtê-lo para que seja difícil dizer. Você pode fazer dentes brancos brilhantes parecer como, talvez, fazer três versões. Antes, realista, e então Colgate sorria, e o que eu adoraria que você fizesse é, eu adoraria que você compartilhasse, mas eu quero compartilhar o antes e o depois. Faça uma captura de tela dele como este, e sua versão, que você terminou e talvez, a versão Super brilhante branco se você quiser também. Eu adoraria vê-lo, deixá-lo nas tarefas, ou nos comentários, ou levar-me nas redes sociais. Tudo bem. Vejo-te no próximo vídeo.
72. Diferença entre um local vinculado e um local incorporado no Photoshop: Qual é a diferença entre Place Linked e Place Embedded? Está aqui em cima, e são estes dois. Pode parecer óbvio, mas eu vou passar por alguns dos prós e contras de ambos e alguns dos truques para, Eu acho que fazê-los trabalhar eficientemente totalmente. Embedded significa que vou colocar uma imagem e ela vai para dentro deste arquivo do Photoshop. Vai estar totalmente contido neste PSD. Se eu vinculá-lo, ele vai mostrá-lo neste arquivo,
mas na verdade ele está voltando para a fonte,
a coisa original na minha área de trabalho o tempo todo. O que significa que se eu excluir o arquivo original, o
Photoshop dirá, “Ei, para onde foi.” Eu só estou ligando a ele, enquanto incorporado significa que ele vem junto com este arquivo e vamos olhar para os prós e contras. Este arquivo aqui sem nada nele, é de 28 megabytes. Eu não incluí este arquivo no seu arquivo de exercícios só porque é um arquivo realmente grande e é apenas uma demonstração de qualquer maneira. Vamos para “Arquivo” e vamos para “Lugar incorporado”. Vou trazer esta pequena maquete em que estou a trabalhar. Está em um arquivo diferente do Photoshop. Pode ser qualquer outra coisa. Pode ser um JPEG, pode ser um arquivo AI. Se você entrou aqui estou apertando “Retenha”, eu estou apertando “Salvar”. O arquivo incorporado é aumentado em uma quantidade correspondente. Isso é quase sete megabytes e subiu quase sete megabytes. Considerando que vamos fazer a mesma coisa com arquivo vinculado. Place Linked, mesmo arquivo trouxe de uma maneira ligeiramente diferente. Parece o mesmo, funciona da mesma maneira. Aperte “Salvar”, bilhete de salto. Você pode ver aqui que só subiu um pouquinho. A maior desvantagem, digamos que alguém vai e apaga aquele, digamos que eu apague, Adeus. Photoshop vai, tinha salvar, ele enlouquece, não realmente enlouquece. Na verdade, tudo bem, você pode ver aqui em baixo. A única coisa que mudou é este pequeno ícone, é pouco ditado, [inaudível] Eu não consigo encontrar esse arquivo, mas se você olhar a pré-visualização nesses agradáveis e você pode escapar com ele sendo quebrado, Se você perder um, muitas vezes você pode apertar [ inaudível]. É difícil dizer como realmente se foi, mas se eu voltar e trazê-lo de volta, você pode ver que o pequeno ícone de link está de volta ao normal, então o problema é que, se alguém excluir o arquivo original uniformemente vinculado, ele pode causar drama. Quando você usaria cada um deles? Basicamente, quando estou trabalhando sozinho do meu próprio mundinho, eu costumo incorporar. Quando eu estou olhando para uma agência maior onde todos nós estamos compartilhando arquivos e por mais antigo trazendo o mesmo gráfico em muitos documentos diferentes,
nós vamos ter um tamanho de arquivo de balonagem, mais qualquer um precisa fazer uma atualização para este arquivo vinculado, todo mundo vai ter que abrir todos os PhD e tentar ler linker ou pelo menos atualizado com base nisso. Maior trabalho de agência, usar um monte de me ligar sozinho, trabalhar no meu escritório em casa, eu tendem a incorporar tudo. Como saber o que está incorporado e o que está ligado, pequeno ícone de cadeia é para ligado. Vamos para Arquivo e lance e confira isso, e eu trago o segundo gráfico e você vê o ícone nele apenas se parece com um Objeto Inteligente. Um gráfico vinculado tem um pequeno ícone de link e ícone incorporado é apenas um Objeto Inteligente. Agora faça isso, então este cara aqui à esquerda está embutido e este à direita está ligado. Digamos que um tamanho de arquivo está ficando muito grande e que você queira, essa coisa que estava incorporada no momento, você quer que ele vincule agora. Tudo que você faz é clicar com o botão direito nessa área cinza, não na miniatura e dizer que eu gostaria que você vinculasse a um arquivo, por favor. Agora clique no gráfico original e agora nada mudou exceto agora que ele está ligado. Eu diminuo o tamanho do arquivo e se forem feitas atualizações para o original, ele virá junto para o passeio. Duas coisas para notar sobre esta atualização, ok para arquivos vinculados, é que, às vezes ele faz isso sem perguntar, e então às vezes ele apenas foi para [inaudível], agora
é como meio feliz, eu sinto. Eu tenho este gráfico maquete, que é, este que vamos fazer, maquete gráfico um. Ok, eu quero fazer uma mudança nisso. Eu só vou abri-lo, mas porque esses arquivos abrem o que é colocado em, as coisas acontecem de forma diferente, então eu tenho o meu original aberto. Quando eu abrir esse arquivo, eu quero fazer uma alteração nele, algo óbvio, eu vou apenas torná-lo, rosa no fundo,
salvá-lo, fechá-lo, e como isso está aberto, ele acabou de ser uma atualização. Ele nem te disse, o que é legal, mas também um pouco, eu sinto que precisa ser como um oculto,
algo mudou, mas está tudo bem nós sabemos o que aconteceu, embora um pouco diferente. Se eu fechar isso e salvá-lo, esse arquivo não está mais aberto e agora eu vou fazer uma alteração. Agora você vai ser verde. Salve, feche. Volte para o original, toque nele, você vê que, não mudou. Ok, então com o aberto ele vai e vai automaticamente, oh hey, você provavelmente quer atualizá-lo, enquanto aqui, ele dá a você este pequeno ícone realmente sutil aqui dizendo, “hey, eu lhe dei uma pequena sugestão de que essas coisas em um data”, e você pode clicar com o botão direito do mouse em qualquer lugar e dizer, “atualizar, modificar conteúdo”. Só para você saber, onde esse aberto, flui muito bem com ele não aberto, ele lhe dá apenas uma pequena dica pequenina, também, o que você pode fazer é em vez de abri-lo separadamente, você pode apenas clicar duas vezes sobre isso pequeno ícone aqui e vamos abrir esse arquivo original. Voltarei à cor que tinha, que não me lembro qual é. Vamos escolher como essa cor. [ inaudível]. Salve, feche. Sim, salve e é atualizado. Independentemente de ter isso ligado ou incorporado, vou mostrar-lhe um pequeno truque. Eu vou distorcer isso porque é um objeto slink ou um objeto inteligente, Não importa, é um pouco legal de fluxo de trabalho que podemos fazer, então nós zombamos dele. Nós dizemos, na verdade eu vou entrar nisso, transformar, distorcer. Eu vou fazer isso olhar, eu queria parecer que é,
eu não sei, em um ângulo voando para fora, olha para isso. Eu usei distorções, Eu
também vou obtê-lo para clipe para a cor azul fundo se ele estiver lá. Vou movê-lo para baixo na ordem da camada
mantendo pressionado o comando e o colchete até encontrar, onde está, lá embaixo ele está. Eu tenho que logo acima dele, e se você nunca fez isso antes, você pode manter pressionada a tecla de opção em um Mac ou PC apenas para dizer cortada para esta caixa azul, então está tudo amarrado lá. Com ele selecionado também eu vou dizer “você meu amigo tem, filtro.” Deixe-me usar a Galeria Azul e o Borrão Iris. Vamos olhar para borrar um pouco mais tarde corretamente, o nosso, é apenas uma onda legal sentado como um alvo para azul. Eu quero que ele caia e eu quero apenas isso, tipo, eu estou fingindo mergulhar naquele campo, é o que eu estou tentando fazer. Uma das fotos para usar o arquivo incorporado em vez de copiar e colar é que você pode dizer na verdade, eu gostei desta, eu gostei da distorção, eu gosto do blurb, mas eu preciso que o gráfico mude. Mock-up gráfico um Eu posso clicar com o botão direito em qualquer lugar nesta área cinza e eu vou dizer “Relacionar para arquivo”. Eu vou dizer na verdade que eu quero me relacionar com esta nova versão que eu tenho. É uma versão atualizada. O legal sobre isso é que, você pode ver que é uma versão diferente. Você pode não ir para desfazer, refazer, desfazer, refazer. Eu deveria tê-los deixado óbvios, mas eu já passei e eu realmente fiz isso legal ou talvez seja a versão dois ou os gráficos do próximo mês, é um boletim mensal ou um e-mail. Basta saber que você pode passar e ir para Revincular para Arquivo, e isso não importa se você foi arquivo e lance ou lareira. Uma última coisa a mencionar é que se você tem arquivos
vinculados e você quer enviar este PSD para alguém, você vai ter que enviar ambos este PSD em qualquer arquivo vinculado. Há uma maneira fácil de fazer isso. Se você for para Arquivo e descer para aquecer um “pacote”, eu vou ficar na minha área de trabalho. Vou clicar, “Escolha aqui, por favor.” e é como empacotar adobe, Illustrator e InDesign. Ele cria uma pasta, mas o mesmo nome que o meu PSD e aqui estão todos os arquivos de link. Aí está o meu PSD original e todos os links. Ok, e isso só significa que eu posso clicar com o botão direito do mouse nisso, compactá-lo e eu posso enviar isso para alguém em um e-mail ou via Dropbox e eles têm tudo o que precisam. Se você está em um PC, eu acho que você clica com o botão direito do mouse no arquivo e este diz “enviar para”, e eu acho que é um zip, algo assim. Essa é a versão longa do Incorporado versus Vinculado no Photoshop. Vejo você no próximo vídeo.
73. Qual a diferença de preenchimento e opacidade na camada: Qual é a diferença entre fill e opacity? Aqui minhas camadas, eu tinha esta camada selecionada. Eu abaixo a opacidade e tudo desce pela camada mais a sombra. Mas o preenchimento diminuirá a camada, mas não o estilo da camada. Essa é a versão rápida da diferença. Na minha vida, eu nunca uso preenchimento, desculpe preencher. A versão longa é que vamos adicionar algum texto. [ inaudível] ao redor, e o que você vai encontrar é opacidade. Nós deslizá-lo para baixo, torná-lo transparente e preencher faz exatamente a mesma coisa. Eu vou por que eu tenho os dois? É só para que se você adicionar algo como um estilo de camada, digamos uma sombra, editar sombra. Agora, se eu diminuir a opacidade, ele faz tanto a camada quanto a sombra, enquanto o preenchimento faz a camada para cima e não o estilo da camada. Lá vai você. Essa é a diferença. Se você é como eu, esta pode ser a primeira vez que
você abaixa se o preenchimento e não a capacidade. Para mim, 99,9% do tempo eles fazem exatamente a mesma coisa, e eu não preciso preencher, desculpe, preencher. Obrigado [inaudível] Obrigado. O Charles. Obrigado são incríveis. Certo, próximo vídeo.
74. Como usar e exportar composições de camada no Adobe Photoshop: Oi lá. Este vídeo é sobre composições de camada. O que são eles? Eles são maneiras de salvar uma opção A e uma opção B de um layout, tudo dentro do mesmo PSD. Eu estou em um PSD, eu posso clicar na opção A, opção B e o que ele faz é ligar e desligar camadas, move-los ao redor para o que eu tinha salvo nas duas composições de camada diferentes. Eu posso exportar estes como JPEGs e no final e é apenas uma alternativa para ter dois PSDs na opção A e na opção B. Você pode tê-lo dentro do PSD. Vamos aprender como fazer isso para começar, vá para sua pasta de 11 camadas e abra composições de camada. Abra a janela de composições de camada e as composições de camada. Para duas versões, eu gosto desta versão. Este é um que eu quero dizer apresentar aos meus clientes, mas eu quero outra versão uma Opção A ou Opção B. A
primeira coisa é criar uma nova comp. Esta vai ser a Opção A. Vou ter todos estes tectônicos só significa visibilidade significa o globo ocular ligado e desligado. Ele vai se lembrar que quais camadas serão ativadas e quais serão desativadas. Onde essas camadas aparecem. A posição deles e a aparência. Se tiver uma sombra ou não, quero todos eles ligados. Clique em “Ok”. Tem a opção A. Legal. Vai se lembrar disso. O que eu preciso fazer agora é fazer uma opção B. Eu tenho essa citação. Eu tenho uma bolha de fala. Eu estou indo para duplicar pug vida comando J e tê-lo acima. Eu vou torná-lo menor para que ele se encaixe aqui dentro. Aperte Turn Quero desligar essa camada. Acabei de fazer alguns ajustes. Pode ser qualquer coisa. Agora eu quero acertar esta nova composição de camada. Essa será a Opção B. Clique em “Ok” e agora o que eu posso fazer é dizer: “Ei, pessoas que estão olhando para essa opção, aqui está minha opção A e opção B. É o mesmo arquivo do Photoshop, mas eu posso reorganizar, reordenar, ativar e desativar camadas para mostrar algumas opções diferentes. Pode ser opções de capa e pode ser opções de logotipo rapaz e é apenas uma alternativa para ter dois PSD sentado em seu disco rígido. Com toda a honestidade, eu provavelmente teria composições de camada A e B e não usaria composições de camada. Mas essa é a minha preferência pessoal. Quero mostrar-vos porque somos avançados, pessoas que talvez gostem disto, podem estar a trabalhar num sítio onde isto faz muito sentido. Para ir um pouco mais longe. Digamos que a opção B é boa, mas isso precisa ser um pouco menor. Eu só vou encolher um pouco e você vai lá. Isso precisa ser um pouco menor também e movido para cima para que você faça alguns ajustes. O que você pode fazer agora é você pode clicar nesta opção aqui, este pequeno botão de atualização que diz Atualizá-lo. Agora, quando eu vou para a opção A e a opção B, ou basta clicar nessas setas, se você tiver algumas versões diferentes, você pode alternar entre todas elas. Está actualizado. Ainda mais você pode exportar essas composições de camada para seus próprios arquivos. Você pode ir para Arquivo, ir para exportar, e você pode decidir se camada de exportação vem para arquivos vai dar-lhe um monte de JPEGs ou PNGs. Este aqui, obviamente, vai ser um PDF. Ou, ou eu vou colocar o meu na minha área de trabalho e eu crio um chamado, camada comp exporta-lo abrir o que
eu quero, eu gostaria que as composições fossem JPEGs por favor e tudo bem. Corrida de propina. Obrigado Photoshop e lá está a minha camada comp exportação. e estes são os dois JPEGs. A mesma coisa funciona para um PDF, ele está na mesma pequena camada de exportação de arquivos bit comps para PDF. Que os meus amigos vão passar para o próximo vídeo.
75. Como criar uma exposição dupla no Adobe Photoshop: Oi lá. Neste vídeo vamos pegar este perfil modal, este fundo e fazer uma dupla exposição. Faremos algumas opções. Este, vamos fazer este, e vamos fazer este. Pulverizamos na parte de trás. Vamos entrar e aprender como fazê-lo; Photoshop. Para começar a partir da sua pasta de 12 estilos visuais, coloquei dupla exposição um e dois. Vamos combinar os dois, então vou abrir minhas montanhas. Selecione tudo, vá para editar, copie e cole-o. Ambos juntos, vamos dar nomes. Esta vai ser a minha camada modal, e esta vai ser a minha montanha. Vamos desligar a montanha por enquanto. Precisamos aplicar uma máscara ao nosso modelo para polar para fora
do fundo e assim podemos mascarar a montanha dentro da forma dela. Para fazer isso, clique na camada modal e, neste caso, selecione Assuntos, ele vai funcionar perfeitamente. Então, há o novo para o Photoshop, ele vai procurar uma pessoa em sua seleção. Se você não tem esse recurso e não gostou, você pode simplesmente usar sua ferramenta de seleção rápida e apenas trabalhar seu caminho ao redor. Não precisa ser perfeito, pode ser muito duro neste caso. Estamos faltando no nariz, estou feliz com isso. Se quando você aplicar sua máscara, você não está satisfeito com a máscara, você pode selecionar na máscara de camada e lembrar de selecionar a máscara e ampliar. Trabalhe na borda refinada. Você pode ver que há alguns pedacinhos indo junto com um rosto aqui. Não vai importar muito para o meu exercício. Mas eu vou suavizar isso de qualquer maneira. Agradável e se você quisesse, neste caso, o cabelo não vai fazer muita diferença, mas você pode usar a ferramenta de borda refinar e pintar nessas bordas para o cabelo. Meu nori parece bem, então eu vou clicar em “Ok” e eu vou diminuir o zoom. Então nós temos uma seleção para o modelo, eu quero aplicar essa mesma seleção para a montanha. Então vamos ligá-lo. Para obter essa máscara de camada até aqui, você pode manter pressionada a tecla “Command” em um Mac e clicar
na “Máscara de camada” ou na “Tecla Control” no PC e dar um clique nele. Carrega como uma seleção, clique em montanhas e, em seguida, clique em máscara de camada. Vamos ter o modelo na parte superior, clique em manter pressionado e arraste-o para que ele fique no topo. Com a imagem real, não a máscara de camada selecionada, então a imagem, permite escolher um modo de mesclagem de multiplicação. Você pode descobrir que funciona bem para você. O que eu quero fazer no entanto, é remover um pouco da cor do rosto, porque ele está interagindo com o fundo e fazendo coisas estranhas. Se o seu passado é bastante monocromático, você não vai notar, eu vou. Então eu vou para os ajustes e eu clicar em preto e branco e eu gostaria que ele só
afetasse a camada logo abaixo, apenas a camada modelo. Agora você pode ajustar isso dependendo de quanto dos recursos que você deseja ver, isso vai depender de sua imagem ok. A maneira como eu filmei os destaques, os escuros. Então, no meu caso, porque seus tons de pele, eu só vou lidar com os vermelhos e os amarelos e eu vou querer algumas das sardas através. Agora, eu quero me livrar do cabelo, então eu vou clicar na máscara de camada na minha esquerda modal, pegar minha ferramenta de escova. Eu estou escolhendo realmente tipo de apenas um pincel grande com um zero por cento de calor, isso é agradável e fofo. Vou certificar-me de que o preto é a minha cor de primeiro plano e depois pintar o cabelo. Garanta que minha densidade seja 100% e pinte o aqui. Um pouco atrás do pescoço, quero a orelha? Não, claro. A sugestão de uma orelha, aqui vamos nós. Eu gosto da linha da mandíbula aqui, é meio legal. Certo, e isso pode ser uma dupla exposição. Vamos adicionar uma camada de fundo, eu uso minha ferramenta conta-gotas e escolher uma cor a partir disso,
em seguida, mantenha pressionada a opção backspace ou Alt backspace, ok vamos preenchê-lo. Você pode decidir que é o suficiente para você, tem a dupla exposição, dias felizes. Para ir mais longe, você pode fazer uma das poucas coisas. Vou clicar na máscara de camada para
a montanha real e fazer a mesma coisa que fiz com a cabeça de modelos. Pegue minha ferramenta de pincel e provavelmente pintar a borda para fora, você pode mudá-la de volta para branco e pintá-la de volta. Eu vou baixar a capacidade para 40%,
só para que eu possa trabalhar o fundo como uma coisa flutuante, que está chegando em segundo plano. Vês o que estou a fazer nesta camada, estou a pintar isto, para que pareça que está a sair da cabeça. Eu faço isso ficar preto e branco segurando a tecla opcional, ou a tecla alt no PC e apenas clicando na máscara de camada, estamos nos acostumando com alguns dos atalhos agora. Você pode ver algumas coisas que eu deixei para trás. Deixei uns bocadinhos aqui em cima quando estava a trabalhar nesta máscara. Então eu só vou mudar minhas cores rodada, alguns pretos na frente e apenas pintá-los para fora. Na verdade, neste fundo, em vez de ser tudo wafty, eu só quero totalmente dentro, é meio legal. Esta camada aqui, eu acho que eu fui um pouco longe com o preto e branco, Eu só vou clicar sobre a camada preto e branco
e apenas talvez puxar para fora um pouco da força. Você também pode pegar toda essa camada e apenas diminuir a opacidade dela, depende do que você quer. Certo, então essa é outra opção para a dupla exposição. Deixe-me me livrar da orelha aqui. O que eu gostaria de fazer é, eu gostaria de levá-lo em uma direção diferente. Então eu quero salvar essa visão e criar outra. Então eu posso fazer um arquivo, Salvar como, ou eu posso mostrar apenas um truque, selecionar todas as camadas, então ir para camada, ir para camadas duplicadas e, na verdade, eu vou dizer vamos ser um novo local de documento. Darei um nome ao documento, Opção B. Tudo o que fiz foi pegar a primeira opção, que ainda está aqui. Eu vou salvar este e este vai ser chamado Opção A. Eu vou salvá-lo na minha área de trabalho e Opção B, eu vou levar em uma direção um pouco diferente com você. Então pegue algumas coisas, o fundo que usamos uma cor sólida que saiu do fundo em algum lugar, o que você pode fazer é talvez um gradiente. Então eu tenho uma camada de fundo é esta aqui, eu vou pegar minha ferramenta Gradient e o que eu quero fazer é ir de digamos, esta cor azul para mais deste pêssego. Então ferramenta conta-gotas, usando a tecla de olho no meu teclado, eu vou clicar um pouco deste azul ou este azul cinza e eu apertei “X” no meu teclado para mover o primeiro plano e o fundo, você vê ali. Ok, a tecla X apenas entra e então eu clico neste. Agora com a ferramenta de gradiente, vou usar o gradiente de rádio, vou clicar em segurar e fazer algo assim. Na verdade, eu quero virar, então ele diz inverter, não, eu quero aquela cor escura, ali. Meu objetivo era tentar amarrá-lo
ao fundo um pouco mais. Então essa é uma maneira. Outra maneira é pegar essa camada de fundo, vamos duplicá-la. O que eu vou fazer com a versão inferior é eu vou excluir a máscara de camada,
clicando com o botão direito do mouse na máscara de camada e excluindo-a. Ele preenche o fundo, que por si só é legal. Você pode fazer algumas coisas. Você pode pegar essa camada de montanha e fazer ajustes e dizer que na verdade eu vou pegar a saturação de matiz, eu só vou baixá-la. Isso pode ser legal, não
é o que eu quero fazer, então eu quero trazer isso. Mas eu quero fazer é com esta camada de montanha selecionada agora, eu vou para filtrar, eu vou para borrar e ir pegar borrão gaussiano e apenas encontrar alguma coisa. Eu não quero totalmente perdido, mas basicamente eu quero gradiente no fundo que realmente reflete o resto disso. Isso é o que eu vou fazer. Agora, a única coisa que não fizemos no início é que não reorganizamos isso, nós apenas
levantamos isso onde quer que ele se colocasse. Então o que você pode fazer é clicar nesta camada, quebrar o link, vamos trabalhar no lado da imagem, deixar a máscara sozinha e reorganizar isso como quiser. Digamos que é algo assim, o único problema com isso é que estamos sem bordas aqui. Então o que vamos fazer é usar nossos truques baratos. Então, com esta camada selecionada, vamos usar editar, vamos contá-la em uma escala e ver se podemos escalar isso para obter um pouco mais de montanha. Então preenche a borda, mais por favor obrigado
muito [inaudível] tudo bem. Então, ou gradiente no fundo ou uma versão desbotada, eu vou salvá-lo, Opção B. Eu vou fazer uma terceira opção para você. Como você viu no início, mas brilhos saindo pelas traseiras. Mesma coisa novamente, eu vou selecionar todos esses caras e ir camada, camadas
duplicadas e você vai ser um novo documento chamado Opção C. Ok, A, B, C e então ver o que eu vou fazer é esta camada de montanha aqui, eu estou trabalhando na máscara de camada. Vou pegar minha ferramenta de pincel, vou ter certeza que minha cor de primeiro plano é preto e eu vou pintar isso, eu vou até desligar esse fundo. Então eu estou pintando de volta aqui muito rápido e então basicamente o que eu
vou fazer é pintá-lo de volta com branco usando um dos pincéis especiais. Então você pode totalizar todos esses pincéis e eu vou usar esses pincéis de efeitos especiais, Você não pode usar nenhum desses, um que tem, veja este pouco útil, é chamado de ferramenta de manchas, não vai funcionar neste caso. Você precisa usar os que são pincéis, estes funcionarão perfeitamente em nossa máscara. Então, qual é a minha cor de primeiro plano? Eu estou escolhendo um tamanho de pincel que é apropriado, eu estou supondo e o que eu vou fazer é, eu vou apenas talvez, eu vou diminuir a opacidade um pouco apenas um pouco mais forte. Abaixe o fluxo também, está saindo rápido demais para mim. Aqui vamos nós, vou construí-lo lentamente agora para ter este spray. Brincando com o tamanho do pincel, brincando com o fluxo e quando eu entrar amarrado a aqui. Eu estou indo para realmente apenas entrar e obter uma boa junção junto aqui primeiro, eu estou clicando como balançando meu mouse ao redor. Você tem que aumentar o fluxo um pouco e, em seguida, ficar maior e pulverizar para fora, sim. Tudo bem, nossa primeira foto, eu só vou trabalhar isso até que eu esteja feliz com ela. Vejo-te do outro lado. Tudo bem, estou feliz o suficiente com isso. Eu até troquei pincéis para uma das outras escovas especiais de pulverização. Então opção A, B, C, não sei qual você gosta. Acho que gosto da opção A melhor, legal. Tudo bem e é isso. Vejo-te no próximo vídeo.
76. Projeto do curso — exposição dupla: Olá, amigos. É hora de outro projeto de classe. Usando as técnicas que aprendemos no último vídeo, eu gostaria que você usasse os dois arquivos que estão em sua pasta de 12 estilos visuais em projeto de classe, há um chamado Double Exposure A e B. Você vai ter que mascarar Nosso homem aqui. Tente usar o sujeito Slicked, ver até onde você chega. Nós preto e branco o homem, nós adicionamos máscaras para ambas as camadas e então é uma questão de misturar os dois juntos. Você pode decidir como você quer fazer isso. Se você contém o gráfico de fundo direto no cabelo
dele com seu pequeno fluxo na parte de trás como eu fiz, se você usar o pincel de respingos, o que funciona para você. Você também provavelmente vai ter que recompor isso porque ele meio que empurrou um pouco para a esquerda. Nós provavelmente queremos movê-lo um pouco para a direita e você pode ter que gerar um pouco mais de fundo, até você. Você pode usar essas imagens, tanto fotos muito legais. Eu amo este. Aqui é a Polônia, não faço ideia de onde, mas eu adoro esse mau humor, um pouco. Eu não sei. Eu sinto que isso é apenas parte de fazer exposições duplas. Você tem que usar imagens escuras, temperamentais, nebulosas, caso contrário, você não está fazendo exposições duplas direito. O que eu adoraria que você fizesse, é que você pode usar suas próprias imagens. Você pode não ter um retrato por aí, mas você pode ter outra imagem de fundo que você poderia usar. Combine estes dois e, em seguida, compartilhe comigo no painel de tarefas, ou nos comentários ou marque-me nas redes sociais. Lembre-se, Instagram, eu sou @bringyourownlaptop e no Twitter eu sou @danlovesadobe. Tudo bem, divirta-se com este. Vejo-te no próximo vídeo.
77. Como criar um efeito de pintura em aquarela no Photoshop: Oi lá. Neste vídeo vamos criar este efeito aquarela. Aqui está o original e com alguns filtros e um pouco de textura e um pouco de nossos traços, talvez um pouco de níveis. Podemos fazer parecer que está pintado à mão. Faremos uma segunda opção. Este acaba sendo bastante abstrato, mas você pode ver que há a antiga
Nova Zelândia original . Mas agora é uma pintura em aquarela. Vamos entrar e aprender como fazê-lo no photoshop. Para começar, vamos abrir a cor da água 1, 2, 3 da sua pasta de 12 estilos visuais e começar a trabalhar com o que é uma cor e você precisa converter isso estava aqui também. Objeto inteligente. Eu só vou mostrar-lhe aqui filtro converter para filtros inteligentes. Nós vamos usar muitos filtros neste vídeo e nesta opção aqui, já que meus filtros não fazem nada além de converter em um objeto inteligente só para que você saiba, a diferença entre fazer isso dessa maneira, clicar com o botão direito do mouse e converter para um objeto inteligente ou converter para filtros inteligentes, mesmo ciclo. Em seguida, vá para o filtro e vá para a galeria de filtros. Muito do trabalho é feito por autistas e aqui, sem surpresa, que cor. Clique sobre isso e nós realmente dependeremos de sua imagem, em qual dessas sessões para brincar. Este aqui em particular, a densidade de sombra, uma vez que fica abaixo de um, isso realmente parece bem e aqueles já passaram muito tempo desde a combinação. Vamos combinar um monte de filtros diferentes para obter o efeito. Eu tenho um jogo ao redor, chegar ao que você sente parece uma aquarela realista em sua opinião e pequeno truque avançado é que você pode adicionar mais de um. Veja este pequeno virado páginas é que eu posso adicionar aquarela. No momento em que eu tenho duas aquarelas, diz China prato duas vezes. O que eu gostaria de fazer é que eles realmente têm paleta faca e aquarela. Como camadas, painel, a ordem disso é importante. A aquarela na parte superior e a parte inferior do Pell e do iPhone mudarão a aparência. Isso é o que eu estou procurando. Sob a faca de paleta, vou sentir falta aqui. Nós não vamos gastar muito tempo como
é, realmente depende de sua imagem, quais detalhes isso deve ser e lembre-se que é uma combinação. O que você pode encontrar parece bom aqui. Você pode voltar para a aquarela e fazer alguns ajustes aqui para obter o efeito certo e isso não sou bem eu. De volta à faca de paleta. Para a coisa quando você está ajustando esta chave, veja abaixo abaixo aqui. Este é o seu tipo, santo [inaudível], Estou estressado tentando aplicar essa coisa, basta esperar até que ele obtenha o controle deslizante final. Se estás a pensar que não fazemos nada, estás a deslizar por aí. Apenas sorteio para que essa coisa termine. Agora, digamos que eu gosto disso. Vamos clicar em “ok”. Eles são um filtro inteligente. Conversando com eles de vez em quando. Eu quero aplicar outro filtro que na verdade não faz parte
das galerias de filtro apenas aqui, ruído e mediana. Isso dependerá da sua imagem. Este parece bem do jeito que está. Mas se você achar que sua imagem, especialmente se for como os rostos das pessoas ou qualquer coisa que seja bastante detalhada, você pode achar que ela é muito realista. Você precisa usar essa mediana só para espalhá-la. Você pode ver quanto mais alto você vai, mais abstrato esta coisa se torna. Mas eu vou editar para este tutorial. Este em particular realmente não precisa dele, mas eu ainda vou fazê-lo e também notar que a ordem aqui é importante. Meu caso, eu quero filtrar galeria para aplicar primeiro e, em seguida, eu quero median-lo para fora. Wheatley, na verdade ele funciona do outro modo em torno alguma reunião é aplicada e, em seguida, filtrar galeria em cima. No meu caso, eu quero adicionar algum barulho a ele, metade
uterina para eu acho que eu quero. Com o último selecionado, eu vou obter um ruído de filtro e adicionar um pouco de ruído. Quanto? Não tanto assim. Só um pouco, é adicionar um pouco de grão a esta coisa. Clique bem, a quantidade, isso é apenas preferência pessoal. Mas o que realmente faz este efeito aquarela é a textura. Aquarela também é apenas uma imagem de biblioteca presa que eu comprei. Vou copiá-lo e vou colá-lo. Nós vamos usar isso para adicionar um monte de detalhes também. Vou copiá-lo e colá-lo. Bom. Sim, isso funciona. Para que isso funcione, ele precisa ser dessaturado. Você pode usar a camada de ajuste de matiz e saturação e abaixado. Eu só estou indo para truque barato usar mudança de comando para você apenas para arrancar toda a cor, então é encontrar um modo de mistura e isso é o que ele vai nos dar um pouco de efeito. Vou percorrer esses diferentes modos de sangramento, e encontrar um que funcione para você. Clareia legal. Agora isso dependerá da sua imagem. Eu encontrei. Como neste caso, sobreposição funciona muito bem em, desligado. Mas em outros exemplos no modo de mistura diferente. Este não é um fato absoluto que não deveria ser apenas sobreposto. Brincar com eles, e não tenha medo de diminuir a opacidade. Você gostaria disso, mas talvez seja bastante extremo. Ele vai baixá-lo para este efeito aquarela. Mas sem ele ser realmente dominante, eu gostaria que ele estivesse dominando bem no topo lá. A outra coisa que você pode fazer, porém, é com este lay, você pode ir para ajustes e ir para níveis. Este, eu realmente não preciso dele, mas eu quero que ele efeito apenas a minha camada de
textura aquarela e você pode mexer com isso para decidir, quão escuro é basicamente e quanto é um ferro fixo por baixo. Você pode perder sobre e aqui. Estou feliz onde está lá. Também uma das últimas coisas que farão para adicionar um pouco de credibilidade é fazer uma nova camada. Diga o nome, enlouquece. Vamos chamar isso de pinceladas. Pegue sua ferramenta de pincel, e aqui em cima. Dependendo da versão do photoshop usando, se você estiver usando 2018 ou acima, você terá pincéis gerais, sagacidade
seca e queremos este efeito especial pressões. Você não tinha esses dois. Estes são apenas os que eu instalei no Photoshop é escolas centrais. De qualquer forma. Sob pincéis de efeitos especiais, vou escolher este. Só porque funciona para mim. Eu vou roubar uma das cores dele e manter pressionado o I no meu teclado para pegar o conta-gotas lá, clique em uma das cores. Mas estou de volta à minha ferramenta de pincel. Faça um pincel muito grande. Provavelmente não tão grande. Talvez não tão grande e apenas clique algumas vezes. Você vê o que eu estou fazendo aqui. Eu só vou desligar para que você possa ver apenas adicionando algumas gotas de tinta ao hábito de fingir. Eles têm sido um realismo para o topo disso. Talvez a mesma coisa com este marrom aqui. Eu vou fazer uma nova camada e apenas cabeça, talvez apenas um aqui. Apenas um par de gotas daquele pintinho com todos eles. Novamente, você pode decidir que não é para você. Você pode decidir que precisa de shopping de cargas. O que é legal sobre essa coisa toda é, vamos dar um nome a essa. Pinceladas dois é este reutilizável. Veja passou algum tempo recebendo algo que você acha que funciona para você. Vou pegar esta camada, esta camada e esta camada. Estes três, as pinceladas são bastante individuais para a imagem. Se você usar uma imagem diferente, provavelmente está criando novos pincelados com base nas cores que estão nela. Os rótulos são importantes, essa textura, e basicamente eu quero trazer esta camada para cima porque eu quero filtros de mapa. Ele é a minha ferramenta de movimento. Vocês vão para a cor três. Basicamente eu o curvo para que esses caras viessem. A camada de fundo. Vamos torná-lo um objeto inteligente e apenas arraste as camadas inteligentes. Filtros inteligentes para essa camada e agora eu posso iluminar isso e você pode ver tudo sobre o fundo. Todo o conserto do refrigerador. Bem, os filtros aplicados e tudo o que eu preciso
fazer com esta camada é que eu preciso transformá-lo e girá-lo em torno e torná-lo algo que se encaixa nesta imagem. Vamos ampliar e lá um pouco. Você pode ver que a sobreposição neste caso não funciona tão bem como funcionou neste original. Com a camada selecionada, eu posso encontrar sobreposição não funciona para mim, ou pelo menos você gosta de sobreposição e você diminui a opacidade. Não é tão forte. Teremos pouco olhar por aqui e ver se há outro modo de mistura que funciona. Se você encontrar um que faz, mas talvez seja muito forte ou para fraco você pode jogar com como rótulos aqui para ajustá-lo e isso afetará a maneira que, essa textura como aplicada. Para negligenciar o quão abstrata nós queremos isso? Luz suave, isso é legal. Sim, embora isso funcione para mim. Talvez leve para todos eles fora em Hamilton, os filtros inteligentes desligados. Antes e depois. Legal. Isso é tudo para aquarelas, eu poderia adicionar alguns pincelados para este e o que eu faço é realmente encontrar algumas versões diferentes deste que eu não estou me repetindo tanto. É isso. Vejo-te no próximo vídeo.
78. Projeto do curso — aquarela: É hora de um projeto de classe super emocionante. Há dois arquivos em seu 12º estilo visual no Projeto Classe,
aquarela A e B. Eu gostaria que você usasse as técnicas que aprendemos no último vídeo para criar suas próprias versões. Quando acabares, partilha-os comigo. Adoraria ver o que você fez. Assim que terminar com os arquivos do projeto de classe, eu adoraria que você usasse o seu próprio. Encontre algo no seu telefone, talvez nas suas imagens do Google, fotos ou iPhotos, encontre algo. Faça um efeito de aquarela legal e, em seguida, compartilhe-o conosco nas tarefas, comentários ou nas mídias sociais. Divirta-se usando aquarelas.
79. Como decompor o método de dispersão de explosão pixel no Photoshop: Oi lá. Este vídeo é tudo sobre os métodos de dispersão
de explosão de pixel em decomposição no Photoshop. Vamos pegar este modelo aqui, esticá-lo usando pesquisa fina, pintá-lo de volta com alguns pincéis de exploração. Mais explorando pincéis para realismo, e é isso. Vamos entrar agora e aprender a fazer isso. Primeiro, vamos abrir uma decadência da nossa pasta de 12 estilos visuais. Então essa técnica, eu sinto que há uma regra não escrita, você tem que fazer isso com uma dançarina que bate cabelo. Não sei por que, mas temos nossa dançarina agora precisamos fazer a exportação dela. A primeira coisa que você precisa fazer é instalar alguns pincéis. Tenho alguns em seus arquivos de exercícios, é este aqui. Se você for para 12 Estilos Visuais, há um aqui chamado Pincéis de Explosão. Tudo o que você faz é clicar duas vezes neles e eles serão instalados no Photoshop. Agora estes são apenas alguns pincéis grátis que eu encontrei on-line que têm uma explosão legal. Você pode usar esses, mas você acaba com um efeito muito semelhante ao que eu tenho aqui. Se você está procurando algo um pouco mais elogiado ou mais afiado, basta dar uma olhada e ver se você pode encontrar alguns outros pincéis Debbie que vão funcionar para você. Você pode verificar duas vezes para baixo estas ferramentas, eles estão aqui e os pincéis, então janela vir para baixo para pincéis, e meus são aqui pincéis de explosão. Você pode ter que vomitar tudo isso, pode ser um pouco bagunçado aqui. Você quer gotejar ou fumar. Esses são pincéis que instalamos em nosso curso Photoshop Essentials. Espero que você tenha Pincéis de Explosão agora. São 12 de volta. A primeira coisa que precisamos fazer é mascarar a garota aqui.
Vamos usar nosso sujeito sorrateiro. Vai fazer muito trabalho pesado, provavelmente. Quão boa tem que ser uma seleção? Não muito bom. Só a técnica que usamos nela não precisa ser ótima. Eu só vou torná-lo um pouco maior, então eu vou pegar minha Ferramenta de Seleção Rápida e escolher um tamanho de pincel e basta clicar nisso. Agora, se você não consegue ver as bordas do seu pincel, é Caps Lock. Caps Lock on, Caps Lock off. Lá vamos nós. Vamos ver as bordas. Aquela pequena etiqueta no meio que ligamos
as preferências no início do curso, lembre-se. Apenas um pouco de adição e remoção de, lembre-se de apenas clicar, vamos adicionar à seção, mantendo pressionada a tecla de opção em um Mac ou qual PC vamos remover. Vamos aqui acontecer de ser durante Greg no fundo cinza pássaro, o que nos deu um pouco de problemas. Há as grandes coisas, está tudo bem. O que vamos fazer é duplicar esta camada aqui. Eu tenho um passado, este vai ser o meu modelo modal. Este particular está aqui, então desligue o plano de fundo, vamos preenchê-lo mais tarde, mas nossa camada de modelo, vamos clicar na máscara de camada. Você pode passar e selecionar nesta máscara e ir para Selecionar a máscara e arrumá-lo, mas não vai ser necessário. Vamos aplicar esta máscara e é contra-intuitiva, acabamos de fazer esta bela máscara de camada. O que vamos fazer é clicar com o botão direito do mouse na máscara e dizer aplicar. Nós só precisamos dele para este truque em particular porque nós vamos para liquefazer, que está sob Filter Liquefy. O que precisamos fazer aqui é decidir onde vamos empurrar isso. Estou usando a primeira ferramenta aqui. Eu tenho um pincel bem grande, e nós vamos empurrá-lo para fora assim. Você tem que decidir, eu só estou fazendo a explosão sair deste lado se você precisa que ela saia de ambos os lados, você precisa empurrar os dois lados, se você quiser sair daqui, ele precisa ir pelo menos em direções diferentes. O único problema em fazer isso assim é que isso a distorce muito mal, então eu vou desfazer. Estou mantendo pressionada a opção de comando Z ou controle alt e Z, isso vai para trás. O que você pode fazer só para ter certeza que você não comparará os lugares como principalmente o rosto dela e apenas as coisas que você não quer distorcer muito. Há este aqui, chama-se “Congelar e Descongelar”. Congelar significa que vou pintar
na cara por aqui, um pincel um pouco maior. Tudo o que significa é não vai, eu vou descer aquele lado da perna, talvez apenas para baixo do lado da mão também. Pincel menor, o que ele faz é se eu pegar a ferramenta de Warp e empurrá-la, você
pode ver que ele deixa
o rosto dela como ele, a parte do seu rosto está presa lá, congela no lugar. Estou retrocedendo de novo. O degelo é apenas removê-lo e você não precisa deste pedaço ou você não precisa deste lixo aqui. Congelar e descongelar. Agora, é tudo sobre mover isso para fora. É melhor começar com um pincel menor, e você só quer a borda realmente, você não quer muito do documento. Há muito como contorcê-lo,
e construí-lo para fora. Estou empurrando o meu para a esquerda porque é para lá que minha explosão está indo, mas há apenas um monte de torção. Uma vez que você chegar a um ponto tão longe, você pode fazer um pincel maior, e apenas puxá-lo para fora. Você quer que ele vá tão longe quanto você quer explosões de manchas para ir. Vou empurrar a minha direita para a borda. Eu vou fazer isso pelo resto desta parte, mas eu vou acelerar esta parte. Vejo você quando terminar. Tudo bem, e você está de volta clicando na letra arrastando, vamos clicar em OK. Vamos ativar nossa camada de fundo agora. Basicamente, o que queremos fazer é esconder isto completamente e trazê-lo de volta sem pincel de explosão. Poderíamos clicar em uma máscara de camada e o nome pintado completamente. Pincel Tool, pincel preto e pintar tudo, e então vamos pintá-lo de volta, ou bom truque é, antes de adicionar a máscara de camada, antes de clicar neste botão, basta manter pressionada a tecla Option no Mac ou a tecla alt em um PC e coloca em torno desta máscara, tudo está oculto. É todo preto, vamos fazer pequenos pedaços dele branco,
brilhando nossa ferramenta de pincel, certifique-se de que nossa cor de primeiro plano é branca. Em seguida, para o nosso painel de pincéis, vamos usar os painéis de pincéis grandes. Pincéis de janela, clicaremos neste pequeno ícone, usamos pincéis de explosão, e o que estamos procurando fazer é que esses caras aqui são explosões. Se o seu é como um esfregaço, é um pouco difícil de ver, então você pode ir para este pequeno menu de hambúrguer aqui e ir para este que diz ponta de escova. Verifique se o traçado do pincel está desativado. Aumente isso também, para que você possa ver tudo. Não quero ver o derrame. quais começar? Isso é com você. Temos a explosão 1, 2, 3 ,
4, 5, 6, e temos alguns deles para escolher. É tudo sobre construí-la e é exatamente muito difícil de fazer. Demore seu tempo, você pode começar novamente algumas vezes, você pode fazer um Salvar como agora, ou duplicar essas camadas e então você pode voltar atrás. Talvez use explosão também. O que você vai notar é que depende do tamanho da sua imagem. Se você está me acompanhando
, provavelmente ainda será muito grande. Há muito redimensionamento desses pincéis. A outra coisa a notar é este escovado. Se eu clicar nele uma vez, você pode ver que tem um fundo muito forte e direita, o que não é legal, mas havia escovas livres, eles parecem muito legal. O que eu preciso fazer é garantir que essa linha não seja vista aqui. O que eu vou fazer é eu vou para as minhas configurações de pincel, então janela ou configurações, e nós vamos jogar com essa rotação um pouco neste curso porque eu quero
obtê-lo para que a explosão esteja saindo desse lado. Você pode ver que eu estou apenas mantendo as bordas aqui, mas isso é o que eu estou olhando para fazer, escova menor. Eu vou fazer uma rodada disso. Me vejo querendo fazer esse tipo de barulho. Não se preocupe se você foi longe demais, nós vamos realmente trazê-lo de volta um pouco porque apenas sair aqui parece bem, mas se nós dobrarmos de volta nele, nós podemos remover pedaços dele também. Mas vamos, Explosão, vamos olhar para aquele. Vou usar este aqui. Tudo bem, é o caminho errado. Se alguém souber o atalho para girar, posso fazê-lo no meu tablet Wacom. É um atalho, mas a rotação aqui é um atalho zero que eu não sabia. Deixe-me saber nos comentários. Escovas legal, eu só vou trabalhar lentamente isso. Você pode ficar por aí. Eu quero que você veja como lento e, apenas clicando uma vez. Dá para ver o que estou fazendo aqui. Basicamente, estou pintando essa máscara. Estamos chegando lá. Talvez mais uma vez, essa parece boa. Rotação. Você pode ver não
há nenhum divisor aqui em cima porque eu liquefeito aqui fora. Provavelmente você quer fazer isso agora. Se você quiser sair deste lado também, você vai ter que liquefazer desse lado, eu acabei de fazer um lado. Nós saímos, vamos voltar em si mesmo. Tudo o que precisamos fazer é mudar a cor do primeiro plano e do plano de fundo. Então eu vou girar o ângulo do meu pincel em si mesmo. Vai ser por aqui. Você pode ver o que estou fazendo porque é muito denso aqui. Eu só estou tentando criar alguns, vamos ampliar para que você possa ver, eu estou apenas tentando criar alguns, apenas mostrando o fundo através. A última coisa que eu vou fazer é adicionar um pouco de mergulho falso os campos botões como coisas vindo para a câmera. O que eu vou fazer é criar uma nova camada, eu vou chamar esta de bits de campo. Vou usar uma dessas ferramentas. Vou usar um desses pincéis. Qual deles? Uma que não tenha uma vantagem muito forte, provavelmente a que estou. Talvez aquele. Não vou trabalhar numa máscara, na verdade
vou roubar uma cor daqui. Eu estou usando a ferramenta conta-gotas, eu vou pegar este cinza, de volta ao meu pincel, fazer uma versão sóbria e
vaga dele e eu vou apenas girá-lo em torno,
zoom out
para que eu possa ver as bordas dele. Ômega ou mil porque vai. Isso é o que eu quero. Eu quero este escolher um branco também. Vou escolher um preto e fazer outro. O que eu estou fazendo? Estou tentando fazer uns que pareçam ir além de onde precisam estar. O que você pode fazer é que você pode, com esta camada selecionada aqui, vamos transformá-la em objetos inteligentes para que possamos obter um filtro. Nós vamos para o Borrão Gaussiano, e assim, você entende o que eu quero dizer? Quero sentir que está preso contra a lente apenas fora de foco. Então, off pode ter colocado isso em camadas diferentes também para que eu possa me mover, mas aqui vamos nós. Esse é o nosso tipo de mapa de dispersão de pixel em decomposição no Photoshop. Basicamente, mascaramos o assunto, neste caso a dançarina. Em seguida, liquefeito em sua própria camada, espalhando-o para as direções que queremos que ele vá, aplicar máscara a ele e, em seguida, apenas pintado de volta usando diferentes pincéis e explorando pincéis. Vamos para o próximo vídeo. Faremos mais um pouco de decadência, mas aprenderemos alguns truques extras e faremos isso com um sapato. Sinto que essa é a única outra coisa que você pode fazer
com dançarina e um sapato, mas o problema tem que ser uma Nike. Estas são as regras, eu não as fiz. Vamos fazer isso no próximo vídeo.
80. Como fazer o efeito sapato explodindo no Adobe Photoshop: Tudo bem. Este vídeo, vamos fazer uma técnica similar,
um mapa de dispersão de explosão de pixel, mas estamos fazendo isso com um sapato. Nós vamos aprender alguns truques extras sobre o que aprendemos no último, basicamente dobrando sobre si mesmo e removendo o sapato completamente do fundo para que possamos torná-lo realista. Tão realista quanto um sapato explosivo. Vamos entrar agora e aprender a fazer isso. Vamos abrir nosso Decay 2 de estilos visuais. Aqui é aqui. Há duas coisas que eu quero fazer, e acho que estamos levando o que fizemos no último vídeo um pouco mais longe, para cobrir alguns dos problemas que você pode encontrar. Primeiro, quero isso explodindo na parte de trás do sapato, mas não há espaço suficiente aqui. Vamos usar a nossa ferramenta Cortar. Mas o que vamos fazer é ativar o conteúdo ciente, modo que quando ele gerar mais fundo, aqui, aperte “Return”, ele vai inventá-lo, o que é muito legal. Porque há um gradiente sutil no fundo aqui. A outra coisa que quero fazer é mascarar isto e removê-lo do fundo. Porque talvez no vídeo não parece, mas há um gradiente aqui. Se eu copiar e colar isso, você pode ver que é realmente, não
é a mesma cor todo o caminho através do fundo. Vamos selecionar o sapato. Eu só vou usar a Ferramenta de Seleção Rápida, e apenas dar a volta. Eu vou ser um pouco mais cuidadoso neste aqui, não uma grande quantidade. O que eu vou fazer é acelerar isso enquanto eu vou por aí e adicionar e remover seleções. Eu tenho uma seleção. Vamos fazer algumas coisas. Vamos duplicar esta camada algumas vezes. Vou clicar com o botão direito e dizer duplicado. Vamos ter três. Vamos ter o sapato por si só, vamos duplicá-lo novamente. Vamos ter outro que vai ser o, vamos ter a camada Explosão, auto-explosão, um loop, e esta camada aqui vai agora ser o fundo. Algumas coisas que quero fazer. Camada de sapato, vamos fazer tudo sobre esse cara, e vamos mascará-lo, então ele está sozinho. Quero pegar essa seleção novamente, então mantenha pressionada a tecla Command em um Mac, tecla
Control em um PC e pegue o plano de fundo para desativar isso. O que eu gostaria de fazer é tirar o sapato
do fundo para que não haja nada por trás dele. A maneira de preencher funcionará, mas minhas seleções não são perfeitas, então acabará com um fantasma por fora. Vamos apenas dar uma olhada rápida no conteúdo que temos preenchido, e vamos fazer tudo bem, porque é como o pequeno fantasma ao redor do lado de fora. Antes de fazer isso, vamos apenas para Selecionar, Modificar e ir para Expandir. Quão longe? Trinta pixels, isso serve. Agora, se formos, Editar, Preencher Content-aware Preenchimento, é tudo melhor. Isso ainda um pouco, então eu vou ficar ainda maior. Selecione, Modificar e Expandir novamente. Então, na verdade, foi 60, 30 mais 30, 60. Preencher, desmarcar. Legal. Então, quando você está fazendo isso, expandido para 60. Livre-se do fundo. Eu tenho esse cara em uma camada de zona sozinho. Agora, a camada Explosão é a coisa Dissolver novamente. Então vamos pegar a seleção. Vamos mascarar. Vamos aplicar esta máscara de camada. Nós realmente não precisamos fazer isso para este aqui porque o fundo é tão simples, mas vamos fazê-lo por hábito. Não vai doer. Mas isso significa que se você está fazendo algo com um fundo realmente complexo, você terá que fazer este passo. Legal. Vamos desligar esses caras só para podermos trabalhar na camada
de Explosão. Vamos filtrar. Vamos ao Dissolver. Este vai ser um pouco mais fácil. Que tipo de direção de explosão eu quero? Provavelmente não vou perder muito com a parte de trás do sapato. Com os gráficos, eu só queria ir assim. Não consigo evitar fazer barulhos. Ajuda a explosão a obter o humor. Na verdade, eu também vou por aqui, mesmo que eu queira que minha explosão volte lá. Eu encontrei no último exercício que eu queria apenas um pouco nos lados. Eu disse, vá até os fundos. Chegamos até aqui e vamos clicar em “Ok”. Então temos nosso grande tipo de explosão, vamos mascarar. Lembre-se, se mantivermos pressionada a tecla Option
no Mac e clicar em Layer Mask ou A key em um PC, obteremos uma bela máscara preta grande. Vamos ligar todos esses outros caras. A diferença entre este e o último é o último em que saltamos em linha reta adicionando a explosão aqui, o que é legal. O que vamos fazer é porque temos o sapato em sua própria camada, o que podemos fazer é clicar na máscara de sapato, ir para um dos meus pincéis. Vou pegar os pincéis de explosão que baixamos no último tutorial. Pegue um pouco disso. Veja como é grande, perfeito, rotação, e eu só vou pintar um pouco. Veja o que estamos fazendo aqui, como em vez de explodir, é uma área onde há um pouco de ambos. Vamos pintar de volta. Isso faz você trabalhar nesta camada aqui, apenas certifique-se de que o branco é o primeiro plano. Qual é a minha cor de primeiro plano? Agora, vou pintá-la de volta. Vamos pegar nossa ferramenta Pincel. Há tanta tentativa e erro nesta técnica em particular, um total de vezes e 60% do tempo, eu sou como, “Cara, isso foi legal.” Então os outros 40%, eu sou como, “Eu vou começar de novo.” O que eu quero? Estou gostando disso. Uau, é demais lá dentro. Eu vou escolher um pincéis realmente grandes e ficar fora deste jeito. É isso que estou procurando. Eu provavelmente estou menos feliz com aquele Dissolver agora porque ele está meio que indo para cima e girando em volta. O que eu vou fazer é clicar nesta camada Dissolver, voltar para Filter, Dissolver. Eu só vou endireitar isso. Endireitando-o, quero dizer, tem um chicote legal indo. Esse é o olhar que estou procurando. Aqui vamos nós. Clique na máscara. Pinte coisas. Vou dar a volta a isto. Pinte com preto. Pinte de volta. Talvez um pincel pequeno. Vai haver muito disto. Eu só estou indo para a frente pintando de volta, pintando de volta novamente para tentar encontrar meu meio feliz, e eu vou te ver quando eu terminar. Estamos de volta. Não estou feliz com o que está acontecendo. Então o que vou fazer é começar de novo. Vou ter a minha máscara seleccionada. Ter preto como a cor de primeiro plano e basta manter pressionadas as teclas Option e Backspace no Mac, as teclas Alt e Backspace em um PC e começar novamente. Não tenha medo de fazer isso. Então esse é o que vai longe demais. Eu não gosto de todos esses pedacinhos, e eu gosto dessas especificações lá dentro. Então eu gosto do fim deste pincel, mas não de todo. Eu vou para algo um pouco mais sutil então. Vamos lá. Vamos escolher um pincel. Vamos para outro explodindo. É girado em torno dele. Aqui vamos nós. É mais o que procuro. Isso é algo com que estou 50% feliz. Isso foi mais sutil. Vou adicionar um par da profundidade do pincel de campo. Então eu só vou pegar, eu acho que eu quero um pouco do rosa. Pegue um pincel grande, pincel
ainda maior, e tenha um pouco disso saindo. Então, em vez de usar o Liquifying, eu só estou pintando diretamente, então um pouco disso. Vou fazer outra camada aqui. Um pouco o azul. Aqui vamos nós. Vou converter ambos para Objetos Inteligentes, para que eu
possa aplicar um filtro,
Galeria, Borrão Gaussiano só para fazer sentir que eles estão fora de foco. Eu vou fazer o mesmo com o Borrão, mas talvez não tanto gaussiano. Como este é um objeto inteligente, você pode clicar duas vezes na palavra Desfoque gaussiano mais tarde e entrar e alterá-lo. Mova-o ao redor. Meus amigos, essa é a segunda versão, fiz o dançarino. Agora, já fizemos o sapato. Há muito mais licença artística neste aqui, decidir o que você quer, trabalhar com os pincéis, e não tenha medo de começar de novo. Vamos entrar no próximo vídeo.
81. Projeto do curso — decompor: É hora do projeto de classe, na sua pasta de 12 estilos visuais, há a pasta do projeto de classe. Então essa decadência, A, B e C, alguns exemplos legais, [inaudível]. Você pode usar os pincéis que eu lhe dei nos arquivos de exercícios. Mas se eles não estão funcionando para você e você sair e encontrar alguns outros pincéis, deixe-me saber quais você usa quando você compartilha seus exemplos, seja nas atribuições aqui, nos comentários, ou nas mídias sociais, mostre-me o que você fez com esses três, ou porque se você usar sua própria imagem ou mesmo apenas uma imagem diferente do unsplash.com. Eles têm algumas imagens ótimas que você pode usar comercialmente, usar para o seu portfólio, e se você usou um pincel diferente, deixe-me saber de onde você as tirou para que possamos compartilhá-lo com outras pessoas. Espero que você goste deste exercício, pode ser um pouco frustrante se você não acertar, lembre-se começar de novo, a menos que mais como mais, mas certifique-se de compartilhar seus resultados, feliz explosão.
82. 95: Olá. Oi. Você está pronto para falsificar cerca de três
D no photoshop São alguns truques baratos e divertidos. Só preciso de um pincel
e um gradiente. Deixe essas sombras falsas aqui
embaixo. Tudo é falso. Mas parece legal. Tudo bem,
vamos começar Tudo bem. Para começar, vamos abrir três
D falsos da nossa pasta 153 D. Esse plano de fundo é apenas
um plano de fundo bonito. Isso não
terá nenhuma influência sobre os três aspectos
do que estamos fazendo A próxima coisa que precisamos fazer
é descer aqui embaixo, pegar a ferramenta retangular mantê-la pressionada até
obtermos a ferramenta de elipse Essa elipse precisa ter
o gradiente que queremos usar. Provavelmente
terá um preenchimento normal. Clique em preencher na parte superior
aqui e clique em gradiente. Não estamos muito preocupados com
as cores no momento. Clique neste primeiro,
esse preto versus branco. Vamos
mudar isso em um segundo e desenhar um círculo. Estou pressionando a tecla shift para que, ao
arrastá-la para fora, seja um círculo perfeito.
Quão grande deveria ser? Basicamente, é o tamanho que você deseja da maior parte do seu
tipo de texto em três D. Você viu que o meu não ficou
tão grande, então tudo bem. Eu posso ser menor, posso ser maior. Vamos mudar o gradiente.
Com a elipse selecionada, meu painel de
propriedades Vou clicar na cor e vou
clicar duas vezes nessas casas inferiores. Você pode escolher um
dos padrões. Isso funcionaria.
Vou pular para Grabient porque adoro roubar
cores desses caras Vou usar a opção da
página dois. RI você. Até a página três, esta aqui. Vou acrescentar
três pequenos pontos. Veja a pequena cor,
pegue o número decimal hexadecimal. Clique aqui.
Clique duas vezes no primeiro ícone e cole-o
na parte inferior aqui. Salte de volta para fora.
Obrigado Grab in. Vou adicionar esse
do meio clicando em qualquer lugar na
parte inferior. Aparece magicamente. Na verdade, eu gosto disso
com a laranja. Agora vou ficar com
o original. Eu minto. Eu só vou
deixar a laranja. Louco, Dan. Pensando
por você mesmo. Agora, o que eu vou fazer é duplicar essa camada Vou clicar
nele e clicar em Caan j. Vou desligar isso Quero essa forma editável para
mais tarde, porque essa ferramenta não funcionará se
for uma linda forma ativa Então, precisamos clicar com o botão direito do mouse em elipse one e obter
uma camada de rasterização, destruindo toda a boa capacidade de
atualização dela,
mas isso significa que essa técnica realmente funcionará O que precisamos fazer é precisar algo chamado
pincel misturador. Está escondido embaixo da ferramenta de pincel,
segure-o e pegue o pincel da
batedeira. Tudo bem. A primeira coisa que você precisa
fazer é fazer essa pequena gota aqui, você
precisa desligá-la. Ele estará ativado por padrão. Vamos desativar o carregamento de cores sólidas somente porque
queremos roubar um gradiente Há muito tempo, queremos reduzir
a umidade para zero, a carga para 100% Vamos ver a dureza
desse pincel. OK. Vou clicar nos pincéis gerais e
usar esse duro e arredondado A primeira coisa que
precisamos fazer é que tamanho
do pincel seja
maior do que nossos lábios aqui. Faça com que seu pincel
seja um pouco maior do que você precisava ser. O que vamos
fazer é segurar a tecla Option
em um Mac ou a tecla k em um PC
para definir isso como alvo. Nós vamos dizer
U. O seu provavelmente não vai funcionar
porque vai dizer amostra ou camadas Vai capturar
meu histórico,
assim como este. Olhe aqui. Com ele ligado, ele pega muito
fundo, além da minha elipse. Eu quero dizer, na verdade, apenas uma
amostra da camada em que estou. Que é isso. É daqui que
ele vai roubar Vou reduzir o tamanho do pincel
para o tamanho que eu quero
usar para desenhar. Vamos criar
nossa própria camada. Esta será
minha camada de três tipos D. Na verdade, você não
deve chamá-lo de três D, é 2,5 D falso três D. Tudo
bem, então vamos começar Eu vou desenhar.
Tipo terrível com meu mouse. Então, estamos meio que lá. Está
fazendo o que queremos. Vamos desfazer isso. Eu deixo isso aí.
Vamos desligá-lo. Vamos fazer outra camada. O que você pode fazer para
parecer um pouco, na verdade, foi o
que saiu. Eu tenho que me mover rápido. Mas digamos que você
queira suavizar isso. Você vai até este ícone de engrenagem. Na verdade, se você não consegue
ver essa coisa aqui, ela está suavizando,
talvez seja necessário
ativá-la nas configurações do
pincel Eu abri uma janela e voltei para as configurações do
pincel e simplesmente suavização
, se ainda não E isso significa que
eu poderia dizer não precisa ser 100%,
mas se eu
aumentar para cerca de 70,
quando eu desenho a mesma palavra, é um pouco mais lento, mas está calculando a
média dos meus movimentos, e as coisas estão muito
melhores Bom, senhor. Bom, senhor. Eu vou desenhá-lo
novamente. Passe meu tempo. Por que estou usando a palavra rainha? Eu gosto da palavra Q em três D, e eu não sei. E isso é definitivamente rainha.
Eu sempre quis ser um E. Tudo bem, vou
refazer meu E. E. Ah, cara. Tão ruim. Vou comprar meu
tablet Wacom em um segundo e depois vou mostrar como é
incrível com um tablet Tudo bem, isso
bastará. A suavização ajudou, mas, na verdade, esse efeito funciona muito bem com
uma das duas Vamos usar
um tablet Wacom agora
e, no próximo vídeo,
veremos como usar caminhos O que é um tablet Wacom? É aquela caneta com a qual você desenha. Ele age como um mouse,
mas você pode segurá-lo como uma caneta. Eu
conectei o meu agora Acho que estou relutante em fazer todo
esse curso
com um tablet Wacom, embora o retoque seja muito útil com um desses, nem todo mundo tem um Mas vamos ver
a vantagem de usá-lo com essa ferramenta específica.
Eu criei uma nova camada. Essa será
minha versão da Wacom. Eu uso o Wakon intus pro, o de tamanho médio. Eu gosto disso. Bom tamanho, funciona muito bem. Então, agora eu estou usando o pino. Eu vou escolher um tamanho de
pincel, provavelmente. Há um pedaço maior. Sim. Outra coisa que vou
fazer é reduzir minha suavização
para zero, principalmente porque sou razoavelmente bom fazendo isso apenas com Você pode ver que é bem suave. Você pode ativar a suavização,
talvez um pouco. Mas agora, eu estou fazendo com uma caneta. Vou tentar fazer uma
boa. P. Não, Q. E você pode ver que o que é
realmente bom nisso é que o tamanho do pincel muda
dependendo
da força com que você pressiona Então, agora eu provavelmente vou
fazer um zilhão de
tentativas para tentar transformar a
palavra rainha novamente Ah, o fim. O último. Estou ficando sem espaço, vou pegar minha camada
e meio que movê-la para o outro lado. Tão perto. Eu não consigo terminar isso. Eles vão fazer. Não. Tudo bem. Está perto o suficiente. Mas você pode ver como é bom usar apenas um tablet, só fazer pequenos pontos
e pequenas coisas e tudo bem Enrolando. Legal. Tudo bem. O que faremos para adicionar um pouco mais de
realismo a isso antes de partirmos Vou trocar meu mouse de
volta. O que eu vou fazer é
com essa camada selecionada, eu vou adicionar uma sombra projetada. Tudo isso parece bom. E clique em OK. Lembre-se de que o que eu quero fazer é clicar com o botão direito do mouse na
sombra e criar. Muito
obrigado. Significa apenas que essa sombra projetada
agora está em sua própria camada. O que eu vou
fazer é talvez fazer com
que eu tenha certeza de quanto. Vou dividi-lo
ao meio, pelo menos. Eu vou pegar você. Copia,
na verdade corta, cola. Eu tenho duas metades. Por que? Porque eu quero usar
essa dobra no chão. Vamos trabalhar na
primeira metade primeiro. Desligue a metade inferior e é
isso que eu quero fazer. Eu quero parecer as
luzes vindo daqui de cima e
encostadas na parede traseira Então, com essa camada,
a parte inferior, eu quero que ela se alinhe. Use minhas teclas de seta apenas para ter
certeza de que está alinhado. E então eu vou
editar, transformar e vou
usar a opção de perspectiva. Eu vou meio que tentar
fazer algo assim. Parece que está meio que
atravessando o chão, para arrastá-lo um pouco para fora. Vire. Está meio que funcionando bem. Tudo bem, eu tenho que brincar
com isso um pouco mais. Estou feliz o suficiente com
isso, e o que
vamos fazer é contornar
os modos de mesclagem Ambos, o que
eu poderia fazer é encontrar um modo de mesclagem que funcione
para este, então multiplique Vamos dar uma olhada em
outra coisa, mas mais verossímil. Essa é uma boa luz suave e talvez também diminua a
opacidade da luz suave E eu vou fazer o
mesmo por este. Você e meu amigo baixem suavemente
e diminuam a opacidade Provavelmente até um pouco
mais baixo. É super sutil. Está ajudando um
pouco. Tudo bem. Então você faz um círculo,
adiciona um gradiente e garante que
esteja rasterizado Use o pincel misturador, uma amostra dessa elipse e depois
pinte-a em sua própria camada Se você o associar a um
tablet como um tablet wacom, poderá fazer coisas melhores, ter apenas
um tipo de espessura Tudo bem, vamos ver
o próximo vídeo. Vamos fazer algo
muito parecido, mas vamos
usar caminhos em vez disso. Coisas como o penol
que vou ver em um segundo.
83. Efeito de gradiente 2.5D falso com caminhos no Photoshop: Tudo bem, neste vídeo vamos fazer algo semelhante ao que fizemos no último, exceto que vamos usar caminhos neste caso porque isso é um pouco mais de controle, especialmente se você entender como a ferramenta Caneta funciona e Além disso, irá descobrir como entrelaçar essas coisas também. 38, porque é quantos aniversários eu tive e eles se entrelaçam muito bem. Vamos começar. Para começar, estou usando o mesmo plano de fundo. Eu estou usando o mesmo arquivo de antes, nós apenas desligamos tudo. Indo para fazer uma nova camada e este vai ser o meu 3D usando caminhos 2.5D. Para que isso funcione, precisamos de um caminho. Caminho são usados, criados usando qualquer uma dessas ferramentas. Se você for mestre da ferramenta Caneta, use a ferramenta Caneta. Se você fez o meu curso ilustrador e você está amando a ferramenta Curvatura, use essa se você não tem idéia do que qualquer um destes fazer, pegue a ferramenta caneta à mão livre e isso está nos permitindo desenhar caminhos ou linhas, mas à mão livre. Desfeito, apenas certifique-se de que fora do topo aqui é ou Caminho e não Forma. Se você quiser, você pode ver que diz curva ajuste. Eu acho que por padrão como um completo, não
consigo lembrar o que o padrão é, mas ele vai até um máximo de 10, apenas indo para suavizar o seu desenho. Se é um zero ou um, não
vai ser muito suave e eu estou desenhando, você viu no início um 38, é a minha idade. Acontece que eles se entrelaçam bem. Onde quer que você queira pegar a ferramenta Caneta. Eu não posso fazer isso, você pode usar a ferramenta de caneta à mão livre. Estou usando a ferramenta de curvatura porque desenha curvas doces. Esta é a introdução super rápida clique uma vez. Clique mais uma vez, apenas lhe dá uma linha, mas você clica uma terceira vez e é uma curva. Clique aqui novamente, vamos talvez mais uma vez, mais algumas vezes e se eu quiser transformar isso em um canto, eu mantenho a tecla de opção e dou um clique e ele vai de uma curva para um canto, curva doce. Eu tenho o meu caminho, ferramenta de mão livre ou a ferramenta de caneta ou a ferramenta de curvatura. Vou ao Caminhos e é disso que preciso. Agora, por padrão, um caminho desaparece quando você começa a trabalhar com ele, a menos que você dê um nome a ele. Clique duas vezes na palavra Caminho de Trabalho e este é o meu três. Posso voltar para eles mais tarde. Agora, no painel demarcador, se você não pode ver os caminhos, ele está em Janela e lá está. O que você pode fazer é clicar com o botão direito em qualquer uma dessas áreas cinzentas e dizer, eu gostaria que você fizesse um traço nesse caminho, por favor. A partir das opções que eu quero usar a ferramenta de pincel misturador e se você ainda não o fez, você precisa voltar para o tutorial anterior para criar a lib, definir o destino, obter essa ferramenta de pincel misturador tudo configurado. Nós não vamos cobrir isso novamente e apenas ligar a Pressão Simular e o que ele vai fazer é um bom trabalho. É uma maneira de contornar se você não tiver uma mesa digitalizadora wacom, você quer que ela seja agradável e suave. Se o seu não se parece nada com isso, há algumas coisas que podem estar erradas. Vou desfazer. A coisa mais fácil de verificar é copiar meu pincel misturador. Eu vou para o meu pincel misturador lá, eu vou abrir minhas configurações de pincel mixer, em Shape Dynamics. Apenas certifique-se de que a pressão da caneta é usada. Smoothing não precisa estar ligado, mas definitivamente pressão da caneta e no topo aqui você pode copiar as configurações que eu tenho. Se você está descobrindo onde ele fica em torno do encadernado, ele fica todo irregular. Algumas coisas que você pode fazer para corrigir isto é, vá para Forma da Ponta do Pincel e altere o espaçamento para baixo para um ou dois por cento. alto é o mais irregular eles são. Isso pode consertar isso. Se não acontecer, provavelmente significa a sua fonte original, a coisa que fizemos no último vídeo, esse cara aqui não é grande o suficiente, você fez uma elipse muito pequena e você está tentando esticá-la muito grande e Photoshop é apenas esmagando em torno do lugar. A outra coisa que vamos fazer só porque é legal, sob a Shape Dynamics, vamos dizer que há um diâmetro mínimo, você
pode ver as bordas aqui? Porque aquele que eu fiz tinha extremidades muito pontudas dos três. Vamos dar uma olhada e compará-los. Eu tenho uma camada. Vá para Caminhos, clique com o botão direito traçado caminho faz um pincel parecer bom, simular pressão vai colocar pontas pontudas, mas o que eu quero fazer é fazer outra camada. Vou desligar esse, voltar ao meu Caminhos, mas antes de adicionar o
traço, vou dizer que tem um diâmetro mínimo. Você pode ver aqui? Isso é tão pequeno quanto as linhas vão ficar, não
vai ser mais pontudo. Traçado Caminho, para o jeito que você está procurando. Vamos passar mais uma vez do topo e fazer uma nova camada. Vou pegar minha ferramenta de curvatura e desenhar meu oito. Certifique-se de que seu próprio caminho. Eu vou dizer, eu quero que você fique preso lá, aqui em baixo. Eu tenho uma ferramenta de curvatura apenas clicando em nada pressionado, sem arrastar, lá e ali. Ótima figura oito de zonas infinitas. Se você não estiver satisfeito com o resultado final, você pode saltar para esta área branca aqui, a Ferramenta de Seleção Direta. Mantenha pressionada a seleção do caminho, pegue isso, clicando nos pontos angulares e você pode fazer ajustes para obtê-lo mais como quiser. Estou feliz o suficiente com isso. Eu minto. Houve um ajuste justo com isso. É o suficiente. Eu recebo mais um. - Não. Acho que era melhor antes de começar a tocá-lo. De qualquer forma. Quero mover a coisa toda. Vamos pegar a ferramenta de seleção de caminho, pegar qualquer uma das bordas e movê-la para cima. Eu tenho minha própria camada. Eu vou para Caminhos, e eu fiz isso totalmente errado, tudo isso como sendo esmagado em uma camada. O que eu vou fazer é selecioná-lo, cortá-lo, novo caminho, colá-lo. Está em sua própria camada de caminho e este
vai ser o oito. Você deveria fazer isso primeiro. Faça uma nova camada, entre em caminhos, crie um novo caminho e comece a desenhar o oito. Faça o que eu digo, não o que eu faço. Com oito selecionados, vou traçar o caminho, pincel misturador. Você pode ver que está começando onde eu comecei. Se eu fosse fazer de novo, provavelmente começaria a fazer o meu caminho no topo aqui porque parece estranho assim, mas vai servir. Para se livrar desta linha no centro aqui, basta clicar em qualquer lugar fora do caminho, clicar nas camadas e o que eu quero fazer é fazê-las interbloquear um vai por cima, outro vai por baixo. Na verdade, eu vou pegar minha ferramenta de movimento e talvez girá-la um pouco, olhe para isso, tão ruim. Estou girando em torno dele para que eu possa esconder esta pequena junção aqui e eu quero fazer duas coisas. Eu quero que isso vá por baixo, e isso vá para cima. Preciso de uma visão disto, o oito. Vou duplicá-lo em um acima e um abaixo dos três. Lá vamos nós, três sanduíches. A parte superior, Eu quero adicionar uma máscara de camada e eu agarro meu pincel para ter
certeza que a cor do primeiro plano definido para pintura preta na máscara. Estou só a pintar esta parte, faz com que seja muito fácil fazer esta coisa de entrelaçamento. Desde que seja um no topo, outro no fundo. Use uma máscara no topo. É assim que se faz o nosso falso caminho de entrelaçamento 3D 38. Eu vou vê-lo no próximo tutorial.
84. Projeto do curso — falso 3D: Olá, é hora do seu projeto. Usando as técnicas que aprendemos nos dois vídeos anteriores, você pode desenhá-lo manualmente ou você pode usar a opção Caminho. Eu gostaria que você criasse seus próprios carrapatos. Pode ser seu nome, pode ser sua idade como eu, comida
favorita, palavra aleatória como rainha porque você gosta da forma dela. Agora, na sua pasta 15 3D, há uma pasta de projeto de classe, e eu lhe dei dois fundos que você pode usar. Cabe a você. Você pode encontrar outros em Unsplash ou Pixel, ou pode ser apenas um fundo simples, talvez um gradiente. Mas use as técnicas que aprendeu, crie algo e envie para mim. Mostre a todos, seja as tarefas nesta página, os comentários ou compartilhe comigo nas redes sociais. Lembre-se, no Instagram eu sou @bringyourownlaptop e no Twitter eu sou @danlovesAdobe. Mostre-me o que você fez e vamos para o próximo vídeo.
85. Como editar vídeo no Adobe Photoshop: Oi lá. Neste vídeo, vamos olhar para a edição de vídeo. Nós vamos adicionar música, logotipos vão voar para dentro Eu vou falar todo o caminho. Haverá transições onde passaremos de um tiro para outro. Nós adicionamos música de fundo é terceiro inferior, você pode ver lá hey, esse é o meu nome. Tudo isso pode ser feito no Adobe Photoshop. É uma loucura, é incrível. Vamos entrar agora e aprender a fazer isso. Para começar, a maneira mais fácil é ir para File Open, e em seus 13 vídeos, clique em “Talking Head”. Photoshop tem a capacidade de abrir MP4, MOV, AVIs talvez. MP4 é o formato mais genérico. Vamos clicar em “Abrir”. A coisa legal sobre isso, é que ele vai padrão para algo que se parece com isso. Você terá esta linha do tempo mágica aqui em cima, suas camadas aqui são diferentes, você pode ver que é um grupo de vídeo, você pode ver que o ícone tem um pequeno rolo de filme no canto. O principal que precisamos é esta pequena linha do tempo se ela não aparecer, vá para “Janela”, vá para “Espaço de Trabalho” e diga que eu quero ser ajustado para movimento, por favor e ele deve trazê-lo para cima. Há uma outra maneira de começar e eu vou te mostrar rápido. Você pode obter um arquivo e ir para “Novo” e ir para esta opção que diz “Filme e Vídeo”. Esta opção aqui no início é geralmente o formato mais comum. É chamado de 1080p, significa apenas que tem 1080 pixels de altura, que é apenas o tamanho genérico para vídeo de alta definição. A única diferença entre fazer isso assim, eu vou te mostrar um pouco rápido. Não é o que eu quero que você faça é querer que você saiba que você pode fazer dessa maneira. Porque uma vez que você tem aqui, você precisa ir para o arquivo, você precisa ir para importações vinculadas. Você pode incorporá-los vinculando o arquivo de vídeo apenas significa que o tamanho do arquivo deste PSD não vai ser enorme. Então nós colocamos em, apertamos “Return” para obter o tamanho certo, nós só precisamos clicar neste botão aqui, “Criar Linha do Tempo” e basicamente estamos prontos para ir novamente. Cabe a você. Vamos fechar isso, mas vamos usar o método de abertura de arquivo, é melhor e mais rápido. Ok, a primeira coisa é que você vai aprender um atalho, a barra de espaço. Se você clicar em “Barra de espaço”, ele vai parar de tocar. “ Olá”, ok e barra de espaço de novo é parar. Então você usa isso razoavelmente muito ou você pode definir este botão de parar de jogar. A outra coisa a notar é que você precisa ficar de olho nesta coisa aqui, no momento em que ele diz, 25 quadros por segundo. Basicamente, é a taxa de quadros ou a velocidade em que este vídeo é reproduzido. Agora, o Photoshop não foi criado para edição de vídeo. Ele pode fazê-lo, então ele faz um bom trabalho, mas para mim, para toda a minha edição, eu vou usar um programa desenvolvido especificamente para Adobe, seu Adobe Premiere Pro. Algumas outras pessoas usam Final Cuts, que são produtos Apple. O Premiere Pro foi criado para fins específicos, por isso significa que ele reproduz muito bem e rápido e tem muito mais configurações e recursos. A razão pela qual eu mostro aqui no Photoshop como editar vídeo é que isso significa que podemos confiar em quais são as ferramentas que já conhecemos. Se você quiser clicar nos níveis deste podemos apenas clicar nesta camada de níveis, ir para ajustes e ir para níveis. É legal, matiz e saturação funciona. Todos esses truques, podemos subir para filtrar e usar a galeria desfocada, todas as coisas que você conhece e adora. A grande desvantagem é que não há muitos recursos para edição de vídeo. É estilo homem das cavernas e o outro é a reprodução. Fica muito nervoso, muito estressado, só vamos fazer um pequeno vídeo segundo. Mas assim que entramos em algo mais longo do que isso, Pearl Photoshop tenta que é melhor, mas não é feito de propósito. Se você está interessado em protocolos premium confira o meu em curso Premier Pro. Mas vamos ficar com o Photoshop porque é muito incrível
além de ser lento e está faltando alguns recursos que eu gosto. Você chega muito longe apenas editando vídeo no Photoshop. Uma das coisas para ajudá-lo, porém, é clicar nesta engrenagem e mudar a resolução para 25 por cento, apenas significa assistir isso e se eu apertar “Play”, “Eu sou um designer gráfico” você vê que é bastante pixelado. Só significa que está pré-visualizando pixelizado. Ele vai realmente exportar em alta resolução, não importa o que você tem a resolução definida como aqui, mas enquanto você está trabalhando, defina-a para 25. A próxima coisa a fazer é você editar, e neste caso, eu vou limpar sozinho. Basicamente eu tenho dois falsos começos e então eu entro nele. Veja isso, eu vou te mostrar o que quero dizer, onde eu termino? Aqui vamos nós, então vamos jogar isso, “Eu tenho que fazer” sim acontece muito. Vou levar cerca de dez tomadas para fazer qualquer boa tomada. O que temos que fazer é editá-lo. Então há aquele e há aquele que eu estou falando, eu vou usá-lo novamente, “Eu sou um designer gráfico.” Sou designer gráfico, perdido. Este último aqui, você pode ver aqui em baixo, estou a 26 segundos, isso é uma boa indicação para você também. Eu só vou esfregar de volta, nós chamamos isso de esfregar para pouco antes de eu acenar minha mão, é onde eu vou cortá-la. Para cortá-lo, você pode clicar sobre este cara aqui, e clicar sobre a pequena tesoura e isso apenas corta em pedaços. Você clica neste primeiro pedaço direito no meio
do bit azul hit “Excluir” e ele se livra desse primeiro pedaço. Ok, essa é uma maneira de fazer isso, então eu vou apertar “Space-Bar” para ver onde começa. “ Oi, meu nome é”, parece ótimo. Eu vou esfregar até o fim onde eu terminar isso é tudo. Sobre lá, “Conferência muito legal” lá eu paro. Então, em vez de usar a tesoura para excluí-la, você pode arrastar as pontas e dizer:
“Na verdade, lá vai você.” Então, ou use uma tesoura ou apenas arraste as pontas, é com você. É a nossa primeira edição. Como trazemos outro arquivo de vídeo? A maneira mais fácil é “Arquivo”, vamos trazer, “Lugar Ligado”. vez, estamos trazendo para falar sobre o lugar ligado e este aqui e no momento ele está me perguntando se eu quero redimensioná-lo? Não sei, vai apertar “Return” no meu teclado. Agora eu vou esfregar ao longo deste aqui eu só tenho uma boa tomada. Você não tem que perder muito por isso. Você vai ver em algum lugar lá, que sou eu falando, Eu gostaria que você pudesse ver a forma de onda se você é como um Premier Pro usando o seu tipo, “Oh eu gostaria de poder ver isso.” Gosta da faixa de áudio? Você não pode. Diga também, se você realmente gosta de edição de vídeo do Photoshop, você está apenas fazendo mídias sociais curtas, Instagram hex, perfeito para isso. Na verdade, você pode comprar plug-ins para o Photoshop levar a edição de vídeo a outro nível. Eu não os comprei ou usei eu mesmo porque eu pulo em algo como premium, mas se você é uma pessoa que você é como, “O homem não precisa aprender premier, basta me dar alguns recursos extras no Photoshop e eu vou ser bom.” Existem plug-ins que você pode comprar para levá-lo para o próximo nível. Então lá estava eu falando, e lá eu parei. Vai ser suficiente para esta edição. Não se preocupe muito com o diálogo. Só estamos pegando as técnicas aqui. Então eu vou esfregar este pequeno lavador aqui para encontrar o fim. Veja isso aqui, há uma pequena colina grande, desculpe por isso. Grande colina se aproxima. Pequena colina se aproxima. Vou continuar ampliando até ver o fim, e eu poderia usar minha tesoura ou apenas arrastá-la até que estale. Então, meus amigos, é a minha edição a partir disto. Isso é chamado de corte de salto. Vou tocar no “Space Bar”. Vê isso? Corte de salto. Nem sequer é um corte. Saltar transição apenas uma vez pára uma vez que começa e eles podem trabalhar. No meu caso, parece um pouco estranho. Há um pequeno salto. A câmera também se move. A primeira pequena técnica que vamos olhar é transições. Transições estão escondidas neste pequeno ícone aqui. Eu clico sobre eles, e aqui estão todos os conceitos básicos. Vamos ver o Fade. Clique em “Segurar” e arrastá-lo, e você pode ver que eu posso assustar os dois aqui. Vamos dar uma olhadinha. Isto vai desaparecer e voltar a desaparecer. Para que funcione literalmente, você precisa de um fundo preto aqui, que você
possa fazer uma nova camada, colocá-lo na parte de trás, preenchê-lo com preto, batê-lo preencher. Nós usamos um atalho, e apenas certifique-se de que você tem uma camada embaixo preenchendo isso. Pode ser branco para o qual você quer fazer a transição. Tudo o que fiz foi criar uma nova camada, colocá-la na parte inferior, e esticá-la para ficar aqui embaixo. Agora, quando isso desaparecer, não sei por que as transições são muito lentas. Vou me livrar dessa camada aqui. Vamos trocar este. Vamos apagar este. Basta clicar nele fisicamente na linha do tempo e excluí-lo com sua tecla Delete. Vamos tentar Cross Fade. Este aqui faz algo estranho. Está tudo bem. Não se preocupe com isso, mas veja isso. Ele vai tentar desaparecer na cruz, e você quer que ele esteja no, não vai funcionar neste caso. Estou a fazer o que quero. Cabe a você. É muito comum ter desbotamento para preto ou desvanecer-se para branco. Eu gosto de desaparecer para branco apenas como uma preferência pessoal, então mergulhe para branco. Normalmente, está frio. Eu gosto muito curto. Você pode vê-lo? Eu posso ampliar. Grande montanha, grande montanha, e apenas agarrar as extremidades destes e apertá-los dentro Eu acho um belo flash branco. Mantenha o espaço. [ inaudível]. Veja, todos os meus intros fazem isso se eu aguentar mais rápido que isso. Real como um pequeno flash branco. Isso é o que eu gosto. A maioria das pessoas usará desbotamento para preto, porém, em vez de um desvanecimento para branco. Outro pequeno truque básico de edição é quando você está fazendo um desses cortes, pode ser estranho que eu apareça no mesmo lugar, o que você pode fazer é falsificar outra câmera, ou uma foto diferente. O que eu quero fazer é com esta camada aqui, Cabeça
Falante 2, eu vou transformá-la. Estou usando meu comando T. Você pode ir para editar transformar. Eu só vou aumentar a escala. Parece que fui incriminado aqui. Entrar. É um velho truque legal. Parece que é um lugar totalmente diferente e as câmeras sendo reiniciadas em vez apenas tirar meus braços terríveis e nozes. Isso é com você. Aprendemos a transição, e fizemos um pequeno flash para branco. Está tocando um pouco devagar aqui, então eu não vou me preocupar muito com o tempo até que eu o renderize. Eu escalei isso, subi para parecer que houve uma mudança de câmera. O outro problema é que vai ser um pouco de pixelização. Cabe a você. Estou feliz com isso. Eu acho que ele lê melhor como eu clipe ou a necessidade está piscando e aparecendo exatamente no mesmo lugar. Se eu tivesse que piscar de novo, eu apareceria de volta nesse tipo de escala e alternaria entre os dois. A próxima coisa que queremos fazer é adicionar algum áudio. Sente-se aqui onde diz Audio Track, e clique sobre isso, clique em “Adicionar áudio”. No seu arquivo de 13 vídeos, eu tenho música de fundo. Estamos prontos para ir. Vamos dar uma olhadinha. Reduza o zoom. Você pode ver que é um clipe muito longo, então eu vou colocá-lo em estar aqui. Zoom de volta, de volta ao início, aperte “Barra de espaço”. A música de fundo, eles são realmente bons para coisas como intros. O único problema com isso aqui é que é muito barulhento. Vou clicar com o botão direito do mouse em qualquer lugar na parte verde e baixá-lo para algo para que você ainda possa me ouvir, e vamos embora. Música realmente adiciona um recurso especial. De onde você tira música? Há alguns lugares. O que eu conheço de cima da minha cabeça é que Wistia tem, que é Wi-I-S-T-I-A, Wistia. Eles têm músicas grátis que você pode usar, mas para mim, eu tenho toda a mina da Shutterstock, um dos poucos lugares que ainda fazem áudio. Isso pode ter me custado adivinhar cerca de US $30, e eu usá-lo uma e outra vez como minha música de apoio. É assim que se adiciona música. Vamos fazer outra coisa típica de edição de vídeo no Photoshop, e é a introdução do logotipo. O que vamos fazer é ir para Arquivo,
vamos para Place Linked, e vamos trazer o logotipo Traga o Seu Próprio Laptop. Esse é o meu negócio. É em 13 Video, vamos clicar em “Lugar”. Vamos clicar em “Ok”. Já é do tamanho certo. Aperte “Return” para colocá-lo lá. Agora vamos ter um pequeno problema em que isto,
é apenas um tipo de amontoado onde quer que o meu playhead estava. O que eu vou fazer é não ter nada selecionado, apenas ter isso selecionado, arrastá-lo para o início. Quanto tempo eu quero que seja? Ainda não tenho certeza. Vou pegar tudo isso. Segurando Shift, clique em ambos, e apenas arrastá-lo até aqui até que eu tenha o momento certo. Quanto tempo precisa ser? O jeito que eu faço é apertar “Barra de espaço” e então eu aperto “Barra de espaço” novamente quando eu sinto que já faz muito tempo. Então barra de espaço, talvez até mais tempo. Estar lá em cima parece certo. Clique em, coloque-o, espaçamento novamente. - Sim. Isso parece, talvez um pouco mais. Lá vamos nós. Agora eu vou pegar esses dois caras e arrastá-los para dentro, estender a música de fundo para que comece lá. Eu vou tê-lo para que ele leve até o final lá, e nós vamos fazer um pouco de animação logotipo.
86. Efeito paralaxe para fazer as fotos se moverem no Photoshop: Oi lá. Este vídeo é tudo sobre animações de paralaxe. Basicamente, vamos cortar duas camadas diferentes e depois animá-las usando nossas novas habilidades de edição de vídeo. Você pode vê-los aqui. O edifício é mascarado, as nuvens são mascaradas, e é animado em diferentes momentos dada a ilusão de movimento. Outra versão aqui. Este aqui nós cortamos a montanha da frente para fora do meio, da parte de trás, e do céu, então nós vamos apenas mover-nos em momentos diferentes para dar-lhe este efeito Parallax legal. Esse cara, esse cara, esse cara, completamente, uma experiência de vídeo 2.5D. Vamos entrar agora, e aprender como fazê-lo. Primeiro na sua pasta de 13 vídeos, vamos abrir o paralaxe 1&2. Isso é tudo, vamos preparar nosso arquivo, eu vou encolher minha linha do tempo, me
colocar em paralaxe 1. Antes de transformá-lo em uma linha do tempo de vídeo, vamos mascarar o céu aqui. Tem que ser lento ser fácil por causa deste bom azul claro, eu estou usando a ferramenta de seleção rápida. Eu tenho o céu selecionado, vamos invertê-lo. Então nesta camada de fundo aqui, vamos clicar em “Máscara de camada”. Vamos trazer a paralaxe 2. Selecione tudo, copie e cole-o. Minhas nuvens são maiores do que eu preciso, e isso vai ser chato porque eu queria me mover através do céu. Quero ficar aqui embaixo. Para paralaxe funcionar, precisamos ser capazes de ver a linha do tempo. Se você não pode ver, vá para a janela, e vá para a linha do tempo. Clique em “Criar linha do tempo de vídeo” e estende-a novamente. Vamos trabalhar no prédio primeiro. Vamos dar nomes a eles. Aqui, este vai ser o meu prédio e isto vai ser as minhas nuvens. Na camada de construção, eu vou diminuir o zoom para que eu possa ver o final aqui. Quanto tempo precisa ser? É totalmente com você. O padrão é cerca de cinco segundos. Você pode ver esses grandes números aqui, 1, 2, 3, esses são segundos. Eles vão mudar dependendo do seu nível de zoom. Se aumentar e diminuir o zoom, terá números diferentes. Então, vamos aplicar. É uma animação muito longa, cinco segundos está bem. Você pode estendê-lo apenas agarrando estas pontas aqui e decidindo quanto tempo você quer que seja. Para o prédio, precisamos fazer duas coisas. Vamos fazer a posição e a escala. Vamos girar essa flecha aqui. A única coisa que acontece quando você está fazendo uma máscara é que se você animá-la agora, eu vou mostrar rapidamente uma posição, depois outra posição, mas eu vou movê-la. Veja o que acontece quando eu o animo. Espere, a camada, mas não a máscara anima. Vou desfazer o caminho de volta ao início antes de ter quaisquer quadros-chave, e tudo o que vou fazer é clicar com o botão direito do mouse nesse cara e dizer: “Você é um objeto inteligente.” Clique com o botão direito do mouse na área cinza , objeto
inteligente, agora, quando o animamos, ele vai funcionar. Então jogue de cabeça bem no início e eu clico no pequeno cronômetro, eu pego nosso primeiro quadro-chave e depois aqui, o fim, isso tem que mudar isso. Isso requer um pouco de prática jogando em torno do que parece crível. Vou fingir um zoom. Pode ser um pouco de panorâmica e zoom, então eu estou me movendo e zoom ao mesmo tempo. Vou entrar em um quadro-chave aqui, vou para Control T em um PC, Command T em um Mac. Vou fingir que estamos a aproximar, mas também a descer. Volto e vou ver como é isso. Já viu o zoom? Talvez seja um pouco demais. A outra coisa a notar é que a mina volta por aí. Se o seu não está circulando, você pode ver nesta pequena roda dentada aqui, você pode ativar a reprodução em loop. Provavelmente é um pouco demais, então se você quiser mudá-lo, você tem que ter certeza que você colocar sua cabeça de jogo bem acima dele. Se você não fizer isso para se aproximar, adicionará um quadro-chave extra, então eu vou desfazer. Quando você arrasta essa cabeça de jogo, qual é o atalho que aprendemos? Se você manter pressionada a tecla Shift
e arrastar, ela tentará encaixar em coisas como esse quadro-chave. Havia apenas um pouco a muito talvez, vamos para algo um pouco mais sutil. Não muito mais sutil. Muitas das obras podem ser feitas por estas nuvens. Não há máscara nisso e eu a fiz um pouco maior. Eu fiz isso, só encontrei a imagem que era um pouco maior do que precisava ser, então eu vou começar ao longo desta borda. Pegue o começo aqui, vamos girar essa posição para baixo, e no final aqui, eu vou ter um tipo de aqui. Assim como uma regra básica do polegar é que, onda é mais próximo do primeiro plano, move-se mais rápido do que o material no fundo. Isso nem sempre é verdade, mas essas nuvens estão correndo. Agora, ele está pré-visualizando em uma resolução muito baixa porque eu defini aqui para a resolução 25. O que você pode encontrar, se você tem em mais alto ou você tem uma animação mais complexa acontecendo, você pode ter que assistir esta opção aqui, diz 30 quadros por segundo. Você vê caindo para 14, é agitado, agitado, nervoso. Você pode ver este pequeno bar que está correndo na frente dele, que é isso que está tampando. Está a tentar renderizá-lo. Agora que passou uma vez, você pode ver que não está tentando mais fazer isso e essa pequena linha é sólida. Significa que na segunda vez, você pode ver verde? Dizia: “Passei por minha versão estressante e agora estou pronto para jogar de volta em um bom loop.” Isso é paralaxe, meus amigos. Duas coisas se movendo em velocidades diferentes, elas podem escalar. Aqui não há razão para eu não escalar minhas nuvens também. Eu só fui para vir da esquerda para a direita, mas meu prédio aqui, eu tentei escalar um pouco. Vamos entrar e fazer outra versão com paralaxe. Não é nada mais do que fizemos aqui, mas vamos ter alguns níveis diferentes, não apenas o edifício ao fundo. Então vamos abrir esse arquivo agora. É um arquivo, e ele vai abrir, abrir o paralaxe 3, e no final disso vamos exportá-lo. Mas basicamente é o mesmo que fizemos no último vídeo. Basta apertar este pequeno botão “Renderizar” na parte inferior. Para este aqui, vou mostrar-lhe um pequeno truque. Antes de criarmos esta “Linha do tempo”, vou clicar duas vezes na miniatura apenas para me livrar dela por enquanto. Zoom um pouco. Vai ser 1, 2, 3, 4. Fechar montanha, montanha média, montanhas
traseiras, e depois o céu. Vamos ter quatro camadas. Vamos fazer esses. Com esse Comando J selecionado, vou acertar isso então eu tenho três versões, vamos até nomeá-las, enlouquecer. Esta vai ser a camada do céu, esta aqui vai ser a montanha traseira, esta aqui vai ser a montanha da camada média, esta aqui vai ser a montanha da frente. Legal. Vamos mascará-los da frente para trás. Vou desligar tudo isso. Vamos fazer a frente primeiro e eu vou apenas usar minha Ferramenta de Seleção Rápida. Muito bom. Mais uma vez, isto é bastante indulgente. Veja, a máscara não precisa ser perfeita. Basta fazê-lo, obtê-lo animado e, em seguida, você pode ir e corrigir a máscara mais tarde se você gosta de usar o selecione a máscara, adicionar uma máscara de camada. Isso é legal com a montanha da frente. Vamos fazer este. Mantenha pressionada a tecla de opção e clique no Eyeball, desliga os outros, apenas este. É Alt em um PC. Montanha do meio. Preciso de você? Parece muito bom. Sim, no meio da montanha. Obrigado. Vamos clicar na parte de trás. Lá você poderia ir o [inaudível] e há algumas montanhas extras aqui. Você poderia fazê-las em todos os momentos. O problema é que, lembre-se, quanto mais longe as coisas estão, menos movimentos terão. O céu vai ter um pouco de movimento porque estamos fingindo nuvens se movendo no céu. Mas essas montanhas aqui atrás, não
vão se mover muito. Para cortar todos esses outros, não
tenho certeza se alguém vai notar. Tudo bem, funciona para mim. Montanha de volta. Sky é o último. Às vezes você precisa de mais céu. Neste último exercício, acabamos de roubar o céu de uma imagem diferente. Eu só passei por Unsplash e apenas fui o que parece ter
a mesma profundidade visual do tipo de campo? É os ângulos retos e eu apenas adivinhei isso e parece bem. Mas neste paralaxe, eu quero realmente usar as nuvens que temos. O que eu vou fazer é, eu vou pegar minha ferramenta de laço e selecionar todos esses caras de trás. Na minha camada de céu, eu tenho uma grande seleção e eu só quero remover as montanhas. Então, Editar, Preencher, certifique-se de que está ciente do conteúdo e que não vai ser perfeito, mas vai me dar muito mais para brincar. É muito legal. Vamos ligar todos eles, todos olham juntos e agora vamos animá-los em momentos diferentes. Este é diferente deste. Abra a Linha do Tempo e vamos colocar isso em uma animação. Vamos começar com esse cara da frente porque ele vai estar se movendo mais, e vamos dar zoom nele. Vamos começar do início aqui, vamos colocar dentro. Porque não podemos ir para trás, porque não há extras aqui. Você pode usar o preenchimento consciente de conteúdo e tentar gerar mais, ou você pode simplesmente começar realmente grande. Oh, não tão grande, e encolhê-lo ao longo das vezes há extras é por aqui. Mas neste é um falso o que eu quero fazer é, movê-lo como se estivéssemos avançando. Eu posiciono e isso não vai funcionar. Lembre-se da pequena coisa que precisamos fazer, desfazer. Precisamos ter certeza de que você Objeto Inteligente, você Objeto Inteligente, você Objeto Inteligente. De trás para a frente. Legal. Transformação aqui, e à medida que ela aumenta em cinco segundos, eu vou apertar Comando T. Podemos ir para Editar Transformação, Controle T em um PC. Vai funcionar para mim. Isso vai ter um grande movimento. Agora, o do meio, porque é um pouco mais longe, vai ter menos movimento. No início, Transformar, no final,
Transformar, mas vai ter apenas não tanto. Você pode olhar para as porcentagens. Consegue ver aqui em cima? Isso é um 130. Se você está assistindo, eu não tenho idéia do que eu fiz o primeiro, mas você pode simplesmente ir acima de 150, 130, 110, algo assim. Se precisar de matemática. Só estou me certificando que você não pode ver a junção. Provavelmente é um pouco menos. Vamos testá-lo, e ver fazer ajustes depois. Vamos pôr a mecânica a funcionar. Aqui atrás, transforme. Não entendi bem no início. Então Transforme e, no final aqui, eu vou apenas 11%. Mova um pouco para cima. Acho que está tudo bem. Vamos olhar para fazer o céu agora. Neste caso, porque eles são um pouco diferentes, veja isso. Como este é um objeto inteligente, eu tenho essa opção chamada Transformar. Se eu clicar no céu e eu rodar para baixo, é diferente. Você pode ver que eu tenho opacidade de posição e estilo. A posição funcionará, posso enquadrar a posição, mas não farei a escala que quero fazer. Vou clicar com o botão direito do mouse nesse cara, criar um objeto inteligente, mesmo que ele não tenha máscara ou algo assim, significa que me dá acesso à transformação. O começo aqui e eu transformá-lo, e então no final, eu vou mudar a posição e também a escala. Provavelmente não muito para baixo, só um pouquinho e talvez apenas um pouco de céu para lá. As nuvens estão se movendo lentamente para lá. Entra, está bom para ir. Você pode ver, a primeira vez através dele está tentando amortecer. Ele não pode fazer isso. Ele só está tocando a sete quadros por segundo, deve estar a 30. O que vamos fazer é, provavelmente mudar para a resolução para 25 por cento, seria bom. Mas eu consegui em 100, mas se fôssemos dar a volta, e agora deve ser legal. Muito movimento lá primeiro. Mas agora temos um drone que está chegando, ampliando. Certo, tipo de crível e provavelmente tem que baixar
a escala e o movimento da primeira frente. Isso é o que você pode fazer agora. Apenas certifique-se de que você tem a cabeça de jogo, mantendo o shift pressionado para que ele se encaixe nos quadros-chave, e faça ajustes. Para renderizar isso, vamos apertar
este pequeno botão Renderizar para baixo a pequena seta inferior, selecione a pasta, Eu vou colar o meu na área de trabalho. Vai pegar o nome do JPEG que abrimos. Isso vai funcionar para mim. Vamos exportar o nosso como um H.264, por isso é um mp4, e deixar todo o resto lá. Aperte “Render”,
relaxe e acabará com um mp4. Vamos verificar nossa área de trabalho e agora ele está aqui, e isso é incrível. Mostrou-se um pouco rápido demais. Se você quiser exportar isso como um GIF animado, faremos isso no próximo vídeo quando fizermos cinemagraphs, e faremos algumas exportações GIF animadas.
87. Projeto do curso — paralaxe: Olá a todos, é hora de um projeto de classe, e eu quero que vocês criem algum paralaxe. Na sua pasta de 13 vídeos, em Classe Project, tenho duas opções para você. Uma fácil e uma difícil. Então eu quero que você faça duas coisas diferentes. Então a versão um aqui é o sinal, mascarar o sinal e, em seguida, usando preenchimento sensível ao conteúdo, remova os sinais. Você tem uma camada que apenas tinha um sinal nela, uma que apenas tinha as nuvens e, em seguida, animar a escala e a posição, ou talvez apenas a escala, até você. Mas a versão dois, a segunda aqui, há três níveis principais. Há a pessoa que eu sinto que pode estar ligada a isso. Poderia ser quatro, poderia ser esta grama, a pessoa, a montanha e o céu. Você pode decidir, três vai ficar bem. Mas todos eles vão estar se movendo em velocidades diferentes. Ampliando, ampliando, talvez girando da esquerda para a direita. Esta máscara vai ser mais difícil de fazer,
ok, porque este homem está um pouco embaçado. Depois de criar e renderizar sua paralaxe, este é um pouco mais difícil de compartilhar. Então, poste um link que você enviou para o Dropbox, um link para o seu MP4 ou talvez use o Google Drive ou outra coisa, OneDrive, há muitos deles por aí. Apenas um link para ele, ou você pode enviá-lo para o YouTube ou Vimeo e nos enviar o link para lá. Vamos ver o que você faz, especialmente da segunda versão. Tudo bem, vão andando. Vejo-te no próximo vídeo.
88. Como criar imagens de vida cinematográficas no Photoshop: Oi lá. Este vídeo é sobre a criação de Cinemagraphs no Photoshop. Você pode ver que a água está se movendo, mas todo o resto ainda está. Desligue uma máscara. Você pode ver que é toda a imagem circulando ao redor. Mas com uma pequena máscara legal, você pode fazer isso acontecer em um pouquinho e com um pouco de loopiness camada, ele pode jogar para sempre. Faremos algumas versões. Este também, grãos de café continuam indo para sempre. Então vamos olhar para exportá-los como um presente para que você possa enviá-los para sites e redes sociais e ter um desses jornais Harry Potter coisas de imagem viva. Vamos aprender a fazer isso agora no Photoshop. Para criar nosso Cinemagraph, vamos para “File Open” e em seu arquivo “Fitting Video”, vamos abrir Cinemagraph 1. Agora este falso em particular funciona principalmente porque eu encontrei um vídeo que tem algo em movimento, água é uma boa. É fácil falsificar e amassar. Esse cara não se mexe muito. Ele faz durante todo o curso, mas eu só vou usar um pequeno trecho no início aqui quando ele não está se movendo muito. Se houver muito movimento ou a câmera estiver girando e se movendo, simplesmente não funciona. É primeiro plano estático, fundo, e apenas tem algo se movendo dentro dele. Pode ser uma cachoeira, pode ser coisas sendo derramadas, cabelo soprando ao vento. Se você fizer o Google das principais animações do Cinemagraph no YouTube, ele lhe dará algumas ideias de coisas que você pode fazer. Agora, vou ver o que você precisa fazer passo a passo. Agora, a única razão pela qual eu me lembro como fazer isso é porque eu ensinei isso tantas vezes. É muito difícil lembrar do topo da sua cabeça. O que eu fiz, foi em seus projetos de classe, eu criei este chamado Cinemagraph e eu acabei de fazê-lo passo a passo. Mesmo nas minhas anotações, é muito difícil. Há muitas brincadeiras, pausas. Não se preocupe, todo mundo acha isso difícil. A primeira coisa a fazer é nos certificar sob esta pequena engrenagem aqui que temos uma reprodução em loop porque é isso. Queremos criar um GIF animado que apenas joga rio. Para isso funcionar, precisamos encontrar uma parte da animação. Vou usar esta parte aqui,
no início, onde ele não está se movendo muito. Então precisamos cortar o começo. Você tem que arrastar este lado até certo ponto. Eu faço isso de novo. Você precisa arrastar a esquerda desta camada para a direita. Tudo o que significa é que quando eu arrasto isso para fora, há algumas coisas extras lá dentro. São áreas escondidas lá. Você corta para que você não possa vê-lo. Isso é necessário. Então ele faz este pequeno loop aqui e eventualmente eu estou feliz com ele lá. Vou arrastar para este lado também. Só precisamos de um pequeno trecho para fazer o loop. Agora vamos dar uma olhada, barra de espaço só para vê-lo em loop. Eu quero a água em loop, mas ele não. Talvez um pouco mais. O problema é que há um pouco de movimento lá dentro, mas eu vou arriscar. Cortar o começo, você tem que fazer isso. Aparar a ponta, você não tem que fazer essa parte, mas foi muito longo. Eu quero um pequeno loop curto com a camada selecionada. Vamos duplicar a camada. Copie e cole. Apertei “Comando C”, “Comando V”. Bem “Controle C”, “Controle V” em um PC. Há duas camadas agora. Agora, para isso funcionar, eles não podem estar neste pequeno grupo aqui, então pegue a camada 2 e arraste para fora. Basta arrastá-lo para qualquer lugar aqui. Agora eles podem trabalhar lado a lado. A esquerda da camada 2 é arrastada até lá e a direita dela é arrastada para dentro de modo que ela se alinha com a camada 1. Isso é um pouco que você nunca vai se lembrar. Farei de novo depois disso um pouco mais rápido. Se você está assistindo isso e acompanhando, assista isso, então vamos fazê-lo juntos um pouco mais rápido e você pode pausar e fazer sua própria versão. Agora, nada vai acontecer. O que precisamos fazer agora é desvanecer isso para mostrar através da imagem por baixo. Vai criar o loop. Vamos mover para cima, jogar hit em qualquer lugar entre onde estes dois se sobrepõem. Eu vou começar em algum lugar aqui, clique nesta camada superior aqui, Camada 1, sarja para baixo e eu vou começar com a minha opacidade, ligar o pequeno cronômetro. Aqui está o meu primeiro quadro-chave. Só deixe essa. Então, em qualquer lugar entre aqui e aqui, você terá que ajustar isso dependendo da sua animação. Em qualquer lugar aqui, contanto que ainda esteja se sobrepondo colocando em outro quadro-chave e diminuindo a opacidade aqui e seu painel de camadas. Basicamente, ele vai jogar e então ele começa a ficar mais e mais transparente. Vou desligar este. Vai ficar mais e mais transparente. Por causa deste truque que fizemos com este último nível, este pega. Basicamente começa a tocar aqui, a parte que cortamos, até que eventualmente chega a isso em parte, que é na verdade o começo aqui, que provavelmente não faz sentido para você. Eu sempre recebo olhares em branco na aula. Com os dois ligados agora, espero que agora tenhamos um loop. Há um pouco de desvanecimento acontecendo. Eu não estou muito preocupado com isso porque ele está se mudando, porque eu vou mascará-lo. Só quero a água. Não vamos nos preocupar muito com isso, podemos ajustar isso mais tarde. Vamos fazer a nossa máscara. Para criar uma máscara, precisamos fazer um quieto de tudo isso. Coloque sua peça aqui onde quiser. Eu vou ter o meu apenas no início aqui. Em seguida, com ambos selecionados, clique nestes dois. Há um atalho fixe “Comando, Opção Shift E”. Isso é em um Mac. “ Ctrl, Alt, Shift E” em um PC, dá a você uma imagem de todas essas camadas e faz sua própria pequena duplicação na parte superior ou você pode achatá-lo, copiá-lo e, em seguida, desfazê-lo e colá-lo novamente. Você tem essas opções no topo aqui. Isso está cobrindo tudo. Se eu apertar “Play Now”. Esta é a minha animação. Tem esse cara. Ele precisa ter certeza de que está no topo acima de tudo. Vou arrastá-lo até aqui para ele cobrir o meu vídeo. Vou diminuir um pouco. Está cobrindo tudo, não podemos ver nada. É isto. Vamos fazer um buraco com isto,
com uma máscara para mostrar apenas a água. Com a camada selecionada, selecione “Máscara de camada”, vamos pegar nossa ferramenta Pincel, encontrar um tamanho de pincel apropriado
e, em seguida, pintar um buraco aqui. É um pouco difícil de fazer. Você vai ter que ajustá-lo. Não quero muito desta garrafa, “Desfazer”, não quero muito do rosto dele, “Desfazer”. Dê uma prática. Acerte a barra de espaço agora. Você pode ver. É muito bom, na verdade. Você pode ver, talvez aquela confusão que tivemos, não se preocupar com isso agora, porque a água é bastante indulgente. Seu rosto, quanto disso eu quero? Se eu pintar um pouco mais do rosto dele, está funcionando porque esse cara está se movendo com o tempo, o que está arruinando tudo. Vou pintá-lo de branco, que o rosto dele não se mexa. Isso é tudo amigos fixos. Reduza o zoom. É legal. Se ele não se mexesse com tudo, eu ficaria tentado a fazê-lo com as coisas correndo pelo rosto dele também, mas porque ele se inclina para a frente durante a animação, não podemos. Vou salvar esta. Vai guardá-lo na minha área de trabalho. Vamos exportá-lo como um GIF em um segundo. Eu só quero mostrar uma vez que você entrar no ritmo ou pelo menos trabalhar fora os passos, em vez de explicar tudo, eu vou apenas correr através dele razoavelmente rápido. Este será o que você pode assistir novamente. Pule para este poço, onde é agradável e rápido. Vou tentar explicar as coisas à medida que formos. Eu vou para “File Open” e vamos fazer isso com 13 Video em Cinemagraph 2. Este aqui, feijão sendo derramado em uma tigela. Quero que isto sinta como se estivesse sempre a ser preenchido para sempre. Qual parte eu quero? Eu provavelmente quero a parte que é. É um pouco alto quando você pode ver o fundo da tigela. Eu pratiquei. É mais fácil quando não há buraco. Só quero um pedaço deste tamanho. Lembre-se que a regra é que você tem que arrastar este lado esquerdo para a direita. Quanto? Até você. Contanto que haja um pouco lá e quanto do loop? Isso é tempo suficiente. Aperte a barra de espaço para verificar. Sim. Isso é tempo suficiente. Agora é aqui que a magia acontece. Com isso selecionado, “Copiar”, “Colar”. Certifica-te que este tipo não está no mesmo grupo. Arrastar este até aqui. Pode ir até o início. Pode ir até a metade do tempo, que há uma boa sobreposição e, em seguida, arrastar o lado direito para aqui. Agora com esta camada selecionada, precisamos adicionar alguns quadros-chave de opacidade. Um, você não faz nada, o outro, você baixa a opacidade para zero. Acerte a barra de espaço e agora deve fazer loop para sempre. Essa é a parte. Você pode ver que há um pouco de desvanecimento, mas é muito bom. Você pode decidir que não precisa ser mais nada nisso, porque a mistura é realmente muito boa. É um Cinemagraph sem ter que fazer a máscara. Quando pratiquei isso nunca saiu tão bem. Digamos que sim. Quero-os a entrar, mas não a saltarem por aí. Lembre-se, eu seleciono ambos, mantenha pressionada todas as teclas e E assim opção Command, “Shift, E” ou “Control, Alt, Shift, E” em um PC arrastá-lo para o topo. Aqui vamos nós. Certifique-se de que ele se sobrepõe e adicionamos uma “máscara de camada” a ele. Máscara de camada, botões de tinta. Só quero estas partes. Certifique-se de que o preto é a sua cor de primeiro plano. Em seguida, aperte “Barra de espaço”. É o que estamos tentando fazer. Nós vamos ter que trabalhar alguns desses em. Quero-te lá dentro. Quanto do fundo eu quero entrar? É isso. Isso vai fazer um Cinemagraph muito legal. Vamos transformá-lo em um GIF animado agora. Espero que ele mostre depois de um pouco de prática. Você pode bater fora muitos desses Cinemagraphs. Teste em coisas diferentes. Mas vamos olhar para exportar agora como um GIF. Para exportá-lo, vá até “Arquivo”. Você precisa usar o Export Safe Web Legacy. Você tem que usar esta versão mais antiga, porque tem alguns truques GIF especiais aqui. Espere que ele carregue. Vai ser um pouco estressante na sua máquina. Photoshop não gosta muito de fazer vídeo e animação. Você precisa escolher uma Predefinição. Não importa, desde que seja GIF. Quanto maiores os números, mais cores, mais agradável ficará, mas o tamanho do arquivo será maior. Você não precisa mudar nada exceto por aqui onde diz “Opções de Looping”. Você quer que ele diga “Loop Forever” em vez de apenas “Play Once”. Isto é Full HD. Vai ser um GIF super grande. Se isso for divulgado através das mídias sociais, você provavelmente quer que ele seja muito menor. Vou fazer o meu tipo 20% do tamanho original. Tem cerca de 300 pixels de diâmetro. Em seguida, clique nesta opção que diz “Salvar”. Vou colocar o meu na minha área de trabalho. Aperte “Salvar”. Vou substituí-lo porque já pratiquei. Então espero que na minha área de trabalho, há o meu GIF. É menos de meio megabyte, o que é bom, e tem uma coisa legal looping. Incrível. Vamos fazer a segunda opção. Vamos deixar este como resolução completa apenas para que você possa ver a diferença, então “File”, “Export”, “Save for Web”. Não deve ser muito grande, não como um GIF totalmente animado, porque é apenas uma pequena parte que está realmente mudando de cor. Sobre “Loop Forever”, certifique-se de que está no GIF. Aperte “Salvar”. Coloquei na minha área de trabalho. Verifica isso. Onde você está? Em um Mac, você pode apenas clicar em “Barra de espaço” e ele apenas joga. Você pode ver que as cores estão todas abandonadas e tal, só porque você só tem permissão 128 cores nessa predefinição. Se você quiser mais cores que você quer que seja o mais foto-realista possível,
você pode ir para “File Export”, “Save for Web”. Mesmo que os padrões só vão até 128, você pode ter aqui, ir para 256, você pode adicionar mais algumas cores a ele. Ele vai ficar bonito e ainda vai ter flexão como apenas 256 cores são permitidas em um GIF, enquanto nós realmente temos milhões e milhões, normalmente um RGB ou um JPEG típico. Os GIFs profissionais têm apenas algumas cores. Se te dobrares, não há muito que possas fazer. Aumente até 256 cores. A outra coisa que você poderia fazer é tornar essa coisa monocromática, então ficaria bem, seria menos flexão e teria muitas notas, 256 graus. Olhe para este, ainda um pouco de flexão, sobrevivente. Agora lembre-se no meu Mac, eu posso apenas apertar “Barra de espaço” e ele começa a tocar. Se você estiver em um PC e não conseguir fazê-lo funcionar aqui em um Mac, não pode fazê-lo funcionar. Basta abrir um navegador. Pode ser Chrome, pode
ser Safari, Firefox, Microsoft Edge, Microsoft Explorer. Senti que havia um teste de quantos navegadores eu conhecia. De qualquer forma, uma vez que você
tem, pegue-os para que você possa vê-los e, em seguida, basta
arrastá-lo para aqui e ele deve começar a tocar. Ali está ele. Carregue isso para as mídias sociais e é uma coisa legal no Facebook, mesma coisa no Instagram, enviando-o para coisas como drible mesmo apenas em seu site. Os GIFs só jogam sozinhos. Considerando que todos os MP4s eles precisam ser obviamente jogado. Isso é um Cinemagraph ou chamado de filme vivo. É muito legal pouco efeito, fácil o suficiente de fazer. Os passos são um pouco difíceis, então confira. Lembre-se do documento do Word que está em seus arquivos de exercícios e procure o projeto de classe chamado Cinemagraph. Vejo você no próximo vídeo.
89. Projeto do curso — cinematográficas: Oi lá é hora do projeto da classe. Eu vou colocar você no projeto de criar isso em um cinemagraph. Café lento Mo. Comece café lento mo, para começar a tentar um pouco fora do início e até onde você quer que ele pare. Ok, mas o arquivo está em sua pasta de 13 vídeos sob o projeto de classe chamado cinemagraph A, e usar as técnicas no último vídeo, provavelmente lotes de pausar e verificar o contrário em seu arquivo de projetos de classe. Tentei listá-lo passo a passo. Mesmo assim, é difícil de lembrar. Quando você terminar, assim como o último paralaxe, eu adoraria que você exportasse um vídeo e enviasse para o YouTube ou Vimeo e nos enviasse o link. Ou faça o upload para o Dropbox ou Google Drive e compartilhe o link, eu adoraria ver o que você faz. Agora eu te dei um arquivo. Você pode definitivamente criar o seu próprio, fotografar o seu próprio é muito mais fácil porque você pode saber o que manter parado, o que mover. Você pode obter a composição perfeita. Se você está procurando imagens que são gratuitas ou vídeos que são gratuitos. Este aqui é um bom lugar para ir. Pixels por si só é um bom lugar, como no splash, você pode obter uso comercial imagens livres. Mas eu tenho uma seção de vídeo também. Foi aí que peguei seu café e os feijões foram despejados na tigela. Dê uma olhada aqui como aquele moinho de vento seria bom, se não estivesse tudo em movimento. Vá em frente, faça um cinemagraph enviá-lo para mim. Vejo você no próximo vídeo.
90. Como configurar um arquivo pronto para o design de interface do usuário (UI) de Web no Photoshop: Oi lá. Neste vídeo vamos falar sobre web design no Photoshop. Não vamos cobrir todas as partes do web design no Photoshop. Pode ser uma grande coisa. Eu realmente fiz um curso separado especificamente para web design no Photoshop. São 50 vídeos por si só, então não vamos colocar tudo aqui no curso avançado de photoshop. O que vou fazer é dar-te os detalhes importantes de alto nível. Se você quiser ir mais fundo, você pode ir ver o outro curso. Também vale a pena mencionar aqui que o Photoshop é uma ótima ferramenta para simular sites. Você pode ver aqui, eu tenho essa maquete de um site que, esta é a maneira como ele se parece em um desktop, e isso é o que ele parece em um celular, um site responsivo. Você pode mockup aplicativos móveis aqui, mas é apenas um maquete. Eventualmente, você vai ter que fazer essa coisa em uma ferramenta de web design. Algo como o Dreamweaver seria útil ou você pode enviá-lo para um desenvolvedor para ser feito. Nos próximos dois vídeos, vou mostrar a vocês como você zombaria no Photoshop e como passar informações a um web designer para construí-las para você ou para você mesmo construir. Outra nota é que o Photoshop é uma ferramenta perfeita para fazê-lo. Illustrator também pode ser uma ótima ferramenta para você se suas habilidades forem melhores e a terceira é o Adobe XD. O Adobe XD é provavelmente a ferramenta de maquete mais profissional que a Adobe tem, mas esse é um programa totalmente novo para aprender. Cabe a você. Eu tenho cursos em todos os três desses para web design: Illustrator, XD ou Photoshop. Já chega de falar. Vamos entrar e começar. Primeira parada, vamos para File, e vamos para New. No Photoshop super útil e nos deu aqui onde diz Web e Mobile, apenas alguns modelos para começar em termos de tamanhos. Neste caso, estamos fazendo um site, um site responsivo. Queremos projetá-lo para tamanhos de desktop, celular e tablet. Vou começar com um destes. Se você está fazendo digamos, um design de aplicativo móvel, você vai projetá-lo em Mobile, ou você pode simplesmente digitar a altura e a largura do pixel aqui. Vamos começar com a Web, e vamos começar com os sites mais comuns. Agora, estamos começando do zero. O que você pode fazer é na Web, você
pode ver todos esses modelos na parte inferior aqui? Há algum modelo de wireframing legal, muitas coisas prontas para ir para ajudá-lo a começar com um design de site. Vamos dar uma olhada nelas. Se você quiser um, clique nele, ele dirá, faça o download aqui, e ele será baixado lentamente. Você pode abri-lo e fazer as alterações. Vamos começar do zero. Escolhi “Web Most Common”. Vou clicar em “Criar”. A grande coisa que vai me dar usando esse modelo ao longo do topo lá, em vez de apenas digitar os pixels, vai começar a fazer pranchetas. Sabemos como fazer pranchetas, e elas se tornam particularmente úteis aqui. Esta vai ser a minha maquete para o tamanho da minha área de trabalho. Vou renomear essa área de trabalho. Vou criar uma nova prancheta. Eu vou clicar aqui, “Ferramenta de prancheta”, aquele pouco mais, e este é em vez de 1316, este vai ser um tamanho típico de tablet, que é 768. Dependerá de quais tamanhos você está projetando, e da altura, como muitas dessas coisas. A maioria dos sites são roláveis. Realmente não importa qual a altura ou pelo menos eu vou projetá-lo para que ele possa ser rolado para cima. Digamos que com este tamanho de desktop aqui, eu vou clicar na borda dele, e apenas fazer isso mais longo, porque eu quero que o meu site seja o que vai ser um pouco começar a endurecer e uma vara dentro da largura, mas vai ser rolável em termos do site. O último, vamos fazer o celular. Na verdade, vamos nomear tudo. Este, vai ser o Tablet. Vamos fazer um novo. Vamos chamar esse telefone, e a largura típica do telefone é design [inaudível] para 480. Você pode ver pranchetas são super úteis quando você está fazendo o trabalho de interface do usuário. Estamos fazendo design de site, mas se você estivesse fazendo telefone, você poderia ter todas as telas diferentes, apenas um monte de duplicatas desse telefone. Tela de login, inscrição, pagamentos de faturamento. Há muitas repetições. Agora, a única coisa que você está fazendo quando você está fazendo design de
site é usar algo chamado grades. Eu acho que isso requer um pouco de pré-conhecimento, e eu acho que o curso mais longo iria ajudar. Mas isso é útil para as pessoas que já estão fazendo web design, uma das coisas mais quentes que poderia estar configurando uma grade. Mas seja design de revista ou web design, muitas vezes páginas divididas em colunas. Normalmente 12 colunas, corresponde Bootstrap em algumas outras bibliotecas. Queremos esta grade em vez de realmente atraí-los em nós mesmos. Command R tende as regras sobre, Ctrl+R em um PC, e apenas tentar colocar para fora este sistema de grade é esse truque realmente fácil. Vá para Exibir e vá para Novo guia a partir de Layout. Você pode ver aqui predefinições. Quero uma grade de 12 colunas. Vamos colocar uma grade de 12 colunas lá. Você decide se precisa de margens ou não de ambos os lados, superior e inferior. É assim tão fácil. Essa grade de 12 colunas persiste no tablet e celular. Mas o que eu acho mais útil quando eu estou realmente projetando é apenas que eu tenho seis em ambos estes, seis e quatro em geral. Você poderia colocar 12 lá, se é assim que você prefere para o design. Mas para mim, bem, eu preciso ver aqui são seis. Com tablet selecionado, Exibir, você tem layout, você tem que predefinir. Não tem seis. Eu só vou digitar. Divide tudo. Você pode ajustar a calha dependendo da estrutura que você está usando. Desta vez, vou usar o Bootstrap. Se você não tem idéia do que é Bootstrap, não se preocupe. Ele usa aproximadamente 20 pixels no meio. mesmo com o telefone, e ajudá-lo. Provavelmente vou fazer quatro neste. Clique em “Ok”. Vamos dar uma olhada em adicionar apenas algumas coisas básicas para começar, antes de olhar para a exportação para toda a minha área de trabalho. Eu vou para File, Place Embedded ou Linked, vamos usar Embedded. Em seus arquivos de exercícios , na Web, há um, e eles chamaram de construção de tijolos de fundo, e eu vou colocá-los dentro Torná-lo um pouco maior. Vou para o topo. Pressione “Return”. Eu só vou usar minhas habilidades genéricas no Photoshop, não
é nada de especial nisso. Quero começar a desenhar. Mas eu gostaria de fazer com esse cara, eu nunca datilografar sobre eles, mas é muito leve. Com o selecionado, eu vou para Ajustes, e nós temos Níveis, e então apenas puxamos para cima, e apenas puxamos o branco para escurecê-lo. Ainda chegar a todo o documento, eu queria apenas afetar os tijolos de fundo. Se os guias estão ficando irritantes, comando e dois-pontos. Colon está ao lado da sua tecla L, normalmente como dois pontos de controle em um PC. As grades são úteis às vezes, e às vezes, no caminho, fazíamos isso dentro e fora dessa maneira. Agora vou adicionar o meu título. Vou clicar uma vez. Vou escolher a fonte do site. Vou usar o Roboto. Estou colocando meus carrapatos de herói, minha grande recepção ao meu site. Vamos fazer as coisas incríveis. Só porque fazer ticks em uma imagem porque eu quero trabalhar através de alguns
dos princípios de alto nível de web design dentro do Photoshop, principalmente a exportação. Grelhas em. Vou certificar-me de que isto se alinhe com o meu sistema de rede de alguma forma. Meu título, coloquei um texto. Arrastamos uma caixa. Certifique-se de que o tamanho da fonte é algo legível, não tão grande. Eu vou digitar, colar Lorem Ipsum. Isso vai servir por enquanto. Vou colocar uma barra estreita falsa ao longo do topo. Meu retângulo também, eu encho com preto. Vou tê-lo semitransparente. Agora, eu vou adicionar o meu não para a caixa real em si, apenas aqui em baixo. Vai ter uma página inicial. A página Sobre Nós
e o Fale Conosco. Lembre-se, isso no Photoshop é apenas uma maquete. Um visual que podemos obter o cliente assinado. Você não precisa ser um web designer ou desenvolvedor para fazer isso funcionar. Apenas olhe e sinta. Você é nosso designer de interface do usuário. Você está encarregado de fazer com que pareçam ótimos e funcionem. Certifique-se de que a experiência do usuário é agradável. Está colocando algumas últimas coisas básicas. Você tem que seguir adiante, mas eu acho que eu só queria mostrar
que estamos usando o Photoshop como uma ferramenta de maquete. Não é realmente criar o código. Você pode fazer pequenos pedaços. Ele pode ajudar nossos desenvolvedores. Se você for um designer, poderá criá-lo no Photoshop e construí-lo em algo como o Dreamweaver. Mas mesmo se você não fizer isso, você pode apenas fazer o lado do design. Isso faz de você um web designer, não um desenvolvedor web, e você pode apenas fazer o trabalho do Photoshop, então você terá que entregá-lo a outra pessoa para fazer HTML e CSS. Se você estiver interessado em entrar nesse tipo de coisa, esse web design de front-end, algo como o Dreamweaver pode ser um bom começo para você. Eu tenho um curso. Tenho vários cursos com a Dreamweaver. Mas digamos que este é o básico para começar. Só quero mostrar que estamos zombando disso usando nossas ferramentas do Photoshop. Vamos transformá-lo em um site mais tarde, não neste curso. Mas você pode sobreviver, sendo um web designer, e apenas zombando das coisas. Eu vou salvar isso. O que eu vou fazer é realmente em seu arquivo de exercícios, sob 14 Web, eu realmente incluir meu modelo que eu tenho do meu curso de photoshop, e ele só tem toda a configuração de grade já, pronto para ir para o nosso Template Responsive. Você pode começar com isso em vez de ter que ir para o View, guiar-se e descobrir quais todos os tamanhos precisam ser. Isso é tudo para este vídeo. Vamos entrar no próximo em que olharemos para obter algumas das informações da nossa maquete, e como levá-las ao nosso desenvolvedor web para começar a construí-la como um site.
91. Como exportar seu projeto de webdesign UI para Dreamweaver: Oi lá. Este vídeo é tudo sobre como exportar nosso CSS, nossas imagens, tudo o que precisamos para construir um site a partir de nossa maquete, mesmo que você não planeje fazer web design e Photoshop, fique por aí porque há algumas configurações de exportação muito legais que você pode usar para dizer exportações
impressas ou de mídia social. Vale a pena assistir, andar por aí. Vamos começar. Eu trapaceei, peguei nosso exemplo do último vídeo e fiz um monte de trabalho extra, você pode pular para aqui e ir para Arquivo Abrir, e em seus arquivos de exercícios há um arquivo chamado exemplo de web design abrir aquele. Se estiver pedindo fontes ausentes, basta clicar em Cancelar. Não se preocupe em atualizá-los por enquanto. Basicamente, este é apenas um Photoshop documentos, nada de especial,
há caixas de ticks , há imagens têm feito algum corte para alguns deles cama alguns filtros de grãos para isso. Ignorei fazer o tablet só porque sou preguiçoso. Mas digamos que eu tenha uma visualização de desktop, uma visualização móvel e uma visualização de tablet. O cliente gosta, eles assinaram que muitas vezes, eles dizem, “Eu gosto de seus projetos, você
pode ir e começar a fazer isso.” Agora, se você é apenas o designer, você está apenas trabalhando no Photoshop e então é isso. Você não quer tocar no HTML e CSS, você quer entregar isso para outra pessoa. Há coisas que você pode fazer para facilitar a vida deles. Se você é como eu e gosta de fazer coisas extras para você como fazer o web design front-end, você também pode extrair informações que estão aqui para tornar sua vida mais fácil em algo como Dreamweaver. Digamos que é esta fonte aqui. Se eu enviar para o meu amigo desenvolvedor da web Malte, ele diz que tipo de letra é essa, que tamanho é. Eu tenho que criar isso, como uma grande lista longa do que deveria ser. Caso contrário, mandei-lhe JPGs e ele adivinha, isso não é divertido. Informações que posso dar a ele para garantir que vai ser perfeito. Eu me certifico de que eu clique na camada direita para que ele seja selecionado. Eu posso subir a camada oculta superior e há esta opção, Copiar CSS. CSS é o estilo da fonte e nada realmente acontece. Basta copiá-lo, e então o que eu posso fazer é colar em um e-mail ou em um documento como este. Eu posso colar o CSS, e ele vai lhe dizer muitas informações, provavelmente mais do que ele precisa. Mas ele está indo abaixo do tamanho da fonte, que família de fontes estou usando, que cor estou usando. A linha alta seja centrada, todos os tipos de informação super útil. Se você é um desenvolvedor, você pode fazer um favor a si mesmo e você pode ver que ele é usado se criou a classe com base nos nomes, você pode dar-lhe um nome diferente em vez de apenas deixá-lo camada
B um ou vamos fazer isso, Você pode chamar isso de talvez H1. Há pedaços aqui que eles não precisam. Mas se você não tem certeza, mande tudo para eles e eles serão capazes de pegar a melhor coisa que precisa, provavelmente nós não precisamos de nada disso. Que agora se Malcolm voltar para mim e dizer, “Ei, eu escolhi esta fonte e não é nada como esta.” Posso dizer: “Ei, o que aconteceu? Enviei-lhe os detalhes perfeitos.” Não é apenas para texto, é útil para ceras. Este grande retângulo que eu fiz aqui para minha navegação, eu posso tê-lo selecionado aqui. Eu posso obter uma camada, eu posso obter uma cópia CSS, a mesma coisa e um documento de texto ou um e-mail, eu posso colá-los. Há Nav_Bar precisa da cor da opacidade para ele também. Provavelmente não estou preocupado com a posição, mas definitivamente com a altura. Vai combinar perfeitamente com a minha maquete, então você pode apenas trabalhar o seu caminho em torno de construir uma lista de títulos, subtítulos, cópia corporal apenas para garantir que seu site seja combinado perfeitamente. Isso está tirando os carrapatos, vamos ver as imagens. Digamos que esta imagem no fundo aqui, esta cor a maneira de tornar isso mais fácil, é nomear a camada. Vou arrastá-lo até aqui. Quando você nomeia a camada, isso é o que o JPG vai ser chamado. É por isso que eu coloquei hífens aqui, porque é melhor ter imagens para sites que não têm espaços, eles têm hífens ou sublinhados. Eu estou me certificando de que eu estou usando palavras amigáveis fáceis, neste caso não é nenhum motor de busca particular amigável, mas você começa a idéia. Digamos que agora eu quero enviá-los, este gráfico de fundo tudo que você precisa fazer é clicar com o botão direito do mouse nele, e há uma opção aqui que diz, você pode ver que diz Quick Export como PNG. Por algum motivo, esse padrão é um PNG. Não é algo que eu uso com muita frequência. O que você pode fazer é ir para suas preferências e alterar esta Exportação Rápida para tomar JPG. Em um Mac, as Preferências do Photoshop CC vão para geral
e, em um PC, estão em edição. Na parte inferior, você encontrará preferências, aqui
embaixo em Exportar. Vou mudar isto para JPG. JPG meus favoritos, comportamento qualquer que seja o seu favorito qualidade vai para 16. Clique em Ok, e isso significa agora este gráfico aqui, Eu posso clicar com o botão direito do mouse e disco Quick Export, dizer-lhe onde eu
quero que ele vá, quero ir na minha área de trabalho, isso vai ser imagens para o site. Você pode vê-lo como padrão JPG e usado o nome dessa camada. Esperemos que agora minha área de trabalho é minhas imagens para o site e aqui está o meu JPG. De volta ao Photoshop. Agora, se você tem uma pessoa que costumava usar fatias apenas dizer fatias não se acostumam mais, você pode usá-las. Mas esta é uma maneira mais fácil de fazer isso. Digamos que com esta imagem aqui, ainda pratique este tipo aqui, dei-lhe um bom nome. Posso clicar com o botão direito do mouse nele, ir para exportação rápida como JPG hit save. Você pode ver como isso é muito mais rápido agora. Vamos dar uma olhada e lá está, ali. Outra coisa legal que você pode fazer é, digamos que eu inverter este clique com o botão direito do mouse nele, Quick Export como JPG, salvar, substituir você pode obter um bom fluxo pouco de obter essas imagens pronto para o seu lado. Vamos olhar para um último pequeno truque que você pode fazer quando você está exportando coisas para sites é chamado Debbie gerar. Primeiro de tudo, eu vou arquivar salvar como, porque eu quero mostrar-lhe um pequeno truque. Vou colocá-lo na minha área de trabalho. Isso vai ser chamado de truques do Dan só porque eu não conseguia pensar em um nome melhor. Vamos ligar essa coisa chamada arquivo gerar ativos de imagem. Nós usá-lo para design de site que poderia usar isso para, digamos, exportação de mídia social. O que é útil é aqui, eu tenho essa coisa chamada livros de imagem. Se eu dar-lhe a extinção JPG para JPEG e clique em retorno, o que acaba acontecendo é Photoshop, em meus ativos truques de Dan desktop. Há o PSD que eu criei, é gerado automaticamente esta pasta de recursos de hífen aqui. Você pode ver? Eu tenho um chamado livros de imagem. Qualquer coisa que você adicionou uma extinção, nós realmente criaremos automaticamente. Vamos dar uma olhada neste aqui. O fim aqui ponto JPG sem fazer mais nada. [ inaudível] ir em frente. É uma espécie de coisa dinâmica ao vivo. Vamos entrar aqui e lembrar que invertemos isso, inverter de volta, então, temos que fazer qualquer outra coisa, mas você pode ver livros de imagem atualizados. Há uma espécie de coisa boa ao vivo que diz estes ícones aqui, estes ícones transparentes, há buracos neles. Este aqui, eu prefiro ser ponto PNG, porque nós conhecemos PNG. O PNG permite a transparência. Vou dar-lhe o ponto PNG, verificar. Há um PNG, pronto para ir? Para que isso funcione, você precisa ter salvo seu arquivo, certifique-se de ter ativado gerar na escola de tick on, e nada realmente acontece. Até que você comece a nomear coisas com PNGs, JPGs e photoshop vai e exportá-los. aguarde na correção de cor, clique em Salvar, pule de volta aqui. Eu deveria ter versão preta. Se você quiser parar de atualizar, você pode desativar gerar, ou simplesmente copiá-los e colá-los da pasta que está sendo feita. Aquela pasta que é feita chamada de ativos, basta colocá-los em outro lugar. Essa é a versão skinny do uso do Photoshop para web design. Usamos muitas placas de arte que guias são super úteis para fazer tudo se alinhar quando estamos explorando também. Podemos exportar o CSS, que é perfeito para coisas como caixas e digitar qualquer coisa que é gerado normalmente com código em um site. As coisas que não são códigos como imagens, JPGs e PNGs. Podemos clicar com o botão direito do mouse neles e ir Exportar como, ou podemos obter fantasia e usar Adobe gerar. Isso vai ser tudo para o web design. Vejo-te no próximo vídeo.
92. Usando modelos gratuitos e o Adobe Market para criar modelos no Photoshop: Oi lá. Este vídeo é tudo sobre maquetes. Vamos tirar o trabalho que fizemos ao longo do curso e prendê-los de maneiras diferentes, e vamos fazer com a maneira super fácil. A maneira mais fácil como na Adobe já nos deram esses modelos. Eles são muito sofisticados. Basta adicionar seus gráficos. Você pode ver que há a interface familiar adicionar nossos logotipos e magicamente o maquete é adicionado à nossa caixa de óculos e até mesmo folhetos triplos, garrafas de
vinho, eles estão todos prontos para ir para nós. Vai levar segundos para actualizar. Vamos pular agora, dar uma olhada em como fazer essas coisas funcionarem. Para começar, precisamos encontrar essas maquetes. Eles estão ocultos sob o aplicativo Creative Cloud em um Mac, é um ícone no topo aqui e, se você estiver em um PC, ele está no canto inferior direito, e o que você encontrará é que provavelmente será assim. Vá para Ativos, vá para Mercado e você terá esse tipo de ícones gratuitos, principalmente, mas algumas maquetes. Você não terá acesso a isso se estiver usando uma versão anterior do Photoshop, então talvez CS6. Você também não terá acesso a ele se tiver potencialmente o que é chamado de licença de máquina. Se você estiver trabalhando em uma grande universidade e não tiver seu próprio login pessoal, como faço login na Creative Cloud com meu próprio endereço de e-mail. Algumas instituições maiores recebem uma versão mais barata, mas não vem com essa incrível biblioteca personalizada. Verifique com o seu departamento de TI se você tem isso e eles simplesmente não lhe deram o login ou você simplesmente não tem acesso a ele. Além disso, se você tiver uma versão
roubada e hackeada , provavelmente também não funcionará. Se você não tem uma versão funcional, eu baixei uma para você e coloquei nos arquivos de exercícios. Se encontrares as 16 maquetes, há uma aqui chamada “cartaz maquete”. Isso é um que vai fazer primeiro. Eu não vou incluir tudo a partir deste tutorial só porque os tamanhos de arquivo são realmente grandes. Tudo bem, então, para descobrir maquetes, Creative Cloud app como diz “Market” e basta clicar neste pequeno ícone de pesquisa e digitar em maquete. Realmente, enquanto você tem resultados diferentes, se você colocar um espaço lá, eu sei maquetes, uma palavra,
bem, eu não sei, é uma palavra. Eu soletrei errado mais cedo e não obteve resultados muito bons, mas você tem resultados diferentes. Digite em maquete e então você verá apenas uma quantidade incrível de prontas para ir maquetes e o que é realmente legal sobre ele é, vamos clicar sobre o aqui, é um PST então ele vai ter todos os tipos de camadas em frieza que nós pode facilmente substituir usando algo chamado Objetos Inteligentes. Clique em “Baixar” colocá-lo em uma de suas bibliotecas, Eu já fiz um par. Uma vez que ele é baixado, você verá que este pequeno ícone vai mudar para parecer que ele está ocupado fazendo algo. Para abri-lo, o Photoshop começa em uma tela de boas-vindas. Você pode simplesmente ir para a janela e abrir suas bibliotecas. Aqui está o que eu baixei. Basta clicar duas vezes nele e ele será aberto no Photoshop. Você pode ver aqui super camada grandiosidade e o que a maioria das pessoas faz e eles não são todos projetados pela mesma pessoa, mas
muitas vezes há uma camada que diz substituir-me e muitas vezes tem uma cor. Se você também quiser torná-la uma camada colorida, basta clicar com o botão direito do mouse em qualquer camada e apenas dar-lhe uma cor. O que queremos fazer é clicar duas vezes nele porque é um objeto inteligente. Ele se abre em sua própria aba pequena e agora nós apenas começamos a substituí-lo. O que eu vou fazer é ir para “Arquivo”, colocar embutido, ir em seus arquivos de exercícios, nós temos um e um maquete chamado cartaz. Apenas algo que fizemos antes. Use sua própria versão, você não precisa usar isso. Estou a torná-lo maior para cobrir todo o cartaz e eu poderia rapidamente fazer uma borda branca ao redor. Gosto disso do original. Só vou desenhar uma caixa. Rapidamente se você desenhar um retângulo direito, com aqui em cima, ele não tem preenchimento, e tem um golpe de Eu queria ser grande e talvez 40. Quando você arrastá-lo inicialmente para fora, ele não se encaixa nas bordas, mas uma vez que você transformá-lo, então Controle T no meu Mac, ou, desculpe, Command T em um Mac, Control T no PC, e ele se encaixará nas bordas após Isso. Então, basta arrastá-lo para fora. Poupe-o,
feche isso e a magia só atualiza a maquete. Coisa legal sobre essa maquete em particular, ele tem muitas coisas que você pode ligar e desligar. Você pode não gostar da iluminação ou digamos que você não gosta da iluminação, você também não gosta das dobras. Você prefere o brilho, então é uma espécie de reflexo vítreo ou apenas uma versão vítrea e
oscilante, você pode decidir qual você gosta. Acho que gosto das dobras. Dê uma olhada e veja o que mais está feito. Há um tipo diferente de sombra, como um extra duplo que o designer deste decidiu que eu não quero, talvez dar-lhes a opção dele e fundo desfocado. É meio legal e aqui está outra versão do seu objeto inteligente com algum borrão gaussiano e está meio desbotada em segundo plano. Muito legal. Vamos dar uma olhada em outras maquetes. No meu painel de bibliotecas eu tenho este aqui. É um iPhone 6 maquetes. É um pouco velho. A maquete em si foi incrível. Aqui tem um monte de coisas. Uma versão branca, há uma versão preta. Basicamente, tudo que você precisa fazer é colocar sua imagem aqui. Clique duas vezes nele para entrar e mostrarei duas maneiras de eu ter meus designs de interface aqui. Ou um design de aplicativo ou dizer um design de site móvel. Vamos abrir um arquivo familiar, arquivo aberto. Na sua pasta 14 da Web. Lembre-se desse cara que usamos antes, exemplo de
web design e abri-los. Você pode copiar e colar tudo a partir desta placa de aplicativos. Provavelmente é fácil apenas cortar no aplicativo para cima
clicando no nome na parte superior usando o movimento para. Em seguida, vá para Arquivo e vamos para Exportações, e eu vou exportar para PDF. Você pode exportar os arquivos que lhe dá JPEGs e PNGs. PDF vai pelo menos retém parte do vetor. Usei um pouco disso para digitar formas vetoriais aqui. PDF vai mantê-los. Ou seja, qualquer um. Para onde é que ele vai? Vou enfiá-lo na minha área de trabalho muito bagunçada. Vocês fizeram isso comigo. Mal posso esperar para vê-lo limpo, mas comecei a despejar aqui, não consigo parar. Vamos chamar isso de uma
interface móvel e esta opção aqui finalmente entra em jogo, exportar selecionados para cima. Apenas o que eu tinha selecionado aqui e eu quero ter certeza de que tudo isso é assim. Clique em “Executar”. Obrigado Photoshop e o que eu vou fazer aqui eu vou para o arquivo e vamos lugar ligado. Por quê? Só significa que muitas vezes eu sou tipo de este não é um aplicativo acabado, por isso é um design como a versão 1, 2, 3, 4, 5, 6. Então, se você vincular, isso significa que você pode atualizar esse arquivo e ele irá atualizar e sua maquete. Então, na minha área de trabalho, é chamado de UI móvel. Lugar. Tamanho errado. Reduza o zoom, diminua as cargas, arraste-o para baixo. Ampliar. Salve esse arquivo. Sim, por favor. Voltar para aqui. Olhe para isso. Quando você tem atualizações, você precisa alterá-las. Você pode ir até aqui. Pode clicar com o botão direito. Você pode apenas atualizar o PDF
e, em seguida, aqui ele será atualizado, ou você pode clicar com o botão direito do mouse e apenas revincular para um arquivo diferente. Quão eficientes somos? Flip telefone. Tão fixe. Uma coisa que vou mostrar é como obter seus designs de dizer algo como o Adobe XD. Adobe XD é, Eu tenho um curso sobre
isso, é apenas para uma simulação especialmente sites e aplicativos, porque ele permite que você faça o que Photoshop faz em termos de mocking up,
mas também permite que você adicione interatividade para testes. Super legal. Para que você possa fazer se for relativamente do tamanho certo, você pode simplesmente clicar no nome integrado e copiá-lo e simplesmente colá-lo diretamente na maquete. O problema é que é do tamanho errado e não é vetor. O que você pode fazer é clicar no nome a bordo,” Arquivo” “Exportar” e ir exportar selecionado. Acabamos exatamente no mesmo lugar. Este aqui você quer que ele seja formatos pode ser qualquer coisa. PDF novamente vai manter o vetor assim é [inaudível]. Faça o que for bom. Certo, de volta ao Photoshop. Eu fecho-os. O que eu quero fazer é mostrar-lhe outro exemplo muito legal. Este é o caso dos óculos. É outro que eu baixei do mercado da Adobe e veja o quão bom e detalhado isso é. No meu último painel aqui vai bibliotecas, estes óculos aviso de caso bem dispostos. Uma coisa que você pode fazer é se você encontrar você abrir uma maquete nessa coisa, todos que você gosta, o que eu atualizo? Muitas vezes basta clicar neste ícone aqui. Talvez possamos classificar todas as minhas camadas para mostrar apenas objetos inteligentes. Muitas vezes, só me mostram as coisas que precisam ser substituídas. Tudo ou que objetos? Substituir-me. Aqui vamos nós. Vamos clicar duas vezes em m. Eu vou trazer o meu arquivo de logotipo
incorporado em seus arquivos de exercícios está sob 16 maquetes. Há um logotipo que eu estou fazendo no momento em que é apenas um arquivo do Illustrator, clique em “Ok”, apenas um logotipo preto e branco porque é vetor embora espero. Ele retornou foi aquele lá, salve-o, clique aqui. Quão legal é isso? Estou muito impressionado com esta maquete em branco, parece estar em Boston lá. Tão fixe. O que mais temos? Vou te mostrar apenas mais dois, mas é basicamente tudo fazendo a mesma coisa, e eu estava usando na frente do projeto. Onde está a minha biblioteca? Este é um folheto tri fold. Ok, então você o projetou, digamos, no Illustrator ou no InDesign, você pode substituir o logotipo e ele acabará no lugar certo. A coisa toda está sendo ridicularizada para que você possa colocar na minha garrafa de vinho. A mesma coisa aqui. Existe uma camada de substituição. Você pode clicar duas vezes, entrar, clicar em “Ok”, salvá-lo, voltar e está tudo mocado, legal. Agora há montes de mockups legais no mercado [inaudível]. Está crescendo o tempo todo, mas às vezes
não é o ângulo que você quer ou simplesmente não está fazendo isso por você. O outro lugar para ir é algo como um site de biblioteca de ações. Eu uso uma mistura de estoque Shutter, eu estoque e Adobe estoque. Há coisas diferentes em diferentes. Estou usando o Adobe Stock cada vez mais porque é arrumado e tão bem assim neste curso. Você pode ver que eu apenas digitei em maquete de revista ou revista em branco. O problema é que você não vai conseguir PSTs, então você vai ter que zombar deles mesmo depois, e vamos fazer isso no próximo vídeo é mostrar como configurá-lo como as pessoas fizeram para o mercado da Adobe. Você pode ver aqui, há apenas um monte de exemplos. Então, ou revista em branco ou se você está procurando em branco ou maquete. Espero que você possa encontrar algo no mercado da Adobe ou em um site da Biblioteca de ações, e simular você mesmo e é isso que faremos no próximo vídeo. Vou mostrar-te como preparar a tua maquete. Você pode estar tendo algo realmente especial que você quer para sua agência, para seu portfólio estudantil, ou talvez seja seus produtos. Você tem um tipo especial de embalagem. Você pode fotografá-lo e nós vamos mostrar-lhe como zombar dele para que você possa economizar tempo
toda vez que não tem que movê-lo por todo o lado. Vamos fazer isso agora.
93. Como fazer um modelo reutilizável no Photoshop usando objetos inteligentes: Oi lá. Este vídeo é tudo sobre fazer nossas próprias maquetes. Vamos começar com um editor de revista em branco sobre gráficos e algumas sombras e alguns destaques. O que é realmente legal sobre isso é que nós podemos atualizá-lo facilmente, salvá-lo e agora maquete. Olhe para isso. Magicamente atualiza os compartimentos ao redor. Vamos trabalhar nesse processo agora. Para começar, vamos a 16 simulações e abrir a revista em branco. Este é um que eu tenho de um site da Biblioteca preso. O que precisamos fazer agora é maquinar nosso projeto como você viu no início. Primeiro, vamos importar a nossa maquete. Nossa maquete, eu vou no lugar embutido. Em seus arquivos de exercícios menores de 16 anos. Esta é a propagação. Se você fez meus cursos do InDesign é uma das coisas que fazemos lá. O que vamos fazer é usar a revista spread 1 PDF. Acabei de exportar isso do InDesign como PDF. Vou tocar em Place, clique em “Ok”. Size-wise provavelmente precisa ser um pouco menor e pressionar Enter. A primeira coisa que precisamos fazer é, é um objeto inteligente, certo? Podemos ver o pequeno ícone que nos acostumamos agora, mas precisamos torná-lo outro objeto inteligente ou rasterizar a camada. Clique com o botão direito ou Rasterizar. Por quê? Porque editar transformar. Precisamos dessas opções para funcionar e elas não funcionam logo após a importação. Vou clicar com o botão direito do mouse e dizer : “Você é novamente um objeto inteligente.” Nada muda a não ser acertá-lo, Transformar e queremos este chamado Warp. Atingimos o Enter. Agora vamos passar o nosso tempo mover isto e a balançar para tentar fazê-lo caber nesta revista. Acho que a coisa a notar é que, porque estamos usando um objeto inteligente quando entramos em posição e giramos para baixo, temos apenas 10 minutos ou meia hora fazendo essa coisa parecer perfeita significa que da próxima vez podemos usar o inteligente objeto, atualize-o como fizemos no último vídeo e a vida está chutando bem. Já faz anos que trabalhei numa agência. Antes de eu aprender alguma dessas coisas, eu tinha talvez 13 anos atrás. Passei séculos. Um dos meus trabalhos era
marcar todo o trabalho da agência e colocá-lo no nosso site. Tentando fazer parecer real, mas que realmente ter fotografar as revistas reais dispostas. Quero poupar tempo. Toda vez que começo do zero. Eu vou trabalhar meu caminho através disso e você pode ficar por aqui ou apenas pular em frente alguns minutos. Podemos assistir. O truque é que com estas linhas aqui, se você está pendurado em torno de, você
está recebendo as bordas primeiro, então apenas obter as bordas ásperas. Não gaste muito tempo conseguindo as bordas. Você pode ver que eu ainda não estou ampliado. Eu só estou ficando difícil porque há um monte de, você
pode ver isso dentro um pouco precisa de um pouco de trabalho. Você pode apenas clicar e arrastar o interior e há um pouco de fudging. Você está observando as linhas, mas também olhando para sua arte. Você pode ver lá, esta é apenas uma mistura de ambos agarrando as alças, mas também arrastando o interior apenas para obtê-lo a olhar para a direita. Acho que isso é muito bom. Agora eu poderia passar um pouco mais de tempo ampliando apenas para que essas bordas se sobreponham bem. Estou feliz com isso. Quando estiver satisfeito com ele, aperte Return. Isso é muito legal. Vamos adicionar um par de pedaços extras apenas para torná-lo um pouco mais credível. O que eu vou fazer é pegar uma nova camada. Esta vai ser a minha camada de sombra. Pego minha ferramenta de escova. Vou pegar um pincel grande. A capacidade vai ser de 30 por cento. Quero que minha cor de primeiro plano seja preta. Estou clicando em um no topo aqui, clicando e outro tempo para baixo e para baixo. Quão grande é isso? Provavelmente é um pouco grande demais. A opacidade deste pincel 40 por cento talvez. Você sempre pode descer, certo? Eu vou tê-lo realmente entrar nesta dobra aqui e talvez um segundo que é um pouco menor, construí-lo naquele canto ali. Agora o problema é que ele está se espalhando por todas as bordas, então o que você pode fazer é fazer uma camada de sombra se encaixar na camada abaixo. O longo caminho está sob a camada e você pode criar máscara de recorte. Isso funciona. Bem, eu estou fazendo isso e ele está mantendo pressionada a tecla de opção e clicando entre as duas ou a tecla Alt em um PC e ele apenas prende a sombra na página da revista. Vamos fazer outro, este aqui vai ser os destaques. A mesma coisa de antes, exceto que estou usando branco como cor de primeiro plano. Talvez só alterne o branco, o branco e o preto. Clicando uma vez, mantendo a tecla Shift pressionada, clicando novamente, apenas o executa. É muito grande. Você pode por cento para baixo. Você pode tê-lo para cima. Eu vou manter o meu em 40 por cento porque eu quero fazer é talvez apenas baixar a opacidade. Na verdade, posso não carregar capacidade. Eu poderia usar um modo de camada, ok? Eu só vou percorrer eles até eu encontrar. Isso parece bom. Há uma sutil e agradável. A mesma coisa, mantenha pressionada a tecla Option no Mac, mantenha a tecla C em um PC e ambos podem se encaixar na página da revista. Fizemos uma maquete, parece bom e depois temos de voltar no mês que vem para o colocar de novo. O que podemos fazer é clicar duas vezes no objeto inteligente. Venha aqui e eu estou indo para o arquivo colocar a revista 2. Cada muito, aperte Return, Save. Quão legal é isso? Passamos um pouco de tempo consertando. Tenho que trabalhar no brilho. Parece que a revista está dobrada um pouco com a minha sombra não muito sutil, ok? Eu poderia olhar para refazer isso. Mas espero que consigas ver. Demora muito tempo para maquinar sua própria versão, suas coisas acostumadas, algo que se relaciona com você. Você pode trabalhar para uma empresa que não faz revistas. Pode ser caixas ou embalagens ou e-books ou algo que você deseja maquete uma vez, girar o tempo, mas então ser capaz de atualizar um rápido real mais tarde. Nós temos uma revista, você pode fazer uma caixa,
você pode fazer uma taça de vinho, pode ser jarro, qualquer coisa que você gosta. Certifica-te disso quando trouxeres o teu objecto inteligente, está bem? Você vai ao File place. Certifica-se que uma vez que ele está dentro, você tem que convertê-lo em um objeto inteligente novamente que
possamos obter todas as configurações de transformação legal. Vamos entrar no próximo vídeo de maquete.
94. Modelo de cartaz contra uma parede usando o Photoshop: Oi lá. Neste vídeo vamos aprender algumas técnicas para fazer este Mockup. Não é muito especial, como um botão Mockup. Nós o construímos a partir de alguns triângulos borrados e algumas sombras para mais triângulos, apenas o grande retângulo e parece bastante credível. Então, vamos trabalhar sobre como fazer isso agora no Photoshop. Vamos começar. Vamos criar um novo documento, usando qualquer coisa que você goste, talvez imprimir. Vou usar carta dos EUA, fazê-lo paisagem, clique em Criar. Vamos trazer a imagem que queremos fazer maquete. Vou aos Mockups. Eu vou para o arquivo, lugar embutido. Deixe-me usar um dos seus arquivos de exercícios, chamado Mockups. Chama-se vermelho. Lembre-se do nosso cartaz vermelho. Vou zombar disso. Provavelmente precisou fazer uma versão maior. Primeiro, vamos escolher uma cor de fundo. A maneira mais fácil de colorir o fundo é escolher uma cor, digamos cor de primeiro plano. Clique duas vezes aqui, deslize, encontre uma cor com a qual você deseja trabalhar. Eu quero algo assim e, em seguida, mantenha pressionada a tecla opcional backspace. Se você estiver em um PC, é Alt Backspace. Agora este vídeo aqui é que não há nada de especial sobre ele. Usaremos ferramentas que já usámos antes, mas sei que às vezes é mais fácil ver outra pessoa a fazê-lo e tu dizes,
sim, por isso acho que é o que estamos a fazer aqui. Não é nada como fenomenalmente incrível que você nunca viu antes. São apenas combinações diferentes. Então vamos fingir a mesa. Vamos usar a ferramenta de retângulo. Vou escolher uma cor que é um pouco mais clara do que a que eu tinha antes. Então, só arrastando um pouco dessa maneira. Vou dar-lhe a cor de preenchimento de vermelho, e o traço não vai ter nenhum derrame. Só precisamos tê-lo para que a mesa fique um pouco abaixo da nossa imagem. Então parece que este cartaz sentado em cima e eu não estou totalmente feliz com essa cor. Ok, então eu vou clicar nele. De volta ao original. Clique neste pequeno arco-íris coisa aqui e iluminá-lo. Iluminá-lo está ficando muito rosa para mim. Então o que eu vou fazer é com o fundo, eu vou mudar essa cor. Certo, acho que não estou feliz com as cores também, mas podemos mudá-lo mais tarde usando matiz e saturação. Ignorando minhas péssimas escolhas de cores, vamos usar a ferramenta de pintura. Mesmo que você nunca tenha usado a ferramenta de pintura antes, o que vamos fazer é desenhar um preto. Então nós vamos ter certeza de lápis, nós mudá-lo para a forma. Vamos escolher uma cor de preenchimento, de preto. Não tenha essa camada selecionada Eu vou desfazer. Basta clicar fora na terra de ninguém. Isso significa que eu não tenho nenhuma camada é selecionada. Agora, se eu usar a ferramenta de pintura e eu tenho que preencher e eu ir para preto, ele não vai recuperar o que eu tinha selecionado. Então, não preencha nenhum golpe e eu vou desenhar um triângulo que começa lá, desce depois da parte de trás da mesa, vem para cá também. Não tente correr até o limite. Você vai acabar vendo as bordas do triângulo quando borrá-lo. Quero que fique atrás da mesa e agora só quero borrá-la. Você pode usar qualquer tipo de borrão. Então isso vai ser o blr top. O borrão que eu acho mais útil está sob a galeria de borrão e é chamado de borrão da íris. Diz que vou convertê-lo em um Objeto Inteligente. Muito obrigado. Você acaba nesse próprio mundinho e o borrão da íris é legal, o que acontece é que você tem uma sintaxe que não está embaçada e à medida que sai, você
pode ver que fica mais embaçada e borrada. Então o que eu quero fazer é, eu quero tudo embaçado. Eu quero encontrar, talvez colocar isso aqui, apenas reorganizar as bordas aqui clicando e
arrastando-as para encontrar algo que eu gosto. Você pode girá-lo também agarrando qualquer um desses pontos. Então é isso que estou procurando. Estou procurando por algo que é afiado aqui. Tão embaçado, mas não super embaçado como ele fica para baixo, fica mais embaçado e embaçado e mais embaçado. Nós também podemos fazer é arrastar isso ao redor para extremá-lo um pouco dele. Ainda mais borrada, mexa-se. Estou feliz com isso. Vou clicar bem. Esperámos o tempo que demorou. Essa coisa estava girando por um tempo, fazendo o borrão. Só para o caso de o seu também fazer isso. A próxima coisa que quero fazer é depender, temos cores retas, então podemos brincar com a opacidade só para chegar onde queremos. Você pode descobrir, porém, que se você tem, digamos, um fundo texturizado, você pode querer jogar com diferentes modos de mesclagem para fazer com que ele se misture bem com o fundo. Digamos que estamos felizes com isso, vamos fazer o outro triângulo aqui em cima da mesa. Parte do processo é uma pequena mudança extra. Então ferramenta de pintura, vamos passar e sobre a mesa. A ferramenta de pintura é que estamos apenas clicando uma vez e, em seguida, certifique-se de que ele
volta para aqui porque se você borrar nas bordas aqui você começa a ver rosa mais claro vindo através. Eu quero que ele na frente da mesa e eu quero borrá-lo filtro, galeria de
desfoque não está funcionando. Tenho de voltar à minha ferramenta de movimento porque estou a meio da construção com a ferramenta de pintura. Eu não gostei disso. Então filtro, galeria de desfoque agora vai desfoque de íris, converter em um objeto inteligente. Obrigado. Aumente o lado de fora. Em vez de arrastar isso por aí, você pode arrastá-lo até aqui e ver se eu arrastá-lo para cima, ele está deslizando. Sentir que o cara da frente precisa ser menos embaçado. Então essa coisa de wafty na parte de trás aqui, e novamente apenas arrastando para posicioná-lo onde, está um pouco embaçado no início, mas bastante embaçado para fora. Clique em OK. Isso funcionou muito mais rápido, e para fazer este funcionar, precisamos moldá-lo para que você possa ver um pouco mais fácil, vamos cortar isso para o fundo aqui. Nós fizemos isso algumas vezes agora, lembre-se segurando opção e apenas encontrar a lacuna entre e dar-lhe um clique em um PC é Alt. Você também está ficando cansado de eu explicar cada atalho, cada vez, sim, eu sei, mas é repetição. Algumas pessoas precisavam de um milhão de vezes. Espero que não esteja ofendido e agora está diminuindo a capacidade para algo que pareça credível. Acho que deveria ser mais leve do que o fundo. Só brinque com ele. Eu não sei o que você acha? Outra coisa que eu poderia fazer é que eu quero que haja um pouco de um gradiente vindo de trás desta mesa. Então eu vou fazer uma nova camada logo acima dela. Na verdade, logo atrás. Vai ser o meu gradiente. Eu vou pegar minha ferramenta de gradiente, eu vou usar minha cor de primeiro plano como preto e eu vou usar uma segunda opção aqui que vai preto para transparente, e o que vamos fazer é clicar em segurar e arrastar para editar gradiente. Agora, se você segurar Shift, bem você
arrastá-lo, ele vai em linhas retas perfeitas. Então, pressionando Shift, clique e arraste para baixo por aqui, e então eu vou diminuir a opacidade, apenas tocando minhas teclas numéricas no meu teclado. Estou na minha ferramenta Move e só vou me dar um pouco de sombra. Se não houvesse sombras suficientes, eu vou dar a isso uma moldura branca sem motivo, com esta última correção selecionada, eu vou adicionar um traço. Agora Stroke usa provavelmente dizer para o centro. Eu não posso ser capaz de redefinir por padrão, mas por dentro ele vai te dar uma borda nítida agradável, decidir sobre a espessura que você quer. Enquanto eu também estiver aqui, vou adicionar uma sombra. Que tipo de sombra? Não tão grande ou, aquele felpudo, um bebezinho. Veja o que estou fazendo lá, abaixe a opacidade. Preview on, preview off, na verdade, vamos clicar ok. É só ligar e desligar a sombra, só uma coisinha. Então, tem um pouco de algo acontecendo lá embaixo. Você pode ter muitas dessas sombras e isso é uma falsificação Mockup. Coisa legal sobre isso lembrar que é um objeto inteligente, podemos atualizá-lo. Mas sim, não é nada de especial ou novo, mas apenas por suposição combinando as coisas que aprendemos em um projeto diferente, que eu acho que pode ser útil. Vamos entrar em uma técnica de Mockup diferente no próximo vídeo.
95. Como fazer um modelo simples de web design de aplicação UI usando Photoshop: Oi lá. Este vídeo é tudo sobre simular um design de aplicativo de interface do usuário. É uma boa e simples. Nós vamos reduzir esses caras, que não é emocionante, mas vamos adicionar um borrão convincente, ligar,
desligar, ligar, reduzir os níveis de fundo. Vamos adicionar uma sombra que afeta apenas as opções de interface do usuário de fundo, é muito fácil de fazer. Vamos aprender as técnicas agora no Photoshop. Para começar, vamos imprimir, então arquivar nova impressão, estamos usando carta dos EUA, vamos usar paisagem, e isso vai funcionar para mim. Vou colorir o fundo em um gradiente. Eu vou clicar na minha ferramenta de gradiente, o que eu vou fazer é, eu vou ter certeza de que minha cor de primeiro plano é um tipo de cinza, e então a cor de fundo é um cinza diferente ou mais escuro. Vou usar um gradiente radial. Clique, segure e arraste, isso vai funcionar para mim, apenas aquele gradiente sutil real de qualquer maneira. Vamos trazer os diferentes modelos de interface do usuário. Estes foram feitos em Adobe Extinct, apenas forma simples e letras, lugar incorporado, sob arquivos de exercícios, sob maquetes. Vou mostrar-lhe,
usando esse arquivo, lugar embutido, você não pode escolher mais de um. O que eu costumo fazer, é que eu tenho isso aberto, isso funciona em um Mac e um PC. Você só tem que ter a janela do localizador aberta ou a janela aberta no Windows. Encontre seus arquivos, pegue esses três, e jogue-os lá. Aperte retorno, retorno, retorno. Basta colocá-los todos nele ao mesmo tempo. Além disso, todos os seus objetos inteligentes, o que é legal, ou apenas trabalhar lentamente, e trazê-los em um por um. O que eu quero? Meu painel vai ser como o foco principal. Quero que ele transforme o Comando T para ser a maior característica principal. Esses outros dois, eu gostaria de ter o mesmo tamanho, então selecionei ambos no meu painel de camadas, Command T ou “Ctrl T”, em um PC. Espalhem para baixo. Vou usar no embarque. Vai passar por aqui. Vai ser logo atrás. O mesmo com o login. Vai ser logo atrás. Mas eu poderia fazer, é selecionar todos eles, e apenas distribuir os centros. Só para ter certeza que eles estão bem alinhados. Perfeito. Mas eu também poderia fazer para estes dois tanto quanto [inaudível] para baixo. Agora eu preciso fazer esses na parte de trás, recuar para o fundo. O que eu gostaria de fazer é, em vez de fazer isso uma vez para este e depois tentar copiar e colar estilos de camada, eu vou agrupá-los. Em vez de agrupá-los dentro de uma pasta, é realmente muito bom, apenas para selecionar os dois, e torná-los um objeto inteligente. Só significa que eles vão agir como uma camada. Se eu precisar entrar, posso clicar duas vezes para entrar, e os dois ainda estão lá. Você usa objetos inteligentes como agrupamento também, eu faço. Eu vou fazer duas coisas, com ele selecionado, eu vou para ajustes e eu quero encontrar meus níveis. Eu quero ter certeza de que os níveis estão cortando apenas para a camada abaixo. Isso é o que este pequeno erro faz, apenas esta camada aqui. Eu acho que este é um truque útil apenas para pegar os brancos, e dizer que eu só quero menos brancos, eu não estou consertando os níveis, eu estou apenas arrastando dizendo que não há mais brancos. Você pode ver que está apenas escurecendo-os. Mostrando um pouco de contraste entre os dois. Até o quão longe você quer ir. Muito longe, algures por ali. A próxima coisa que eu quero fazer bem, é que eu quero clicar nesta camada, e eu quero adicionar meu segundo filtro favorito. Meu primeiro favorito é Borrão Gaussiano. Quem poderia esquecer você, amigo? Mas o meu próximo favorito, Galeria
Borrão, Iris Borrão. A coisa legal sobre o borrão da íris, tem um centro, e ele desaparece e você pode mover esse centro, lembra? Bem no meio aqui, na verdade, por padrão é legal, só está afetando esses caras no fundo. Você pode ajustar isso. Só significa que vai ser perfeitamente nítido no meio, e há essa transição entre o quão embaçado está no lado de fora, e que é controlado por este pequeno slide aqui, como está embaçado no exterior ou você pode usar o controle deslizante Por aqui. É por isso que eu quero visível legível no meio aqui. Eu poderia movê-lo um pouco para cima também. Você pode ter mais de um. Eu não tenho neste curso. Eu só tenho usado um para muitas coisas,
mas agora você pode ter mais de um Quando você estiver pronto, clique em “Ok”, incrível. Uma última coisa que queremos fazer, é ter uma sombra para esta visão principal do painel do meu aplicativo. Quero que isso faça uma sombra sobre estes dois. Com ele selecionado, vamos para efeitos, soltar sombra, escolher uma sombra. Vou escolher uma coisa bonita e confusa. Distância sábia, eu não estou muito preocupado com a distância no momento. Por quê? Porque nós vamos separá-lo. Eu tenho distância em zero, e eu tenho isso agradável e fofo, algo assim, mesmo mais fofo, clique em “Ok”, e você pode deixar assim. O que eu quero fazer é, você pode ver que tem a sombra em todo lugar. Vou fazer nosso truque que fizemos um zilhão de vezes agora, vamos clicar com o botão direito do mouse em “Drop shadow”, e dizer Create Layer. Aquela coisa misteriosamente nomeada, para que a separe da camada original. Agora o que podemos fazer, é dizer que você, meu amigo, eu gostaria que você só afetasse este grupo aqui. Eu queria fazer exatamente o que os rótulos estão fazendo. Os rótulos estão se recortando nessa camada, quero que você faça isso também. Mantenha pressionada a tecla Option em um Mac ou tecla O em um PC, e apenas olhando para este pequeno ícone que aparece entre as duas camadas, que agora você possa ver que ele só aparece nesses dois caras, não neste fundo. Se você quiser atualizá-lo, o que você faz é clicar duas vezes sobre eles. Vou inverter o meu sem motivo, poupa-o. Você pode ver que é uma linda maquete reutilizável. Isso é tudo para este tutorial, Eu vou vê-lo no próximo vídeo. Antes de irmos ao QG dos instrutores, só para que saibas, é algo em que trabalho. É um dos meus outros projetos. Basicamente, o instrutor HQ.com é para pessoas que querem se tornar um instrutor. Eu sou um instrutor da Adobe, mas você pode estar procurando fazer algo semelhante, ou algum outro campo completo, e basicamente o HQ do instrutor está lá para mostrar como fazer os cursos, como editá-los, maneiras de distribuí-los, como comercializá-los, e além disso rastreia seu sucesso também. É uma coisinha legal, vá dar uma olhada, se você está interessado. Isso explica por que o instrutor HQ OP é aleatoriamente de vez em quando. Esse é definitivamente o fim do vídeo. Vejo-te no próximo.
96. Projeto do curso — modelos: Olá, está ficando tarde neste curso e este vai ser o nosso último projeto de aula. O que eu vou adorar que você faça é passar pelas coisas que você fez neste curso, e escolher uma das idéias de maquete que
passamos por aquela que mais ressoa com você, quer ver uma das manuais em vez de uma das que você tem do mercado. Você pode definitivamente fazer esses e enviá-los para mim e compartilhá-los, mas eu quero ver um daqueles onde você realmente colocar algum tempo em criar ou encadernado ou distorção ou falso, mas usar alguns de seus próprios gráficos. Não tem que ser coisas que você fez a partir deste curso, talvez seu próprio trabalho de portfólio pessoal, talvez apenas uma fotografia que você gosta. Quando terminar, envie-os para nas tarefas, comentários ou nas mídias sociais. Eu tenho um chute real de ver o que as outras pessoas fazem, e se você enviar para mim eu saberei que você chegou até o fim ou quase o fim. Este é o meu maior curso de sempre, se você ainda está aqui tenho pena que você seja um dos poucos, compartilhe comigo o que você fez e prove a última metade deste curso não foi feita em vão. Você está aqui, você está aprendendo, você está animado. Certo, vamos entrar na última seção do curso, então explorando.
97. Como fazer prova de cores no Adobe Photoshop pronto para impressão: É hora de provar as cores se preparando para, digamos, imprimir. É muito comum trabalhar com RGB quando você está fazendo um gráfico. Há mais espaço de cores para trabalhar, cores
mais ricas e mais vibrantes. Mas ainda há muitas vezes em que você precisa enviá-lo para impressão física. Vai ser convertido para CMYK. Uma maneira fácil de verificar como ele vai se parecer no CMYK. É só uma representação para te dar uma ideia. Obter uma vista, e tem este aqui. Comando Y em um Mac, controle Y em um PC. Apenas certifique-se de que sob a configuração de prova ele se encaixe para trabalhar CMYK, como um processo de impressão CMYK genérico. Comando Y ligado, desligado, ligado, desligado. Pode ser difícil ver no vídeo. O principal problema para mim é o meu respingo de cor no fundo, está mudando de cor consideravelmente. Congelando sua cor, ficou um pouco verde, provavelmente tinha uma tangente verde para começar. É apenas temporário. Ele não vai para o modo de arquivo e CMYK e convertê-lo, apenas dando-lhe uma pequena pré-visualização. Outra maneira visual em vez de apenas ligar e desligar e espirrar sobre, é ir para ver e ligar o aviso gama. Isso só lhe dará uma representação cinza de cores que se sente apropriado novamente, como suavizadas juntas ao passar pela impressão. Ao suavizar isso significa que ele não pode ser representado muito bem em CMYK. Os amarelos têm a banana perfeita porque um dos ciano, magenta, amarelo e preto, um deles é amarelo faz bem. Os cianos fazem bem, os verdes não se dão bem. Isso é o que está afetando esta imagem. Um monte de grama aqui, você já fez isso antes. Você imprimiu algo e ele só fica ótimo na tela e os verdes vêm todo marrom lamacento. O que posso fazer aqui agora, é que posso trabalhar nesta camada aqui. Eu já tenho alguns níveis e ajustes de cor, então eu vou clicar em matiz e saturação, basta empurrá-lo um pouco mais para os amarelos. Você pode ver apenas voa de volta à ação porque tinha um tom verde para ele realmente. Essa é uma maneira de consertar isso. Você pode trabalhar nos níveis da imagem. Tudo o que você está fazendo é tentar fazer alguns ajustes para ver, A, você está feliz com o olhar? B, tem um monte deste aviso gama desapareceu. Eu vou perder sobre relâmpago este meio tons aqui, para que a impressão CMYK, eu posso lidar com isso. Mas nunca vai ser perfeito. Sempre haverá uma mudança quando você estiver indo de RGB para CMYK. Mas é útil verificá-lo. Alerta gamut e dê uma olhada nele. Digamos que você quer ir um pouco mais profissional, no momento em que você está apenas usando a configuração de prova para um processo de impressão CMYK genérico, o que você deve fazer é ir para personalizado. Dependendo de onde você está imprimindo, digamos que estou imprimindo aqui no meu escritório. Tenho uma impressora a laser Oki aqui. Não foi caro. Mas o que posso fazer é dizer, que gostaria que você simulasse, e o que ele fará é se você tiver algo instalado em sua máquina. Bem no fundo aqui, isso é um ipsum que eu tenho em um disco diferente e este é o Oki que eu instalei. Se você já tiver uma impressora instalada em seu computador, ela deverá aparecer nesta lista aqui. Eu sei que o meu é o, eu acho que é este aqui, é o 342 multi, esse é o único aqui. O que eu também poderia fazer para me dar uma representação realista é ir para simular a cor do papel e o que ele
faz, ele vai aborrecer o branco, tentar combinar papel mais do que visão de tela aqui, que é bastante brilhante. Mas mesmo assim, é muito mais fácil
obter uma prova feita porque esta ainda é uma simulação,
uma pré-visualização ativada, pré-visualização desligada. Há uma grande mudança na cor aqui, que não estava no CMYK genérico. Minha impressora Oki está dizendo que provavelmente vou enriquecer um pouco isso. O que eu posso fazer agora é que eu configurei tudo, eu cliquei ok agora eu posso fazer um ajuste para tentar e mitigar isso, talvez mudando a cor deste, chega perto do que eu quero. Se você está lidando com uma impressora comercial, você pode pedir-lhes algo chamado perfil ICC e você pode ir e carregá-lo aqui. Você pode ir para exibir, configurar provas, ir para personalizado e ir para carregar. Se você lidar com um pequeno lugar mãe-e-pop, eles provavelmente não vão saber como enviar este perfil de cor para você. Se você está lidando com um lugar comercial maior, eles vão ser capazes de enviá-lo facilmente para você. Vamos clicar bem. Esse é o primeiro passo para preparar nosso documento para impressão comercial. Vamos entrar no próximo vídeo.
98. Como organizar os seus arquivos no Photoshop antes de enviá-los: Oi lá. Este vídeo é tudo sobre como limpar seus arquivos do Photoshop antes de enviá-los para um cliente ou um colega. Preparando o PSD só para sair. São algumas coisas que precisamos fazer. Precisamos ter certeza de que o tamanho do arquivo é tão pequeno quanto possível. Precisamos parecer profissionais. Precisamos ter certeza de que ele vai abrir nos computadores de outras pessoas. Vou te mostrar uma maneira de compartilhar isso com eles também. Na pasta Exportação, abra limpar files.psd, e este aqui tem 32 megabytes no momento. Agora isso não é tão grande para um arquivo do Photoshop, mas como você tem que baixar esses arquivos de exercícios eu adoraria colocar um arquivo gigabyte lá e mostrar como ele é grande, quanta economia podemos fazer. Mas você me mataria porque teria que baixar um gigabytes com um arquivo. Aqui eu vou levantar isso e mover isso para cima para que possamos ver nosso painel Camadas. É um arquivo velho e bagunçado. A coisa legal sobre isso, não a coisa legal. Eu só fui e abri um arquivo que eu tinha. Que eu estava trabalhando recentemente e não mudei nada. O que você vai notar é que é assim que meus arquivos se parecem. Há coisas que estão desligadas que eu não preciso mais que está sentado lá dentro, é uma grande bagunça velha. Sem nomes nas camadas. Enquanto estou trabalhando, trabalho sozinho comigo mesmo, então sim, mas trabalhando com um colega, eu faço isso muito mais agradável. Antes de enviar isso para um cliente. Vamos trabalhar agora como eu faço isso. As duas maiores coisas que vamos fazer primeiro é nos livrar de qualquer camada escondida, apenas os globos oculares desligados, apenas coisas que eu não preciso. Mudei isso por uma razão e só quero limpá-lo. Além disso, quaisquer camadas que estão apenas vazias, há algumas camadas vazias aqui, eu sei que a camada 16
está vazia, não tem nada, eu realmente edito essa, mas não há nada nela. Vamos descobrir como fazer isso há dois lugares. Há um que diz arquivo e vai para scripts e há esta opção aqui que diz excluir todas as camadas vazias e ele apenas vai e olha para o que potencialmente poderia ser um documento realmente longo. Apenas remove qualquer sim, apenas camadas vazias. O próximo é remover as camadas escondidas e está em um lugar ligeiramente diferente. Está sob a camada excluir quaisquer camadas ocultas. Legal, arrumado um pouco. O que vamos fazer é fazer um arquivo Salvar como para que possamos comparar os tamanhos dos arquivos e ver o que essas coisas poupanças.Limpar arquivos Eu vou colocar um na minha área de trabalho. Vai ser frio, arrumado. Duvido que seja assim que se soletra, mas é o mais perto que posso chegar. Vamos salvar e ver o que estamos fazendo. Outra coisa antes de partirmos é ter certeza de que isso está ligado. Faz um tamanho de arquivo um pouco maior. Mas isso significa quando enviamos para o nosso colega. Isso significa que se eles têm uma versão anterior do Photoshop, isso significa que é mais provável abrir nessa versão com isso ativado, com ele desligado, o tamanho do arquivo é menor, mas não como versão cruzada y. Vamos clicar em “Ok”. Mova o estudo 7.2. Agora vamos dar uma olhada na área de trabalho e lá está, lá. Estamos agora em 30. Nessas camadas, há algumas coisas que não precisávamos. Pixels. Incrível. Então esse é o primeiro pedaço. Agora, a próxima parte realmente depende do que você precisa deste arquivo. Porque há muito trabalho extra. Vamos dar uma olhada em alguns desses arquivos. Há, alguns desses arquivos aqui só têm coisas que não precisamos. Então você vai encher do canto superior direito. Ele é cortado, então não precisa estar neste arquivo. Se eu enviar para talvez um colega que eu quisesse ter acesso a todos esses pedaços extras, eu poderia deixá-lo. Vamos dar uma olhada. Este aqui, em particular, estes dois primeiros aqui. Estes são apenas lixo que não precisamos que não podem ser vistos. O que podemos fazer para se livrar de tudo isso para aparar tudo, basta pegar a ferramenta de corte e certifique-se excluído zona de pixel recortada fora por padrão, eu tenho certeza que então ligá-lo só significa que qualquer coisa cortou, vai ser excluído. Carregue em Return no teclado e dá-lhe uma pré-visualização do que está a acontecer. Esta coisa ao longo do topo aqui, aperte Return novamente. Agora, nessa mesma camada, vamos dar uma olhada nesse cara aqui. Você vê que não há nada lá, eu vou desligar isso também. Há como um canto lá agora. Então nós apenas deletamos esses. Isso funciona até certo ponto, mas se eu voltar para a minha ferramenta de corte e clicar em “Enter” novamente, você verá que há todo esse lixo no fundo que você gosta, Oh, por que ele não foi excluído? Não funcionará se essas coisas forem objetos inteligentes. Agora você tem que decidir se você precisa reter objetos
inteligentes ou não se gosta de mim agora. Só quero cortar tudo para que seja bom e compactado aqui. Nós vamos usar um pequeno truque de mais cedo, eu quero encontrar aqui embaixo que diz gentil. Ele deve estar lá por padrão. Eu quero encontrar esta última opção aqui diz apenas
me mostrar todos os Objetos Inteligentes, por favor, vá em frente. Vou selecionar todos esses caras. Eu vou deixar este aqui porque eu quero que o texto permaneça vetorial dentro do objeto inteligente. Mas esses caras aqui são apenas pixels. Vou apenas clicar com o botão direito do mouse neles, obter qualquer uma da área cinza aqui e esta opção aqui, diz camadas rasterizadas. Isso só se livra dos Objetos Inteligentes. Eles simplesmente desapareceram desta lista porque conhecem objetos inteligentes mais longos. Eu desligo isso, ainda há camada, aqui estão eles. Mas eles não vão definir minha técnica de corte agora. Então, clique em criptografia retornar no seu teclado ou enter e, em seguida, digite novamente. Espero que agora, se eu clicar mais uma vez, tudo se foi. Então fuja. Vamos apertar “Salvar”. Vamos ver o quão grande é agora. Estamos reduzidos a três megabytes agora. Você pode ver que isso pode objetos podem conter um monte de dados, e agora é claro que não precisamos deles. A próxima coisa é falar sobre compatibilidade. O que eu fiz por vocês no curso é essa fonte aqui que eu não gosto muito é Arial, mas eu estou esperando que todos tenham, caso contrário, photoshops vai abrir e dizer, hey, você está perdendo uma fonte. Por que eu disse isso para Arial, o que você pode ter que fazer é dizer que você está usando sua fonte corporativa ou apenas coisas fontes. Isso é um pouco estranho e você sabe, quem quer que você está enviando isso não vai ter. Eles não vão precisar mudar o texto, mas você quer permanecer vetorial. Por vetor, quero dizer, esta coisa é escalável e porque é uma fonte, vai manter a sua boa qualidade. Há um truque em torno disso. Este arquivo aqui é o objeto inteligente aqui. Você verá que não há texto real aqui, mas é um objeto inteligente. Posso clicar duas vezes na miniatura para entrar no Objeto Inteligente. Lá está o meu original, Eu mergulhei no objeto inteligente, ele diz arquivo PSB apenas como um arquivo temporário, desculpe eu quero dizer o objeto inteligente e todas as suas camadas, você pode ver aqui, todos os tipos de Arial. Digamos, eu sei que meus clientes ou meu colega não tem Arial, qualquer tipo de letra chique que estou usando. Você pode selecionar todas essas camadas de texto. Você poderia bater neste membro. É útil me mostrar todo o texto. Eu cliquei uma vez que o top hold shift para os últimos, eles são todos selecionados. Clique com o botão direito do mouse em qualquer um deles, não no ícone aqui, aqui nesta área cinza. Em seguida, há esta opção diz Converter em forma. Muitas vezes as pessoas rasterizam o tipo e isso vai se transformar em pequenos pixels e não é escalável, e é tão fácil fazer isso, que permanece vetorial. Pontos e caminhos escaláveis essencialmente apenas melhor qualidade. Clique nisso, o único problema com ele, eu vou desligar o tipo de agora é que esses caras não são textos editáveis. Esse é um dos problemas usando esse método. Nenhum texto editável. Você tem que decidir se isso funciona para a sua situação. Acho que só quero mostrar todas as maneiras que você pode fazer isso para torná-lo indestrutível. Pode ser que você esteja fazendo coisas que estão acontecendo para um público realmente vasto. Digamos que está indo para o canal de marketing onde você quer dar o arquivo às pessoas, mas você não quer que elas enviem e-mails a cada 5 segundos e dizendo, hey, você não tem isso, ou isso não está incluído ou ele não vai abrir na minha máquina, esse tipo de coisa. Vamos salvar isso e vamos fechar essa guia e essa coisa é atualizada, perfeita. Vamos salvá-lo novamente e vamos verificar o quão grande ele é agora. Então 3.7, é um pouco maior do que o que era, porque agora não está usando uma fonte, é realmente clicar em todos os dados e agora é formas. Presumo que seja isso mesmo. É tipo de novo, a próxima coisa a fazer é como você compartilha isso? Nós mostramos como empacotar no último vídeo, vou mostrar-lhe um pequeno truque que podemos fazer neste particular. Queremos compartilhar este PSD. Agora vamos para Arquivo Salvar como novamente. O que você vai encontrar é no seu computador, você terá uma pasta no meu Mac, ele só aqui é aqui arquivos da Creative Cloud. Está sob a minha estrutura se você estiver em um Mac, se estiver em um PC, dê uma olhada para encontrar essa pasta chamada Arquivos da Creative Cloud. Pense nisso como o Dropbox se você nunca o usou e ele fizer parte da sua licença Se eu salvá-lo lá, clique em “Ok”. Nada realmente extravagante acontece, exceto que meu Creative Cloud App aqui em cima, você pode ver a pequena seta dupla aqui que está dizendo, Estou sincronizando e você pode ver que estou sincronizando aqui. Está a enviá-lo para o seu armazenamento online. A coisa legal sobre isso é que se você acessar seu aplicativo de nuvem de crédito, se você estiver em um PC, ele está em, um canto inferior direito. Procure o mesmo, assim como. Vá para ativos e vá para arquivos e vá para abrir ou exibir no chicote. Outra coisa que você pode fazer é se você ainda não consegue encontrar, digamos que você está em um PC e você não consegue encontrar com essa pasta de nuvem de crédito é apenas chegar ou descer para aquele pequeno ícone, ir para Ativos, Arquivos. Se você clicar em “Abrir pasta”, ele mostrará onde ela está no computador. Eu salvei. Está sincronizando. O que eu quero fazer é ir a este que diz vista na web. Aqui estamos nós aqui. Leve-me a basicamente que é só este lugar. Assets.adobe.com. Na verdade, você pode digitar isso no login com sua Adobe ID. Assim que terminar a sincronização, este arquivo será exibido. É um PSD. Não há diferença real aqui além de usar o Dropbox ou a Creative Cloud. Digo isso porque uso bastante o Dropbox. Eu uso esses ativos. adobe.com menos. Mas o que é realmente legal sobre isso é que você pode clicar sobre ele e você pode dizer na verdade, eu gostaria de compartilhar este e você pode esperar que ele lhe dê uma pequena opção, mas você pode enviá-lo para as pessoas, copiar e colar o link e eles terão acesso a ele. Mas o que é realmente legal sobre ele é que se você editar este arquivo e clicar em salvar, ele será atualizado. Se o cliente voltar e dizer que não posso abrir, não
precisa enviar um link de verdade. Basta enviar-lhes este link aqui. Você copia, envia para eles por e-mail. Decida sobre que tipo de configurações são permitidas. Então, se eles precisarem fazer alterações, basta alterá-lo aqui no Photoshop e ele será ativado e clicar em Salvar e será atualizado aqui online. A última coisa que faremos antes de terminarmos é o nome. Fizemos isso em um vídeo anterior. Vou rever os nossos velhos truques. Lembre-se, podemos digitar aqui e apertar Tab e eu
vou trabalhar meu caminho através de nomear tudo. Você entendeu a idéia. Você pode apenas pressionar tab e tab e tab e nomeá-los todos realmente bom. Então você parece um profissional quando envia para outra pessoa. O tamanho do arquivo é bom e pequeno e você não
deve ter problemas com eles não conseguirem abri-lo. É isso para este vídeo, vamos entrar no próximo.
99. Como empacotar o seu arquivo no Photoshop para incluir imagens vinculadas: Oi, aí. Este vídeo é tudo sobre arquivos de empacotamento. O que são arquivos de embalagem? Isso significa que eu tenho fontes que estão incluídos neste PSD que eu fiz. Há também imagens que estão ligadas a ele. Se eu vê-los apenas o PSD, eles vão abri-lo e ele vai dizer, “Ei, eu estou perdendo algumas das imagens vinculadas como esta imagem aqui.” Também vai dizer, “Estou perdendo algumas das fontes.” Vamos corrigir isso com o recurso de pacote do Photoshop, que é perfeito para exportar imagens. Não é tão bom para fontes, mas vou mostrar-lhe um pouco hacky usando o Illustrator para obter as fontes também. Vamos começar. Para começar na sua 17 pasta de exportação há um PSD lá chamado Final Artwork, abra isso. Eu fiz isso bem pequeno apenas para manter os tamanhos de arquivo baixos em seus arquivos de exercícios. Quero mostrar-te as coisas diferentes que aconteceram. Para cair embalagem é muito fácil, temos um arquivo e vamos para um pacote. Vamos tirar isso do caminho. Nós vamos colocá-lo. Eu vou colocar o meu na minha área de trabalho para torná-lo agradável e confuso e ele vai clicar em Escolher, e o que eu vou fazer é reutilizar o nome do seu arquivo, arte
final, e é o beijo da morte chamando qualquer coisa final, mas de qualquer maneira. Vamos olhar em nossa área de trabalho e você pode ver sua pasta de saída final é gerado para você. Ele nomeia a pasta para você, coloca uma cópia do PSD lá e quaisquer links que foram usados. Então, quais são os links? Vamos dar uma olhada. Em meus arquivos aqui, eu tenho um monte de coisas diferentes, então eu vou fazer isso um pouco maior para que possamos ver. Esta imagem de mirtilos aqui não tem nenhum pequeno ícone aqui e você vai notar que em minhas exportações, ele não apareceu. Então eu tenho a imagem e eu tenho o fundo. Por que eu só peguei aqueles dois? É porque aqui,
o plano de fundo é, na verdade, uma imagem de bibliotecas da Creative Cloud. Então eu fiz isso, fui para minhas bibliotecas e fui para cá e eu arrastei isso para fora. Como ele está conectado à minha biblioteca e realmente incorporado neste documento, quando eu vou para o pacote, o Photoshop os inclui. Algo semelhante aconteceu com esta opção aqui, você pode ver esta aqui? Quando eu trouxe esta imagem,
eu fui Arquivo e em vez de usar Place Embedded, eu usei Place Linked, você pode ver o pequeno ícone de vinculação lá. Está se ligando ao meu disco rígido, é incluído no pacote. Mas há muitas outras coisas que não dizem este especial. Eles só estavam embutidos no documento. É um objeto inteligente que é legal, mas ele não está incluído no pacote porque ele está realmente incorporado aqui, e ele foi ou copiado e colado aqui ou usar o arquivo incorporado. Então você tem três opções, você pode simplesmente deixá-lo do jeito que está e ter algumas delas incorporadas, algumas delas não, de modo que o documento do pacote seja um pouco dos dois. Você poderia passar e dizer que realmente esta banana aqui, eu quero ligá-la. Para fazer isso, você pode clicar com o botão direito do mouse nele e você pode dizer, converter para vinculado, e basicamente ele vai dizer, nós queremos colocar a banana,
eu vou colocar o meu na minha área de trabalho, aleatoriamente ausente na área de trabalho, e agora ele está ligado a esse arquivo chamado banana. Agora, para ser incluído no meu pacote, tenho alguma inconsistência. Ele também vai tornar o PSD, mas menor em termos de tamanho de arquivo porque ele não está incluído aqui, ele é apenas vinculado. Alternativamente, eu poderia dizer que na verdade eu não quero tudo isso ligado. Ele vai clicar com o botão direito neles e dizer incorporar este link e vai incorporar este e, em seguida nada será incluído em seu pacote e você não precisará ir File Package em tudo. Uma das coisas que você não viu aparecer lá eram fontes. Se por algum motivo o Photoshop não empacotar as fontes, eu não posso fazer isso acontecer, eu tentei o meu melhor feito. O Adobe Illustrator e o InDesign também, mas o Photoshop ainda não. Há um truque para tirar as fontes, mas há algumas condições que precisam ser atendidas, e praticamente este arquivo aqui quebra todas elas, mas você pode fazer isso, abrir no Illustrator e usar seu pacote de arquivos e ele vai puxar o fontes para fora. Por que não funciona com este documento? Ele não funcionará com nenhuma camada que tenha um estilo de camada, e agora Kaiser tem uma sombra suspensa, vou clicar em Limpar camadas para baixo. A outra coisa que não vai acontecer é ver este R aqui, tem uma sombra. Antes de apagar a sombra, mas ainda está por trás deste respingo. Não vai funcionar. Então eu vou salvar este arquivo aqui, e vamos para o Illustrator. Vamos abrir esse arquivo, arquivos de
exercícios 17, arte final. Eu só quero ter certeza que eu converto camadas em objetos está ativado e clique em ok, e o que você vai notar aqui é que esta fonte aqui é convertida em texto editável real. Photoshop e Illustrator trabalham juntos e eles dizem, bem, eu vou refazer isso na fonte, perfeito. Isso será incluído quando eu exportar. O que aconteceu é que, você vê este R aqui atrás, zoom nele. Vemos que o texto aqui é vetor perfeito. Diga amém, adorável. Mas vamos olhar para o R dele aqui, porque este testamento por trás
disso, foi esmagado e bronzeado em pixels, então ele simplesmente não é exportado. Se você está apenas olhando para obter as fontes para fora, você pode ter que fazer alguma hacking apenas para colocar isso no topo,
sem sombra, apenas para que o Illustrator possa passar e extrair toda a fonte para fora. A outra coisa que não vai acontecer é, se eu escolher outra fonte e escolher uma fonte Typekit, digamos, vamos usar esta aqui, Adelle. Porque esta é uma fonte Typekit, Adelle esta fonte Tk, não vai funcionar. Este aqui, porém, é Arial, pode ser qualquer coisa desde que não tenha Tk ao lado. As fontes do tipo O, o tipo aberto funcionarão, os TTs funcionarão, mas não o Typekit. Você só tem permissão para usar o Typekit porque paga por sua licença da Creative Cloud
e, se a outra pessoa do outro lado tiver uma licença da Creative Cloud, as fontes irão com ela, perfeito. Se não o fizerem, então não lhes é permitido tê-los. Digamos que chegamos até aqui, tem um arquivo, está no mesmo lugar, pacote escolar. Onde vou enfiar? Eu vou salvar este documento, onde eu vou salvá-lo? Na minha área de trabalho. Eu vou fazer uma pasta chamada exemplo de embalagem, o
homem está ficando bagunçado, coloque isso aí. Então eu preciso salvá-lo primeiro, e então, quando eu receber um pacote, eu vou apenas certificar-me de que eu incluo as fontes. Você pode ver que não me deixava ter fontes Typekit. Diz: “Cuidado com as restrições das fontes”, você diz: “Não se preocupe, eu vou”. Agora, na minha área de trabalho, há um exemplo de embalagem, há minha arte final e para onde eu disse que o pacote estava indo? Eu não verifiquei esse pacote de arquivos. Eu coloquei o meu em uma pasta estranha que é para entrar em uma área de trabalho, dentro daquela nova e adorável pasta que fizemos. Certifique-se de que as fontes estão incluídas, faça-o duas vezes. Está lá, há o arquivo AI que eu
realmente não preciso porque eu tirei todas as imagens do Photoshop, mas esta é a Arial que eu usei. Tirado do seu disco rígido, pronto para ser enviado para a próxima pessoa. Mas se um hack pode não valer a pena o tempo e o esforço, mas você também pode estar desesperado para obter as fontes para fora. Mas lembre-se, sem estilos de vida, sem fontes Typekit. Certifique-se de que eles estão na parte superior do seu logotipo e use o pacote de arquivos. Usamos o Illustrator apenas para obter as fontes e usamos o Photoshop para obter todas as imagens vinculadas. Combine-os juntos, temos um arquivo de pacote completo. Você pode estar assistindo em um futuro distante, eles podem ter apenas fontes no Photoshop. Basta verificar primeiro, ele não esteve lá desde sempre até agora, então você pode ter sorte e eles podem atualizar isso. Talvez você não precise fazer essa versão hackeada. É isso para este vídeo, empacotamento. Vejo você no próximo vídeo.
100. 3 tipos de exportação de arquivos para Photoshop: mídia social, web e impressão: Oi lá. Este vídeo é tudo sobre exportar nossos arquivos. Vamos olhar para três casos de uso, vamos fazer mídias sociais, vamos fazer web e vamos fazer impressão. Nós cobrimos alguns desses em áreas específicas, mas eu quero condensá-lo em um vídeo utilizável apenas. Estas são as regras definitivas para explorar os diferentes formatos, tudo em um único lugar. Mídias sociais primeiro vamos olhar para apenas fazer um único documento mais uma exportação de popa múltipla. Este aqui, maneira mais fácil e melhor maneira é File Save As porque o que queremos é um JPG. Estamos usando apenas um JPG antigo normal. Não é uma maneira mais segura porque as mídias sociais não precisam ser condensadas e os dados retirados para tornar o tamanho do arquivo menor. Só queremos uma imagem muito bonita. Eu vou colocá-lo na área de trabalho e eu vou colocá-lo em uma pasta chamada exportação. Este vai ser chamado de crescer e este vai ser 19 de julho. É seguro, controle deslizante de qualidade porque não estamos preocupados. Vamos para o Facebook, Twitter, Instagram, lá vamos fazer o dimensionamento das imagens. Não queremos fazer isso por eles. Se você está carregando mil usuários, provavelmente
você quer manter o tamanho do arquivo um pouco menor, mas JPG que é realmente uma boa qualidade. Isso vai estar pronto para ir. Digamos que você tenha trabalhado em algo que tenha vários uploads. Queremos exportá-los para nossas diferentes plataformas de mídia social. O que precisamos fazer é ir para o arquivo e vamos usar essa opção de exportação. O que queremos é exportar para arquivos. Coloque-os todos na pasta da minha área de trabalho chamada export, clique em “Abrir”. Este vai ser o meu curso de ilustrador. Então você pode decidir sobre o formato vai ser um JPG e o slide de qualidade está em oito e clique em “Run”. Eu poderia arrastá-lo até 10. Sucesso. Agora minha área de trabalho eu tenho e eles exportar pasta que você pode ver lá. Tenho o meu curso ilustrado. Está tirando o resto do nome do arquivo do seu nome de upload. Apenas certifique-se de que você está nomeando seu upload algo que você deseja que o arquivo seja. Vamos passar para as exportações impressas. Eu uso um simples, troco um aqui. Digamos que essa coisa que fizemos com fixo, ele precisa sair para um poste ou uma impressora. Qual formato de arquivo devo usar? O mais versátil é o arquivo, salvar como. Você não pode salvar no PSD, apenas deixe-os como estão. O tamanho do arquivo é bastante grande, então o que vamos usar é o método Photoshop PDF. A coisa legal sobre isso, se houver texto ou gráficos vetoriais, Ele será mantido dentro deste PDF mais o tamanho do arquivo é realmente pequeno e bastante intercambiável em um formato que é esperado eu acho. É facilmente enviado por e-mail. Vamos colocá-lo na minha área de trabalho. Você pode ver que eu tenho que exportar pastas. Só mexa com todo mundo. Este vai ser chamado de impressão smoop. Muito obrigado. Nessas sessões de PDF, porque ele está indo para impressão comercial, basta escolher impressões de alta qualidade e simplesmente desligar isso. Por quê? Porque isso vai basicamente fazer um PDF com isso ativado. Basicamente, tudo que você tem é um PSD, super grande, totalmente editável, todas as camadas, mas é apenas chamado de PDF. Pode causar problemas com rasgos de impressão, torna o tamanho do arquivo super enorme. Nós só não precisamos de todas essas máscaras de borrão e essa coisa agora que estamos enviando para a impressora que não precisa dessas coisas. Podemos desligá-lo, clique em “Salvar como”. Se verificarmos nos meus arquivos de exportação, ele estará lá. 2.2 Megabytes, enquanto este arquivo real aqui é cerca de 50 megabytes. Vamos fazer o último. Vamos fazer com o design. Em seus arquivos de exercícios, se você quiser jogar junto em 17 exportando, eu tenho este exemplo de web design. Tenho uma versão ligeiramente diferente que já usamos antes. Há duas maneiras. Digamos que eu gosto deste gráfico aqui. Eu vou fazer o meu painel de camadas agradável e grande para que você possa vê-lo. Eu tenho essa coisa chamada camada de livros de imagem. Vou clicar com o botão direito do mouse nele e apenas dizer exportar como. Podemos usar a exportação rápida. Essa é a maneira rápida de tirar uma única camada. Isso é fazer um de cada vez. Eu posso decidir quando ser PNG, JPG, eu quero que seja simplesmente esta imagem clique em “Exportar”. Isso é um de cada vez, o que é muito legal. Mas se você quiser fazer lotes, então vamos usar o Adobe Generate. Vamos levar isso ainda mais longe do que fizemos no início do curso. Um arquivo, vamos nos certificar de que gerar ativos de imagem está ativado. Na verdade, vou guardar meus documentos em algum lugar, facilitar a visualização. O que vou fazer é “Salvar como”. Você não tem que fazer isso. Ele vai fazer uma pasta na minha área de trabalho chamada gerar e eu vou colocar isso em. Legal. A maneira de gerar funciona é que ele olha para onde você salvou o PSD, lá está ele. Está em uma pasta chamada gerar. Quando você ativa isso em arquivo, gera, recursos de imagem, nada realmente acontece exceto que você obtém essa pasta e é aí que ela vai colar todas as nossas imagens. Digamos que este hino gráfico de fundo, eu quero salvar isso como a.jpg. Magicamente, nos meus recursos de imagem, há o meu jpg. Eu posso trabalhar o meu caminho através dele e dizer que na verdade eu quero que isso seja um JPG bem, livros de imagem. Você está indo como um jpg. Quero ir um pouco mais longe. O que eu gostaria de fazer é que eu quero que esta seja uma versão realmente baixa qualidade para pelo menos eu sei que ele parece bom em 40 por cento. Basta digitar 40 por cento no final. Tem que ser esta sintaxe não pode ter outros espaços. Ele tem que be.jpg e em linha reta para o 40 por cento. Coisa legal sobre isso é que ele vai fazer livros de imagem com uma qualidade de 40 por cento. Vamos fazer isso em 10 por cento para que você possa realmente ver que está fazendo o que eu digo. É regenerado e você pode ver que é bem pixelado. Você pode estar feliz que este está em 40, mas este aqui porque é passado, nós podemos escapar com cerca de 30 por cento e abaixo. Agora esta sintaxe, vamos chamá-la um pouco
neste curso e é difícil lembrar essa sintaxe. O que tem que ir para onde. Se você pesquisar no Google a sintaxe da camada do Adobe Photoshop, você acabará aqui. É o resultado principal, é adobehelp.com. Aqui está a grande versão longa e eu vou te dar esta versão skinny, mas tem toda a sintaxe escrita aqui. Antes de terminarmos a sintaxe, o que eu quero fazer é deixar você saber que você pode explorar grupos porque no momento eu tenho este gráfico e este gráfico há dois gráficos separados. Eu poderia nomeá-los, mas eles saíam separadamente para que eu possa golpear os dois aqui, grupo. Nomeie este grupo logo.png. Digamos que eu queira que seja um PNG de 8 bits ou 24 bits ou 32 bits. Você pode apenas adicionar isso lá também. Vamos deixá-lo como um PNG normal, que é de 8 bits. Esperemos que aqui esse grupo seja exportado. Agora, se verificarmos, você pode ver que o meu não está aparecendo. Às vezes isso acontece, às vezes você só precisa desativar e ativar novamente. Aqui está o meu logotipo.. Deixe isso aí. É um problema que eu tinha. Você provavelmente vai correr para ele também. Você pode ver, eu acho que o que eu quero mostrar é que você pode ver que eles
agrupados juntos para apenas nomear o grupo. Vejamos uma sintaxe diferente. Apenas saiba que você pode fazer três deles. Você pode fazer PNG, você pode fazer GIF, e você pode fazer JPG. Você pode ver que tem o meu GIF lá. O que mais você pode fazer? Digamos que você está fazendo um design responsivo e você precisa de algumas versões desse plano de fundo. Vamos nos livrar dos 30 por cento. Tente mantê-lo limpo. Eu tenho tijolos, mas eu quero uma versão menor. Eu quero 50%. Cinquenta por cento vai no início com um espaço, o que ele vai fazer é gerar qualquer tamanho que está na versão de metade do tamanho do documento. Temos tijolos. Lá está ele. Agora é, quão grande é isso? Este aqui é 603. Isso é metade do que está neste documento. Muitas vezes, quando você está fazendo a resposta do que você quer é que você quer uma vírgula, você quer dois deles. Vou copiar isto. Você poderia colocar 100 por cento, mas você realmente não precisa disso. Uma vírgula, depois um espaço. O que você precisa fazer é estes precisam de nomes
diferentes porque nós vamos criar dois arquivos agora. Uma vírgula significa fazer duas versões disso. Este vai ser o meu, talvez @2x ou talvez este seja apenas o Número 2 ou contratados. Um é 50 por cento, o outro é normal. Com sorte, agora eu tenho que olhar porque ele para baixo. Isto é tijolos e, em seguida, este é tijolos-contratações, você pode estar usando o sufixo às vezes dois. Você pode adicionar isso lá também. Isso é redimensioná-lo. Vejamos outra maneira de redimensioná-lo. Em vez de fazer 50 por cento você pode realmente dizer, eu gostaria que fosse, digamos 200 pixels através do espaço x espaço. São 200 vezes. Digamos que você precisa ter 200 de largura, mas você não tem certeza de quão alto ele é apenas como torná-lo qualquer altura que é proporcionalmente, então 200 de largura e se você usar ponto de interrogação, você tem que usar o x, você tem para usar os pequenos espaços, ele vai adivinhar a altura para você. Agora aqui, eu vou ter um tijolo que tem 200 pixels de largura. Copie isso. Vou ter outro com 500 pixels de largura. Este vai ser chamado, talvez, 500. Agora eu tenho a minha sintaxe direita, há 200 versão e há 500 versão. Agora vamos dizer que você quer levar isso a outro nível, porque você precisa de um contratações e baixos. Você não quer ter que copiar, colar e mudar os nomes. O que vamos fazer é chamá-lo de tijolos. Até tijolos. Cara, isso são tijolos? Ter um dia ruim ou apenas um dia normal. De qualquer forma, você tem tijolos e vamos fazer alguns outros, nós temos aquele. Livros de imagem está feito. Vamos fazer alguns desses PNGs. Aí está o meu ícone para impressão. Não vai para be.png. Este aqui vai ser o meu app.png. Todos estes vão ser.pngs. Você deve nomear completamente suas camadas como você vai. Poderíamos passar por tudo isso. Nós nomeamos todas as camadas. A Adobe está gerando todos eles à medida que avançamos. Aí estão os meus ícones. Mas digamos que preciso de duas versões. Preciso de uma alta resolução e uma baixa resolução. Você pode precisar de 50 por cento, 100 por cento, 200, 300 para todos os diferentes telefones celulares ou consultas de mídia. O que você pode fazer é criar uma nova camada. Não importa onde esteja. Eu vou colocar minha mina no topo do meu grupo aqui só para que seja fácil de encontrar. Você tem que usar essa sintaxe. Você tem que dizer padrão, oi-res, você não precisa dizer oi-res. Você pode chamar isso, isso é nomear suas pastas. O que quer que diga aqui pode ser a pasta Dan. Vou criar uma pasta chamada hi-res. Ele sabe que é um dobrado porque você colocou uma barra na frente dele. Tinha que dizer padrão, tem que colocar uma barra
direta depois. Vamos ver o que acontece. É apenas uma camada em branco para o nosso caso, eu vou colocar todos eles nesta pasta padrão para você, que não é tão emocionante até você colocar dois deles aqui. Então você coloca um pouco mais e você tem uma visão de baixa resolução. Lembre-se, ele precisa de um pouco de barra no final, então eu tenho duas pastas. O problema agora é que não há nada diferente nesses dois. Está gerando duas pastas, mas são exatamente iguais, exatamente do mesmo tamanho. O que podemos fazer esta pasta de baixa resolução aqui. Lembre-se de quando fizemos nossa escala mais cedo, colocamos 50% na frente dele. É o mesmo aqui. Quero que tudo nesta pasta seja 50 para sintetizar. Estamos lá? Vamos dar uma olhada agora. Você pode ver que todos os tijolos são menores que os tijolos maiores. Se você quer ficar ainda mais nerd, é
como se não houvesse como ficar mais nerd do que isso. Você pode dizer diretamente até alta resolução, eu quero que você anexá-lo com o @2x, que é realmente comum em web design e design móvel como um indicador para a versão de alta resolução. Agora eu tenho todos esses arquivos @2x. Agora, não se preocupe se você está tipo, isso explodiu minha mente. Ele foi muito rápido. O que você precisa fazer é digitar uma vez e apenas fazer o que eu faço. Como se eu nunca me lembrasse disso tudo de cabeça. Acabei de abrir um arquivo anterior em que trabalhei. Eu copio e colo-o para isso ou eu apenas google layer sintaxe para Photoshop e você pode retirá-lo daquele site da Adobe. Ficamos um pouco nerds lá no final. Mas espero que você possa ver, especialmente se você é um web designer regular, você precisa sair. Ou você mesmo construindo sites todos para o seu desenvolvedor, é realmente bom agora, especialmente se você está fazendo um meio, você passar por e dizer que realmente esta coisa aqui precisa ser trocada para uma cor diferente. Eu tenho meus tijolos às vezes dois e eu tenho minha versão menor agora estamos prontos para ir super rápido, super fácil. Tem que colocar o infinito inicial. Isso termina uma boa longa exploração arquivos do Photoshop. Espero que tenha aprendido algo novo. Vamos para o próximo vídeo.
101. BÔNUS: atualizações de software: Ei, ali. Este é um vídeo bônus que eu fiz para compartilhar com vocês todas as últimas atualizações no Photoshop desde a gravação original deste curso. A Adobe está constantemente atualizando o software. Achei que seria uma maneira útil de te manter super atualizado. Eu passei por todos os recursos aqui e eu coloquei todos no que eu acho que são os novos recursos mais importantes através dos mais obscuros no final do vídeo. Pare de falar Dan e me mostre as atualizações. O melhor recurso do Photoshop 2019 é algo chamado preenchimento sensível ao conteúdo. Você pode ter ouvido falar disso antes, mas o espaço de trabalho que eles criaram é muito legal. Se você estiver acompanhando, vá para Arquivo, Abrir e abra esses três espaços de trabalho com reconhecimento de conteúdo 1, 2 e 3. Começaremos com um. A versão antiga do Content-Aware. Só estou usando a ferramenta Laço aqui. Vou dar a volta pelo lado de fora. Isso já está por aí há algum tempo. Você foi para Editar e você foi para Preencher e você deixou tudo por padrão. Você clicou em “Ok”, e foi mágico. Isso é realmente bom em obter pequenas partes de uma imagem maior, especialmente tipo de natureza. É aí que é fácil. Onde fica difícil é quando você tem esse objeto maior,
que faz parte. Olha, é proporcionalmente grande comparado com o resto da imagem. Eu selecionei tudo. Use a mesma técnica e espero que seja uma espécie de pausa. Você pode ver que fez um bom trabalho, mas você pode ver aqui. Na verdade, começou a agarrar a terra fora de foco aqui. Quem me dera que tivesses agarrado isto aqui e é aí que a magia acontece. Vou desfazer para ativar esse novo recurso. Vá para Editar. Este aqui chamado Content Aware Fill. Você pode ser como, “Isso não esteve sempre lá?” - Não. É novo. O que acontece neste caso é que, você acaba com esse novo tipo de espaço de trabalho, essa nova área de trabalho. À esquerda está o que queremos que o Photoshop experimente e, à direita aqui está seu resultado atualizado dinamicamente. É pior do que era. O que vamos fazer é, não precisamos fazer nada na verdade. Você deve ter tudo isso por padrão, essas ferramentas e apenas pintar as coisas que você não quer incluir. Eu quero dizer “Photoshop não inclua nada disso, por favor
”, e seu computador vai
se estressar um pouco porque do lado direito lá, enquanto eu estou pintando
isso, ele está tentando atualizar dinamicamente e girando para longe. Aguarde que esta coisa seja feita e tem muito melhor. Se você é como eu e usar continuar com filtro ou mover como esta pequena coisa e, em seguida, remove-lo, mas substitui-lo com algo pior, este é apenas um pouco muito agradável recurso extra. Experimente Preencher primeiro usando Content Aware. Se isso não funcionar ou se você tiver um resultado ruim, pule aqui. Vá para Editar e na opção Preenchimento sensível ao conteúdo. Outras coisas que você deve saber, aqui à direita em Configurações de preenchimento, você tem essa coisa chamada Adaptação de cores. O que eu descobri é, não se preocupe muito com o peso Adaptação de Cor. É mais como, vou tentar usar a opção a ou b e que diz “Atualizar”. Ele tentará novamente com diferentes tipos de modos de mistura de cores. Você só pode ver se você gosta mais ou pior. Eles parecem muito iguais, muito altos. Veja que ele tem empregos diferentes. Você começa como um par de golpes nele. Você tem de volta. Nenhuma, pior. Acho que o padrão original foi ótimo. Uma das outras vantagens para este método aqui é, você pode ver que diz Configurações de saída. Ele vai para a saída para uma nova camada por padrão. Você pode encaixá-lo na Camada Atual. Foi o que a versão antiga fez. Foi uma edição destrutiva. É uma Nova Camada. Eu vou te mostrar. Clique em “Ok”. Vou desmarcar. Você pode ver aqui, ele está na verdade em sua própria camada, então você pode realmente executar isso algumas vezes. Você tem algumas opções diferentes para começar a se misturar. Esse é o novo espaço de trabalho de preenchimento com reconhecimento de conteúdo. Uma coisa que eu queria mostrar a vocês, porém, é Content Aware se sente incrível, mas há uma pequena ferramenta que é usada na mesma finalidade. Você quer dizer que removemos essas anotações de post-it. Vamos dar um passo usando nosso método de antes, Content Aware-Fill. Se formos para Editar, preenchimento sensível ao conteúdo, use o método do espaço de trabalho. Ele vai passar e você pode começar a apagar muitas coisas. Eu vou dizer: “Não é o laptop. Adeus.” Assistindo a uma atualização aqui. Vamos para o bosque. Então, nenhum dos bosques, por favor. Você pode perseguir isso para sempre e ainda obter um resultado um pouco obscuro. O homem está recebendo mais madeira, não menos madeira. Há momentos em que temos essa pequena opção mágica é. Mesmo tipo de seleção menos [inaudível] e pegue a Ferramenta de Patch. A Ferramenta de Patch está escondida por baixo do Pincel de Recuperação de Pontos. Você só arrasta. Este aqui está usando a mesma tecnologia, mas você está dizendo para substituí-lo com este pedaço exato, por favor e depois misturá-lo. Aperte “desmarcar”, acho que isso lhe dá bons resultados. É a mesma coisa. É como usar preenchimento sensível ao conteúdo, mas você estava dizendo direto desta área, por favor. Ambos os métodos têm o seu lugar. Uma é, você deixa o computador fazer o trabalho. Com a Ferramenta de Patch, eu acho que às vezes realmente especificamente. Na verdade, basta usar isso, mas, para o próximo novo recurso. O próximo recurso não é realmente um recurso, mas é algo novo e eles atualizaram e é um pouco doloroso e precisamos resolver isso antes de seguirmos em frente. Abra “Transformar”. Vou para a minha camada de logotipo selecionada. Usamos Editar, Transformação Livre. Todo mundo faz isso. É Comando T em um Mac, Controle T em um PC. Nós pressionamos “Shift” para ter certeza de todas as proporções de multa. Mas agora é o oposto. Se você segurar “Shift”, ele esmaga. Vou apertar “Escape”. Tudo o que precisamos fazer agora é o Comando T ou Controle T e pegar um dos cantos e você não segurar nada agora. É uma daquelas mudanças estranhas que é um pouco difícil de se acostumar. Eu tenho usado por talvez cerca de duas semanas agora e é totalmente bom. Eu me acostumei com isso agora. Eu posso ver o porquê. Lembre-se, se você pressionar “Shift”, você pode quebrá-lo. Mas em versões mais antigas do Photoshop, você viu pessoas que fizeram isso com logotipos e imagens e porque os novatos, eles são como, “O quê? Está tudo bem.” Você é tipo, “Não, você destruiu o logotipo.” Por padrão, eles não devem ser capazes de quebrá-lo. Mas se você pressionar “Shift”, se você quiser distorcê-lo. É o mesmo aqui para isso abaixo da camada se eu estiver usando editar. Tudo o que tem seus limites de Transformação agora mudou. Escala sensível ao conteúdo, eu amo esse recurso. Mas já está por aí há algum tempo. Nós não seguramos nada. É meio que, bem, escala-o proporcionalmente. Na verdade, quero arrastá-lo desta forma. Vai segurar “Shift” e usar este lado direito. Novos antecedentes mágicos. Amo isso. Se você odiar, você pode acessar Preferências e desativá-lo. Uma pequena atualização também é o Desfazer. O desfazer usado para alternar. Costumava ser pressionado “Command Z” ou “Control Z” em um PC. Você bateu um par de vezes, e ele fez isso e foi para frente, para trás, para frente, para trás. Então você teve que ajudar para baixo como um zilhão de teclas no seu teclado e apertar a tecla “Z” para obtê-lo para fazer este,
aquele que todos querem e nós queremos aquele que diz passo para trás. Isso é alterado por Padrão. Comando Z iria continuar indo para trás e desfazer direto para o início. Costumava ser chamado de passo para trás. Isso é mais compatível com outros produtos da Adobe e apenas com produtos em geral. Vamos fazer algo mais sexy, como a ferramenta de moldura. Abra a partir dos Arquivos de Exercício, Ferramenta de Quadro 1. Realmente, esta é a segunda ferramenta mais favorita. As opções Transformar e Desfazer são apenas coisas necessárias para resolver. Porque é que isto é muito fixe? Eu tenho esse tipo de simulação da Web UI. Não importa com o que está fazendo. Pense em um quadro como uma máscara. Se você usou o InDesign ou o Illustrator, eles usaram essa técnica o tempo todo, seja fazendo máscaras de clubbing. O Frame Tool é este aqui. Agora, se essas dicas de ferramentas estão te deixando louco, eles estão me deixando louco, em um Mac, Photoshop CC, Preferências, Ferramentas em um PC. É Editar, Preferências, Ferramentas e Dicas de Ferramentas avançadas ido. A ferramenta Frame, eu vou escolher um quadrado e eu vou arrastar daqui para aqui. O que você vai notar é que o painel Camadas tem este novo assento aqui. É assim que uma moldura se parece. Mas o que eu vou fazer é, pegar minha ferramenta de movimento. Eu vou duplicar para ter um par de versões para a minha pequena maquete aqui. Há quadros vazios no momento. Para adicionar itens a esse quadro, você pode arrastá-los da Biblioteca. Tenho uma imagem aqui, acerte-os. O legal sobre eles é que eles carregam proporcionalmente. Eles vão encher a moldura. É muito bom. Você pode arrastá-los da Biblioteca. Você pode clicar neles e ir para o painel Propriedades. Lá está ele ali. Você pode dizer imagem inserida de. Você pode obter do Adobe Stock, ou eu vou usar isso para o meu disco local e vou incorporar um. Vou usar o Frame Tool 3. Você acaba na mesma posição ou não sei por que faço isso o tempo todo. Gosto de ver a janela do Finder. Basta arrastar deste diretamente para ele. De qualquer forma, há muitas maneiras de arrastá-lo. Você pode ver o quão melhor é o painel Camadas. Há muitas outras maneiras de fazer isso. Eu realmente uso camadas de recorte, mas eu estou mudando totalmente para quadros agora. Vamos dar uma olhada em outra maneira de usá-lo. Vamos abrir o Frame Tool 5. Ampliar. Criamos o quadro e, em seguida, arrastamos a imagem. Você pode fazer isso ao contrário. Vou ao File, Place Embedded. Vou pegar o Frame Tool 6. Um pouco grande. Aproximadamente o tamanho certo, 10. Eu tenho uma imagem e quero arrastar um quadro em torno dela. No final, é selecionado. Eu vou para o meu Frame Tool e pegar a versão Elipse, e eu só vou arrastá-lo através segurando “Shift”. É uma largura perfeitamente elevada. Você pode ver lá. Acabei de convertê-lo em uma moldura. Agora, quando você está trabalhando com quadros, podemos chegar à Ferramenta Mover. Há uma maneira de trabalhar com isso na tela. Você pode clicar duas vezes nele. Você pode ver que ele se afasta e eu posso ver os dois retângulos. Este é o meu exterior, é a imagem e eu posso trabalhar nela separadamente do meu quadro. Se eu agarrar a borda da moldura, posso arrastá-la, posso redimensioná-la. Agora, há atalhos. Eu os usei. Acho que é mais fácil passar por aqui. Você pode ver o forro branco do lado de fora. Eu posso clicar na máscara ou eu posso clicar na imagem. Acho isso um pouco mais fácil. A imagem é selecionada, posso transformá-la e escalá-la. Mas não segurando “Shift”. Se você quiser mover ambos, você pode manter a tecla “Shift” e clicar em ambas as coisas. Basta se mover, mover para trás. O que você também notará é que, aqui
no meu painel Camadas, você pode vê-lo convertido essa imagem em um Objeto Inteligente, caso ainda não esteja. Você também pode adicionar um traçado ao quadro, o que é útil. Com o Quadro selecionado aqui, meu painel Propriedades, vou clicar duas vezes aqui. Encolha-o. Meu painel Propriedades, eu tenho o Traçado e posso decidir qual cor eu quero. Eu nem sei. Escolha um, então. Você pode escolher um tamanho e você pode ver, eu posso decidir o que eu quero no interior em todo o lado de fora. Surpreendentemente, útil em vez de ter como duas camadas com efeitos de
traçado aplicados na parte superior ou em uma imagem de círculo separada. Ou pelo menos olhe para outra maneira de usá-lo. Veja, eu tenho um arquivo aberto e aberto Frame Tool 7. Não são apenas retângulos e círculos. Você pode usar o Texto. Praticamente qualquer tipo de caminho vencedor no Photoshop pode ser convertido. Vamos usar a Ferramenta de Tipo. Vou escrever “Daniel” porque é o meu nome e a minha grande fonte, arraste para perto. Depois de desenhar o texto, você precisa convertê-lo em um quadro. Ele não vai mais ser texto editável, então basta clicar com o botão direito do mouse na palavra Daniel, e ir para este aqui que diz converter para frame. Tudo funciona para mim, clique em “Ok”. Agora, você pode usar qualquer uma dessas técnicas anteriores. Eu vou usar este aqui, eu vou usar a ferramenta de moldura 8, entrar lá. Você pode ver que minha imagem simplesmente não é tão grande quanto o texto que eu tinha. Lembre-se, é fácil clicar neste Command T ou Control T em um PC. Não mantenha a tecla Shift pressionada. Você pode manter pressionada a tecla Option em um Mac ou segurar o PC para arrastar do centro. Isso é útil, aperte “Enter”. Agora, você não pode fazer algumas coisas com esses quadros ainda. Eu imagino que eles vão adicionar todos eles. Parece que você pode adicionar uma sombra, mas parece que não se aplica. Está lá, só não funciona. Há maneiras de contornar isso. Você pode apenas criar um grupo, colar essa camada no grupo e esse grupo pode obter uma sombra. É uma solução alternativa para o momento, tenho certeza que será atualizado para ser capaz de mostrar essas coisas. Clique em “Ok”. Se eu estou destruindo essas coisas com uma correção, eu vou selecioná-los todos e eu vou torná-los um objeto inteligente e onde está o melhor filtro em toda a terra, você sabe o que é. Lente flare bondade, trabalho feito. Qualquer coisa pode ser uma moldura. Usamos círculos, texto, retângulos, vou te mostrar mais alguns antes de seguirmos em frente. Vou abrir a ferramenta de moldura 9. Vamos esquecer a caneta
ao viver a vida com a nova ferramenta de caneta de curvatura. É novo da última visão, se você ainda não começou a usar, é incrível. Clique duas vezes para canto, clique uma vez para obter uma curva. Clique duas vezes para o canto, uma vez para uma curva. Outra curva, clique duas vezes para um canto, clique uma vez para uma curva. Clique duas vezes para um canto, uma vez para uma curva. Nunca sei o que fazer no último. Eu sou convertido homem da ferramenta caneta com a ferramenta de curvatura, mas desenhar qualquer coisa realmente não importa o que você desenhou com, a forma livre, a ferramenta caneta. O que você precisa fazer para convertê-lo em um quadro é que eu quero que este quadro envolva e mascare neste fundo. Não funcionará se os fundos estiverem bloqueados, basta clicar duas vezes no plano de fundo. A Camada 0 deve nomeá-lo, nunca fazer. Clique neste topo estava aqui e porque é logo acima se eu clicar com
o botão direito do mouse na palavra forma um e dizer converter para quadro, clique em “Ok”. Magia. Eu vou pular para o ilustrador, eu tenho uma forma que eu desenhei aqui. Vou selecionar minha pequena baleia. Observe que eu fiz uma atualização 2019 recursos para ilustrador também. Copie-o daqui, cole-o no Photoshop, verifique se é uma camada de forma, clique em “Ok”. É um pouco grande, e transformá-los para baixo. Aqui vamos nós, clique em “Ok”. O mesmo que antes, copie o plano de fundo bloqueado, duas vezes nele, clique nesta parte superior e clique com o botão direito do mouse nele, converta em quadro. Porque está bem acima dele, deve mascarar tudo lá dentro. Lembre-se que eu posso trabalhar no quadro, movê-lo, ou eu posso trabalhar na imagem no interior. Ao clicar neste, você pode ver pequenos pontos brancos ao redor dele. Transformá-lo, lá está ele, eu posso movê-lo. Uma coisa que você vai notar nesta versão também é quando eu me transformar, você
pode ver que ele está faltando o alvo no meio? Clique em “Ok”. Se voltar para a versão antiga do Photoshop, lembre-se disso, vê aquele alvo ali? É perfeito, mas eu sou um professor, então como eu digo, transforme algo e mexa. Todos tentam mover isso e dizem: “Não está se movendo.” Então eles se livraram do alvo. Você pode ativá-lo novamente nas preferências se você amou esse pequeno alvo, mas ele desapareceu na versão mais recente. Veja, foi embora. Agora pequenas notas sobre isso realmente é apenas para imagens. O quadro pode ser material vetorial em técnicos e todas essas coisas, mas você não pode colocar texto editável dentro deles no momento. Então camadas de forma e técnicos não podem ser a coisa que está no interior do quadro. Pode ser o quadro, que é principalmente imagens de imagens em objetos inteligentes. A outra coisa a notar é se você quiser se livrar de um quadro dizer que aconteceu acidentalmente. Você pode clicar com o botão direito do mouse na camada qualquer neste texto aqui e ele é uma opção que diz remover quadro da camada e ele desapareceu. Vamos para o próximo recurso. A próxima melhor característica número 3 na minha humilde opinião é modos de mistura ao vivo. É simples, vou te mostrar o que faz. Sem razão nenhuma, estamos colocando uma ilha na garrafa. Então modos de mistura ao vivo 2, eu vou arrastá-lo até que eu mesclá-lo para os modos um, eu vou girá-lo em torno de não segurar Shift, eu vou tentar dimensioná-lo para a posição. Um pouco pequeno demais, talvez lá embaixo. Retornar e eu quero que ele se misture com o fundo, então eu quero um modo de camada, e se você já fez isso antes de você em normal, dissolva. Dissolver nunca funciona, então você ficou escurecido, e então você foi se multiplicar. Você clicou em todos esses e ficou louco, mas agora eu não tenho que clicar neles. Olha para isto. Posso passar e achar um que funcione. Oh, olhe para isso. Qual é que eu quero? Luz suave, você vai fazer. Parece que está debaixo de água agora.O atalho ainda funciona se você estiver usando essa maneira louca da ferramenta Move, mantenha pressionada Shift, pressione “Plus” no seu teclado. Isso ainda funciona, mas não precisamos agora. Levei muito tempo para aprender esse atalho. Agora, tudo que você precisa fazer é pairar. Obrigado, Adobe. Próximo recurso, por favor. Agora, esse próximo recurso é chamado de selecionar assunto. Isso teria sido totalmente número um se tivesse saído no lançamento 2019, mas eles esgueiro-lo na metade de 2018. Se você é como um monte de pessoas que você nem sequer verificar com as novas atualizações onde você acabou de ir e sim, atualizar. Se isso soa como você, isso pode mudar sua vida. Eu tenho o assunto selecionado 1 aberto. Eu vou para selecionar e esta coisa aqui deve ter um ponto de exclamação ou super fantástico depois, mas não basta clicar em “Selecionar”,
clicar em “Assunto”, ficar para trás. Quão bom foi isso? Eu tenho usado isso por um tempo agora, ele leva 90 por cento lá. Às vezes mais perto e depende de quão exigente você é, mas vamos adicionar uma máscara clicando neste pequeno ícone na parte inferior aqui. Máscara de camada, olhe isso. Não olhe muito de perto para os detalhes, mas se você só precisa de um corte áspero, na verdade isso é melhor do que um corte áspero. Eu diria 95 por cento lá. Agora, a opção select subject 2 tem alguns pequenos problemas que queremos ajustar. Quero mostrar a vocês como aperfeiçoar o assunto selecionado. Vai fazer um trabalho incrível conseguir as bordas. Nós vamos adicionar uma máscara de camada, e você pode ver que a barba aqui precisa de algum trabalho e há um pedaço aqui faltando então o que podemos fazer é usá-lo em combinação com a seleção e máscara. Então, certifique-se de que a máscara está selecionada e não a máscara de imagem, clique em “Selecionar e Máscara”. Agora, o que eu fiz foi mudar o meu para estar em preto e talvez esteja um pouco escuro só para ver um pouco de contraste. Agora com isso aqui, esta ferramenta aqui é a melhor. É um nada selecionado por padrão, escolha um tamanho. Este aqui você pode ver a partir do ícone é realmente bom cheio aqui. Por objetivo fácil diz: “Vá e faça isso de novo, por favor.” Olhe para isso. É muito bom para as bordas daqui, coisas que estão se movendo para pedaços maiores como, no
fundo aqui, essa pessoa. Essa lacuna agarra esta opção superior, a ferramenta de seleção rápida. Defina-o para menos, escolha um tamanho que sirva. Legal. Ele se livra disso. Há pedaços aqui, provavelmente, só precisa de um retoque. Ela fez um e fez a todos muito bem. Você pode vê-lo embora haja um pouco de cor laranja em torno do lado de fora de seu braço aqui, ele está em torno do chapéu um pouco. O que eu acho é um monte de opções aqui e você pode brincar com eles lá grande. Mas acho que a bala mágica é esta última opção. Você pode ter que ajustar as configurações de saída e este aqui descontaminar cores. É como essa coisa mágica que acontece, veja. Clique uma vez e você ainda notá-lo mais na barba aqui. O que é isto? Barba laranjada, sem barba laranjada. Barba laranjada, sem barba laranja. Eu tenho um grande próximo com a minha borda redefinida para o rosto dele. Seja um pouco mais cuidadoso do que eu. Vamos aumentar isso para 100 por cento. Redefinir, ligar, desligar. Isso parece mais excitante. Então clique em “Abrir”, e além de eu selecionei um pouco demais de sua bochecha, é máscara bastante incrível. Saiu no início do ano. É assunto seleto, não tem que ser pessoas. É como um objeto principal nele, então, se você estiver fazendo fotografia de produto, ele funciona muito bem. Saltei do vídeo e achei isso só para mostrar que não tem que ser pessoas. Pode ser coisas ursos. Selecione assunto, nós lemos para essas coisas, aperte o botão. Não é perfeito, mas é incrível. Mais uma vez, se você achar que as bordas não são perfeitas para você, clique na Máscara, selecione “Range”, pegue este pequeno cara de penas aqui e apenas pintar as bordas e alguma forma ele magicamente encontra as bordas do urso. Agora, terminamos com esta ferramenta. Saiu no início do ano, mas aposto que perdeu. É uma ferramenta brilhante, especialmente se você combiná-lo com seleção e máscara. Para o próximo recurso. A próxima característica é algo chamado dobra colcha. De seus arquivos de exercícios, abra esses três arquivos warp, 1,2 e 3. Quando tivermos feito warps no passado, vou combinar estes dois. Quero zombar desta capa de revista neste fundo e vamos editar, transformar, vamos para dobra. É muito fácil do jeito antigo, desde que haja em um único avião. Agora eu vou passar alguns minutos fazendo isso apenas ficando bonito então eu vou fazê-lo para acelerar, zoom feito. Não foi o meu melhor trabalho, mas foi fácil. Desde que esteja em um único avião, é bom. Se você já usou tanto antes, você sabe que se eu quiser mais controle, eu posso adicionar um pouco mais de uma nota para que a mesma coisa edite, transforme dobra. Posso saltar para isto como uma grelha de três por três, e isso é fixe, desde que tudo seja uniforme. Meu próximo exemplo vai exigir um pouco mais de personalização e é aí que esta opção de dobra colcha funciona. Em dobra 3, quero que a videira envolva um pouco o texto, então preciso movê-lo para cima. Primeiro de tudo, eu vou mascarar este fundo provavelmente neste porque é
uma cor simples e, em seguida, selecionar na videira e usar o dandy útil, selecione a faixa de cores. Não é um bom trabalho. Você pode clicar aqui com o conta-gotas e dizer que eu quero essa cor, em seguida, aumentar a confusão para dizer, “Eu vou escolher como amigos escolher os outros pedaços de verde.” Você pode adicionar o botão mais para dizer e isso, e provavelmente não tão fuzzy mais. Eventualmente, você vai conseguir algo muito bom. Vamos clicar em “Ok”. Não é uma má seleção, vamos adicionar uma máscara, mas agora o que eu quero fazer é ligar o Dan e colocá-lo no topo aqui. Se estás a fazer isto comigo, não precisas de usar o Dan, podes usar o teu próprio nome. Com a imagem selecionada, vou usar a mesma coisa, editar, transformar dobra. Estes são os novos recursos que eles chamam de dobra colcha. Bem, eles me disseram que é o que o chamaram, mas realmente é esta divisão ao longo do topo aqui permite que você adicione seus próprios personalizados. Você pode fazê-lo tanto horizontal e vertical e adicionar um ponto personalizado que é legal. Desfazer isso, ou você pode apenas fazer uma horizontal ou uma vertical e apenas obter controles simples reais. Cabe a você. Neste caso, vou usar a divisão e espero que sim. Eu pratiquei isso de antemão. Bem, com toda a honestidade eu tento fazer parecer legal. Eu vou adicionar dois deles para eu não ter que usar essa grade. Mesmo que seja apenas três por três, pode ser muito complicado. Vou levantar estes dois aqui porque
quero subir e parecer que está ali. Só um pouco de brincadeira para tentar fazer parecer real. Tão real quanto algo assim pode. A coisa legal sobre isso é que você pode fazer exatamente como quiser,
adicionando quantos pontos ou tão pequenos pontos quanto você quiser e no confirmate. Esse é o novo recurso, em seguida, você adição
à ferramenta de dobra está adicionando pontos personalizados eles chamam de dobra citação. Antes de seguirmos em frente, quero mostrar rapidamente um truque legal. É uma maneira fácil de fazer a videira parecer que está entrando e saindo do texto. Aquela interação que parece legal. Você precisa de duas versões, então eu vou duplicar esse cara. Dois Dans, você tem um acima da videira, um abaixo dela e com este top selecionado em um deixe-me perguntar, pegue seu pincel. Certifique-se de que o preto é a sua cor de primeiro plano, escolha um tamanho e pinte os pedaços que você deseja. É bem legal. Vai ser por trás dessa parte e então na frente dessa parte e você pode decidir quanto picos através. Estou pintando de branco para me livrar das coisas, sem morphing. Se fizeres a tua visão, mostra-me o teu exemplo, e podes usar o meu nome. Você pode não ter um divino tão estranho, dar-lhe uma cor de fundo. Ali está o meu branco, e partilha-o comigo nas redes sociais. Instagram é o melhor. Eu sou Bring Your Own Laptop ou se você estiver no Twitter, eu sou Dan Loves Adobe. Faça uma captura de tela e me mostre o que você fez e vamos passar para o próximo recurso. O próximo recurso é algo chamado espaçamento distribuído. Até esta versão, tudo o que você poderia fazer é selecionar todas essas pessoas e dizer que eu quero alinhá-las. Então eu quero ignorá-los em espaços individuais. Até recentemente, tudo o que você tinha era esses centros de distribuição e que funcionaria. Você pode dizer assim, ele está usando o centro de cada objeto e porque este é pequeno e este é grande, eles não têm o mesmo espaçamento interno. Isto é fixe. Eu sinto que isso poderia ser mais cedo no tutorial agora, eu sinto que sempre foi um problema aqui, mas agora esta coisa é nova que não parece muito extravagante mas eles distribuem as lacunas, o que é muito legal. Clique em horizontal ou vertical se você pode trabalhar para fora. É por isso que eles têm ícones para pessoas como eu. Agora o espaçamento é mesmo, em vez de os centros serem pares. É uma adição simples, tem sido em coisas como ilustrador por um longo tempo, mas nós recebemos você aqui no Photoshop. Próximo recurso. Para este próximo recurso, é chamado de pintura de simetria. Você pode ter esbarrado com ele na nossa última versão. Ele estava escondido sob algumas características especiais que você tinha que ligar. Era um aperto de mão secreto para fazer funcionar, mas agora é construído diretamente. Se você perdeu a última versão, há algumas atualizações para ela. A maneira como funciona é escolher. Eu tenho uma pintura de simetria aberta, basicamente uma camada vazia é tudo que eu preciso. Vou pegar qualquer uma das ferramentas de pincel ou borracha ou qualquer outra coisa que você desenhe com a ferramenta de lápis. Vamos pegar o pincel. Os novos pincéis doces saíram há um tempo no Photoshop, não há muito tempo. Você notará que os painéis de pincéis foram limpos bem e sob mídia seca e pincéis especiais, Kyle Webster juntou-se à Adobe e todos esses pincéis vieram junto com ele e eles são incríveis. Vou usar os secos, este aqui. Tinto final grosso e fino. A maneira como isso funciona é você escolher um tamanho de pincel. Este é o novo recurso aqui, esta pequena borboleta. Basicamente, você derruba e escolhe um desses. Vamos começar com um vertical, é agradável e fácil. Você começa a transformá-lo primeiro. Tens mesmo de decidir se quero que seja assim ou assim? Vou deixar como estava. Prenda-o para baixo. Agora eu tenho uma cor de primeiro plano e eu vou clicar em segurar e dar-lhe uma sensação de que como um pincel gigante. Mas se tiveres a ideia de que não precisas de me ver desenhar, vou mostrar-te o desenho. Há uma mistura legal aqui de ambos a simetria que é legal, mas também o pincel e também a maneira com tablet reunirá para se tornar um gavetas, um artista, melhor amigo. Muito o que estou fazendo agora. Isso é apenas virar em cada lado um. Você pode desligá-lo quando terminar. Você pode realmente mudar para outra coisa se você terminar isso e você gosta. Na verdade, quero ver o que o radial faz. Esse é um novo, então eu vou ter uma contagem de segmentos do que falta na cadenza, e você pode desenhar por aí, e ele desenha um pronto. Em vez de trabalhar em radial, vou olhar para esta Mandala. Subindo para cinco no tamanho. Se você levantar o alisamento para 100 por cento, ele vai suavizar suas linhas e olhar muito mais natural
e mais desenhado à mão do que as coisas nervosas que você pode obter. Você também pode mexer com alguns destes ketchup acidente vascular cerebral e ketchup o indo acidente vascular cerebral. O mesmo com o cordão puxado, dê-lhes uma chance. Você acha que o
que sente é natural e eu vou desenhar sem nenhuma boa razão. Agora eu vou acelerar isso porque eu vou brincar com ele. Eu nem sabia o que estava fazendo, mas é divertido. Eu tenho o meu padrão e alguns como você escova, você pode ver que há um monte de opções diferentes lá dentro. Uma coisa que você pode encontrar é como a minha, e vai devagar se você escolher alguns pincéis hardcore em alguns desses outros que Kyle projetou. Toda essa coisa de simetria é estressante na minha máquina. Espero ter uma lata de terrorismo. Vou fazer algo incrível e como fizemos aqui. Parece uma torta ao ou uma pizza atropelada. Vamos abrir a glória. Eu tenho o meu jeito, pente fora do armário para você. Você é bem-vindo. Eu tenho essa solução. Selecione-os todos para baixo e você sabe o que está por vir. O mundo é um lugar melhor. Para o próximo recurso. Estamos chegando perto do fim, vou jogar estes três últimos nesta imagem incrível. É a minha imagem preferida. Vou estocar imagens, uma compartilhada pelo fotógrafo, Charles Deluvio, no unsplash, vamos dar uma olhada nele, então vamos terminar depois da coisa do Nick Step. Este aqui, vou usar o Pinto. Vou dar um derrame e encher. Eu vou desenhar um óculos vermelhos nele sem nenhuma outra razão a não ser para mostrar este recurso. Se trabalhássemos em um documento onde isso não é tão ruim porque o padrão é azul e o fundo é azul, mas é bastante fino e difícil de ver. Agora você pode no Photoshop ir para esta pequena engrenagem. Eu estou trabalhando minha caneta para, você pode dizer que realmente eu quero vê-lo mais grosso. Vou para o tamanho gigante. Você pode vê-lo agradável e fácil e também escolher uma cor diferente. Isso é um alto contraste, elástico também é legal. Eu começo outra forma aqui, você
pode ver que ele está realmente conectado a ele e ilustrá-lo, faz isso por padrão. Você pode decidir se você gosta dessa coisa porque sem ela, se você esquecer, adivinhe o que ela vai fazer. Se você está bem com a ferramenta de caneta, então tudo bem. Se você é um novato, sintonize esse elástico e ele vai te dar uma dica. De volta a esse cara. Eu o amo tanto. Mais três coisas simples. Eu vou pegar a ferramenta de pincel e fazer uma nova camada sob as cores aqui, este é o cubo de cores. Estamos usando isso há muito tempo e é útil, mas eu fiz uma chamada roda de cores para você. Significa que você tem o matiz todo o caminho ao redor e ele volta em si mesmo, vez disso, nós deslizamos que pára escrito em, volta ao vermelho. Este aqui é uma maneira fácil de escolher a tonalidade. Dentro dessa tonalidade, você tem a opção de totalmente saturado e então você pode começar a lavá-lo até o branco, ou escurecê-lo até preto e em qualquer lugar no meio. É comum em outros campos. Alguns do trabalho de vídeo e premium e é útil, especialmente eu amo a saturação de matiz e brilho. RGB é estranho, especialmente quando é um controle deslizante. Mas ele é legal. Não estamos fazendo isso por nada além de adicionar esse homem... um bigode e uma toga lá. Esse é um recurso, a roda de cores e o outro é Window Workspace bloquear o espaço de trabalho já terminou em. O que significa é que você não pode movê-los ou quebrá-los. Por que você faria isso? Talvez você goste. Você pode ter resolvido, mas realmente é para as pessoas que absorvem em computadores que na verdade eu toque telas como a superfície da Microsoft ou o estúdio de superfície ou a maneira com Enviar. Vou te mostrar um deles. Este é o novo da Microsoft. Já foi liberado ou falado sobre ontem. É por isso que todas estas imagens de um dia atrás, podemos realmente trabalhar nelas. Então é um sistema operacional completo e você pode realmente começar a desenhar em cima dele. Isso pode ser problemático quando os painéis se movem. Essa opção é para você. Nosso último antes de encerrarmos e falar sobre os próximos passos é vista e este aqui horizontal, este aqui virar horizontal. Vire-o temporariamente. Não está feito. Não é como se ele transformasse, virar horizontal. É apenas lá para fazer pintinhos
rápidos, bem como a conta de e-mail sem uma razão para isso. Adobe me disse que é por causa de um ligeiro para verificar simetria. Pode deixar um comentário, se quiser. Adorei essa ideia. Não está acabado, é como virar temporário. Você pode trabalhar nisso, mas é apenas uma mudança de visão. Vamos saltar para o verdadeiro Dan para embrulhar as coisas. Diga adeus ao PAG.
102. Adobe Photoshop CC 2021: novos recursos e atualizações — parte 1: Olá a todos, meu nome é Daniel Walter Scott e sou um designer e um instrutor certificado pela Adobe para o Photoshop. Hoje, você e eu vamos passar por todos os novos recursos emocionantes do Photoshop 2021 que acaba de ser lançado. Eu vou colocá-los em ordem que eu acho que são mais importantes, emocionante, através do, não pior, mas o mais obscuro das novas atualizações. Vamos ter arquivos de exercícios. Você pode realmente jogar junto com isso. Então você pode assisti-lo agora e, em seguida, baixar os arquivos de exercícios para fazer alguns desses projetos você mesmo. Haverá um link abaixo para isso. Vamos abrir a nova versão do Photoshop e entrar. Abra o Photoshop e, em seguida, vá para Arquivo. Abra, e vamos trabalhar com o arquivo chamado Sky Substitution 01. Você vai notar que alguns dos arquivos têm esses nomes depois, porque Samuel Ferrara decidiu compartilhar sua imagem com o mundo sob uma licença Creative Commons. Significa que podemos usá-lo sem ter que pagar por isso, e sem uma marca d'água. Então, obrigado. Samuel, Dan, Ethan, Tobias, vocês verão alguns deles através do curso. A primeira coisa que precisamos fazer é ter certeza de que
todos se parecem com o meu em termos de espaço de trabalho; vá para Janela, vá para o Workspace, clique no Essentials, depois volte aqui e vá para Redefinir Essentials, apenas para que Você sempre se parece com o meu. Agora, vamos olhar para o melhor,
mais emocionante, de acordo com Dan, 2021 recurso Photoshop. Está sob Edit, e é este, Sky Replacement. Sim, maneira. Clique nele. Relaxe, relaxe, observe o céu. Cuidado com isso. Ele apenas removeu. Olhe para a máscara. Tão bom. Ative e desative a Pré-visualização. Este, lembre-se, é o último céu que você escolheu. Aqui em cima, onde diz Sky, largue isso, e você pode trabalhar o seu caminho. Há um monte de predefinidos, então céu azul, você pode clicar em qualquer um desses e assistir. Assistindo. Bom? Há todos os tipos de incríveis neste espetacular. Vamos para o espectacular. Eles têm que se adequar à sua imagem. Uma coisa que você precisa notar, é que você pode clicar sobre estes e realmente arrastá-los aqui. Então, se eles não estão bem alinhados, você pode movê-los ao redor. Isso vai ser bom para o meu. Olhe para isso, tão bom. Vamos clicar em “Ok”. Quero que reparem nas camadas aqui, é muito não-destrutivo. Você pode desligar esse grupo e tudo está de volta ao normal, mas há todas essas máscaras não destrutivas; os fundos lá, muitas coisas com que você pode mexer depois. Vamos dar uma olhada na segunda versão. Arquivo, Abra, e vá para Sky Substituições O2, Dan Freeman. Este é Auckland Harbour, na Nova Zelândia. Você vai notar muitas fotos da Nova Zelândia, porque é de onde eu venho. Mas vamos olhar para levar este Sky Substitution em um pouco mais de detalhes. Vamos para Edit, vamos para Sky Replacement e BMA. Cuidado com o céu. É bom. Vamos dar uma olhadinha. Vamos escolher uma das do pôr-do-sol porque quero mostrar-te uma coisa. Escolha o que quiser, mexa como quiser. Mas quero mostrar-vos estes ajustes de primeiro plano que estão a acontecer aqui. Se eu clicar em “Ok”, você vai notar aqui, nós vamos tirar uma camada construída. Mas estes dois de baixo estão fazendo um trabalho incrível. O fundo, se fosse apenas cortado, ficaria bem, mas irrealista. Estas cores de primeiro plano, veja, ligue-as, desligue-as. Eles estão realmente tirando a cor do fundo, no nosso caso, do pôr do sol, e isso está realmente influenciando este primeiro plano. Na verdade, está mudando nossa imagem de primeiro plano para torná-la credível. O tipo de coisa que teríamos que fazer como profissionais é tentar misturá-lo, mas eles estão fazendo isso automaticamente para nós. Novamente, há ajustes. Então há muitas máscaras, você pode realmente clicar neste pequeno ícone lá, e realmente trabalhar através das curvas que eles ajustaram, para afinar como você gosta. Mas é muito bom fora da caixa para mim. Vamos abrir o terceiro. File, Open, vamos para Sky Substitution O3. Agora, estou mostrando este porque não funciona muito bem, ou pelo menos precisa de um pouco de modificação depois. Às vezes eu vejo esses tutoriais online e eles me mostram os únicos que funcionam perfeitamente, mas eu quero compartilhar com vocês o que você pode fazer se não funcionar bem. É este pôr-do-sol superexposto aqui. Vamos clicar em Substituição do Céu. Embora faça um bom trabalho, vou levantá-lo, tentar igualá-lo. Você pode ver o que está acontecendo aqui. Para contornar isso, você pode brincar com Shift Edge e Fade Edge. Se for consistente, não vai funcionar para nós. Agora clique em “Ok”. Mas como o photoshop foi inteligente o suficiente para dar todas essas camadas com as quais podemos trabalhar, ver o céu aqui, você pode ver no polegar e como ele mergulha até aqui muito longe. O que eu quero fazer é trabalhar na máscara. Pegue minha ferramenta de pincel, este aqui estará no seu teclado, e em termos de cor, eu quero ter certeza de que minha cor de primeiro plano é preto. Então aqui, se é branco na frente, clique nesta pequena seta aqui, e em termos de tamanhos de pincel, pequeno truque útil para você é, eu vou escalá-lo para cima. Você pode usar seus colchetes. Cabe a você. Mas o que eu quero fazer é, se você estiver em um Mac, mantenha pressionadas as teclas Control e Option no teclado, ambas as opções pressionadas e clique em. Segure o mouse para baixo, esquerda e direita, é o tamanho, e para cima e para baixo é dureza. Isso é um truque doce. Se você estiver em um PC, mantenha pressionada a tecla Alt e use o botão direito do mouse, estranhamente. Clique com o botão direito do mouse para baixo, pressione-o e mova para a esquerda e para a direita, para cima e para baixo. Eu tenho algo sobre esse tipo de tamanho, preto é minha cor de primeiro plano, e eu estou apenas definindo a opacidade para cerca de 50. Outro pequeno truque é, no seu teclado, toque dois. Você pode ver isso mudar a opacidade para 20, 5? Estes são os números que estão logo acima de suas ninhadas. Clique nelas. Zero é 100%, estranhamente. Sete, indo para baixo para cerca de 50, e então apenas tipo de escovar isso para fora. Há para trás e para frente tentando igualar o resto. Eu poderia realmente rastejar até esta área aqui. Faça o mesmo na cor da iluminação do primeiro plano, só para tentar trazer isso de volta. Portanto, nunca vai ser perfeito em tudo, mas espero que você vai dar algumas ferramentas para
torná-lo extensível através de alguns dos fundos mais desafiadores. Vamos abrir o número 4. Este aqui, Sky Substitution 04, clique em Abrir. Quero te mostrar mais algumas coisas que você pode fazer. Então, Edit, Sky Substitution. Vamos dar uma olhada, escolher algo diferente desta vez. Isso é legal. Já algumas montanhas. Montanhas duplas. Então o que você pode fazer é, Shift Edge, ele vai brincar com a conexão entre o primeiro plano e fundo novo céu aqui. Assim, você pode brincar com Shift Edge, ou mais do plano de fundo, a imagem original, e você pode ir para o outro lado onde ela fica realmente apertada e começa a se sobrepor. Dependeria da sua imagem. Os recursos automáticos, eu não sei, parece fazer um bom trabalho para um recurso tão novo. Bom trabalho Photoshop, qualquer Fade Edge também. Como o quanto de uma transição é? É bastante abrupto, ou há um grande desvanecimento? Tudo o resto, você pode brincar com o brilho do céu, a temperatura do céu. Mais alguma coisa? Você pode trazer seus próprios céus. Então, nesta pequena lista abaixo, você pode clicar em mais, e trazer em algo que você tem; algo próprio ou algo de um site da Biblioteca de Estoque. Você pode construir seus próprios grupos. Você pode fazer todo tipo de coisas legais aqui. Isso é fixe. Uma última coisa que quero mostrar é esta ferramenta aqui, o Pincel Celeste. Clique nisso. O que você pode fazer é, estes são controles muito genéricos para toda a imagem com o pincel, você pode realmente apenas mexer com parte da imagem. Digamos que esta é uma parte que lhe dá problemas, você pode pintá-lo ou desligado, usando mais ou menos. Só mexe com a borda. Vou levantá-lo para mostrar o que está fazendo. Não preciso consertar esse. Achei difícil encontrar uma imagem quebrada. Então eu acho que é crédito para o Photoshop que esta coisa funcionou muito bem. Só estou quebrando agora. Então segure mais ou segure menos para decidir de que maneira ele move o primeiro plano e a cor do plano de fundo. Novamente, eu não consegui encontrar um exemplo que foi quebrado o suficiente para eu ir e usar um Pincel Skype. Está lá para pequenos retoques. Céu ligado, Sky off. Bom. Na verdade, antes de seguirmos em frente, quero que você faça alguns trabalhos de casa. Pense nisso como um treino divertido. Quero que encontres uma fotografia da tua cidade, da tua aldeia, da
tua cidade, do teu estado, do teu país, seja lá o que for, e quero que me mandes um antes e um depois. Você pode encontrar imagens do Adobe stock, se você tem uma licença para isso, Unsplash ou Pexels são ótimos lugares para imagens gratuitas, ou tirar um você mesmo. Quero ver um antes e depois que você substituiu o céu. Compartilhe comigo no Twitter, Eu sou danlovesadobe, Instagram Eu estou trazingyourownlaptop, e no Facebook, confira o grupo Traga seu próprio laptop on-line. Junte-se a esse grupo e certifique-se de compartilhar um antes e depois. Adoraria ver o que você faz. Vamos seguir em frente. O próximo recurso é uma espécie de adição à substituição do céu. A substituição do céu é bastante abrupta. Talvez não seja essa a palavra, mas só substitui o céu. Talvez o que queremos fazer é apenas melhorar o céu, ajustá-lo. O que eles fizeram foi, eles nos deram uma característica legal. Vamos ao File, Open. Vamos a um chamado Sky Select 01 jeremy-bispo. Abra este, e digamos que não queremos substituir o céu, mas queremos ajustá-lo. Talvez no nosso caso, vamos adicionar um pouco de vibração a ele, alinhá-lo. Então o que podemos fazer é, podemos ir para Selecionar, e eles nos deram essa seleção útil, clique sobre isso. Faz um trabalho incrível. Olhe para isso. Testado em um monte de imagens diferentes, e funciona muito bem. O que vamos fazer com essa seleção? Podemos fazer ajustes, e eu vou usar este último aqui chamado Vibração, e eu vou aumentar a Vibração ou Saturação. Cabe a você, o que você quer fazer. Dada essa seleção, podemos usar curvas, níveis, o que você quiser fazer. Provavelmente é um pouco extremo. Você pode ver aqui, porque nós tivemos uma seleção, é uma máscara de camada que é tudo muito não-destrutivo. Ligar, desligar, ligar, desligar. Podemos usar a mesma técnica para fazer o inverso também. Podemos ir para Select, Sky, e vamos dizer que queremos mexer com o primeiro plano. Então temos o céu selecionado. O que podemos fazer é, podemos ir para Select, ir para o inverso, e olha, nós temos o primeiro plano selecionado. Legal. Fazemos a mesma coisa. Vamos fazer ajustes, usar curvas e fazer o que quiser. Estou fazendo o meu melhor ou pior. Todos gritam em casa: “Pior”. Foi muito bom para começar. Lá vamos nós. Primeiro plano, céu, tudo com a nova seleção de céu chique. Próximo novo recurso. Eu quero fechar tudo isso, você pode salvar o seu, eu não vou salvar o meu. Um truque útil para pessoas que não sabem, Fechar Tudo. Você é tipo, isso pode ser tão útil? Fechar tudo significa que você pode fazer isso, Aplicar a todos, “Não salvar” ou clicar em “Salvar”, até você. Não salve todos eles, adeus pessoas, e todos eles vão de uma vez. Ninguém fez o arquivo, fechar, não salvar, arquivo, fechar, não salvar,
arquivo, fechar, não salvar, qualquer maneira. Vamos dar uma olhada no próximo. Chama-se Trace Content-Content-Aware. Agora, para isso funcionar, dependendo de quando você está assistindo
isso, está em algo chamado pré-visualizações de tecnologia. Isso significa que você pode ligá-lo se você quiser usá-lo, eu acho que você deve porque é legal, mas talvez não está pronto para o grande momento ainda. Se você for em um Mac Photoshop, Preferências e acessar Visualizações de tecnologia, se estiver em um PC, acesse Editar, você terá Preferências na parte inferior e encontrará Visualizações de tecnologia. O seu pode estar ativado por padrão. Se você não pode vê-lo aqui, você vê o meu e ele diz Ativar ferramenta de rastreamento sensível ao conteúdo. Ligue isso se puder ver. Se não estiver lá, provavelmente
está ativado por padrão agora porque você está
no futuro e acabou de
ativá-lo, não é mais uma coisa secreta que você precisa ativar. Certifique-se de que está ligado e vá para Arquivo, Abrir. Vamos ao chamado Content Aware 01, Jude-beck. Agora, para quem é que isto é bom? É para as pessoas que usam a ferramenta de caneta no Photoshop para cortar coisas ou criar vetores, é melhor mostrar o que ela faz. Ele está oculto, bem, não está oculto, consulte Ferramenta de rastreamento sensível ao conteúdo, é misturado com a ferramenta Caneta. Clique, segure, segure, segure isso por um tempo, vá para Ferramenta de rastreamento com reconhecimento de conteúdo. Aqui em cima, eu escolhi, você pode estar usando um caminho, depende de como você está usando isso, eu vou construir uma forma para que você possa vê-lo no vídeo facilmente. Eu vou ter um preenchimento sem preenchimento, e eu vou ter um traço que é verde brilhante, e é 10 pixels apenas para que você possa ver o que eu estou fazendo. Já se eu passar por cima dele, e eu sei que Jason e Taylor, os editores, vão ampliar para que você possa ver,
mas isso é como uma linha pontilhada em T ao redor do lado de fora. O que você pode fazer é, olhar para isso,
pronto, clicar uma vez, ele desenhou uma linha ao redor do lado de fora. Olha como é bom. Sou bom com a ferramenta de caneta, mas definitivamente não sou tão rápido ou tão bom. O que você quer fazer é que eu quero acrescentar a ele. Você apenas muda para a próxima ferramenta, e o que ele vai fazer é dizer “você não quer juntá-la com esta, e então junte-se a esta, e de volta para aquela mesmo. Olhe para isso. Olha o que ele fez. Tão bom com a ferramenta de caneta. Mesmo se você é bom com a ferramenta caneta, e você gosta de ir ao redor do lado de fora e ajustar curvas e alças, você tem que ficar um pouco impressionado, eu estou pelo menos. Vamos olhar para outra opção porque eu encontrei uma opção que estava em um fundo agradável e claro. Se você estiver fazendo fotografia de produto, você pode fazer esses fundos simples acontecer para tornar seu corte fácil. Mas vejamos algo um pouco mais complicado. Vamos para Arquivo, Abrir, vamos para Content Aware 02. Este aqui tem algumas formas compostas. Vamos usar a mesma ferramenta, e vamos fazer isso no Auto Trim. Descobri que ele está desativado por padrão, mas pode não estar desativado por padrão, dependendo do que o Photoshop eu decidir fazer nas versões finais. Mas esta coisa aqui eu encontro apenas ligá-lo e deixá-lo ligado porque o que ele vai fazer é assistir isso. Eu vou dar zoom aqui, você
pode ver esta primeira forma? Se eu clicar aqui, ótimo, e eu for para isso, e eu vou para isso, você pode ver que ele vai entrar? Está seguindo aquela curva lá dentro. É ser muito inteligente para si mesmo, você clica nisso, e você fica tipo “Oh, não, o que eu faço?” Se você for até aqui e ver, com o poder de ampliar, você
pode ver essa linha? Cuidado com aquela linha ali. Isto é como uma pequena escola com uma linha vermelha indo [inaudível]. Nem sei se é vermelho, é minúsculo. Mas isso significa que é o recurso de corte automático. Significa que você está indo por aqui, eu vou apagar todas essas coisas. Então você pode dar a volta, ter
certeza de que o Auto Trim está ativado, e apenas certifique-se de que ele vai voltar e apagar qualquer coisa. Agora lembre-se, eu estou nessa mais, então eu estou adicionando a ele todas as vezes, e isso é o que eu estou usando por padrão. Agora você pode ver do outro lado, é desistido. É como, oh, não há contraste suficiente, ele não sabe o que fazer. O que você pode fazer, isso é com esta opção Detalhes é definido como um por cento. Veja isso, eu clico, segure-o, segure-o com o mouse, clique nele e arraste-o para a direita. Você pode começar a ver todas essas linhas aparecendo? Se você for longe demais, ele vai tentar desenhar cada mudança de túnel. Você quer encontrar em sua imagem que temos o meio pesado de como a maioria dele é visível. Você pode ver todas essas linhas azuis aparecendo? Está em algum lugar lá dentro, só sendo um pouco mais detalhado com seu visual. Você pode ver lá agora que tem aquela peça. Você pode ter que aumentá-lo para cima e para baixo como você ir ao redor dependendo de quão detalhado ele é. O meu está indo surpreendentemente. Olha, ele só fez [inaudível]. Agora vou ser honesto, ele funciona incrivelmente bem com essas imagens de alto contraste, se você está tentando pegar o cabelo do feno, não vai funcionar. Ele precisa ter este estágio pelo menos, e é uma versão de pré-lançamento. Precisa de um contraste muito alto e simples. Outra coisa que quero mostrar a vocês é que estamos batendo mais para continuar adicionando a ele. Na verdade, quero terminar. Depende do que você quer fazer, não
tenho que terminar isso. Eu quero chegar perto daqui para torná-lo um
sólido completo porque então eu poderia passar e preenchê-lo se eu quisesse. Não é o que eu quero fazer, só para provar que você pode. O que eu quero é essas formas aqui, eu preciso cortar essas também. Eu quero voltar para esta primeira ferramenta, e isso só significa que ele vai pensar que eu estou criando uma nova forma, que é o que eu quero fazer. Não quero que tente juntar-se ao antigo. Eu vou entrar aqui, mostrar essa. Agora começou outra forma, eu tenho que voltar para a vantagem, caso contrário ele vai continuar criando novas formas. Isso é algo que você tem que fazer. Você tem que se mexer um pouco para encontrá-lo. Vamos, amplie um pouco. Isso vai fazer, isso vai fazer. Vou ter que consertar isso com a ferramenta de caneta porque está muito embaçada. Não te culpo, Photoshop, essa é difícil. Algum outro? Eu deveria fazer a mesma coisa aqui. Isso foi um clique. Deixe-me mostrar-lhe no próximo teve que arrumar algumas dessas coisas. Mas você pode ver aqui três formas separadas. Eu poderia estar copiando e colando isso no Illustrator, XD. Eu poderia estar usando os caminhos, para fazer máscaras. Novo recurso incrível para aquelas pessoas que usam a ferramenta caneta no Photoshop. Vamos abrir o terceiro, Content Aware 03. Este, o que você precisa lembrar é que o detalhe está definido para o que quer que foi da última vez que você usou. Provavelmente, o meu subiu bastante alto, eu vou voltar para um por cento para ver o quão bem ele faz e, eu não sei, apenas dar uma chance. Muitas vezes, vá o mais baixo que puder e levante-o se precisar. Eu deixo Auto Trim ligado, eu muitas vezes apenas parar com mais e deixá-lo ligado mais, e eu vou apenas trabalhar o meu caminho ao redor. Uau, olhe isso. - Legal. De qualquer forma, animado. Vamos clicar em um. Vamos clicar neste aqui. Não me agarrou lá, então preciso disso. Oh, não, lá estava. Este é muito mais complicado, então haverá alguns problemas aqui. Vamos dar uma olhadinha aqui em baixo, ainda bem. Tem que ser arrumado independentemente. Os primeiros que te dei foram muito empolgantes, e eu me certifiquei que eles eram muito bons para a demo para deixar todo mundo animado e animado, mas vai haver um arrumado para ser feito. Coisas como esta, é fácil o suficiente para passar e
ir para a Ferramenta Caneta e a Ferramenta de Seleção Direta. Estes são os dois que você vai usar. Você pode entrar aqui e P para ferramenta de caneta. Aquele ali, eu não preciso de você, então eu não tenho que segurar nada, desligá-lo. O mesmo com aquele, eu não preciso de você, mas aquele ali não funcionou. Vou pegar minha “Ferramenta de Seleção Direta”, e arrastá-la para aqui. Eu diria que é um ponto de partida incrível para este particular, depende de quão rápido você é com a ferramenta caneta. De qualquer forma, isso é Content-Aware Trace Tool, em Technology Previews para o momento. Mas se você está assistindo isso em um futuro longo, provavelmente
é apenas uma ferramenta lá dentro pronta para ir. Próximo recurso, vou fazer meu arquivo, Fechar tudo, marcar “Não salvar”
e, em seguida, ir para Arquivo, Abrir. Quero que vás ter com o Daniel Walter Scott 01. - Sou eu. Olá, eu. Estou sendo muito neutro. Eu normalmente estou sorrindo, esse não é o meu rosto natural, mas eu tive que fazer para este novo recurso em particular. Vamos verificar isso. O chamado Filtro, Filtros Neurais, estes são assustadores, bons. Vamos clicar neles. Vamos clicar em “Ok”. Está usando coisas como chamam de Adobe Sensei. Pense em aprendizado de máquina, inteligência artificial. Agora todos os seus parecem diferentes dos meus, provavelmente, eu tenho a minha versão de pré-lançamento. Você tem esses filtros em destaque que só tem um par. Estes são os que a Adobe diz que estes estão prontos e são muito bons. Estes aqui em baixo, que veremos nos filtros Beta, são coisas que são realmente boas, mas estão saindo cedo para nós para dar uma olhada. Mas há alguns artefatos e alguns pequenos problemas com eles. Mas à medida que melhorarem, vão mudar-se para cá. Você pode ter que olhar entre esses dois para encontrar os dois. O que eu vou ligar primeiro é “Skin Smoothing”, clique nele. Olhe para isso. Agora esta pequena opção no fundo, esta pré-visualização,
ligado, desligado, ligado, desligado. Olhe para mim, 10 anos mais nova, pareço muito mole. Você pode brincar com a suavidade e o quão embaçado é para obter algo que funcione com o seu modelo. Seu modelo pode não ser tão bonito quanto esse modelo. Você pode ter que aumentar o borrão e a suavidade, mas para mim, talvez porque eu me conheço demais, eu sei que essa é uma boa versão de mim, mas você pode aumentá-la também e ficar cheia de pele falsa. - Legal. Vou desligar o Skin Smoothing. Vamos dar uma olhada provavelmente na primeira característica que eu corri para ir e encontrar em filtros Beta, ativar Smart Portrait. Você pode ter que baixar algumas coisas para isso, pode
haver um botão aqui que diz download. Então você foi direto para cá, você fez espessura do cabelo, me
deu muito. Em seguida, chute para trás,
relaxe, e assista aqui em cima, ele está realmente fazendo o trabalho na nuvem. Vamos lá. Vou acelerar. Eu estava esperando mais aqui, mais como, eu não sei, diversão. Mas é muito bom. Pré-visualização ativada, pré-visualização desligada. Mas é bastante realista. Isso realmente voltou, triste dizer que provavelmente cerca de 10 anos. Vamos ao máximo aqui. Agora, você pode ver aqui em cima, ele faz coisas onde, olhe para isso, sou eu com muito mais cabelo. É muito bom. Está me dando mais cabelo, minhas costeletas também. Isso está em Beta, então há algumas falhas nele, mas é bastante incrível. Novamente, ele processa muito na Nuvem, de modo que está ficando cada vez mais rápido. O meu não demorou muito, mas talvez tenha que esperar. Se você tiver uma conexão com a Internet realmente ruim, pode
demorar um pouco para que os servidores da Adobe processem o que você está fazendo. Mas sim, isso é muito legal. Vamos desligar a espessura do cabelo. Eu não vou passar por todos eles, eu vou passar por aqueles que eu achei que eram interessantes. Vamos ser felizes e aumentar isso. É por isso que eu tenho um rosto neutro lá. Olha, ícone de pré-visualização, pré-visualização desligada. Santo cigarro, sou eu sorrindo. De alguma forma, tenho dentes melhores do que normalmente. Tenho dentes muito ruins. De qualquer forma, então dê uma olhada naqueles. Eles estão melhorando. Eu sei que há outro lançamento chegando nos próximos dias, que vai consertar os dentes para ficar um pouco menos fora de [inaudível]. A idade facial é provavelmente a certa. Este é o maior. Este é o que é bonito. Olha, sou eu quando estou velho. É totalmente. Isso vai ser eu quando eu for mais velho, fora. Ligar, desligar. Vamos dar a volta ao contrário. Eu não vou, já faz muito tempo nisso. Pareço mais jovem? Eu faço. Estamos a aumentar a idade facial. Vamos olhar. Este aqui, eu não sei. Isso me assustou ou me deixou excitado com a tecnologia. Veja isso, olhe para a direita. Eu olhei para isso direito. Agora, eu quero ir em frente e apenas jogar com todos eles e ter você junto para o passeio. Mas vamos seguir em frente. Mas as coisas que quero mostrar-lhe é este pequeno ponto azul aqui. Ele mostra quais filtros você realmente aplicou para que você possa realmente
passar e aplicar mais de um de cada vez. Isto irá dizer-lhe os que você tem aplicado. Vamos nos certificar de que minha espessura de cabelo está dobrada novamente e depois clicamos. Uma coisa que eu quero que você olhe aqui em baixo é para onde produzir. Às vezes você deseja enviar para uma nova camada. Pode ser um filtro inteligente, camada duplicada, só sei que essa opção está aqui embaixo. Vou colocar o meu numa camada duplicada. Vamos clicar em “Ok”. Eu acho que o olhar, fez algo com meus olhos porque eu fiz minha imagem original. Estou usando uma luz anelar e você pode ver essa luz aqui. Está um pouco estranho lá. Este sou totalmente eu com mais cabelo. Vamos seguir em frente. Na verdade, o que eu fiz por você é que
eu te dei mais versões de mim para mexer em seus arquivos de exercícios. Você tem permissão para me deixar velho, bagunçar. Há apenas algumas outras imagens com as quais você pode brincar. Seja respeitoso, mas estou totalmente feliz e não ofendido, e posso aceitar uma piada. Mas seja respeitoso em termos de, não sei. Tópicos controversos, mantenha-me fora disso. Eles estão lá para você brincar e eu realmente gostaria de ver o que você faz. Mais uma vez, eu quero ver alguma ridicularidade ou sutileza, até você. Mas tenha um jogo com essas outras versões. Como antes, me mande o que você faz. Onde no Twitter, danlovesadobe, Instagram, bringyourownlaptop e em nosso grupo no Facebook, junte-se a isso, Traga seu próprio laptop on-line, confira esse grupo. Adoraria ver o que você faz. Enquanto estamos aqui, vamos passar para o próximo. Vamos para a Transferência de Maquiagem 01 e clicar em “Abrir”. Não tenho a certeza do que estava a fazer. Mas vamos dar uma olhada em um dos outros filtros neurais. Vamos ao File. Não, vamos ao Filter. Vamos para Filtros Neurais. Há algumas coisas boas aqui. Vale a pena passar um pouco de tempo aqui para mostrar os melhores que eu acho. Vamos para este aqui. Vamos para a Transferência de Maquiagem. Na verdade, esta não é boa. Isso é engraçado e só leva um segundo. Então ligue-o, encontre sua imagem de referência. Eu te dei um em seus arquivos chamado Transferência de Maquiagem 02. Abra esse e dê um segundo. Isso é bonito. Você pode transferir maquiagem de uma fotografia, você pode ver aqui para outra. Mais uma vez, eu adoraria que você suas próprias imagens, referências quando você pode me usar como modelo, e colocar maquiagem diferente. Vamos clicar em “Ok”. Quero mostrar-lhe alguns dos outros mais práticos. Olhe as camadas. Deixou isso lá. Você pode fazer outra mistura mais tarde. Provavelmente não é a melhor imagem, meu rosto estragado. Mas de qualquer forma, funcionou. Vamos olhar outro filtro neural realmente útil. Vamos a uma chamada Transferência de Estilo. Então, Style Transfer, sim ,
Daniel, eu posso encontrá-lo. Transferência de estilo. Aí está, abra. A Transferência de Estilo também está aqui. Vamos filtrar. Vamos para os filtros neurais, vamos para, na verdade, está na seção em destaque. Vá para Transferência de Estilo, ative o pequeno carrapato. Você pode ter que baixar algumas coisas. Pode demorar um pouco, e olhe para
isso, combina com o estilo aqui. Você pode apenas trabalhar o seu caminho através. Ele faz um trabalho bastante incrível em combinar alguns desses estilos destes. Alguns deles bons, alguém deles maus. Olhe para aquele, isso é muito bom. Clique em “Mostrar mais”. Você pode apenas clicar no seu caminho. Vamos fazer um pouco de Van Gogh. Isso é muito legal. Você pode, no fundo aqui, fazer algumas coisas. Provavelmente a única coisa que eu fiz um pouco foi preservar a cor. Ele realmente preserva a cor original e apenas escolhe a textura dele. Sim, é bem incrível. Vamos dar uma olhada em outro. Vamos clicar nesse. Então arquivo, abra. Vejamos uma das imagens anteriores. Chama-se Substituição do Céu. Onde é que está? Substituição do céu. Faremos com Sky Substitution 01. Vá para a mesma coisa. Filtro, ele funciona realmente incrível com paisagens. Transferência de estilo, clique nele. Experimente alguns deles. Cara, eu amo essa combinação daquela imagem lá. É a praia de O'Neil, a oeste de Oakland. Olhe para isso, tão bom. Alguns deles são medianos, alguém deles é realmente bom. Funciona muito bem com imagens naturais. Uau, olhe isso, conexão daquilo e aquilo. Sim, você pode brincar com força de estilo e tamanho do
pincel e todos os tipos de outras coisas depois. Mas Style Transfer, maneira muito legal de, eu não sei, Eu usei um pouco para fazer imagens, apenas para parecer velho. Encontrei um que funciona. Eu preservei a cor e eu estava brincando com alguns desses para fazer parecer vintage. É um pintor legal, coisa
texturey acontecendo. Havia outro que eu gostava. Qual deles foi? Sim, de qualquer maneira, então isso é Style Transfer, e clique em “Ok”. Vou olhar para abrir a próxima imagem. Vamos abrir o arquivo. Este chama-se Colorize 01. Abra essa. Este novo recurso está preso nos filtros neurais novamente, mas todos eles devem estar separados. Não, não deveriam, mas quero identificá-los como casos de uso diferentes. Eles estão colorindo imagens em preto e branco. Você pode fazer algum trabalho incrível em seu filtro. Em Filtros Neurais novamente, salte para Beta e clique neste
Colorize, e espere por um segundo. Olhe para isso. Eu não fiz nada. De alguma forma o Adobe Sensei foi, isso é grama, essas são pessoas. É bastante incrível. Você pode brincar com as coisas depois, mas cara, para o primeiro, fez um trabalho incrível. Vamos dar uma olhada em outro. Então File, Open, vamos para Colorize 02. Vejamos algo que talvez seja um pouco mais, não problemático, mas vou mostrar-lhe como obter um pouco mais de detalhes. Vamos ao Filtro. Filtros Neurais, vá para Beta. Agora, novamente, o seu pode estar sob este destaque porque eu gosto. Eu não tenho certeza quais são os problemas com ele que ele ainda está em Beta. Uau, olhe isso. Agora, uma coisa que você pode fazer é ir, eu gosto disso, mas eu quero uma cor um pouco diferente aqui. O que você pode fazer é um pouco estranho em seu uso. Então você clica aqui e escolhe uma cor, elas precisam ser muito neutras. Se eu quiser verde, quero verde para a grama. Quero um verde amarelado. Não posso usar isso porque parece terrível. Vá até aqui. Só estou clicando e arrastando aqui para obter uma cor. Clique em “Ok”. Então o que você faz é clicar uma vez na miniatura aqui. Você pode vê-lo? Mudou por aqui. Olhe para isso. Você pode adicionar mais de uma cor. Digamos que você queira fazer, digamos, este mar aqui. Clique nele primeiro e, em seguida, vá e mude a cor. Você pode vê-lo selecionado, ele tem um anel azul em torno dele. Agora, eu não quero um mar verde, eu quero uma turquesa. Segure em. Lembrem-se, cores sutis tendem a funcionar melhor. Isso é bastante incrível. Vamos clicar em “Ok”. Agora, se você baixou os arquivos de exercícios, eu te dei um par de mais com os quais você pode brincar, 03 e 04, jogar com eles. Eles são bastante incríveis. Mas vamos seguir em frente. Vamos deixar os filtros neurais lá por enquanto. Há outros para brincar. Em Filtros Beta, há alguns outros. Super Zoom amplia e tenta limpá-lo. Há apenas alguns para os quais eu não tenho sido capaz de encontrar um bom uso. Alguns deles aqui são brincadeiras. Se você clicar em poeira e arranhões como, oh. No momento, o que eles estão fazendo é que eles estão decidindo qual deles fazemos primeiro para o nosso feliz uso do photoshop, e você clica neste e você diz a eles por que você está interessado, eles vão começar a construir aqueles que as pessoas são mais interessados em primeiro lugar. É uma maneira muito legal de fazer isso. Dê uma olhada nestes. Face à Caricatura. De qualquer forma, então dê uma olhada através deles e novamente, talvez isso se mova à medida que eles se tornam um pouco mais acabados e eles vão acabar na opção em destaque. Vamos clicar em “Cancelar” e seguir em frente.
103. Adobe Photoshop CC 2021: novos recursos e atualizações — parte 2: Vou arquivar, fechar tudo. Você já viu isso antes. Não salve. Vamos abrir, Arquivo Abrir, e vamos para um chamado Padrão 1 aberto. As ferramentas que quero mostrar, vamos fazer quatro seleções diferentes aqui. Alguns deles são de atualizações mais antigas para o Photoshop que muitas pessoas
não conhecem e alguns deles são os recursos mais recentes. Provavelmente o maior do ano passado foi este. É clicar duas vezes na palavra plano de fundo, porque ela não funciona se for chamada de fundo e bloqueada. Chame de nome. Vou chamar o meu beija-flor. É engraçado o suficiente. Vou clicar duas vezes em cor só para fechá-la, então eu tenho um pouco mais de espaço e você pode ver este, olhe para ele. Enquanto fundo se foi, a palavra fundo, pelo menos, clique sobre isso, remova fundo. Olhe para isso, eu amo o recurso. Você pode ver aqui embaixo, ele adicionou uma máscara de camada e removeu-a. Vou entrar nas minhas bibliotecas. Vou criar uma nova biblioteca para nós agora. Este será o lançamento do Photoshop 2021. Eu vou pegar minha ferramenta de movimento, e eu vou clicar em segurar e arrastar meu beija-flor para dentro Legal. Esse é um deles. Vamos abrir alguns outros arquivos. Arquivo aberto. Agora, antes de seguir em frente, como foi? Isso foi bom? Sim, mover fundo. Cara, essa é legal. Vamos dar uma olhada em alguns outros. Já temos o Padrão 1 aberto. Vamos abrir 2, 3 e 4. Você pode clicar no primeiro, manter a tecla Shift pressionada e clicar no último para abrir mais de um documento. Você pode pressionar Control Tab em um Mach. Acho que está nos dois. Controle no teclado e pressione a tecla “Tab”. Você pode alternar entre as guias abertas. Vamos para o Padrão 2. Nosso passado é bom. Quero mostrar-lhe outro assunto que é selecionado. Isso saiu recentemente também. Essa é uma ótima maneira. Ele passa por dentro e faz uma grande seleção. Tem um pequeno problema aqui, e quero mostrar-lhe como arrumá-lo. Na camada de fundo, vamos adicionar uma máscara de camada. Apanhou-nos lá, perto. Precisamos remover esses. Com a máscara selecionada, vamos para Propriedades,
eu vou para Selecionar e Máscara,
e terminamos neste novo mundo de seleção e máscara, essa barra de ferramentas mudou em bits. O que eu quero é este terceiro aqui em baixo. Bem, na verdade, não, usamos o primeiro. A opção de seleção rápida aqui em cima, nós vamos adicionar menos a ele porque nós queremos se livrar de coisas. Tamanho do pincel, quem lembra qual era o nosso atalho? Você não escreveu, não é? Mantenha premida a opção de controlo num Mac
e, em seguida, clique, mantenha premida e arraste para a esquerda e para a direita, para cima e para baixo. Apenas esquerda e direita para este caso. Não há desfocagem para esta ferramenta. Se estiver num PC, mantenha premida a tecla Alt e, em seguida, clique e mantenha premida a direita. Clique no mouse. Estranho. Vou clicar uma vez lá dentro e está
feito um péssimo trabalho. Eu pintei isso. Eu vou voltar para mais e escolher um tamanho de pincel mais apropriado e apenas pintar isso. Eu acho incrível a maneira como ele pode
passar e eu estou sendo muito genérico e vago com ele, e ele está fazendo uma seleção muito boa. Estou aqui em baixo. Há um pouco aqui, então você pode apenas alternar o mais e menos, então deixe um plus. Manter premida a tecla Option num Mac altera-a de um sinal de mais para um menos. Você pode ver isso? É a opção em um PC. Encolher, clicar uma vez. Demasiado bom. Encolher, clicar uma vez. Eu posso arrastar essa. Essa primeira ferramenta para rigor maneira de uma vez que você fez uma máscara e é bom, como nosso assunto selecionado, mas você precisa retocá-lo, essa primeira ferramenta é um bom ponto de partida. Clique em “Ok”. A mesma coisa com este, você pode nomeá-lo depois. Cabe a você. Mover ferramenta, entre na biblioteca. Vou ligar para este, é um pelicano? Eu nem sei. Pássaro rosa. Eu deveria ter verificado. Vamos dar uma olhada na próxima e outra técnica de seleção para você. Isso entra em alguns dos novos recursos 2021. Vamos fazer a mesma coisa de novo. Vamos para Selecionar assunto, adicionar uma máscara de camada. Você pode ver que tem algumas coisas por aqui, que é bastante incrível. Os pés, mas esta asa precisa de algum trabalho. Lembre-se, clique na máscara, vá para Propriedades, clique em Selecionar uma máscara. Até esta versão, havia apenas o refinamento Content Aware. Aqui, eles adicionaram o próximo chamado “conhecimento de objeto”. O que ele faz é, você pode ver esta ferramenta aqui em cima? O cabelo que parece um? É chamada de ferramenta Pincel Refinar Borda. O que acontece nesta primeira versão é que você pode clicar nele e ele funciona. Acabei de encontrar um exemplo com isso é que prova que é muito bom. Eu vou desfazer isso, então é esta opção aqui, ciente do objeto. Não pense que isso é melhor ou pior, apenas tente este. Se não funcionar, use reconhecimento de objeto. Vou clicar em “Ok”. A mesma coisa usando o mesmo pincel e eu vou arrastar ao longo da borda aqui. Só vai me dar melhores resultados neste caso em particular. Então é muito bom com cabelo ou coisas como grama, ou neste caso, é algo em movimento. Esse é um dos novos recursos aqui. Você verá o objeto ciente. Pense tente cor consciente e se isso não funcionar, vá para esta outra opção. Vamos clicar em “Ok” e a mesma coisa com este. Que tipo de pássaro é esse? Eu não verifiquei, então agora você é um pássaro azul, independentemente do que você realmente é. Vamos levá-lo para lá e vamos abrir, lembre-se da nossa guia de controle de atalho doce, e vamos dar uma olhada neste. Este aqui é outro recurso novo, novato. Se você ainda estiver usando a ferramenta Seleção rápida, se você ainda usar a ferramenta mágica, precisará começar a usar a Ferramenta Seleção Rápida. Se você estiver usando isso, mas não a ferramenta de seleção de objetos, isso é muito doce. Clique em Reconhecimento de objeto. Na verdade, vamos fazer o assunto selecionado, porque selecionar assunto funciona e você diz, não é o que eu quero. É uma máscara muito grande, porque é bastante detalhada. Mas a ferramenta de seleção de objetos, veja isso. Posso desenhar uma caixa em volta desse cara e olhar. Bem, [inaudível]. Dê-lhe um segundo, vamos lá. Olhe para isso. Fez um trabalho incrível. Até o pé está bem, está bem. Você pode adicionar a ele. Digamos que perdeu um pouco da cabeça lá. Na verdade, em primeiro lugar, aperte a máscara para ver o que ela fez. Ele cortou um pouco de sua cabeça para fora. Você pode adicionar a ele mantendo pressionada a tecla Shift. Então eu realmente adiciono a esse pedaço lá. Bastante incrível. Vamos transformar isso em uma máscara e vamos pegá-lo, arrastá-lo para dentro Eu quero dizer tucano, mas eu não acho que ele seja. Ele vai ser tucanos. Lá vai você. Eu tenho meus pássaros e agora eu posso mostrar outro recurso 2021 chamado Preview Pattern. Para fazer isso, vamos para arquivo, novo, e aqui, vamos digitar, Eu quero estar em pixels. Então defina o seu para pixels se você quiser acompanhar. Quero ser 500 por 500. Vamos ser 72 DPI, vamos ser RGB. Não quero motores de popa para este em particular. Esse recurso, pelo menos na minha versão de pré-lançamento, não gosta de motores de popa, e vamos clicar em “Criar”. Pequeno quadrado branco. Antes de explicar a ferramenta, vamos arrastar algo para dentro, vamos pegar o Sr. Tucanos e levá-lo para o nosso tamanho apropriado, acertar por 10. Eu quero fazer isso um padrão de repetição, porque eu quero isso para papel de parede de tela de fundo ou tecido, algo. Já fez isso antes? Eu fiz isso, onde você corta o topo da cabeça dele fora e coloca
aqui embaixo ou exporta para outro programa para fazer ladrilhos. Olhe, veja e vá para a pré-visualização de padrões. Então nossos tucanos, eu posso movê-lo ainda, e eu posso pegar outro. Obtenha o tamanho certo. Bastante incrível. Agora, vou trazê-lo para cá. Se você já tentou fazê-lo, você está pulando de alegria porque isso é super legal. Se você não faz repetição padrão parede depende, ainda é bastante impressionante. Só estou trazendo nossos amigos aqui, Willy Nilly. Quem lhes pediu para cantar? Beija-flor. Amigo, você não se encaixa. Um pouco de sobreposição será necessário. Tudo bem, isso serve. Isto é como uma vista, não
está realmente a fazer nada. Não fez um padrão para nós, ainda
precisamos fazer isso. É uma maneira de ver isso. Com ele desligado, você não pode ver a sobreposição. Para fazer o nosso padrão, nós definitivamente precisamos dele em, Preview Pattern. Você pode ver que dois cutucando o topo. Então vamos ao painel Padrões. Se você não tem isso, vá para nossa Janela e abra Padrões. Vou desligar minha cor de fundo para ficar branco. Eu vou apenas enterrá-lo. O que eu quero fazer não é nada. Basta clicar neste pequeno plus, dar-lhe um nome, pássaros do meu. Nome estranho, pássaros. Você pode ver lá, nossa amostra de padrões repetidos. Agora você pode sair para algo como adicionar minha flor de colher ou o que quer que seja. Eu tenho papel de parede impresso como padrões repetidos, eu tenho padrões de papel de embrulho em tecido, almofadas
feitas, aquela coisa. Podemos fazer isso por algumas maquetes aqui. Vamos ao File, Open. Vamos fazer maquete, abriremos a maquete 1 e 2, se eu achar. Aí está, maquete 1 e 2. Estes não estarão nos seus arquivos de exercícios porque
não tenho o direito de lhe dar estes. Mas você pode encontrar muitos modelos do Photoshop. Você está procurando os modelos estranhos do Photoshop. Estes são os dois, não me lembro. Acho que são da Envato Elements ou do Photoshop Adobe. Mas o que acaba acontecendo se você encontrar modelos do Photoshop, ou maquetes é que alguns, um design é passado e simular isso para você, e tudo que você precisa fazer é ajustar o objeto inteligente. Para editar um objeto inteligente, é este pequeno ícone lá, clique duas vezes nele. Abre nesta nova aba aqui em cima. Vou me livrar de tudo isso. Eu só vou selecionar, All. Eu vou editar. Quero que tenha um fundo branco. Deixe-me ir para Editar, Preencher. Nem consigo fazer isso no fundo. Tenha sua camada assoreada. Aqui vamos nós. Edite e vá para Preenchimento. Vou preenchê-lo com a cor do primeiro plano? Não, só vou encher com branco. Então eu vou aplicar meu padrão a ele. Este selecionado, vou clicar uma vez. Olhe para isso. Olha para o meu padrão de repetição. Vamos salvar e, em seguida, saltar de volta para a maquete 1. Dê-lhe um segundo, vai actualizar. Leva um pouco de segundo. Vamos lá, olhe isso. Já foi em torno dos lençóis e tudo foi desbotado em muito bem. São alguns dos benefícios de usar esses modelos e um amigo de uso prático para o nosso padrão de repetição. Vamos dar uma olhada em outro. O mesmo com este. Alguém passou e adicionou os gráficos e misturou-os bem já. Tudo o que precisamos fazer é atualizar os objetos inteligentes. Vamos fazer essa parte do capuz aqui. Todo mundo faz isso um pouco diferente. Vou clicar duas vezes nele. Dividido como uma zona segura, você pode ver onde tudo vai. Eu só vou criar, ele vai passar por cima da camada de novo. Com Editar, Preencher, porque eu quero que ele seja de fundo branco. Agarre nisso, e aperte “Salvar” e assistir meu projeto espero, atualizar, olhar, pássaros. Vamos fazer mais uma. Vamos clicar na manga. Vou enchê-lo de novo, com branco, nos pássaros. O que você pode fazer é, você pode escalá-los. Consegues ver aqui em baixo? É um efeito que se aplica a ele. Você pode clicar duas vezes sobre o pequeno ícone aqui e dizer realmente sobre o ângulo que seria diferente. Você pode se mover. Quero mudar essa escala, não sejam
tão grandes. Clique em “Ok” “Salvar”. Cuidado com a minha maquete número 2. Já está atualizado, olhe para isso. Há muitas maquetes ao redor e modelos em torno de coisas como papelaria e
sites e um maquetes de interface do usuário para telefones que muito útil. A única coisa que eu fiz quando eu estava brincando com isso foi quando eu fiz meu gráfico, quando eu estava tentando fazer meus padrões, eu desativei a Visualização de Padrão e então fiz isso. Não assiste a isso se eu editar, não faz da mesma maneira. Não está se repetindo. Está bem. Isso precisa estar ligado. Quando terminar, você pode desligá-lo. Certo, vamos ver o próximo recurso. Vamos ao File, Open. Quero abrir um site chamado, deve estar na parte inferior. Agora, esse recurso é um daqueles úteis, mas não muito excitantes. Não vai me devolver meu cabelo ou talvez perder menos. Aqui, olhe isso. Há uma ferramenta de triângulo, e você diz : “Sempre houve uma ferramenta de triângulo?” Não. É novo e excitante. Acho que é novo. Mas você já tentou ir e você disse: “Por que não há ferramenta de triângulo?” Você pega a ferramenta de caneta e desenha um triângulo em forma áspera e não é muito simétrico e sim, basta viver com ela. Olhe isso, ferramenta triangular. Preencha um traço. Eu ia deixar como está,
olha, nós temos um triângulo, segure Shift, obter como restrição lados iguais, triângulo. Não é excitante, mas coisas como pontas de flechas e triângulos é, se você estiver nessa coisa. Uma coisa que você vai notar também é que isso é novo. Você é como, “Quem? Isso, o que é que isso faz?” Se você é do Illustrator, você diria : “Eu sei o que ele faz, eu posso clicar nele e arrastá-lo.” Olhe para isso, bordas vivas. Ou pelo menos formas vivas. Tudo bem, todas as ferramentas fazem isso agora. Desenhe um retângulo e agora você tem a opção de percorrer o objeto e arrastá-lo para fora. Se ele desaparecer e você ficar tipo, você tem que deixá-lo mover ferramenta e você tipo, “Como eu pego isso de volta?” Você pode voltar para a ferramenta de retângulo e
certificar-se de que a camada de retângulo está selecionada. Ou você pode ir para esta ferramenta de seleção de caminho e clicar sobre esses caras. Vamos mudar para a ferramenta de seleção direta. Certifique-se quando passar na ferramenta de seleção, onde está o meu triângulo? Lá está ele ali. Podemos ajustá-lo depois. Isso não era possível antes. Você desenhou, e foi consertado lá para sempre. Agora, todas essas formas são atualizáveis. Outro novo, assim como o triângulo, é a ferramenta polígono. Você pode arrastá-lo para fora, ou pelo menos eu posso
arrastá-lo para fora agora e mudá-lo porque ele está vivo em forma. Veja, estou rolando para baixo minhas Propriedades e vou clicar duas vezes em Padrão. Como você pode ver, eu posso aumentar os lados para torná-lo em outros tamanhos moldados. Aqui vamos nós, octógono, outro. Cantos arredondados. Quanta estrela acontece? Baseado em estrelas. Isto é novo para 2012. O que eu estava fazendo aqui? Eu não estava destinado a desenhar aqueles dois. Eu estava destinado a mostrar-lhe algo bonito, girando. Tenho que te mostrar outra coisa. Deixe-me colocar isso aqui. Nosso triângulo não está aqui sem motivo, mesma razão que os pontos estão aqui. Ela não teve derrame, em termos de preenchimento. Houve, na verdade, no ano passado, eles construíram um monte de gradientes que são realmente bons. Se você mergulhou nos gradientes, eu não sei. Não no último ano. Na verdade, há alguns bons aqui, olhe para estes, vá em frente. Na verdade, são indecentes lá dentro. O que vou usar? Eu não sei. Isso vai fazer. Lá vai você. O que também podemos fazer é que eu vou duplicá-los, então temos um par. Olha, nós temos companhia visionária, eu vou selecionar todos os três. Outra atualização para o Photoshop do ano passado que muitas pessoas
não sabem é que se você clicar em normal, você pode realmente apenas passar o mouse acima deles e eles realmente
mostrarão a visualização agora do que eles vão ser. Considerando que antes você tinha que fazer alguns atalhos secretos malucos, ou apenas clicar em um e voltar para todos eles. Aqui está a sobreposição. Olhe para nós, visionário. Uma das novas atualizações, que são atualizações estranhas, mas realmente útil é a ferramenta de linha. Você está tipo, “Essa ferramenta de linha já esteve lá, você não pode me enganar.” Mas o que costumava ser, na verdade, costumava ser como um pequeno retângulo. Vamos ter o Photoshop lá com linhas. Agora, embora seja uma linha real que pode ser copiada e colada em algo como Illustrator ou XD. É como uma linha de um pixel adequada em vez de ser apenas um retângulo magro. Isso significava algo especialmente quando você estava tentando
produzir isso para programas de desenho vetorial em um vento. Apenas um retângulo magro e você não pode mudar o traço. Isso é um derrame legítimo. Você tem que acreditar na minha palavra. Outra coisa que você pode fazer é, você pode redefinir as formas ao vivo. Ok, estas são formas. Vejamos o nosso retângulo aqui. Digamos que você tenha jogado ao redor com ele e você quer configurá-lo de volta ao normal, você pode redefinir as transformações. Veja isto. Se eu reiniciá-lo, ele volta ao seu tamanho original e sua rotação original. Isso é novo, super excitante, mas útil de saber. Fica um pouco mais útil quando você está fazendo algo como, onde está a nossa maquete? Este aqui. Sim, vamos pegar a biblioteca. Vamos pegar, bem, um beija-flor. Digamos que queremos zombar disto. Vem neste tamanho. Quero transformá-lo para baixo. Mas eu queria mencionar como o tecido. Tem sido em torno de um pouco de tempo agora que você pode usar whoops em objetos inteligentes, o que é legal. Mas você entra aqui, como se eu quisesse curvá-lo para combinar com o tecido e os caixotes ao redor e fazer coisas legais. Se você ainda não fez isso antes, é uma ótima maneira de
tentar fazer com que sua arte corresponda ao seu tecido. Você pode clicar e arrastar estes e, em seguida, jogar com essas alças. Outro truque que nem todas as pessoas sabem é que você tem que ser muito exato. É pequeno. É que eu posso subir aqui e dizer na verdade que eu quero
adicionar uma linha horizontal para cima e para baixo, veja isso. Digamos que há aquela dobra ali. Eu quero tentar dobrá-lo para que aquele pedaço lá pareça que ele está agarrado. É doloroso assistir isso? Por alguma razão, esse pequeno touchpad aqui não é muito ousado hoje. De qualquer forma. Vamos a este. Você pode começar a combinar o tecido e você pode adicionar todos esses pontos extras bons como você precisa deles para tentar e andar as coisas para fazer com que pareça que ele está indo ao redor do tecido. Perco pontos por isso porque é uma dobra terrível. Espero que tenhas tido a ideia do que eu estava a tentar fazer. A razão pela qual estou mostrando isso é porque olhe, você pode ir para Propriedades e ir para Redefinir, e ele redefine a dobra, bem como o tamanho, bem
como a rotação. Então você pode desfazer tudo isso. Isso não era possível antes. É terrível. Eu demorei isso antes gravar e saiu muito bem.
Não aquele. O próximo recurso que quero mostrar a vocês
é, é um desses estranhos onde provavelmente deve estar mais perto do início porque é muito especial, mas não é muito emocionante. Eu quero que este vídeo seja emocionante para mantê-lo assistindo. É mais administrativo, mas muito legal. Vou a este site. Não importa qual você vai. Vamos para “Arquivo” e vamos para “Salvar como”. Vou guardar o meu para os documentos da Nuvem. Isso se move um pouco. Às vezes está aqui, às vezes está lá. Clique em “Salvar na nuvem”. Agora, se você tem ignorado salvar na Cloud por um longo tempo, vemos que não é assim que eu estou acostumado a trabalhar. Vou mostrar-te uma das vantagens do porquê de o fazeres. Então eu vou chamar o meu, “Website V1.” Clique em “Salvar”. Agora, o que acaba acontecendo é que ele está salvando uma versão ou essa versão em seus documentos da Creative Cloud, ok? Então está salvando lá em cima. Há sempre uma versão local, modo que funciona rápido. Mas a versão real real está na Nuvem, e há vantagens para isso porque digamos que eu faça algumas mudanças. Venho aqui e vou, cor, fundo. Vamos mudar o gradiente de fundo. Parece bom, e mudamos algum tipo e estamos trabalhando nisso. Pronta para isso? - Não. Foi um mockup rápido. Vamos guardá-lo e fechá-lo, e você está tipo, oh meu Deus, eu preciso abri-lo novamente porque eu não queria cometer essas mudanças. Se você já fez isso, talvez se eu abrir rápido, toda a história ainda estará lá. Você é tipo, rápido, abra e, você sabe que se você vai para Window e vai para a História depois de fechar algo, a história está vazia e você fica tipo, cara triste. Mas porque é um documento na nuvem, você terá notado meu trabalho real eu não é muito diferente porque ele carrega muito rápido, não baixá-lo toda vez. Há coisas inteligentes acontecendo no fundo. Mas veja isso. Diferente da história é a história da versão. Veja isto. Veja isso, é uma versão do Cloud Docs mostrando todas as alterações que fiz depois que ela foi salva na Nuvem. Então aqui atrás, antes que eu mude a cor, esta versão. Quando eu mudar o texto. Quão bom é isso? É como este backup. Agora, o que acaba acontecendo é que você pode ver a versão, eu acho? Estou em uma versão corporativa do software. Então eu tenho 60 dias. Acho que para todos os outros, são 30 dias. De qualquer forma, é longo. O que acaba acontecendo é digamos que você está chegando a este ponto. Na verdade, você é como, na verdade, eu quero marcar isso. Vamos mudar a cor de fundo. Depende do que está fazendo. Pode ser que você tenha recuperado o maquete do seu diretor de criação e você queria salvá-lo onde está antes de seguir em frente. Então você não precisa fazer um arquivo Salvar como em vez de V1, V2, V50, você pode simplesmente adicionar esses pequenos marcadores. Estes aqui vão apagar. Suas versões antigas desaparecerão. Você não pode voltar para eles depois, no meu caso, 60 dias. Estes que eu marquei ao bater este pequeno marcador nunca desaparecerão. Será anexado ao documento e eu sempre posso voltar atrás. É bastante incrível. Eu posso voltar para aqui e realmente dizer reverter para esta versão, e nós vamos saltar para trás. Volto à versão que estava lá antes. Marque isso como outra opção. Este é o fundo roxo. Então nada se foi. Depois de 60 dias, tudo terá desaparecido, mas se você marcar alguns deles, você sempre pode voltar para eles. É bastante impressionante. Agora, algumas das falhas que eu sei, pelo
menos eu tive quando eu estava começando com documentos
Cloud são como, largura de banda, Internet lenta. Eu moro em uma área rural, temos Internet terrível. O que eles fizeram é, digamos que eu faço uma mudança para isso. Eu adiciono uma camada de texto. O que está acontecendo é que não consigo apertar “Salvar”. Mas o que ele está fazendo é salvá-lo automaticamente a cada, eu acho que cinco ou 10 minutos, eu não consigo me lembrar exatamente, mas ele está sempre fazendo backup para a nuvem. Então, eu não sei, se meu laptop pegar fogo, sempre
há uma versão Cloud, que é um recurso incrível em si mesmo. Mas o que ele não está tentando fazer é carregar todo o PSD de cada vez. Adicionei esta camada de texto, apenas a camada de texto está sendo atualizada na versão Cloud. Então, há apenas um pouco de largura de banda acumulando e atualizando. Se você não tentou agora, meu conselho seria dar uma chance agora. Parece uma forma madura de trabalhar. Isso significa que posso saltar para coisas como o meu iPad, que tem o Photoshop nele agora. Na verdade, deixe-me pular para isso rapidinho. Este é o meu iPad. Até limpei a tela para vocês. Identificação facial. Não posso fazer minha senha porque você está assistindo. Vamos lá, identificação facial. Você tem que ver a minha identidade de nuca. Vamos documentar Clouds. O que você vai notar é que lá está. Já está me mostrando uma miniatura. Você clica nele, ele é baixado. Isso foi bem rápido. Agora, essa é uma das grandes vantagens para usar documentos Cloud, especialmente saltar para outros dispositivos, pode ser um computador diferente, laptop
doméstico, laptop de trabalho. Neste caso, para um iPad e Photoshop para iPad é muito legal. Não vou passar por tudo isso. Clique em alguns botões. Mas você tem camadas, você tem suas ferramentas. Nem todos, mas é incrível o que você pode fazer aqui. Vamos mudar algo óbvio. Vamos ao painel de propriedades. Vamos escolher uma fonte. Vamos escolher fontes terríveis para que possamos ver a mudança, o Cs. Os “C “são sempre maus. Courier New, Chalk Duster, Copperplate, são todos maus, tão maus. Vamos para o tamanho da fonte apenas para que possamos realmente vê-lo muito claramente. Eu mostro-lhe como atualizar a versão desktop. Mais uma vez, é tudo o que faremos. Basta fazer backup pressionando o botão de Início. Vai começar a afundar. Você pode ver aquela coisinha azul lá, talvez. Dê-lhe um segundo e lá está, está feito. Vamos pular para a versão desktop e eu vou te mostrar. Lá no meu laptop, você pode ver que ele está lá. Só porque foi usado pela última vez, está lá. Eu posso abrir. Não sei o que está acontecendo, mas aconteceu muito rápido. Deve estar afundando sem eu fazer nada ou é apenas uma pequena mudança que é rápida. De qualquer forma, é rápido, sem costura, você diria. Lembre-se que bicar de antes, janela, lembrar histórico de revisão, você pode dizer gole. Quero voltar para outra versão. Reverta para esta visão, por favor. Lá vai você. Minha velha fonte feia se foi. Então, essa é a atualização do documento Cloud para 2021 no Photoshop. Belo pequeno processo. Vejamos o próximo recurso, que é pixels reais. Para testar isso, precisamos abrir um arquivo. Como arquivo aberto, assim sendo arquivos de exercício pode tamanho real. Você abre e pode haver alguns avisos sobre fontes. Ignore tudo isso. Teríamos que principalmente o tamanho. Em termos de tamanho, se eu for para “Ver” e ir para “Tamanho real”, isso é para ser a vida real real real, vida real
legítima se eu fosse imprimi-la e segurá-la na frente do meu rosto. Então vamos testá-lo. Vou mudar para a câmera agora e mostrar a vocês, aqui é A4. Se você está nos Estados Unidos, você vai ter que acreditar na minha palavra em termos de medidas. Agora, eu já testei isso na minha tela e ele funciona totalmente. Eu estaria interessado em você criar um novo documento, torná-lo EUA mais tarde, e medi-lo você mesmo. Deixe-me pular para a câmera e vamos provar seu tamanho. O que é que o Dan está a fazer sobre isto? Você já imprimiu algo e percebeu que o tamanho da fonte era muito grande ou muito pequeno. Você precisa fazer essas provas simples só para verificar as fontes. Enquanto agora, a Adobe diz que se eu for para Exibir e ir para o tamanho real, ele vai realmente ser A4. Pequeno atalho, se você tocar “IF” uma vez e duas vezes, coloca para o modo de tela cheia e eu deveria ser capaz de medir isso agora. É A4, deve ser 210 milímetros. É, eu diria um milímetro de desconto, mas eu posso viver com isso quando eu estou fazendo uma prova suave desta forma, economiza o papel para impressão. Na verdade, deixe-me verificar com uma folha A4 real. Vê lá? Não sei se consegue ver o que na tela, mas está a um milímetro de distância. Estarei interessado em ver se o seu é preciso. Se você está nos EUA fazendo você documento que é carta dos EUA ou o que quer que você está acostumado e saber as medidas fora, apenas deixe-me saber o quão perto ele é. O meu está bem perto. Não exato, mas perto o suficiente. Vamos voltar para o computador. Para sair da tela cheia, basta tocar em “SE” novamente. Então, se uma, duas, três vezes é um pequeno loop. A próxima coisa que eu quero mostrar é plugins e eu ia ter que demo aqueles porque ir para painel Plugins. No meu caso, porque eu tenho uma versão de pré-lançamento, não há nada aqui ainda. Abra você mesmo agora que o software está fora, e só para ver o que você encontra aqui. Clique em “Discover plugins” e a Creative Cloud Apple abra e, com sorte ofereça alguns plugins novos e empolgantes para o Photoshop. Agora, plugins já existem há algum tempo. Se você acessar Todos os plugins, há muitos plugins do Photoshop há algum tempo. Mas o que a Adobe está fazendo agora e geralmente em todos os aplicativos é que está tentando oferecer suporte a plugins muito melhor. Dê uma olhada aqui, veja se há algo excitante, mas isso é novo, mas até novo demais para mim. Então dê uma olhada neles. Vamos voltar para a câmera e discutir os próximos passos. Isso vai ser todo mundo. Espero que tenha gostado das atualizações do Photoshop 2021. Avise-me se você gostou do vídeo, se gostou das atualizações que a Adobe fez. Deixe-me saber também nos comentários, digamos que seus três primeiros em ordem de melhor para terceiro. Em termos de recursos, eu estaria interessado em ver como ele comparado com como eu encomendei eles neste vídeo. Coloquei o primeiro que achei que era o melhor primeiro e trabalhei no meu caminho. Também sei que fiz atualizações para os outros produtos da Adobe. Então vá checar isso. Illustrator, InDesign, XT, Premiere Pro, Aftereffects. É isso. Verei você novamente em outro vídeo muito em breve. Tchau agora.
104. Adobe Photoshop CC 2022: novos recursos e atualizações: próxima parada são as atualizações para Adobe Photoshop 2022, hooray. O primeiro novo recurso que quero mostrar é a ferramenta de seleção de objetos, esta aqui. Está aqui há algum tempo, é incrível se você não o usou,
mas eles o sobrecarregaram. Se eu clicar nele,
você pode ver essas pequenas setas se movendo? Isso acontecerá automaticamente e assistirá o que acontece. Olha, está isolando, você tinha que clicar e arrastar aleatoriamente e agora, embora isso lhe dê uma pequena visualização. Posso clicar uma vez e ele fez uma seleção. Posso adicionar uma máscara. Alguma razão pela qual não precisamos transformar isso em. Renomeamos a camada de fundo para desbloqueá-la, e isso não precisa mais acontecer. Nem tenho certeza de quando isso aconteceu. Mas, independentemente disso, podemos criar uma máscara doce e desfazer,
desmarcar , vamos clicar nesta. Se eu precisar adicionar à seleção, posso manter pressionada minha tecla Shift no meu teclado e clicar na segunda aqui. Aqui vai você para esses dois. Agora vou adicionar uma máscara, aqui vou desfazer, desmarcar. Digamos que eu quero isso,
este que ele não está destacando, mas eu ainda posso segurar minha tecla Shift para adicionar e apenas arrastar uma caixa ao redor da coisa, e como aqui vai você. Legal. Quase consegui. Tem essa pequena aba lá que eu quero me livrar. Para remover da seleção, mude este anúncio, mantenha pressionada a tecla Option em um Mac ou Alt em um PC para remover da seleção, basta arrastar uma caixa ao redor daquela coisa que você não deseja. Pode ser bem vago, é
incrível . Lá vai você. Essa é a atualização para a ferramenta de seleção de objetos, se você ainda não usou a ferramenta de seleção de objetos, isso é ainda mais interessante. Próximo recurso. O próximo recurso é chamado Illustrator Interop. Isso é o que eles estão chamando. De qualquer forma, é a maneira de trabalhar entre Illustrator e o Photoshop. Vamos mudar para o Illustrator. Vamos usar essa ferramenta de polígono, ela ilustra essa função muito bem. Vou clicar em “Manter” e arrastar uma forma. Agora, antes de soltar, você pode usar as setas para cima e para baixo para adicionar ou remover lados a um polígono. Esse não é o atalho, é apenas um truque útil. Vou descer para um triângulo , vou soltar,
vou copiá-lo e vou
colá-lo no Photoshop. Até agora, se você já fez alguma das minhas aulas, você era como,
oh, eu sei que o Objeto Inteligente é a resposta correta. Não mais. As camadas geralmente são melhores no momento. Layers vai nos dar esse pouco de coisas extras,
deixe-me mostrar, porque não há nada de errado com Objetos Inteligentes, mas se você estiver usando antes de voltar
para o Illustrator para ajustar eles, e depois de volta ao InDesign, que serão resolvidos por camadas. Eu o trouxe. Onde está isso? Aí está, eu trago para o topo. A diferença agora é que ainda é Victor, que é uma das vantagens dos Objetos Inteligentes. Mas se eu for para o painel Propriedades, você
pode ver que toda a bondade chegou. Olha quantos lados? Quantos lados eu tenho? Ainda posso ajustar o preenchimento ou o traçado que posso remover. Isso me deu todo o controle que eu costumava ter entre o Illustrator 4. Agora podemos fazer isso diretamente no Photoshop. Deixe-me fazer a minha altura certa, 300 por 300. Olha, podemos mudar a estrela e definir também. Fantasia. Quantos tamanhos eu quero? Cinquenta. Starburst. Posso trocar minhas bibliotecas, escolher uma das minhas cores. Fácil. Isso é Interop with Illustrator. Vou colocá-lo em uma posição. Ajuste. Agora funciona muito bem para essas formas simples. Vou te mostrar uma outra forma simples. Digamos que eu desenhe um retângulo e que eu jogo com os cantos arredondados, ou apenas clique em um deles e ajuste um deles. Se eu copiar e colar essa forma feia no Photoshop, os cantos arredondados virão. Contanto que eu use essa opção Camadas. Posso começar a dizer que você é feio, mas vamos dar uma olhada em Propriedades, todos esses cantos arredondados, espero que a aparência seja boa, a maior parte da camada. Posso ajustá-los todos juntos, posso desvinculá-los. Aqui vamos nós. Algumas dessas formas primitivas têm todos os controles. Mas eu tenho usado isso para que eu quero te mostrar. Na verdade, não há conexão entre isso agora, então eu posso excluí-los. Eu não preciso deles. É uma rua de mão única. O que vou fazer agora é
pegar minha ferramenta de caneta. Vou ter um derrame ou preenchimento. Só vou desenhar como um pequeno rabisco que eu quero usar. Aqui vamos nós. Vou usar minha ferramenta de largura só para obter, aqui está, alguma coisa rabugenta. Agora, vou descrever isso. Vou até Object, vou para Path, e vou descrever o traçado, porque o que eu quero fazer é copiá-lo e
trazê-lo para o Photoshop. Na verdade, o que eu poderia fazer antes de fazer isso é que você pode ver quando eu o descrevi? Tem muitas curvas ou pontos de ancoragem. Estes são ótimos. Eu realmente amo essa ferramenta no Illustrator. Isso não é novo, saiu como no ano passado, a atualização disso, mas você tem que simplificar. Olha o que acontece. Olhe para isso. É só um par de passes. Você pode decidir o quão simples você quer. Venha e vá para automático, suavize tudo e lhe dá
alças suficientes para controlar isso como uma forma bastante grande. De qualquer forma, vou copiar e colar no Photoshop. Certifique-se de que sejam novas camadas. Vou mudar para minha ferramenta de seleção direta. É este aqui ou a chave A. Você pode ver todos os pontos de
ancoragem chegarem para o passeio? Mais uma vez, ainda posso colorir. Posso ir às minhas bibliotecas. Posso escolher qualquer uma das cores daqui. Só vou
enfiá-lo no fundo aqui. Você espera lá. Eu entendi, consegui onde eu queria. Mas você ainda pode ver que está cutucando lá fora, mas lembre-se porque eu trouxe isso é essa Interop do Illustrator, todas essas camadas. Posso selecioná-lo aqui. Pegue minha Ferramenta de Seleção Direta ou a tecla A e assista isso, posso clicar neste endpoint e parecer totalmente editável. Oh, lindo. Isso é o Illustrator Interop com o Photoshop. O próximo recurso é uma atualização para gradientes, como você atualiza um gradiente? Bem, é quando acaba parecendo assim. Verde de um lado, vermelho no outro, gradientes terríveis, eu sei, mas olhe para esta lama no meio. Até algumas horas atrás, quando o lançamento deles foi, isso é o que você tinha que fazer. Se você é como eu e tem gradientes que precisa consertar,
você acaba adicionando barulho e desfocamento e todas as coisas divertidas, mas eles fizeram isso. Isso é como uma maneira científica de fazer um gradiente, mas se você acabar com essas coisas não bonitas no meio. O que eles fizeram é que quando você está usando a ferramenta retângulo, eu vou criar uma nova camada aqui, é nossa ferramenta retângulo, a ferramenta de gradiente. Você pode subir aqui no método agora, você pode usar perpétuo ou linear, eu não sei. Eles são alguma coisa de criação de tipo para gradientes. Qualquer um deles parece funcionar lindamente, mas veja isso, pronto, mesmo gradiente, mas olhe no meio ali. Não é marrom de lama. É lindo laranja-verde. Eu uso esse verde e vermelho porque é o mais óbvio. Mas se você já fez gradientes no Photoshop e teve alguns resultados indesejáveis quando eles se misturam, basta escolher métodos diferentes, lineares
ou perceptivos. Se você está trabalhando em uma empresa que usa verde e vermelho como cores, bem, isso é uma verdadeira vergonha. Mas agora você pode fazer gradientes melhores. Não são bons gradientes, gradientes melhores. próximo recurso. O próximo recurso é chamado de harmonização. Quero combinar duas imagens. Vou pegar pedaços desse disco e
colocá-lo nesta tabela aqui. A coloração é tão diferente. Vamos pegar algo daqui usando nossa nova e doce ferramenta de seleção de objetos. Estou segurando Shift, lembre-se, agarrando alguns desses, indo arrastar todos esses [inaudíveis] mais fáceis, apenas para arrastar uma caixa em torno de um monte de coisas. Vamos continuar. Não é um bom trabalho. Vou mascará-lo. Está faltando um pouco. De volta aqui, segure Shift, pegue esse pedaço também. Chegando lá. Adicione uma máscara. Vou trazê-lo para este outro documento aqui, despejá-lo. Sim, é do tamanho errado. Vou encolhê-lo para baixo. Não segure Shift. Entendendo, eu não sei, proporcionalmente bem. É melhor você ver o que estou fazendo. Lá vai você, está na mesa, mas são as cores erradas, você pode dizer. É só esse tom azul aqui e tem essa coisa calorosa e
arrogante acontecendo aqui. O que você pode fazer é com o objeto selecionado, não a máscara, o que você quer colorir, você precisa ter outra camada qual você está tentando combinar. Então você vai para “Filtrar” e está sob este doce novo Filtros Neurais. Eles saem na última versão e há um monte de coisas aqui. Os próximos recursos são atualizações para isso. É este aqui chamado harmonização. Talvez seja necessário clicar
nele e talvez tenha que clicar em “Download”. Mas uma vez baixado, você pode ativá-lo
e, para fazê-lo funcionar, você precisa dizer a camada que eu selecionei. Gostaria de corresponder ao ponto de fundo. Dê um segundo, espere por isso. Espere por isso. Espere por isso. Olhe para isso, começou a puxar cores de todos aqui e combiná-las. Olhe para isso. Você pode ativá-lo e desligar. Você pode decidir sobre a força. Você também pode fazer ajustes aqui. Você quer a saturação para cima, para baixo, para a esquerda, para a direita. Vamos viver isso. Apenas uma ótima maneira de tentar combinar o plano de fundo com o primeiro plano. Você clica em “Ok”. Isso é harmonização. Me deu uma camada separada aqui, você pode ligar e desligar. Um pequeno buraco na minha máscara lá eu preciso consertar e as sombras realmente precisam ser consertadas também. Deixe-me fazer isso rapidamente. Então meus amigos são como usar demais a ferramenta Burn. Se você não tiver feito as ferramentas Gravar, use a ferramenta Gravar para sombras. Geralmente, é a maneira mais crível se você tomar seu tempo e não se apressar por isso. Lá vai você. Antes da cor, depois da cor. Chama-se harmonização, e é um dos novos filtros neurais. Outro novo, mas semelhante Filtros Neurais é poder mudar de cor de uma para a outra porque eu tenho essas duas imagens e vou usá-las em uma série e as duas cores distintamente diferentes. Eu quero que eles combinem antes de fazermos qualquer coisa, vou ao Window arrumar e sentá-los verticalmente. Se você ainda não fez isso, basta usar dois documentos separados abertos. Eles precisam estar na mesma pilha de camadas. Vou trabalhar nesta imagem aqui. Ele tem que ser selecionado, voltar para nossos mesmos filtros neurais. Tenho que ligá-lo. É chamado transferência de
cores, ative o pequeno botão. Há algumas predefinições e você pode dizer, eu quero fazer com que pareça com esta. É muito legal, e faz um bom trabalho combinando. Mas o que eu quero usar meu próprio cliente porque eu quero que eles estejam claramente juntos. Posso escolher dessa outra imagem que por acaso está aberta. Dê um saquê e esteja pronto para a grandeza. Pronto? As cores do ar, o brilho é um pouco estranho. Vou dizer que preservou a escala de luminância, a luz da original e pronta, fica ainda melhor. Tão bom, como se estivesse na pré-visualização, pré-visualize. Você pode ver como agora eu poderia usar isso e uma série consistente de imagens, transferência de cores. Tudo bem, Próximo recurso, mas antes de prosseguirmos, você pode
ficar preso com duas janelas para cima e você gosta, ajuda, está muito aberto. Vá para organizar a janela e
vamos consolidar todas as guias. Nós vamos trabalhar neste aqui, ok, e vou mostrar a vocês esses outros últimos filtros neurais para atualizar. Filtrar filtros neurais, você não precisa de nada aberto ou pode. Mas neste caso, quero
ir às horas no mixer paisagístico. Você pode ter que baixá-lo, demorar um pouco para
baixá-lo e você pode ativá-lo. Então você pode simplesmente mudar a temporada. Assista isso. Oh meu Deus. É uma hora da janela o que é isso? Liga-desliga. Uau, é muito bom. Vamos dar uma olhada em alguns deles. Oh meu Deus. Depois, é fantástico. Não acredito nisso. Vou mudar para o costume e, em vez de selecionar uma imagem como fizemos antes, vamos torná-la mais invernada. Antes, depois. É inverno inverno completo. Uau, on-off. Vamos fazer mais um. Agora é primavera,
verão, primavera, primavera com um pôr do sol. Mais um, último. É bom demais. Eu adoro isso. Há misturador paisagístico. Vamos entrar em outra coisa. Tem sido muito tempo aqui. Este próximo recurso é o melhor. Não é a mais sexy das atualizações, mas provavelmente é a melhor para mim como designer profissional prático. O que você está vendo aqui é a versão web do meu documento do Photoshop. Estou fingindo ser o cliente. O cliente pode adicionar uma caneta e dizer, sabe o quê? Aqui estão alguns comentários úteis. Eles podem
enviá-lo, está fixado no documento, o que é bom. Mas para mim, como designer, veja o que recebo. Oh, meu Deus, está aqui e está
marcado no lugar certo com ótimos comentários. Ou a Adobe está chamando de compartilhamento para comentar, o que faz sentido. Não sei, é incrível. Deixe-me mostrar como funciona. Para que ele funcione, a parte importante é que ele precisa ser documento na nuvem que PSDC. Se você está evitando o uso documentos do
Cloud agora pode ser uma boa chance de se mudar. Digamos que você tenha apenas um tipo normal de documento do Photoshop em seu disco rígido. Você precisa salvar como e você precisa salvá-lo como um documento do Cloud. Se você já disse, eu não quero fazer isso. Salve seu computador. O que você pode fazer é ver essa pequena opção aqui. Você pode clicar em “
Documentos salvos na nuvem ” e ele o fará funcionar novamente. Ele precisa ser salvo na nuvem. Já fiz o meu. Então, no topo aqui, você pode ir para esta opção que diz compartilhar documento, e você pode decidir aqui. Quando estou compartilhando, posso convidar pessoas usando o endereço de e-mail ou posso simplesmente criar um link e copiar o link. Apenas certifique-se quando você estiver criando o link. Nesse caso, quero comentar porque essa é a coisa excitante que eu gosto sobre isso. Você pode copiá-lo ou enviá-lo por e-mail para eles ou enviá-lo por meio de socials ou Slack usando o link de qualquer maneira. É aqui que esse link vai. Isso é o que seu cliente ou stakeholder vê e eles podem comentar aqui. Eles precisam fazer login com uma Adobe ID. Eles podem usar como G-mail ou Facebook, seja o que for. Eles não precisam de uma conta paga. Mas eu posso pegar uma caneta. Estou fingindo ser meu próprio chefe. Posso entrar aqui e dizer algo realmente útil. Lá vamos nós. Posso escolher cor da
minha caneta porque isso é super importante. Eu poderia enviar e agora de volta ao Photoshop, fato sendo Dan, o designer, Você pode dizer “uau” editado aqui. Assista a isso, vá para Janela e vá para comentários. Isso é novo. Clique nisso e dê um segundo. Aí está, fazendo mais coisas de sushi, e eu posso fazer as coisas de comentários regulares ou posso dizer realmente resolvi isso ou talvez eu possa responder e dizer, sem problema, mais solução está chegando. Podemos resolvê-lo para nos livrar deles. Há mais filtragem aqui, podemos ocultar as anotações
no documento para que possamos lê-las. Aqui, sob comentários de filtro, podemos decidir de quem, a que horas, os diferentes status. Muito emocionante. Eu não sei. Talvez seja só eu, mas você provavelmente é. Espero que eles sejam um bando de vocês lá fora também. Eles trabalharam em equipes maiores que eram assim é brilhante, em vez de tentar colocar, eu não sei, A, B, C está no canto e você está tipo, ok, eu gosto do primeiro e você viu um monte de anexos e você não sabe qual deles é difícil. Este é muito mais direto e
claro para mim, pois o designer acaba com a outra pessoa. Vamos fazer essa pequena mudança. O mais legal é que vamos torná-lo mais sushi. Você espera lá. É quase sushi. De qualquer forma, eu fiz isso e posso salvar isso e porque ele salvou na nuvem, o que acontecerá na versão do link, lá vamos nós, os pequenos comunistas sendo resolvidos, e olha, mais sushi. Tem o blobby. Mas você entende a ideia. Você não está trabalhando esses e-mails onde as pessoas estão, “ei, você não fez isso.” Você diz, você verificou suas atualizações? Verificamos o último e-mail que lhe enviei com a linha de assunto enigmática. Todos nós fizemos isso. Estamos apenas trabalhando a partir da fonte de verdade da cor
1, vamos chamá-la. Porque seu documento do Photoshop é salvo na Nuvem. Essa coisa é atualizada e agora temos comentários e está no Illustrator também,
parece exatamente da mesma forma, comenta o Window e tivemos a mesma interação. É isso para atualizações de 2022 para o Photoshop. Espero que você tenha gostado do vídeo e de todas as novas atualizações, algumas coisas interessantes lá. Isso faz isso no próximo vídeo.
105. O que vem a seguir depois do seu curso de Photoshop avançado: Oi lá. Bem-vindo ao fim do curso. Estou feliz que tenha conseguido. Quase não o fiz, são mais de 100 vídeos. É um curso realmente grande porque o Photoshop é um produto tão grande e muitos podem usar casos para ele. Merecia este vídeo. É uma longa moagem você aqui agora. Vamos falar sobre o que fazer a seguir. Deixe-me um comentário ou um comentário sobre como você gostou do curso, o que eu poderia fazer melhor, isso ajuda. Em termos de seu desenvolvimento profissional, o que você faz a seguir? Digamos que você é um fotógrafo, o próximo passo seria algo como o Lightroom, se você ainda não estiver nisso. Se você estiver em mais campos
de design gráfico talvez já tenha habilidades no Illustrator ou no In-Design. Eu tenho cursos avançados sobre esses, se você quiser pular naqueles. Se você estiver no mundo da interface do usuário da web ou quiser entrar nesse mundo. Eu terminei um curso separado para Photo-shop, para web design. É um curso grande o suficiente por conta própria e passa
pelas considerações que você precisa para se tornar um web designer usando o Photoshop. Ok, você zomba de sites, e ainda trabalhou com um desenvolvedor para construí-los. Isso é web design. Você pode fazer a mesma coisa no Illustrator. Ilustrador para o curso de web design. Depende de onde suas habilidades estão. Você acaba no mesmo lugar, você acaba com uma maquete para um aplicativo ou um site. Você só tem que decidir com um Photoshop ou Illustrator é certo para você. Tenho cursos sobre ambos. O próximo passo depois disso seria algo como XD. O que é o XD? XD é a experiência de usuário da Adobe ou ferramenta de design UX que
permite que você faça muitas das mesmas coisas que você faz em algo como Illustrator para projetar um aplicativo ou um site. A coisa legal sobre isso é que ele adiciona um nível de interatividade. Você começa a adicionar cliques e arrasta e furtos e outras coisas para obter as coisas testadas na fase de design antes de passar para projetar essa coisa. Tenho cursos sobre ambos. Se você gosta do lado do movimento gráfico, esse pode ser o seu próximo passo. Motion graphics é pegar coisas que fizemos no Photoshop, que é estético, e depois movê-lo. Digite, animados, vídeos de introdução, podem ser infográficos animados. Algo como efeitos secundários. Confira o meu cavalo info-gráfico animado para depois de uma correção. Esse pode ser o próximo passo. Acho isso muito legal. Eu realmente amo pegar o material que fizemos e, em seguida, adicioná-lo a música e animações e é um lugar tão bom para fazer isso ou uma casa para isso agora, on-line com coisas como YouTube e sites. Em termos de próximas etapas para vídeo, você pode ver algo como o Premiere. Digamos que você fez o curso e você realmente gosta de editá-los. No meu vídeo da cabeça falante, tivemos uma pequena introdução, o começo. Você pode fazer isso por um tempo, mas você vai chegar a um ponto que você é como, cara, eu gostaria que eles tivessem esses recursos extras e aqui é onde algo como Adobe Premiere seria útil. Confira esse curso. Vai ser isso. Está muito quente aqui. É por isso que estou suando. Foi um curso muito longo. Muito obrigado por fazer isso. Espero vê-lo em outro vídeo. Adeus da Suécia.
 Daniel Scott, Designer & Teacher